Monday, April 6, 2015

Nagaimo pork roll 長芋の豚肉巻き

Vegetables wrapped in thin slices of meat either pork or beef are a common and favorite theme in Japanese cooking. The most popular version of this theme in the U.S. is probably “Negimaki” 葱巻き which is scallion wrapped in thin slices of beef and then braised in a sweet soy sauce-based sauce. Since I had leftover nagaimo 長芋 and perilla leaves 大葉, I made this dish. Although using thinly sliced pork belly or "sanmai-niku" 三枚肉 would have been the best, I used some pork loin which I happened to have, thinly sliced and then pounded very thin.


To make it more interesting I also added "bainuki 梅肉" sauce which is umeboshi 梅干し meat (sans stone), finely chopped and then made into a paste using a Japanese mortar or "suribachi" すり鉢 with a small amount of mirin.


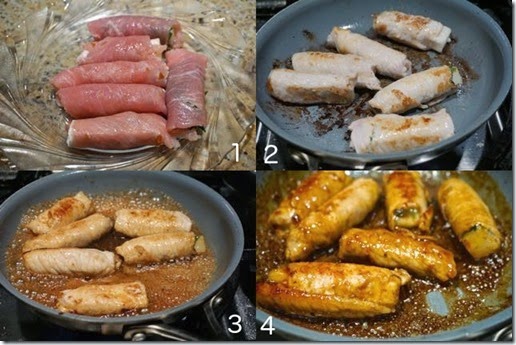
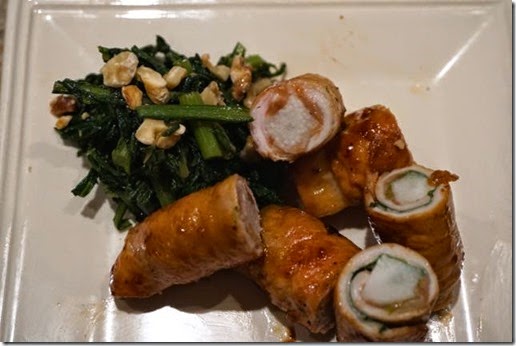
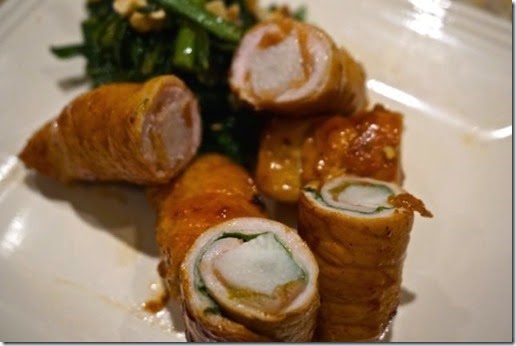
I made 6 sticks of the meat covered nagaimo and served them as an appetizer for two as shown above. I did this by first cutting batons of nagaimo after peeling the skin (approximately half inch thick and 2 inches long) and soaked them in water with a splash of rice vinegar. Meanwhile I cut thin slices of pork loin and pounded them thin using a meat pounder. I then coated the pork with flour using a fine mesh strainer to distribute the flour in a thin coat over the surface of the pork. I then placed a leaf of perilla on the pork, and a baton of nagaimo (after patting it dry using a paper towel) on the perilla, followed by a small amount of the bainiku and then rolled them together (#1 below).

In a non-stick frying pan on medium flame, I added a small amount of vegetable oil and cooked the meat roll first with the seams down turning to brown all sides(#2). I deglazed the brown bits (fond) from the bottom of the pan with sake (1 tbs) and mirin (1 tbs). When browned bits were incorporated, I added soy sauce (about 1-2 tsp) (#3) and shook the pan to roll the meat rolls until the sauce thickened and coated the surface of the meat (#4).
pork roll composit

I cut each roll in half and served it with blanched edible chrysanthemum or "shungiku" 春菊 dressed with soy sauce, sugar and  Japanese hot mustard mixture and garnished with toasted walnut bits.

The nagainmo was almost raw and still a bit slimy but had a nice crunch. The sliminess did not brother my wife (a good sign). Since the pork was not pork belly, I thought it was a bit dry but it had a nice flavor from the sauce and browning. The perilla and bainiku sauce added to the flavors. So, this was a rather successful starter dish for sake.

Friday, April 3, 2015

Edible chrysanthemum roll 春菊ロールと煮浸し

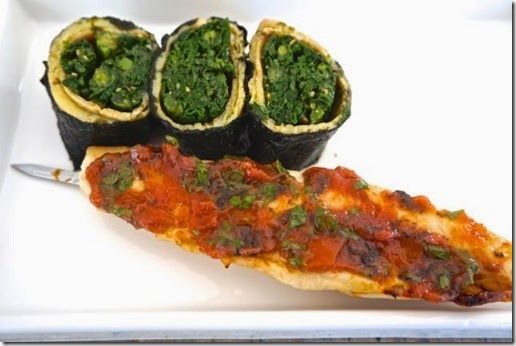
The other day, I saw fresh edible chrysanthemum or "shungiku" 春菊 at the Japanese grocery store. Since this is my wife's favorite Japanese vegetable and only sporadically appears in the grocery store, I got it. Although the most classic way to enjoy shungiku is in sukiyaki すき焼き, we were not having sukiyaki this time. So, I made a small appetizer with shungiku and served it with a skewer of chicken tenderloin in yakitori style with pickled plum 梅肉 and perilla 大葉 as a starter one evening.


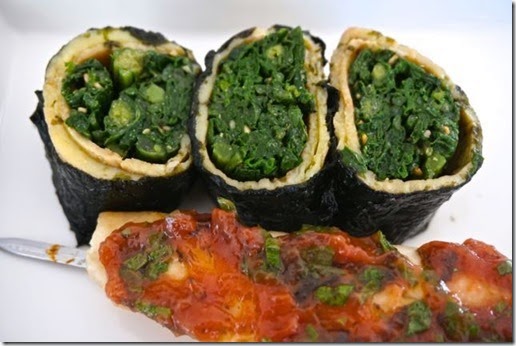
I decided to make it a bit interesting and made a roll wrapped with thin omelet and a nori sheet.


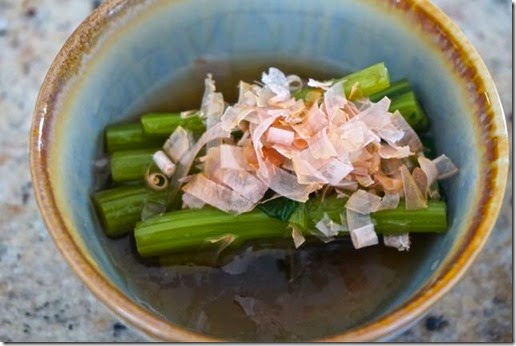
In addition, I made the thick stem part into "Oshitashi" おひたし or "Nibitashi" 煮浸し garnished with bonito flakes.


I should have taken the pictures while I was making the roll but I did not.

Preparation of shungiku:
I washed and removed any wilted leaves and cut off the very end of the stems. I removed the leaves with thin stalks and separated the thick stems.

Cooking:
In a large pot, I cooked the thick stems first in salted boiling water for several minutes until cooked but still crunchy in the center. I scooped them up with a large slotted spoon and let them cool on the plate until I could handle them. I cut them into 2 inch logs.

I cooked the remaining shungiku for less than 1 minute, drained, and let cool on a paper towel lined plate.

Seasoning:
Thick stems (3rd picture):
I immediately soaked them in warm seasoned broth (dashi broth, soy sauce and mirin). Once it came to room temperature, I placed it in the refrigerator. I served it garnished with dried bonito flakes.

Leaves (1st and 2nd pictures):
After I squeezed out the excess moisture, I dressed them in karashi shouyu からし醤油 (Japanese hot mustard, sugar and soy sauce). It could be served as is (after cut into a reasonable size) but I made a roll with thin omelet and then dried nori sheet using a bamboo mat. I let it sit wrapped in plastic wrap for few minutes or until the nori sheet adhered to itself. I cut it in 1 inch cylinders.

Shungiku has a very unique nice flavors. Using two different ways of preparing, both were quite good as small starter dish for sake.

Tuesday, March 31, 2015

American Mu Shu Pork アメリカ風ムシューポーク

When I was browsing through the printed version of “Cook's Illustrated”, I came across this Mu Shu Pork recipe. I was particularly intrigued to try making the thin Chinese pancake. Mu Shu pork must be one of the quintessential American Chinese dishes (like chop suey). I remember I made this dish once many years ago when we lived in California for our American friends (I used wood ear black fungus and dried day lily buds which appear to be more authentic and I served it in  a Chinese pancake, probably store-bought). I asked our Chinese friend and confirmed that the authentic Mu Shu pork uses wood ear and lily buds but it is served on rice not a pan cake. (I suppose the Chinese pan cake is for Peking duck). In any case, the whole point of this exercise for me was to make a thin Chinese pancake, so I followed the American recipe in “Cook’s Illustrated”.

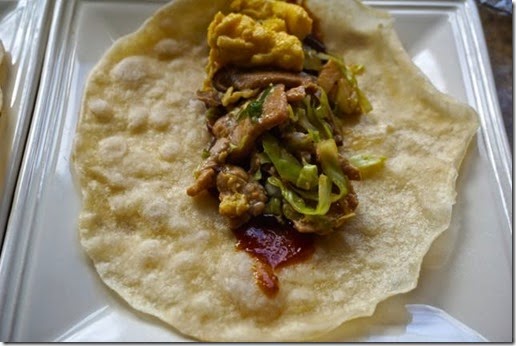
Here is the final product. Looking at it brings to mind an oriental burrito perfect for an American Chinese dish.


I am fairly proud, if I do say so myself, for successfully making this thin stretchy Chinese pancake. I smeared store-bought Hoisin sauce on the pancake and topped with the filling then wrapped it in a burrito-style.


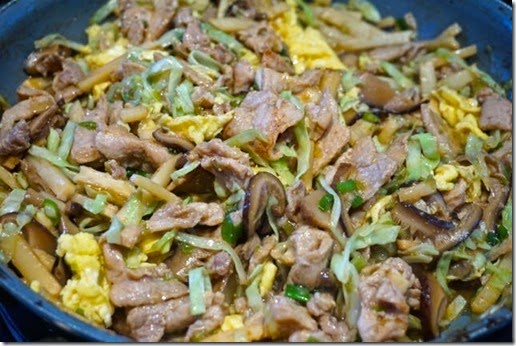
The filling looked like this. I deviated a bit but mostly followed the recipe (in the recipe below, many parts are directly quoted from the original recipe with my added modifications).


Ingredients for stuffing:
3 large dried shiitake mushrooms, rinsed
1/4 cup soy sauce
2 tablespoons mirin
1 teaspoon grated fresh ginger
1/4 teaspoon white pepper
1 (12-ounce) pork tenderloin, sliced thin against grain
2 teaspoons cornstarch
2 tablespoons plus 2 teaspoons  peanut oil)

2 eggs, beaten (I seasoned it with 2 tsp of sugar and a small pinch  of salt)
6 scallions, white and green parts separated and sliced thin on bias
1 (8-ounce) can bamboo shoots, rinsed and sliced into matchsticks (I used Japanese boiled bamboo shoot in a pouch)
3 cups thinly sliced green cabbage
1/4 cup hoisin sauce

  1. I soaked the dried mushrooms in cold filtered water, enough to cover, in a sealable container and left them in the refrigerator for 24 hours. I removed the stem, thinly sliced and place them in a small sauce pan with the soaking liquid and cooked for 30 minutes (I could have lightly seasoned  with soy sauce and mirin but I did not) on simmer and let it cool (right middle in the picture above). I strained and reserved 1/3 cup of the soaking liquid (for making the final seasoning liquid mix).
  2. I marinated the pork in 2 tablespoons soy sauce, 2 tablespoon mirin, ginger (right top).
  3. I mixed the reserved mushroom liquid, remaining 2 tablespoons soy sauce, and 1 tbs of mirin (left upper). I mixed the corn starch in a small amount of sake (or water) in a separate container for thickening the sauce (not shown).
  4. I heated 2 teaspoons of oil in a skillet over medium-high heat until shimmering. I added eggs and scrambled quickly until set but not dry, about 15 seconds. I transferred these to bowl and broke the scrambled eggs into 1/4- to 1/2-inch pieces with a fork.
  5. I returned the now-empty skillet to medium-high heat and heated 1 tablespoon of oil until shimmering. I added scallion (left bottom) whites and cooked, stirring frequently, until well browned, 1 to 1 1/2 minutes. Next came the pork mixture. Spread into an even layer and cooked without moving it until well browned on 1 side, 1 to 2 minutes. I stirred and continued to cooking, stirring frequently, until all the pork was opaque, 1 to 2 minutes longer. Then transferred it to the bowl with eggs.
  6. I returned the now-empty skillet to medium-high heat and heated the remaining 1 tablespoon oil until shimmering. I added the mushrooms and bamboo shoots to the skillet and cooked, stirring frequently, until heated through, about 1 minute. I added the cabbage, all but 2 tablespoons scallion greens, and mushroom liquid mixture and cooked, stirring constantly, until the liquid evaporated and the cabbage was wilted but retained some crunch, 2 to 3 minutes. Then I added  the pork and eggs and stirred to combine followed with the cornstarch slurry (enough to thicken the sauce). All this was transferred to a platter and topped with scallion greens.
  7. I spread about 1/2 teaspoon hoisin sauce in the center of each warm pancake then spooned on the stir-fry over the hoisin sauce and served.
Ingredients for pancake
1 1/2 cups (7 1/2 ounces) all-purpose flour
3/4 cup boiling water
1/2 teaspoons toasted sesame oil
2 teaspoon vegetable oil

chinese pancake composit
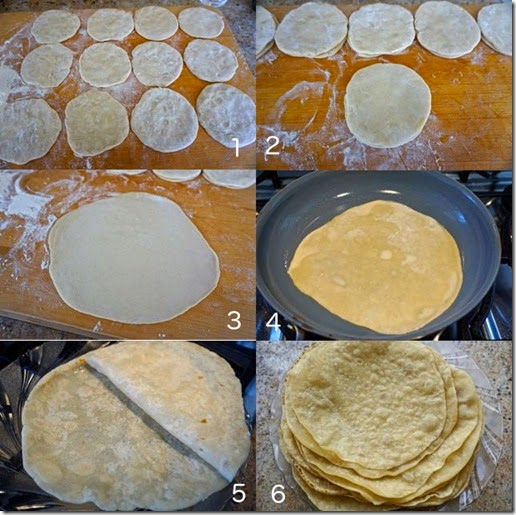
  1. These are the instructions: Using a wooden spoon,  mix the flour and boiling water in a bowl to form a rough dough. When cool, transfer dough to a lightly floured surface and knead until it forms a ball that is tacky but no longer sticky, about 4 minutes (dough will not be perfectly smooth). Cover loosely with plastic wrap and let rest for 30 minutes.
  2. Roll dough into a 12-inch-long log on a lightly floured surface and cut into 12 equal pieces (I cut in half, then cut into 3 equal pieces, then cut in half to make 12 pieces, #1 above)). Turn each piece cut side up and pat into a rough 3-inch disk. Brush both sides of 6 disks with vegetable oil with a splash of sesame oil added (The original recipe calls for all sesame oil but sesame oil is too strong for us); top each disk with oiled sides facing each other,  press lightly to form 6 pairs (#2). Roll disks into 7-inch rounds, lightly flouring work surface as needed (#3).
  3. Heat vegetable oil in a 12-inch nonstick skillet over medium heat until shimmering. Using paper towels, carefully wipe out the oil. Place pancake in the skillet and cook without moving until air pockets begin to form between the layers and underside is dry, 40 to 60 seconds (#4). Flip pancake and cook until a few light brown spots appear on the second side, 40 to 60 seconds. Transfer to a plate and, when cool enough to handle, peel apart into 2 pancakes (#5). Stack pancakes moist side up  (#6) and cover loosely with plastic. Repeat with remaining pancakes. Cover pancakes tightly and keep warm.  (Pancakes can be wrapped tightly in plastic wrap, then aluminum foil, and refrigerated for up to 3 days or frozen for up to 2 months. Thaw wrapped pancakes at room temperature. Unwrap and place on plate. Invert second plate over pancakes and microwave until warm and soft, 60 to 90 seconds.)
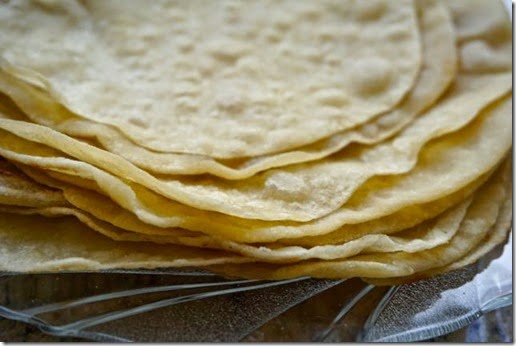
The below is the finished stack of the pancake. It is thin with a nice elastic texture. But, I had to confess that this is my second try. The first try did not work out. I did not make the size of the initial disks large enough and I oiled only one side (as instructed in the recipe) which made it very difficult to peel the two disk pair apart after cooking. Also the sesame oil flavor was too intense. So on the second try, I made sure I started out with 3 inch diameter disks (#1) and I brushed oil on both pancakes with vegetable oil plus a splash of sesame oil and made 6 pairs (#2).


We really liked this American Chinese Mu Shu Pork. Since I substituted mirin for dry sherry and omitted the sugar called for in the original recipe, by itself, the stuffing may have needed a bit more sweetness but once put together on the pancake, the hoisin sauce provided the sweetness which made the overall dish well balanced. I used freshly ground white pepper (instead of usual black pepper) which gave some heat. The use of good quality dried shiitake mushrooms is also important giving tons of "umami" flavor to the dish. In my opinion, the best way to hydrate dried mushrooms is to soak them in cold water in the refrigerator for 24 hours but not in the microwave oven as suggested in the original recipe. The pancakes are really good and this recipe works. At least for us, reducing the sesame oil flavor was an improvement. The pancake had a nice, unique stretchy consistency which cannot be substituted by using flour tortilla.

Since I made Chinese pancake successfully, maybe my next challenge will be making Peking duck but that will be difficult.

Saturday, March 28, 2015

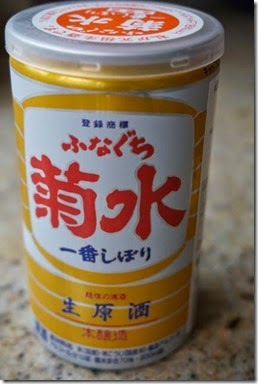
“Cup” sake Funagichi Kikusui ふなぐち菊水生原酒


There is a class of sake called "Cup-sake" which comes in either a glass or aluminum "cup" (about 1 go size 一合 or 180-200ml) with a pull top. These are widely available in convenience stores and vending machines in Japan. This type of sake is usually not high quality but it is easy to get and you can consume it anytime anywhere which appeals to certain clientele. Ozeki 大関 sake brewery is credited for inventing this type of sake  (called "One cup Ozeki" ワンカップ大関) in 1964. More recently, better quality sake, even daiginjou 大吟醸 class is being sold in this format but when I lived in Japan, "cup sake" had some negative stigma attached to the extent that even in my youth I did not partake.

Interestingly, when we went to Sakamai 酒舞 in New York some years ago, one of the "genshu" 原酒 tasting included this "Funaguchi Kikusui" ふなぐち菊水生原酒. We did not think it was a particularly great sake but not bad either. We were a bit surprised that this came in an aluminum cup and was included in the "genshu" tasting at this “fancy” sake bar. Later, I learned that Kikusui sake brewery 菊水酒造 was in Niigata 新潟 and there were four different kinds of cup sake including "ginjo" class but this particular one is "hon jouzou" 本醸造 made of rice polished to 70%. "Nama genshu" 生原酒 implies non-pasteurized and non-diluted sake but I am not sure if it was pasteurized after placing it in the can.

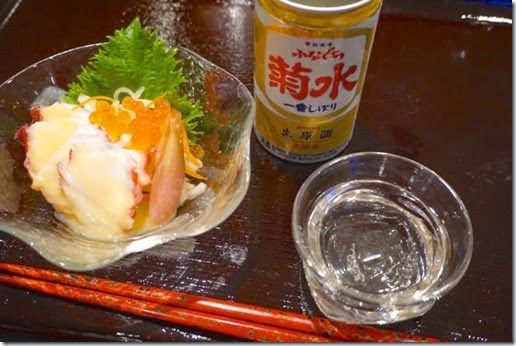
In any case, when we had this at Yuzu restaurant the other evening.  Few days later, I happened to spot this sake-in-a-can at the Japanese grocery store.  I had to buy it to taste it. I served this cold.


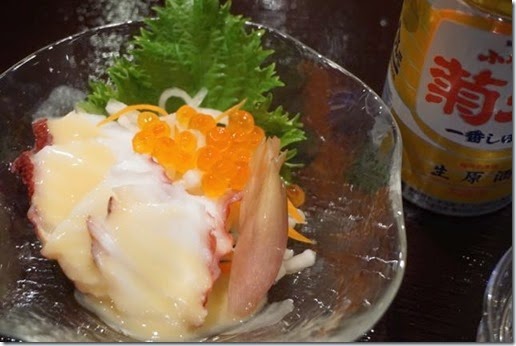
It is always important to me that we taste sake with the appropriate food. I served daikon namasu 大根なます garnished with ikura いくら salmon roe, boiled octopus leg with karashi sumiso 芥子酢味噌and my pickled myouga 茗荷の酢漬.


The taste of the sake was totally different from what we had at Yuzu. It has some yeasty flavor of honjouzou but had a nice "umami" flavor and not extremely dry.  Although this is not one of our favorites, it is certainly a drinkable sake.

Wednesday, March 25, 2015

Cauliflower parsnip soup カリフラワーとパースニップスープ

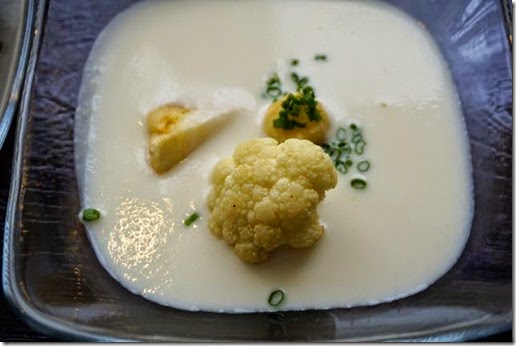
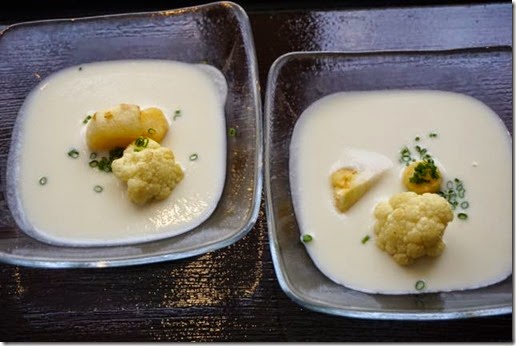
I got the idea for this cauliflower soup/potage from one of the episodes of “Worst cooks in America”. (I hasten to add this was one of the recipes used in the final contest after the worst cooks were no longer the worst). I had a head of cauliflower and a bag of parsnips in the refrigerator and decided to make this dish (I just winged it without a specific recipe). To echo what is in the potage, I added baked cauliflower florets and parsnip medallions and garnished with chopped chives. I served this several times and in one rendition my wife added some of her cheese curd which was also good.
I served this just an small starter dish as you can see below.

Ingredients:
Cauliflower, one head, leaves and thick stem removed and coarsely copped preserving 1/5 separated into small florets for garnish.
Onion, three medium, finely chopped
Parsnips, 3, peeled and coarsely copped, reserving one cut into small medallions.
Olive oil, 2-3 tbs
Chicken broth, about 3 cups or just cover all the vegetables.
I sweated the onion in the olive oil in a soup pot until soft and cooked (4-5 minutes), I added the cauliflower and parsnips and covered it with chicken broth and let it simmer for 30 minutes until the vegetables were soft. Using an emersion blender, I pureed the mixture until smooth.
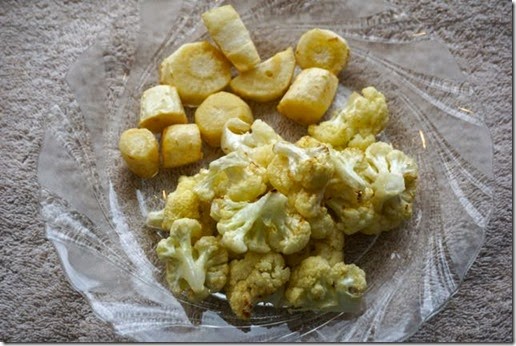
Meanwhile, I coated the cauliflower florets and parsnips with olive oil, seasoned with salt and baked in the convection toaster oven for 30 minutes at 350F (below) and set aside.

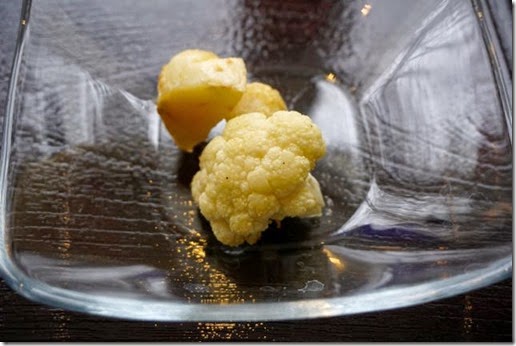
To assemble the final serving, I put the serving portion of the potage in a small sauce pan and heated it up. I then added light cream (to your liking) and seasoned it with salt and freshly ground white pepper. I placed the baked cauliflower and parsnip in the middle of the small bowl and ladled in the potage then garnished it with chopped chives.

This is a very straightforward potage with nice sweetness from parsnips and creamy texture. Still slightly crunchy baked vegetable echoed what was in the potage. When my wife added the cheese curd it contributed a different smooth texture that was very pleasing. This is quite a nice potage/soup, albeit all  white.

Sunday, March 22, 2015

Yuzu restaurant Omakase 日本料理店柚子おまかせ

We had some business to attend to in downtown Bethesda and since the timing was perfect, we had a chance to go back to the Japanese restaurant "Yuzu" 柚子 after almost 2 years. On our last visit,  it was still in its “soft-opening”. Again we went for "Omakase" お任せ ($80, the smallest one offered since we tend to get full very quickly). When we sat down and greeted Chef "Yoshi Ota", he remembered us despite our 2 year absence and mentioned the post we wrote about our experience at the restaurant 2 years ago. We were honored.

The sake menu has improved but is not extensive. Chef Yoshi again lamented the fact that he had to go through the Montgomery county liquor board to purchase sake which makes it difficult to have an extensive list. We choose the tried-and-true Suigei junmai 酔鯨純米. He served the sake in a stem-less white wine glass so that we could swirl and enjoy the aroma. Suigei has a pleasant non-yeasty nose with slight green apple taste. On this occasion, this sake tasted a bit sweeter than I remembered. Towards the end, we (I, in particular) wanted a bit more sake to complement the last dishes and had “Kikusui genshu” 菊水原酒 which came in a 200ml “cup”. We had this first at “Sakamai” 酒舞, New York some years ago in a “Genshu” tasting. This time, it seemed to have an almost a turpentine flavor.

The starter was "nuta" ぬた of tuna, avocado and cream cheese wrapped in nori. Sweet, nutty and sour "nuta" sauce (miso paste, vinegar and sugar) was a good contrast of flavor and texture to the tuna, avocado (nicely ripened) and cream cheese.
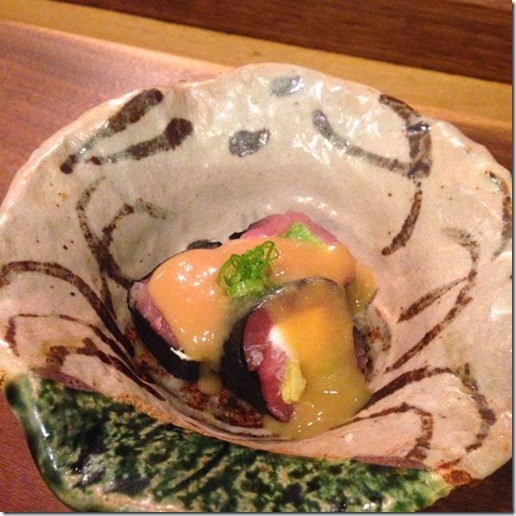
Photo Mar 12, 5 44 07 PM

Next came a very nice refreshing plate of scallop carpaccio. Thin slices of raw scallop were placed on a bed of wakame seaweed 若芽, They were accompanied by almost jewel-like colorful mini-tomatoes (with the skin removed of course), thinly sliced cucumber and red radish. A yuzu (Japanese citrus) dressing completed the dish. The combination of gentle sweetness of the scallops with the refreshing tang of the tomatoes and yuzu dressing was very balanced; a beautiful and tasty dish. The delicate interplay of tastes and texture set the tone for the rest of the dishes that followed.
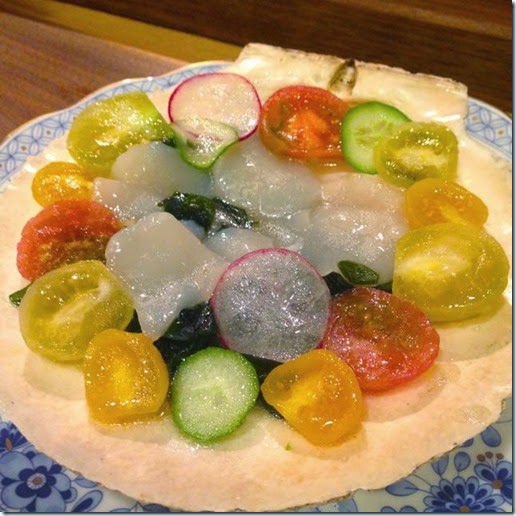
Photo Mar 12, 5 51 23 PM

This is another raw fish dish of “hirame” (sole or flat fish) and salmon. The hirame tasted cured with a nice texture. I thought it was kelp cured but Chef said it was salt cured. It was served with a garnish of fried onion bits, finely chopped green scallion, and pine nuts. The dressing was white truffle oil and soy sauce (I am sure this is “sashimi” soy sauce). Each morsel was a progression of taste and textures that was sublime. First the taste and texture of the fish, followed by the crunch and mild burst of flavor from the fried onion bits, then another crunch and the flavor of pine nuts. All packed on one small slice of fish and suffused with the flavor of the truffle.
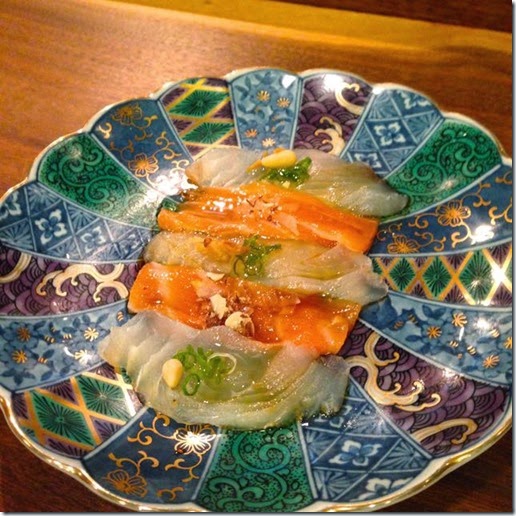
Photo Mar 12, 5 59 42 PM

When I saw Chef Yoshi preparing the next dish, I thought  this was an eggplant dengaku 茄子の味噌田楽 but, to my surprise, this was a miso marinated piece of “Gindara” 銀鱈 (sable fish or black cod), grilled with miso and meat sauce 肉みそ on the top. Gindara has a very moist nice flavor and texture similar to Chilean sea bass. The miso sauce had a nice nutty and salty taste.  The combination of the succulent tender fish with the miso based meat topping made this a remarkably comforting dish. The size of the portion was quite generous allowing us to almost wallow contentedly in the pleasure of each bite. This was a dish to savor. Chef Yoshi mentioned, it would have been “perfect” with a bowl of white rice but it went very well with cold sake we were having.
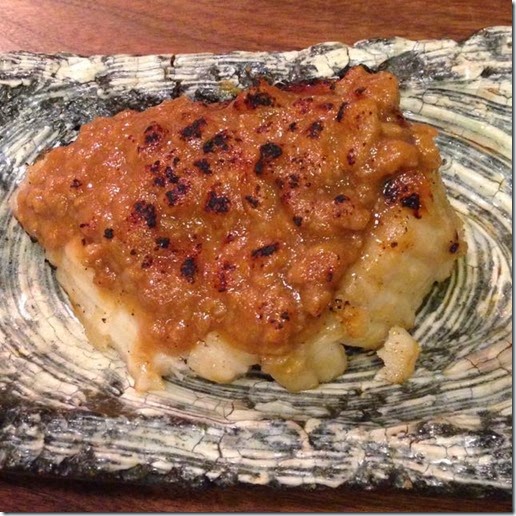
Photo Mar 12, 6 07 13 PM

Next came ”Amadai tatsuta age アマダイの竜田揚げ” or deep fried marinated tile fish which was served with ponzu sauce with graded daikon and red pepper flakes.
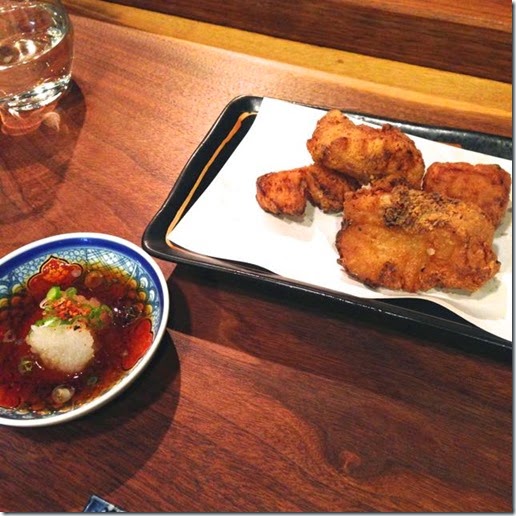
Photo Mar 12, 6 17 27 PM

We immediately started digging in. Chef Yoshi thought this dish was not particularly photogenic and added several fried green beans. By then, only two pieces remained.
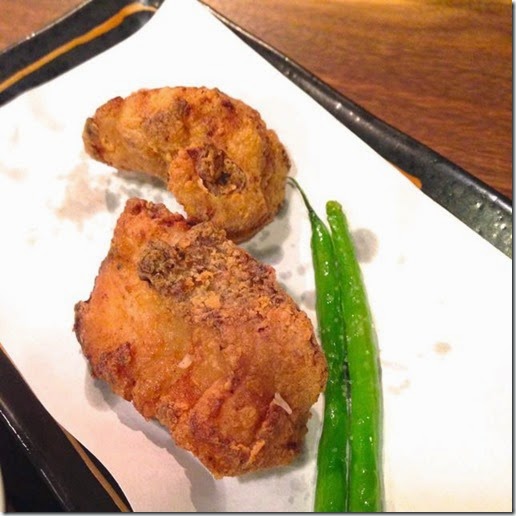
Photo Mar 12, 6 19 18 PM (1)

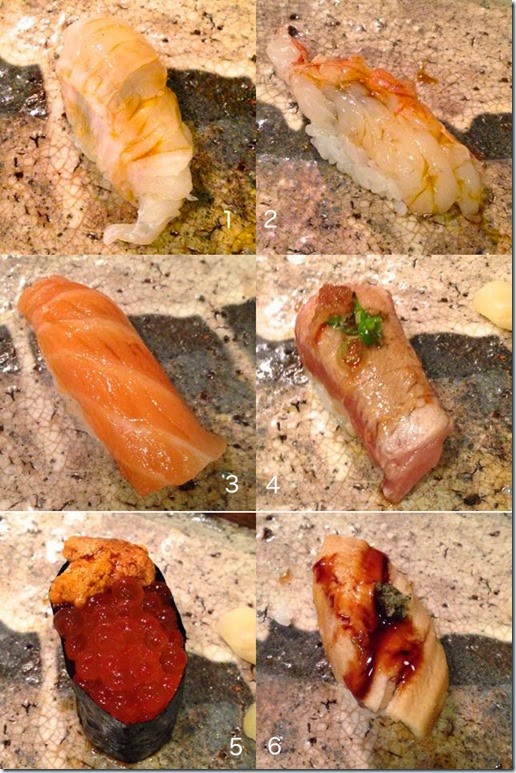
Next, we proceeded to the sushi course. Chef Yoshi first prepared a real wasabi rhizome 山葵大根 (grated on a traditional shark skin grater). I did not take pictures of all the sushi (I got too busy eating). Chef Yoshi did a great job with the “sushi” progression starting with hirame “engawa” ヒラメの縁側 (#1), meat of dorsal fin, which happens to be my ultimate favorite. I love the firmness of this part of hirame. This was followed by botan ebi shrimp 牡丹エビ which was sweet with a nice “nettori” ねっとり texture (hard to translate to English) . Then we progressed to oiler red meat fish including salmon (#3), fatty tuna (straight) which was immediately followed by aburi tuna 鮪の炙り (#4). The same tuna tasted quite different and showed nice contrast. Although Chef Yoshi commented that the quality of Maine uni he had was not of the quality of California uni, the gunkan 軍艦 of salmon roe and sea urchin was great (#5). This combination is my wife’s absolute favorite. As in any good sushi course, the second to the last dish was “anago” 穴子 sea eel with “Tsume” ツメ sauce (#6).
Sushi composit

Almost like desert, the last one was a Japanese sweet omelet which was still warm. Perfect last item.
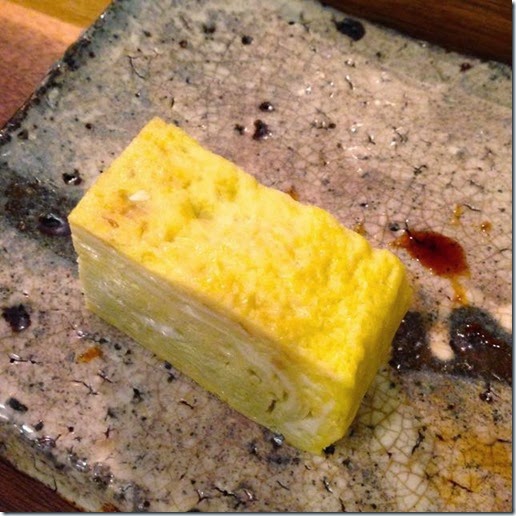
Photo Mar 12, 7 03 00 PM

At this point, we were presented with a desert menu but we were really full and declined. The meal was more than complete without it. The sweet omelet was in effect a desert enough for us. We really enjoyed this omakase dinner. Yuzu has been open for 2 years and seems to have hit its stride with things falling nicely into place. We were struck by the subtle complexity of texture and taste built seamlessly into each dish reflecting the unique artistry of the chef. The evening was not particularly busy and we got all the attention of Chef Yoshi—which we selfishly enjoyed immensely .
Thursday, March 19, 2015

Ebi Yaki "Æbiskiever" エビ焼 "エビスキーバー"

As we suggested in the previous post of "Takoyaki" たこ焼き, we made "Ebiyaki" エビ焼き. Since we made this in our Æbelskiever cooker, I name this "Æbiskiever" エビスキーバー.  We had this for lunch one weekend.

From the outside, they look the same as takoyaki. This time I used bonito flakes as garnish with aonori 青海苔 and my takoyaki sauce たこ焼きソース.


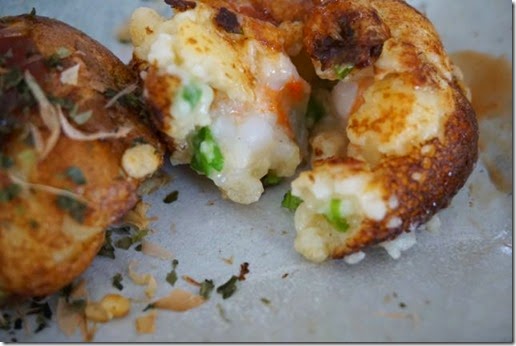
Once you cut into it, however, instead of octopus, you’ll find shrimp.


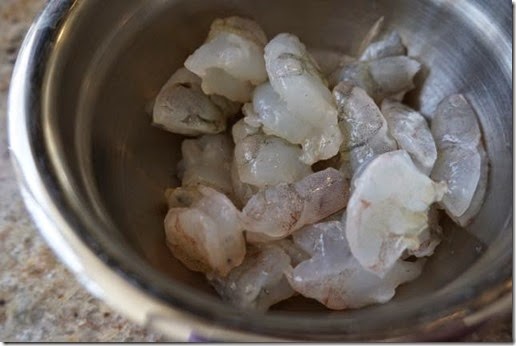
I used shell-on raw frozen shrimp, thawed under running cold water, shelled, cut into chunks, and salted (below).


After some discussion with my wife,  I decided to omit "Tenkasu" 天かすsince our store-bought variety does not add any flavor (this must be related to the kind of tenkatsu you use) and once cooked in the batter, no texture remained in the takoyaki.  So, I used chopped scallion and the shrimp but nothing else in our Æbiskiever.

I prepared the batter as before but I used powdered skim milk as the original recipe suggested. I let it rest over night in the refrigerator. For the first batch this time, I did not do as well as my first try. After my wife took over for the second batch, we learned that you have to be extremely patient (which I knew and I was when I made takoyake, but in general is not my forte) until the crust is fully formed before trying to turn them over. The sauce was made as before; a mixture of Lee and Perrin worcestershire sauce, ketchup and honey. I made the sauce slightly sweeter than before.

I am sure a traditionalist "Takoyaki" connoisseur will cringe at our innovation but we really liked this Ebiyaki "Æbiskiever". Watch out, more variations to come!