Wednesday, June 30, 2010

Cold ramen noodle 冷やしラーメン

Regional name differences and variations of this and similar dishes and who invented this dish etc are quite complicated. In Hokkaido 北海道 where I grew up, this dish is called “hiyashi ra-men” 冷やしラーメン.  The rest of Japan including Tokyo, this dish is usually called “hiyashi chuka” 冷やし中華 which is short for “hiyashi chuka-soba” 冷やし中華そば. “Hiyashi” means cold and “chuka-soba” means Chinese “soba” or noodle. Although this is more of a summer lunch item and not an Izakaya food, Izakayas in Hokkaido often serve “ra-sara” ラーサラ which is short for “ramen salad” throughout the seasons. This is a variation with some more vegetable toppings resembling a salad more than a noodle dish. It is said to have been invented by the chef at the Sapporo Grand Hotel for their Beer Hall (Bierhalle) when it was opened for the first time in the 1980s. I have not made this dish for a long time. An intrepid Japanese food and culture explorer I know announced his intention to thoroughly explore cheap Chinese food and “hiyashi chuka” in the Kanda 神田 area during hot summer days in Tokyo. This combined with the unseasonably hot weather we are having here in the DC area made me think of this dish. In contrast to regular ramen, which appears to invoke profound emotions among “rameniacs" out there, this dish is very low-key and cool-as-a-cucumber--no high emotion required.


Ramen noodle: The dried ramen noodle I had in my pantry this time is made in Yamagata prefecture 山形県, which is located in a northern part of the mainland Japan. It is rather thin and straight but has a nice firm texture, I have no idea what style of a ramen noodle this is (Yamagata style??). I prepared it as per the package instruction and washed it in cold water and drained (Do not ask me how many times I have to shake a “spider” strainer or a flat “zaru” strainer, I just use a good American colander.)

Sauce: Again, there is no complicated preparation for the sauce (you need not to boil whole birds, pig heads, bones, and other secret ingredients for days and months in a cauldron while saying secret mantras). It is essentially a vinegar, soy sauce, mirin with some sesame oil; so I just used a bottled good quality ponzu (shoyu) sauce (this one specifically said “with Hokkaido kelp broth”--my kind of ponzu). I dressed the noodles with a small splash of dark roasted sesame oil before plating it and added the ponzu sauce over it (not too much). All the topping should be cut into thin match stick strips (or “julienned” as Julia[n] Child used to say) and top the noodle with the individual toppings arranged in a radial fashion rather than randomly scattering them (just a tradition). You can mix it up yourself before eating. I had a leftover miso-marinated grilled chicken thigh, so I used that. I also used cucumber, scallion, perilla, pickled ginger root, and golden thread egg (kinshiran 金糸卵). You could add strips of nori sheet, sprouts, carrot, corn, etc but now you are getting dangerously close to  the “ra-sara” territory.

I garnished it with Campari tomato and served it with a dab of Japaneses hot mustard. This was a lunch and we ate it on our back deck which is perfect especially in this rather hot and muggy weather.

Tuesday, June 29, 2010

Hijiki and chicken salad and Stewed Hijiki ひじきと鶏肉のサラダ、ひじきの煮物

Hijiki ひじき is one of the several "kaiso" 海藻 or sea vegetables (sounds better than "seaweed") which has been a part of Japanese cuisine for a long time. Japanese consider hijiki to be a healthy food with high fibers and minerals. As I was growning up, we had hijiki occasionally, but it was, by no means, my favorite dish as a kid. It does make a nice small dish for a drink, however, and as such, I like hijiki now. (Regarding arsenic contained in Hijiki, please refer to the footnote.)

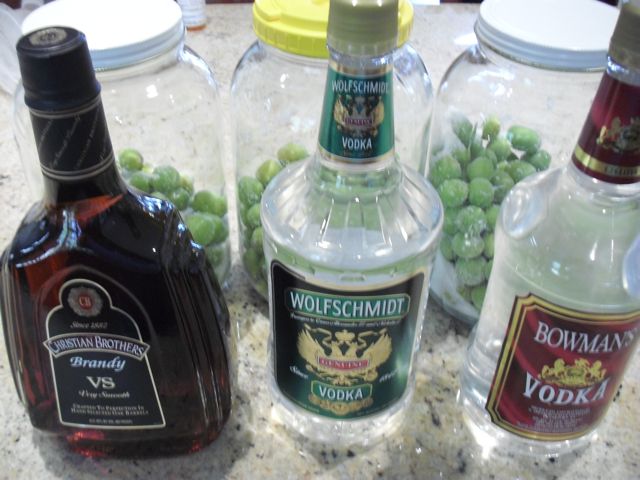
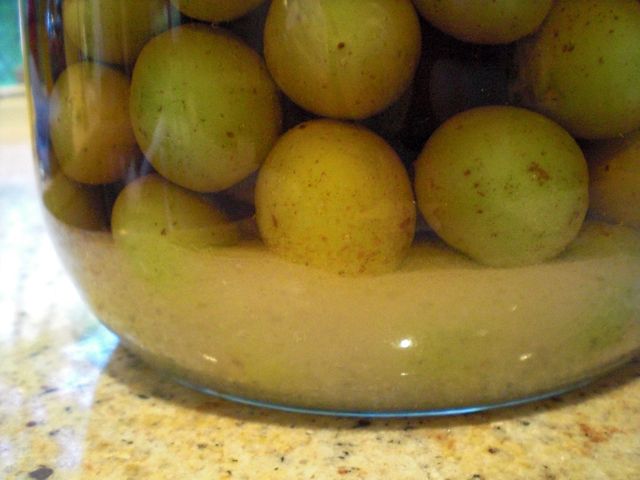
Hijiki comes dried and usually has two different kinds; "Me-hijiki" 芽ひじき consisting of the buds or tips of hijiki, and "Naga-hijiki" 長ひじき consisting of the stalks of hijiki. I happened to get dried "Naga-hijiki" and decided to make two dishes. In dried form, hijiki is very hard and black like tangles of black metal wires. To prepare, after washing in cold running water in a colander, I soak it in large amount of cold water initially for 30 minutes. At the end of the 30 minutes, the volume of hijiki increases something like 10 fold and you can see the dark brown shapes of the original hijiki plant with the fresh smell of the ocean. I drain and wash in cold running water in a colander.  I then soak again in fresh water. I repeat this several times over the period of about 2 hours (you do not really need this long soak and changes of water but I like to leach out as much of the small amount of arsenic as possible, see the footnote). If I am not ready to cook this immediately I keep it in a container with water and place it in the refrigerator.

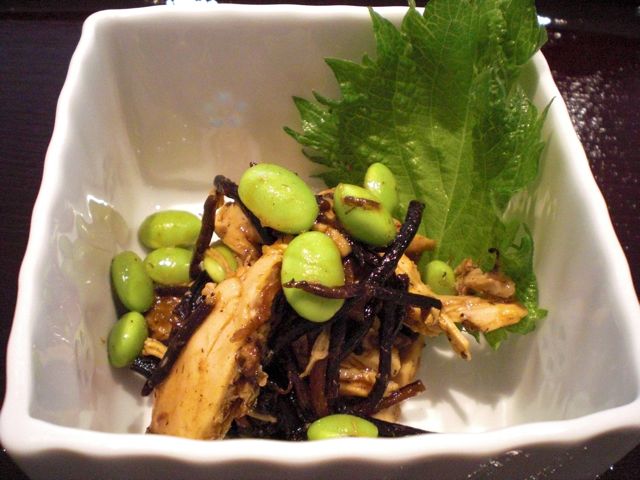
1. Hijiki and chicken salad ひじきと鶏肉のサラダ

Since I had some leftover cooked (barbecued) whole chicken, I used the breast meat for this dish. If you are making this from scratch, you should either steam in sake or "sakamushi*" 酒蒸し or microwave the chicken breasts.

*add 2-3 tbs of sake in a small frying pan and add a chicken breast (skin removed). Put on a tight fitting lid and braise/steam for 4-5 minutes or until the chicken is done in a low flame.

In a small frying pan, add olive oil with a dash of dark roasted sesame oil. When the oil is hot, add a desired amount of hydrated and drained hijiki and saute for 1-2 minutes and then add coarsely shredded (by hand) cooked chicken breast and saute for aother minute and season with salt and pepper.  Tip them out in a bowl and add soy sauce with dissolved yuzukosho 柚子胡椒 (from the tube) or wasabi. You could also use ponzu (soy sauce) ポン酢醤油 with or without the spicy stuff. Here, I made a half and half mixture of soy sauce and yuzukosho and added the mixture in several increments as I tasted it to my liking. I garnished it with cooked and shelled edamame. I serve this at a room temperature. This is a good dish. Mild zing and flavors of the yuzukosho is very nice.

2. Stewed Hijiki ひじきの煮物

This is as classic as hijiki dishes go. There are many variations to this. Some add cooked (yellow or ripe) soy beans "mizuni daizu" 水煮大豆 and other vegetables. Carrot and deep-fried tofu pouch "abura-age" 油揚げ are most common ingredients in this dish. I used carrot, sweet potato, edamame  枝豆 and deep fried tofu pouch in mine.

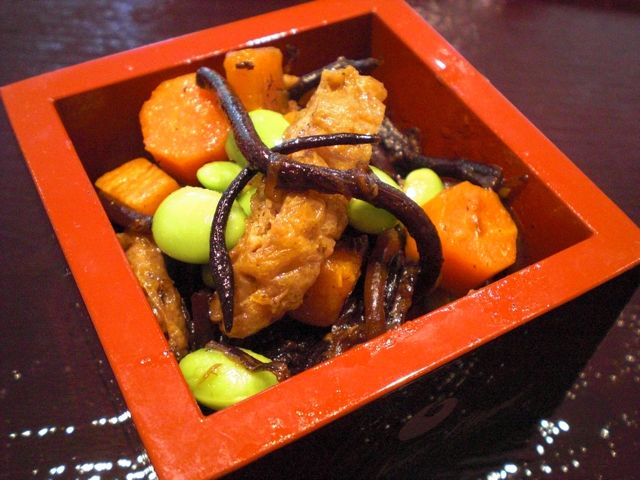
I made a large batch with the remaining prepared hijiki which is about 3 cups after hydration. I added broth (I used granulated instant "dashi" dissolved in water) (1 cup) add small cubes of carrot (one large) and sweet potato (1/2 large) and simmered for 10 minutes or until vegetables were cooked (not too soft) and set it aside in a bowl with the liquid. I added peanut oil (1tbs) with a dash of dark sesame oil in a sauce pan on a medium flame and saute the prepared hijiki and thin strips of abura-age (2 small squares or "koage" 小揚げ, blanched, squeezed of water and cut into thin strips) for 1-2 minutes and add the cooked vegetables with its liquid. Simmer for 5 minutes and I season it with sake, mirin and soy sauce (1:1:2 parts), I will go easy on soy sauce at first since it will cook until the liquid is almost all gone. I taste when the dish is almost done and add more soy sauce if needed (I did not). After turning off the heat, I mixed in cooked and shelled edamame and let it sit and come to the room temperature before serving. This has a classic taste of hijiki "nimono" dish.  I found  old "ichi-go Masu" 一合升 in the back of the kitchen cabinet and used it to serve this dish.

We had both hijiki dishes at one sitting. Both dishes are quite different in taste and texture (although it may look similar) and went well with cold sake.

*Footnote regrading arsenic in Hijiki:
I did not know this until I read Hiroyuki's blog some time ago. It appears that the amount of inorganic arsenic is not high enough to have a serous health concern if you consume hijiki in moderation (meaning not eat tons of hijiki everyday). There is no known case of arsenic health effects even in Japan where people tend to eat more seaweed than anywhere else including hijiki. It is also reported that If you soak hijiki for 1 hour and if you boil it for 5 minutes after hydration, . This time, I soaked much longer than needed with multiple changes of water which, I am surmising, reasonably reduced the arsenic content. So it appears that consuming hijiki cooked this way is not to be of any health concern. A (professional) well-informed Japanese food blogger appears to take a similar position.

Sunday, June 27, 2010

Grilled rosemary lamb chops with barley risotto ラムチョップと大麦のリソト

Well, I am, again, deviating from the Izakaya theme. This is a type of a Bistro cuisine but apparently some Japanese bars serve this type of dish. I used a rack of lamb and cut it into individual chops. This rack was not as well prepared as the ones we usually get and I had to remove some silver skin and excess fat but I left some fat just above the chop since the fat imparts a good lamb flavor (if you like lamb flavor).

I marinated the lamb chops in fresh rosemary (chopped up, 1 tbs, from our herb garden), crushed garlic (4-5 cloves), olive oil (3-4 tbs) and cracked pepper (1/2 tsp) in a Ziploc bag overnight in the refrigerator. Just before cooking, I removed the meat leaving the garlic and marinade in the bag (I noticed that one of the garlic cloves went with the meat to the grill judging from the picture below). I then salted the meat. I was too lazy to fire up the charcoal grill so I used an electric grill outside (see below left).

I cooked the chops 2-3 minutes for medium doneness (this grill cooks from both sides). I turned the chops 90 degree in the middle of the cooking time to make nice grill marks. This dish had a more assertive lamb flavor than the oven roasted rack of lamb but if you like lamb this is a very straightforward nice dish.

Barley risotto: My wife made this dish and I assisted by chopping up the ingredients. I finely chopped onion (large, half), shiitake mushroom (5 medium, stem removed), and garlic (3 cloves). In a small pot, add olive oil (1 tbs) and saute the above vegetables for 2-3 minutes on a medium flame, season with salt and pepper. Add one cup of pearled barley and saute to coat the grains with the oil. Add 2/3 cup white wine (we used sake) and cook until the wine is completely absorbed. Add 3 and 1/2 cups of chicken broth (our usual Swanson reduced salt no-fat version). After it comes to a boil, cover and turn the heat down to simmer and cook for 30 minutes or more, stirring once or twice during cooking, until done. (It should be creamy but all the liquid should be absorbed). Add crumbled fresh goat cheese (2 tbs) and fresh thyme (from our herb garden) to taste. Adjust seasoning if needed. We also added small cubes of oven roasted root vegetables (this was leftover from a previous dish. sweet potato, onion and carrot were tossed with olive oil and seasoned with salt and pepper, roasted with garlic and onion at 350F for 45 minutes to one hour).

As an accompaniment, we served barley risotto and oven roasted green beans. This was a very satisfying "comfort" food type dish. The barley has a nutty flavor with a rich mouth feel and a slight "al dente" crunch. Of course, a good red wine is called for. We had a nice Spanish Temperanillo, Caro Dorum 2005.

Friday, June 25, 2010

"Hanpen" fish cake stuffed with perilla and cheese はんぺんのシソとチーズ挟み焼き

This is another quick dish and variation of a sauteed "Hanpen" fish cake. This time, I used butter instead of olive oil and stuffed it with perilla and Raclette cheese.

I thawed the "hanpen" and cut it into 4 equal squares. I then cut into the middle of the thickness to make a deep pocket taking care not to cut through. I cut the slice of Raclette cheese to the size of the pocket. I wrapped the piece of cheese with a leaf of perilla and inserted the wrapped cheese into the pocket. I sauteed the packet in butter over a medium flame for a few minutes on each side until the cheese melted and the hanpen nicely browned. I served it with a dab of grated ginger and soy sauce for dipping. It is another simple but good dish which will go with any drink.

Wednesday, June 23, 2010

"Mozuku" and "Nagaimo" in sweet vinegar モズクと長芋の甘酢

The Japanese eat anything which comes out from the sea and also like combining slimy food with slimy food (double slim or, sometimes, triple slim). I got inspired (??) from the reportedly mediocre dish I saw in Jon's posting. I occasionally get a type of slimy sea vegetable called "Mozuku" もずく, which is already prepared in sweet vinegar and packaged in a plastic cup, which I get frozen. The southernmost archipelago of Japan, Okinawa 沖縄, is famous for Mozuku. Since I had an end piece of "Nagaimo" 長芋 left over, I simply peeled, sliced and made it into match stick shaped pieces. I used sushi vinegar to lightly dress it and placed it over the mozuku and garnished with another type of aquatic vegetable called "aonori" 青のり which is dried and comes as small flakes.

 It was an exceptionally nice day for mid June and we fired up the Konro grill outside and this was a part of the starter dishes pictured below. I already had stewed "hijiki" which I had made previously (middle). The cut glass tumbler from Kitaichi glass (on the right) is tall and a bit unstable so I used "masu" 升, a square wooden Japanese measuring cup, to stabilize it.  This happens to be the common way in which sake is served in an Izakaya. They intentionally pour sake to overflow the cup and let the sake spill over into the "masu" underneath as a gesture of generosity. Although we need not to do that since we are quite generous to ourselves when it comes to sake, I recall Dave was not too happy at Shuto-an 酒徒庵 since they did not serve sake this way.

The nagaimo has a nice crispy texture with some sliminess (but nothing compared to grated nagaimo) and mozuku has a bit similar characteristic and is the perfect match. The sweet vinegar is very gentle and we slurped whatever was left in the cup. Actually, I served this in a crystal sake cup "guinomi" ぐいのみ also from Kitaichi glass, so this was a very natural thing to do.

Monday, June 21, 2010

Plum wine, Supplement 梅酒、追加

We harvested "aoume" 青梅 or unripe green plum last weekend for 2010 umeshu.


Although I posted umeshu when I bottled the 08 vintage, I decided to add a few more images and a description of how to make umeshu. We usually use 1 lb of plums, 1/2 lb of sugar and 1.75 liter of liquor (either Vodka or brandy), but we started using 2 lb of plums with the 2008 vintage since our tree produces so much fruit. Traditionally, rock sugar or "koorizatou" 氷砂糖 is used but it is difficult to find rock sugar here in the U.S. and we cannot detect the difference in the end product, so we use regular granulated sugar. I think the reason for using rock sugar is that it will slowly melt producing a saturated sugar containing liquid layer. Since this layer has a high specific gravity (as compare to the remaining liquid) the saturated layer will remain in the bottom for some time extracting plum juice. I try to achieve the same effect by coating the fruit with sugar and leaving it over night to extract the plum juice before adding the liquor as described below.

The image below left is of washed and dried plums (2 lb) in a container with (1/2 lb) of sugar added. I just gently rotate the container several times so that each plum is coated with sugar. The picture on the right is after the plums have been in the sugar over night. You can see the plum juice came out and the sugar is wet.

I use brandy for one batch and Vodka for two other batches as you can see below. For brandy, I use Christian Brothers, not Remy Martin XO, but that is up to you. I also use the cheapest Vodka I can find.

I gently pour in the liquor so as not to disturb the sugar in the bottom. As you can see below, undissolved sugar can be seen in the bottom. My hope is that the sugar will melt gradually and produce a concentrated sugar layer in the bottom of the jar.

I just place the containers on a shelf in the basement or where ever they will not be in your way and wait for one year before bottling and drinking. Just don't forget about it.  (I forgot to bottle the '08 vintage for 2 years but the result was still good. So if you do forget, a few extra years don't seem to hurt.) Several years of bottle aging will make umeshu better.

Sunday, June 20, 2010

Pizza Margherita and Pizza with caramelized onion ピザ

When we had our wine party/tasting, I made pizzas as a starter. They were a big hit but were eaten so fast we did not have a chance to take pictures. So, next day, I made a half-and-half pizza Margherita (left) and pizza with caramelized onion (right) from the left over ingredients. I already posted my pizza dough recipe. (Please note this image was not doctored up by Gimp or Photoshop.)

Garlic infused olive oil: I just crush several cloves of garlic using a garlic press and add good extravirgin olive oil and mix. Use this to brush pizza dough and crust.

Tomato sauce: Tomato sauce was made similar to my Marinara sauce but I added a small amount of port wine (Cheap Ruby port from Taylor) and simmered it longer so that the moisture level was very low.

Cheese: I used fresh cow's milk mozzarella. I usually use smoked mozzarella for the caramelized onion pizza but I used up all the smoked cheese I had for the pizzas at the wine party. So, for this pizza I used regular mozzarella and small chunks of fresh goat cheese. I do not shred the mozzarella but slice it (the reason becomes clear in the assembly part below). It is easier to cut thin slices when the mozzarella is cold using a thin bladed knife. 

Caramelized onion: Simply saute halved and thinly sliced onion in olive oil. This requires some patience until the onion become wilted and dark brown (15 minutes or longer). When enough brown "fond" appears on the bottom of the saute pan, I deglaze it with small amount of water which helps to color and flavor the onion but you need to saute further to evaporate most of the liquid.

Pine nuts: We keep pine nuts in a freezer. Just dry roast them in a frying pan until slightly brown.

Assembly: I sprinkle corn meal on a pizza peel and place the stretched and formed pizza dough on the corn meal before starting the assembly. Give the peel a quick tug to make sure the dough moves freely before adding the topping.

Pizza Margherita: I brush the garlic infused olive oil on the prepared dough. I put the slices of mozzarella cheese on the pizza first and then place a small amount of the tomato sauce on top of the cheese slices. (Usually the sauce is put on first and then the cheese). While my method is the opposite of what is usually done, I think this makes a better pizza since the cheese protects the crust from the moisture of the sauce. The result is a crispier crust.

Caramelized onion: The same as above but I spread the caramelized onion over the slices of cheese and then dot it with small chunks of the fresh goat cheese and sprinkle the pine nuts.

Baking: I bake for 8-9 minutes directly on a hot pizza stone by sliding the assembled pizza off the pizza peel. I preheat the oven for at least 30 minutes to 450F before baking--with the pizza stone in.

Take the pizza out and brush the edge of the crust with olive oil and grated Parmesan cheese. For Margherita, I garnish with a chiffonade of fresh basil.

We had this with the leftover wine from the day before, The 2005 Clos Mogador (about half the bottle left). The wine was much better than the first time we tasted it. The funky nose was totally dissipated. This wine has a very nice complex taste and went particularly well with the caramelized onion.