Thursday, November 29, 2012

Baked curry flavored cauliflower カレー味焼きカリフラワー

We saw a recipe called “Buffalo wing cauliflower” posted on an internet “recipe site”. Essentially, it was crispy hot (spicy) baked cauliflower. But that recipe did not work well. It called for a kind of batter to coat the cauliflower florets then the florets were to be baked so the crust would get crispy. After the florets were removed from the oven they were to be coated with a mixture of melted butter and hot sauce. Somehow the batter did not work (at all). It was soggy and it made the cauliflower soggy instead of crispy. (did anyone actually try making this dish before posting it)? The idea of spicy nuggets of cauliflower sounded good however, so my wife suggested I try making baked cauliflower like I make my curry flavored wings and I agreed to try it.

CIMG5513

I could have used an oven, either toaster oven or regular oven, but we were doing chicken thighs and wings on the Weber grill and decided to baked this in the grill before I cooked the chicken. (Later I tried with the 400F convection toaster oven for 10-13 minutes which worked well).

The recipe is very simple. I first separated the cauliflower into small florets. I then coated the surface of the florets with olive oil using my hands to toss and coat well.

For seasoning I used 4-6:1 ratio of flours and curry powder (I used “sweet” curry powder) mixture. I placed it in a gallon-size Ziploc bag and coated the florets (I forgot to add salt here and sprinkled it after it was cooked).

CIMG5510

I placed this in a Weber Grill (I set it up for in-direct heat with the hot coal placed only half of the bottom. I placed the cauliflower on the cool side (indirect heat), put the lid (both lower and upper vents open) for 10 minutes (or 400 F oven for 10-13 minutes). We tasted it and felt it was slightly underdone and might need 5 more minutes. But after baking 5 more minutes, we found it was a bit overdone.

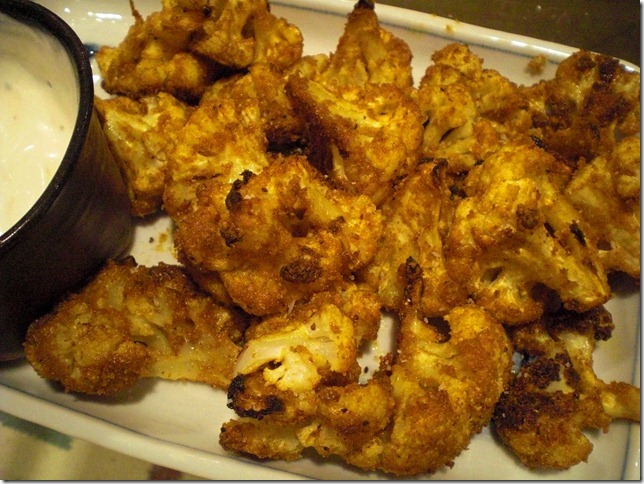
In any case, this is a very nice way to eat cauliflower and is a perfect appetizer while waiting for the chicken to cook. The curry was not too hot. The florets had a slight crunch from the combination coating of oil and flour. Our only regret was that they were too soft (over cooked). We must stop cooking when the cauliflower is still a bit underdone since it keeps cooking after removing from the heat. We had this with a dipping sauce of Greek yogurt flavored with blue cheese dressing (our effort to cut excess fat). This works very well since the flavor of the blue cheese dressing permeated the yogurt, and the blue cheese flavor went very well with the curried cauliflower.

Monday, November 26, 2012

Autumnal kara-age with chestnuts and ginkonuts 秋の栗と銀杏のから揚げ

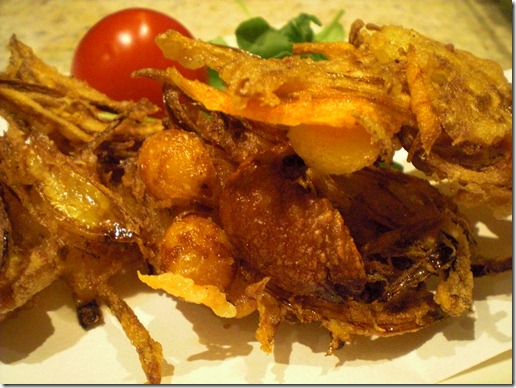
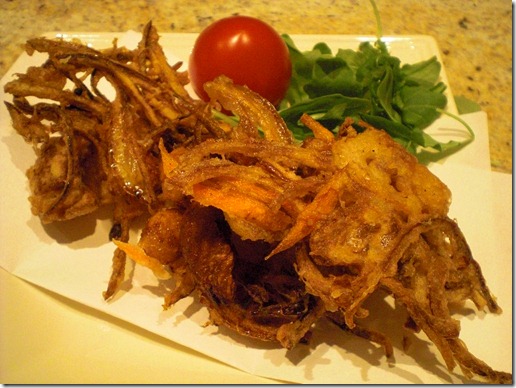
Since I am running out of dishes to make with North American chestnuts, this is my last attempt this fall. Here is "kakiage" かき揚げ with the essences of autumn; ginkonuts 銀杏 and chestnuts 栗.

CIMG5528

Although it is possible to harvest ginko fruits (which nobody here does except some dedicate Japanese expats), clean off the smelly skin, broil and crack open to produce ginkonuts, but it is too smelly and messy work for even for me. I tried it on a very small scale once in the past but that was more than enough for one lifetime. In the center of the kakiage shown in the above picture is a chestnut surrounded by three small yellow ginkonuts (out of a can).

CIMG5526

I used whatever vegetables were available. They included: onion (thinly sliced) and carrot (julienned). The amount is all arbitrary. I first put the vegetables in a bowl and added a pinch of salt and enough cake flour to coat the vegetables and let it sit for a few minutes. The moisture came out of the vegetables and moistened the flour which makes it easier to fry the veggies crispy. This “undercoat” of flour means the batter will coat the vegetables better. I added a bit more flour and cold seltzer water and mixed to make a rather thin runny batter.

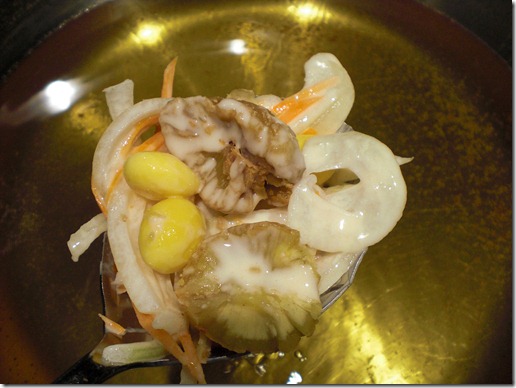
On a large spoon or wooden (flat) spatula (or  Japanese "Hera" へら), I placed the mixture and chestnuts (previously boiled and both outer skin and inner skin removed) as shown below.

CIMG5522

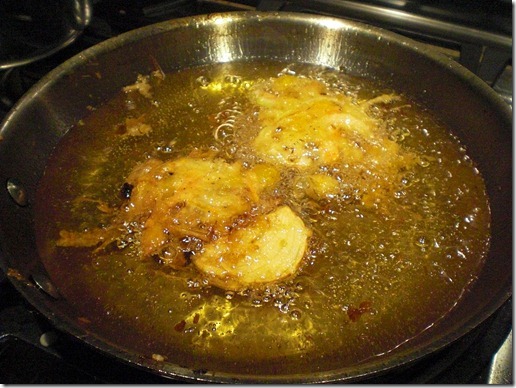
I slipped the mixture into hot oil (175-180C or 350F). I used peanut oil. I fried them for 4-5 minutes until brown and crispy (my oil was a bit too hot).

CIMG5524

The vegetables turned out to be a bit too brown but the crust was very light and crispy and deep frying makes the onions, ginko nuts and chestnuts very sweet. They have a nice texture as well. We had this with my usual green tea salt. Any left overs can be heated up nicely in a toaster oven. To reheat them in a toaster over, however, you need a metal grate over a cookie sheet since excess oil will drip down. This is another winning combination. You can’t go wrong with deep fried onions, a combination of sweet carrot and nuts.

Friday, November 23, 2012

RGPB (Really Good Pumpkin Bread) パンプキンブレッド

Again, this is something my wife made. This recipe came from America's test kitchen. I have to say this is one of the best quick breads I ever tasted. It is moist, flavorful with the crunch of nuts and sweet crumbs on the top. You can eat this any time of the day. It is sweet enough to be even a dessert (at least for us but probably not for most Americans). I asked my wife to take over this post.

This bread consists of two parts: the topping and the bread itself. The secret of this recipe is to cook the pumpkin puree to caramelize slightly and remove the “canned” taste. 


Topping: 5 Tbs. packed light brown sugar,1Tbs. all purpose flour, 1Tbs. unsalted butter softened, 1 Tsp. ground cinnamon, 1/8 Tsp. salt. I used my fingers to mix all the ingredients together until the mixture resembled coarse sand.

Bread: 
2 cups all purpose flour, 
1 1/2 Tsp baking powder, 
1/2 Tsp. baking soda, 
1, 15 oz. can of unsweetened pumpkin puree (According direct mathematical conversion 15 oz. should equal 425 grams.  But when I weighed the actual contents of the can it came out to 418 grams. I provide this information in case I don’t have a can of that exact size), 
1tsp. salt, 
1 1/2 tsp ground cinnamon, 
1/4 tsp. ground nutmeg, 
1/8 tsp. ground cloves, 
2 cups granulated sugar, 
1 Tbs. molasses, 
1/2 cup vegetable oil, 
4 oz. cream cheese cut into pieces, 
4 large eggs, 
1/4 cup buttermilk, 
1 cup walnuts toasted and chopped. 

I mixed the flour, baking powder and baking soda together in a bowl and set it aside. I combined the pumpkin puree, salt, cinnamon, nutmeg and cloves in a large sauce pan and cooked continuously until it turned brown and reduced by about half (picture 1 below). I removed the pan from the heat and stirred in the sugars, molasses, oil and cream cheese. I mixed it until everything was incorporated and homogeneous. I whisked together the eggs and buttermilk and added it to the pumpkin mixture (picture 2). (This step requires some care not to curdle the eggs so either let the mixture cool down or temper the eggs a bit before adding.)  I poured the cooled pumpkin mixture into the flour mixture to form a batter. I folded the walnuts into the batter. I poured the mixture into two greased loaf pans and sprinkled the topping mixture on top of the loaves. I cooked the loaves in a 350 degree oven for about 45 or 50 minutes or until a skewer came out clean. (I also made these into muffins, making a total of 15 muffins.) Just after cooking, this loaf is very tender so I let it rest in the pan for about 20 minutes before I attempted to remove it (picture 3). I waited until it was completely cool before slicing it (picture 4).

This bread is quite good. It is very tender and has lots of flavor. The nuts add a nice counterpoint to the rich soft texture of the bread. The topping adds an additional texture component and a nice sweet crunch. The bread would be really good even without the topping. We will be making this again.

Tuesday, November 20, 2012

PD Noodle Mac and Cheese variation マック アンド チーズ ヴァリエーション

We had leftover barbecued chicken from the weekend, leftover Pennsylvania Dutch noodle (egg noodle) and this was a leftover control dish. This is similar to my Mac and cheese with some variations.

The below will make a 9 inch casserole.

Sauce: This is a type of Morney sauce (or Béchamel sauce with cheese). I try to make Béchamel with the least amount of fat possible. To do this I start with finely chopped onions before adding the flour. Because the flour coats the surface of the chopped onion, it will make a smooth Béchamel without much fat.

I sautéed 1 medium finely chopped onion in a frying pan (2 tbs of light olive oil instead of butter) and seasoned it with salt. I then added shiitake mushroom (optional 3 big ones, stem removed and finely chopped). After mushrooms were softened, I added flour (3 tbs) stirring until dry flour was no longer visible and the pieces of vegetable were coated with flour. I added cold 1% (instead of cream or 4%) milk at once (about 1 cup and add more later). I stirred the mixture with a silicon spatula until the sauce thickened. Since cheeses will be added and the noodles may absorb moisture, I wanted this sauce to be rather runny. I added more milk until the desired consistency was attained. I seasoned it with salt, white pepper and freshly grated nutmeg (we like lots of freshly grated nutmeg).

Cheese: We added two cheeses; sharp Cheddar (1/2 cup grated) and Gruyere cheese (1/2 cup grated). If the sauce became too thick, you can add more milk to loosen it.

Chicken: This is optional but one of the reason for this dish was to use the leftover barbecued chicken. I used about 1/2 cup of cooked and shredded chicken which was mixed into the sauce. Since the chicken was hot smoked, it added a nice smoky flavor.

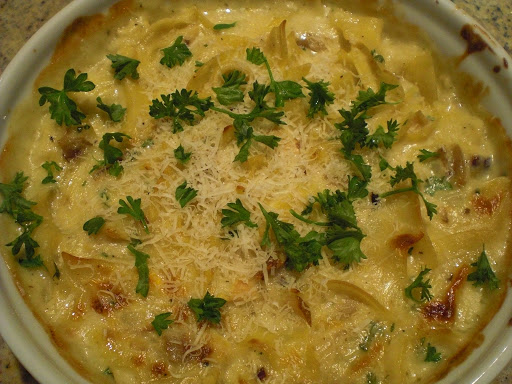
Noodles: This was Pennsylvania Dutch noodle (wide noodle) cooked. I added about a cup to the chicken cheese mixture. I placed the sauce mixture with noodles into the casserole and placed it in a 400F preheated convection (toaster) oven for 15-20 minutes or until the surface started showing brown spots. I grated Riggiano Palmigiano cheese and chopped parsley on the top. I let it rest for 10 minutes before serving.

This was a quite wonderful “comfort” dish for leftover control. Often Cheddar cheese cooked too long becomes "chalky" but the addition of Gruyere and the rather loose sauce appeared to prevent this from happening. The nutmeg and smoky chicken added nice flavor. I could have added bread crumbs on the top to make crunchy surface but even without it this was a fine dish.

Saturday, November 17, 2012

Nagaimo and mushroom cheese casserole 長芋とエリンギのチーズ焼き

More than a week or so ago, I bought nagaimo 長芋 from the Japanese grocery store. I did not finish it and the edges were getting discolored and I needed to make something from it. I remembered the recipe I saw previously and decided to make this dish. The original recipe uses clamshell mushrooms or shimeji しめじ mushroom but I did not have one. Instead I used royal trumpet mushroom which is very similar to eryingi (popular in Japan). This is a Western-Japanese fusion casserole dish consisting of bacon, nagaimo, onion, mushroom which are first sautéed and then baked with the cheese on the top. The ingredient below made two of the small casserole or ramekin as you see below.

Nagaimo: I had 3 inch piece of nagaimo. I peeled it and removed any discolored ends, cut it in half length wise and then sliced it into half circles (about 1/3 inch thick).

Royal trumpet mushroom: Starting from the stem-side I tore it into 4-6 long, thin pieces (I used 4 large mushrooms).

Onion: I halved and then sliced onions (one small).

Bacon: I cut one strip of bacon into half-inch size.

Cheese: I used smoked mozzarella cheese. I  sliced it into thin (1/4 inch) slices, 2 per ramekin.
I first put the bacon into a dry frying pan on medium low head and rendered the bacon fat and made the bacon brown and crispy (5-7 minutes). Since the amount of the fat was not enough, I also added olive oil (1 tsp) and sautéed the onion for several minutes and then the mushroom. I seasoned it with salt and black pepper. I then added the slices of nagaimo and sautéed for several minutes and seasoned it again. I divided the mixture into two small ramekins and placed the slices of cheese on the top. On hi-broil, I melted the cheese in a toaster oven (2-3 minutes). I garnished I with chopped chives.
The above picture shows nagaimo slices.
Here is the royal trumpet mushroom.

This is a Ok dish but not great. Although cooking (especially grilling) usually reduces the sliminess of nagaimo, that did not happen in this dish. Although the nagaimo had a nice crunchy texture, it was way too slimy and as a result not great. On the positive side, I satisfied my curiosity about this dish, used up leftover mushrooms and nagaimo and made one new post.

Wednesday, November 14, 2012

Southern cheese grits soufflé チーズグリッツスフレ

This is another Southern grits dish my wife made. We had this as an ending dish one evening but this is also a perfect breakfast item. It is a kind of soufflé with grits as a stabilizer. It is quite good but we (I) burned our/my tongue(s) since the ramekins retained heat so well. If you are going to try this recipe, I suggest to let it cool for 10 minutes or so before tasting.

I have to ask my wife to fill in the recipe.

The amount below made 4 small ramekins like seen here (about 3 inch in diameter).

Grits:I made a batch of grits according to the recipe on the box. Basically it was 1 cup of milk, and a pinch of salt. I brought the milk just to the boil and stirred in 3 table spoons of grits. I brought it back to the boil then reduced to simmer and cooked for 5 minutes.

Grits “soufflé”: I preheated the toaster oven to 325 degrees then generously greased 4 individual ramekins (about 3 inch diameter). We had some leftover garlic chips. (a sliced garlic clove slowly sautéed in olive oil until it starts to brown, then quickly removed before it starts to burn). I cut the chips into small pieces and added them with 1/4 cup milk and 4 Tbs. butter and a cup of grated cheddar cheese to the cooked grits. I then took 2 eggs and slowly tempered them by adding spoonfuls of the hot grit mixture to the eggs and stirring. I added the tempered eggs to the rest of the grits mixture. I poured the mixture into the ramekins and put into the preheated toaster oven and cooked them for about 30 minutes.

The final dish was beautiful. The grits puffed up just like a soufflé. This is a a very satisfying dish. The garlic chips add a nice mellow garlic flavor that can’t go wrong with the combination of garlic and cheddar cheese. The texture is almost like a very firm pudding with a gritty texture (from the grits of course). I think it would also be good made with polenta. My husband found it good too but in his hurry to taste it really burned his tongue. Next time we will let it cool for a while. 

Sunday, November 11, 2012

Savory French toast with hot sauce ホットソース入りフレンチトースト

While we we vacationing in Hilton Head, I made French toast one morning. Since we did not have maple syrup. I just made it with a mixture of eggs and cream, seasoned with salt rather than making it sweet. My wife really liked the non-sweet French toast and came up with the idea of “savory” french toast. After coming home, she made this dish one weekend as a breakfast.
CIMG5478
Bread: We used two thick slices of store-bought semolina loaf.
Egg mixture: For two slices like above, we used two whole eggs, cream (2 tbs), Sriracha hot sauce (to your taste) and salt (1/4 tsp).

In a shallow pan, which was just large enough to accommodate two slices of bread, we place the bread slices and poured over the egg mixture. Turning once, to coat. Then we placed it in the refrigerator over night so that the bread could totally absorb the egg mixture.

Next morning, I fried the bread in melted butter in a frying pan until both sides were browned and finished it in a 350F preheated oven for 10-15 minutes or until the center of the bread was cooked.

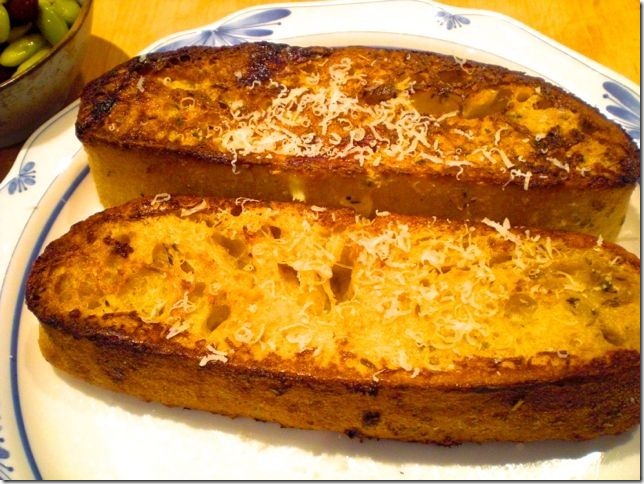
We grated Parmigiano-Riggiano cheese on the top. This turned out pretty well. It is a slightly hot (egg and cream tamed the heat from the hot sauce) but savory French toast. The bread was crunchy on the outside but moist (almost like bread pudding) on the inside. We actually prefer this to the more traditional sweet French toast. We also enjoyed the leftover French toast as a drinking snack by cutting it into  bite-sized cubes and toasting it before serving. My wife says the success of this dish opens wide vistas of possibility for variations on this theme…oops!