Most recent post

Sunday, August 29, 2021

Wacky waffle cake bowl with ricotta cheese topping

In trying to decide how to use the waffle bowls we made a few days ago, my wife was inspired by two items. The first was the realization that there are several Pennsylvania Dutch desserts such as funny cake or shoofly pie  that are essentially cakes in a pie shell. In addition she thought of Japanese melon pan which is essentially a cakey bread covered in a cookie (and wasn’t the waffle bowl a kind of cookie?) So based on these inspirations, she decided, as an experiment, to fill several of the waffle bowls with a PA Dutch cake called Wacky cake topped with ricotta filling. She chose wacky cake because it is so simple to make. If the experiment didn’t turn out, it wouldn’t be a great loss. In fact the “experiment” turned out quite nicely. The picture shows a whole wacky waffle cake plus one cut in half to show how the ricotta filling dips into the cake as it cooks.


The waffle bowls were cooked again and got really brown and crispy. Then after some time, stored in the refrigerator they became a bit soft again. My wife  heated them up in the toaster oven just before serving which made the bowls crispy. I turn the platform over to my wife to describe how she made them.

Ingredients:

For the cake 
1 1/2 cups all purpose flour
1 tsp baking soda
1/4 tsp salt
1 cup sugar
1/3 cup cocoa powder
1 tsp. vanilla
1 tbs. vinegar
1/3 cup oil
1 cup water 


For the ricotta filling
1 cup ricotta cheese
1 egg 
1/8 cup sugar
1/4 tsp. salt
1/2 tsp vanilla


Directions:
Mix all the ingredients for the ricotta filling until smooth and set aside. Mix the dry ingredients from the flour thru the cocoa powder in a bowl. Mix the wet ingredients in another bowl. Add the wet ingredients to the dry ingredients until smooth. I put the waffle bowls in a tin for large muffins to provide support as the cake cooked (and in case the waffle bowls fell apart during cooking the mess would be contained.) I then filled them with the cake mixture and topped them with a scoop of the ricotta filling. (These are shown in the bottom row of muffins in the next picture). I had some batter left over after filling the waffle bowls so I just made some large muffins by putting the batter directly into the muffin tin and topping them with the ricotta mixture. (These muffins are shown in the top row of muffins in the picture). I cooked them at 350 degree for about 30 to 35 minutes until the ricotta topping firmed up and a skewer came out clean. 


The wacky waffle cakes were surprisingly good. Even though the shell was double cooked and got a bit high done it was nice and crispy and tasted very good. The combination of cookie-like crispiness, soft sweet chocolate cake and smooth moist ricotta filling made each chew a nice complex texture experience. The three different flavors of each element also went very well together. I think I may be onto something here. Stand back! 

Thursday, August 26, 2021

Butter, butter, butter, butter, rolls バター、バター、バターロール

My wife recently bought a cookbook called “Fast Breads” by Elinor Klivans and these were the first things she made from it. The are called buttery rowies. She thought they looked like croissants but were much easier to make so she gave them a try. 


Ingredients:
2 1/4 cups unbleached AP flour
2 tsp. Salt
2 1/4 tsp. Yeast
1 cup warm water (recipe calls for water 130 degrees F. I thought that was too hot and would kill the yeast. I don’t know what the purpose of such a high temperature would be.)
1 cup (two sticks) of butter softened for 20 minutes to room temperature

Directions:
Put the flour, salt, and yeast in the bowl of stand mixer. Add the water and mix until the ingredients are combined then beat for 4 minutes. Cover the bowl and let the dough rest for 15 minutes. Cut the butter into 1/4 inch slices. Pat and roll the dough into a 10 X 8 inch rectangle about 1/2 inch thick. Distribute the 1/2 of the butter pieces on the rectangle (picture on the left below). Using a spatula spread the butter evenly over the dough leaving a 1 inch border all around. With the long edge facing you fold the dough over into thirds and pinch the edges tightly to seal. (The dough should now measure 3 X 8.) Roll the dough out into a 12 X 6 rectangle. Distribute the remaining butter over the rectangle. Again using a spatula spread the butter evenly over the dough rectangle leaving a 1 inch border all around. With the short side facing you fold the dough into thirds pinching the sides to seal tightly. Let the dough rest 5 minutes.

Line baking sheet with 1 inch sides with parchment paper. Gently roll the dough into a 10 x 8 rectangle. Using a sharp knife (I used a pizza cutter), cut the dough into 2 inch squares. Place the squares on the baking sheet one inch apart, cover and let rolls rise for about 30 minutes. (They will not rise much but will soft and puffy). Bake in a 400 degree oven for about 20 to 25 minutes until golden brown (picture on the right). (Some of the butter will leak out so they will be baking in bubbling butter).
Let cool about 10 minutes then serve.


These rolls are basically a butter deliver system for those who like butter but are too embarrassed to just gnaw on a raw stick of it straight out of the package. To get an idea of how much butter was involved, the ratio of butter to flour is one stick of butter for each cup of flour. Also the picture on the left above, just shows half the butter used. Twice the amount of butter shown there goes on the same rectangle of dough. When the rolls came out of the oven they were literally swimming in melted butter. My wife tipped the baking sheet and ladled spoonfuls of butter over the top of the rolls to use it up. While the rolls were crispy on the outside they were completely soaked in butter on the inside. In short this is a prime example of “too much of a good thing”. This was way too much butter. My wife couldn’t eat them. I think they could be quite good, however, if made with half the amount of butter. 

Saturday, August 21, 2021

Simmered eggplant and shime-saba with grated daikon 茄子の忘れ煮としめ鯖のおろし和え

These are four appetizers we started with one evening. I tend to make the same things we like but this time, for a change, I made two new dishes. In the picture below, clock-wise from upper left are vinegar cured Japanese mackerel or "shime-saba" in grated daikon dressed in ponzu しめ鯖のおろし和え, long simmered Japanese eggplant or 茄子の忘れ煮, squid "shiokara" 塩辛 and salmon "nanban" 鮭の南蛮漬け.


I bought a package of frozen vinegar cured Japanese mackerel or "shime-saba" from the Japanese grocery store and realized I already had another package in the freezer. So I decided to use the old package. I have served this several different ways including simple sashimiしめ鯖の刺身, ceviche  鯖のサビーチェ, and moulded sushi 鯖の押し寿司. I saw this recipe on line and made some modifications. This is very similar to what I made using tuna sashimi 鮪のおろし和え, previously. I garnished this with chiffonade of perilla and a wedge of lemon. I served this the evening I made it and then, again the following evening. After some time in the fridge, the flavors amalgamated and it got much better.


Ingredients:
One package of shime-saba, thawed, lightly washed with sake, patted dry, thin skin removed, and then cut into thin (1/4 inch) slices.
2 tbs ponzu shoyu ポン酢醤油 (from the bottle, or equal mixture of rice vinegar or citrus juice and soy sauce)
2 inch long daikon, peeled and grated and excess moisture drained*
Rehydrate dried seaweed mixture, arbitrary amount (optional)
Chiffonade of perilla and lemon wedge for garnish

*I use a grater with a meshed receptacle inside the bottom container which automatically drains excess moisture from grated daikon (or any other items). I made  sure to taste before assembling into the dish since some daikon is atomically hot. This one was ok.


Directions:
In a bowl, add the shime-saba, grated diakon, seaweed and ponzu and mix, I also added additional yuzu juice (from the bottle) for a good measure. I let it marinate for several hours to overnight, then topped it with the perilla and lemon.

This is a good dish. The daikon really makes this dish and goes perfectly with cold sake.

I made the eggplant dish since I got 2 Japanese eggplants at the Japanese grocery store a week ago and did not immediately use them. (My wife was kind enough to reminded me that eggplant, even the Japanese kind, does not improve with age.) The dish is also from the same web site I got the recipe for the mackerel dish. I decided to make this since it does not use any oil and looked healthy and simple. The Japanese name is "Wasure-ni" 忘れ煮 meaning "forgot that it was still simmering" indicating involving long simmering. The original recipe calls for "hoshi-ebi" 干しエビ, small dried shrimp, which is used to add "umami" flavor and fresh "myouga" 茗荷 but I did not have either one so I skipped the shrimp and substituted fresh myouga with vinegard myouga 茗荷の甘酢漬け we made almost one year ago as a garnish. I added slices of ginger in the simmering liquid whihc was not part of the original recipe. I served this with blanched broccoli rabe which is the closest we can get to "Nanohana" 菜の花.


Ingredients:
One Japanese eggplant (this one was on the larger side), remove the stem end, cut in quarters lengthwise, multiple thin slice cuts on the bias through the skin into the flesh but not all the way through and immediately soak in salted cold water for 10-20 minutes.
2 slices of ginger
Threads of ginger root for garnish (skin, slice thinly and then cut into thin threads).

For broth
1 cup Bonito broth (I made it from a dashi pack)
1/3 cup of concentrated Japanese noodle sauce (or mirin and soy sauce in equal amount).
two slices of ginger (original recipe calls for 1 tbs dried shrimp)

Directions:
Heat up the simmering broth until boiling
Put the prepared egg plant, the ginger slices and cover with a inner "otoshi" buta 落とし蓋 (I used a silicon "otoshi-buta" or cover it with an aluminum foil made it to a round, slight smaller than the pot opening, place the lid and simmer for 20-30 minutes.

This is a really good dish. The eggplant got really soft and absorbed the flavors of the broth. I served it cold which is perfect for summer.

The picture below is the usual salmon dish I make which is always good with cold sake.


Shown below is frozen "shiokara" from the pouch. Again, only the drink that goes with this is sake.


So, we enjoyed all four appetizers with a sips of cold sake. Our home Izakaya is not bad at all.

Wednesday, August 18, 2021

Not-fried "Kara-age" fried chicken 揚げない唐揚げ

My wife really likes the chicken kara-age I make. I have not made it for some time. One weekend, we got chicken thighs specifically to make this dish but somehow I didn’t get around to it over the weekend. I just prepared the chicken (removed the bone and cut the meat into bite sized pieces). I marinated it in soy sauce, mirin, sake, sesame oil, grated garlic and ginger in a Ziploc bag. I thought, maybe, I could fry it up one weekday evening. But I did not have the energy or time to do that. So, instead, I baked it in our toaster oven on convection mode. We have baked such dishes as chicken wings before in the toaster oven instead of frying them. This version of kara-age was not as good as deep fried but good enough. I served this as an appetizer with cucumber and tomato salad.


Ingredients:
4 bone-in, skin-on chicken thighs, excess fat removed and bone removed, cut into bite sized pieces with some skin on.
1/4 cup "Katakuri-ko" potato starch

Marinade:
4 tbs soy sauce
2 tbs sake
2 tbs mirin
1/2 tsp grated garlic (from tube)
1/2 tsp grated ginger (from tube)
2 tsp dark sesame oil
Hot sauce such as Sriracha to taste

Directions:
Place the marinade and the chicken in a Ziploc bag, massage, remove the air, seal and let it marinate overnight in the refrigerator.
Remove the chicken, blot off the excess marinade and dredge with the potato starch shaking off excess starch.
Preheat the toaster oven to 380F (I could have used a higher temperature like 400F, but I was afraid it might burn since the marinade contained mirin).
I covered the baking tray with aluminum foil  (still the chicken stuck, I could have used parchment paper), lightly oiled, placed the chicken and baked for 25-30 minutes (shorter with higher temp may have been better).


This was not bad but it may have been better if I could have cooked it at a higher temperature. I didn’t because of the sugar in the mirin, it could easily burn. Maybe, next time, I may just use soy sauce and  sake in the marinade omitting the mirin.

In any case, this was good especially weekday night and it heated up nicely in the toaster oven in the toasting mode next day.

Sunday, August 15, 2021

Stuffed mini waffle bowls

 After making mini-waffle bowls, my wife suggested several ideas for filling them. For desert, ice cream and fruit appear standard. She wanted something for breakfast. Since we usually eat a bowl of home-made yogurt, she suggested filling the waffle bowls with the yogurt and blueberries. This was good but kind of difficult to eat the waffle and yogurt together. If you just eat the fruit and yogurt and then eat the waffle bowl, the waffle tends to get a bit soggy. I tried to chomp on the waffle and yogurt together but it was a bit messy. Using a knife and folk, cutting a wedge sort of works. But in the end, I’d rather eat the yogurt and waffle separately.


The next morning, my wife suggested filling the waffle bowls with her favorite sweet Lebanon bologna and scrambled eggs. This sort of worked using a knife and folk to cut a wedge and then eating the waffle, sausage and egg together.


It seems the major role of these waffle bowls is in the presentation. They had a nice crisp cookie taste but its a little awkward eating bowl and contents together. Nonetheless, never daunted, I suggested stuffing the waffle bowl with ice cream then freezing the entire thing. I am not sure if my wife bought the idea. We have to see.

Thursday, August 12, 2021

Mini waffle bowl ワッフルボール

My wife somehow got the idea of making mini-waffle bowls. She must have seen an ad for the mini-waffle bowl maker on the internet. In any case, it was inexpensive so we decided to try it.   It is shown in (#1 and #2) in the composite picture below. The maker came with a little cookbook that had several recipes for different kinds of waffle bowls such as pumpkin, chocolate or cheddar cornbread, which was very useful. We made the “classic waffle bowl” shown in the first picture. Making these bowels is not as straight forward as the instructions would have you believe. It took some trial and error until we got the hang of it. Once cooled down, the little bowel was quite nice and crispy.


Ingredients (made 13 mini-waffle Bowles).
1 1/2 cups AP flour
1 1/3 cups sugar
2 tsp. Baking powder
1 tsp. Salt
4 large eggs
1/2 cup whole milk
6 Tbs. butter
1 tsp. Vanilla


Directions:
Mix the dry ingredients in a bowl and set aside. Mix the wet ingredients in a bowl. Whisk the wet ingredients into the dry ingredients until blended (#3) The instructions say ladle 3 Tbs. into the preheated waffle maker. This is where things get tricky—figuring out how much batter to put in. We ended up using our second to smallest ice cream scoop (#4). The next question was how much to push down the lid? Push too much and the batter runs out the side, too little and the bowl is very thick. We liked it when the bowl had a little lip as shown in #5. Another thing we noticed was that the hinge in the back was very tight and did not adjust to match the gap the batter made in the front. So the sides of the bowls were very thin in the back and very thick in the front. Also, it took about 5 minutes apiece to cook the little bowls. We ended up making 16 bowls (#6). You do the math on how long this project took to complete.


The little waffle bowls were nice and crunchy. They had a subtle sweetness slight buttery flavor. As just a cookie they were really good. They will make nice edible bowls to serve thing in. Next question what will we serve in them?

Monday, August 9, 2021

Tako Grill Take-out タコグリルからテイクアウト

Our Izakaya substitute "Tako Grill" has been close for dining-in for some time. Mr. Terry Segawa indicated that they would operate in a take-out rather than sit-in format. He also added a Japanese grocery section. Although we will miss being able to  interact with the sushi chefs and Mr and Mrs Segawa, we have been enjoying Omakase sushi and take-out all during covid. One of the pluses of take-out is that we do not have to worry about driving home afterwards. To make the experience more enjoyable, I usually re-plate the food. An example of which is shown in the next picture. Using the garnish they provided, I rearranged the sashimi into two servings; one for me and one for my wife instead of sharing the plate (which is what we used to do at Tako Grill at the sushi counter).


Today, we got nicely marbled “toro tuna” almost looking like Wagyu beef, in the center is “hamachi” and on the right is “aji” horse mackerel. Since aji sashimi is best eaten with grated ginger and soy sauce, I used sauce bowl which had two wells and served both wasabi (using Tako Grill provided one) and added grated ginger (from tube) soysauce
 

I rearranged “uni” sea urchin and squid sashimi into a small bowl and added a garnish of nori strips and wasabi dissolved in soy sauce.


Whenever, we get “Aji” sashimi, Sushi Chef  Santos always serves us deep fried aji skeleton. Even for the take-out, this is included. We heated it up in the toaster oven on toasting  mode. It comes out hot and crispy almost like just out of hot oil. Since there is only one, we share it. We essentially eat everything including the head.


Like we are dining in, we finish with some sushi. Today, we got Japanese “tai” red snapper, toro and eel sushi and our usual California roll made of real lump crab meat and addition of  tobiko roe.


Although someday, we may be able to dine-in again, we are quite happy with this arrangement. We also get some Japanese groceries which is definitively a big plus. We are regularly getting frozen edamame (they have the best quality edamame), Japanese crackers (especially my wife likes them), Tonkotsu ramen, and green tea ice cream daifuku among others.  We hope this new format will work for Tako Grill as a business. We are certainly very happy with this format.

Friday, August 6, 2021

Big eye tuna sashimi 4 ways めばち鮪刺身 四通り

When we got firefly squid from Regalis food, we also got 3 lbs. of fresh bigeye tuna sashimi メバチマグロ (akami 赤身). Since this was too much tuna sashimi for us to finish in one sitting, I divided it into 4 portions. We finished one portion fresh. The remaining three portions were vacuum packed and frozen.  Over time we have been enjoying the frozen portions and finally we came to the last one. Although this tuna tasted fairly good, certain portions, including this last one, were very “sinewy”.  So I had to tailor the dishes I made to make the sinew less noticeable. The dishes I made are shown in the next picture. The upper row from left to right are “yamakake” やまかけ, “sashimi” 赤身刺身, tuna with avocado cubes マグロとアボカドの角切りand the lower row is imitation “negitoro” 擬制ネギトロ. I did a similar combination of dishes using frozen yellowtail tuna but these made with big eye tuna were much better.
 

For the yamakake, I marinated  cubes of tuna for several hours in concentrated (x4) Japanese noodle sauce and also added soy sauce with dissolved wasabi to the grated nagaimo. I topped it with thin strips of nori. This is a classic and also sort of filling because of the grated nagaimo.


I chose the portion with the least sinew and made a small serving of straight sashimi. It was quite good.


This is another dish I make often. The dressing contains chopped garlic, soy sauce, sake, and dark sesame oil. The similarity of textures of tuna sashimi cubes and avocado works well. Since I did not have fresh chives, I used the green part of scallion for garnish.


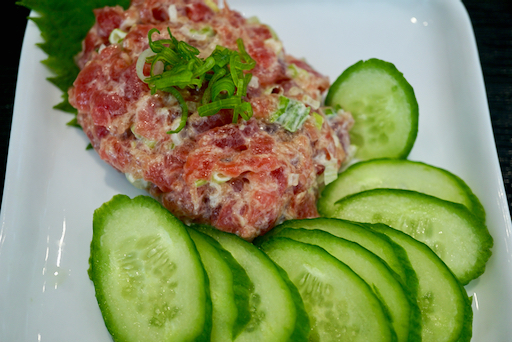
Finally, imitaion negitoro. The combination of mayonise and tuna cannot go wrong. As usual, I left a half portion of tuna in small cubes and mixed it with the more finely chopped tuna with mayo, Japanese noodle sauce and chopped scallion. I served this with slices of cucumber (American minicucues) and small rectangular  sheets of Korean nori 韓国海苔. We made small nori rolls with the cucumber and negitoro. This is really great and also filling.


After finishing these 4 tuna sashimi dishes, we enjoyed  “edamame” 枝豆 and assortment of Japanese rice crackers and few more cups of cold sake and we were quite full.

Tuesday, August 3, 2021

Mixed seafood fry 海鮮フライ

This is our effort to clear up some frozen seafood inventory that has been in our freezer “long enough”. Among the items in danger of exceeding their allotted time were  scallops we got from Great-Alaska-Seafood and Pacific Oysters we got from Vital Choice wild seafood. I added shrimp also from Great-Alaska-Seafood to these items so that I could make a mixed seafood fry.

The picture below is not one of my better jobs at presentation, but hot out of the oil, these fried items were great. I served them with homemade Pa Dutch coleslaw, Campari tomatoes and wedges of lemon.


Although the scallops had freezer burn, I carefully shaved it off before cooking. Despite that, they tasted good. We should not be eating this type of fried food too often but when we  do, we  really enjoy it.