Showing posts with label Egg. Show all posts

Friday, July 31, 2026

Spinach Feta Cheese Frittata Bites ほうれん草とフェタチーズのフリッタータバイト

This is the third iteration of the small egg bites series my wife made. This time she used spinach and dill. She also reused a “feta cheese dip” which we initially made for another dish but didn’t use because we thought it was too strong by itself. This was quite a good bites. Hopefully we may derive some health benefit from the added veggie greens.


Ingredients:
6 eggs
1/2 cup cream
1/4 cup Buttermilk
1 garlic  clove 
1/2 tsp Dijon mustard 
1/2 cup fresh dill, finely chopped
1/2 tsp salt
1 large package of  spinach, cooked without adding water, drained, finely chopped
Feta cheese dip*
1/2 log of goat cheese

*fetacheese dip
8 oz good-quality teta cheese (block form)
1 clove garlic, chopped
½ teaspoon dried oregano
1 teaspoon red pepper flakes
¼ cup olive oil
2 tablespoons water
1 teaspoon lemon juice

Directions:
In a bowl, whisk together the ingredients eggs through salt and set aside. In another bowl, mix together the feta cheese dip and the goat cheese until completely combined. Add the cooked spinach to the cheese dip and completely combine. Scoop the cheese mixture into mini muffin tins lined with paper cups. Do not fill completely. Gently pour the egg mixture over and around the cheese mixture. Bake in a 350 degree oven for 15 to 20 minutes until the eggs are set (shown in picture)


These cheese bites were quite different from the other ones my wife made recently. The feta cheese dip by itself was quite strong flavored but the addition of the spinach and goat cheese really tamed it down making it pleasantly savory. The egg mixture essentially formed a shell around the cheese mixture (which can be clearly seen in the cross section picture). The dill really added a good additional flavor dimension.

Tuesday, July 28, 2026

Mashed Potato, Roasted Pork and Cheese Bites version #2 マシュポテト、ローストポークチーズバイト V2

This is another edition of my wife’s “small bites” series. This time it is a variation on “Pork, Potato, Goat Cheese Bites”. For this version she did not have mashed potato and parsnip cooked in the Weber. So she made mashed potatoes by cooking a Russet potato in the microwave. This is quite good but the original had a bit more flavors due to inclusion of parsnip and juice from the roasted pork.


Ingredients:
1 1/2 cup mashed potato (from potatoes cooked in pork barbeque)
6 eggs
8 oz sour creme
2 diced onion
8 oz  roasted pork, diced.
Cheeses (I used smoked gouda and cheddar cheese

Directions:
Microwave a russet potato for 5 minutes or until done. Peel and mash the potato. Saute the onion. Add the onions to the potatoes. When the potato and onion have cooled to room temperature add the eggs sour cream, and roasted pork. Scoop the potato mixture into mini muffin tins lined with paper cups. Top with a layer of cheese. (I topped it with a layer or smoked gouda and another layer of cheddar.) Cook in a 350 degree oven for 15 to 20 minutes.


These were also very good cheese bites. They didn’t have quite the complexity in flavor that the previous batch had because they did not include mashed parsnips and were not cooked in the Weber. Again the diced pork was crucial. The cheeses were fairly strong tasting and really added to the dish.

Monday, June 22, 2026

Goat Cheese Popover ゴートチーズ ポップオーバー

This is another one based on a recipe from “Silver Palate Good Times Cook Book”.  This is basically a variation of  “Yorkshire pudding”. My wife said that “back in the day” she used to make traditional Yorkshire pudding from the holiday roast drippings. Although Yorkshire pudding is not a popular item served at restaurants these days, we used to have it regularly at a brunch we attended with a friend of ours at a local club/restaurant.  When my wife saw this recipe, it called to her because it is a mini version of the old time favorite and goat cheese is involved. Since these types of recipes can be finicky and we were not sure it would work. To our delight it did! It puffed up nicely and the center was hollow with a nice eggy crust and goat cheese inside on the bottom (picture #1 and #3). This is a nice hors d'oeuvre as suggested in the recipe. I will ask my wife to continue.


Ingredients: (makes about 30 to 35 mini-bites)
6 eggs
1½ cups unbleached all-purpose flour
1 teaspoon salt
½ teaspoon freshly ground black pepper
1 teaspoon dried thyme
Pinch ground nutmeg
2 cups milk
½ cup heavy or whipping cream
4 ounces herbed chèvre, cut into 18 to 20 piece

Ingredients (1/2 recipe. makes 16 to 17 mini-bites)
3 eggs 
3/4 cup unbleached all-purpose flour 
1/2 teaspoon salt 
1/8  teaspoon freshly ground black pepper (or cayenne)
1/2 teaspoon dried thyme 
Pinch ground nutmeg 
1 cup milk
1/4 cup cream
2 ounces herbed chèvre, cut into pieces

Directions:
Preheat oven to 400°F. Line mini muffin tin with paper cups.

Place the eggs, flour, salt, pepper, thyme, and nutmeg in a blender. Blend until well combined, about 10 seconds. Scrape down the sides of the container. With the blender running, slowly pour in the milk and cream and blend until smooth. (It will have a very watery consistency). Place the prepared muffin tins in the oven to warm slightly. Remove the warmed tins and fill each halfway with batter. Place a piece of the cheese in the center of each cup (#1). Pour in the remaining batter to fill each cup two-thirds. Bake the popovers 20 to 25 minutes or until puffed and golden (#2). Serve immediately (#4). 


These were unexpected perfection. Nice and crunchy with the pleasant taste of the goat cheese. Perfect as a little bite with wine as an appetizer.

Friday, June 19, 2026

Grilled Tofu-puff with Egg Yolk Miso 柚子胡椒入り玉味噌の焼き油揚げ

I made many variations of the Izakaya dish of grilled and stuffed deep fried tofu pouches or “abura-age 油揚げ” previously but I have not made it for some time.  This time, two extra egg yolks were available from my wife’s  baking projects and I remembered a Youtube episode of a grilled abura-age dish stuffed with egg yolks mixed with miso (which is called “Tama Miso 玉味噌” ) and seasoned with yuzu kosho* 柚子胡椒.

*It is a mixture of salt, chopped peel of a Japanese citrus called "yuzu" 柚子 and chili pepper (usually green chili pepper but it could also be red chili pepper). It is available through Japanese grocery stores or from Amazon.>

“Tama-Miso” is fairly common condiment/sauce in Japan with various variations. It can be used as a grilling sauce called “denegaku 田楽” on tofu and eggplant, dipping sauce (for cucumber sticks). I did not follow any particular recipe to make the “Tama Miso”.

I could have grilled the final product in the toaster oven but I cooked it in a frying pan (which is easier). Just grilled abura-age can be a good drinking snack (with grated daikon and soy sauce) but the addition of  various stuffings make it even more interesting and better. I had made and posted different variations of abura-age dishes including ones stuffed with cheese, nori with suriracha, gyoza stuffing and even nattou.

This rendition is a bit different from anything I posted before because of the use of “Tama Miso” and “Yuzu kosho”.  The rich favors of the tama miso and mild spiciness and citrus flavors, worked very well encased in crunchy grilled abura-age skin. I served this with steamed brocollini dressed in mustard soy sauce. This was a perfect small dish for the “home” Izakaya.


For “Tama Miso” with Yuzu Kosho:
Ingredients: (makes about 1/3 cup)
2 egg yolks
2 tsp sugar
1 tsp. or more of yuzu kosho (to taste)
3 tbs white miso (I used Saikyo miso which is a sweet white miso) or a combination of red and white miso
1 tbs mirin
2-3 tbs sake

Directions:
In a small sauce pan, add all the ingredients except for the sake and mix well until smooth. Add the sake and mix so that the consistency is loose like pancake batter. Place the pan on a low flame and stir constantly until the egg yolks are cooked and reduced to the consistency of the original miso before you added the sake. Let it cool. It will further thicken (#3 in the composite picture). It will keep at least a week in the refrigerator.

Assembly and cooking of the stuffed abura-age:
Thaw the abura-age if frozen (#1). Using a sharp paring knife, cut along three sides and open like a book (#2). Using a spatula, smear the tama miso (#3) on one side of the open abura-age (#4). Close and make sure both sides are adhering well. Place it in a dry frying pan on medium low flame and cook until lightly brown (a few minutes) turn it over and cook the other side a few more minutes. Cut into 4 pieces and serve warm.


This is a very satisfying snack. It has a nice crunch and toasty flavor from the cooked abura-age. The inside provides a mellow richness with a little spiciness from the yuzu kosho. Although it is a very light mouthful, it is full of a complex range of flavors. Great with either red wine or sake.

Thursday, June 4, 2026

Three Eel Dishes うなぎの蒲焼料理3種類

Fresh water eel or “unagi 鰻” is a popular fish item in Japan and many restaurants specialize in eel dishes. At these specialized restaurants, eels are brought in live and prepared on site. “Kaba-yaki 蒲焼“ (eel grilled with sauce) is the most common dish with two variations of preparation and cooking* i.e., Kansai, Eastern Japan 関西 and Tokyo 東京 styles.  (Even in Japan, however, other types of restaurants may use previously prepared and frozen eel the majority of which comes from China (99 percent) and the rest from Taiwan.) Once eel kaba-yaki is prepared, two main ways of eating it is “Una-ju 鰻重” and “Una-don 鰻丼”. Both are eel kaba-yaki on rice but the former is served in a Ju-bako 重箱  (a square lacquered box) and the latter in a don-buri 丼bowl. Consequently, Una-ju is the more expensive and formal way of serving eel on rice. Una-don is the more informal way of serving eel.

In the U.S., although some eel is aqua-cultured in Maine and some restaurants may bring it in live and prepared it on site,  most of the eel is pre-packaged and frozen. The majority of this frozen eel comes from China, and Vietnam.

*For Tokyo style the filet of the eel comes from the eel’s back. It is then steamed, and grilled. For Kansai style the filet comes from the eel belly. It is then grilled without steaming. Please see here in more details.

We had a package of frozen eel kaba-yaki (11oz) in our freezer which came from Weee some time ago. We decided it was time to eat it. Since we are not big eaters and eel is quite rich, we ended up making three dishes over 3 days to finish the entire package. (Of course, we had some other small dishes along with the eel so we didn’t just eat eel for 3 days.)

The first dish I made (picture #1), is called “Wu-zaku 鰻ざく”. I posted a version of this some time ago. It is a combination of cold cucumber with julienned ginger and vinegar dressing and warmed slices of kaba-yaki eel. The cold cucumber slices counteract the rich flavor of the eel.


The next day, I made another standard or popular fail-proof eel dish called “wu-maki 鰻巻き” (picture #2). Again, I made and posted a version of this some years ago. I served this with sliced cucumber and grated daikon with soy sauce.


Finally, I made a mini una-ju ミニ鰻重 as a shime or ending dish the next evening (picture #3). I used a small square box which was a part of a larger ju-bako we used for Hanami. The traditional way of serving this is with white rice, some “unagi” sauce and the filet of kaba-yaki eel placed on top. My wife requested “sushi rice” so I used frozen rice we made some time ago when we cooked rice. After thawing and warming up the rice in a lidded silicon container in the microwave, I added some sushi vinegar (from the bottle). I mixed the vinegar into the rice and let it sit for a few minutes. Meanwhile I heated up the eel kabayaki in the toaster oven (on toast mode) until warm with the sauce bubbling. I added “sansho 山椒” Japanese  pepper powder on the top.


For us, this was the perfect ending to the meal. We spread the enjoyment of this eel over several days because too much eel is too much of a good thing. We were quite pleased with the  quality of this frozen eel kaba-yaki from China which we got from Weee.

Sunday, April 5, 2026

Hanami 2026 #2 and #3 花見2026、二回目、三回目

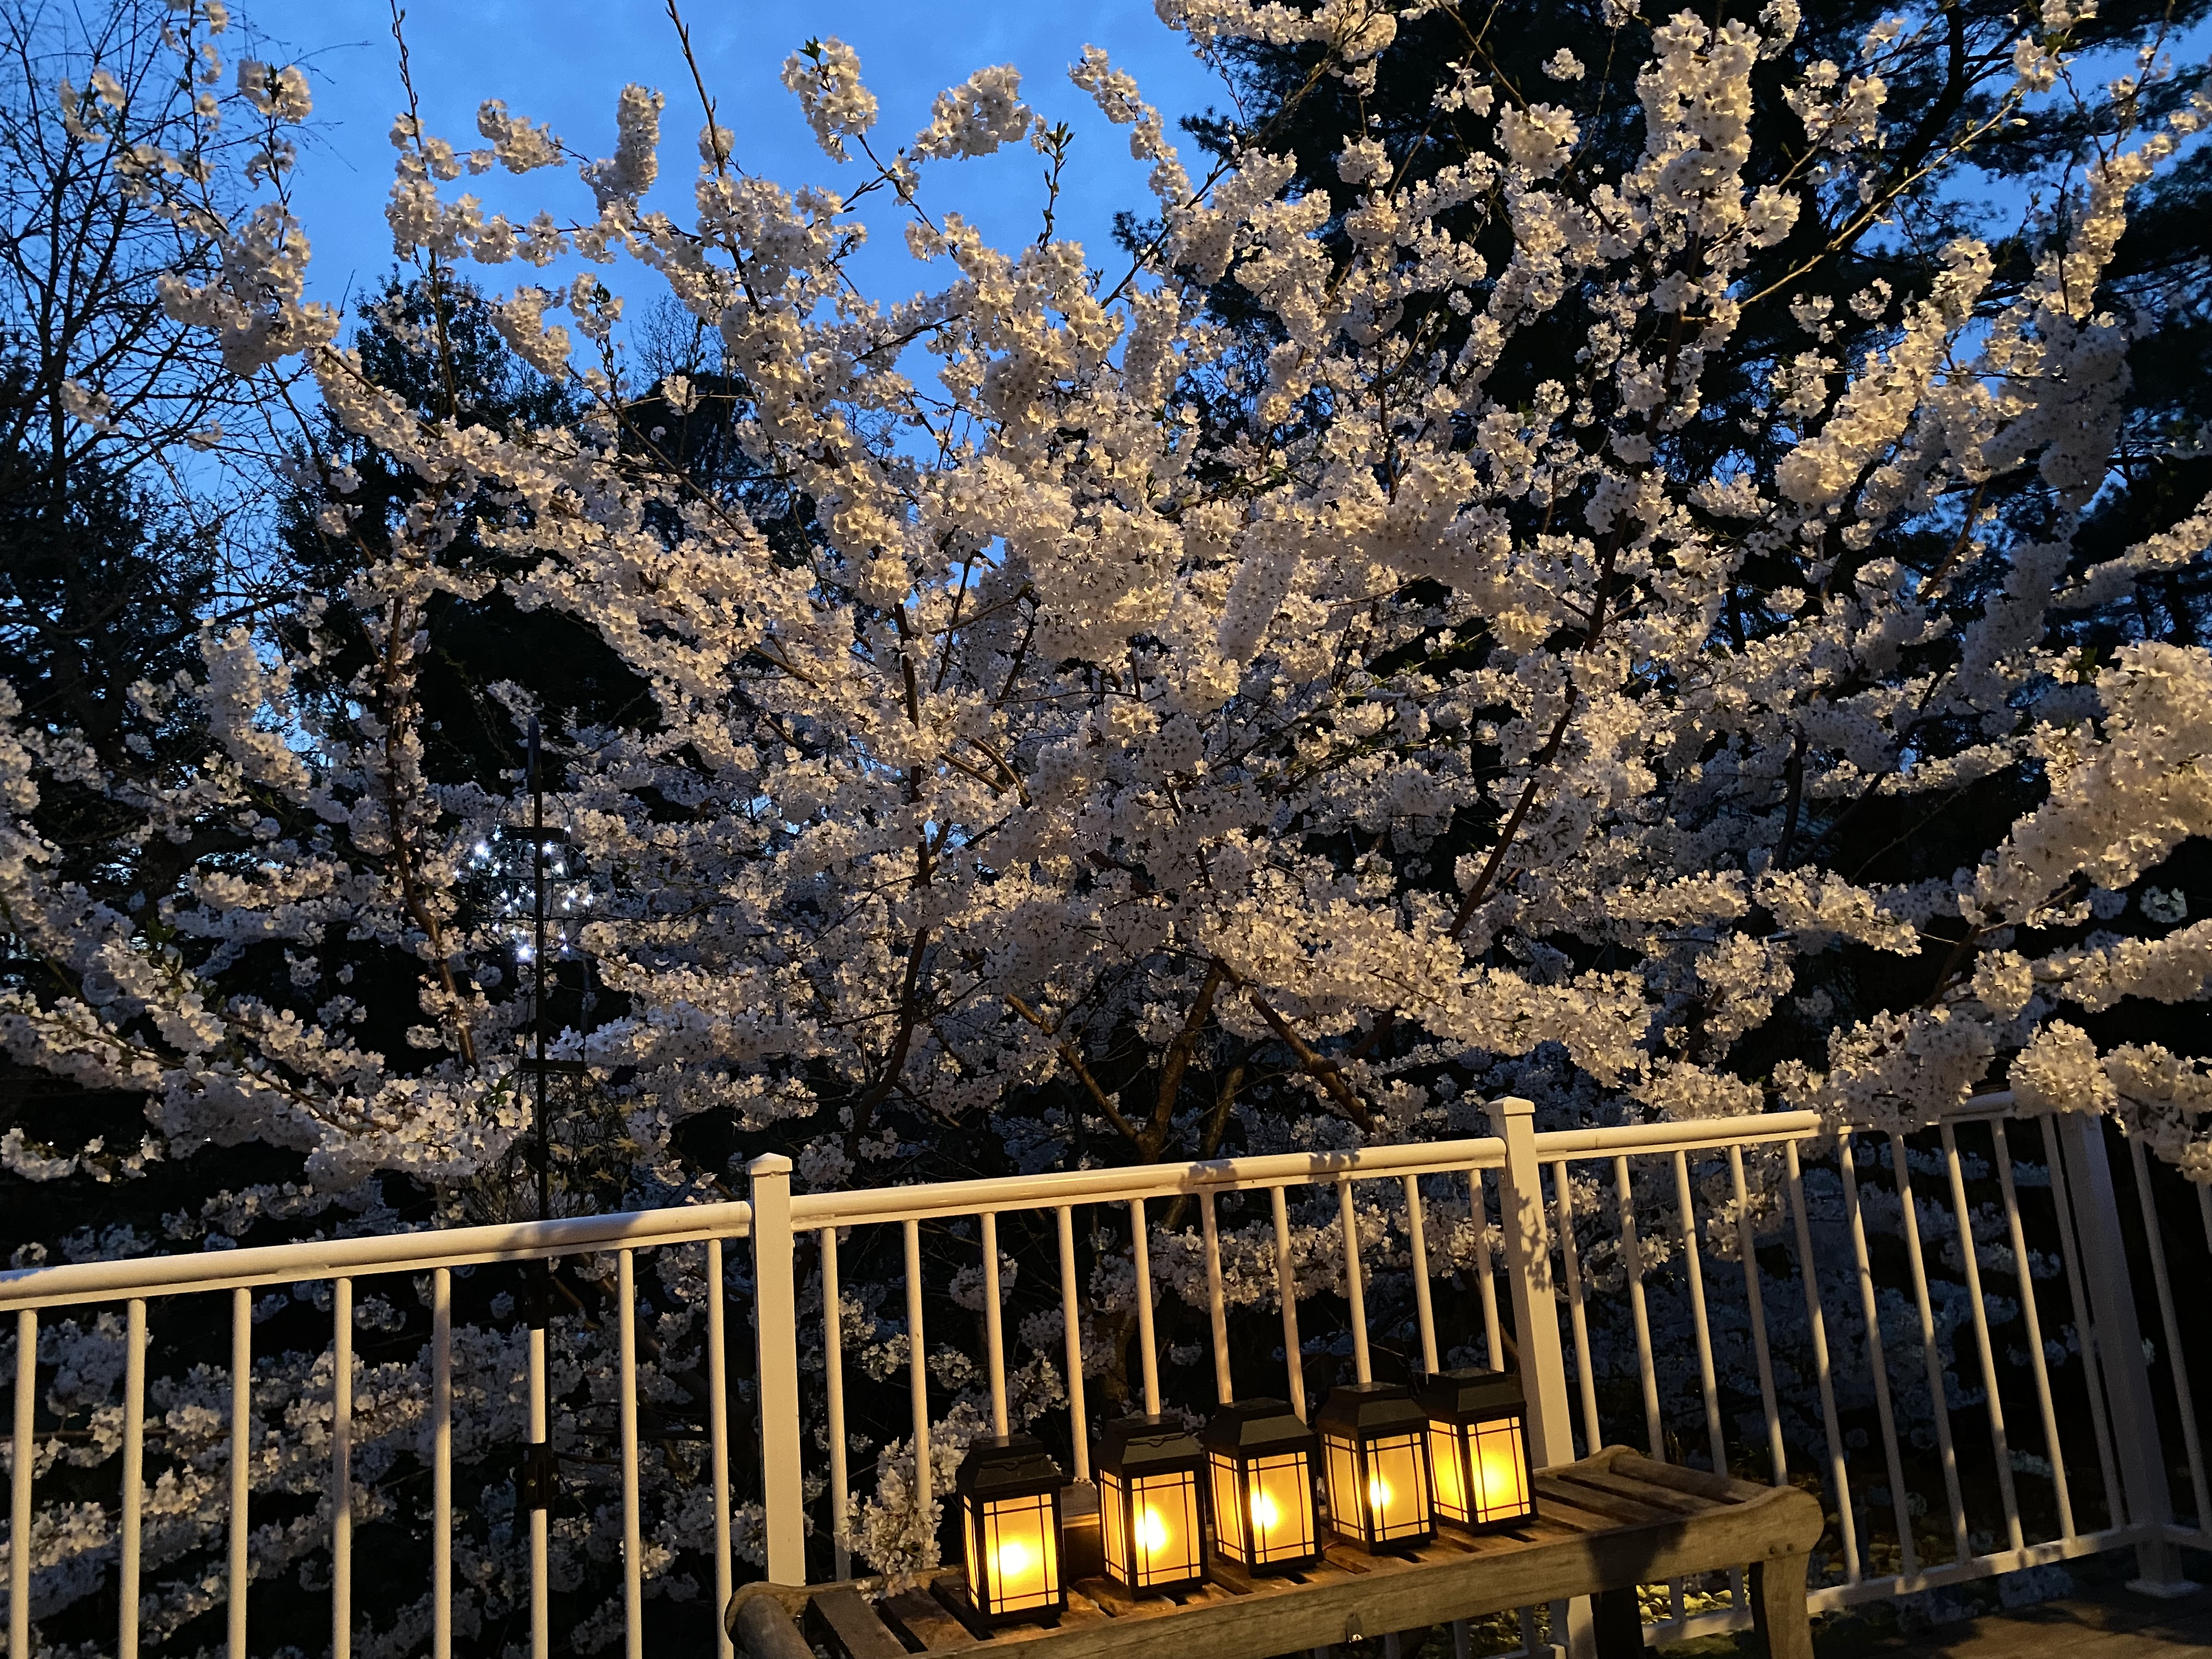
This year, two of our cherry trees (shown in the picture) kept their blossoms for several days, which gave us an opportunity to have multiple “Hanami 花見” cherry blossom gazing celebrations. The weather was a bit too cold to stay outside in the evening but we had a some time during the day to sit under the cherry trees. In the evening, we moved inside but still had a great view of the cherry blossoms. We served several small hanami dishes in the red and gold “jubako 重箱” (stackable boxes) which we have. These boxes were was just the right size and an elegant way to serve the small hanami feasts. 


The picture below shows the various dishes we served in the jubako. In picture #1, the dish in the upper left is a small “chirashi-sushi* ちらし寿司” scattered sushi with “ikura いくら” salmon roe, “uni ウニ” (not fresh uni but “Uni shuto うにの酒盗 from Maruhide 丸秀 which is the next best thing to fresh uni), and slices of avocado and cucumber.

*Since I had hydrated dried shiitake mushrooms left over from making vegetarian broth and “Kanpyo 干瓢” gourd peel from making salmon kelp rolls, I cooked and seasoned them with sugar and soy sauce (sweet and salty “ama-kara 甘辛” ). I chopped them up and mixed it into the sushi rice (this is the classic way of preparing rice for  “chirashi-zushi ちらし寿司” scattered sushi).


The upper right is simmered mackerel in miso sauce 鯖の味噌煮 with small pieces of two kinds of dashi-maki omelettes だし巻き卵, left-over from the first hanami. The left lower is Russian marinated salmon サーモンのロシア漬け topped with ikura. Finally the lower right is an assortment of what I made mostly for the first hanami, all vegetalian including mock tofu 擬制豆腐, persimmon in tofu dressing 柿のしら和え, braised burdock 金平牛蒡, nappa and cucumber asa-zuke 白菜とキュウリの浅漬け,
and marinated qual eggs うずらの味玉.

The next day, I served similar items including scattered sushi. A notable addition were the fire-fly squid ホタルイカ we got from Regalis foods. We ate half of the quantity of squid soon after we received them. For the other half,  I re-boiled, then removed the tough rock-like eyes and beaks and froze them. I thought they would be a perfect addition to the hanami feast. After thawing them, I briefly sautéed them in butter and seasoned them with a small amount of soy sauce. I also added karashi-sumiso 辛子酢味噌 miso and vinegar dressing with Japanese hot mustard (picture #2).


This has been our cherished once-a-year event. The only problem is that when the blooms are over, we have to wait a whole year before we can enjoy them again. As an aside, the Easter (and late blooming Christmas) amaryllis are also adding to the show.  


Tuesday, March 24, 2026

Shrimp and Grits with Poached Egg 温玉のせ海老とグリィツ

Dishes made with grits used to be a breakfast staple for us. These included such things as shrimp and grits and grits with poached egg. One day recently, my wife mentioned, “we have not had grits for a long time.” So, we got a package of “instant” grits. We used them for a sort-of-combination lunch dish of shrimp and grits with home pasteurized poached eggs. When I got ready to take a “serving” picture, however, I noticed everything was sort of white (except maybe for some light pink from the shrimp). To brighten things up I snarfed some baby arugula and tomato from the salad I had made as a side dish. This was a really gentle but satisfying lunch.


Ingredients: (2 servings)
1/2 cups grits
2 cups liquid (either milk or water, we used the liquid the shrimp were poached in.)
2-3 pats of unsalted butter
6 large shrimp (we used shell-on frozen shrimp)
2 pasteurized eggs

Directions:
Thaw the shrimp in cold 2% salted water for 30 minutes. Drain out the shrimp but keep the salted water. Add the salted water to a pan. When it boils, turn down the heat and add the shrimp. Let them gently poach for 2-3 minutes. Remove the shrimp from the pan and peel off the shell. Add the shell back into the poaching liquid and gently boil for a few minutes. Strain out the shells and set aside the poaching liquid. Slice the shrimp in half length wise.

Cook the grits for 5 minutes using the poaching liquid, stirring occasionally. When the grits have thickened turn off the flame and add the butter. Taste and if needed add more salt.

Top the cooked grits with the shrimp and the poached egg in the center.

Monday, January 26, 2026

“Bento” Lunch Box 弁当

Since the occasion called for it, I made a bento box which is something I rarely do. As usual, I used an adult sized two tier bento box. I filled the layers with whatever we had on hand. I would have included cooked rice but since we had arancini, I used that instead.


#1: Simmered kabocha Japanese squash かぼちゃの煮物  and blanched green beans サヤインゲン. #2: Cucumber and nappa cabbage “asazuke” 胡瓜と白菜の浅漬け(nappa cabbage is hiding underneath). #3: boiled and marinated quail egg うずらの味玉 and skinned Campari tomato. #4: Carrot salad 人参サラダ. #5: Ricotta cheese meatballs in marinara sauce  トマトソースとミートボール. #6: Arancini made with shiitake mushroom risotto アランチーニ. #7: Japanese omelet seasoned with “Shiro-dashi” 白出汁味のオムレツ.


I made the omelet just for the lunch box (two eggs beaten and seasoned with shiro-dashi*). I made the meatballs shown here in the marinara sauce a few days ago. I combined the meatballs and marinara sauce by cutting the meatballs in half, adding them to the sauce in a frying pan and heating every thing until it was warmed up and the marinara sauce thickened. I finished this by adding grated parmesan cheese. I let these two dishes cool before adding them to the lunch box.

*Shiro-dashi 白出汁: A concentrated dashi soup base. Japanese dashi broth (made from kelp, bonito flakes etc) with added light colored soy sauce. This is most commonly used to make “Chawan mushi 茶碗蒸し. I used a commercial bottled one. It adds both nice flavors and saltiness without adding color like regular soy sauce or concentrated noodle sauce would do.

This was a quite filling and nice bento.

P.S. As a side light shown in the following picture, the Christmas amaryllis are in full bloom. What a treat on a gloomy winter’s day. 


Friday, December 5, 2025

Wood-ear Mushroom in Sesame Sauce キクラゲの胡麻和え

This is another dish I made to finish up the fresh wood ear mushrooms I got from Weee. Although we prepared the mushrooms by boiling and washing them before storing them in the fridge, I repeated the process for this dish since they were getting old. I got the idea for this dish from a recipe I saw on line.  I prepared the sesame sauce the way I usually make it using freshly re-roasted sesame seeds rather than following the recipe. The re-roasting adds a fresher sesame flavor. I also added golden thread egg or “kinshiran 金糸卵” mostly for color. This turned out to be quite a good dish. The wood ear mushrooms gave a nice crunch in contrast to the softer vegetables.


Ingredients:
1/2 cup blanched and washed wood-ear mushrooms, cut into thin strips (I used whatever was left which was about 1/2 cup)
2 small carrots, peeled, cut into thick match sticks about1 inch long then boiled in salted water for a few minutes and cooled
7-8 green beans (I had ones already streamed for 3 minutes and cooled), cut into the. same size as the carrots. 
golden thread egg for garnish (optional)

Dressing:
1 tbs white sesame seeds, dry roast using either small dry frying pan or a special sesame roasting pan
1 tbs white sesame paste
1 tbs soy sauce
2 tsp sugar
1-2 tsp rice vinegar

Directions:
Add the roasted sesame seeds in a Japanese mortar and pestle or “suri-bachi 摺鉢”  and grind them until some oil comes out.
Add the sesame paste, sugar and soy sauce and mix using the pestle or “suri-kogi すりこぎ” . Taste and add more soy sauce if needed. Add the rice vinegar.
If the consistency is too thick and the seasoning is strong enough, add warm water to make the consistency appropriate for dressing.
Dress the vegetables and mushrooms and garnish with the egg threads.

This is a nice dish. It can go as a small side dish for a Japanese meal or a drinking snack. It can also go with red wine especially if you do not make the dressing too vinegary.

Tuesday, December 2, 2025

Nutmeat Pate 木の実のパテ

This is a very interesting pâté recipe from “Frog Commissary Cookbook” my wife found. This is a pâté made of white beans and nuts. The color is a bit drab but it almost tastes like a meat pate (#1). After a few days, the flavor and texture got better. This is a perfect appetizer for vegetarian friends but the omnivore will also enjoy it. I will ask my wife to take over.


Ingredients: Makes 3 small loaves. 

One can of white navy beans whizzed until smooth in a food processor 
2 cups walnuts (½ pound), lightly toasted and finely ground
2 cups pecans (½ pound), light toasted and finely ground
1 cup grated Gruyère cheese (¼ pound)
1 cup grated Parmesan cheese
⅓ cup minced scallion
¼ teaspoon ground cumin
½ teaspoon dried thyme (I used fresh from our garden)
½ teaspoon crumbled dried rosemary (I used fresh from our garden)
1¾ teaspoons salt
¾ teaspoon pepper
⅓ cup heavy cream
1½ teaspoons minced garlic
6 tablespoons butter, softened
2 eggs
1 tablespoon brandy  
1 ounce dried shiitake mushrooms, reconstituted in warm water, drained and minced

(These are other herbs called for in the recipe but I didn’t use)
⅓ cup minced parsley 
½ teaspoon dried marjoram 

Directions:
Toast the walnuts and pecans. Grind them separately in a food processor and set aside. Grind the white beans in a food processor to form a “bean paste”. In a large bowl, combine all the ingredients and mix well (#2) Preheat the oven to 350°. Fill the three small silicon bread pans with the pâté mixture and cover it tightly with tin foil (#4). Set in a larger baking pan filled with hot water half way up the sides of the baking pans.

Bake in the toaster oven for 1 hour. Let cool 10 minutes and then invert the baking pan onto a serving plate and unmold the pâte. The pâté can be served either hot or cold (#4).


As stated before this pâté tastes remarkably like it was made with meat. It is very savory and makes a nice appetizer with a glass of red wine. 

Wednesday, September 24, 2025

Cabbage and pork belly stir-fry キャベツと豚バラの炒め物

In Japan, one of the popular cuts of pork is thinly sliced pork belly 豚バラの薄切り. As in other Asian dishes, the meat/pork is used basically as a “seasoning” in vegetable dishes rather than as an “entrée” on its own. Weee sells thinly sliced pork belly (6mm in thickness) which is a bit thicker than Japanese style sliced pork belly (picture #3). After debating for some time I finally decided to get it. It comes in a one pound package (about 450 grams) which was a bit larger than we would use for one meal so I separated it into three portions (about 115-120 grams each). I vacuum packed and then froze them. These packages were the right amount to make one dish. I used one of the packages to make this stir-fry dish for lunch one day from whatever I had in the fridge which turned out to be mostly cabbage. But cabbage and pork go well together. The seasoning was totally ad-hoc. Besides salt and black pepper, I used oyster sauce and soy sauce. I topped this with a fried egg (picture #1) (since I was out of pasteurized eggs, I had to cook the yolk. A runny yolk would have been much better in this dish). In any case, this was a fairly low-carb lunch.


Picture #2 shows the dish just finished in the wok. You can see the ingredients better including small pieces of pork.


This is not a recipe per se but just a note to myself.

Ingredients (two servings):
1/3 lb (or more) pork belly, (skin off) and thinly sliced (in this case it was 6mm thick but thinner is better), cut into 1 inch long pieces 
1/4 head of cabbage, thick center removed and leaves cut into 1/2 inch squares
1 large onion, halved and cut into small wedges
2 small carrots, peeled and cut into large match sticks
10 green beans, blanched and cut into 1 inch segments
1tsp each of garlic and ginger,  minced
2 eggs (optional)
2 tbs vegetable oil

Seasoning:
1 tbs “shoko” Chinese cooking wine 紹興料理酒
1 tbs soy sauce
1 tbs mirin
1 tbs oyster sauce
salt and pepper to taste


Directions:
In a wok or frying pan on medium high flame, add the 2tbs oil, when heated add the ginger and garlic until fragrant. Add the onion and stir for a few minutes. Add the pork and cook until the color changes.
Add the vegetables and stir for a few minutes until wilted and soft.
Add the seasoning and stir. Add salt and pepper to taste.
(optional) Cook the eggs and top the servings. The best is fried eggs with runny yolks but I cooked the yolk through since we did not have pasteurized eggs.

The flavors in this dish worked well together.  The pork was good but it was a bit chewy compared to Japanese thinly cut pork belly.

Friday, September 19, 2025

Small Dishes or “Sake-no-sakana” 酒の肴

This is another presentation of small dishes (#1) I served one evening as starters. They are perfect little nibbles to go with sake. On the left of the white rectangular plates are skewers of Nibuta 煮豚, marinated boiled quail egg ウズラの味玉 and Ginko nuts 銀杏. All toasted in the toaster oven and then skewered using small bamboo skewers with knots called “noshi-gushi のし串*” (The skewers were for decorative purposes and I used them just because I had them.)

Note: I did not toast/grill the food on the skewers since the bamboo skewers would burn. Instead I toaster-ovened the food and after cooked put it on the skewers for presentation.

*Noshi-gushi are a take-off of a better known item called “Noshi-bukuro のし袋”  which is the special envelope containing money given as a gift at happy/festive occasions (wedding etc) or at funerals. The envelope has two decorations; one is called “noshi” and another is called “mizuhiki 水引”. Mizuhiki is a traditional Japanese decorative knot. The knot on the “noshi-gushi” is thought to be reminiscent of the  “mizuhiki” of  the “noshi-bukuro”. Make sense? 


Here is the close up (#2) of the skewered nibuta, quail egg and ginko nuts all toasted/grilled (the ginko nuts were coated with salt before toasting). Since the noshi-gushi are very thin, the ginko nuts can be skewered without splitting them. This combination worked well. The marinated boiled quail egg had a nice creamy yolk and savory flavors from the marinade they were soaked in.  I also served “Mock tofu 擬制豆腐” (#2 right). Since I thawed “ikura イクラ” salmon roe the day before, I served some on cucumber cups (#3). I seasoned the cucumber with sweet vinegar and also added a bit of Japanese noodle sauce on the ikura. Although not shown in the picture, just before serving I garnished this with threads of dried nori seaweed or “kizami-nori 刻み海苔”.


In a small covered container resembling a miniature Japanese lidded soup bowl, I served squid shiokara イカの塩辛” (frozen in a pouch) (#4).

The variety of flavors and textures were a treat thoroughly enjoyed with our favorite house sake.

Monday, September 1, 2025

Savory Breakfast Mini Cheesecakes ミニチーズケーキ

This is another one of my wife’s baking projects. This time it was small cheesy bites called “Savory Breakfast Mini Cheesecakes” which she found on-line. She made quite a few modifications using her CCK (Common Culinary Knowledge). For example just looking at the list of ingredients for the crusts  listed in the recipe on the web she knew there was no way they would be enough to form crusts on 24 full sized muffin tins. She doubled the amount of ingredients and it was still not enough to fill all the mini muffin tin. Also the three 8 ounce packages of cream cheese (a total of 24 oz.) seemed a bit excessive so she significantly reduced the amount she used. (She wonders if sometimes the people who publish some of the recipes on the web have actually made them). The list of ingredients listed below includes all the specific alterations my wife made. Despite the numerous alterations in ingredients the cheese bites certainly turned out pretty well. They had a nice crunchy crust and cheesy center which cannot go wrong. But with the amount of eggs, cheese and butter that went in, this has to be more spectacular to be repeated.


Ingredients:
1 cup dry bread crumbs (I used Panko)
2/3 cup finely grated Pecorino Romano cheese (I used parmesan)
1/4 cup melted butter
3/4 package (8 oz.) cream cheese (or 1/2 package cream cheese plus1/4 chive and onion cream cheese)
2 large eggs
1 cup shredded cheese (gruyere, cheddar, smoked gouda)
2 pieces cooked bacon crumbled
1/4 teaspoon salt
other items could include cooked shallots, green onions, red peppers).

Directions:
Preheat the oven to 350 degrees. Spray 24 mini muffin tin cups with cooking spray or use paper liners.

Mix bread crumbs, parmesan cheese, and melted butter together in a small bowl. Spoon about 1 teaspoon mixture into each of the prepared muffin cups. Using your fingers press down the bread crumbs to form a crust for the cheese filling. (This procedure is the very definition of tedious). 

Beat cream cheese with an electric mixer in a large bowl until smooth. Beat in eggs one at a time until combined. Stir in the cheeses, bacon and any other additions you might be using. Scoop the cheese mixture into the bread crumb crusts. (I used the smallest ice cream scoop). 

Bake in the preheated oven until cheesecakes are firm to the touch and lightly browned, about 20 minutes. Remove from the oven and let cool in muffin tins for 10 minutes.

These were not bad. The crust was crispy because it was essentially oven fried. The cheesy filling was smooth and very pleasant. The bacon somehow didn’t stand out as much as we would have liked. It also made a nice cheese bite to go with wine. Subsequent note: These actually got better with time. Somehow the flavors stood out more and the crust actually was a good addition. 

Saturday, April 5, 2025

Hanami #2 花見#2

After our first hanami 花見, we were expecting bad weather and rain.  However,  luckily, we had a second nice day of hanami and I made another attempt at a hanami bento 花見弁当. This time, I filled the smaller lidded box with scattered sushi or “chirashi-zushi” ちらし寿司 made of smoked salmon, marinated “ikura” salmon roe いくらの醤油漬け(#1).


Opening the lid of the smaller box revealed scattered sushi (#2 left upper). I also served Russian marinated salmon 鮭のロシアずけ topped with ikura (#2 upper right) and herring marinated in wine sauce (store-bought) topped with sour cream mixed with the brine from the herring jar and chopped dill (#2, lower left). The smaller box without a lid, I served salmon kelp roll 鮭の昆布巻き, “kinpira gobo” 金平牛蒡 braised burdock root, mock tofu 擬制豆腐, braised spicy marinated tofu ピリカラ豆腐, braised crunchy cauliflower モンパルナスのカリフラワー and crispy marinated  enoki mushroom エノキのパリパリ焼き, skinned Campari tomato, and chicken liver simmered in red wine 鶏肝の赤ワイン煮.


I used frozen rice to make sushi rice. I just microwaved the rice until warm, added the sushi vinegar (from the bottle) mixed and microwaved a bit more to warm up. I mixed it again and let it sit for 5 minutes. It was not the best sushi rice but certainly good enough for the purpose. I marinated ikura with x4 concentrated Japanese noodle sauce overnight in the refrigerator. I first placed the sushi rice on the bottom of the small covered box then distributed ikura over half of the rice surface followed by smoked salmon (#3). I topped this with a julienne of cucumber and golden thread egg or “kinshi-ran” 金糸卵 and nori threads or “kizami-nori” 刻み海苔(#4). Since we were not expecting to have the second hanami this was a bonus and what I put together for the occasion was pretty satisfying.


Now, our main cherry tree (“somei-yoshino” 染井吉野 which has a bottle brush appearance of numerous blossoms covering the branches (foreground) and the more traditional one like depicted in “ukiyoe” painting of edo time 江戸時代の浮世絵  which is in the background are both in full bloom displaying their individual personalities in the shape and characteristics of their petals. 


Wednesday, April 2, 2025

Hanami 2025 花見2025

Because it got warm quickly, three of our cherry trees blossomed one after the other. The first one is dropping petals already, our main tree is in full bloom and our old tree has just started. So it was hanami 花見 time. I filled the new jubako box 重箱 with goodies for the occasion. I used the smaller box without a lid, the smaller box with a lid and two small porcelain bowls to fill each tier. One tier served one person.  I served quite a few sashimi items accompanied by soy sauce, wasabi and yuzu kosho 柚子胡椒 (#1).


The sashimi I served (#2) was bluefin tuna クロマグロ (was called “akami” 赤身 but it was more like “chutoro” 中トロ), kanpachi カンパチ” amberjack, and salmon. All came from Riviera Seafood Club. The tuna was good but kanpachi and salmon could have been better. The meat was abit too lean and could have used a bit more fat. 

In one of the bowls, I served the remaining tuna and Russian marinated salmon 鮭のロシア漬け in the shape of roses and topped it with “ikura” いくら salmon roe (#3).

I also served scallop sashimi ホタテの刺身 which was really good as always (#4).

In the covered small box (#5), I served an assortment of dishes I made as well as “uni suhto” which I did not make  ウニの酒盗 shown in a very small square bowl. Lower bottom is a salmon kelp roll 鮭の昆布巻 and mock tofu 擬制豆腐. Left upper are dashimaki egg omelet with dried nori powder or “aonori” 青海苔入りだし巻 topped with cruchy braised cauliflower.


Our second generation cherry tree blossomed nicely. The tree has grown quite a bit. It was planted after we lost the original tree in a nor’easter 7 years ago.


We started our hanami while it was still light but the fun extended into the evening and we turned on the flood lights as shown in the picture below. Even thought the sun was down It was still very warm and pleasant.


Wednesday, December 11, 2024

Marinated Tofu and Egg Sir Fry 味付け豆腐の卵炒め

Good tofu is difficult come by here.  There was a Kyoto-based tofu maker called “Kyozen-an京善庵 which used to produce good quality tofu we could get at our Japanese grocery store. Unfortunately, it closed their factory in New Jersey and went out of business because it was not meeting US regulation. “Otokomae tofu男前豆腐 is another kyoto brand of good tofu we could get but not any longer.  Currently the best tofu we can get is “House Foodハウス食品. They make fresh tofu in the factories located in California and New Jersey from US soy beans. We found that their “medium firm” tofu is the most versatile which we get from Weee. This blog is a variation on the theme of tofu and egg stir fry. This is vaguely based on the recipe I saw on Youtube. The main idea is that the tofu is marinated before stir frying. The seasonings are oyster and soy sauce. I also added the last of  the fresh shiitake and wood ear mushrooms I had on hand. I ended up using a block of tofu cut in half for this dish and another one. I started out intending to make a whole block of tofu into “braised spicy marinated tofu”. So I accordingly marinated one block. Then I changed my mind and made half the block into the spicy tofu and the other half into this dish. This was a hearty and very filling lunch for us (picture #1).


Ingredients (2 servings):
1/2 block tofu, cut into half inch cubes and marinated overnight 
3 eggs, beaten
3 scallions, chopped fine
1 tsp garlic, finely chopped 
1 tsp ginger, finely chopped
1 stalk of garlic green* (optional garnish)
3 caps of fresh shiitake mushroom (optional)
1/2 cup wood ear mushroom (optional)
1 tbs vegetable/peanut oil
1tsp sesame oil

Tofu marinade:
1tbs soy sauce
1tbs mirin
1tsp sriracha
1tsp rice vinegar
1 tsp sesame oil
1/2 tsp each grated ginger and garlic

Seasonings:
1 tbs oyster sauce
1 tbs soy sauce
1 tbs shaoxing cooking wine
white pepper to taste

*my wife recently learned about garlic greens. According to what she read, she took a head of garlic we got from our grocery store separated it into individual cloves and planted them in a pot of soil on the window sill. Green leaves sprouted out quite quickly.  These taste of garlic and can be used in cooking. We tasted them and they had a mild but distinctive garlic flavor. These sprouts however, will never develop garlic bulbs because a certain number of “cold units” (cold days) are needed to trigger bulb formation. (Luckily they will never get those cold units sitting on the window sill in our kitchen). Last year we planted some garlic cloves in the herb garden in October (before the first frost) and in the spring harvested a very nice crop of garlic cloves. 

Directions:
Drain the marinade from the tofu
Mix the tofu, eggs and half the chopped scallions (white part)
Add half of the oils in the wok or frying pan on medium high heat
When the oils are hot, add the egg-tofu mixture and cook until the bottom is set. Turn it over using a silicon spatula. Toss and let the eggs coat the tofu. Remove from the wok and set aside (picture #2).


Add the remaining oils to the same wok. Add the garlic, ginger cook for 1 minute until fragrant, add the mushrooms cook for another few minutes and add the remaining scallion and stir (picture #3).


Add back the tofu and egg mixture and stir and toss. Add the seasonings and stir for 1-2 minutes.
Garnish with either chopped green part of scallion or chopped garlic green.

We had this as a lunch and it was quite filling. Although the tofu did not absorb much of the marinade, the combination of seasonings, eggs and tofu and mushrooms worked well. The egg and the tofu have very similar soft textures but very different flavors. The mushrooms introduced yet another set of textures; meat-like from the shitake and crunchy-chewey from the wood ear mushrooms.  Overall a very satisfying dish. 

P.S. This is a picture of a sunset we had recently. This is what we saw outside our window. It is probably the most beautiful sunset we have ever seen here and we had to commemorate it by including it in this blog.


Sunday, November 3, 2024

Hiyaoroshi Sake Dewanoyuki “Sho-nai Bijin” 出羽ノ雪 庄内美人 ひやおろし

It is the season for “Hiyaoroshi ひやおろし” or “Akiagari 秋上がり” sake. As I mentioned in the previous post, this type of sake is bottled in the spring and cold-aged until the following fall. It is considered a seasonal sake and available in autumn in limited quantity. We can now enjoy some of the hiyaoroshi sake without visiting Japan in autumn thanks to “Tippsy sake”. This year we got two kinds. The frist one we tried is one from Yamagata prefecture 山形県 (which is known for many excellent sake breweries; some are considered  “cult” sake such as “Juuyondai” 十四代.) called  Dewanoyuki Shonai Bijin Hiya-oroshi” 出羽ノ雪庄内美人. It is “kimoto-junnmai 生酛純米 made from sake rice varieties Dewakirari 出羽きらりand Miyamanishiki 美山錦. We tasted it cold. We really like it. It has nice rich “umami” and nice fruity finish but dry and not yeasty. 


Of course, to enjoy a good sake like this, we need good “sake-no-sakana 酒の肴” drinking snacks. This is what I served. From top left clockwise; sugar snap peas in salt broth スナップ豌豆の塩びたし, Wakame sea weed in ponzu sesami oil dressing わかめのポン酢胡麻油あえ, in the next square dish are seasoned boiled egg or “ajitama” 味玉 and pickled daikon and cucumber 大根と胡瓜の漬物, in a round small dish is  urchin shutou ウニの酒盗, in the small bowl is herring in wine sauce (from the jar) which I added sour cream dill sauce


While we really like both of them, among the two hiya-oroshi sake we tried this year we particularly liked Sho-nai Bijin. (the other one will be posted soon).

Monday, October 28, 2024

Egg-wrapped Kabocha カボチャの黄金焼き

I was trying to use up a kabocha カボチャ we got recently from Weee. Then, I saw this recipe on Youtube. It was named poetically as “golden grill 黄金焼き” due to the egg covering the kabocha. It was simple enough and I decided to make it. This dish is essentially cooked kabocha cut into a bite size pieces, coated with flour and then dipped in beaten egg and fried. The seasonings  are salt and pepper. I made this for lunch one day (picture #1). This is a pretty good dish and indeed nice golden look to it.


We had it with left-over gyoza 餃子 I made and new pumpkin salad, and spicy (not really) crunchy tofu square* (picture #2).

*I made some modification. I now coat the tofu after marination with a mixture of rice flour and potato starch which make really good crunchy crust.


Ingredients:
1/4 kabocha, skin shaved off (optional, many do not mind having the skin), cooked (either steamed, boiled, or microwaved) until soft and  cut into a bite size. 
AP flour for dredging
Salt and pepper to taste
One large egg beaten
2 tbs vegetable oil

Directions:
Dredge the kabocha pieces in the flour (you could season the kabocha pieces before dredging or season the beaten egg. I did the latter).
In the frying pan on medium flame, add the oil.
Dip and coat the kabocha pieces with the egg.
Cook one side until golden and turn it over (1 minutes each).

The original recipe suggest dipping into “aurora” sauce which is the mixture of mayo and catsup popular in Japan

So, from the one relatively small “Kabocha” we got from Weee, I made our usual traditional simmered kabocha, new kabocha salad with bacon and walnuts and finally egg wrapped kabocha. This was a nice combination of flavors but I had to wonder if it wouldn’t have been simpler to get the same effect by just cooking the kabocha pieces in scrambled eggs. 

Wednesday, October 16, 2024

Enoki mushroom frittata エノキ オムレツ/フリッタータ

We like mushrooms. Our favorite is shiitake. Maitake 舞茸 or hen-of-the-woods is also great. Although it may not be one of our absolute favorites we also like enoki エノキ mushrooms and we have made many dishes using enoki mushrooms. Actually, many years ago, when we were dating, we went to a Robata-yaki restaurant in Japan town, San Francisco. One of the dishes we had was enoki wrapped in foil and grilled with miso and butter. My wife said it was first time she had enoki and later I recreated the dish many times. It was one of our favorites. In any case, this is a new enoki dish I saw on YouTube and made it for lunch one day. There appears to be some variations but it is essentially, an enoki omelet or frittata. It was really good. Since I had some roasted red pepper sauce, we added it on top and it went very well. On the side I served coleslaw and skinned Campari tomato (picture #1).


Ingredients:
1 package (200gram) fresh enoki mushroom, root ends cut and removed, separated and cut into one inch segments
3 large eggs
2 tbs “katakuri-ko” 片栗粉 potato starch
Salt and pepper to taste
2 tbs vegetable/olive oil

Directions:
In a bowl, add the enoki and the potato starch and mix to coat
Add the eggs and mix well
In a non-stick frying pan on medium low flame,  add the oil and when oil is hot, add the enoki/egg mixture, spread and flatten with spatula
Place the lid and cook for 5 minutes or longer until the bottom browns and the surface looks dry
Flip and cook the other side for another 3-4 minutes (picture#2) so that the mushroom is cooked and lighly brown
Remove from the pan and cut into wedges and serve


We had the remaining half later heated up in the microwave oven which came out very nicely. This is easy to make and we really like the texture and flavors of enoki with eggs. Interestingly the mushrooms loose their distinctive shape and meld into the egg mixture. They add a type of density to the mixture which has an unctuous mouth feel. We will make this again.

Sunday, April 21, 2024

Spinach Soufflé (easy version) ほうれん草のスフレ

My wife is partial to spinach soufflé. Previously I made it the traditional way by separating the egg yolks and whites. Then making a béchamel sauce in which I put the egg yolks. The whites are whipped before being incorporated into the béchamel sauce too. Then we learned from Jacques Pepin that there are two simpler ways to make souffle. One is to just use a whole egg rather than separating it. The other was to make  a corn soufflé  without even making a béchamel by using fresh corn pure instead. Those two methods were much easier. Recently we tried a variation of another soufflé recipe from Pepin which he called (Maman’s cheese soufflé recipe). We saw the recipe presented on YouTube. Again we used whole eggs rather than separating the yolks and whites. Although we adopted the idea of using a whole egg in the souffle, we did not make Maman’s cheese souffle instead we tailored the recipe to make spinach souffle by adding spinach and onion. It did not rise as much as we expected but it was pretty good. We served it with roasted lamb with mushroom port wine sauce (picture #1).


We cooked it in small but deep ramekins (picture #2). If we used shallower and wider opening vessels like one used by Pepin, it may have risen more but this was just fine and tasted really great.


Again, we modified the recipe in several ways. One modification is that I used much less butter than is used in classic Béchamel sauce; in the classic the same amount of butter and flour is used. I add finely chopped onion and/or mushrooms in addition to the butter. The flour coats the surface of the fat covered onion and makes the resulting Béchame without lumps. This is not a precise recipe but just a note for myself.

Ingredients: (made two large ramekins full, 2 inches in diameter)
1 medium shallot, finely chopped
2 tbs unsalted butter
3 tbs Ap flour
1/2 cup or more milk
1/4 cup spinach, cooked and moisture squeezed, finely chopped (I cooked it without added water in a wok with a lid and then squeezed out any remaining moisture using a ricer).
1/2 cup Gruyere cheese, grated
3 large eggs, well beaten
Back pepper, salt and nutmeg for taste

Butter and grated parmesan cheese to lightly grease the ramekins.

Directions:
In a frying pan, melt the butter and cook the shallot for a few minutes, add the flour and mix for one minute after the dry flour disappears
Add cold milk at once and mix using a silicon spatula until well mixed and thickened. Add the cheese and mix (adjust the thickness by adding more milk)
Add the spinach and seasonings and let it cook for 5 minutes then add to the beaten eggs and mix.
Pour the mixture into the prepared ramekins (70% full) (as per Pepin, this can be stored in the refrigerator for a few days before cooking).
Bake for 30-35 minutes in a preheated 375F oven (I used our toaster oven in convection mode).

It did not rise as much as our previous soufflé but it did rise and tasted great with good texture. This is much easier to make. My wife was quite satisfied with it.