Showing posts with label Salad. Show all posts

Wednesday, June 26, 2024

Wood Ear Mushroom and Wakame Salad 木耳とわかめの和物

I made this dish mostly for left-overs control. I can now get fresh wood ear mushrooms from Weee. Previously the only wood ear mushrooms I could get were dried. Although we like fresh wood ear, we get a lot for one order. To make it last longer, as soon as we receive it, I wash it in cold running water and then blanch it. After blanching I wash it again and let it dry a bit on a towel so that there is no obvious surface water. I then place it in a sealable container with layers of paper towels on the bottom. Since the wood ear does not soften by cooking I can repeat this treatment (at least one more time). Besides making it last longer, if you use wood ear for salad, it is better to blanch it before hand. In any case, in addition to the wood ear, I had extra hydrated wakame so I came up with this Japanese style salad or “ae-mono” 和物. The contribution of sea plant and wood ear mushroom to the dish is mostly through their distinctive textures. Nonetheless this is a very refreshing small dish.


Again, this is not a recipe but just a note to myself.

Ingredients:
Blanched and chilled wood ear mushroom, cut into strips
Hydrated wakame sea weed
Sesame seed

Dressing:
Ponzu, sesame oil and olive oil (this is what I used this time)
or
Japanese hot mustard, soy sauce and sugar

These two items went very well together. They were similar in texture but just different enough to make an interesting combination. 

Saturday, April 6, 2024

Pumpkin “Kabocha” salad カボチャのサラダ

We regularly get Japanese/Asian groceries from Weee. This time we got a Japanese “Kabocha” かぼちゃ squash. It was larger than usual. I made my usual simmered kabocha and pottage かぼちゃの煮物とポタージュ but some still remained. I thought about tempura but that was too much work for such a small piece. So I decided to make this “kabocha salad”. I did not follow any particular recipe but sort of combined two different recipes. This is curry flavored and turned out to be quite good highlighting the natural sweetness of the kabocha.


This is just a note for myself.

Ingredients:
Kabocha squash, seeds removed, skin shaved off (optional), cut into half inch cubes
Raisins

For the dressing
Greek yogurt
Mayonnaise
Curry powder
Salt and pepper to taste

Directions:
Boil the kabocha in salted water for 5-7 minutes until cooked but not too mushy
Mix the ingredients for the dressing (about the same amount of mayo and yogurt, the amount of curry powder is to your liking)

For an impromptu salad, this was much better than I expected. The natural sweetness of the kabocha was complemented by the curry flavor. The mixture of the yogurt, mayo and kabocha made a nice creamy texture with some tartness. I will make this again.

P.S. Hawk joins us for Hanami 花見!
This year was a bit unusual for the cherry blossoms. The trees bloomed early and the blooms lasted for a long time. Since we have three trees with different bloom timing, we had a very long time to enjoy cherry blossoms or “Hanami”. One afternoon, a hawk joined us for Hanami! We looked out the window and there he was in all his magnificence sitting not ten feet from the window on the railing of the deck. We marveled at the image of such an awesome creature juxtaposed to the delicate loveliness of the cherry blossoms.


Saturday, October 28, 2023

Fig and Edible Chrysanthemum Salad 無花果と春菊の甘酢あえ

A few days ago, we got some mission figs. Since figs tend to get moldy rather quickly, I processed them meaning I quartered them and then marinated them in Triple Sec (this is our standard method for prolonging the shelf life of many fruits). Since we had a lot of other fruit (especially grapes) to eat, we forgot about the figs for a while. When I checked, they were still good thanks to the liquor. Instead of eating them as is, I made this small salad with edible chrysanthemum. This was inspired by this blog I follow. The edible chrysanthemum is from Weee. Some time ago, we got it for sukiyaki but somehow we did not have the sukiyaki. So, I blanched and froze it. I thawed and used it for this dish. The fig was quite nice and sweet which made this dish.


This is not a quite a recipe but I used my home-made sweet vinegar and a dash of x4 concentrated noodle sauce for dressing. I served this one evening as part of an “Otsumami” drinking snack line-up. The figs were sweet and slightly sour from the vinegar in the dressing with a slight crunch from the seeds. The chrysanthemum provided a slightly bitter contrast that added to the overall complex flavor of the dish.

Sunday, October 22, 2023

Tuna and Daikon salad ツナ大根

We found two cans of albacore tuna in our pantry. We are not a fan of canned tuna and I am not sure why we have it; something to do with the start of COVID and the various food shortages, particularly of protein that occurred at that time. In any case, I saw a recipe on YouTube which combined daikon 大根 and canned tuna ツナ缶. I was not sure how this would work but I had just got two whole daikon from Weee. So I had to try this recipe. We first tasted the tuna as is. It was very dry and not great tasting but my wife said the only way to save this tuna was with the addition of mayonnaise.  This made me think that  this recipe could work after all. I slightly deviated from the original recipe.


Ingredients:
1 can of tuna (I used albacore tuna in water but the original recipe used tuna in oil)
1/4 daikon, peeled, sliced and julienned
salt

For dressing
2 tbs mayonnaise
2 tbs Greek yogurt
1-2 tsp soy sauce or x4 concentrated Japanese noodle sauce
1/4 tsp yuzu kosho (optional)
1/2 tsp “aonori” dried sea weed flakes (optional)

Directions:
Add salt to the daikon, knead and let it stand for 10 minutes
Squeeze out as much moisture as possible
Add the mixture of the mayo and Greek yogurt
Add the soy sauce and taste. If needed add more.
Add aonori and yuzu kosho if using..

This is a surprisingly good dish. If you are not told you couldn’t guess it has daikon in it. Even the tuna added some flavor helped by the dressing. This is definitely a very easy dish to make as well. Perfect for a drinking snack or a small side dish.

Saturday, September 23, 2023

Creamy Tomato Aspic Salad クリーミートマトアスピックサラダ

My wife is a great fan of ribbon or aspic salad which now appears to be out of fashion. I also developed a liking for these aspic salads. Somewhere on-line, she came across a recipe for “creamy aspic salad”. She also had some V-8 juice left over from when she made ribbon salad so she decided to use it making this creamy aspic. As usual, although she got the idea to make the aspic from the recipe she modified it to her liking to accommodate the ingredients that were available. The most difficult part of making aspic is determining the correct amount of gelatin to use. Too much gelatin makes it like rubber and too little and it won’t hold together and keep its shape. This one was a bit on the softer side but had nice flavors and texture from using ricotta cheese and some crunch from celery.


Beside the celery, it has sliced and chopped green and black olive which gives a burst of salty flavor.


Ingredients:
3 cup V8 juice
2 packets of powdered gelatin (the end result was a bit soft so maybe another 1/2 packet of gelatin would make it firmer)
1 tbs sushi vinegar
2 tbs Worcestershire sauce
1/4 tsp salt
1 cup Ricotta cheese (I used 3/4 cup ricotta and 1/4 cup sour cream)
1 small onion (sweet or Vidalia onion), grated
2 stalks of celery, finely chopped
5 each Kalamata and oil cured olives, stone removed and chopped
5 pimento stuffed green olives, thinly sliced

Directions:
Soak the powdered gelatin in a cup of the V8 juice. Mix the remaining V8, vinegar, Worcestershire sauce and salt. Combine the ricotta and sour cream. Mix the cheese into the V8 vinegar mixture. Cut up and prepare the vegetables. Heat the soaked gelatin in the top of a double boiler until completely dissolved. (This is the only way I found to make sure all the gelatin is dissolved.) Add to the cheese mixture and stir to combine completely. Pour into the 9 X 13 pyrex pan and refrigerate. When the mixture becomes semi-solid stir in the vegetables. (This will encourage them to spread through out the mixture instead of sinking to the bottom.) Chill until fully set.

This is a very refreshing dish served cold on a hot summer day. The cheese and sour cream tone down the acidity of the V8 juice while ironically the sushi vinegar adds a nice acidic sharpness. The grated onion completely blends nicely into the mixture rather than standing out. The chopped veggies add a nice texture and the celery in particular really makes the dish. This is a good summer salad.

Thursday, July 6, 2023

Sous Vide Chicken Breast with Red Pepper Sauce 低温調理鶏胸肉のロースト赤パプリカソース添え

In my book, the best way to cook chicken breast is using the sous vide method. As I posted before, skin-on and bone-in split chicken breast appears to work best. Sometimes this type of chicken breast is hard to come by since most people seem to prefer skin-less and bone-less chicken breast. So when skin-on bone-in chicken breast is available, we like to stock-up. This time we got a “family” pack which contained 4 large chicken breasts. I sous vide all of them and froze three. I prepared one of the sous vide breasts into three dishes. I hand shredded the tenderloin and dressed it with sesame/mayo sauce. I made half of the main breast meat into curry-flavored chicken salad and I served the rest sliced with roasted red pepper sauce.  I served this dish at lunch with two salad sides; celery mushroom feta salad (right upper) and corn, red pepper, edamame and bacon salad (right lower).


When we made corn, red pepper, edamame and bacon salad, we had an excess of roasted red peppers since we got a bag of 6 red peppers. So, I made a roasted red pepper sauce. The sauce went well with sous vide chicken shown here with mayo and blanched broccoli added to the plate.


I am sure there are many ways to make roasted red pepper sauce, but the one shown below is my improvised sauce.

Ingredients:
Two roasted red peppers, stem end and skin removed, seeds and ribs removed, cut into small size (for pureeing)
1/2 sweet (Vidalia) onion, finely chopped
1 tbs caper
1 tbs lemon juice
3-4 tbs olive oil
Salt and pepper to taste

Directions:
Add all the ingredients except the salt and pepper in a cylindrical container for an emersion blender.
Puree on high-speed until smooth. Taste and add salt and pepper

This sauce went very well with the sous vide chicken breast. The chicken cooked this way is very moist and tender but can taste a bit bland. The sauce really added a nice slightly tangy flavor. We still have a lot of sauce left so there will be more to come.

Friday, June 30, 2023

Corn, Roasted Ped Pepper, Edamame and Jalapeño Pepper Salad 玉蜀黍、ロースト赤パプリカ、枝豆とべーコンサラダ

Although it is not quite local corn season, fresh corn is available and on our last trip to Whole Foods my wife celebrated the season by stocking up on corn. She used it for various dishes and this is one of them. In addition, we got a bag of 6 red peppers. (Turns out it was much cheaper to buy the bag of peppers than to buy several peppers individually). My wife looked up corn salad recipes which used roasted red pepper on the internet. This dish is an amalgamation of the various ingredients used in those recipes with our own ideas mixed in. It has a nice color combination and tasted great.


Ingredients:
1 roasted red pepper, skin, ribs and seeds removed and cut into small squares
2 ears of fresh corn on cob, microwaved wrapped in wet paper towel for 2 minutes or more until cooked
1 sweet (Vidalia) onion, finely chopped
2 strips of bacon, cooked to crisp and crumbled
1 large jalapeño pepper, seeded, deveined and finely chopped
1 cup of boiled edamame, shelled (or lima beans)

For dressing:
1 tbs Dijon mustard
1 tbs honey
2 tbs rice vinegar (or any vinegar)
8 tbs or more fruity olive oil
salt and pepper to taste

Directions:

For roasted red pepper
I roasted them at 450F in the toaster oven on convection mode for 20 minutes turning a few times so that all the surface was cooked/charred. I then put them in Ziploc bags to steam for 30 minutes. Once cooled down, remove the stem end, skin, ribs, seeds and peel. (The skin will come off easily).

Combine all the ingredients, add the dressing and stir well.

This is a great salad. The corn adds and lovely sweetness and crunch. Although I initially protested when my wife suggested using bacon, it adds a salty, smokiness and crunch which is really a great addition and a “must-have” for this salad. In addition to adding to the color the roasted red peppers adds a slightly spicy bite. The edamame yields yet another crunch dimension. The dressing adds a bright tart note. We will be making this one again.

Monday, May 1, 2023

Four Salad Lunch 4種類サラダランチ

I made 4 different salads (not all on the same day) and had the 4 salads for lunch with a cold asparagus soup. We also had a small piece of “Not no-knead bread made with dried fruit”. We feel good about the fact that all salads, soup and bread were home-made. In the center of the four salads, I served snap peas which were blanched and then soaked in Japanese salt broth.


The picture below shows Israeli couscous with artichoke hearts and garbanzo beans with a nice lemony and dill dressing.


The pic below shows a celery, mushroom, and navy bean salad with feta cheese. The mushrooms make the salad. They gave an almost meaty texture and flavor.


The next is a curry flavored sous vide chicken salad. Since we had a nice ripe Champagne mango, I added small cubes of mango which went very well with this salad.


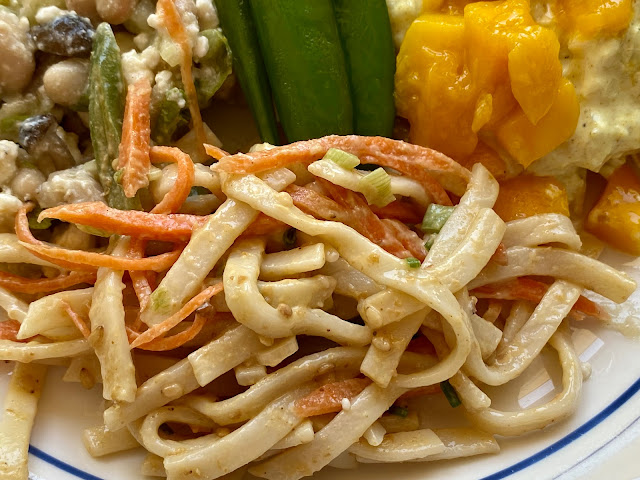
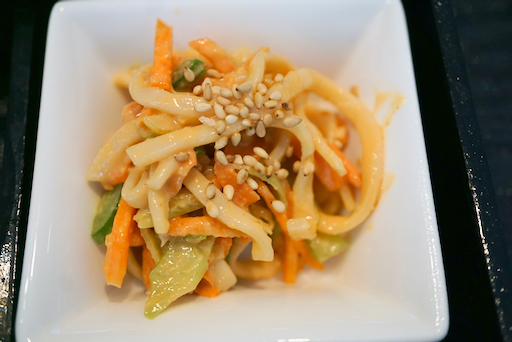
I made this udon noodle salad since I had left-over cooked udon noodles.  The dressing is sesame-flavored. I do make several versions of the sesame dressing (for example, using Japanese “nerigoma” ねりごま sesame paste or peanut butter) but this time I used Tahini with dry roasted white sesame seeds which I ground in a Japanese “suribachi” すり鉢 mortar. Other seasonings included soy sauce, sugar, and rice vinegar.


This was a surprisingly filling lunch. Beans, udon noodles, and couscous all contribute to this and, at the same time, we enjoyed so many different flavors and textures. We just have to make sure we finish all these salads before they go bad.

Friday, April 28, 2023

Lamb Tenderloin for Easter 子羊のテンダーローイン

Tenderloin of lamb is not a usual cut but we got several of them from D’Artagnan. We decided to try it for Easter dinner. I did not follow any recipes. I made a pan-sauce with red wine and balsamic vinegar.


I sort of did a reverse searing. After cooking it in the toaster oven, I seared it with sprigs of fresh rosemary which I kept in the frying pan during the searing and while I made a red wine sauce.


As sides, we served pencil asparagus and shiitake mushroom stir fry  (left) and Israeli couscous salad with marinated artichoke hearts (right). To mop up the sauce, we also served a slice of  (mini) baguette I baked.


I have never cook lamb tenderloins before. I decided to cook two of them in the toaster oven at 350F for 10 minutes and then reverse seared them in a pan with rosemary. It sort of worked but the lamb was a bit overcooked. The entire dinner was really good and for the occasion, we opened a bottle of 2014 Insignia from Joseph Phelps. Despite some age on the bottle, it was really fresh with a nice fruit flavor. It was a perfect wine for this dinner.

Ingredients (makes about 4 servings)
x2 Lamb tenderloins thawed, salted and kept in the refrigerator for 6 hours uncovered (to dry them a bit)
2 springs of fresh rosemary
2 tbs olive oil
Salt and pepper to taste

for the pan sauce
1/4 cup red wine (Not Insignia; a much more reasonably priced CA wine I already had open)
1 tsp balsamic vinegar
2 tbs of cold butter, cut into thin pats
Salt and pepper

Directions:
I seasoned the lamb with pepper (no salt; it was already salted). I roasted it at 350F in the toaster oven on convection mode for 10 minutes.
I then pan-seared it with olive oil and the rosemary for 1 minute on each side.
I set aside the lamb covered loosely with an aluminum foil, leaving the rosemary in the pan.
(I was aiming for an internal temperature of 130-135F for the lamb to be medium rare but in the end, the temperature went over)
I added the red wine and balsamic vinegar to the pan and reduced it to the point that it was just coating the bottom of the pan.
I added several pats of cold butter one by one until it reached a saucy consistency.
I seasoned with salt and pepper

I sliced the lamb tenderloin and spooned on the wine sauce then topped the dish with the rosemary sprig.

The couscous salad, asparagus with mushroom and baguette all worked well together with the lamb.  Of course, the wine made this dinner a bit special.

Tuesday, April 25, 2023

Israeli (Pearl) Couscous Salad イスラエルクスクスサラダ

The other day, we were taking inventory of our pantry and found boxes of couscous (classic and Israeli or pearled) as well as tabouleh all of which were way pass their BUB (best-used-by) date. We sniffed and did not detect any rancid oil odor so we cooked the classic couscous and the tabouleh. But once they were cooked, it was clear that in these cases the BUB date had some meaning—they tasted terrible. So we discarded those boxes and bought new ones. We decided to go ahead and try cooking the Israeli couscous* and it turned out to be OK. So we decided to use it to make a salad. We looked up recipes on the web and essentailly combined two recipes omitting some of the ingredients called for in the recipe while adding others not mentioned.

*Digression alert: While we were looking up recipes, we found that Israeli or pearl couscous was invented by an Israeli company as a substitute for rice in 1959 since there was a rice shortage at that time.In any case, the end result was a quite nice filling salad. The vinaigrette had a nice lemony flavor with dill which made this salad very refreshing.


Ingredietns:

For Couscous
1 1/2 cup (250gram or 8oz) Israel couscous
1 garlic clove, minced (I used three)
1/2 small onion, finely mince (I used one small onion)
2 tbs olive oil
1 1/2 chicken broth (I used our ususal low sodium Swanson)
1 cup water (we did not add the water. The couscous was fully cooked and the liquid was completely absorbed but although it was not scorched, the couscous stuck to the bottom of the pan. So next time we will try it with the additional water.)

For the salad
5 Campari tomatoes, skinned and cut into quarters
2 tbs dill, finely chopped
6 marinated artichoke hearts, cut into half length wise
1 can (15.5 oz) garbanzo beans, drained and skin removed (optional, but my wife insist on removing the skin)

Other items could be olives, cucumber and other greens.

For dressing
Zest and juice from one lemon
1 tsp dijon mustard
1 tsp honey
Salt and pepper to taste

Directions: {For couscous)
Add the oil in a pan, sauté the onion and garlic for 3-4 minutes, add the couscous and sauté another minute
Add the chicken broth and simmer for 10 minutes
Fluff it up with a fork and let it cool to the room temperature

Mix all the ingredients and the dressing.

Although we forgot to add one cup of water, the couscous was nicely cooked without. The lemony dressing really worked.

Sunday, March 12, 2023

Celery Salad with Mushrooms, White Beans and Feta きのこ、白インゲン豆、フェタチーズ入りセロリサラダ

We keep celery on hand most of the time. I use it as a part of mirepoix for soup, stew etc. I also use it for salad. Our favorite is thinly sliced celery dressed in powdered kelp and salt called “Konbu-cha” 昆布茶. My wife told me that she came across 5 different celery recipes recently in the Washington Post. We decide to try this celery with mushrooms, white beans and feta. Not intentional but I made some modifications due to available ingredients as well as time constraints. We had this for lunch.


We added a half open-face pumpernickel sandwich using leftover slices of Weber grill roasted pork. I added omelet from an egg I had left over from another dish. This made a really good lunch.


Ingredients:
4-5 stalks of celery, strings removed and cut thinly on bias
1 (15.5 oz) can of white (navy) beans, drained and rinsed (the original recipe calls for 1 cup or 8oz but we used the whole can)
Mushrooms (I used fresh shiitake and oyster mushrooms, the original calls for 12 oz cremini mushrooms), the shiitake (this was quite thick and meaty), cut into quarters, the oyster mushrooms torn into bite sized pieces.
Feta cheese crumbled and to taste

Dressing:
2tbs minced shallot (one small)
2 tablespoons rice vinegar (or winevinegar)
2 tablespoons extra-virgin olive oil
1⁄2 teaspoon salt
3⁄4 teaspoon sugar
1⁄4 teaspoon freshly ground black pepper

Directions:
Marinate the celery and the beans in the dressing for 30 minutes (Picture below)


Sauté the mushrooms in a small amount of olive oil in a frying pan seasoned with salt and pepper until cooked with brown spots about 4-5 minutes (using medium high flame so that no moisture comes out and the mushrooms nicely brown instead of steam). (The original recipe calls for roasting them in the oven at 375 for 40 minutes but browning in the pan goes a lot faster).


Assembly:
Chopped fresh herbs (mint, dill and parsley) (we did not have any of fresh herbs so did not use it) mixed into the marinading celery and beans.
Top the salad with the mushrooms and crumbled feta.

We would not ever have thought of this combination of the ingredients for a salad. For the dressing, the taste profile is very similar to the house dressing I make with Dijon mustard, honey, rice vinegar and olive oil. In future we may used my house dressing instead; the mustard makes the dressing emulsify beside adding flavors and honey is better than sugar to add sweetness. We think cooking the  mushrooms in a frying pan is better than roasting them. Roasting takes much longer and often produces charred bits which we do not like but sautéing in a frying pan produces better browned and crispy mushrooms. Although we did not have fresh herbs, this was a good salad. The mushrooms gave a meaty flavor and texture and this is good dish for our vegetarian friends.

Saturday, February 4, 2023

New Fitz and Floyd Japanese Crane Plates 鶴と松模様のお皿

My wife has been getting decorative figurines and china from a Fitz and Floyd overstock website (I call it Frick and Frack) for some time. In addition, since both our china and flatware patterns have been discontinued, she discovered that she could fill in missing pieces from a place called “Replacments, Ltd”. She really hit the “jackpot” when she learned that old discontinued Fitz and Floyd pieces are also available at Replacements. The convergence of these two sites materialized in the form of the beautiful Japanese plates with a crane pattern which were originally produced by Fitz and Floyd, have since been discontinued but were available at Replacements (shown in the picture below.) Since we are particularly fond of the crane motif and have several plates with crane pattern, she got them. We got “bread and butter” size since we tend to use smaller plates more often. They are beautiful; with a crane and pine pattern (both of which are auspicious symbols in Japan).

Immediately after we received them we used them for a lunch (as shown in the picture below). We made Mozzarella cheese mochiマツレラチーズ餅 served on this plate with side of couscous salad クスクスサラダ and “hoshigaki” persimmon daikon namasu 干し柿入り大根なます.


This is close up of this plate. They are labeled “made in Japan” but the exact manufacturer was not specified. They are very well made and we are delighted with them.


My wife found out that Replacements. Ltd also had three larger salad plates available (quantities at Replacements tend to be limited) in the same crane pattern. She bought them out. They are heading our way.

Wednesday, February 1, 2023

Couscous Salad クスクスサラダ

We tend to forget what food items we have especially those that are frozen or “hidden” in the back of the pantry. My wife found several boxes of couscous the other day. All of them were a bit past their “best-used-by” date which was 2017 for one and 2019 for the other two. We just threw 2017 out but decided to try 2019. We gave them the “sniff-test” and they passed without any rancid oil smell detected. So my wife cooked them up. But when we tasted they were clearly well past edible; they were terrible. We had been planning to make some kind of coucous salad and I had already cut up some black and green olives for it. So the next grocery delivery, we ordered several boxes of couscous so that we could finish the couscous salad.  (Ironically the whole purpose of the exercise was to clear out excess pantry goods either by using them or throwing them out. Instead, with the couscous we ended up throwing everything in the pantry out and simply replacing them). For some reason, plain couscous was not available so the boxes we got had various flavors one of which happened to be couscous with roasted garlic and olive oil. That is the one we used to complete the salad. It was remarkably good. In order to prevent the earlier problem we had with the oil in the couscous going rancid, I opened the two remaining boxes of couscous, put the contents in a separate special vacuum bag, vacuum packed them and froze them. The idea was that this should extend the “best-by” date by a few years.


My wife cooked up the couscous and by itself  it tasted really good but the salad tasted even better.


Ingredients:
One box (5oz) Near East couscous with roasted garlic and olive oil (I am sure any other flavored couscous will do)
1 1/4 cup chicken broth
2 tbs butter
Black and green olives, sliced
2/3 block of Feta cheese, crumbled
2 stalks of celery, finely chopped
1/2 Vidalia (or other sweet) onion, finely chopped

For dressing:

1 tbs Dijon mustard
1 tbs honey
2 tbs rice vinegar
1/4 -1/3 cup extra-virgin olive oil
Salt and pepper to taste

Directions:
Cook the couscous according to the instructions on the package. In this case it was heat 1 1/4 cup water (we used chicken broth) to boiling add the butter and the contents of the included flavor package. Then stir in the couscous remove from the heat, cover and let it stand for 5 minutes. Fluff it up using a fork. Let it cool to room temperature.
Add the olives, onion, celery and feta cheese
Add the dressing and mix well
Taste and if needed add salt and pepper

This is a good salad. A bit filling but the combination of olives, feta cheese and slightly sweeet and tangy dressing really makes this dish.

Thursday, September 8, 2022

Tomato ribbon salad version 2 トマトリボンサラダ V2

This is another variation of my wife’s famous ribbon salad. The red layers are tomato juice based aspic but  the cream cheese-based white layers are a bit more complex than the previous version. I helped by chopping up and slicing the ingredients. Initially, my wife was dissapointed since she expected the white layer to be more flavorful. But a few days later when we had this again, the ingredients had melded together and we could taste much more flavor.


Ingredients for Tomato aspic:
3 cups tomato juice (we used V-8)
1 tsp. salt
1 tsp. sugar
2 tsp. Sushi vinegar
1 Tbs. Worcestershire sauce
Onion juice to taste (About 3 Tbs.
2 envelopes gelatin

Ingredients for white section
1 envelope of gelatin
1/4 cup cream
1 tub (8 oz.) or 1 block (8 oz.) Philadelphia cream cheese
1/4 cup sour cream
3 tbsp. mayonnaise
2-3 ribs celery, minced
1 med. green pepper, (jalapeño) finely chopped
2 med. onion, finely chopped
1/4-1/2 cup pimento stuffed olives, sliced
1/4-1/2 cup ripe (black) olives, sliced (we didn’t use because we didn’t have) 
(Optional) 1 ripe avocado, peeled & sliced (we did not use) 

Directions:
Soften gelatin in 1/2 cup of the tomato juice. Add mixture to the top of a double boiler. Heat until the gelatin melts. Put the rest of the tomato juice in a pan. Heat until all ingredients dissolved. Add the gelatin that has been melted in the double boiler. Chill 1/2 of the tomato aspic until set, in a 9 x 13 inch pyrex dish (below).


Soften the gelatin in the cream. Add mixture to the top of a double boiler. Heat until the gelatin melts. Mix cream cheese, sour cream and mayonnaise until smooth. Add the melted gelatin then the chopped celery, jalapeño, and onion. Spread cheese mixture over the congealed aspic. Add the olives on top of the cheese mixture. (Next time it would be better that the olives are finely diced.  Cut like this they made it hard to slice the ribbon salad into servings). (If using avocado lay the slices on top of the cheese mixture.) Refrigerate until firm (below).


Pour the second half of the tomato aspic gently over the avocado slices, to cover all. Cover with saran wrap and refrigerate until set.


Although this is a variation on the previous tomato ribbon salad, it is clearly in the same tradition. The red layer is much the same. The white layer is much softer. The olives are a great addition. They add a burst of saltiness. The flavors get much more pronounced after a day or two when the ingredients have had a chance to meld together. In general, this salad and its precursor are a light cool refreshing addition to a meal on a hot summer day.

Saturday, July 30, 2022

Cucumber salad PA Dutch style PA ダッチ風胡瓜サラダ

Many years ago when we discovered the American mini-cucumber, we were delighted since it is the closest thing to a Japanese cucumber we can get here. Before this, the only options were the standard American cucumber or the English cucumber. We really didn't like the standard American cucumber. It's much larger than the Japanese cucumber. It has a tough skin. It has more and larger seeds. It has somewhat mushy, watery flesh, and for us doesn't have much taste. So, as far as we were concerned, the available alternative was the English cucumber which I used until we discovered the mini-cuke. While it has more flavor than the standard American cucumber, the English cucumber still has, to a lesser extent, some of the characteristics we didn't like about the standard cucumber. It was better than the standard cucumber but not as good, to us, as the mini-cuke. The thing we like most about the mini-cuke besides its smaller size, thin skin, small seeds is its intense fresh cucumber taste.  Even now it is extremely difficult to get a Japanese style cucumber. Occasionally, if we are lucky, it is available at the Japanese grocery store. So for the most part I am using American mini-cukes to make "asazuke" 浅漬け and "sunomono" 酢の物 with good results. One day we realized we had an excess of cucumbers in the fridge so, out of the blue, my wife blurted, "Its summer. We have a lot of cucumbers.  Let's make Pennsylvania Dutch style cucumber salad like I used to eat summers growing up in rural Pennsylvania." So I was set to slicing Vidalia onion and American mini-cukes. After consulting her "historic"  PA Dutch cookbooks my wife made the dressing. This was quite good. 


Ingredients:
5 mini-cukes
1 medium sized Vidalia onion
3 Tbs. dill weed

For the dressing: (shown in picture below)
1/4 cup sour cream
1/4 cup Greek yogurt
1/4 cup Mayonnaise
2 Tbs. sushi vinegar (Yes. I know the Pa. Dutch did not have sushi vinegar…but we did.)
1 Tbs. Worcestershire sauce
1/4 tsp. sugar
1/2 tsp. salt

Directions:
Thinly slice the cucumber and onions. For the onion cover with several pinches of salt, knead it, let stand for several minutes to draw out moisture. Squeeze out additional moisture. Rinse under water to wash off the salt and squeeze it again. For the cucumber; cover with several pinches of salt, using less than for the onion. Repeat the steps used for the onion, but because I used less salt I did not need to rinse it. Add all the ingredients together for the dressing. Add the dressing to the onion, cucumber mixture. Add the dill and mix. (See picture below).


This was a very nostalgic taste of summer for my wife. You can't go wrong with a cream based dressing on fresh veggies. The overall taste of this salad is very refreshing and perfect for a hot humid summer day. The day we made this salad my wife had also made a chicken curry. They were both done at about the same time so we decided to taste the products of our (her) labor. We had a small bowl of each and were very surprised to find that the cucumber salad went perfectly with the curry. Then it dawned on us; this was the Pa. Dutch equivalent of Indian cucumber yogurt salad i.e. raita a customary side dish for curry. No wonder they went so well together. 

Friday, May 7, 2021

Three appetizers with two new ones 新しいお通し2種

 I served these three appetizers one evening. The dish shown on the left in the first picture is my stand-by fried salmon in sweet vinegar or “salmon nanban” 鮭の南蛮漬け. The new ones are the one in the center “dried persimmon and daikon in sweet vinegar” 干し柿の大根なます and the one on the right, “udon noodle salad with peanut butter dressing” うどんのピーナッツバター和え.


The second picture is a close up of the dried persimmon and daikon in sweet vinegar sauce. This is loosely based on my compiled version of various recipes. I actually used the leftover marinade and vegetables from the previous batch of salmon nanban. (If I made this from scratch, I would make it close to the traditional New Year dish “daikon namasu” 大根なます and just add strips of dried persimmon). For a change, I also added roasted and ground sesame (fine grind but not paste) and a small amount of dark sesame oil. The combined taste of sweet and sour with added sesame flavor and refreshing daikon went well with the soft and sweet dried persimmon. Over time the persimmon got softer in the marinade. This is a good refreshing dish.


These are the ingredients and directions to make this dish from scratch (not reusing the vegetable and marinade of the salmon nanban).


Ingredients
2 dried persimmon, stem end and seeds removed and cut into strips.
1 inch segment of daikon, peeled, and cut into buttons then julienned.
Carrot and/or celery julienned (optional)
1/2 cup sweet vinegar (1/2 rice vinegar, 1/4 cup sugar or 2:1 ratio, pinch of salt, heat until dissolved. Then let it cool)
1 Tbs roasted white sesame seeds, fine ground (I used a Japanese mortar and pestle or suribachi.
1/2 tsp dark sesame oil

Directions:
Salt the daikon pieces and knead, then let it stand for 5-10 minutes.
Add all the ingredients and the sweet vinegar.
Let it marinate for at least 30 minutes in the refrigerator.

The next dish is a variation of sesame noodle salad. Since we had home-made peanut butter, instead of sesame paste or “neri-goma” ねりごま, I used the peanut butter. This was very similar but different because of the rather intense peanut flavor. I have not made the sesame noodle salad for sometime and never made it with peanut butter. This is a good salad as an appetizer, I should make it more often.


Ingredients: (amount is all arbitrary)
Cooked thin udon noodle
Carrot, julienned
Scallion, sliced thinly diagonally
Sesame seeds for garnish (or crushed peanuts)

For Dressing:
Peanut butter, soy sauce, and rice vinegar in 2:1:1 ratio
Dash of dark peanut oil
Sugar and sriracha to taste
Minced ginger and garlic to taste
Add warm water if the consistency is too thick

Directions:
Cut the noodles into 1-2 inch lengths (optional but for ease of eating)
Dress with the peanut dressing.
Garnish with sesame seeds or crush peanuts.

Saturday, December 5, 2020

Renkon salad 蓮根サラダ

This is a simple salad made using renkon. This is not even a recipe. 


Besides the renkon, I added blanched broccoli and skinned Campari tomato and dressed them with Yuzu mayonnaise which I concocted from Hellman’s mayonnaise. 


Ingredients: (amounts are all arbitrary)
Fresh renkon, skinned and cut into wedge-shaped bite-size chunks (called “rangeri” 乱切りby cutting on bias,  turn 45 degree again cutting on bias.
Boil it in water with a splash of rice vinegar for 10 minutes, drain and let cool.
Blanched broccoli floret and skinned Campari tomato.

Dressing:
1tbs Hellman’s mayonnaise
1 tsp of Yuzu juice (from the bottle)
1/4 tsp. sugar

This dressing tastes really similar to the commercial Yuzu mayonnaise we bought recently. This combination of vegetables works well—the nice crunchy texture of renkon and slightly less crunchy broccoli.

Saturday, October 10, 2020

Grilled mackerel salad with “Yuzu” mayonnaise 柚子マヨあえ焼き鯖のサラダ

 This is a small salad made of leftover salted and grilled mackerel 鯖の塩焼き. I just came up with this and did not have any recipe.


One interesting thing about this salad is the mayonnaise I used. This is Japanese “yuzu” mayonnaise which I got from one of the gourmet markets through “Instacart”. I added thinly sliced Videlia onion, sliced mini cucumber (both are salted. I let them stand for 5 minutes and then squeezed out the excess moisture). I also added skinned Campari tomato thinly sliced. I dressed the vegetables with the “Yuzu” mayonnaise.  I warmed up the mackerel in the toaster oven. I broke it into bite-size chunks and topped it with a bit more mayo.


I also served 4 additional small dishes. From left to right are blanched green asparagus with sesame dressing, グリーンアスパラガスの胡麻和え simmered Kabocha pumpkin かぼちゃの煮物,  salt broth soaked sugar snap スナップ豌豆の塩びたし and miso-simmered mackerel 鯖の味噌煮.


The salad was really good mainly because of this Japanese “yuzu” mayonnaise. I’ve used up almost half of this mayo already. I took pictures showing the container upside-down. I store it this way so that the contents would come out more easily from the opening.
This is a Japanese style mayonnaise similar in flavors and texture to Kewpie mayonnaise but it contains Japanese “yuzu” citrus juice. This gives a uniquely refreshing flavor. Although fresh Yuzu fruit is difficult to come by, frozen zest and bottled yuzu juice are readily available. I added a bit more yuzu juice to accentuate the flavor.

At first, we are skeptical about this mayonnaise but now we are sold. I even used in our sandwiches with great result.

I think using this with fish like I did here is a great combination. I am thinking of making tartar sauce with this. It should go well with breaded fried fish or Japanese “furai” dish 魚のフライ.

Thursday, September 10, 2020

Tuna sashimi caprese with basil and perilla 漬けマグロのカプレーゼ

This was the first of three appetizers I made one evening using a saku block of yellowfin "ahi" tuna キハダマグロ we got from Great-Alaska seafood. I am always looking for different ways to serve yellowfin tuna sashimi. The recipe I saw at e-recipe was a usual caprese with the addition on tuna sashimi.  I altered the recipe by leaving out the tomato. In addition, I used basil for one batch and perilla for the other.


The one with basil is shown on the left in the picture below . The basil came from our window-sill garden. The one with perilla is shown on the right. The perilla is from our herb garden.


Ingredients: (for an appetizer for two)
1/3 tuna “saku” block, sliced into 6 slices (3 slices per serving)
6 slices of fresh mozzarella cheese
6 basil leaves
6 perilla leaves (if large cut into two)
Good olive oil (I used our favorite Spanish olive oil)
Salt and pepper

Marinade:
2 tbs soy sauce
1 small clove of garlic, crushed  using a garlic press (or grated from tube).
1/2 tsp. sugar

Directions
Add the marinade and the tuna into a Ziploc bag, remove the air, seal and marinate for 10-15 minutes. Blot out excess marinade (I decided to cut one slice into two so that I could make the basil and perilla versions). Layer the mozzarella cheese, tuna, and either basil or perilla. Sprinkle with the olive oil, salt, and freshly cracked black pepper.

This was a really good way to have tuna sashimi. The addition of garlic in the marinade made it really good. Both the basil and perilla versions while different were good. We thought both are good but the perilla ones had stronger and more distinct flavor.

Wednesday, August 12, 2020

Watermelon ribbon salad with wasabi スイカのワサビ入りリボンサラダ

Because of Covid-19, we are having groceries delivered. This creates some problems because we can't inspect the items before we receive them as we would if we were picking them out at the store. In addition, because of substitutions, what we actually receive can sometimes be unexpected such as getting cilantro as a substitution for celery, which occurred in a recent delivery. One such case occurred this week. We ordered a small seedless baby watermelon but instead we got two quarters (actually 1/2) of a full sized melon. This was much much more watermelon than we were expecting. So, besides eating the watermelon as is, my wife made watermelon soup スイカの冷製スープ, pickled watermelon rind, スイカの皮のピクルス and watermelon ribbon salad スイカのリボンサラダ. Although the recipe for the watermelon ribbon salad shown here is basically the same as the one we posted before, my wife changed the amounts to make a smaller portion (using a 5x7 inch casserole dish instead of the usual 6x10) and wanted to record the recipe. The white layer is made of cottage cheese with a good amount of wasabi added which really makes the dish giving it a nice "zing". We served it as a first appetizer of the evening on a crane plate we got in Kyoto sometime ago.
These are the layers of the ribbon salad. Looks like nice pink and white ribbon.


Ingredients:
1/2 cup buttermilk
1/8 cup milk or cream
3/4 + 1/8 cup cottage cheese mashed
1/8 cup mayonnaise
1/8 tsp salt
1 lime or lemon squeezed
2 tsp. wasabi (or to taste)

Directions:
Puree the watermelon. Add the buttermilk and lime. Take 1/4 cup of the puree and use it to bloom the gelatin. Heat the bloomed gelatin in the microwave for 30 seconds. Add the gelatin to the rest of the puree. Pour 3/4 cup of the puree mixture into the bottom of the 5x7casserole dish and let it jell in the refrigerator until solid. (Keep the remaining puree at room temperature and it will stay liquid.)

Mash the cottage cheese using an immersion blender. Add the mayo and salt. Take some of the cottage cheese mixture, add it to a small bowl and use it to soften the wasabi. The amount of wasabi is basically to taste. I found that the cottage cheese tends to calm it down so I end up putting in a fairly large amount. Once it has been homogenized into the amount in the small bowl add it to the large bowl and stir until it is incorporated. Bloom the gelatin in the lime juice. Heat in the microwave for 30 seconds until melted. Add to the bowl of cottage cheese. Pour the cottage cheese over the watermelon layer and cool until solid.  Add the remaining 3/4 cup watermelon puree on top of the cottage cheese layer and cool until solidified.
This is a very summery refreshing salad. The wasabi in the white cottage cheese layer really works well.  The sharpness of the wasabi flavor somehow complements and accentuates the sweetness of the pink melon layer. Without the wasabi this dish would be pretty bland. We had this with chilled pink wine (always good to color coordinate whenever possible), Aix Rose 2019, Rosé from Coteaux d'Aix-en-Provence, Provence, South of France. It went perfectly.