Showing posts sorted by relevance for query 9 divided. Sort by date Show all posts

Sunday, November 12, 2023

“Name-take” as a part of 9 Appetizers 自家製なめたけ

This is another installment of 9 appetizers served on 9 divided plate. There are a few repeats but no store-bought items.  Among these 9 items, the new ones are home-made “name-take” なめ茸* (in the center) and seasoned and grilled quail eggs 味付けうずらの卵 (in the bottom row, center). 

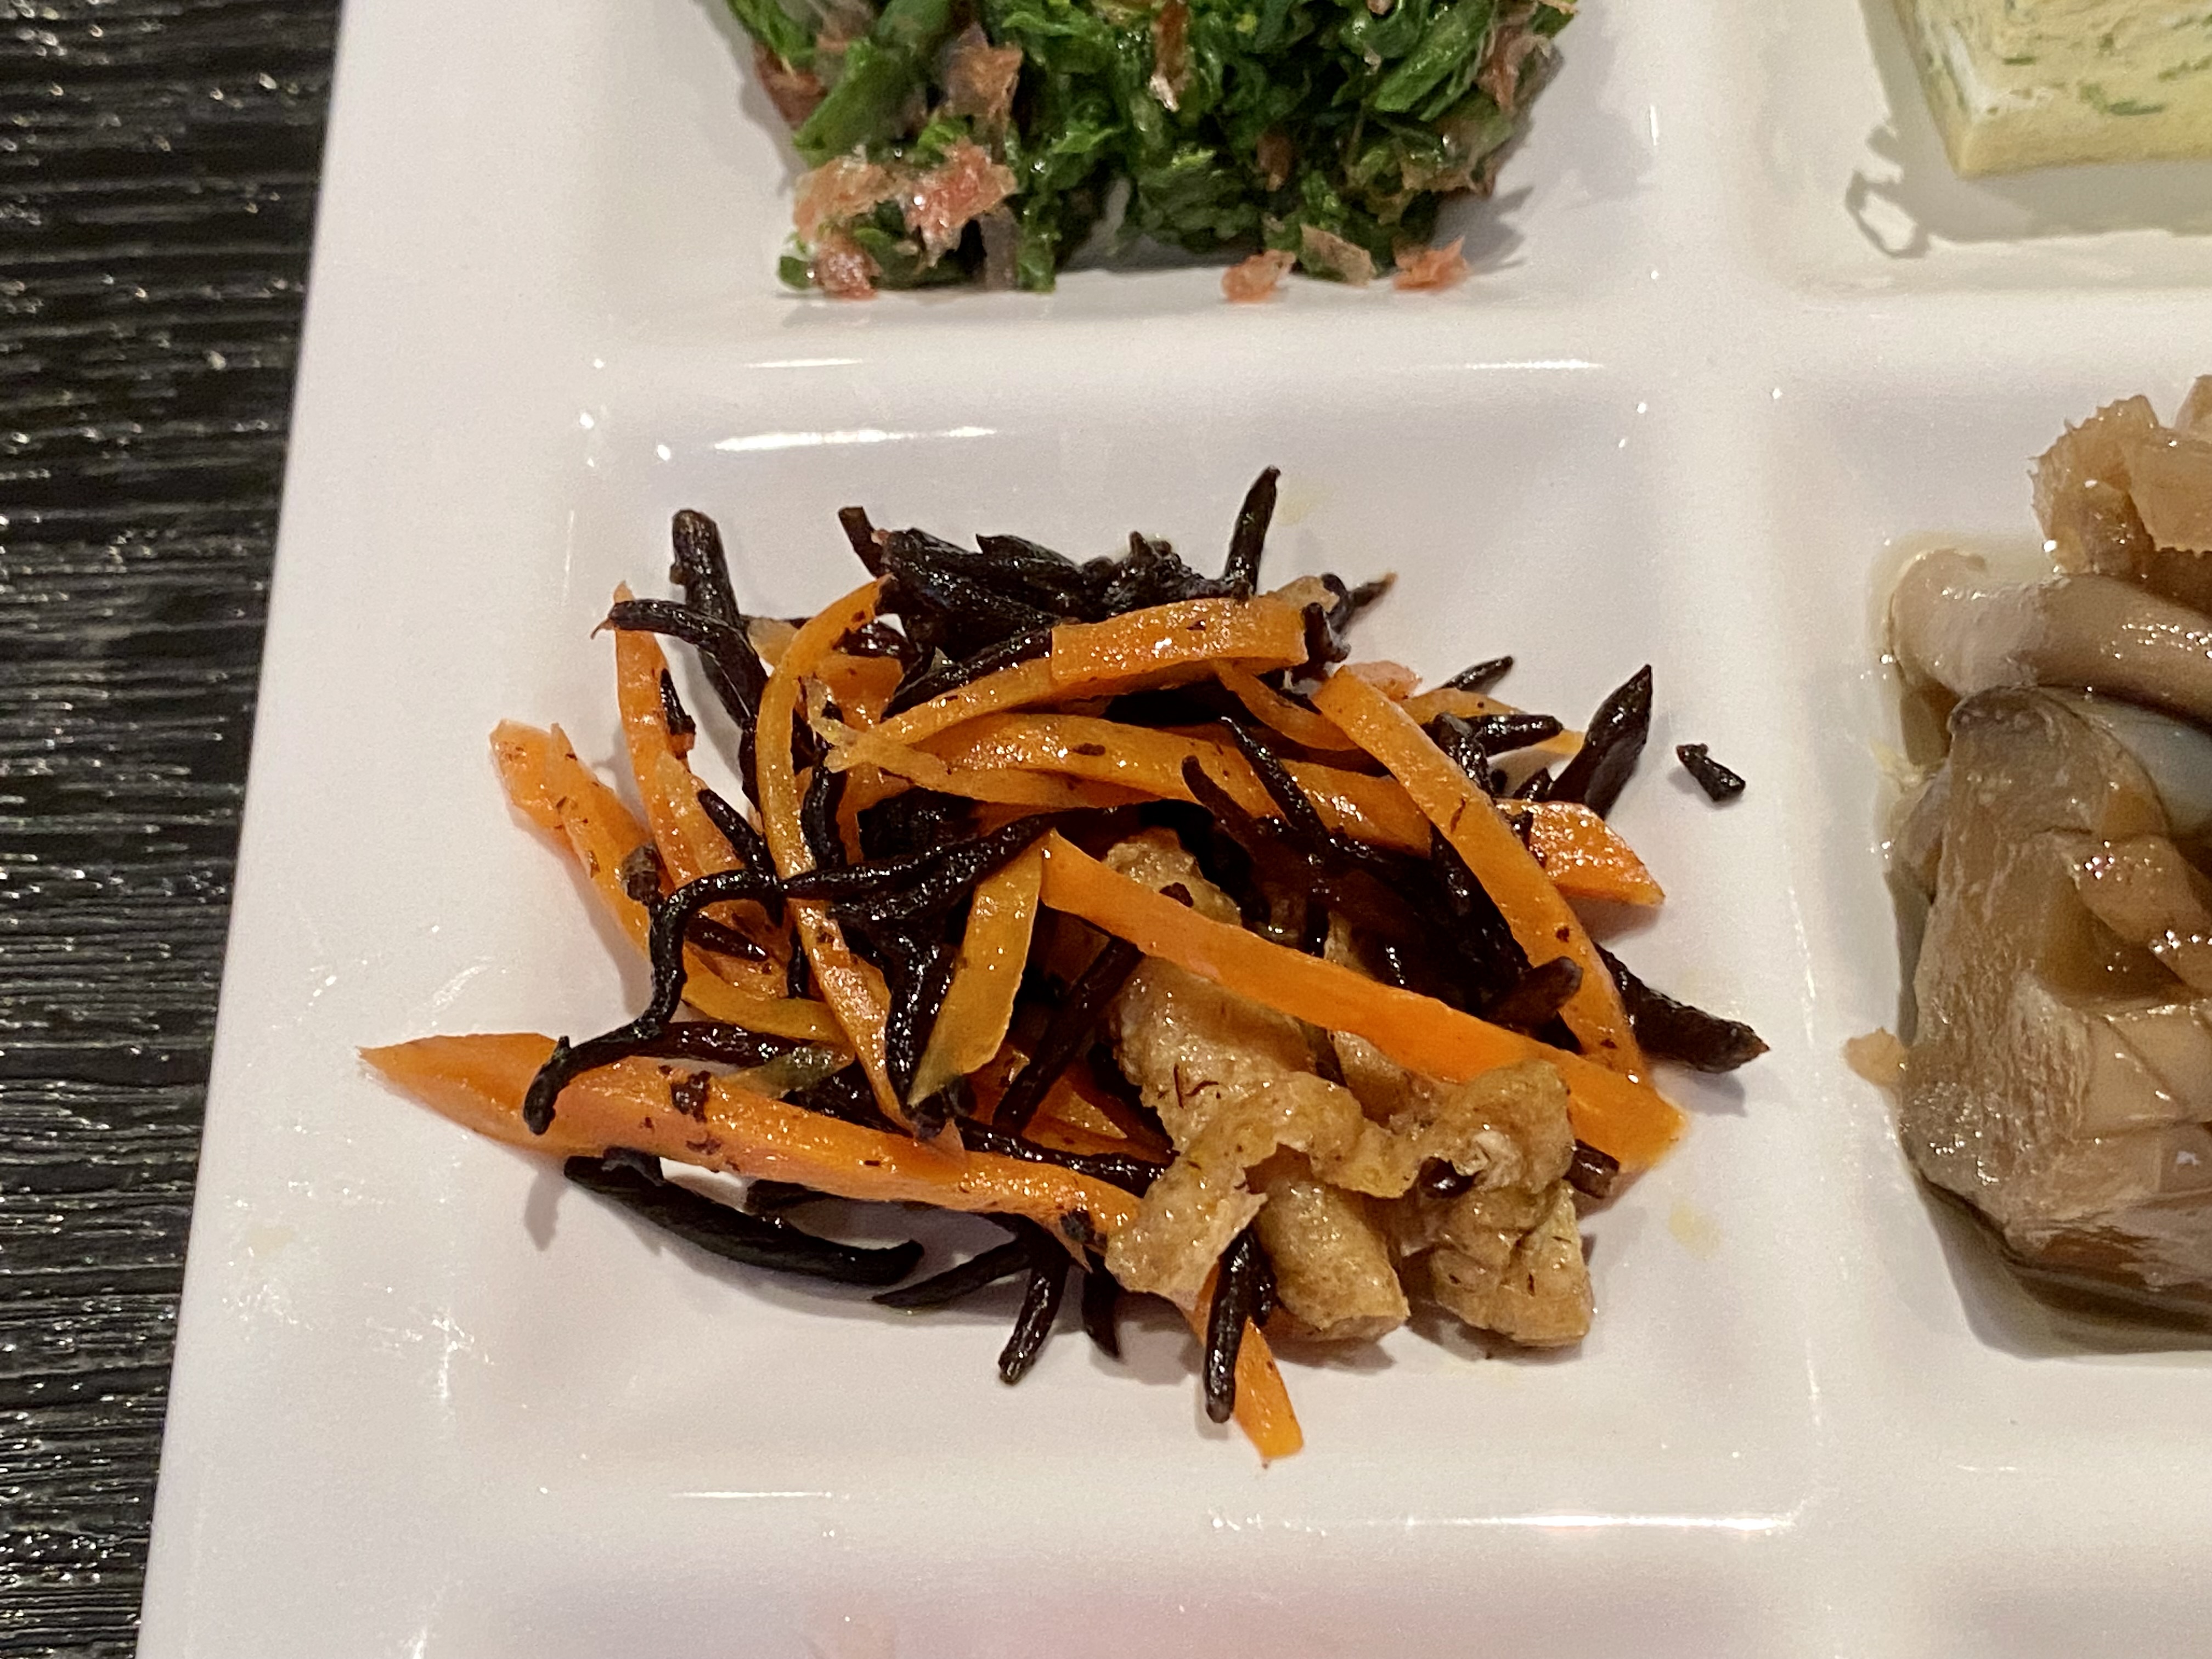
The top row from left to right are fig and edible chrysanthemum イチジクと春菊の和物 (I added sesame dressing this time), sugar snaps in salt broth スナップ豌豆の塩びたし,  simmered mushrooms “tsukudda-ni” キノコの佃煮.  The he middle row left to right are “hoshigaki” dried persimmon with daikon namasu 干し柿大根なます, nametake なめ茸, “kinpira gobo” burdock root 金平牛蒡.  The bottom row left to right are grilled “ginnan” ginko-nuts with salt 銀杏**, grilled seasoned quail eggs 味付けうずらの卵   lilly bulb with ikura salmon roe 百合根のイクラ載せ.


*I thought I have not posted home-made Name-take but when I searched my blog I found two enoki mushroom dishes one is home-made name-take in 2011. I will list the recipe again for my own convenience. Nametake is most commonly available as a rice condiment in a jar.

** It may be spelled as “gingko”. We used to be able to get a small can of boiled ginko nuts but in recent years, it has disappeared. This may be due to the fact that ginko nuts contain a small amount of toxin called MPN, or 4'-methoxypyridoxin. If consumed in a large quantity, especially among children, could produce intoxication. We could harvest ginko nuts since ginko trees are around, the preparation (to remove the meat of the fruit) is messy and smelly which I am hesitant to do). Very recently, however, we could get boiled and packaged ginko nuts (China product) from Weee.

Nametake:

Ingredients: (the seasoning can be more stringer/salty (more soy sauce)
I package (200 gram) Enoki mushroom
2 tbs sake
1 tbs mirin
2 tbs soy sauce (or x4 concentrated Japanese “mentsuyu” noodle sauce

Directions:
Cut off the end of the enoki, cut in half, separate the bottom parts
Place it in a small pot and add sake on low heat with a lid on. After 5 minutes, stir to mix. The consistency changes and thickens. Add the seasoning and increase the heat, stir until no free liquid remains.

Imitating the commercial products, I put  the home-made nametake in a jar (below) after sterilizing the inside of the jar with 50 proof Vodka.

The way this is cooked and seasoned are identical to mushroom tsukuda-ni but the difference is that “Enoki mushroom” cooked this way produced unique texture on the surface of the mushroom (somewhat slippery coating).


Seasoned quail eggs: (I think we figured out how to boil and peel)

How to boil and peel the quail eggs
I
n a pan add enough water and boil. When the water started boiling, add small mount of cold water to stop rapid boiling and add the cold (refrigerated) quail eggs using a slotted spoon. Gently stir in first 1-2 minutes so that the egg yolks center. Cook in gentle boil for 4 minutes then soak the eggs in ice water (mixture of ice cubes and cold water).
After 10-15 minutes, make multiple cracks on the shell (I used the back of the knife) and put them back to the ice water for 10-15 more minutes.
Peel the shells using a thin stream of cold water could help peel the shells.

Marinading the eggs:
I simple marinate the eggs in x4 Japanese concentrated “Mentsuyu” 麺つゆ noodle soup. Alternetively mix equal amount of mirin and soy sauce as a marinade.

Before serving, I toaster oven for 5-6 minutes.

We like these small dishes. The quail eggs have delicate seasoning from the marinade and creamy yolk. The grilled ginko nuts with salt is unique texture and taste for autumn and a quintessential drinking snack in Japan.

Monday, July 17, 2023

New Divided Plate and 9 Otoshi Appetizers 9つ仕切り皿にのせたお通し9種類

This is on the theme of multiple small “otoshi” appetizers. Previously we used a 5 segmented plate to serve 5 appetizers. A few days ago, I found a 9 segmented square plate available on Amazon which was reasonably priced so I got two. I thought it would be hard coming up with 9 appetizers but I managed it with 8 dishes I made. The ninth dish was an exception since I didn’t make it. It was the fried shrimp head which came from Tako Grill when we had our sashimi/sushi take-out. (Shrimp head is a by-product of “botan-ebi” 牡丹海老 sashimi/sushi). In any case, I was surprised that once I started thinking otoshi I was on a roll and could have served two or three more appetizers if I wanted to. This was a nice start of the evening but even very small dishes are filling for us and we ended up with a  “shime” 〆ending dish after this.


In the 1st row, left, is a sugar snap in salt broth スナップ豌豆の塩びたし. We used to be able to get decent sugar snaps from our regular grocery store but recently, we have had to go to gourmet grocery stores to get decent ones This was crunchy, sweet soaked in salt dashi broth.


In the 1st row, center, are cucumber onion salad and stir fried shirataki, jalapeño pepper and enoki mushroom.


In the 1st row, right, is the cheese curd my wife made  but instead of jalapeño pepper, she added “Yuzukosho” 柚子胡椒, soy sauce and cream. I added a dab of yuzukosho on the side to provide an added “schmear” of yuzukosho flavor if desired.


Tsukune on a slice of lotus root 蓮根つくね.


Uni-shuto” ウニ酒盗 from Maruhide. As I stated before this is the best uni aside from fresh uni. I served it with cucumber and perilla leaves.


I refried the shrimp head kara-age which was part of take-out from Tako Grill a few days ago. Shrimp head has a good amount of meat and is very crunchy but you have to be careful how you eat the prickly legs so as to not injure your mouth.


Recently, we discovered that Whole Foods carries fresh quail eggs. We really like boiled quail eggs. Although we can get canned boiled quail eggs, boiled eggs prepared from fresh quail eggs are much much better. I served it with marinara sauce, basil and sprinkle of salt.


Blanched asparagus with sesame mayonnaise. The dressing is a mixture of mayo, Japanese sesame paste or nerigoma 練りごま and soy sauce.


Salmon salad. My usual. The dressing is mixture of mayo, Greek yogurt and Dijon mustard.


We really like our new plates. If I serve 9 appetizers for two of us in small bowls, we have to wash a total of 18 bowls but here we had to wash only two plates. We really like the many small dishes we had here; true Izakaya-style.

Wednesday, March 13, 2024

“Roman” Gnocchi ローマンニョキ

We like gnocchi and every time we cook chicken or pork on the Weber grill, we also cook potatoes and my wife often makes gnocchi from any potatoes left over. She cooks the gnocchi and then freezes them. To serve we heat them up in the toaster oven. Recently, she saw a recipe for “Roman” gnocchi on the Washington post web site and decided she had to make it. This gnocchi is not made with potato but, instead, semolina flour. Also, instead of boiling and then pan frying it is baked (or more accurately oven fried in melted butter). We served this one evening as a part of multiple small “otoshi” snacks. It has nice crust with soft inside with buttery flavor quite different from traditional gnocchi.


The original recipe came from Washington Post.

Ingredients:
8 tablespoons (1 stick) unsalted butter, cut into small pieces and divided, plus more for greasing the dish
4 cups whole milk
1/4 teaspoon fine salt, plus more to taste
1 1/2 cups (9 ounces) semolina, preferably coarse
2 large egg yolks
3 ounces pecorino Romano cheese, finely grated and divided (1 1/2 lightly packed cups) (She used parmegiano reggiano
Freshly ground black pepper

Although I made the gnocchi according to the original recipe these are the changes I would make to the original recipe if I made it again. I would halve the recipe. I would significantly reduce the butter because under the original recipe the gnocchi was swimming in butter when it came out of the oven. I would cook the semolina in the milk slightly differently as described below.

Ingredients: (1/2 recipe)
2 tablespoons unsalted butter, cut into small pieces and divided, plus more for greasing the dish
2 cups whole milk
1/8 teaspoon fine salt, plus more to taste
3/4 cups semolina, preferably coarse
1 large egg yolks
3/4 cup ounces finely grated cheese finely grated and divided (1 1/2 lightly packed cups)
Freshly ground black pepper

Directions:
Position a rack in the middle of the oven and preheat to 400 degrees.
Use a little butter to grease a 9-by-13-inch baking dish (if using the original recipe, the smaller baking dish if using the changed recipe).

In a medium saucepan over medium-high heat, combine the milk and salt. Stirring and scraping the bottom of the pot with a rubber spatula to prevent scorching, bring to a simmer and reduce the heat to medium-low to prevent a boil-over.

Then sprinkle in the semolina, stirring constantly as you do. Cook, stirring, until the mixture is so thick that the spatula can stand in the middle without falling over, 2 to 3 minutes. (Although this is what the recipe suggests when I did it the semolina hit the hot liquid and immediately formed lumps. So in the future I suggest adding the semolina to the cool liquid and then gently heating it up. This way the semolina can be evenly distributed in the liquid before it starts to firm up when heated.)

Let cool for a few minutes, then add half of the butter (4 tablespoons) and 1/2 cup of the cheese, stirring until the butter and cheese melt and the mixture is thoroughly combined. Add the egg yolks, one at a time, and stir until incorporated. The mixture should be the texture of thick mashed potatoes.

Scrape the semolina mixture onto a large sheet pan and use wet hands, a damp knife or offset spatula to spread it out evenly, and pat the top to smooth it. (It should be about 1/2 inch thick, but it’s okay if it’s a little thicker.) Let cool to room temperature, about 5 minutes.

Fill a small bowl with water. Dip a two-inch cookie cutter, biscuit cutter or drinking glass in the water and use it to stamp out rounds, re- dipping frequently, or use a knife to cut it into two-inch squares. If cutting into rounds, mush together and spread out the scraps again and keep cutting, repeating until all of the mixture is used.

Arrange the pieces in overlapping rows, like shingles, in the buttered baking dish (#2). Sprinkle them with the remaining cheese, and top with the remaining pieces of butter.

Bake for 15 to 20 minutes, or until the cheese is browned in spots (#3). Grind a generous amount of pepper on top and serve warm.


This is very different from the gnocchi made with potatoes but it tasted pretty good and has real potential with a few changes. The outside was crispy and the inside soft. It had a pleasing mild flavor of the cheese. It may not be good for you since it has lots of cheese, egg yolks and then oven fried in melted butter. My wife thinks she could cut down on the butter next time. Although the gnocchi was litterly swimming in butter when it came out of the oven the melted butter in the baking dish was completely absorbed as it cooled.

Saturday, November 18, 2023

11 (or 12) Appetizers 11種類の酒のつまみ

This is another version of multiple small appetizers dishes. I used the divided plate with space for 9 dishes. But I had more than nine to serve so I doubled up in the divided space.  But I still needed to add two more small bowls for a total of 11 small dishes. If you count each part of the doubled up item (lotus root tsukune 蓮根つくね was divided and served with quail eggs and ginko nuts) (bottom row left and center), it would be 12 appetizers. None of them are new recipes. Even though the single portion is small, we were quite full after working our way through 12 of them.


To highlight a few the one shown below is Name-take mushroom なめ茸 (top row right),


simmered taro “satoimo” 里芋 potato and carrot with “Kouya-dofu” 高野豆腐* and sugar snap スナップ豌豆の塩びたし (middle row right)


and two small bowls; tofu and shimeji with oyster sauce 豆腐としめじのオイスターソース(top),


simmered shirataki and deep fried tofu 白滝と油揚の煮物 (bottom).


*Kouya-dofu is freeze dried tofu (for preservation I suppose) which creates unique texture and absorbs whatever liquid it is cooked in.

These appetizers are mostly comprised of vegetables and provide so many different textures and tastes. We really like this type of classic Japanese multiple appetizers.

Monday, August 7, 2023

Nine appetizers served in nine divided plate version 2

This is the second version of nine small appetizers served on the nine space divided plate. Although it was not intentional it turned out that I did not have even one repeat of the items I presented in the previously posted nine appetizers. But this time I did include two store-bought items that I got from our Japanese grocery store; Chinese-style octopus salad and fish cakes. But I made the remaining 7.


The top row left is blanched edible chrysanthemum or “shun-giku” 春菊 shown in detail below, dressed with x4 Japanese noodle sauce and mixed with generous amount of dried bonito flakes or “kezuri-bushi”  削り節. It has very distinct flavors which we really like.


The 1st row, middle is my ususal “dashi-maki” だし巻き Japanese omelet. This time I added dried green nori or “aonori” 青のり. I garnished it with julienne of green perila or “aoziso” 青紫蘇.


The next dish is a Chinese-style octopus salad or 中華風タコサラダ. It is pretty good and we like it.


The center row, left is hijiki seaweed, deep fried tofu and carrot stir fry or ひじきと油揚の炒め物.


The 2nd row center is one I just made this morning. Fried egg plant and mushroom simmered in broth or ナスと椎茸の揚げ浸し. The mushrooms include fresh shiitake and brown shimeji. This is served cold with garnish of blanched green beans.


The 2nd row left is my usual burdock root stir fry ゴボウのきんぴら.


The 3rd row left is a cold skinned Campari tomato. I cross cut the top halfway-through and poured on some Irizake  煎り酒 and special sushi vinegar (both from the Rice Factory). Irizake is boiled down sake seasoned with “umeboshi” picked plum 梅干し, kelp and bonito flakes. The sushi vinegar is a special kind from “Echizen 越前” or present day Fukui 福井.  It tastes milder and better than our usual (Mizkan brand). I topped this with fine julienne of  “Gari” がりsweet vinegar marinated thinly sliced ginger root (usually use to accompany sushi) and perilla. I got this idea from one of the food blogs I follow but I did not follow the recipe exactly.


The 3rd row center is store-bought fish cake which I heated up in the toaster oven and dressed in x4 Japanese noodle sauce and yuzukosho.


The 3rd row right is my usual “asazuke” 浅漬け picked (salted) vegetable which includes cucumber, carrot, nappa cabbage and daikon radish. I also added “shio konbu” 塩昆布, and ginger. The asazuke is about two weeks old but still tasted fresh (I attribute this to the fact I added a bit more salt - more than the usual 3% - and added a small amount of Vodka when I made it. While it didn’t alter the overall taste, I think this makes the asazuke last longer without becoming sour).


After enjoying these 9 small dishes both of us were quite full and did not eat anything else. All the wonderful different flavors and textures made a really enjoyable dinner.

Friday, March 25, 2016

Hot cross buns ホットクロスバンズ

Every year, my wife bakes some kind of hot cross buns as Easter approaches. Among the several she's baked over the years, this one is the best so far. This is based on a recipe from King Arthur Flour. She is also into "Seasonal" decorations and, besides a collection of numerous Easter eggs and "bunnies", she also recently got two sets of Easter plates and her hot cross buns were served on one of the "bunny" plates.


According to my wife, this is her favorite bunny plate. I will let my wife take over. 


Ingredients (18 rolls):

- 1/4 cup rum
- 1/2 cup raisins
- 1/2 cup cherry infused craisins
- 1/2 cup pomegranate infused craisins 
- 1 1/4 cups milk, room temperature
- 3 large eggs, 1 separated
- 6 tablespoons butter, room temperature
- 2 teaspoons instant yeast (one packet) 
- 1/4 cup light brown sugar, firmly packed (we used regular sugar and 1 tbs of molasses)
- 1 teaspoon ground cinnamon
- 1/4 teaspoon ground cloves
- 1/4 teaspoon ground nutmeg
- zest of 2 lemons
- 1 3/4 teaspoons salt
- 1 tablespoon baking powder
- 4 1/2 cups All-Purpose Flour (plus more as needed)


For glaze: (I forgot to put the glaze on)
- 1 large egg white, reserved from above
- 1 tablespoon milk

For icing:
- 1 cup + 2 tablespoons confectioners' sugar
- 1/2 teaspoon vanilla extract
- pinch of salt
- 4 teaspoons milk, or enough to make a thick, pipeable icing


Directions:
1) Generously grease a large pyrex pan  (10" square pan or 9" x 13").

2) Mix the rum with the dried fruit and raisins, cover and microwave briefly, just until the fruit and liquid are very warm. Set aside to cool to room temperature. (By-the-way I did not intend to use so many crasins but the labeling on the package was a bit confusing. In large red letters it said "cherry" and "pomegranate" and in much smaller dark blue letters "crasins". I thought I was adding dried cherries and dried pomegranates--but the crasins worked out). 

3) I put 4 cups of all purpose flour in the bowl of the mixer added the cinnamon, cloves, nutmeg, salt and baking powder and stirred to mix into the flour. With the mixer running I added the proofed yeast (proofed in 1/4 cup warm water with some sugar added and dissolved), and milk (with lemon zest added) until blended . Then I added the two eggs and one yolk one at a time until blended (#1). At this point the dough was quite sticky. So like any other type of bread I started adding flour 1/4 cup at a time until the dough could hold its shape even though it was still quite sticky. Then I added the butter a little at a time in pats and blended into the dough as it kneaded on the hook. When I reached what I thought was the right consistency I let it knead for 7 minutes. Then I started adding the fruit and let it knead an additional 3 minutes. (I have found that it is easier to let any butter and fruit added to a bread recipe to be kneaded into the bread in the mixer with the dough hook than tring to do it by hand). Picture #2 shows what the dough looked like when it came out of the mixer. I hand kneaded it a few times until the surface became smooth (#3). I put it into a bowl that had been warmed with hot water and dried. I added some vegetable oil and coated the dough so it wouldn't dry out while rising. 

4) I let the dough rise for about 1 hour, covered. It didn't completely double in size but it was quite puffy (#4).

5) I divided the dough into balls 3 ounces each and put them in the prepared pan (#5).

6) I let the buns rise for about 1 hour, or until they were touching one another and preheated the oven to 375°F.

7) Although I forgot to do this, whisk together the reserved egg white and milk, and brush it over the buns. (I think the buns are ok even without the glaze). 


8) Bake the buns for 18 to 20 minutes, until they're golden brown. Remove from the oven, and transfer to a rack immediately to cool (#6).

9) Before serving and after the buns have cooled I mixed together the icing ingredients, and piped the icing in a cross on top of each bun.

These were extremely good. They had a rich soft texture and lots of flavor from the spices, rum and fruit. I do have to say that with all those good flavors I really didn't notice the lemon zest and may leave it out next time.  While in general I don't like icing because it is too sweet, the icing in this case added a nice flavor dimension that otherwise would have been missed. I think this will become our go-to hot cross bun recipe in future years. It is really a treat to wake up to these buns slightly warmed with a cup of cappuccino --especially when served on an Easter bunny plate. 


Tuesday, April 12, 2022

Hot cross buns 2022 ホットクロスバン 2022

It has been customary every year when Easter approaches, for my wife to make hot cross buns  (mostly without the sugar frosting cross, because the buns are sweet enough without it). This year was no exception. This year the recipe came from the heavy hard covered cookbook called “Bouchon Bakery Cookbook”. To me, this one looked like the most complicated recipe for hot cross buns I’ve seen my wife make over the years. Nonetheless it tasted very good and had a very nice texture.


This recipe calls for a lot of butter and multiple foldings. You can sort of see the multi-layering on the curt surface.


Ingredients: (#1)
Flour 372 g (2 1/2 cups)
Yeast 8 g (2 3/8 tsp)
Sugar 44 g (3 tbs. + 2 tsp)
Salt 9 g (1 1/2 tsp.)
Eggs 186 g (2 eggs)
Whole milk 63 g (1/4 cup)
Butter 167 g (5.8 oz) cut into small cubes
Raisins 122 g (3/4 cup)
Dried cranberries 61 g (1/2 cup)
1 tsp. Vanilla

Ingredients doubled:
Flour 744 g
Yeast 16 g (4 3/4 tsp)
Sugar 88 g (7 tbs. + 1 tsp)
Salt 18 g (3 tsp.)
Eggs 372 g (4 eggs)
Whole milk 126 g (1/2 cup)
Butter 334 g (11 oz) cut into small cubes Raisins 244 g (1 1/2 cups)
Dried cranberries 122 g (1 cup)
2 tsp. Vanilla

Directions:
Combine the fruit in a bowl and pour 2 cups of boiling water over it. Let sit for 5 minutes then drain and pat dry with paper towel. Set aside. Add all the other ingredients but the butter to the bowl of a stand mixer with a dough hook. Mix until a paste-like dough forms. Add the butter a piece at a time and incorporate into the dough. (At this point it will look like that will never happen since there seems to be more butter than flour mixture to incorporate it into.) When all the butter is incorporated mix on speed 2 for 7 to 10 minutes. Pat the dough into a rectangle and spread the fruit evenly over it (#2). Fold the dough into thirds as an envelope fold. Press the dough out into a rectangle again. Turn the dough 180 degrees and do another envelope fold. Press into a rectangle, turn and fold again (#3). Pat into a loaf and place in a lightly oiled bowl turning to coat with the oil and placing it seam side down (#4). Cover and put in proofing box at 75 degrees and let rise for 45 minutes. Remove from bowl and repeat 2 more folds. Return to bowl to rise another 45 minutes. Remove from bowl and divide into 12 equal portions, (24 equal portions for doubled recipe). Roll the divided portions into bun shape and place evenly spaced on a cookie sheet lined with parchment paper. (Next time I will just cut into squares. This will require less working of the dough and make the number of folds more evident in the final product). Cover the pan and let rise until rolls are touching each other. Coat with egg wash and bake in 350 degree oven for 18 to 22 minutes until golden and toothpick comes out clean. Let cool on a rack.


These were indeed fairly complicated muffins. The hardest part was incorporating all the butter. At one point it looked like it wouldn’t happen. But it did. The muffins themselves are luxurious. The texture is dense but very soft. The numerous foldings made very fine layers. They were sweet but not too sweet. (They would have been sweeter if we had added the icing). The fruit adds another texture and a slight vanilla flavor. These are really quite something and worth the effort. 

Tuesday, September 1, 2020

Super-soft Milk Bread 日本風食パン

Many years ago, when we visited Tokyo 東京, we stayed at hotels in the Asakusa area 浅草. (More recently, we've been staying at hotels in the Ginza/Tokyo station area). One of the fond memories we have of our stay at the Asakusa hotels was going to a coffee house or "Kissa-ten" 喫茶店 for breakfast and coffee. At that time, they usually offered, at a very reasonable price, choices of "morning sets" モーニングセットdesignated as  "A", "B" or "C". They consisted of some kind of egg (hard boiled or egg salad) and slightly different sides such as a mini green salad or cucumber. The foundation of the meal, and, as far as we are concerned, the best part, was a very thick slice of soft bread lightly toasted and served with butter or sometimes jam or jelly. The second cup of coffee was usually available at a steep discount which was another reason we liked breakfast at the Kissa-ten. Recently my wife came across a recipe for "Super-soft Milk Bread". In addition to being reminiscent of our favorite Kissa-ten bread, the accompanying write-up referred to it as a variation of "Hokkaido milk bread". Since I am originally from Hokkaido 北海道, that "sealed the deal". I had to make this. This is a very different recipe from our usual white bread loaf. It came out super soft, light and fluffy. It really reminded us of "Kissa-ten" toast. I sliced a very thick piece (but not as thick as some we had at kissa-ten) toasted it and slathered on the butter. Voila!


Some Japanese recipes for this type of bread include "Yu-dane" 湯種 or "Yu-kone or Yu-gone" 湯捏ね in which  a portion of flour is mixed and kneaded with hot water. Instead, this recipe pre-cooked the flour and milk into a soft paste called "tangzhong" which is the Chinese pronunciation of "Yu-dane"  湯種.  I read that this was popularized by a Chinese cookbook author Yvonne Chen as "tangzhong" which is the term that commonly appears in English-written recipes for this type of bread. This recipe came from the King Arthur website.

Ingredients
Tangzhong
3 tablespoons (43g) water
3 tablespoons (43g) whole milk
2 tablespoons (14g) King Arthur Unbleached Bread Flour


Dough
2 1/2 cups (298g) King Arthur Unbleached Bread Flour
2 tablespoons (14g) Baker's Special Dry Milk or nonfat dry milk
1/4 cup (50g) sugar
1 teaspoon salt
1 tablespoon instant yeast (This looked like too much for one loaf of bread, next time I may reduced it in half)
1/2 cup (113g) whole milk
1 large egg
4 tablespoons (57g) unsalted butter, melted

I weighed all ingredients except for the yeast and egg.

Directions
To make the tangzhong: Combine all of the ingredients in a small saucepan, and whisk until no lumps remain.

Place the saucepan over low heat and cook the mixture, whisking constantly, until it becomes thick and the whisk leaves lines on the bottom of the pan, about 3 to 5 minutes (#1 below).

Transfer the tangzhong to a small mixing bowl or measuring cup and let it cool to lukewarm.
To make the dough
Combine the tangzhong with the remaining dough ingredients, then mix and knead — by mixer or bread machine — until a smooth, elastic dough forms; this could take almost 15 minutes in a stand mixer (I used a standing mixer with a dough hook and kneaded it for 7-10 minutes).

Shape the dough into a ball, and let it rest in a lightly greased bowl, covered, for 60 to 90 minutes, until puffy but not necessarily doubled in bulk.

Gently deflate the dough and divide it into four equal pieces; if you have a scale each piece will weigh between 170g and 175g (I divided the dough in half-- I should have weighed the halves; the loaf came out uneven).

Flatten each piece of dough into a 5" x 8" rectangle, then fold the short ends in towards one another like a letter. Flatten the folded pieces into rectangles again (this time about 3" x 6") and, starting with a short end, roll them each into a 4" log. (After flattening, folding, I rolled it into two logs).

Place the logs in a row of four (in my case, two) — seam side down and side by side — in a lightly greased 9" x 5" loaf pan.

Cover the loaf and allow it to rest/rise for 40 to 50 minutes, until puffy (#2 below).

Toward the end of the rising time, preheat the oven to 350°F.

To bake the bread: Brush the loaf with milk and bake it for 30 to 35 minutes, until it's golden brown on top and a digital thermometer inserted into the center reads at least 190°F (#3 below).
Remove the loaf from the oven and cool it in the pan until you can transfer it safely to a rack to cool completely (#4).


The dough rose rather quickly (this is the reason I think I will reduce the yeast next time). After the bread completely cooled, I sliced it (#4).We have been making white bread loafs for some time using an old recipe which came with our stand mixer. Our white bread loaf is good but this one is different and may be better. It is extremely light and very close to the Japanese loaf bread we had at the Kissa-ten. We were "transported" back to Tokyo with the first bite. It had a mildly sweet flavor and the crust was nice and crunchy. We will definitely make this again for sure.

Addendum:

I doubled the amount and made two loaves. I also, decreased the yeast by half (proportionally). I also weighed the 4 portions (2 for one loaf) and they came out in equal sizes (see pictures below). This is just a note to myself so that I do not have to calculate  the ingredients' weight again.

Ingredients:

Tangzhong
86 g water
86 g whole milk
28 g King Arthur Unbleached Bread Flour

Dough
596 g King Arthur Unbleached Bread Flour
28 g  nonfat dry milk 
100 g sugar
2 teaspoon salt
1 tablespoon instant yeast
226 g whole milk
2 large egg
114 g (one stick) unsalted butter, melted

Despite halving the yeast, the dough rose and the bread came out soft and fluffy. It may have taken a little bit more time to rise but the flavor of the bread, we thought, was better.

Monday, April 10, 2023

Firefly Squid Scallion Pancake ホタルイカ入りネギ焼き

Firefly squid season is upon us and we got some from Regalis. I am repeating myself  here but when we visited Kanazawa 金沢 in early summer many years ago, we were introduced  to firefly squid or “hotaru-ika” ホタルイカ. Our favorite way to enjoy firefly squid is “okizuke” 沖漬け but that is difficult to get here in the U.S. The ones from Regalis are boiled. We got two trays, froze one tray and enjoyed the rest. We had this with sumiso 酢味噌 dressing which is the most common and simplest way to enjoy this. The texture of the small squid and very rich flavor from the liver really makes this squid special. This evening I made two dishes; one was our favorite stir-fry of the firefly squid and asparagus shown on the right and another, (new one), was scallion pancake with nagaimo and firefly squid ホタルイカ入りネギ焼き shown on the left. This recipe came from E-recipe


Ingredients (make 4 pancakes)
12 firefly squids (3 per pancake) or more if you like
50 grams grated nagaimo (mine was near 80 grams)
9 tbs chopped scallion (I used 5 stalks)
1 egg (I used 2 eggs)
2 tbs AP flour
1 tsp granulated bonito dashi (I used “Hondashi”ほんだし)
1 tsp soy sauce
1 tbs vegetable oil

Directions:
Since I was using more grated nagaimo than the amount called for in the original recipe, I changed the amount of eggs as a binder. I did not add the firefly squid into the batter initially. I divided the batter into 4 portions and added 3 squid to each batch.

I heated up a non-stick frying pan on medium heat and added the oil. I poured in 4 potions as seen below.


After a few minutes or when the bottoms are set and brown, I flipped the pancakes and lowered the heat and continued cooking for another 2-3 minutes or until the center was done.


I served this pancake with firefly squid and asparagus stir-fly (the first picture). The pancake was very good but we did not see the point of adding the firefly squid. We did not think it did justice to the firefly delicacy since its flavor was somewhat lost in the pancake. We thought adding shrimp would have been more appropriate and that is what we may do next time. In any case, it is nice to enjoy the firefly squid which symbolze spring to early summer.