Wednesday, December 30, 2020

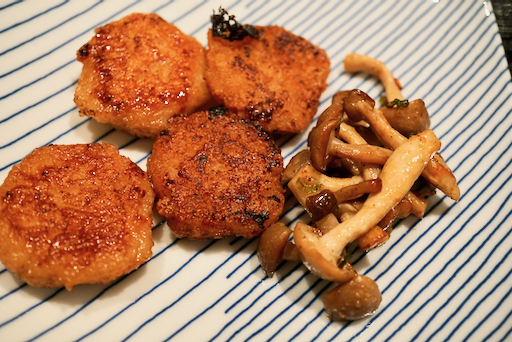
Renkon "lotus root" mochi 蓮根餅

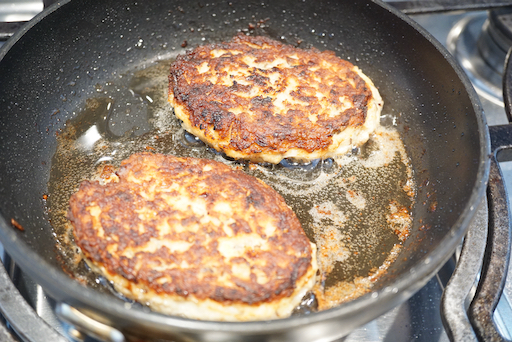
This is on the theme of what you can make from fresh lotus root. This is similar to renkon ball レンコンまんじゅう but instead of deep frying, this was pan fried. I also sautéed shimeji mushroom in the same pan as a side. The Japanese name for this is "renkon mochi" レンコンもち.  This is called “mochi” because it has the consistency of freshly made "mochi" 餅 cake made from rice. 


Ingredients:
Grated fresh "renkon" lotus root, skin peeled and grated and excess moisture drained out (about 100grams for 8 small discs).
2 tbs potato starch or "katakuri-ko" 片栗粉
2 tsp butter
2 tps each of soy sauce and mirin

Directions:
Mix the grated renkon and potato starch in a bowl, divide into 8 small balls.
Melt the butter in a non-stick frying pan. Flatten the renkon balls into small disks and cook a few minutes on both sides until brown.
Add the mirin and soy sauce.


Cook both sides and continue until the liquid is almost all gone.


Grated renkon cooked this way has an interesting elastic consistency with a crunchy crust. This is very pleasant and different preparation of renkon. Perfect for a small drinking snack.

Saturday, December 19, 2020

Appetizers 4 kinds お通し4種類

These are 4 kinds of appetizers we had as starters one evening. Nothing really new. Below, from left to right, are; simmered Japanese eggplant 茄子の含め煮 or 煮浸し and simmered "kabocha" Japanese squash かぼちゃの煮物, salmon in sweet vinegar 鮭の南蛮漬け, "Kazunoko" herring roe with cucumber and "ikura" salmon roe 数の子、胡瓜の酢の物のいくら載せ, and the last is the Spanish mackerel simmered in miso 鯖の味噌煮 I usually make.


I usually take the corners of the kabocha pieces off to prevent them from crumbling during cooking but I was a bit lazy and did not do that this time. Nonetheless the pieces still kept their shape. The eggplant was a small long Japanese eggplant (this is the only kind we can consistently get). I also added blanched broccoli and heated up in the microwave.


The Japanese eggplant was from HMart Korean grocery store which we are using more often. As an innovation from my usual method of cooking eggplant I fried the skin side first. Supposedly, this  helps to retain the skin’s color. Although this is not much different from the previous post, I describe the recipe for my own convenience.


Ingredients:
3 Japanese eggplant
2 tbs neutral vegetable oil
two small pieces of ginger, crushed with the side of the knife.

250ml Japanese dashi broth (I made this with my usual bonito and kelp dashi pack)
3 tbs soy sauce
3 tbs mirin

(Instead of soy sauce, I am using "shirodashi" 白だしand light colored soy sauce).

Directions:
Cut the eggplants in half lengthwise. Shallowly cut the skin in crosshatching pattern and then cut lengthwise again to make 1/4 eggplant.
Add the oil to a frying pan on medium flame and add the ginger for a few minutes until fragrant.
Add the eggplants skin-side down and fry for 3-4 minutes and turn over to fry both of the fresh sides for 2-3 minutes each,
Add the seasonings and broth (below), put on the lid and simmer for 3-4 minutes.


This is good eaten hot right after it is cooked but it can also be stored in the broth in a sealable container in the refrigerator. The stored eggplant can be eaten cold or heated up in the microwave.

This is usual salmon nanban. This one was really good since the quality of the salmon (from Whole foods) was good and I did not over cook it. I served this with sugar snap in salt broth スナップ豌豆の塩びたし.

Mr. and Mrs. Segawa of Tako Grill kindly gave us "kazunoko" herring roe 数の子. I prepared it as I described in my New Year dish tab. The half serving shown below was soaked in dashi broth with soy sauce and mirin seasoning. I marinated the other half serving in sake-lee and miso mixture  or "kasu-miso" 粕味噌. Since this preparation will last longer than the one soaked in dashi broth we will eat it closer to the holidays.


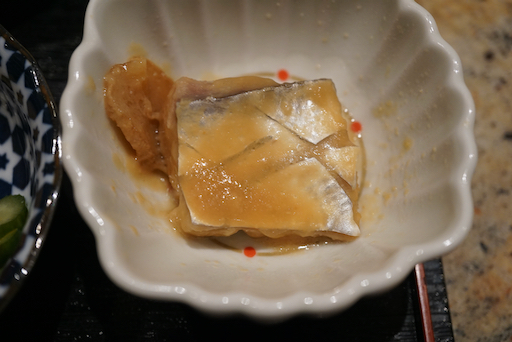
I also served Spanish mackerel in miso sauce 鯖の味噌煮. (The red dots surrounding the mackerel are part to the decoration of the bowel not part of the preparation.)


This was a quite a good starter line up for the evening.

Wednesday, December 16, 2020

Cuttlefish legs with simmered vegetables イカの足いり根菜の煮付け

Some time ago we got some really nice large boiled octopus legs from the HMart Korean grocery store. Unfortunately they have not been available for some time. Alternatives may include "baby octopus" and "Cuttlefish legs".  One day, when I saw boiled octopus was not available again I got "Cuttlefish legs" to see if they could be a substitute for the octopus legs. The short answer, at least as far as I am concerned, is "NO". While they are both good, lets face it Octopus and Cuttlefish are different "animals". If you are craving octopus leg cuttlefish won't "cut it" for you. The package of cuttlefish legs consisted of a collection of small cuttlefish legs, frozen in one large block. It was impossible to thaw just a part of the block. So, one weekend, I thawed the entire block under running water. (Although they were small, that was a lot of cuttlefish legs). I immediately boiled them, in salted water with a splash of sake. To keep the legs from getting too tough I boiled them just enough for them to cook through (1-2 minutes). Using the boil cuttlefish legs I made several dishes but I did not take pictures. I mostly made dishes in which I usually use squid legs such as a small "sumiso-ae" 酢味噌あえ Japanese salad with cucumber and wakame seaweed. I also made simmered dishes with vegetables and the cuttlefish legs. I realized that the dish shown below would use up the last of cuttlefish legs so I decided to take a pic and post. On the left is the cuttlefish with simmered vegetables (daikon and carrot). I added blanched broccoli just before serving. I also served "aji nanban" 鯵の南蛮漬け or fried jack mackerel in sweet vinegar shown on the right.


This is not based on any recipe but sort of basic Japanese home cooking. I peeled and cut the daikon into half moon shapes about 1/4 inch thick. I peeled and cut the carrot using "rangiri" 乱切り to make bite size chunks. I first sautéed  the vegetables in neutral oil such as safflower oil to coat and then added just water and a splash of sake to just cover. I then added the previously prepared (i.e. thawed and blanched) cutttlefish legs. I seasoned with "shirodashi" 白だし which I got from "the rice factory". I did not season the dish strongly so that the flavor of the ingredients could stand out. I simmered it for 30-40 minutes or until the cuttlefish legs were tender. Using the shirodashi kept the ingredients lighter in color than if I had used soy sauce. It also resulted in a gentle tasting simmered dish.


The package of frozen jack mackerel "aji" 鯵 I used for the next dish was getting old, so I decided it was time to cook it and made "nanban-zuke" 南蛮漬け. Although "nanban" refers to red pepper, I omitted the red pepper flakes since my wife is not fond of spicy food. For vegetables, I used carrot, celery, and red onion. I dusted the "aji" with flour and deep fried it before putting it into sweet vinegar with the vegetables. Just before serving, I also added sugar snaps which had been soaking in salt broth スナップ豌豆の塩びたし。


These two appetizers are great with cold sake. Although the cuttlefish legs do not substitute for the octopus legs, they were not bad in their own right. Nonetheless I managed to use them all up although it took several dishes to accomplish that feat.

Monday, December 14, 2020

Sushi Taro "regular" kaiseki box "普通”の寿司太郎会席弁当

We have gotten several "Special" kaiseki boxes 特別会席弁当 from Sushi Taro which we enjoyed immensely. This time because of a large catering job in which Chef Kitayama was involved, they could not provide us with a "special" version but a "regular" kaiseki box was available. Since we never had a "regular" kaiseki box we went ahead and ordered it. This was quite good but also quite different from the "special" kaiseki box we had been getting. Everything comes in elegant one-time-use paper boxes and plates which closely emulate Japanese lacquer ware boxes and china dishes as you can see below. In contrast to the special Kaiseki, instead of all kinds of little different dishes, this one focused more on sashimi and sushi. Each of the two boxes were identical and each contained 4 pieces of sashimi, as well as 9 nigiri plus one half “negitoro” roll and one half rainbow roll equaling the equivalent of one whole roll . The kaiseki part of the box contained 3 dishes.


The Sashimi assortment was composed of "akami" red meat of wild bluefin tuna, flounder, arctic charr and sweet shrimp, all excellent in taste and quality.


One of the 3 kaiseki dishes shown below was "Goma-dofu" 胡麻豆腐 sesame tofu topped with blue crab and "ikura" salmon roe and I think small cubes of "ankimo monkfish liver. This was lovely with a smooth texture and the salmon roe and monkfish liver really added an elegant touch.


Another was shrimp cream croquette in lobster sauce which also contain small chunks of crunchy cauliflower accompanied by crunchy deep fried sweet potato and "renkon" lotus root. There is no way one could go wrong with this crowd pleaser. What is not to like about the smooth creamy texture and sweet taste of crab wrapped in golden crunchy crust accompanied by crunchy renkon and sweet crunchy sweet potato?


Grilled miso-marinated "Gindara" 銀鱈 sable fish or black cod topped with mushrooms and chestnuts. This one was "off the charts". The fish was succulent, melted in the mouth and was covered with a wonderful sauce surrounded by complementary mushrooms.


The sushi section of the box shown below included Nigiri-zushi 握り寿司 included ikura, Maine uni, "anago" sea eel, "aji" horse mackerel (upper row, left to right), "kohada"gizzard shad, bluefin tuna "chutoro", " madai" Japanese snapper, King salmon, and kampachi  (middle row, left tp right), Negitoro roll and rainbow roll with spicy tuna in the center (bottom row, left to right). All of it was excellent. It was also quite a substantial meal. No one would walk away from this hungry; it would satisfy even the heartiest eater in the crowd. (remember we got two sets of this since we ordered boxes for two which is a minimum order).


The regular kaiseki box is quite different from the special kaiseki box but we really quite enjoyed it. Nonetheless, although it is a bit more expensive, our absolute favorite and top choice remains the "tokubetsu" or special kaiseki box. The regular Sushi Taro kaiseki box, however, would, definitely be the next runner-up.

Friday, December 11, 2020

Basil and pine nuts quick bread バジルと松の実の速成パン

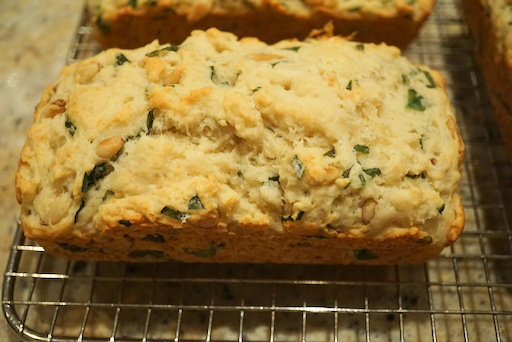
 My wife made this quick bread as an effort to use more of the basil we are growing in our windowsill herb garden. In addition to the basil, it has pine nuts and parmesan cheese. So it is a kind-of disaggregated “pesto” bread.  This is a savory quick bread which is good for breakfast or even as an hors d’oeuvre with wine.


The cut surface shows basil and pine nuts.


Ingredients: (three small loaves)
2 cups AP flour
1 1/2 tsp baking powder<
1/2 tsp baking soda
1 tsp salt
1 cup buttermilk
1 large egg
1/4 cup olive oil
1/2 cup pine nuts, toasted
1/2 cup grated Parmesan cheese
3 tbs minced fresh basil (or more to taste)

Directions:
Preheat oven to 350F.
Butter the three small loaf pans (5x3 inch).
In a large bowl, whisk together the flour, baking powder, baking soda, and salt. Stir in the cheese and minced basil.
In a medium bowl, whisk together the butter milk, egg and olive oil.
Pour the liquid ingredients to the dry ingredients, stir together until just combined.
Fold in the pine nuts.
Bake 30-35 minutes at 350F
Let it cool down for 15 minutes and remove the loaves

This bread is very flavorful. It is really good lightly toasted with melted butter. Since it is late in the season, the basil taste was a bit muted but still present. 

Tuesday, December 8, 2020

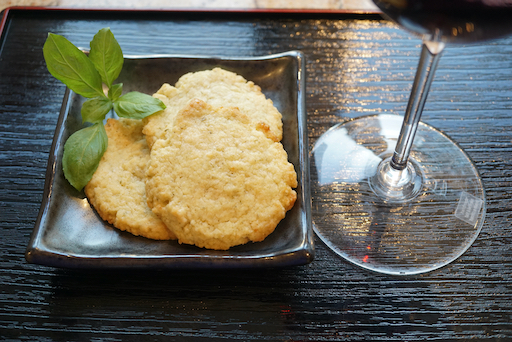
Lemon basil shortbread cookie レモンバジルクッキー

This is a continuation of my wife’s attempt to use more of the basil we are growing in our window sill herb garden. This is a savory cookie/shortbread which goes very well with red wine. My wife found the original recipe on line somewhere.


We had this with DAOU Vineyards Pessimist Red Blend 2018 which is Petit syrah based. Our recent favorite/house wine.


Ingredients: (18 cookies)
1 cup AP flour
1/2 cup sugar
1/2 cup unsalted butter, cold, cut into pieces
2 tbs sliced basil (or more to taste)
grated zest from one lemon
1 tbs lemon juice (or more to taste)
1/4 tsp kosher salt

Directions:
Preheat oven to 375F
Line cookie sheet with parchment paper
Add all ingredients to the food processor and mix (#1)
Using a small ice cream scoop, portion out the dough (#2)
Using the palm (or the lightly floured bottom of a glass) , press the ball into flat disks (#3)
Bake 7-8 minutes at 375F (#4)
Let cool on a cooling rack


The lemon flavors come through strongly contrasts nicely with the sweetness and is pleasantly refreshing. After one day in the refrigerator, the basil flavor began to surface more strongly. Somehow this cookie went well with the red wine we were having. My wife has made quite a good variety of savory cookies. This is another good one.

Saturday, December 5, 2020

Renkon salad 蓮根サラダ

This is a simple salad made using renkon. This is not even a recipe. 


Besides the renkon, I added blanched broccoli and skinned Campari tomato and dressed them with Yuzu mayonnaise which I concocted from Hellman’s mayonnaise. 


Ingredients: (amounts are all arbitrary)
Fresh renkon, skinned and cut into wedge-shaped bite-size chunks (called “rangeri” 乱切りby cutting on bias,  turn 45 degree again cutting on bias.
Boil it in water with a splash of rice vinegar for 10 minutes, drain and let cool.
Blanched broccoli floret and skinned Campari tomato.

Dressing:
1tbs Hellman’s mayonnaise
1 tsp of Yuzu juice (from the bottle)
1/4 tsp. sugar

This dressing tastes really similar to the commercial Yuzu mayonnaise we bought recently. This combination of vegetables works well—the nice crunchy texture of renkon and slightly less crunchy broccoli.

Wednesday, December 2, 2020

Renkon balls レンコンまんじゅう

This dish is the result of an unexpected “silver lining” derived from the Covid epidemic. Because of Covid, we decided as a safety precaution, not to go to the grocery store but rather have groceries delivered. This forced us out of our usual routines and by necessity introduced us to new options. One of which was buying groceries from HMart Korean grocery store via the Instacart. As a benefit, we are now getting items which were not available from our usual grocery stores. One such item is fresh “reckon” 蓮根 or lotus root. (It is the floating stalk, not the root of a water lily). Even at our Japanese grocery store, the only reckon we could get was cleaned, boiled and sold in a package. It is easier to use than fresh renkon but it limits the dishes that can be made from it. For example, I could not have made this renkon ball or dumpling  dish レンコンまんじゅう shown below from packaged prepared renkon. But with fresh renkon available I could. I served the dumplings in a very gentle broth, with garnishes of edamame 枝豆, and simply fried reckon slices.


Reckon is an interesting vegetable. Even after cooking, it remains crunchy but grated and made into dumplings, the consistency changes completely into the consistency of “mochi-mochi” もちもち or like-fresh rice cake. I added shrimp and edamame to the dumpling. As a garnish I added simply fried renkon  which gave a nice contrasting  crunchy texture.


The other evening, I served three renkon dishes. From the left, Nitsuke 煮付け, the center is this renkon ball or dumpling dish but I added one fish ball made from blue fish, the right is renkon salad れんこんサラダ. 


In this nitsuke dish, renkon remains crunchy.


Boiled  renkon (again remains crunchy), blanched broccoli and skinned Campari tomato dressed in Yuzu mayonnaise. Since we used up the store bought Yuzu mayonnaise, I made my version by mixing Hellman’s mayo, yuzu juice (from the bottle) and a pinch of sugar . This really emulated the commercial Yuzu mayonnaise we got earlier.


Instructions for the renkon balls

Ingredients:
One segment of fresh renkon (#1) (after grated, #4, it was slightly more than 700grams)
2 tbs potato starch
3 large shrimp, thawed, shell removed and cut into small chunks then salted
10-15 shelled edamame

For broth
1 cup kelp and bonito broth (I used a dashi pack)
1 tbs of white dashi “shirt-dashi” 白だし seasoning or 1tbs each mirin and light colored soy sauce (or to taste).

Directions:
One segment of fresh renkon (#1).
Remove the ends of the segment of renkon and peel the skin (#2 and #3)
Finely grate the renkon and drain to remove excess moisture (#4)
Mix in the corn starch, shrimp and edamame. Make small balls about one inch in diameter.
Deep fry at 300-320 F for 7-10 minutes (#5)
I also fried sliced and quartered renkon
Drain (#6)


Assembly:
I cut one renkon ball in half and placed the halves in a bowl. I added the fried renkon and edamame and poured in the hot broth. You can also reheat everything in the broth and serve.

This is a very good dish. The contrast of elastic texture of the renkon balls and crunchy fried renkon is wonderful. The shrimp has similar texture to the renkon ball and since it was salted, it imparts briny salty burst of flavors. I made the broth very gentle and light which also went well.

Sunday, November 29, 2020

Yellowtail marinaded in sake lee ハマチの粕漬け

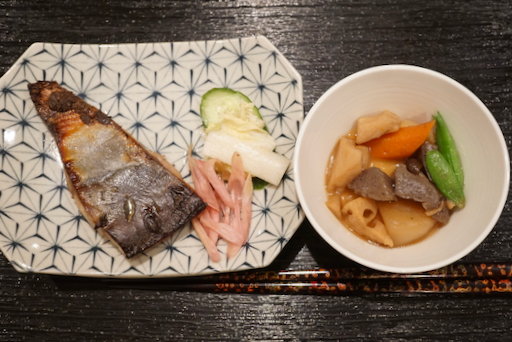
This was the last of the whole fresh yellowtail. I marinated the filet in sake lee 酒粕 or "Kasu-zuke" 粕漬け. Since I did not have a time to cook this during the week, the fish marinated for a week which was a bit too long. I also made Japanese stewed vegetable  "nituske" 煮付け as a side.


I broiled the fish in our toaster oven.


The Japanese vegetable stew included lotus root  or "renkon" レンコン, daikon 大根、carrot, and "konnyaku" こんにゃく. I added blanched and salt broth sugar snaps スナップ豌豆の塩びたし at the time of serving.


Ingredients:
Sake lee 300grams
Red miso 30grams
Sugar 3 tbs
Salt 1/2 tsp
Sake to loosen up the marinade if too stiff,

Directions:
I added half of the sake lee mixture in the bottom of a sealable container and placed cheese cloth (after washing to remove any lint). I put in the filets and then covered them with another layer of cheese cloth. I put the remaining sake lee mixture on top. I let it marinate in the refrigerator (for a week as it turned out).


This was a bit over-marinated. I started broiling on the flesh side first as shown below in the toaster oven.


When the fish is 70% done, I flipped it and broiled the skin side. This would have been perfect if I cooked the fish after 2-3 days. Nonetheless this was good . The fish flesh was firmer than if it was marinated for less time (moisture was leached out). Still, we enjoyed this.

Thursday, November 26, 2020

Yellowtail burger はまちバーガー

 I was trying to use all parts of the whole yellowtail I got from Hmart through Instacart. I scraped off all the meat from the bone as well as the meat close to the end of the tail. I minced it but the amount was not enough to make a substantial dish. So I decided to make a yellowtail burger. As a binder and to make the "meat" go further I added “hanpen ” はんぺん. It is steamed Japanese fish cake made of white fish meat and egg white and came pre-made in a package. I served the resulting burger as a lunch with leftover shiitake mushroom risotto, sautéed pencil asparagus and scrambled egg with tomato.


The yellowtail hamburger came out rather soft and tender thanks to the hanpen but the surface was nicely browned with a slight crunch. 


Ingredients:
Yellowfin meat scraped off from the bone and the end of the tail, finely minced (I am not sure how much this was but probably less than 200 grams)
1/3 hanpen, thawed, cut into small cubes
1/2 egg, beaten
2 shiitake mushroom, both stalks and caps finely chopped
1 tsp of red miso
1/2 tsp mirin
Pinch of salt
Vegetable oil for cooking

Directions:
In a plastic cylinder (which came with the emersion blender), add the hanpen and the egg. Using the emersion blender make a smooth mixture. Add the miso and the seasoning and blend. Add the yellowtail meat and mix with a silicon spatula. Dump the mixture on a lightly oiled plate, divide in half and form two oval disks, half inch thick. In a non-stick fry pan, on medium-low heat add the oil and slide in the disks. I cooked one side about 5 minutes and turned the burger over and cooked another 3-4 minutes until done.


This was rather gentle tasting and tender fish burger. The miso flavor really made it. This was nice light lunch.

Monday, November 23, 2020

Simmered yellowtail head ハマチの兜煮

For many non-Japanese (and even for some Japanese I suppose), this may not look attractive but stewed fish head is a classic Japanese dish and does have a quite good amount of meat to enjoy. Even my wife likes stewed fish heads. I made this from the yellowtail fish I bought recently from Hmart and was part of my effort to make sure none of the fish went to waste.  The classic fish used for this dish is perch or “Tai” 鯛. I have made this using salmon head which was very good. This yellowtail head was not very big (I should not have removed the collar or “kama” which I froze for later use. It would have added more meat). I simmered the head in seasoned broth with daikon.


Ingredients: (for two servings)
One yellowtail head, cut into two lengthwise (requires a heavy chef’s knife)
Daikon, peeled and cut into 4 one inch thick rounds
Ginger, 4-5 slices
100ml sake
100ml water
2tbs mirin
2tbs soy sauce
1 tsp sugar

Directions:
Place the two halves of the fish head in a sauce pan (they should fit snuggly).
Add the sake and water and simmer for 10-15 minutes with folded aluminum foil as an inner lid or “otoshi-buta” until cooked through. 
Add the mirin, soy sauce and sugar (I also added rounds of daikon which were precooked in water with some rice grains). I cooked until only a small amount of liquid remained (15-20minutes).

I served the fish heads with daikon and added sugar snaps cooked in salt broth スナップ豌豆の塩びたし. This was quite good. The seasoned broth was a flavorful part of the serving as were the daikon which absorbed the flavor or the broth and were nice and tender. The fish cheek meat, as is the case with other meat sources such as beef or pork was the best part of the stew. Next time I will not remove the collars since they would have provided a bit more meat.

Friday, November 20, 2020

Shelled ginko nuts 殻付き銀杏

Because of Covid, it is not possible to go to a restaurant for a “sit down” meal so, instead, we are doing “take-out” sashimi and sushi from Tako Grill regularly. Since Mr. Segawa’s restaurant is essentially closed for  sit down customers, he expanded his business into groceries by adding frozen and refrigerated cabinets stocked with many Japanese grocery items. Every time I go there, I get some of  these in addition to the take-out. One such time, Mr. Segawa was kind enough to include some matsutake soup that he made. It was really good. Besides all the lovely ingredients such as matsutake  松茸,  chicken,  "edamame"  it also included "ginnan" ginko nuts. We love ginko nuts! Having them in the soup reminded us that we used to get canned  boiled "gin-nan" 銀杏 ginko nuts. For some reason they have totally disappeared and we have not had ginko nuts for quite some time. I asked Mr. Segawa, if we could buy ginko nuts as groceries from him. He was good enough to provide some with the shells on (see below). We were delighted but, to be honest, I have never dealt with ginko nuts in the shell.


So I quickly searched on-line and found three ways to prepare them: 1. Place the ginko nuts in a paper envelope and microwave it until the shell cracks. 2. Dry roast them in a frying pan until the shell cracks, 3. Crack the shell remove the nuts and gently boil for few minutes making sure the nuts are submerged all the time and then remove the brown inner skin while hot. I tried the 2nd method on some of the nuts, i.e. dry roasting them in a frying pan.  The shells did not crack (although one did "explode"—quite impressive). I cracked open the remaining un-cracked nuts but they were over cooked, dry, with burned spots and taste. So, I decided to try the third method.

I cracked the shells using the kitchen scissors which has a nut cracking device near the handles. It was not too difficult but I had to be careful not to damage the nuts inside. Some of the brown inner skin came off when the shell was remove but, for many, the brown skin remained (picture below).


I then placed the nuts in salted gently boiling water. They stayed submerged without much intervention.


After few minutes, I drained the nuts and using a sheet of paper towel, removed the inner brown skin.


This was a success. Here I used them to top cold chawanmushi 茶碗蒸し along with edamame 枝豆 and ikura.


 We really enjoyed this. Definitely the taste of autumn.

Tuesday, November 17, 2020

Two premium types of Japanese rice from "The rice factory" 北海道ななつぼしと富山県コシヒカリ

When COVID pandemic started, we tried to buy a bag of rice at our Japanese grocery store and realized all  15 Lb. bags of the rice we usually use were sold out. The only rice left was a 5 pound bag of very expensive imported Japanese "Koshihikari" コシヒカリ rice from Niigata 新潟県. Since we did not have any choice, we bought it. But when we cooked the rice, we realized it was much better rice than our usual California Koshihikari rice "Kagayaki" かがやき which is grown on dry field (so called "Okabo" 陸稲) rather than paddy. Later  15 Lb. bags of Kagayaki rice were again available but we decided to finish up the expensive rice first. After we finished it, I was curious about what other kinds of Japanese rice may be available. So I started looking on the internet and came across a store in New York called "The rice factory". This store imports unpolished rice from Japan and as the orders come in they polish the rice to the customer's specifications (brown, 50%, 75% and white rice). Since the 2020 new crop rice is about to come in (according to the site, they start selling new-crop in January 2021), many of the varieties they advertise were out of stock. I ended up getting "Hokkaido Nanatsu-boshi" 北海道ななつぼし(meaning 7 stars) (Hokkaido for obvious reasons, also see addendum below) and "Toyama Koshihikari" 富山県コシヒカリ.


This site also includes rice charts akin to the sake charts at Tippsy sake. I wanted "Hokkaido Yume Pirika" which was out of stock. "Nanatsuboshi" according to this chart is in the bit "tough" or "firm" category and not as sticky as other rice. "Kosjihikari" on the other hand is more sticky and soft.


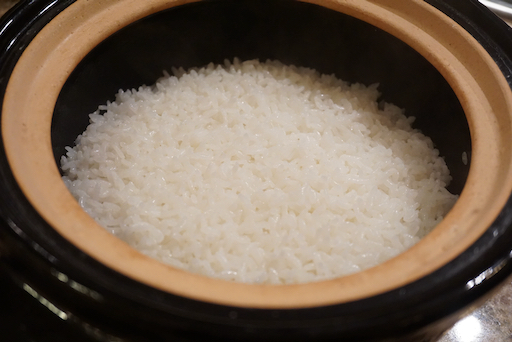
So, we decided to do some rice tasting. I wheeled out our "Kamado-san" かまどさん earthen ware rice cooker and cooked the "nanatsuboshi" first.


It is quite shiny and the rice kernels were separate; not sticking together too much. The texture is exactly a the chart indicated. We did not dislike it but we prefer rice that is a bit softer. We did discover however, that when we re-heated this rice (microwave), it came out much better than our usual California rice. We also found it made excellent risotto. We used it to make Shiitake mushroom risotto from the leftover cooked rice and it was really good. Since the rice kernels kept their consistency, it added a good (not quite al-dente) texture.

Few days later, we tried the "koshihikari". 


We enjoyed Koshihikari with salmon belly , salt broth soaked sugar snap, skinned and sliced Campari tomato with Yuzu mayonnaise and cucumber and wakame dressed is sumiso as a shime one evening. It was softer and stickier than the previous Hokkaido rice; definitely better but less than our expectation. 


I think, when the new crop becomes available we should try "Yume Pirika" ("Yume" means "dream" in Japanese and "pirika" is "beautiful" in Ainu, the original native language of  Hokkaido.

Addendum: One more interesting fact about Hokkaido rice is that when I was growing up, because of the harsh cold, Hokkaido was not the optimum place to grow rice. As a result the rice that was produced was very low quality. But, in recent years, because of the new cultivars and, maybe, because of global warming, Hokkaido rice is now being hailed as one of the best in Japan such as "Yume Pirika". At least one small benefit from global warming ?