My wife grew up in rural Pennsylvania and although she is not Pennsylvania Dutch herself. She is very fond of the many Pennsylvania Dutch dishes that she ate as a child. Among these were “Shoo-fly pie” and “Funny cake”. For many years, she had to bake them herself, if she wanted them, since they are strictly Pennsylvania regional specialties not available elsewhere. Especially funny cake which is unique specifically to the area where she grew up. (Even a Pennsylvania Dutch specialty food store in a nearby town in Maryland said they never even heard of it when we asked if they had funny cake.) Then she discovered that a bakery near where she grew up made these pies. They were extremely good quality. (“Probably better than what I was making,” she claimed). (This was her assessment not mine). In addition, joy-of-joys, she found she could mail order them. So for quite some time this was her source of these delicacies and she didn’t have to bake them herself. But during and after COVID, the bakery stopped their mail order service. After some hiatus she decided that if she wanted these childhood favorites, like the “old days” she would again have to go back to making them herself. We naturally assumed, we posted the recipes for funny cake and shoo-fly pie before but to our surprise we have not posted either. So my wife sprang into action and made a funny cake (picture #1). Although we usually do not partake of substantial desserts like cake, in this case we clearly had to make an exception.

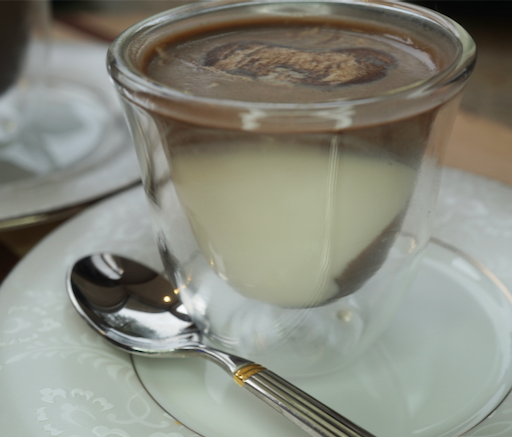
One interesting thing about this cake is that the chocolate “goo” layer is made by pouring the liquid chocolate mixture over the batter in the pan before going into the oven. Then during cooking it forms a chocolate jelly-like layer on the bottom while the batter forms a cake layer above the chocolate (picture #2). Hence the name funny cake. But this is actually a cake/pie since it is made in a pie crust.
The recipe is based on
the recipe on-line at “Serious Eats” but a modification was made to increase the chocolate “goo” on the bottom.
Ingredients 1 store-bought pie crust or any recipe you may have for pie crust.
For the Cake:
144g all-purpose flour (15 ounces; 1 1/8 cups all-purpose flour)
1 1/2 teaspoons (6g) baking powder
1/4 teaspoon kosher salt; for table salt, use half as much by volume
56g unsalted butter (2 ounces; 4 tablespoons), softened
150g granulated sugar (about 5 1/4 ounces; 3/4 cup)
1 large egg, at room temperature
1 teaspoon vanilla extract
1/2 cup (120ml) whole milk
For the Chocolate Sauce: (for less sweet goo reduce the sugar to taste)
200g granulated sugar (7 ounces; 1 cup)
52g unsweetened cocoa powder (about 2 ounce; 2/3 cup) (Since this is Pennsylvania Dutch in origin the chocolate has to be Hersheys).
2/3 cup (160ml) boiling water
1 teaspoon vanilla extract
Directions:
Pie crust: On a clean, lightly floured work surface, roll pie crust into a 12-inch circle about 1/8 inches thick. Transfer to 8-inch pie plate. Cover with plastic wrap and refrigerate until cold, at least 1 hour, or up to 24 hours. Adjust oven rack to middle position and preheat to 350°F (175°C).
For the Chocolate Sauce:
In a 2 cup heat-proof spouted measuring cup, whisk sugar and cocoa powder to combine. Add boiling water and vanilla extract and whisk until sugar and cocoa powder dissolve and no dry bits remain in the bottom of the cup, about 20 seconds. Sauce will be very fluid. let it cool somewhat.
For the Cake:
In a medium bowl, whisk flour, baking powder, and salt together. Place butter in a separate medium bowl and, using an electric mixer fitted with beaters, whip butter on high speed until creamy, about 30 seconds. Add sugar and mix on medium speed until light and fluffy, about 1 minute more. Add egg and vanilla extract and mix on high speed until fully incorporated, about 30 seconds. Using a flexible spatula, scrape down sides of the bowl. Add half of the dry ingredients to the butter- egg mixture, then start mixer on low speed and gradually increase to medium speed, until no dry flour remains, about 30 seconds. On low speed, add half of the milk and mix until fully incorporated, about 30 seconds. Scrape down the bowl as needed. Repeat with remaining flour and milk, mixing until pale and creamy with no visible pockets of flour, about 1 minute. Do not overmix. Set aside.
Assembly: Spoon batter into prepared pie crust in 3 to 4 large dollops. Do not spread. Using a butter knife, swirl batter. Briefly whisk chocolate syrup to recombine, then pour over batter, beginning around outer edge into the middle. Bake until the crust and cake are a deep golden brown, cake is risen with a few cracks, and a cake tester or sharp knife inserted in the center comes out clean, 55 to 60 minutes. Remove cake from oven and cool on wire rack.
Oh the joy of a childhood favorite rediscovered. (My wife decided her home baked funny cake, of whatever quality, was infinitely better than no funny cake). This is truely unique but extremely good. Not to be missed.


