Saturday, July 31, 2021

Nagaimo dressed in cod roe 長芋の鱈子和え

I started going back to our Japanese grocery store again. The last time, I got a fairly good hamachi sashimi. This time, I hit the jack pot! I knew that the Japanese grocery store gets sashimi bluefin tuna or “hon-maguro” or “kuro-maguro” once a month but I did not try to find out when and never went specifically to get sashimi maguro. Just by happenstance I went just a day after they got the maguro. So I had a choice of chu-toro or akami maguro sashimi. I chose a package of “akami” with two good sized portions and also, as an added benefit, some hamachi. That evening, we had a combination sashimi feast of tuna 鮪, hamachi はまち, vinegar cured mackerel しめ鯖 (frozen). I also made imitation “negitoro” 擬制ねぎとろ from this tuna sashimi because the tuna portions were not regular “saku” 柵 blocks for sashimi and I ended up with some odd pieces after slicing the sashimi pieces.  Compared to our usual imitation negitoro which I make from a frozen block of yellofin tuna, this was much much better.  I did not take any pictures, however. Next evening, I served the remaining sashimi, deep fried fish cake or “satsuma-age” さつま揚げ which I also got at the Japanese grocery store (heated in the toaster oven served with soy sauce and grated ginger). I also made a sort of new dish from cod-roe and nagaimo.


Here is the close up of the sashimi dish which I served with dashimaki だし巻き Japanese omelet and sugar snap in salt broth スナップ豌豆の塩びたし.


The next picture shows the “new” nagaimo dish I made. I did this because I had thawed “tarako” たらこ cod roe and found out the membrane in the back was already broken. So, I removed the roe from the remaining sac, mixed it with a small amount of sake, although I did not have a firm idea at the time of what I would make from it. I then remembered that we had a small segment of  nagaimo 長芋 in the refrigerator which had to be used soon. So I just combined the two.  I garnished it with a chiffonade  of perilla and nori. This was a good dish. This tarako was a bit on the salty side but the addition of sake in combination of the crunchy refreshing nagaimo, really worked.


Ingredients:
1 inch segment of nagaimo, skinned, sliced and cut into fat match sticks.
1 tsp sake
One sac of salted tarako, cod roe
Perilla leaves and nori chiffonade for garnish

Direction:
Soak the nagaimo sticks in water with a splash of rice vinegar and gently wash to remove surface sliminess. Blot dry using a sheet of paper towel.
Remove the roe from the sac using the back of the knife and mix it with 1 tsp of sake. Taste and if not salty enough, add soy sauce (mine was salty enough).
Dress the nagaimo and garnish it with the perilla.

So every time I go to our Japanese grocery store, we have a number of  “goodies” for dinner that evening.

Tuesday, July 27, 2021

Chashu egg v2 チャーシューエッグ

 Chashu pork or “yaki-buta” 焼き豚 can be made from different cuts of pork. I used to make it from pork loin but it tends to be too dry since it does not contain enough fat. I also made it from pork belly which is good but it is a bit excessively fatty for this type of preparation. Because of the COVID, we started having groceries delivered. They come directly from the warehouse (I suppose) rather than the retail store so some items are different from what is available in the store. One of them is pork shoulder/butt. This is a cut we have never seen at the store. It is a large portion; either shoulder or butt but it is always called “shoulder”.  The butt is composed of a  portion of butt (naturally) including thigh down to the knee joint. Sometimes the skin is intact. The shoulder cut contains a good portion of scapula and surrounding meat. It is quite a large amount of meat. The only way to cook this cut as a whole piece is probably “true” Southern style barbecue, cooked for long time at low temperature. Since we are not equipped/skilled to do such a preparation, I reduce the piece into more manageable portions by removing the skin (if present), and bone, then dividing the meat into three potions;  the largest roast for cooking in our Weber grill, the smaller roast for Chashu and the rest cut in to small chunks for stew or curry. This time we got  butt and the portion I made into Chashu was a perfect mixture of fat and meat. So I made Chashu egg  which is the combination of sunny-side-up egg (I used home pasteurized egg) with a thick slice of Chashu.


I think this is the perfect combination. The chashu is not too fatty or dry. You could eat or not eat the outside rather thick fat rind. Although it is a bit of work to prepare this big bone-in cut of pork, it is very reasonably priced and the meat we get out of it is quite good.

Saturday, July 24, 2021

Buttermilk ice cream バターミルクアイスクリーム

Since my wife started making heirloom buttermilk, she has been exploring recipes to use the buttermilk she makes. One of the reasons is that since this is "heirloom", the prior batch is used to inoculate and make the next batch. She was worried if she does not make the next batch in a reasonable amount of time (few weeks??), the inoculant may get too weak to make the next batch. So she is trying to use the buttermilk at a regular rate. She made several varieties of buttermilk panna cotta. This time, she made buttermilk ice cream.


She topped the ice cream with peach puree. The ice cream was very good with a nice mild buttermilk flavor and the peach puree went well with it. (the original peach was too hard and the puree was much better).


We mentioned our old (then) ice cream maker with a compressor (self-freezing) in a blog in 2017. After that post, we again completely forgot about the ice cream maker until now. We got it out of the basement. I first tested it with just water to see if the compressor still worked. Amazingly, it did! The bottom of the chamber got cold and formed ice in a few minutes. Then, I tested the churner. It worked as well. This machine must be close to 30 years old and we are amazed that it still works. In any case, my wife was “good to go” for making buttermilk ice cream.


Ingredients:
1 cup (200 g) sugar
3 Tbs. (20 g) cornstarch
1/8 tsp. (0.5) Kosher salt
2 large eggs (100 g). I used pasteurized eggs.
1 cup (225 g) heavy cream
1 1/4 cups (285 g) buttermilk

Directions:
In a sauce pan mix together everything except the buttermilk. (I used a double boiler to reduce the risk of having the mixture curdle.) Keep stirring on medium heat until the mixture starts to thicken. According to the instructions, when the mixture starts to bubble keep stirring for at least a minute to neutralize the starch-dissolving enzyme found in egg yolks. Remove from the heat and strain the mixture to remove any lumps that may have formed. When the mixture has cooled to room temperature stir in the buttermilk. Refrigerate the the mixture until it is about 40 degrees. (I used an ice bath to reduce the temperature of the mixture.) Churn the mixture according to the instructions for the ice cream maker. The final product is shown in the following picture.


This was a wonderful ice cream. It was smooth and creamy. It had a nice bright flavor with an interesting tanginess (from the buttermilk ?) that kept it from being cloying or boring. It also had a somewhat vanilla flavor (even though no vanilla was added). Unlike most recipes for buttermilk ice cream, some of which call for as many as 6 egg yolks, this one contained only two whole eggs. The recipe said that the addition of the cornstarch replaced the need for so many egg yolks to achieve its smooth creamy texture. Having replaced the egg yolks with cornstarch we would like to think that this ice cream was better for us than the other egg yolk based recipes. (Although, in all honesty we would have to admit that the amount of heavy cream used may negate whatever “brownie points” we may have gotten in the health department for the reduction in egg yolks.) Even though, as I have mentioned before, in general, I do not like buttermilk, I had absolutely no trouble eating more than my share of this ice cream. And again, I am astounded that the ice cream maker still works. 

Wednesday, July 21, 2021

Blueberry oatmeal muffin オーツ麦入りブルーベリーマフィン

This is my wife's continuing muffin project. We got fairly good blueberries. Since she has made quite few kinds of blueberry muffins, she wanted to do something different. She found this recipe for a blueberry muffin made with rolled oats.


Ingredients:
1 cup (240 Ml) milk
1 cup (80G) old fashioned whole rolled oats. (Steel cut oats, quick oats, or instant oats won’t work)
1 1/4 (156 g) AP flour
1 tsp. Baking powder
1/2 tsp. Baking soda
1/2 tsp. Ground cinnamon
1/2 tsp salt
1/2 cup (115 g) butter melted and slightly cooled
1/2 cup (120 ml) honey
1 egg
1 tsp vanilla extract
1 cup (190 g) blueberries

Directions:
Combine the milk and oats. Set aside for 20 minutes for the oats to soak up the milk. Mix the dry ingredients from the flour through the salt in a bowl then set aside. Whisk the wet ingredients from the butter through the vanilla together in another bowl. Add the wet ingredients to the dry ingredients and stir just to combine. Add the oats and any remaining milk and stir to combine. Fold in the blueberries. Scoop the batter into the heavily greased muffin cups. Bake for 5 minutes at 425 then lower the temperature to 350 degrees and continue cooking an additional 15 minutes or until a cake tester inserted in a center muffin comes out clean. Let cool for 5 minutes before taking them out of the pan.

The oats seemed to completely incorporate into the overall texture of the muffin which was very tender. (You wouldn’t know oats are included if you weren’t told.) The cinnamon flavor is not something I usually associate with a spring/summer dish (more a fall flavor). So that made these blueberry muffins very different from the usual. The blueberries are in season and were very good. They truly “made” this muffin. 

Sunday, July 18, 2021

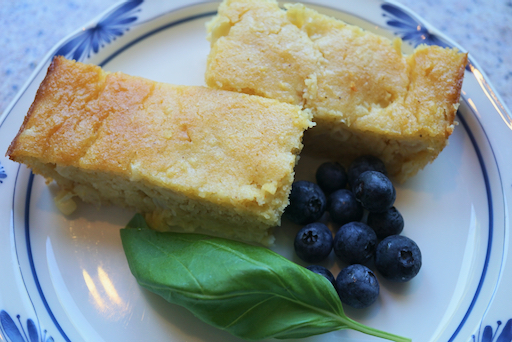
Corn pudding (bread/cake ?) コーンプディング/ケーキ

This is the season for fresh corn. We got a large batch that was very sweet. After making our usual fresh corn dishes we still had some left so my wife found this recipe on the internet. Corn pudding seems to be a staple dish in the south. Most of the recipes involved frozen corn and packaged corn bread mix. This was one of the few that didn't involve those components so my wife decided to try it. It really accentuates the sweetness and taste of corn and is much easier to eat than corn-on-the-cob. 


Ingredients:
2 cups of corn (1 cup to puree, 1 cup raw corn = 3/4 cup puree) (1 cup to add whole to the batter). Cooked and removed from the cob. There is flexibility in the amount of puree you use. See 2X below)
8 Tbs. (115 g.) butter
1/2 tsp. salt
1/4 tsp. cayenne pepper or to taste
3/4 cup (180 g.) sour cream (or 3/4 cup ricotta cheese results in a firmer cake. We prefer this texure) or (1/2 cup sour cream and 1/4 cup ricotta cheese this results in a softer cake; more like a mixture between pudding and cake)
2 large eggs
1 1/2 Tbs. (20 g,) granulated sugar
2 1/4 Tsp. baking powder
7 Tbs. (55 g.) AP flour
6 Tbs. (55 g.) cornmeal

Ingredients X2
2 cups of pureed corn (I made this with 1 cup of puree. Because I miscalculated and that was all I had and it came out just fine)
16 Tbs. (2 sticks) or (230 g.) butter 
1 tsp. salt
1/2 tsp. cayenne pepper or to taste
1 1/2 cup (360 g.) sour cream (or 1 1/2 cup ricotta cheese results in a firmer cake. We prefer this texure) or (1 cup ricotta  and 1/2 cup sour cream this results in a softer cake; more like a mixture between pudding and cake)
 4 large eggs
3 Tbs. (40 g,) granulated sugar
2 1/2 Tsp. baking powder
14 Tbs. (110 g) Ap Flour
12 Tbs. (110 g) cornmeal 


Directions:
Take 1 cup of the corn and puree it in a food blender and set aside. Brown the butter in a sauce pan. Reserve 2 Tbs. of the browned butter and set aside (to be put on the pudding once it is cooked). Mix the pureed corn, whole corn, butter, salt, pepper and sour cream together. Let cool. Once cooled whisk in the eggs. Then the baking powder, flour and cornmeal. Pour mixture into a greased 6 X 10 inch pyrex baking dish. Cook in a 350 degree oven for 40 to 45 minutes until a cake tester comes out clean. Pour the reserved Tbs. of browned butter over the top.

With all the butter, sour cream and eggs this is not the most dietetic dish but it sure is good. It is more like a moist corn bread (cake?) than a pudding. The sweet corn flavor permeates. The whole corn gives a nice crunch and an additional burst of corn sweetness. Hard not to eat the whole thing in one sitting. 

Thursday, July 15, 2021

Mint panna cotta ミントパナコタ

 Now that my wife is making buttermilk she has to come up with ways to use it. It is an heirloom culture so it can be used over and over again but it has to be used every week or so to stay healthy. So she is experimenting with different variations of dessert panna cotta. Or as she refers to it “variations on a theme by Paganini*”. No hardship for me. Keep them coming.  

*  This expression refers to a work by Johannes Brahms based on the caprice No. 24 in A minor by Niccolo Paganini. The work consists of two books. Each opens with the theme Paganini’s caprice No. 24 followed by fourteen variations. Hence variations (of panna cotta) based on a theme. 


Ingredients:
1 tsp gelatin
1 1/2 tsp water
1/2 cup 4 % milk
1 cup fresh mint leaves bruised with a meat pounder or torn into pieces (to release more flavor)
1/4 cup sugar
1/2 tsp vanilla
1 1/2 cup buttermilk

Sauce:
1/2 cup water
1 cup fresh mint bruised
1/4 cup sugar


Directions:
Bloom the gelatin in the water. Add the milk and mint to a sauce pan and gently heat to infuse the milk with the mint flavor. Continue gently heating until mint flavor is to taste (as shown in the second picture). Strain the milk mixture and put it back in the pan. Add the sugar and gently heat and stir until the sugar is dissolved. Let the milk mixture cool to room temperature. Add the buttermilk and vanilla. Distribute to the serving jars. Chill in the refridgerator until the mixture is firm.

For the sauce:
Put the water and mint in a sauce pan. Heat until the the water has a mint flavor to taste. Drain and return liquid to the sauce pan. Add the sugar and heat the mixture until the sugar has melted. When it has reached room temperature top off the serving jars with the mint sauce.

Again, this a very nice dessert. It is very creamy in texture. The mint flavor infuses throughout and very refreshing. Another good way to finish a meal.

Monday, July 12, 2021

Strawberry panna cotta いちごパナコタ

 My wife is into making panna cotta in some small jar we cam across recently. The amount is perfect for us as dessert. This time she made strawberry panna cotta. When we get fresh strawberry, I usually wash the strawberries, hull, cut into small pieces (small one quartered and large ones quartered and then halved). I place the strawberries in a sealable container, add some sugar (depending  on how sweet the strawberries are) and and triple sec  to taste. Then marinate them for a while in the refrigerator. This makes even not-so-good strawberries palatable and we eat as is or add it to the yogurt.  She used these marinated strawberries for panna cotta.


Ingredients:
1 tsp gelatin
1 1/2 Tbs. water
1/2 cup 4 % milk
1/4 cup sugar
1/2 cup strawberry puree (marinated strawberries as described above pureed)
1/2 tsp. vanilla
1 cup buttermilk

Sauce;
Strawberry puree to top off the jars

Directions:
Bloom the gelatin in the water. Warm the milk and sugar in a saucepan until the sugar is dissolved. Use the hot milk mixture to temper the bloomed gelatin until it is completely dissolved then add it back into the warm milk mixing to thoroughly combine. Add the strawberry puree and vanilla to the buttermilk and stir completely. When the milk sugar mixture has cooled to room temperature add the buttermilk mixture. Distribute to the serving jars (or containers). (Fills about 6 of the small jars). Put in the refridgerator until it becomes firm. When it is firm top with the rest of the strawberry puree.

This is a lovely refreshing dessert. The texture is very creamy. The bright slightly sweet strawberry flavor completely infuses the milk mixture and is very nice with the slight tang of the buttermilk. A perfect way to end a meal.

Friday, July 9, 2021

The 4th of July Pacific saury barbecue さんまの塩焼き、焼きおにぎり

 This year, instead of celebrating the 4th of July (Independence day) by firing up the Weber grill, we decided to fire up our ”Hibachi*" or "charcoal konro" 炭火コンロ. And, instead of grilling chicken, we decided to grill some pacific sauries or "sanma" さんま which had been hanging out in the freezer for some time. (My wife refers to these as "torpedo fish"). In the past, “sanma” which is a very bony fish was not considered “prime” eating and was very cheap. But in recent years, they are getting scarce and much more expensive.  According to the label on the package this group of three came from "Taiwan". Traditionally, fresh sanma is cooked with the innards intact but I cleaned these fish after thawing. I had posted and pontificated about sanma previously.  I salted them before grilling and served them with grated Daikon 大根おろし. We even found an appropriate long oval dish serving dish which appropriately accommodated this long heads-on fish as shown in the next picture.

*Digression alert: A Japanese style small charcoal-fired grill is called "hibachi" in the U.S. (or may be elsewhere also). But in Japan "hibachi" 火鉢 is not used for cooking but as a source of heat used in winter for warmth in traditional Japanese rooms. (Not in Hokkaido because it is too cold and an hibachi is not an adequate source of heat). The grills used for cooking are traditionally called "shichirin" 七輪. The modern name would be "charcoal or sumibi-konro".  In the old days, if grilling fish at home,  you would do this outside using a "shichirin" and charcoal fire. More recently, however, most of Japanese cook tops have a built-in fish grill which prevents smoking while grilling fish making "shichirin" obsolete. But, in my opinion, charcoal grilled fish is still the best!


Since the fish is oily, it makes a quite a good amount of smoke but cooks rather quickly.


Whenever we fire up the Japanese charcoal grill, my wife asks me to make grilled rice balls. I usually make a simple rice ball without any filling but this time she specifically asked for stuffing- mayo and mustard dressed salmon. So, I obliged. Since grilled rice ball takes much longer to cook than the fish, I started grilling the rice balls first while we enjoyed several small appetizers and cold sake. I posted how to make perfect grilled rice balls before. As far as we are concerned the best way to cook a rice ball is over a charcoal fire. Such perfection is displayed in the next picture. The high heat sears the outer layer into a toasty brown crust enhanced by the taste of the soy sauce mixture brushed on while it is cooking. The inside is soft and moist. The addition of the salmon stuffing further infuses a mayo/mustard/salmon/salty flavor. 


Once the rice balls were finished, I set them on edge over a cooler part of the grill to keep them warm while I grilled the fish. Our holiday meal is shown in all its splendor in the next picture.


Sanma are extremely boney fish and my wife is not as good at spitting out fish bones as I am. (This was demonstrated early in our marriage when I had to remove a fish bone from the back of my wife’s throat using a long nose plier.) But she is much better at deboning a fish with a knife than I am. So although “bone-out” is not quite the traditional way of serving "sanma", in the interest of safety, that is how we served it.  Seeing the pile of lovely fish meat next to the pile of recently removed bones somehow reminded me of the "Meguro-no sanma" story 目黒のサンマ which, again, I pontificated on before. In any case, this was very enjoyable holiday celebration; grilled sanma with grated daikon and soy sauce followed by grilled stuffed rice balls (we each finished one. My wife thinks the remaining rice balls will nicely heat up in our toaster oven. We will see).

Tuesday, July 6, 2021

Boursin cheese muffin ボーシンチーズマフィン

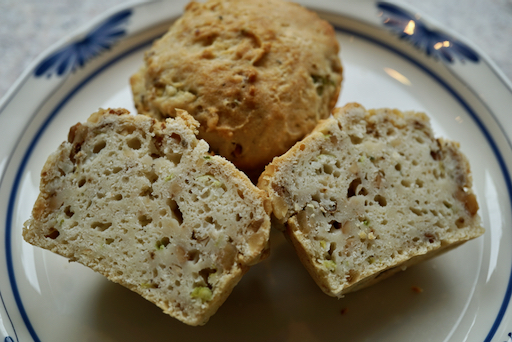
This is my wife's muffin project. This is rather unique. The muffin has Boursin cheese, scallion and garlic. Despite scallion and garlic, it is not too strong and has a nice moist cheesy texture. 


Ingredients: The original recipe did not fill a standard 12 muffin pan so I am showing the ingredients increased to 1 1/2 and and 2 times the original amount. The first increase would at least fill the pan. The second would make a full pan of generous muffins.

1 1/2 times increase
3 cups AP four
3 tsp baking powder
1/4 tsp salt
Black pepper
1 1/2 packages (8.5 oz.) boursin cheese
3 tbs butter
1 1/2 cup milk
2 eggs
3/4 cup walnuts
4 1/2 tbs. finely chopped scallions
1 1/2 cloves garlic

2 times the original recipe
4 cups AP four
4 tsp baking powder
1/4 tsp salt
Black pepper
2 packages boursin cheese
4 tbs butter
2 cups milk
2 eggs
1 cup walnuts
6 tbs. finely chopped scallions
2 cloves garlic

Directions:
Mix the dry ingredients, flour through pepper in a bowl. Set aside. Cream the cheese and butter together. Beat in the milk and eggs. Add the cheese mixture to the dry ingredients. Stir in the walnuts, scallions and garlic. Scoop the batter into the heavily greased muffin tins. Cook at 400 degrees for 18 to 25 minutes or until a cake tester inserted into one of the middle muffins comes out clean. Let cool for 5 minutes before attempting to remove from the pan.
These are hearty savory muffins. They have a dense almost cheese like consistency. The scallion flavor predominates but is not overwhelming. These are great muffins to have with a soup or stew for lunch or dinner. 

Saturday, July 3, 2021

Warm tofu with mushroom sauce 豆腐のキノコあんかけ

This was a dish I made sometime ago but somehow I did not post it. I made this dish one day to use up ingredients which need to be used quickly. I had portions of silken tofu which I kept in a sealable plastic container with water in the fridge, shimeji mushroom and fresh but pre-sliced shiitake mushroom (We specified whole fresh shiitake but we got a package of presliced shiitake mushrooms through the Instacart.) So, I came up with this dish which is a rather standard Japanese dish but I did not follow any recipe.


The sauce is thickened with potato starch slurry.  Dishes made with this kind of sauce are often called “an-kake” 餡掛け. This is a warm and soothing dish. It is basically vegetarian except for bonito in the dashi broth.


Ingredients (2 servings):
Half silken tofu divided into two portions
1 cup Japanese dashi broth (I made this from kelp and bonito flakes).
1/4 cup (or to taste) concentrated Japanese noodle sauce (from bottle)
1/2 scallion finely sliced
1 tsp potato starch or “Katakuri-ko” 片栗粉 make into “slurry” by adding 1 tbs water or sake.

Directions:
Heat the tofu in the simmering broth until warm (5-6 minutes).
Place the warmed tofu in bowels
Add the mushrooms to the broth and cook for 3-4 minutes
Add the noodle sauce and the starch slurries and thicken the sauce.
Add the scallion.
Pour the “ankake”sauce over the tofu and serve.


This is best served in cold weather but this is a very gentle smoothing dish with soft tofu and gentle taste of broth and mushrooms.