Monday, November 29, 2010

Exotic mushrooms and wild rice soup きのことワイルドライスのスープ

I am again drifting from the Izakaya theme but this is one of our favorite soup for special occasions. It is almost a cross between porridge and soup depending on how much wild rice I add. It can be certainly served as either "shime" (ending) or "opening" dish.

The original recipe came form the cookbook called "Openers", which has recipes and very artistic pictures of the appetizers and soups, i.e., "openers". We got this some years ago and it appears that this book is not available any longer. This soup can be a bit expensive to make depending on what kinds of exotic mushroom and types of wild rice are used. 

Mushrooms: For making soup stock, regular white button mushrooms are used, which will be pureed into the soup stock (see below). For the mushrooms in the soup, I used chanterelle, oyster (maitake, 舞茸), shiitake シイタケ, trumpet royale (very similar to eringi エリンギ or eryngii), alba clamshell, and brown clamshell (hon shimeji ホンシメジ) mushrooms this time. Cut them into relatively large pieces so that you can see and taste the mushrooms. Trumpet royale may be cut or torn along its length relatively thinly since it is rather firm. The amount and kinds of mushrooms you can use are totally up to you but using at least one exotic wild mushroom will make this soup special. Chantrelle and morel are two of my favorites and tend to be rather expensive.

Wild rice: Use 100% wild rice either true wild rice from the lakes of Minnesota or cultivated ones. I used the latter. Before adding to the soup, soak it in a hot water for one hour. Do not use a mixed wild rice and regular rice, which is often sold as "wild rice" in a ready-to-use box. You can not substitute wild rice with any other rice. The result will be totally different. So use wild rice. 

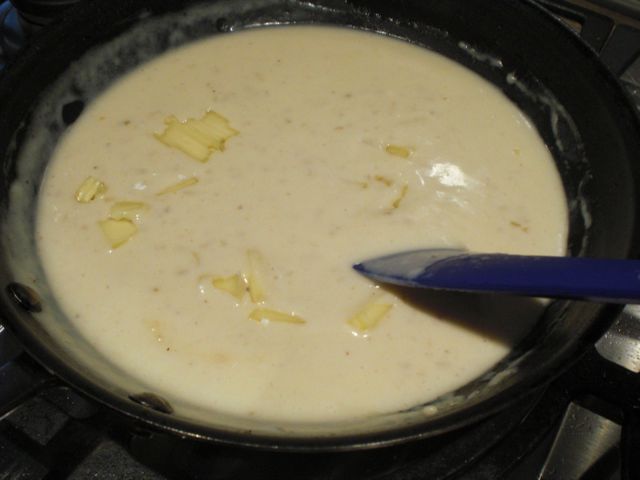
Mushroom Soup Stock: To make the soup stock, I sauteed the shallots, (thinly sliced, 5 medium), and carrot, rather finely chopped (one medium) in butter (2 tbs) in a large (12 inch) frying pan on a medium high flame for several minutes. It is ok to brown the butter in this process. I then add thinly sliced white button mushrooms (stem end removed, one package or about 15-20 small and medium ones) and sauté for 5-7 minutes. The reason I use a rather high heat is that the water exuded from the mushrooms needs to be quickly reduced leaving brown bits on the bottom of the pan. Deglaze with chicken stock (1/2 cup, my usual Swanson no-fat, low sodium) and turn down the flame to low. Put a tight fitting lid on the pan and simmer for 5 minutes. I add this to the stock pot with warm chicken broth (about 3 cups, again Swanson) on simmer. Using an immersion blender, I puree the solids in the soup stock. I put the pan in the sink to make spills easier to clean and blend. Once blended the pot goes back on the stove on simmer. 

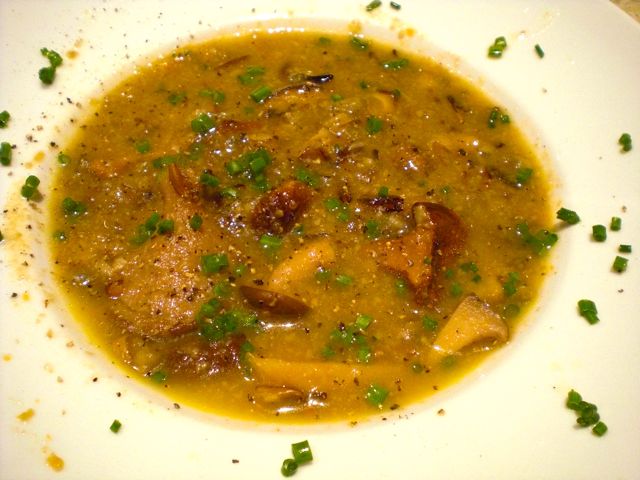
I sauteed the mixture of the mushrooms from above in a large frying pan on a high flame with butter (2 tbs) for several minutes until the mushrooms are soft and browned without any liquid remaining in the bottom of the pan (picture on the left). I deglaze with brandy (2-3 tbs, I used Christian Brothers but it is up to you to use Remy Martin XO here). Be careful since it will ignite (I pour the amount of brandy in a metal cup before deglazing and flambe-ing). Let the flame die down and add the mushrooms to the soup stock. Add the drained wild rice (I only had 1/2 cup but you could use more, up to about 1 cup). I seasoned with dried leaf savory (1/4 tbs, if you have fresh savory, use fresh, 1/2 tbs, but I do not like to use "ground" savory) and fresh chopped thyme (sparingly, thyme can be strong, I used the ones still surviving in our herb garden). Actually, I add fresh thyme towards the end of cooking. I let it simmer for about 40 minutes until the wild rice is cooked. I adjust the seasoning with salt and pepper. I served the soup garnished with chopped chives and freshly cracked black pepper.

This is a wonderful soup. In addition to all the flavors from the mushrooms, the wild rice really adds a nutty flavor as well as a thickness and unctuous mouth feel of the soup. We served this for Thanksgiving and Christmas in the past with great success. We had this with my wife's rye whole wheat bread tonight; an extremely satisfying combination. The wine we had was Bordeaux (unusual for us), Chateau Pavie-Macquin 2006. This is rather young and fruit-forward (for Brodeaux) without any funky nose. The earthy flavors of mushrooms went so well with this wine.

Saturday, November 27, 2010

Nabemono 鍋物

Nabe 鍋 means "pot". Nabemono is an all inclusive term of any hot pot dish but often the dish itself is called "nabe". Any dish you cook (usually on the table) in a pot (most often earthenware) with broth is called "nabe" or "nabemono". Sukiyaki  すき焼き, shabu-shabu しゃぶしゃぶ and oden おでん may be considered types of nabe in a broad sense but I do not think it is appropriate to include them in "nabemono". Depending on the ingredients and seasoning of the broth, you have many variations and many names of "nabe". Whatever the name, in cold winter days, nabemono is one of the most comforting  and warming dishes. The types of broth seasonings could be;

1) Dashi without seasoning; When your broth is not seasoned, you use a dipping sauce such as ponzu. Tarachirinabe タラちり鍋. Mizutaki 鶏の水炊き, and Yudoufu 湯豆腐 are three such examples.
2) Dashi and soy sauce based; Yosebabe 寄せ鍋 is the best example.
3) Dashi and miso based; Chankonabe  ちゃんこ鍋, Ishikarinabe 石狩鍋, and Dotenabe 土手鍋 are three such examples.

Since other ingredients will impart lots of flavor to the broth, the starting broth is usually a simple kelp broth. In terms of the ingredients, you could limit them to only a few items (like yudoufu in which only tofu or tofu and nappa cabbage are usually used) or you could add anything including sea food, meat, vegetables, tofu, fish cake and more, as is done in chankonabe and yosenabe. There are no rules (although there are some guide lines). The name of the nabe changes based on the ingredients, locality, and types of broth.
Here is one example I made one evening in a small one person pot. I am not sure what I should call this. A type of yosenabe but I used mostly vegetables and at the very end decided to add shrimp. I first made dashi from kelp and a "dashi pack". This is like a tea bag but instead of tea, combination of pulverized bonito flakes, dried fish and kelp (there are several different kinds) are placed in the bag. It is much better than granulated instant dashi but still very convenient. I seasoned the broth with mirin, sake and soy sauce (to taste, since I did not measure). I started with the ingredients which take the longest time to cook. In my case, I added daikon (halved and thinly sliced) and carrot (sliced a bit thicker than the daikon) first, then after 10 minutes or so, I added the white part of Nappa cabbage or Hakusai 白菜, tofu 豆腐, followed by (after 5 minutes) maitake mushroom 舞茸, green parts of Nappa, scallion, and finally shrimp.

The ingredients I could have added include fish (usually a white meat, hardy fish such as cod), chicken (cut up thigh meat), fish cakes, and shell fish. As a condiment, I used seven flavored Japanese red pepper powder 七味唐辛子. To finish the meal, I could have added cooked rice to make porridge, or noodles such as udon noodles but I was too full just eating the items I cooked. Traditionally, warm sake is the choice of drink but we like cold sake even in winter and with nabe.

Thursday, November 25, 2010

Baked cornmeal drumett "tulip" 手羽元チュウリップのコーンミールオーブン焼き

I bought chicken wings over the weekend but we did not use them. I marinated them in sake and kept them in the refrigerator so that they would stay fresh for several more days. Since it was not feasible to grill them over a charcoal fire on a weeknight - not to mention that it is getting too cold and dark to barbecue after we get home, I baked them in the oven to make a Yakitori style dish. I decided to do a slightly more elaborate preparation of the drumetts and made "tulips".

It appears this "tulip" preparation is more popular in Japan than here. First, I cut off the wing tips (discard) and then separate the wings and drumetts. For making a drumett "tulip" (here is a visual aid), just loosen the meat from the bone and nick the skin around the joint so that skin and meat can be pushed down and inverted making a "tulip" shaped meat on one end with bone sticking out as a convenient handle. Naturally, I could have deep fried them but I decided to bake them in the oven instead. To make it slightly more interesting, I added a cornmeal crust.

I just evenly coated the the drumett tulips with light olive oil (using my hands) and season with salt and pepper. I made a mixture of yellow cornmeal and potato starch (about 4:1 ratio) and dredged the chicken. I prepped the wings as usual making a cut beween the bones through the skin and seasoned with salt and pepper. I placed the wings and drumetts on a baking sheet with a raised metal rack (I let the drumett tulips stand up with the meat side down). I baked them in a preheated 450F convection oven (very hot) on the top rack for 20-25 minutes until the surface is golden brown as seen in the above picture.

I served this with wedges of lemon and moromi cucumber. It is a bit healthier than deep frying and the cornmeal flavor is kind of nice. 

Tuesday, November 23, 2010

Snap peas in dashi broth スナップ豌豆の塩びたし

This is a very healthy and refreshing small dish which goes well with sake or any drink. Recently, Dave Perry recommended two Izakaya cookbooks to me called "Otsumami Yokocho" おつまみ横町. There are two volumes. Both are called "drinking snack alley". The second is distinguished from the first by the additional phrase in the title of  "Mou ikken"  もう一軒 meaning "one more place". This is an appropriate name for the second volume because this phrase is a classic nagging request made by drinking enthusiasts (read; drunkards) who have finished their first rounds but don't want the bar hopping to end..."just one more place". In any case, I got these books from Amazon Japan (The shipping was more than the cost of the books). These two volumes each contain recipes for 185 small dishes which go well with drinks. Many of the dishes are rather simple (or easy to make) and some are not really new or original but the two volumes still contain a good number of dishes that I would like to try (and post) - thank you Dave, I can continue my blog a bit longer. This is the first such dish (page 12 of the second volume). 

Disclaimer: As usual, I often read these recipes but then I end up doing whatever feels right for me, so the end result may be different from what is described in the books.

Snap peas, Japanese name is "sunappu endou" スナップ豌豆, is the hybrid developed in the U.S. but very popular in Japan as well. We like it more than snow peas. This is a rather simple but elegant and healthy dish especially for an Izakaya snack and also taste good.

I removed both ends of the snap peas and blanched them in salted boiling water for several minutes, until cooked but still crunchy. I drained and put in ice water to stop cooking. I drained again and patted dry with a paper towel.

I made a broth from a dashi pack (kelp and bonito in a tea bag) and added salt to taste. I let the broth cool to room temperature and then refrigerated. I added the above blanched snap peas to the broth and let it marinate in the refreigerator overnight.

It has nice crunch. It has a sweet taste (enhanced by mild saltiness in the broth) with subtle dashi flavor. You feel good eating this, a totally guilt free drinking snack. You can have this instead of edamame 枝豆.

Sunday, November 21, 2010

Pork loin Barbecue 豚のロースのバーベキュー

Pork is definitely the most popular meat in Japan, at least, when I was there (especially in my parents' household). Most of the time Japanese use thin slices or ground pork rather than a big hunks of the meat. Japanese style thinly sliced pork belly 三枚肉 is most commonly used in Japanese dishes but it is not easily available here in US. More recently, it appears that roasts including pork roast is getting popular in Japan. Although I posted a dish using leftover roasted pork, I decide to post it again with more details.
The cut of pork we got was a loin. I trussed it (lower left) first. I then cut thin slivers of garlic (5-6 cloves). Using a boning knife, I make 1-2 inch deep multiple slits in the meat and inserted the garlic slivers (below, right). You should make sure all the garlic slivers were completely inserted into the meat so that it will no burn on the surface.
I smeared olive oil all over the pork and applied my dry rub consisting of salt, pepper, clove, cinnamon and cumin (below, left). I use an equal amount of salt, pepper, and cumin and less amount of cinnamon and clove but this is totally up to your taste. Like my chicken, I hot smoke and babecue in a Weber using indirect heat. I put a temperature probe to the middle of the meat and when it registers 145-150F, I take it off the weber (below, right) and cover it loosely with aluminum foil and let it sit for 10-15 minutes on a plate. I remove the trusses, slice, and served it with its own juice accumulated in the plate on which the pork was resting. The Crust has nice flavors and au jus is also very nice and we can only have au jus when it was just barbecued.
This time, I served the pork with ratatouille (I made this the day before) and mashed sweet potato. My wife made the sweet potato. The sweet potatoes were cooked in the same Weber with the pork, covered with aluminum foil. She added butter, chopped chives, and soy sauce (Yes, soy sauce). I did not remove the garlic from the slices of pork but if you use it for sandwich, it may be wise to remove the garlic from the roast as you slice it. As you can easily imagine, the leftover pork is very handy to have for the weekdays.

Friday, November 19, 2010

Braised Daikon green and Jako 大根葉とじゃこの炒め物

This is another one of those small nothing dishes which goes so well with sake and goes even better with hot white rice. I mentioned before that the daikon we see in the U.S. usually does not have the greens attached. But this weekend, I got one that did. When I get diakon greens, I try to make some kind of small dish from them. This is a variation on the same theme. This time, I braised them with small semi-dried and salted fish hatchlings called "chirimenjako" 縮緬雑魚 or "jako" for short.


These daikon greens were a bit on the tough side as you can see from the picture--the stalks are thick. So I blanched them in salted water first (for 2 minutes) and shocked them in ice cold water to bring back the bright green color. If the greens are tender, you can skip the blanching process. I squeezed out the excess water and chopped them finely. In a frying pan, I heated 1/2 tbs of dark sesame oil and saute one package (probably 3-4 tbs) of frozen "jako" and sauteed until they were slightly brown and crunchy. You may want to taste the "jako" at this point since the saltiness may vary quite a bit and the amount of soy sauce needs to be adjusted accordingly. I then added the blanched and chopped daikon greens and sauteed for 1-2 minutes. I added 2 tsp of sake, 1 tsp of mirin and 1-2 tsp of soy sauce.  I braised until the liquid was almost gone. You could mix in roasted white sesame seeds as well. I made this one a bit too salty so this is better with hot white rice. Just mix it in and enjoy.

Wednesday, November 17, 2010

Rice with butter and soy sauce バーター醤油ご飯

This may not be post-worthy but I realized this represents a regional way of eating rice peculiar to the "Hokkaido dialect" of Japanese food culture and may be worthwhile to "document". Although many Japanese really appreciate (or pretend to appreciate) simply cooked white rice for its subtle flavors, many Japanese children and Westerners find it boring. (Many Japanese adults may also harbor the same opinion privately but do not want to appear unsophisticated or childish by expressing it). Even those who appreciate plain white rice sometimes want additional seasoning.

Furikake seasoning ふりかけ is the mixed seasoning used for this very purpose. It is very popular even in the U.S., and many different varieties are available; some are made specifically for kids and some are for adults. I even know somebody who uses furikake to season cottage cheese (Could that somebody possibly be my wife?). I made the big mistake, early in our marriage, of showing my wife, the way I used to eat rice when I was a kid. I just added a pat of butter to hot rice, let the butter melt first and then mixed in soy sauce as seen below. It had been a long time since I had rice that way. My wife immediately took a liking to it and this is her favorite way of eating fresh, piping hot, white rice. In horror at what I had unleashed I had to warn her about the impropriety of enthusiastically putting together her "favorite" rice at a restaurant. While eating rice for dinner at my mother's house in Sapporo, I reminded my mother of how she used to serve butter and soy sauce rice to me as a kid and how I had made the mistake of introducing my wife to the dish. My mother abruptly put down her chopsticks, got the butter out of the refrigerator, distributed it all around followed by the soy sauce. While mixing the ingredients into her rice she mentioned she used to eat her rice like that as a kid but hadn't eaten it in a long time. She took a bite, sighed and said it sure was good! 


I thought this was a fairly common way for Japanese (especially kids) to eat white rice but apparently that is not the case. This appears to be peculiar to Hokkaido. I guess that makes sense since dairy and specifically butter production are primary industries in Hokkaido.

It is always a bit iffy to season plain white rice in public by doing such things as pouring soy sauce, broth or simmering sauce from, say simmered fish 煮 魚 or miso soup over the rice. But many Japanese will do exactly that in private. If I pour miso soup over my rice, I would call it にゃんこめし meaning "cat rice" but, for people from other regions of Japan, "cat rice" is rice topped with bonio flakes and soy sauce and, they may call it "nekomanma" ねこまんま (the meaning is the same, i.e., "cat rice"). The fact that there is a specific name for this type of rice (albeit a bit derogatory) indicates many Japanese are eating rice in this (unacceptable) manner.  I do not recommend doing this in public, however. Why such doctoring of rice is frowned upon by Japanese is "not logical" as Mr. Spock would say. After all, many donburi どんぶり dishes are made using rice in a seasoned broth with toppings and dishes called hiyajiru 冷や汁 and ochazuke お茶漬け are indeed rice in a broth. It appears that as long as it is prepared in the kitchen or is meant to be consumed this way, it is a "legitimate" dish and can be eaten in public. But if you improvise at the table by pouring soup over rice, it is not OK; go figure. I think there was a lengthy discussion on this subject (in Japanese).

If you have not tried this butter soy sauce rice, I strongly suggest you try it, at least once, and let me know if you like it. You could eat this with seasoned and roasted nori "ajitsuke (yaki) nori" 味付け(焼き)海苔 which was my favorite way of eating rice as a kid (and even now). I am not responsible if you find the comforting flavor of this dish addicting.

Monday, November 15, 2010

Japanese-style chicken curry 日本風チキンカレー

"Curry and rice" or "Kareraisu" カレーライス (or sometimes called "Raisukare" ライスカレー) has been an extremely popular "national" dish in Japan for some time. I assume curry was introduced in the late 19th century to Japan by the British, who brought it from their colonial India. I thought Japanese curry was based on the British version made with brown roux and premixed curry powder. There is one more interesting (at least for me) factoid concerning "Kareraisu".  It has to do with Dr. William Smith Clark. He was an American from Massachusetts who came to Japan at the bequest of the Japanese Government to establish the Sapporo Agricultural College 札幌農学校, the predecessor of my alma mater Hokkaido University 北海道大学. He served as president of the college albeit briefly (for 8 months). Despite his short tenure, he had an enormous influence on his young Japanese students, Japanese society and particularly Hokkaido. He is credited with introducing New England style modern dairy agriculture to Hokkaido. Reportedly, he also came up with the idea of putting potatoes in curry. He was said to have discouraged the consumption of rice by his students at the school dormitory (he must have thought white rice was causing vitamin B1 deficiency or beriberi.) The one exception to his interdiction against white rice was when it was served as "Kareraisu". He apparently really liked curry and rice.

Dr. Clark's parting words to the students who came to see him off at a place known as "Hitsujigaoka" 羊ヶ丘 or "Sheep hill" in Sapporo was "Boys, Be ambitious". This became the motto for Hokkaido University as well as general encouragement for young boys in Japan. (The entire phrase was "Boys, Be ambitious like this old man". Thankfully the egotism "like this old man" was left off the Hokkaido University motto). His statue on the campus used to be a major tourist's attraction but is less so now that access is restricted to foot traffic. His statue on the famous Sheep Hill is more easily accessible and more popular. On one of our first trips after our marriage to Hokkaido, I took my bride for a reverent visit to the statue at Sheep Hill. She was significantly underwhelmed. She took one look at the statue with its motto and said "only Boys...really?" She then scanned the pasture with its few obligatory sheep scattered about in keeping with hill's name and dubbed the place "that tourist attraction where they keep a few sheep on leashes." (I sure can digress!)

In any case, going back to curry, even when I was living in Japan, some more authentic Indian curry restaurants were opening up. Now, in many cities in Japan, you have many authentic (I suppose) and diverse ethnic curry restaurants. But the Japanese style curry is still popular in Japan and it will not disappear any time soon (I hope). As a sign of the popularity of Japanese curry, commercial Japanese curry roux is even available in a regular American supermarket. I occasionally make my own curry sauce based on brown roux and a Japanese curry powder (supplemented by other spices such as toasted mustard seeds, cinnamon, cumin etc), but the problem is the smell of the spices while being dry roasted linger in the house for several days. So this time, I made this curry using a S&B brand curry roux. My only modification to this Japanese curry is using whole bone-in, skin-less chicken thighs instead of small pieces of meat which is common in Japanese curry.  The vegetables to be used include onion, carrot and, of course, potato to be authentic Japanese curry. 

First, I removed skin and excess fat from the thighs. I dredged them in a mixture of curry powder (again S&B) and AP flour (the proportion is arbitrary but I used 1 tsp of curry powder to 1/4 cup of flour) in a Ziploc bag. I brown the surface of the meat in a large saute pan on high heat with olive oil, turning once for 5 or so minutes per side. I removed the chicken and placed it in a separate stock pot or Dutch oven. I added roughly chopped onion to the saute pan and sauteed for several minutes and de-grazed using a small amount of chicken broth. I added this to the pot with the chicken thighs and added chicken broth (my usual Swanson reduced salt no-fat kind) and water (about half and half to prevent it from being too salty) to cover. I added potatoes (I used small red potatoes with the skin on, eyes removed) and carrot. (The amounts of vegetable and liquid are arbitrary but please refer to the package instructions of the curry roux for the appropriate ratio of the roux and liquid.) I simmered it for 30 minutes with two bay leaves (optional). I dissolved the curry roux and simmered for another 5 minutes.
The classic Japanese condiments to curry are pickled "rakkyou" らっきょう (left) and "fukushinzuke" 福神漬け (right in the back). I had the last of the homemade pickled myouga 茗荷, which was added as well (middle).

Using bone-in whole thighs is easier than cutting up the chicken in small pieces. It also appears to add more flavor to the dish. One of the problems of using the commercial curry roux may be the amount of saturated fat and salt it contains but it tastes really good nonetheless. A good sturdy red wine will be our choice of libation here. We had Worthy 2006 which went well with curry.

Sunday, November 14, 2010

Duck "Nanban" Soba 鴨南蛮

When I made the Japanese-style chicken escabeche, which is called "Nanban" 南蛮 or Southern Barbarian, I mentioned another totally unrelated soba noodle and duck dish called "Kamo Nanban" 鴨南蛮. Since I had leftover roasted duck breast after I served duck breast with orange marmalade sauce one weekend, I decided to make an abbreviated version of "Kamo nanban" on a following weekday evening.

As I mentioned before, Japanese think "duck" and "negi scallion" are the ultimate culinary paring and this dish is usually made of grilled and charred, Japanese or Tokyo scallion or "naga negi" 長葱 in addition to duck meat. 

Negi Scallion: Since I did not have a Japanese "Negi" scallion, I used a wedge of onion. I cooked it slowly in a frying pan with a bit of light olive oil, turning over once or twice for 10 minutes or until nice char marks developed on both sides and the onion is cooked.

Broth: I used one "dashi pack (The one I used had kelp and dried bonito, but no dried fish)" in water (about 1.5 cups) and simmered for 5 minutes to make dashi. Any dashi, including instant granulated ones, will do. I added mirin (1tbs) and soy sauce (2 tbs to taste, I could have added more in retrospect). I kept it just barely simmering or hot.

Duck breast: The leftover duck breast had nicely browned skin and was cooked to medium rare. I cut thinly (1/4 inch) and then dusted the pieces with potato starch, katakuriko 片栗粉. I placed each piece in the simmering broth (above) for 20-30 seconds so that the starch cooks into a slightly slippery coating on the surface of the meat.  It also very slightly thickens the broth. if I was cooking the duck from scratch, I would cook the skin side only in a frying pan rendering as much fat as possible while making the skin brown following the first step of my usual way of cooking the duck breast. Instead of finishing the duck in the oven, I would slice the meat and cook it in the broth as descried above for a slightly longer time. You can omit the potato starch, if you do not like the slippery texture.

Soba noodle: I just used dried soba and cooked as per the package instruction, washed in running water, drained and placed in the center of an individual serving bowl.

Assembly: In the bowl with soba noodle on the bottom, I added the broth, and arranged the onion and duck meat as seen above. I garnished it with chopped green onion. Just before eating, I sprinkled 7 flavored Japanese red pepper powder 七味唐辛子.

Up until this point, we were enjoying Orin-Swift "The Prisoner" 2009 (Zin and Cab mix). It was certainly a good wine but it is not as good as the prior vintages and we prefer "Papillon" 2007 (Bordeaux blend with predominant Cab) from the same winery.  But this dish cries out for sake and we obliged. I should have added a bit more soy sauce to the broth but otherwise it was a very nice dish and indeed went very well with cold sake.

We also enjoyed stewed "Kabocha" squash. As before this one was sold as "Butter cup" squash but I believe this is identical to a Japanese "Kabocha".


Friday, November 12, 2010

Mac and Cheese マカロニチーズ

"Macaroni and cheese" a.k.a. "Mac and Cheese" is a quintessential American comfort food. Most  people  in the U.S., including my wife, have grown up eating Kraft "Mac and Cheese" in the blue box. The product is bright yellow and sweet, made of powdered cheddar cheese--kids love it. In recent years, gourmet versions of "Mac and Cheese" started appearing in many good restaurants. We (mostly my wife) tried several and pronounced them "very good". Besides these restaurants, my wife had "Mac and Cheese" at a semi-gourmet fast food restaurant/cafeteria "Wolfgang Puck Express" at the the Denver airport. Since airlines no longer serve food, she found the nice, big, still warm, comforting bowl of really good "Mac and Cheese" especially gratifying and reported to me that she liked it. Sometime later, I too, had a chance to try Wolfgang Puck Express "Mac and Cheese" at the Denver airport during a business trip but I found it way too greasy and I did not like it. When I reported this to my wife she replied,  "for those who do most of their praying during take-offs and landings even greasy Mac and cheese is ethereal". Thus, mostly for my wife, I made my version of "Mac and Cheese".

I think that the quality and types of cheeses are most important. My recipe is nothing unusual.  I first make béchamel sauce and add cheeses, combined with cooked elbow macaroni and bake. This recipe is for about 6 oz of macaroni, which makes about 4 small servings. We cooked one box (16 oz) of elbow macaroni and we used about 2/3 for macaroni salad and 1/3 for Mac and cheese.

Macaroni: As per the instruction on the package, cook Macaroni (al dente, since this will be further baked). I season it with salt  and pepper in a colander immediately after draining and coat it with a small amount of olive oil. The macaroni alone at this stage should be well seasoned and taste fairly good.

Sauce: I first make béchamel. I finely chop shallot (one medium or 1/2 large), and saute in olive oil (3 tbs) and butter (1/2 tbs) and add flour (3 tbs). Cook flour for 1-2 minutes (do not brown, we are not making brow roux) and add about 2 cups of milk (I used 1%) at once and whisk to resolve and keep stirring until it thickens. Add more milk depending on the consistency of the sauce. I keep this rather loose since the addition of the cheeses makes the sauce thick. I season it with salt, pepper, and freshly grated nutmeg. Using freshly grated nutmeg makes a big difference in taste.

Cheeses: Use decent quality cheeses. Cheddar cheese is an absolute "must". Unfortunately when it is cooked for a long time at a high temperature, it becomes grainy, so I mix it into the béchamel just before baking. Besides cheddar, I also use a combination of different cheeses depending on what we have in our refrigerator. This time, I made the mistake of using too much fresh goat cheese in the sauce. It made the sauce a bit grainy. I usually use any combination of Gruyere, Pecorino Romano, and Raclette. Tonight, I had Gruyere, Raclette, fresh goat cheese, and Parmigiano reggiano. The amount of the cheese is arbitrary but I used a total of 1 cup of shredded Gruyere and Raclette in addition to fresh goat cheese (1/4 cup). If the sauce becomes too stiff after the cheese is incorporated, you could add more milk. The sauce should be a bit runny because the macaroni absorbs some of the liquid while it bakes and the sauce may end up dry rather than creamy.

I poured the sauce into the cooked macaroni and mixed in shredded cheddar (1/2 cup, I used aged sharp cheddar). I tasted the mixture and adjusted the seasoning. I apportioned the mixture into 4 small individual ramekins. I grated Parmigiano reggiano cheese on the top. You could use bread crumbs on the top as well, but I did not. I baked it in a 400F (toaster) oven for 7-10 minutes or until the surface browns and the sauce is bubbling.

This was not bad (my wife's opinion was much less reserved but, then again, she may be biased). Nonetheless, to me, the sauce was a bit too grainy and I blame it on the goat cheese. Next time I will have to be more moderate in using it. In any case, this was far better than Kraft's or Wolfgang Puck's mac and cheese. This dish goes well with wines and beer (although we drink beer extremely rarely). I would suggest Izakaya in Japan consider serving this. It may become a big hit.

P.S. We had this later in the week as leftovers reheated in the toaster oven. Strangely enough, the taste and texture were much better and the graininess of the sauce disappeared.

Wednesday, November 10, 2010

Chicken breast cutlet 鶏胸肉のカツレツ

This is another small nothing dish but is very good nonetheless. I had an extra chicken breast after making other dishes. I just sliced the chicken breast into bite sized pieces across the grain of the meat obliquely ("sogigiri" そぎ切り). I added salt and pepper to the pieces, dredged with flour, egg wash and finally coated with Japanese bread crumbs "panko". I fried them with a bit of olive oil (more than for sautéing, not more than 1/4 inch deep) until both sides become crispy golden and meat is cooked through. I just put a leftover marianara sauce on top and garnished it with fresh basil. You could add Tabasco to the marinara sauce to make it spicy if you like.

It is a somewhat mundane dish but a nice dish to start. We had this with a red wine but I can not remember which one this was.

Monday, November 8, 2010

Poached egg, smoked salmon with crème fraîche ポーチドエッグとスモークサーモン

This can be a breakfast (for us) on weekends when it strikes our fancy or a mid-night snack after drinking (for younger fellow imbibers). I'm not sure how this got started but my wife came up with this one. It is a cross between bagels, lox and creme cheese (hold the bagel) and a variation of eggs benedict (hold the hollandaise). This variation may be (very) slightly, less deadly than the original because there is no hollandaise sauce and (hopefully) some benefit from the Omega 3 in the salmon.

The recipe starts with a base of toasted and buttered English muffin bread (homemade, my wife promised me to post her recipe soon). On top of that goes a generous smear of crème fraîche (if not available, use sour cream or cream cheese). Next comes a sprinkle of chopped chives (my wife puts the chives on at this point so they are held in place by the next layers. Otherwise they just fall off the piece on the way to your mouth.  One layer of good cold smoked salmon follows the chives and the whole thing is topped with a poached egg. We sprinkled salt on top of the egg and more chopped chives as garnish. (It doesn't matter if these fall off the chive flavor is locked in the lower layer.)

The poached egg should have a runny egg yolk so that when you cut into it, the yolk makes a wonderful sauce. The combination of all these ingredients work so well together. If you like smoked salmon, you will like this dish.

Since I mentioned several times how easy it is to make poached eggs but never really illustrated the steps, I decided to post some visual aids. We tried many methods including an egg poacher, a classic vinegar water method, Pepin's swirl-water-and-put-an-egg-in-the center-of-the-vortex method (it appears he is not advocating this silly method any longer) but our method always works, no fuss no muss.

1. Use pasteurized eggs (in the U.S., notice a red "P" in a circle).
2. Use a good non-stick frying pan with a high side wall and add enough water so that the eggs can be completely submerged. I also salt the water for subtle seasoning of the eggs (optional) but absolutely no vinegar. (We do not like vinegar tasting eggs). The water should be just barely simmering. Crack an egg into a small ramekin and slide the egg as seen here. 
3. Eggs will sink to the bottom. 
4. Eggs will stick to the bottom (Do not worry). Poach them until the surface of the yolks are opaque and set but the yolks are still runny (4-5 minutes).
5. Using a perforated (slotted) spoon, gently separate the eggs from the bottom. It should not be difficult if the pan is a good non-stick pan. If you encounter undue difficulty, use a silicon spatula to separate the eggs from the bottom of the pan, (if that happens you may want to throw out the pan and buy a new one).
6. Drain the water trapped by the spoon or dripping off the egg by touching the bottom of the perforated spoon to a paper towel and place it on the plate (Do not leave it on the paper towel. It will become very difficult to transfer without breaking the yolk). I usually keep one on the spoon as seen in the picture for easy transfer.

If you are into the looks, you could take off thin peripheral shaggy portions of the egg white to make it pretty.

Saturday, November 6, 2010

Julienned potatoes with spicy cod roe redux ジャガイモの明太子和え 再登場 (Mark's book p24)

The dish I made according to the recipe in the Mark's book (p24) looked and tasted  elegant. But I could not help making it again with some modifications. As before I made a julienne of white potato, soaked in water and then patted dry using paper towels. I removed the "tarako" or cod roe from one large sac and mixed with a small mount of Tabasco, sake and lemon juice. I then sauteed the potatoes in butter for several minutes until done but still crunchy, I mixed  the tarako mixture, chopped chives and seasoned it with a bit more salt and ground black pepper. I served it with nori strips in a manner simialr to  tarako spagetti.

We liked the nori taste with tarako and potatoes. Either way (the original or this version), this is an excellent dish. We really like both versions.

Thursday, November 4, 2010

Monkfish medallion sautéed with garlic and olive oil アンコウのニンニクオリーブオイル焼き

After making the monkfish karaage 唐揚げ, I made the remaining monkfish fillet into this dish the next day.

I made medallions of fish a bit less than 1 inch thick. I then marinated them in olive oil, lemon juice and 3-4 fat cloves of crushed garlic for 24 hours. Just before cooking, I removed the excess moisture from the surface of the medallions and lightly seasoned them with salt and pepper. In a frying pan on a medium flame, I added olive oil, and crushed garlic from the marinade and fried it until it became fragrant and slightly brown. I took the garlic out and set aside. I added the medallions of monkfish and cook them for 3-4 minutes and flipped them over. At this point, I added previously blanched Bok Choy which was cut into a bite sized pieces to the center of the pan, moving the medallions to the periphery to make room for the Bok Choy. I then put two thin pats of cold butter on the top of the Bok Choy and cooked it for another 3-4 minutes. The butter will melt very slowly. As the fish was about to finish cooking, I mixed the Bok Choy and butter and added just a small amount (1 tsp) of soy sauce and also add skinned Campari tomatoes to the pan for another minute or so and, at the very last moment, added back the garlic.

This is a sort of fusion dish and almost tastes like lobster tail. The rather assertive garlic flavor goes well with this fish. The tomatoes also exude some juice to form a small amount of sauce/liquid in the bottom of the pan. The flavors of soy sauce, butter, garlic and tomato add to the dish.

Tuesday, November 2, 2010

Chestnut rice 栗ごはん

Chestnuts are such a typical seasonal food item in Japan for deepening autumn.  As a kid in Japan, we ate them every fall, usually boiled and it was something I generally liked. We had quite a few mature chestnut trees in our neighborhood. Many half open "Iga" いが or outer prickly shells were on the ground and getting chestnuts from those shells was always tricky for young kids. The trick was getting the nut without being pricked. In North America, because of  Chestnut blight, most of the North American Chestnuts trees were wiped out by 1940. Chestnuts, maybe as a result,  appear not to be a very popular food item. The vast majority of chestnuts we see here are imported from Europe (see P.S. below). My wife tells me that her childhood memory of chestnuts was the yearly ordeal (usually around Christmas) of roasting them in the shell over an open fire in the fireplace. While they smelled great, they weren't worth the bother. Once she busted into them, they were a major disappointment--dry, chalky, tasteless.

On one of our first trips to Japan as a married couple, we came across a roasted sweet chestnut vendor, "tenshin amaguri" 天津甘栗, under the raised railroad tracks in Shinbashi 新橋 area of Tokyo. The smell wafting from the cart was divine. I suggested we get some and my wife said, "Don't bother" and kept walking. I got them anyway and the smell enticed her to try some. She was astounded at how good they were. She insisted they couldn't be the same thing she ate as a child. Last week I found chestnuts in the shell at our gourmet grocery store. I, again, could not resist and got some chestnuts for a Japanese chestnut rice or "kurigohan" 栗ごはん. Again my wife advised, "Don't bother" and warned me that they would not taste like the ones I was used to.

I first soaked the chestnuts (15 or so, upper left in the image below) in water for several hours to make it easier to peel the outer hard skin. You could also parboil to make it easier to remove the skin. It is easy to take off the hard skin called "onikawa" 鬼皮 by cutting off the bottom and peeling off the hard skin but the chestnuts are still covered with the bitter-tasting inner skin (upper right). The most labor intensive part is removing the inner skin called "shibukawa" 渋皮 meaning "bitter skin". I just used a small paring knife to remove the inner skin but it is not easy. I put these cleaned chestnuts into water to prevent discoloration (lower left).

I again used the earthenware rice cooker called "Kamado san" like I did when I made "Matsutake gohan", I used kelp soaked water and added sake (2 tbs) and salt (1 tsp) to make 400ml of the cooking liquid. I did not use soy sauce to prevent the rice from darkening. I washed and drained the rice (2 Japanese cups or 360ml). I added the rice and the liquid into the cooker, and placed cleaned chestnuts on the top  (lower right in the above image). As per the instruction that came with the cooker, I put on the inner lid and then the outer lid. I cooked it on a medium high flame for 14 minutes and then let it stand for 20 minutes.

Here is the end product (above). I was a bit disappointed--I "shouldn't have bothered". The chestnuts were dry, chalky and pretty tasteless (as my wife predicted), although they were certainly edible. The rice itself was quite nice. We may try this again with bottled boiled chestnuts from France next time. But at least, I feel like I paid some respect to autumn, which has firmly arrived here.

P.S. After I posted this, an interesting article appeared in Washington post regrading chestnuts including different types and origins of the chestnuts imported here.