Thursday, December 30, 2010

Salmon "Ishikari-nabe" hotpot 石狩鍋

Ishikari 石狩 was a small coastal town which is located near Sapporo 札幌 where I grew up. Ishikari river 石狩川 drains into Ishikari bay 石狩湾 and to Sea of Japan 日本海 after winding down the ishikari plain. The river flooded often and meandered around. In the interest of efficiency, human intervention made shortcuts and straightened the water ways. As a result scimitar shaped lakes called "Mikazuki-ko" 三日月湖 were left behind. These lakes are mostly located in the area called "Barato" 茨戸, which is between Sapporo and Ishikari. They were separated from the main river but provided good fishing. Over the years Barato has become a suburbs of Sapporo 札幌. It is well developed but some pockets of wilderness remain.

Although Barato is now within commuting distance of Sapporo when my late brother and I were in grade school (9 and 6 respectively) getting there to go fishing was a great adventure--we had to take a bus, which ran infrequently from downtown Sapporo. On one such adventure we were supposed to meet a friend of my father's to go fishing at one of the lakes. He was supposed to wait for us at the designated bus stop in Barato but we somehow missed the stop and ended up at the beach of Ishikari, the terminus of the bus line.  The kindly female conductor (this was a time when all buses had conductors) took pity on us and promised to get us to the right bus stop on the return run to Sapporo. Unfortunately, as I mentioned, the bus ran only infrequently and the return trip did not occur until that afternoon. So there we were, two waifs, stranded at the desolate Ishikari beach for several hours getting hungry. The kind conductor once again took pity and bought us a bowl of Ishikari-nabe, for which the city is known, from the near-by eatery where she and the driver were eating lunch. I cannot tell you how great it tasted. The dish I made today was Ishikai-nabe. Making it, smelling it and eating it brought back the long ago memory and evoked this long preamble. 


Ishikari nabe was originally a simple fisherman's stew cooked on the beach using salmon caught in the mouth of the Ishikari river. In the past, salmon were extremely abundant and ran up the ishikari river. The salmon fishery declined drastically for some time but it is making a big come-back because of the continuos release of the hatchlings over many years and improved river management.

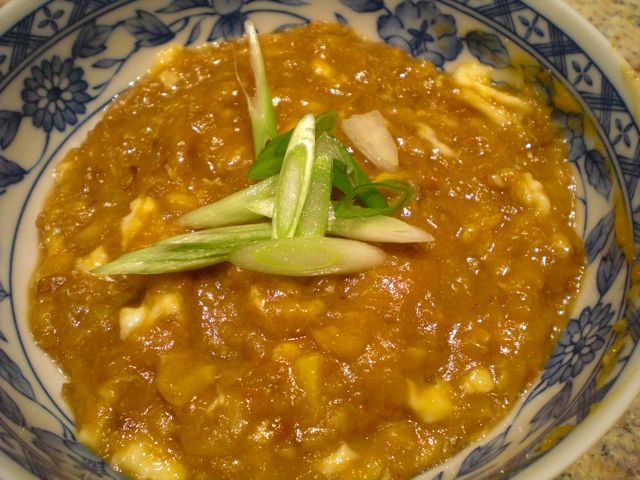
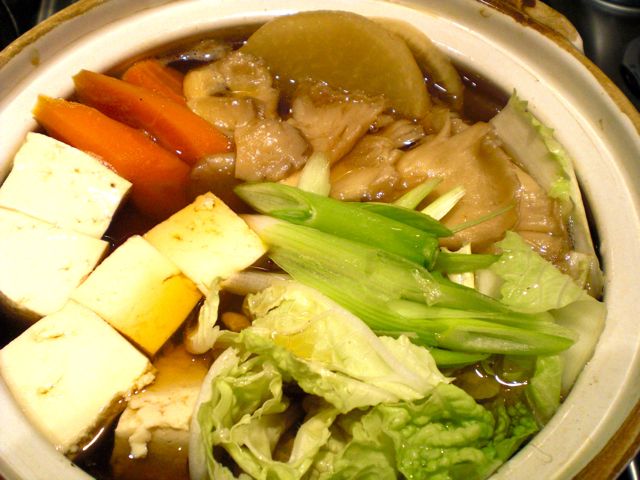
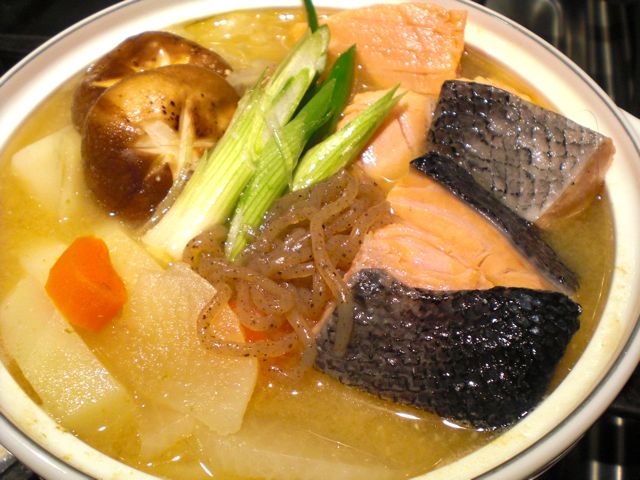
There are many variations of this dish but, the original form is very simple; put whatever ingredients are available (you must have salmon, though) in a pot. The broth is ususally seasoned with kelp broth and miso. The secret of making a good Ishikari nabe is to put the miso seasoning in after the vegetables are cooked. The other secret is not to cook the salmon too long.

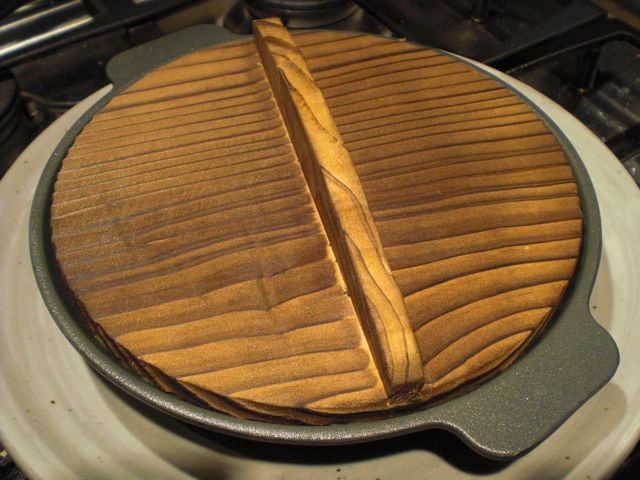
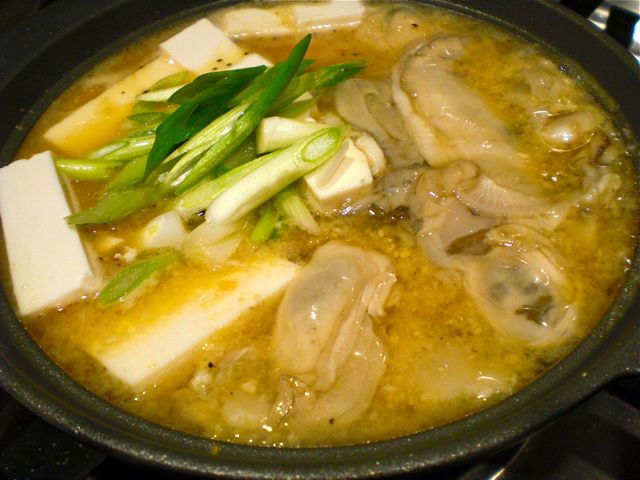
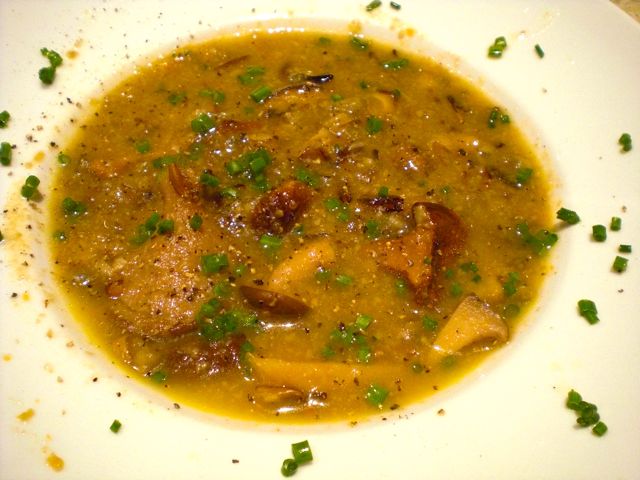
The above picture of Ishikai-nabe is in a small one person pot (8 inch wide), which my wife and I shared. This time I used, daikon (2 inch long, peeled cut thinly in half moon shape), carrot (one medium, cut thicker than daikon in half moon shape), potato (one medium, cut into half inch thick half moon shape) and cabbage (3 leaves, hard veins removed and roughly chopped). In addition, I used fresh shiitake mushrooms (2), shirataki (1/3, parboiled) and scallion (3, cut in a slant) and salmon fillet (whatever amount you like). I thought of adding tofu but the pot was full and I decided not to use tofu this time. You could add other vegetables, sea food, fish cakes etc if you like. 

I started by soaking kelp (4-5 inch long) in about 3 cups of water for 30 minutes or longer or until it gets hydrated and soft. I put the pot on a medium flame and when the water started to boil turned down the heat and took out the kelp. I put the vegetables which takes a long time to cook in the pot first (cabbage, potato, daikon and carrot) and cooked them for 20-30 minutes on a low flame.

Preparation of the salmon: I had one medium size fillet of salmon (1 lb). After washing and removing any scales and bones if present, I removed the thin fatty belly part or "harashu" ハラス for another dish. I cut the remaining fillet into one inch wide strips and then cut the strips in half to make good sized rectangles. In order to reduce the strong or gamey taste of the salmon, I parboiled it in boiling water with a small amount of sake for just 10-20 seconds. Then I washed the pieces in cold running water and set aside.

Seasoning mixture: I disolved miso (3 tbs) in sake (1 cup) and mirin (3 tbs) in a measuring cup and set aside. You could adjust the sweetness by increasing or decreasing the amount of mirin.

When the vegetables were done, I added shirataki and shiitake. After few minutes of cooking (with lid on), I added the seasoning mixture above. After coming back to a simmer, I added the salmon and scallion and cooked it until salmon was just done (3-4 minutes). Some people add butter or milk at the end but I did not.

We enjoyed this with sprinkles of 7 flavored Japanese red pepper flakes and warmed sake. We have not had warmed sake for ages but I just wanted to try it again. I thought Gekkeikan "Black and Gold" (US brewed) is perfect for drinking warm since it is very gentle sake. It took some effort to find the "ochoushi" お銚子 flask for waming the sake. My wife finally found one (Hagi ware 萩焼) in the back of the cupboard. I gently warmed the flask in a hot water to 118 F (I measured the temperature using a digital instant meat thermometer). Guinomi ぐいのみ is made by an American artist Peggy Loudon, which my wife acquired at one of the Smithonian craft shows held at the building museum in Washington, DC. The warm sake was perfect with this nabe on this cold night--especially since we were anticipating a big snow storm which luckily just missed the Washington area by a hair. We probably will go back to drinking cold sake...warm sake is good on certain occasions but in general we prefer cold sake.

P.S.  This recipe was featured in "The Jerusalem post" by Johanna Bailey.

Tuesday, December 28, 2010

Chicken noodle soup チキンヌードルスープ

Every time I make my version of chicken noodle soup, this "Far side" cartoon by Gary Larson comes to mind. I am sure this slightly "dark side" humor won't appeal to everybody but I found it funny. I have been a fan of Far side for quite some time. Unfortunately, Gary Larson retired some years ago after making more than enough money (I am sure). In any case, I also make a cold-fighting chicken noodle soup, although it may not be quite the same as a Jewish (hen) mother's.

(This cartoon is, no doubt, copyrighted by the Farside, Gary Larson, hope posting it in my blog is OK)
I decided to make this soup not because we had a cold but because my wife made a nice chicken stock from chicken bones (breast and thigh bones, which I produced while deboning chicken for other dishes) and vegetables (onion, carrot, ginger root, celery with bay leaves and black pepper corns). My chicken noodle soup deviates from the traditional in several ways.  I use Japanese udon うどん noodle (dry one) and also make my soup thickened. My wife's broth (fat and solids removed after overnight refrigeration) is very nice with the sweetness coming from the vegetables and with a hint of ginger giving an "Oriental or something" touch (no salt added at this point). I usually add either milk or cream at the end (optional). So, this is more a type of chicken noodle stew than traditional chicken noodle soup.
Here is how I made it this time (the recipe changes depending on my mood). The amounts of the ingredients are all arbitrary. I used raw chicken thigh meat with skin, bone, and visible fat removed (I could use precooked chicken but I like to use raw chicken meat). I cut into bite size chunks, seasoned with salt and pepper, and dredged in flour (a part of the crust will dissolve and help thicken the soup). I browned them in small batches in olive oil using the pan in which soup will be cooked. I took out the chicken and set aside. At this point you should have browned bits or "fond" on the bottom of the pan. I added coarsely chopped onion and celery and sautéd for 2-3 minutes and then finely chopped garlic and sautéed for another minute. I deglazed with a small amount of the chicken broth. I added back the chicken, the remaining broth, carrot and potatoes (I used baby red potates). For good measure, I also added three bay leaves. I let it simmer for 30 minutes or until all the vegetables are cooked. I then added Japanese dried udon noodles broken up into pieces a few inches long and let it simmer for another 15-20 minutes or until the udon noodle is done. Starch from the udon also helps thicken the soup. The udon noodle will not get too soft even if the soup is reheated later. I seasoned with salt and pepper and added milk (about 20% of the volume of the broth). Because of the brown color from the "fond", the color of the soup is "beige".  I served this as a starter, garnished with chopped chives. The broth is lovely and the soup in very comforting on a cold winter''s night. 

Sunday, December 26, 2010

Baked mashed potato and celeriac with Parmesan cheese crust and stuffing マシュドポテトとセロリの根のパルメザンチーズオーブン焼きとスタッフイング

This is is a good side dish for any special occasion like Thanksgiving or Christmas but the leftovers can be perfect as a small drinking dish. This is a rather unique mashed potato dish since it includes a root bulb of a special type of celery plant called "celeriac" and has a nice crust of Parmesan cheese on the top.

We served this as a "drinking snack" along with my wife's holiday stuffing and bacon (which was placed over the stuffing when it was baked in a casserole. The bacon was further crisped in a frying pan before serving--decadent).

I learned this recipe from a friend who served this when we were visiting them a long time ago. I do not know where the original recipe came from. Making this dish is relativly easy except that you need celeriac (below left) which appears to be available in Japan, although I have never seen it there while I lived in Japan. After peeling off all the rootlets and skin, you get the object shown on the right.

I use white potatoes (6 medium) but Yukon gold is another kind you may like to use. I peel and cut the potatoes in quarters, parboil and rinse them in running cold water. This removes the excess starch and prevents the mashed potato from becoming too gooey or gummy (skip this step if you like your mashed potatoes gooey and gummy). I dice the celeriac (1/2 inch dice) and cook it with the potatoes in salted water for 20-30 minutes or until both are soft and mashable. I drain and mash them together. I season the mixture with salt. I could use cream or butter or both but I add creme fraiche (2-3 tbs) and mix. I put the mashed potato mixture in a shallow buttered baking dish (I used Pyrex as seen below) and smooth the top using a rubber (silicon) spatula. I grate Parmesiano Reggiano on it. You grate enough cheese to cover the surface of the potato so that it will make a nice crust. Broil it for 5-10 minutes until the cheese melt and developed brown crust (below). Let it stand for 5 minutes so that the parmesan cheese will harden to make a nice crust.

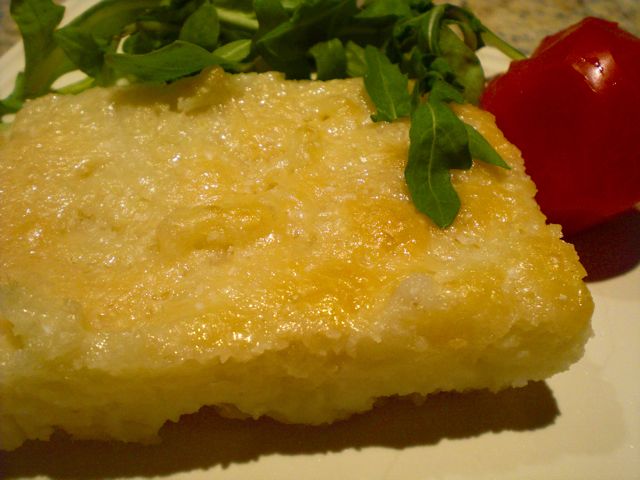
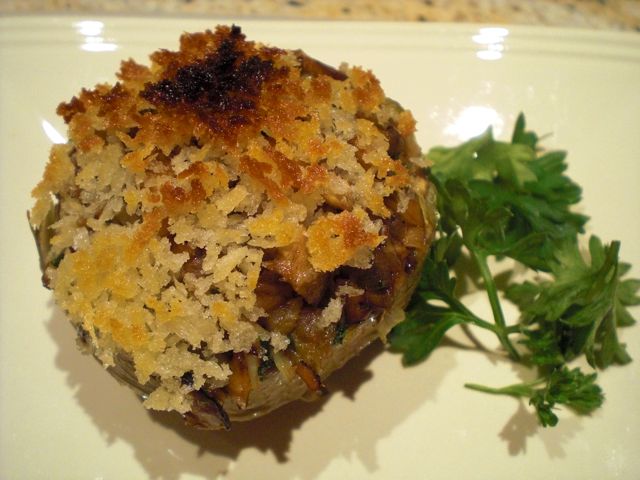
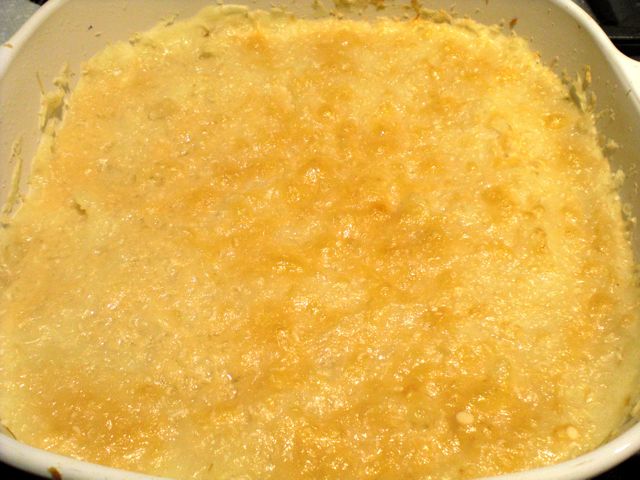
Using a small metal spatula, I cut out rectangles, lift, and serve. The mashed celeriac has a very intense celery-like flavor and the same texture of mashed potatoes. In addition, the dish has the crust of Parmesan cheese.  This combination of flavors and texture is much more interesting than usual mashed potatoes. You can heat up the leftovers in a toaster oven with a good results (actually it comes out even better). This picture makes the dish look bland and does not give a clue to the layers of flavors it contains. 

The stuffing was made by my wife and is baked, not in the cavities of a poor fowl, but in a separate baking dish. (As far as she is concerned the turkey is strictly a stuffing delivery system so she decided to dispense with the turkey and go straight to the stuffing). She sautés chopped celery, onion, and apple (cut a bit larger that the onion and cerely), season with salt and pepper. The sauteed veggies get mixed into herbed bread stuffing (she likes Peperidge Farm brand but you could use your own stale bread and herb mixture if you like.) She adds toasted and chopped walnuts and raisin as well. She then adds enough but not too much chicken broth with melted butter (in several stages allowing the broth to absorb. She uses low salt, no-fat Swanson chicken broth, which becomes fatty again with butter). Since the stuffing is baked separately from meat she puts strips of bacon on top to add flavor and keep the stuffing from drying out. She bakes it in a 350F oven for 30 minutes. When the stuffing comes out she finishes crisping the bacon in a frying pan.  

These leftovers work very well with any drink, albeit carb-heavy. We had Astrales 2007 from Ribera Del Duero, 100% Tempranillo, which is one of our favorites, with this. 

Friday, December 24, 2010

Egg plant and tofu braised in miso and pork 茄子と豆腐の肉味噌風味

This is a very tamed-down variation of Mapo doufu 麻婆豆腐. Mapo doufu is originally a Szechuan (Sichuan) dish but it has been modified and adapted to different tastes and countries. Japan has its own adaptation which is not all that spicy. It has been a very popular Sino-Japanese dish. More recently, Japanese are trying to make it more authentic (and spicy). I used to make semi-authentic one using both black bean garlic sauce 蒜蓉豆鼓醤, chili garlic sauce 蒜蓉辣椒醬 but my wife and Mapo doufu did not get along that well and I have not made this for a long time. I decided to remake this classic Szechuan dish in a non-authentic Japanese way.

I used to make two different version of Mapo doufu; One is with tofu and egg plant, which can be made as a vegetarian dish, and another, similar to the authentic recipe, with tofu and ground pork. This version is combination of these two; I used Italian eggplant, ground pork, and fresh shiitake mushroom in addition to tofu. If I get small Japanese eggplants, I will leave the skin on but, for Italian egg plant, I peel the skin.

For any Chinese-style stir fry, everything should be ready to go before starting.

Ground pork: As ususal, I hand chopped the trimming of pork tenderloins (about 1/2 lb). I sauteed in a wok with small amount of vegetable oil and dash of dark sesami oil on a high flame, so that it will cook quickly without exuding too much liquid and set aside.
Egg plant: I peeled and diced Italian egg plant (1/2 inch cubes, one medium).
Tofu: I diced firm tofu (one package, 1/2 inch cubes) and blanched, drained and set aside.
Additional vegetables: I sliced fresh shiitake mushrooms (6-7 medium) and blanched snap peas (8). 
Seasoning: I chopped scallion (3-4 tbs, with some set aside for garnish), garlic (1 tsp or one fat clove) and ginger (1 tsp). I used a Japanese miso* (2 tbs), mirin (3 tbs) and chicken broth (about 1/2 cup), soy sauce (1/2 tbs). As a thickener, I dissolved potato starch (1 tbs) in sake (3 tbs) in small container and set aside. (* I could have used Chinese fermented black bean garlic sauce but I am making this in a Japanese style.)
Stir frying: I added vegetable oil (3 tbs) with a dash of dark sesame oil in a hot wok on a high flame and add scallion, garlic and ginger. When they were fragrant, added miso, then the egg plant and stir fried for several minutes and added mirin. After the alcohol has evaporated, add the cooked ground pork, tofu, and mushroom. Use your fancy "Iron Chef" moves to stir and flip (optional). I added the chicken broth and put on the lid, turned down the heat and let it simmer for 5 minutes. I stirred in soy sauce and the potato starch slurry to thicken the sauce. I taste it and adjust seasoning (you could add sugar or more soy sauce). I added a small amount of freshly ground white pepper at this point (I had to remember the whole exercise here is to not make it spicy). I splash a little bit of sesame oil on the surface, garnished it with chopped scallion (or chopped cilantro if you prefer) and arranged the blanched snap peas (or any green such as blanched broccoli or no green).

This is a totally Japanized version and is very mild in taste but still very good as is or over hot white rice. This one gets along better with my wife.

Wednesday, December 22, 2010

Chicken Paillard with tomato, fennel, and olive 鶏胸肉パイヤードのオーブン焼き, トマト, フェネルとオリーブのせ

We saw this on one of the episodes of "Avec Eric" and thought this was a perfect small dish to go with wine. I mostly followed his recipe. This dish requires a lots of ingredients and chopping but is relatively easy to cook and tastes great. One chicken breast (picture below) will be perfect as a main dish per person. You could cut it into wedges like a pizza and that will be the perfect as "Otsumami" おつまみ or drinking snack. Fresh fennel may be a difficult ingredient to get in Japan. We like its unique anise-like flavor.

I did not really measure each ingredient as usual and the amounts are guesstimates for two chicken breasts. Please refer to Eric Ripert's original recipe for more precise instructions.

Chicken breast: I used boneless skinless breasts. I butterflied them and then pounded the thicker parts with a meat pounder to make the thickness even as well as sort of round in shape. I seasoned it salt and pepper.

Toppings: Place all the ingredients in a bowl; fennel (1/2 cups, sliced paper thin. I used a Japanese mandolin called "Benriner"), shallots (2 small, thinly sliced), garlic (one fat clove, finely chopped), caper (1 tbs, packed in oil), tomato (4 Campari, skinned and thinly sliced), pine nuts (2 tbs, dry roasted on a frying pan), fresh thyme (very small amount from our garden, finely chopped), green olives (10 small pitted and sliced) and raisins (2 tbs, plumped up by soaking in sake, the original recipe uses, more appropriately, white wine). Season with salt and pepper and good olive oil (few tbs) and mix.

Baking: I placed two chicken paillards in a 12 inch non-stick flying pan (or a large baking dish), put the toppings on, drizzled good olive oil over and around the paillards. I placed the pan in a convection oven (top rack) preheated to 450F for about 15-17 minutes or until the chicken is done.

I placed the paillard on the plate, spooned the pan juice over and drizzled good extra-virgin olive oil and garnished with finely chopped parsley and basil (very pitiful looking basil --the last of the season from our herb garden).

Au jus from the chicken and vegetable mixed with olive oil makes a wonderful sauce. We mopped up the sauce with my wife's home baked rye and whole wheat boule.  Although white wines such as Chardonnay or lighter reds (Rhone, Languedoc or Pinot noir either from new or old worlds) may have been a better pairing, we had this with William Knuttel Napa Valley Cabernet Sauvignon 2005. This is a very decent California cab, if not spectacular but medium bodied, and went very well with this dish. Despite so many ingredients, all the individual flavors came through with a nice rounding taste of fresh fruity olive oil. The veggies on top kept the chicken moist and succulent. Overall this is a very nice dish. Although I have not tried it, if you can not get fresh fennel, I think, celery may be used instead. The flavors will be different but it may work.

Monday, December 20, 2010

Bitter melon "chanpuru" stir-fry with tofu, pork and egg ゴーヤチャンプルー

This is based on a recipe from "Otsumami Yokocho" Volume 1, page 71. "Chanpuru" has many recipe variations. "Chanpuru" in Okinawan means "to mix or mixed" as I understand it. The one with bitter melon (or goya ゴーヤ), "Goya Chanpuru", appears to be the most popular type of Chanpuru. This dish was not at all known outside Okinawa 沖縄 when I lived in Japan (especially in Hokkaido which is the other end country) but now it has become a very popular dish all over Japan. It even made an appearance in "Otsumami Yokocho". I made a few changes in the recipe; for one thing, I refuse to use Spam in my dish, as instructed by the original recipe.

Bitter melon or "goya" (in Okinawan language, "nigauri" 苦瓜 in Japanese but "goya" ゴーヤ is how this vegetable is called all over Japan now) has been available in Chinese markets here in the U.S. I found this one of the regular supermarket and decided to make this dish.

For two small servings to accompany sake, I used bitter melon (1/2), firm tofu (1/3), and egg (1, beaten). I did not use Spam as called for in the recipe (my wife absolutely prohibits me from even mentioning the name because of her childhood experience while at summer camp where they served spam literally for breakfast, lunch and dinner--too much of a good thing). Instead I used another pork product; thinly sliced leftover roasted pork tenderloin (5-6 slices). I suppose, in an authentic Okinawan recipe, some kind of salt preserved pork is used but Spam has been also popular there (due to American military influences).

Bitter melon: I cut it in half lengthwise and scoped out the inner "guts" (seeds and whatever around them) using a teaspoon. I sliced the halves into 2-3 mm (1/8 inch) thickness (It can be thicker if you like). I salted, mixed and let stand for 30 minutes. I washed them in water and squeezed out the excess moisture by wringing the pieces in a paper towel. This process reduces the bitterness but if you like the bitter taste skip this step.

Tofu: I wrapped it in a paper towel with a small plate on the top as a weight and let it sit on the cutting board for 30 minutes, so that the water content is reduced. I cut the tofu in half to increase the surface areas.

In a non-stick frying pan on a medium flame, I added dark roasted sesame oil (1 tbs) and the tofu cubes without crumbling them. I fried them for 5 minutes on each side or until the surface browned. I moved the tofu to the side of the frying pan and added the bitter melon slices and stir fried for 2-3 minutes. Then I added the pork. I took the tofu I just browned, crumbled it and continued to stir fry it together with the other ingredients for another minute or two. I seasoned with salt, pepper, and soy sauce (1/2 tsp, optional). I added the beaten egg next and stirred. When the egg was cooked, I remove the dish from the heat.

This is a very homey comforting dish and the slight bitter taste of "goya" is rather unique. This will go well with any drink but especially with sake or maybe with "awamori" 泡盛 (not for us though).

Sunday, December 19, 2010

Flat iron steak with wasabi butter sauce 和風ステーキのわさびバターソース

This is another variation of Japanese style steak. It is simple to make since it does not require marinading and we like it very much. The sauce is made of soy sauce, sake, butter and wasabi and this combination is wonderful. Any cuts of steak will work but here I used a flat iron steak. Fillet mignon is another cut very much suited for this type of preparation but when I use FM, I make the slices thicker. I simply seasoned the steak with salt and black pepper and browned it in a frying pan for few minutes each side and finished it in a 400F oven for 5-8 minutes. Let it rest on a plate loosely covered with aluminum foil for medium rare. After 5 minutes of resting, I sliced into thin strips. The sauce is made by degrazing the pan with sake (2-3 tbs), dislodging all the brown bits and reducing so that only a thin layer covers the bottom of the pan. Then, add soy sauce (1-2 tsp). Finish with butter (3-4 thin pats of butter, about 1 tbs). Shut down the flame and desolve real wasabi (as much as you like). The side dish shown here is blanched "bok choy" which was dressed with karashi-jouyu 芥子醤油 or Mustard-soy sauce (Japanese hot mustard, a bit of sugar and soy sauce). To make sure, I also added a small dab of wasabi on the side. The sauce is very nice and this can go with red wine or sake very well.

Saturday, December 18, 2010

Izakaya cookbooks

I added a short description of the Izakaya cookbooks that I find useful. You can access the description using the tab third from the left located above. Unfortunately only one of the cookbooks is in English. Other Japanese cookbooks written in English also contain some dishes appropriate for Izakaya and I may be able to list them in the future.

Friday, December 17, 2010

Egg miso 卵味噌

Flavored Miso is perfect to "nibble/lick" as you sip sake. It also works well as a condiment for hot rice. This one is based on a condiment for rice I ate as breakfast when I was a kid. This is also a perfect Izakaya food. My mother made this using a large scallop shell as the pan. She told us that this was the way her father used to cook this dish. The miso and egg were well cooked, even a bit burned at the periphery but loose in the middle. I recall that I enjoyed the different tastes, textures and degrees of doneness of this dish. I do not have any idea what the recipe was except that it was made from egg and miso. Since the scallop shells I have are too small to use as the cooking vessel, I made this in a small frying pan. As a result the end product may not be that similar to what I had as a child. Without a specific recipe I made it according to my whim.

I first finely chopped garlic, ginger, and shallot  (I am sure scallion or onion will also do but I happened to have a half of a large shallot). I added a small amount of light olive oil and a dash of dark sesame oil to a small frying pan and sauteed the garlic, ginger and shallot mixture until fragrant and the shallot was soft (2-3 minutes). I added miso, mirin and sake and mixed well on a low flame (amounts are all arbitrary). After everything was combined, I kept stirring until the mixture became somewhat thick (not to the original miso consistency but softer). I then added one beaten egg and mixed until the egg was just cooked.

This was not too bad but it wasn't like the one I remembered. Maybe I should have added more eggs and I will have to be on the look-out for a really big scallop in the shell. It went well with cold sake, however. As a shime 締め or finishing dish,  we used this as a condiment when we had leftover and microwaved chestnut rice. That was also quite good. The only problem is that this dish is rather salty. As a result over indulgence in sake may occur. I may have to experiment a bit more to make this dish better.

Wednesday, December 15, 2010

Oyster and tofu "nabe" in miso broth 牡蛎の味噌鍋

It is getting cold especially in the morning and evening here in DC. We even had snow. We are definitely getting into "Nabe"  鍋 season. When I posted "Nabemono" 鍋物, I mentioned "Dotenabe" 土手鍋, which is famous in the Hiroshima 広島 region. It uses miso smeared (or "schmeared" in NY and NJ) around the rim of a pot (resembling a "bank" made of soil, "dote" 土手 in Japanese, along the river)  with dashi broth poured in the center of the pot. You dissolve the miso into the broth as you cook. Oysters, for which Hiroshima is famous, among other ingredients, have to be included, in this nabe dish. I found a variation of this dish in the 1st volume of "Otsumami Yokocho" おつまみ横町 P149, I decided to make this nabe dish. When I was choosing which vessel I was going to use for this dish, I found this one (below). I completely forgot that we had it. It is a miniature (about 7-8 inches), imitation cast iron (I guess it is made of cast aluminum with anonized surface) "nabe" with a wooden lid. It is a perfect vessel for this dish.

Here it is when the lid was lifted and the oysters were revealed. When I read the recipe, I immediately thought I had to modify this. The seasoning broth, as instructed, would be too salty and way too sweet for our taste. Besides, I needed some green.

Oyster: The oysters we got were not the best. I bought some already shucked and in a plastic container (I am no sure if they had been pasteurized, probably not). There were a total of 10-12 medium to small oysters. I washed them in salted water, drained and put them on layers of paper towels.

Tofu: I used 3/4 leftover tofu from when I made other dish. I cut it into cubes as seen above.

Miso broth: This is where I deviated from the recipe. I mixed sake (1/2 cup), miso (1.5 tbs or a bit more), and sugar (0.5 tbs). The original calls for sake (1/4 cup), miso (3 tbs) and sugar (1 tbs). In addition, imitating the traditional "dotenabe" flavor, I char the surface of the miso lightly using a small kitchen blow torch (every home cook should have one) to enhance the fragrant flavor of miso before dissolving it in sake.

After the miso broth came to a simmer, I added the tofu and when it was warmed through, I added the oysters and scallions and cooked for a few minutes or until the oysters are just cooked. Although this may not be enough even for one (you big eaters out there), we shared this. I served this in small individual bowls and, before eating, we sprinkled "sansho" 山椒 powder. You have to have sake with this. The broth was surprisingly good. Even though I reduced the amount of sugar, the broth was slightly sweet but also very delicate and excellent. Although this dish was wonderful and we enjoyed it, we could have had better quality oysters. Especially when you use oysters which can be eaten raw, slightly undercooking oysters is the best way to enjoy this nabe. 

Monday, December 13, 2010

Chicken tender Picatta with aonori 鶏の笹身の青のりピカタ

Whenever I use chicken breasts, I usually separate the tenders from the rest of the breast to make separate small dishes, which I have posted before. This is one such variation. I am not sure "Picatta" is the correct name for this dish especially since there is no lemon caper sauce.  The ultimate-and-always-correct  reference, Wikipedia, has two different versions for "Picatta" depending on ja.wikipedia or en.wikipedia, although both show an identical picture of the dish. It.wikipedia appears not to have an entry for "Piccata". In any case, since this dish is Izakaya-style, I call this dish "Picatta" as per the Japanese definition.

 I had three chicken tenders which were marinated in sake for several days in the refrigerator (I almost forgot I had it). I use the sake, not particularly for seasoning, but to prevent the meat from going bad (American chicken goes bad very quickly). 

I pat dry the tenders and lightly salt and pepper them. I cut each tender in half crosswise to make even numbers (6 pieces) for 2 small servings. I dredge the meat with flour (I used potato starch just because it was easier to get to than the regular flour in our pantry). 

For the egg coating; One large egg beaten, add dried aonori 青海苔, salt and pepper. I coated each piece with the egg mixture and cooked it in a non-stick frying pan with a small amount of olive oil on a medium low flame. Once the bottom cooked, I poured the remaining egg over the meat and turned it over, so that the meat pieces were completely encased. I turned the heat to low and cooked it for 5 minutes more or longer until the center of the thickest part is done.

I served this with a pan fried tomato half, seasoned with salt and pepper, and American mini-cucumber with moromi miso. I could have made a sweet and sour Chinese style sauce but I did not. 

This is a really good dish. The egg crust seals in the moisture and chicken tender comes out very tender and moist. The egg crust add a nice eggy taste with an oceanic flavor of aonori. The garnish also went very well especially the pan-fried tomato.

Saturday, December 11, 2010

Baked Miso marinated Chilean Sea bass チリアンシーバスの味噌焼き

Chilean sea bass is a wonderful fish to eat. This is one of those rare fish you can not over cook even if you tried. The name was totally made up for marketing purposes and it is more appropriately called "Patagonian tooth fish", (you can see why they changed the name). In the past, this fish was reasonably priced, readily available and served in many restaurants but it has been over fished. In addition, many were caught illegally or "poached". This fish is on the list of "un-sustainable" fish along with tuna. I found this in our near-by gourmet market. The fish monger assured me that this particular fish was legally caught. Since we have not seen or eaten this fish for a long time I decided to try it.  I was expendissimo!

This fish can be cooked simply seasoned with salt and pepper but I marinated it in a sweet miso marinade before baking.

I got just over 1lb of Chilean sea bass for two servings. Since I did not have much Saikyo miso 西京味噌 left, I used white miso with mirin and sugar. Again, the exact proportion is a bit iffy and I have to guesstimate; white miso (3 tbs), sugar (1tbs), yuzu juice (from the bottle, 1 tsp) and mirin (2 tbs or until right consistency is reached). I marinated the fish in a Ziploc bag in the refrigerator for several hours. I removed the miso marinade by rubbing the surface with my hand so that a small amount of the marinade remains on the surface. I baked it in a 350F convection oven for 30 minutes on a metal rack set on the top of the deep baking pan so that hot air could circulate underneath the fish.

The fish is very nice--oily with a soft flaky texture and a nice sweet miso flavor. Among the  many other fish which can be over cooked so easily ending up dry, this is an exceptionally good fish. I served it with asparagus tips blanched and dressed with sesame sauce (sesame paste, sugar and soy sauce).

Thursday, December 9, 2010

Sake brewed in the United Sates Part 3, 続続アメリカで醸造されているお酒


Another decent sake, Gekkeikan "Black and Gold"!

After tasting "G Sake", we hit another good one. This is from Gekkeikan USA and is Junmai Ginjou. Although this one is not as complex as "G sake" and will not compete with high-end premium sake, this is surprisingly good and pleasant.

The nose has faint cooked rice note but pleasant. From this nose, I was expecting the usual overly yeasty taste but the palate is clean with a fruity note (melon?) and a hint of sweetness. It gives a nice pleasant mouth feel. Finish is rather short. This is not an overly complex or sophisticated sake (I do not think this was meant to be that) but very drinkable and pleasant. This will not make it to our top choices but this is a good everyday sake and, for sure, better than "Haiku". With some good "Otsumami" drinking snacks, this sake is an excellent down-to-earth sake to enjoy, just perfect for Izakaya (even the traditional "tokkuri" 徳利 sake container-shaped bottle).

After tasting "G sake" and "Black and Gold", I am seeing some parallel to "the battle of French vs. American wines" here. In a few years, some of the American brewed sake may win in a blind tasting against Japanese sake, which, thereafter, may be known as  "the judgement of Tokyo".  Mark my words. Watch out "Fudo" 不動 and "Juyondai" 十四代! Hope I can say in the near future, "Remember I said that way back when". (Probably NOT!)

Wednesday, December 8, 2010

Sake brewed in the United Sates Part 2, 続アメリカで醸造されているお酒

Finally we came across an excellent Junmai Gingo Genshu called "G sake"!

Over the years, the number of sakes brewed in the U.S. has been mostly non-premium sake. We tasted a fair number of them and until recently, none of them has been really remarkable. Gekkeikan Haiku was our favorite for a while basically by default--it was the best of the bunch. After our recent trips to Japan, we realized the extent to which domestic (US) sakes fell short of the level of premium Japanese brewed sake (although many Japanese brewed sake are not that good either). We finally found a sake which is on a par with top ranking sake brewed in Japan. This one is called "G sake" from SakeOne. This is a Junmai Ginjou Genshu 純米吟醸原酒. Three selected batches were blended and aged for 10 months (I assume this is a cold aging process). 

The nose has a nice floral with mineral note, very pleasant. The mouth feel, when first in your mouth, is nicely smooth, silky and slightly viscous. Very clean taste and nice honeysuckle flavor lingers in mid palate with slight hint of sweetness and ending into long finish with some hint of spices. Despite its high alcohol content of 18%, no appreciable boozy taste (although we felt it afterwards). We tasted this chilled and we may taste it again at room temperature but this should not be drunk warm. Even other sakes from SakeOne have improved and we hope, for the next and future brew years, they will deliver this level of quality or better. Brew year is denoted with prefix "BY" followed by a number which represents the year of the present emperors reign i.e "Heisei" 平成 year. For example "BY20" means the brew year was the 20th year of the present emperor's "heisei" reign. For those who tend not to think in terms of heisei years, that would be 2008, since the Heisei emperor's reign started in 1989. (Now wasn't that straight forward?). I assume the one we tasted was BY21 or could be BY20.

Compared to Japan, the sake available in the U.S. is limited and good ones imported from Japan are expensive. Now, there are quite a few sake specialized stores including some on the internet. Regular on-line or brick-and-mortar wine stores do carry some sake but the choices are very limited. Most of the sake imported from Japan is relatively large scale production with few exceptions. Among the sakes brewed in Japan and imported to the U.S. which we tasted over the years, we like "Mu" 無 junmai dai-ginjou 純米大吟醸 from Yaegaki 八重垣 Brewery in Hyougo 兵庫, Japan. In terms of cost performance and clean taste, we thought, it was the best available. We could often find "Mu" at the nearby Japanese grocery store, however, markup in price was quite substantial. We now order it through the internet from New York/New Jersey. More recently, one of the local liquor stores start carrying "Mu" (we special ordered this once before from this place. It may be that after our special order they started stocking "Mu" regularly). After the discovery of "G sake", we now have two house sakes, "Mu" and "G sake".  The characteristics of both sakes are quite different and we now have two nice choices; one brewed in the U.S.!

Tuesday, December 7, 2010

Sake brewed in the United Sates Part 1, アメリカで醸造されているお酒

On a recent visit to the Maryland County Liquor store I was surprised to see a selection of Sakes. While I was familiar with most of them, I had not tasted some of them for many years and decided to have a small sake tasting with our house sake "Mu" as a reference (the rightmost in the picture below).

There are a small number of companies brewing sake in the United States; and they generally do not produce premium sake. The most, however, do produce "Ginjou" level sake. According to the "Insider guide of sake", there used to be six (6) sake breweries in the U.S.  (listed below the picture) but now there are only 4. It is not clear what types of rice they use except that it is "high-quality" rice from the Sacrament valley in California. Japanese short grain rice including Akita komachi and Koshi Hikari are grown there. These rices are good for eating but not for sake making.  It appears that Calrose rice (85% of California short/medium grain rice being produced) is used for sake brewing in the U.S., for sure, by SakeOne. In terms of water, all the California manufacturers said they used water from Sierra Nevada mountains snow melt or in the case of the Oregon manufacturer, water from the aquifer at the edge of the Oregon forest (SakeOne).


1.Hakusan 白山 in Napa, California: This was the U.S. only brand and no Japanese sake with this name. It was owned and operated by a Japanese company that did not produce sake in Japan. We actually visited the brewery on a wine tasting trip to Napa soon after it opened and took a tour of the facility. We have fond memories of the experience. Unfortunately, it closed a few years ago. After moving to the east, we never saw this brand of sake for sale here. We still have a decorative mini-komokaburi container (empty) from our visit to Hakusan.

2. Hakushika 黒松白鹿 in Colorado: In 1992, they opened a sake brewery in Colorado but it was closed in 2000 and all sake production was moved back to Rokko brewery 六光蔵, Japan. We only bought and tasted regular "honjouzou" class sake over the years (I am not sure it was actually brewed in the U.S.--probably it was). We used it mostly as cooking sake.

3. Gekkeikan 月桂冠 in Folsom, California: Currently, our cooking sake is Gekkeikan. As a regular sake, it is not too bad and widely available. If you drink sake warm, this is certainly drinkable. Gekkeikan also makes semi-premium sake; "Haiku" 俳句, Silver, and "Black and Gold". Haiku is the "Tokubetsu Junmai" class and drinkable. It is brewed specifically to be consumed cold.  "Black and Gold" is on order, when it arrives, we will have a tasting.

4. Takara 宝 in Berkley, California: The Japanese parent company is located in Kyoto 伏見, 京都. The majority of Shochikubai 松竹梅 sake sold here appears to be U.S. brewed. They also make "Junmai", "Tokubetsu junmai (to 60% polished)" and "Junmai Ginjo" (to 50% polished). Again, the "Junmai" variety is OK to drink warm and good for cooking. We have not tried others. They also produce sweet cooking wine "Takara mirin".

5. SakeOne  in Forest grove, Oregon: This is a very interesting company and probably, at this point, the sole American brewery committed to making only premium sake. Although this is an American company and Momokawa 桃川 in Aomori 青森 has a partnership with it--providing the technical know-how (I suppose) and their brand name "Momokawa". The sake makers appear to be non-Japanese. Under the Momokawa name, they make four Ginjou sakes; Diamond, Silver, Ruby and Pearl. We tried these quite some years ago and did not like any of them. I decided to taste a few (Diamond and Silver) hoping the more recent brew may be different. The recent brews appear to be better than before but still not great. They also make fruit infused sake under the "Moonstone" label but I am a bit of a purist when it comes to sake and did not try them. Apparently they started making their top of the line "G joy" or "G sake". I found a place to buy this sake and will taste it when it arrives

6. Ozeki 大関 Hollister in California: Ozeki is the oldest brewery of sake in the U.S. The parent company, Ozeki 大関,  is located in Nada 灘. If I remember correctly, they started in an old dairy processing plant in US. Again, the regular sake they produce is just OK to drink warm or for cooking. Besides the regular brews, they produce Ginjo but I have not tried it. They also produce "special dry" and nigorizake.

Sunday, December 5, 2010

Artichoke hearts stuffed with shiitake mushroom duxelle アティチョークのシイタケデュクセルづめ

When I posted artichokes, I said that the hearts are the best part and the petals are essentially a dip delivery system. It is fun to eat the outside petals working your way to the heart but sometimes, you just want to get to the best part quickly. This is a perfect small dish which goes wonderfully with wines. The taste of artichokes gets enhanced if you drink a small amount of water after tasting for some reason. The shiitake duxelle has nice almost meat-like flavor but this dish is totally vegetarian (if you care).

I baked this is a toaster oven and the temperature was too high and the heat was uneven making the bread crumb crust unevenly darkened but it still tasted ok. Here is the cut surface (left) and I served the artichoke with the chicken strudel (right) as a first dish of the evening. We had a Napa cab, which is rather austere and Bordeaux-like but without a funky nose, Round Pond Cab 2006 (WE 92). We are not sure we would give a score of 92 to this wine; a bit too austere for our taste. Nevertheless, this starter dish was a good match for this wine.

Cleaning the artichokes: It requires some work but once you are used to it, it is rather quick. As seen in the image below, using a sharp long knife, I cut around the outer petals by moving the knife blade up-and-down while rotating the artichoke. It is similar, but more exaggerated motions, to "katsura muki" かつらむき for daikon. You end up with something like in #2. Cut the inner young petals off and remove the outer skin of the stalk and the bottom green part of the heart (#3). You may want to have a lemon half handy so that you can rub the cut surface with lemon to prevent discoloration. I plunge these cleaned artichoke hearts into acidulated and salted water containing lemons (1, cut in half with juice squeezed into the water), bay leaves (2-3) and onion (1 medium roughly cut up) (#4). You could also add black peppercorns.

Cooking artichoke herts: Gently boil the hearts for 20- 30 minutes until a skewer goes through the bottom of the hearts easily. After they have cooled, I remove the remaining inner petals to expose the chokes (left in the image below).

Removing the chokes: Using a spoon, remove all the chokes, even a little bit of chokes left will be very unpleasant. The image below on the right is after the chokes have been removed.

Although you could just eat the artichoke hearts as is with melted butter or mayonnaise, I decided to make it a bit more fancy; artichoke hearts stuffed with shiitake duxelle. 

Duxelle: This is for four (4) artichoke hearts. The classic recipe uses button mushrooms but we like fresh shiitake. I finely chop a shallot (1 medium), and fresh shiitake mushrooms (one 3.5 oz package or about 100 grams). I also include the stems. After removing the stem from the cap, I cut off the discolored end and then tear it along the direction of the fibers into thin strands and then chop finely. I removed the stalk of the artichoke hearts so that the hearts will sit on the plate properly. I chop finely the artichoke stalks.

I saute the shallot first with light olive oil (1-2 tbs) for a few minutes and add the shiitake and the artichoke stalks. I season it with salt and pepper and keep sautéing for several more minutes. The pan should be rather dry without any liquid because the mushrooms will exude some liquid. I add Marsala (2 tbs, or port if you prefer) and saute until all the liquid has evaporated. I remove from the heat, taste and adjust the seasonings and let it cool down to room temperature. When it is cool, I mix in chopped parsley (1 tbs).

Using my hand, I coat the surface of the artichokes hearts with olive oil and then stuff the artichokes with the duxelle (left) and top it with panko bread crumbs mixed with olive oil (right). I bake this in a 350F oven for 20 minutes. (This time I used a toaster oven and it burned the surface, I should have used a regular oven).

This looks like a lot of work but I did it in stages over two days so it was not too bad. If you like the taste of artichokes, you will like this dish.

Friday, December 3, 2010

Chicken strudel with carrot and asparagus 鶏肉, 人参, アスパラガスのフィロ 巻き

This is a nice small starter which can be perfect with your wine or beer. This is also from the "Openers" cookbook. The original name was "Chicken Mosaic Strudel" but I changed it to a more descriptive name. This is somewhat similar to making a sushi roll. Essentially, you put cooked chicken in a creamy cheese sauce then roll in layers of phyllo dough with strips of carrot and asparagus and bake. Again, I did not follow the recipe precisely.

Chicken: I use one large boneless, skinless half breast. I butterfly it to make the thickness even and made 1/4 wide strips. I season it with salt and pepper and cook in a frying pan with olive oil (1 tbs) for several minutes until the chicken is done leaving brown bits on the bottom of the pan. 

Vegetables: I use pencil asparagus (10-12), hard root end trimmed and blanched. I cut carrot (two medium) into long strips after peeling the skin (1/8 wide) and cook in a salted water until cooked.

Cream sauce: In the same pan in which the chicken was cooked, I add additional olive oil (1 tbs), finely chopped celery (2 stalks), and onion (1/2 medium). I saute for several minutes scraping off the fond left on the bottom of the pan from cooking the chicken, and season with sat and pepper. I add cream (1/4 cup and a bit more) and grated gruyere cheese (about 1/4 cup). After simmering for 5 minutes, this will become a nice thick sauce. Put back the chicken strips and coat them with the sauce and set aside.

Chopped roasted almond: I roast whole almonds (1/4 cup) in a toaster oven (actually my wife did). After they cool to room temperature, I chop them finely using a small bowl food processor. I mix in Japanese panko (3 tbs but any good bread crumbs will do).

Phyllo dough: I use store bought frozen phyllo which is thawed for 20-30 minutes at room temperature.

Assembly: I did not take pictures of the most crucial step of rolling. I use kitchen parchment paper on the bottom and put one layer of phyllo, brush melted butter and sprinkle the almond/bread crumb mixture. Repeat this 3 times (or more if you like, see pictures below on the left). Exactly as if making a sushi roll, put the chicken strips coated with sauce, the asparagus and the carrot strips on the end of the phyllo sheets nearest to you. Using the parchment paper as an aid, roll it exactly like making a sushi roll.  Brush melted butter all over and set it on the cookie sheet lined with aluminum foil (picture below on the right). 

Bake in a 450F oven for 20-25 minutes or until the phyllo is nicely golden. Let it cool down a bit and slice exactly like a sushi roll and serve. This sounds complicated but it is worth it and is a very nice dish. It keeps very well wrapped in parchment paper in the refrigerator for a few days. Even when re-heated the phyllo is nice and crispy. To re-heat, unwrap, slice and warm it up in the toaster oven for few minutes. The only problem with this dish is that it is not dietetic with all the cream, butter, and cheese.

Wednesday, December 1, 2010

Sautéed mix mushrooms with butter and soy sauce きのこのバータ醤油いため

This is a typical cook-as-you-drink type dish. I had leftover oyster mushroom (maitake 舞茸), trumpet royale (similar to eringi エリンギ or eryngii), alba clamshell and brown clamshell (hon shimeji ホンシメジ) from when I made the exotic mushroom soup. Trumpet royal is, I suppose, very similar but different from eryngii (popular in Japan but not here) and has a nice firm texture and porcini-like flavor.
This dish is not based on any recipe but has the classic flavor (to me, classic but I am not sure it is classic to any cuisine) of soy sauce, butter and garlic. The mushrooms, especially trumpet royale has a nice meaty texture and flavor and is perfect for any accompanying drink. The amount of mushrooms I use is about twice as much as you see in the picture above (that is what I had left).

If you wash the mushrooms, they, especially oyster mushroom, tend to absorb water. You may choose not to wash the mushrooms. Regardless of whether I wash them or not, I spread them on a paper towel and let them stand for 1 hour or so at room temperature before cooking, so that the surface of the mushrooms is completely dry. This procedure also lets some excess moisture evaporate from the mushrooms themselves. I tear the trumpet royale lengthwise from the stem end. I just separate the oyster and clamshell mushrooms; if too large, I cut them into a bite size lengths.

In a large frying pan (I use a 12 inch non-stick, do not crowd the mushrooms) on a high flame and add peanut oil (1 tbs, I use peanut oil to begin and add butter later because of the high smoking point of peanut oil). When the oil is almost at the smoking point, I add the mushrooms. Any water left on the surface of the mushrooms will make the oil splatter. I do not salt at this time since it will draw out moisture from the mushrooms. I saute for several minutes or until the mushrooms develop brown spots on the surface. You should not see any liquid coming out at this point. I add pats of butter (less than 1 tbs) and turn down the heat to medium. When the butter melts, I add garlic (1 clove, finely chopped), salt and pepper and stir. At the end, I add soy sauce (2 tsp) from the side wall of the pan so that it will be heated and become fragrant before mixing into the mushrooms. 

This is a simple and satisfying dish but to make it right, you have to make sure that liquid does not come out of the mushroom while cooking; drying the mushrooms before cooking and using high heat as described above are two of the secrets for success. We had this with cold sake but wines will be wonderful with this as well. Instead of soy sauce, you could use other herbs such as tarragon or thyme and also deglaze with Marsala,  port, or sherry to make it more Western in style.

Monday, November 29, 2010

Exotic mushrooms and wild rice soup きのことワイルドライスのスープ

I am again drifting from the Izakaya theme but this is one of our favorite soup for special occasions. It is almost a cross between porridge and soup depending on how much wild rice I add. It can be certainly served as either "shime" (ending) or "opening" dish.

The original recipe came form the cookbook called "Openers", which has recipes and very artistic pictures of the appetizers and soups, i.e., "openers". We got this some years ago and it appears that this book is not available any longer. This soup can be a bit expensive to make depending on what kinds of exotic mushroom and types of wild rice are used. 

Mushrooms: For making soup stock, regular white button mushrooms are used, which will be pureed into the soup stock (see below). For the mushrooms in the soup, I used chanterelle, oyster (maitake, 舞茸), shiitake シイタケ, trumpet royale (very similar to eringi エリンギ or eryngii), alba clamshell, and brown clamshell (hon shimeji ホンシメジ) mushrooms this time. Cut them into relatively large pieces so that you can see and taste the mushrooms. Trumpet royale may be cut or torn along its length relatively thinly since it is rather firm. The amount and kinds of mushrooms you can use are totally up to you but using at least one exotic wild mushroom will make this soup special. Chantrelle and morel are two of my favorites and tend to be rather expensive.

Wild rice: Use 100% wild rice either true wild rice from the lakes of Minnesota or cultivated ones. I used the latter. Before adding to the soup, soak it in a hot water for one hour. Do not use a mixed wild rice and regular rice, which is often sold as "wild rice" in a ready-to-use box. You can not substitute wild rice with any other rice. The result will be totally different. So use wild rice. 

Mushroom Soup Stock: To make the soup stock, I sauteed the shallots, (thinly sliced, 5 medium), and carrot, rather finely chopped (one medium) in butter (2 tbs) in a large (12 inch) frying pan on a medium high flame for several minutes. It is ok to brown the butter in this process. I then add thinly sliced white button mushrooms (stem end removed, one package or about 15-20 small and medium ones) and sauté for 5-7 minutes. The reason I use a rather high heat is that the water exuded from the mushrooms needs to be quickly reduced leaving brown bits on the bottom of the pan. Deglaze with chicken stock (1/2 cup, my usual Swanson no-fat, low sodium) and turn down the flame to low. Put a tight fitting lid on the pan and simmer for 5 minutes. I add this to the stock pot with warm chicken broth (about 3 cups, again Swanson) on simmer. Using an immersion blender, I puree the solids in the soup stock. I put the pan in the sink to make spills easier to clean and blend. Once blended the pot goes back on the stove on simmer. 

I sauteed the mixture of the mushrooms from above in a large frying pan on a high flame with butter (2 tbs) for several minutes until the mushrooms are soft and browned without any liquid remaining in the bottom of the pan (picture on the left). I deglaze with brandy (2-3 tbs, I used Christian Brothers but it is up to you to use Remy Martin XO here). Be careful since it will ignite (I pour the amount of brandy in a metal cup before deglazing and flambe-ing). Let the flame die down and add the mushrooms to the soup stock. Add the drained wild rice (I only had 1/2 cup but you could use more, up to about 1 cup). I seasoned with dried leaf savory (1/4 tbs, if you have fresh savory, use fresh, 1/2 tbs, but I do not like to use "ground" savory) and fresh chopped thyme (sparingly, thyme can be strong, I used the ones still surviving in our herb garden). Actually, I add fresh thyme towards the end of cooking. I let it simmer for about 40 minutes until the wild rice is cooked. I adjust the seasoning with salt and pepper. I served the soup garnished with chopped chives and freshly cracked black pepper.

This is a wonderful soup. In addition to all the flavors from the mushrooms, the wild rice really adds a nutty flavor as well as a thickness and unctuous mouth feel of the soup. We served this for Thanksgiving and Christmas in the past with great success. We had this with my wife's rye whole wheat bread tonight; an extremely satisfying combination. The wine we had was Bordeaux (unusual for us), Chateau Pavie-Macquin 2006. This is rather young and fruit-forward (for Brodeaux) without any funky nose. The earthy flavors of mushrooms went so well with this wine.

Saturday, November 27, 2010

Nabemono 鍋物

Nabe 鍋 means "pot". Nabemono is an all inclusive term of any hot pot dish but often the dish itself is called "nabe". Any dish you cook (usually on the table) in a pot (most often earthenware) with broth is called "nabe" or "nabemono". Sukiyaki  すき焼き, shabu-shabu しゃぶしゃぶ and oden おでん may be considered types of nabe in a broad sense but I do not think it is appropriate to include them in "nabemono". Depending on the ingredients and seasoning of the broth, you have many variations and many names of "nabe". Whatever the name, in cold winter days, nabemono is one of the most comforting  and warming dishes. The types of broth seasonings could be;

1) Dashi without seasoning; When your broth is not seasoned, you use a dipping sauce such as ponzu. Tarachirinabe タラちり鍋. Mizutaki 鶏の水炊き, and Yudoufu 湯豆腐 are three such examples.
2) Dashi and soy sauce based; Yosebabe 寄せ鍋 is the best example.
3) Dashi and miso based; Chankonabe  ちゃんこ鍋, Ishikarinabe 石狩鍋, and Dotenabe 土手鍋 are three such examples.

Since other ingredients will impart lots of flavor to the broth, the starting broth is usually a simple kelp broth. In terms of the ingredients, you could limit them to only a few items (like yudoufu in which only tofu or tofu and nappa cabbage are usually used) or you could add anything including sea food, meat, vegetables, tofu, fish cake and more, as is done in chankonabe and yosenabe. There are no rules (although there are some guide lines). The name of the nabe changes based on the ingredients, locality, and types of broth.
Here is one example I made one evening in a small one person pot. I am not sure what I should call this. A type of yosenabe but I used mostly vegetables and at the very end decided to add shrimp. I first made dashi from kelp and a "dashi pack". This is like a tea bag but instead of tea, combination of pulverized bonito flakes, dried fish and kelp (there are several different kinds) are placed in the bag. It is much better than granulated instant dashi but still very convenient. I seasoned the broth with mirin, sake and soy sauce (to taste, since I did not measure). I started with the ingredients which take the longest time to cook. In my case, I added daikon (halved and thinly sliced) and carrot (sliced a bit thicker than the daikon) first, then after 10 minutes or so, I added the white part of Nappa cabbage or Hakusai 白菜, tofu 豆腐, followed by (after 5 minutes) maitake mushroom 舞茸, green parts of Nappa, scallion, and finally shrimp.

The ingredients I could have added include fish (usually a white meat, hardy fish such as cod), chicken (cut up thigh meat), fish cakes, and shell fish. As a condiment, I used seven flavored Japanese red pepper powder 七味唐辛子. To finish the meal, I could have added cooked rice to make porridge, or noodles such as udon noodles but I was too full just eating the items I cooked. Traditionally, warm sake is the choice of drink but we like cold sake even in winter and with nabe.

Thursday, November 25, 2010

Baked cornmeal drumett "tulip" 手羽元チュウリップのコーンミールオーブン焼き

I bought chicken wings over the weekend but we did not use them. I marinated them in sake and kept them in the refrigerator so that they would stay fresh for several more days. Since it was not feasible to grill them over a charcoal fire on a weeknight - not to mention that it is getting too cold and dark to barbecue after we get home, I baked them in the oven to make a Yakitori style dish. I decided to do a slightly more elaborate preparation of the drumetts and made "tulips".

It appears this "tulip" preparation is more popular in Japan than here. First, I cut off the wing tips (discard) and then separate the wings and drumetts. For making a drumett "tulip" (here is a visual aid), just loosen the meat from the bone and nick the skin around the joint so that skin and meat can be pushed down and inverted making a "tulip" shaped meat on one end with bone sticking out as a convenient handle. Naturally, I could have deep fried them but I decided to bake them in the oven instead. To make it slightly more interesting, I added a cornmeal crust.

I just evenly coated the the drumett tulips with light olive oil (using my hands) and season with salt and pepper. I made a mixture of yellow cornmeal and potato starch (about 4:1 ratio) and dredged the chicken. I prepped the wings as usual making a cut beween the bones through the skin and seasoned with salt and pepper. I placed the wings and drumetts on a baking sheet with a raised metal rack (I let the drumett tulips stand up with the meat side down). I baked them in a preheated 450F convection oven (very hot) on the top rack for 20-25 minutes until the surface is golden brown as seen in the above picture.

I served this with wedges of lemon and moromi cucumber. It is a bit healthier than deep frying and the cornmeal flavor is kind of nice. 

Tuesday, November 23, 2010

Snap peas in dashi broth スナップ豌豆の塩びたし

This is a very healthy and refreshing small dish which goes well with sake or any drink. Recently, Dave Perry recommended two Izakaya cookbooks to me called "Otsumami Yokocho" おつまみ横町. There are two volumes. Both are called "drinking snack alley". The second is distinguished from the first by the additional phrase in the title of  "Mou ikken"  もう一軒 meaning "one more place". This is an appropriate name for the second volume because this phrase is a classic nagging request made by drinking enthusiasts (read; drunkards) who have finished their first rounds but don't want the bar hopping to end..."just one more place". In any case, I got these books from Amazon Japan (The shipping was more than the cost of the books). These two volumes each contain recipes for 185 small dishes which go well with drinks. Many of the dishes are rather simple (or easy to make) and some are not really new or original but the two volumes still contain a good number of dishes that I would like to try (and post) - thank you Dave, I can continue my blog a bit longer. This is the first such dish (page 12 of the second volume). 

Disclaimer: As usual, I often read these recipes but then I end up doing whatever feels right for me, so the end result may be different from what is described in the books.

Snap peas, Japanese name is "sunappu endou" スナップ豌豆, is the hybrid developed in the U.S. but very popular in Japan as well. We like it more than snow peas. This is a rather simple but elegant and healthy dish especially for an Izakaya snack and also taste good.

I removed both ends of the snap peas and blanched them in salted boiling water for several minutes, until cooked but still crunchy. I drained and put in ice water to stop cooking. I drained again and patted dry with a paper towel.

I made a broth from a dashi pack (kelp and bonito in a tea bag) and added salt to taste. I let the broth cool to room temperature and then refrigerated. I added the above blanched snap peas to the broth and let it marinate in the refreigerator overnight.

It has nice crunch. It has a sweet taste (enhanced by mild saltiness in the broth) with subtle dashi flavor. You feel good eating this, a totally guilt free drinking snack. You can have this instead of edamame 枝豆.

Sunday, November 21, 2010

Pork loin Barbecue 豚のロースのバーベキュー

Pork is definitely the most popular meat in Japan, at least, when I was there (especially in my parents' household). Most of the time Japanese use thin slices or ground pork rather than a big hunks of the meat. Japanese style thinly sliced pork belly 三枚肉 is most commonly used in Japanese dishes but it is not easily available here in US. More recently, it appears that roasts including pork roast is getting popular in Japan. Although I posted a dish using leftover roasted pork, I decide to post it again with more details.
The cut of pork we got was a loin. I trussed it (lower left) first. I then cut thin slivers of garlic (5-6 cloves). Using a boning knife, I make 1-2 inch deep multiple slits in the meat and inserted the garlic slivers (below, right). You should make sure all the garlic slivers were completely inserted into the meat so that it will no burn on the surface.
I smeared olive oil all over the pork and applied my dry rub consisting of salt, pepper, clove, cinnamon and cumin (below, left). I use an equal amount of salt, pepper, and cumin and less amount of cinnamon and clove but this is totally up to your taste. Like my chicken, I hot smoke and babecue in a Weber using indirect heat. I put a temperature probe to the middle of the meat and when it registers 145-150F, I take it off the weber (below, right) and cover it loosely with aluminum foil and let it sit for 10-15 minutes on a plate. I remove the trusses, slice, and served it with its own juice accumulated in the plate on which the pork was resting. The Crust has nice flavors and au jus is also very nice and we can only have au jus when it was just barbecued.
This time, I served the pork with ratatouille (I made this the day before) and mashed sweet potato. My wife made the sweet potato. The sweet potatoes were cooked in the same Weber with the pork, covered with aluminum foil. She added butter, chopped chives, and soy sauce (Yes, soy sauce). I did not remove the garlic from the slices of pork but if you use it for sandwich, it may be wise to remove the garlic from the roast as you slice it. As you can easily imagine, the leftover pork is very handy to have for the weekdays.

Friday, November 19, 2010

Braised Daikon green and Jako 大根葉とじゃこの炒め物

This is another one of those small nothing dishes which goes so well with sake and goes even better with hot white rice. I mentioned before that the daikon we see in the U.S. usually does not have the greens attached. But this weekend, I got one that did. When I get diakon greens, I try to make some kind of small dish from them. This is a variation on the same theme. This time, I braised them with small semi-dried and salted fish hatchlings called "chirimenjako" 縮緬雑魚 or "jako" for short.


These daikon greens were a bit on the tough side as you can see from the picture--the stalks are thick. So I blanched them in salted water first (for 2 minutes) and shocked them in ice cold water to bring back the bright green color. If the greens are tender, you can skip the blanching process. I squeezed out the excess water and chopped them finely. In a frying pan, I heated 1/2 tbs of dark sesame oil and saute one package (probably 3-4 tbs) of frozen "jako" and sauteed until they were slightly brown and crunchy. You may want to taste the "jako" at this point since the saltiness may vary quite a bit and the amount of soy sauce needs to be adjusted accordingly. I then added the blanched and chopped daikon greens and sauteed for 1-2 minutes. I added 2 tsp of sake, 1 tsp of mirin and 1-2 tsp of soy sauce.  I braised until the liquid was almost gone. You could mix in roasted white sesame seeds as well. I made this one a bit too salty so this is better with hot white rice. Just mix it in and enjoy.