Tuesday, February 26, 2019

Quick cheese bread クイックチーズブレッド

My wife found this recipe in Cooks Illustrated "All Time Best Bread Recipes" and decide to make it one afternoon. I helped her by dicing and grading the cheeses. This is a quick bread but came out really nice with cheesy flavor. Deviating a bit from the original recipe, we used two kinds of cheeses; cheddar and smoked gouda.


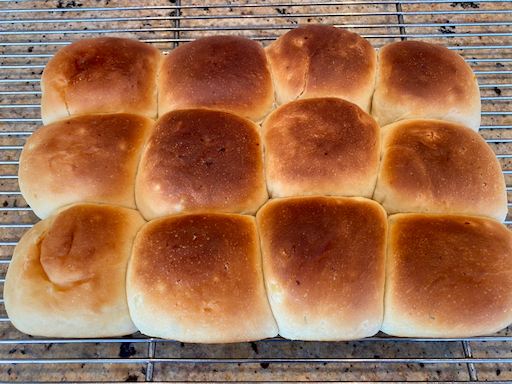
This is just after the bread cooled down to room temperature. Some cheddar has melted but gouda remained. As usual, even distribution of the cheeses did not happen.


Ingredients:
3 oz Parmesan Cheese, shredded (1 cup) (We grated and used 1/2 cup)
1 1/2 cups (12 1/2 oz) AP flour
1 tbs baking powder
1 tsp salt
1/8 tsp cayenne pepper
1/8 tsp black pepper
4 oz extra-sharp cheddar cheese, cut into 1/2 inch cubes (1 cup) (we used 1/2 cup cheddar and 1/2 cup smoked Gouda)
1 cup whole milk
1/2 sour cream
3 tbs unsalted butter, melted and cooled
1 large egg, lightly beaten

Directions:
Heavily grease a loaf pan. Spread half the parmesan on the bottom of the pan. Mix the dry ingredients; flour, baking powder, salt, peppers together in a bowl. Mix the wet ingredients, milk, sour cream, melted butter, and egg together in another bowl. Mix the cheddar and gouda cheese into the dry ingredients and mix until they are coated with the flour. Add the wet ingredients to the dry ingredients. The batter will be very heavy (don't over mix). Put the batter into the loaf pan and cover with the remaining parmesan cheese. Cook in a 350 degree oven for 40 to 45 minutes or until it is golden brown and a skewer comes out clean (the skewer may have residue on it if it hit a pocket of cheese. In which case move to another central area and try again.)


Another variation would be to add bacon and caramelized onions omitting the butter. (How could that possibly taste bad?)

This bread was extremely good with a very cheesy flavor. The peppers added a nice little zing that kinda caught up with you after several bites. The cheddar melted entirely and disappeared into the bread. The smoked cheese did not melt completely (as is the case with smoked cheeses) leaving a pocket of concentrated smoked cheese flavor that was very nice. The parmesan cheese on the top did not form a crust and it mostly fell off when the bread came out of the pan. Next time it would probably be better to add the parmesan to the batter. This bread works well. I can already taste the bacon in the next loaf.

Saturday, February 23, 2019

Five appetizers on a five compartment plate 新しいお皿とお通し5種

Some izakayas are known for giving multiple "otoshi" お通し appetizers to guests at the start of a meal.  For example we had six ostoshi at "Suiko" 酔香 and "Shuhai" 酒杯. We really love these types of dishes and often make similar ones at home. But sometimes multiple small bowls and dishes are a bit of work to arrange and clean. When I was browsing the "Korin" website recently, I found a long rectangular dish with five small square indentations and thought it would be a perfect way to circumvent the multiple-small-dish-cleanup issue. So, this is my first attempt at serving 5 small appetizers on this new plate. None of appetizers; only the dishes are new.


Shown below from left to right; #1 miso marinated cream cheese クリームチーズの味噌ずけ, and #2 "Jako" hatchling fish arima-ni ジャコの有馬煮. #1 was almost 10 days old and the flavor really got better over time as the cheese absorbed the salty nuttiness of the miso. I served this on thinly sliced mini-cucumber. #2 is the last of the leftovers from the Sushitaro osechi box (I heated it up in sake and soy sauce to make it last). This time since I was heating up other items in the toaster oven, I decide to include this. The result was a bit surprising and very good. The surface of the little fish got really crispy (nearly burnt) and they became nice crunchy bits.


Shown below #3 is chicken patty with dried fig and gorgonzola cheese いちじくとブルーチーズの松風焼きwhich was topped with figgy cranberry sauceいちじくクランベリーソース. #4 is braised spicy tofu ピリ辛豆腐 with blanched sugar snap.


Below, #5 is blanched broccoli dressed in sesame dressing ブロッコリーの胡麻よごし. It was an attempt to add vegetables for a "nutritionally balanced" appetizer.


Since I cook multiple dishes over the weekend, keeping them in the fridge then heating them up in the toaster over when we are ready to eat I could easily have added a few more items. Maybe, I should aim for the type of "Hassun*" 八寸 appetizers we got at "Kappa" 小料理屋河童  in  San Francisco which had 15 small appetizer dishes on one square plate.

* "Su-n" is a traditional  Japanese measurement (one "su-n" 一寸 is about 3cm, so eight "su-n" or "Hassun" is about 24cm). The idea here is to serve several small seasonal dishes on a "hassun" or "eight su-n" square cedar tray (or plate) which is usually the second course of a traditional "Kaiseki" 会席 or 懐石 course dinner.

Tuesday, February 19, 2019

Puff pastry cheese bites パフペイストリーリコッタチーズ

My wife really likes small cheesy appetizers in all various forms. This is based on a recipe she saw on line called "Simple Leek and Ricotta Tarts". She made substantial changes to the recipe.


The end  result was quite different in appearance (and maybe in taste).


Ingredients:
500 grams (1 pound) fresh ricotta cheese

1/4 cup grated parmesan cheese

1 egg
one sheet ready-prepared puff pastry
1 shallot, trimmed and finely sliced
2 tablespoons butter, melted
2 dried thyme leaves
 to taste
Salt and cracked black pepper

Direction:
Preheat the oven to 180°C (355°F).
Place the ricotta, parmesan, thyme and eggs in a bowl and whisk until smooth.
Roll out the pastry on a lightly floured surface until 3 mm (1/8 inch) thick.
Cut into bite sized squares and place on baking trays lined with non-stick baking paper. Using a small scoop put the ricotta mixture over the pastry squares leaving a border (#1).
According to the recipe place the shallots on top of the ricotta mixture (#2), (next time we will dice the shallots and mix them into the ricotta mixture).  Brush with the butter especially on the exposed pastry edges. Sprinkle with salt, and pepper and bake for 25–30 minutes or until golden (#3 & #4).


These weren't bad but they were a little bland. Next time we will pump up the flavors by adding the shallots directly to the ricotta mixture, using a bit more thyme and salt. The ricotta mixture expanded to cover the pastry making a nice cheesy crust. They reheated well in the toaster oven. We toasted them crust side up on parchment paper. That way the crust becomes crunchy again and the parchment paper keeps the cheese from sticking to the pan. These are nice little cheesy bites to go with wine.

Saturday, February 16, 2019

Green tea cake with "Kuromame" black beans 黒豆入り抹茶ケーキ

I usually do not make deserts but this was an exception. I saw the recipe (in Japanese) in one of the food blogs I follow. The blogger is a very talented and her cooking covers a wide range of international and Japanese cuisines.  Since I had leftover "Kuromame" 黒豆 black beans from the Osechi box and green tea powder or "macha" 抹茶, I decided to make this cake. Sushitaro osechi included a similar cake one year.  Since this is not my usual area of cooking my wife advised me on several of the techniques (such as creaming sugar and butter) and even though I had a slight "hiccup" in the butter creaming department, the cake came out extremely well. We had this as an afternoon snack with "sencha" 煎茶 green tea (from Hibiki-an 響庵).


The cake is moist with a nice green tea smell and flavor. Although I did not brush the cake with brandy as suggested in the original recipe, the brandy flavor came from the black beans since they were soaked in brandy before baking. This is an excellent cake.


The below are English translation of  the original recipe in Japanese.

Ingredients: (for one loaf of 19cm x 9cm)
100g unsalted butter, room temperature
65g  sugar
50g AP flour
20g potato starch (Katakuri-ko)
40g almond flour
1/2 tsp baking powder
1/4 tsp salt
1tbs green tea powder (macha)
2 eggs, lightly beaten
3tbs plain yogurt
1tsp vanilla essence
Japanese "Kuromame" black beans in a syrup, arbitrary amount, drained and soaked in 2 tbs brandy.


Ingredients: X2 (for 2 loaves of 19cm x 9cm)
200 g unsalted butter, room temperature
130 g  sugar
100 g AP flour
40g potato starch (Katakuri-ko)
80g almond flour
1 tsp baking powder
1/2 tsp salt
2 tbs green tea powder (macha)
4 eggs, lightly beaten
6 tbs plain yogurt
2 tsp vanilla essence
Japanese "Kuromame" black beans in a syrup, arbitrary amount, drained and soaked in 4 tbs brandy.


Directions:
1. I mixed all dry ingredients (including the sugar) together and sifted to remove any crumbs.
(I made the mistake of not creaming the butter with the sugar. My wife (always helpful) pointed out that this process is very common in cake making or cookie baking. So in an attempt to recover from my mistake, I punted).
2. I added the butter and eggs to the plastic mixing container for the immersion blender. Using low speed, I mixed the butter and eggs. I added all the remaining wet ingredients and further mixed (This worked. All wet ingredients were nicely mixed).
3. I added the wet ingredients to the dry ingredients and mixed until no dry ingredients were visible (#1).
4. Since we did not have a loaf pan of the size specified in the original recipe, we used a disposable aluminum baking pan, well-buttered with the bottom lined with parchment paper  (in retrospect, we could have used a smaller pan which we did have). I placed half of the batter in the loaf pan and smoothed the surface (#2).
5. I drained the black beans soaked in brandy and mixed into the remaining batter (#3).
6. I layered the second batter on top of the first layer and smoothed the surface (#4). (This process results in the black beans being evenly distributed in the cake).
7. I baked the loaf in a preheated 350F oven for 40-45 minutes or until a bamboo skew inserted in the center came out clean.
8. After the loaf cooled down, I removed it from the pan (#5).
9. The black beans appear evenly distributed (sort of).


When the cake came out of the oven, the smell of green tea was really good. For the very first cake I ever made this is an unqualified success (thanks in part to my wife's guidance of course). We are thinking that instead of kuromame, we can make this cake without it or with nuts. We really enjoyed this cake. It is truly special.

Wednesday, February 13, 2019

Seasoned fish "soboro" donburi 鯛のそぼろ丼

We had this as a lunch one weekend. This is a mini-"donduri" rice bowl ミニ丼 made with the last of the leftovers from the Sushi Taro osechi box. I made a similar dish before. The osechi box included a small "tai" red fish 小鯛姿焼き which is basically a symbolic dish for the new year. The fish does not have much of the meat and taste rather mild. So rather than just eat it, I removed the meat and made "soboro" そぼろ. I also used "jako" arima-ni" ジャコの有馬煮 in this donburi. I served this with a clear soup made of fish meat ball  (from mackerel) and tofu さばのつみれ汁.


To add colors and taste, I also added scrambled egg and green beans. The green beans were blanched, cut into small pieces and sautéed in butter and seasoned with salt and pepper. The scrambled egg was seasoned with sugar and salt.


The "tai" soboro is visible on the left and the Jako arima-ni on the right.


The picture below shows the mackerel fishball soup. I added snow peas, shiitake mushroom, chopped scallion and Yuzu skin.


Fish soboro 魚のそぼろ
"Soboro" is a type of Japanese dish in which finely minced meat (chicken, pork or beef) or fish is braised with seasoning (soy sauce and mirin or sake) until almost dry. The soboro is usually used as a condiment for rice or used to make donburi by putting it on top of the rice.

I just removed the meat from the small red fish and tore the meat into small pieces. I braised it with soy sauce and mirin (about 2:1ratio) until also mostly dry. I tasted it towards the end of cooking and added more soy sauce. The seasoning is totally arbitrary but, as a condiment for rice, you may want rather strong soy sauce/salty flavor. To balance with "Jako" arima-ni, I also added sansho powder 山椒 at the end.

I microwaved frozen rice (it was frozen in a special Japanese container for rice. I just opened the steam hole and microwaved it). I placed the rice in the bowl, arranged fish soboro, Jako arima-ni, scrambled egg and green beans on top.

This was quite satisfying lunch and went well with the soup.

Sunday, February 10, 2019

Green Goddess dip and improved carrot miso dip 緑の女神ディップ

We made these three dips/spreads for a dinner we had with friends. We previously posted the carrot cashew spread (left) and Greek cheese with olive oil (center) recipes but the green dip (right) is new. All of these dips are great and the carrot cashew spread was a great improvement over the previous version. These are perfect with crackers and wine. We also used the green dip on a sandwich instead of mayonnaise and it was really good.


This is an improved carrot miso spread. The last time we made this, we did not have raw cashews so we used roasted cashews. This time we used raw cashews which were also cooked in chicken broth before being pureed. This resulted in a much smoother consistency. Both the miso and the natural sweetness of the carrot come through. I also roasted the sesame seeds before grinding them which really added a fresh nutty sesame taste. I am not sure if using raw cashew nuts or cooking them or both made the difference but this version is much creamier in texture.


This Greek yogurt olive oil dip is our old stand-by and favorite. Two key points to making this dip are to straining plain yogurt (not low-fat) to make your own Greek yogurt and using high quality fruity and spicy olive oil like our favorite Spanish olive oil. This time, I garnished it with Japanese Yuzu peels (frozen) which added nice fresh citrus taste.


This is a new dip. The recipe came from the Washington Post. It is called "Cashew Green Goddess Dip". The green color makes it look like an avocado dip but there is no avocado. The green color comes mostly from parsley and tarragon. Another interesting ingredient is canned anchovies.


Ingredients:
1 cup raw cashews*
1⁄2 cup water (we used chicken broth*)
1⁄2 cup chopped parsley
1⁄4 cup lemon juice
1⁄4 cup chopped fresh tarragon
2 tablespoons chopped chives
3 filets of canned anchovies, drained
1 teaspoon honey
1 clove garlic
1⁄2 teaspoon salt

*The instructs state that if you are using a high-speed blender such as Vitamix, you just puree the ingredients. (We have a good regular blender), otherwise you soak the cashews in water overnight before pureeing. We cooked the raw cashews in chicken broth for 5 minutes instead. This worked well. The broth, in which the cashews were cooked, was also used in leu of the water.

Directions:
Combine the raw cashews*, water (or chicken broth), parsley, lemon juice, tarragon, chives, anchovies, honey, garlic and salt in a blender. Puree until smooth. Chill before serving.

This is a very good and unique dip. We can really taste the tarragon and honey. The garlic and anchovies are there in the background and add "je ne sais quoi" but if we are not told, it is not easy to detect. The original recipe called for celery sticks as the dip "delivery system" but we just enjoyed it on crackers. All these three dips are excellent and different from each other and made an excellent start for the evening.

Thursday, February 7, 2019

Refrigerator Potato Bread/muffin 冷蔵庫ポテトパン/マフィン

This is the second potato bread we made. This time my wife did everything herself from the beginning to the end. So, her arm is definitely improving as well as she is determined to accomplish what she wants to do. This is called "refrigerator" bread since it rises over night in the refrigerator. The recipe also came from "Beard on Bread" cookbook. Again, it is a nice rustic bread with integrity and perfect for toasting with butter for breakfast.


Ingredients:
1 pkg. yeast
1/2 cup sugar (plus 1/2 tsp additional to proof the yeast)
1/2 cup warm water
1 cup warm milk
1 1/2 sticks ( 3/4 cup butter softened)
2 tsp. salt
2 eggs
1 cup mashed potatoes (make link to my potato recipe) run through a food mill to eliminate any        chunks that may remain after the potatoes have been mashed.
4 cups bread flour (with more as needed)

Directions:
Day1:
1. Proof the yeast in the warm water and 1/2 tsp. sugar.  Warm the milk with the butter in it. Dissolve the sugar in the milk mixture.
2. Using a mixing paddle on the stand mixer add the warm milk butter mixture, eggs and mashed potatoes blend thoroughly. Add the proofed yeast and salt. Mix completely.
3. Switch to a dough hook and add the flour one cup at a time until the dough clings to the hook and is smooth and springy to the touch. Knead on speed 2 for 7 to 10 minutes.
4. Form into a ball and put into a bowl with a small amount of vegetable oil turning the dough to cover with a coat of the oil. Cover tightly and place in the refrigerator overnight (or as the recipe says up to 16 to 18 hours).

Day2:
1. Next morning punch down the dough. (It will extremely cold and dense). Let rest for about 5 minutes (picture below).


2. Knead vigorously until it becomes soft and pliable (about 6 minutes).
3. Shape into 2 loaves of equal size and place into 2 heavily greased loaf pans. Cover and let rise until doubled in bulk  (the recipe says this could take up to 4 hours. This bread rose in 2 hours).  Make shallow slashes using a bread lame (see picture below).


4. Bake in a 375 degree oven for 40 to 45 minutes until browned and sounds hollow when tapped.
5. Remove from the pans immediately when they come out of the oven. (When I removed the loaves they seemed a bit soft on the underside so I put the loafs back in the oven outside the pans directly on the oven rack for about 5 minutes. This made the crust nice and crunchy).


This bread has a very pleasing dense but fine texture. It has a slightly sweet taste and the taste of the cream cheese and chives used in the mashed potatoes came through adding a pleasant dimension.


We are glad that my wife is up to baking again. I am certainly benefitting from having good breads to enjoy.

Addendum (1-22-22): This bread can also be made into muffins as shown in the next picture. These muffins were weighed at 76 grams and produced a total of 23 muffins. They were cooked in a 400 degree over for 20 to 25 minutes or until golden. When turned out of the pan the underside was very soft and white so I turned them upside down on a cookie sheet and cooked them for another 5 to ten minutes until they formed a light brown crust. 


Monday, February 4, 2019

Dill-weed bread ディル入りパン

I helped to make this bread with my wife since she is still having problems with her arm. This bread is very unusual in that it has only one rise. Nonetheless, the texture is very delicate almost cake like. The original recipe is for one loaf. So we doubled the recipe and made two loaves. This is also from "Beard on Bread" cookbook. The original recipe indicated a choice of using dill weeds or dill seeds. We used fresh dill weed in this bread.


Ingredients (2 loaves):
2 packages yeast
4 tsp sugar (1/2 tsp. additional to proof yeast)
1/2 cup warm water
16 oz. cottage cheese
2 eggs
4 tsp grated onion
4 tbs melted butter
2 tsp salt
1/2 tsp baking soda
2 cups whole wheat flour
3 cups All Purpose flour
4 Tsp fresh dill weed finely chopped

Directions:
1. Proof the yeast in the 1/2 cup warm water with 1/2 tsp sugar.
2. Using a mixing paddle on the stand mixer add the cottage cheese, eggs and blend thoroughly.
3. Add the grated onion, melted butter, dill weed, salt and baking soda. Mix completely.
4. Switch to a dough hook and add the flour one cup at a time until the dough clings to the hook and is smooth and springy to the touch. Knead on speed 2 for 7 to 10 minutes.
5. Heavily butter two loaf pans. Distribute the dough into the pans (it will be very sticky and difficult to divided up).
6. Cover and let rise until doubled in bulk.
7. Bake in a 375 degree oven for 35 to 40 minutes until it sound hollow when tapped.


The crust appears rather rustic but the bread has a very nice tender texture with a distinctive dill smell and flavor. (The crust came out "rustic" because the dough is very sticky and was a little difficult to get into the loaf pan.)


This is a great bread toasted with butter and perfect for breakfast. It is interesting that with only one rising, the texture of the bread is very fine and tender. It has nice dill tastes but onion flavor is very subtle.

Friday, February 1, 2019

Miso marinated cream cheese クリームチーズの味噌ずけ

Marinading cheese or tofu in miso appears to be a very common way of making snacks in Japan that  go well with drinks. I have posted similar dishes (tofu and Mozzarella cheese marinated in miso). I saw miso-marinated Philadelphia cream cheese somewhere and made this dish one day.


I used a block of regular Philadelphia cream cheese cut into square.


Miso marinade is essentially a mixture of miso and mirin but this time I also added some sugar (1tbs miso, 1/2 tbs mirin and 1/2 tbs sugar. I adjusted the mirin to make a spreadable but not runny consistency (below).


I layered the cream cheese adding thin layers of the miso mixture and another layer of the cream cheese and so on. I covered the top with plastic wrap and then closed the lid to let it marinate in the refrigerator.

We tried this after it had been marinating for one day, one week and 10 days. It got better the longer it marinated. The 10 day one was the best. It can marinate longer as far as we can tell. This is a very rich dish; a little goes a long way but it is good with either sake or wine (especially red wine).