Saturday, September 14, 2024
Pesto Blini Prosciutto Cheese Sandwich ペストビリニの生ハムチーズサンド
Ingredients:
2 pesto blinis, spilt in half horizontally
Mayo and Dijon mustard
Slices of sharp cheddar or other meting cheese
Prosciutto or honey ham
Direction.
Place slices of the cheddar on one slice of the blini and toast both slices until the cheese melts
Smear the mayo and mustard on the other slices (picture #2)
Add the prosciutto (picture #3)
The prosciutto was a bit on the salty side and this sandwich may be better with honey ham or some other meat but it was still pretty good with nice pesto/basil flavor and crispy blini.
Thursday, September 5, 2024
Pesto Blini ペストビリ二
Ingredients(X2.5) makes 17 blini
1/2 cup pesto
5 tbs melted butter
1/2 +1/8 cup cream
5 large eggs, beaten
1 2/3 cup all-purpose flour
3 3/4 tsp baking powder
1 1/4 tsp salt
Directions:
In a medium bowl, add the egg, the pesto, the melted butter and cream, then add the flour, baking powder and salt and whisk until well blended. (You may need to add more liquid so the batter is the consistency of pancake batter.)
Melt 1 tablespoon of butter in a pyrex dish. Use the melted butter to grease each of the platar cups of a cast iron platar before adding the batter . Pour the batter into the cups until they are 1/2 full. Cook over moderately low heat, turning once, until set, about 3 to 5 minutes per side. Repeat with the remaining butter and batter.
This makes a lovely savory crumpet like bite. It also provides a nice contrast to the usual flavors that appear for breakfast and it is a great way to use up pesto left over from pesto pizza.
Monday, July 8, 2024
Pizza Made in Indoor Electric “Pizzaiolo” Pizza Oven
Compared to the pizza stone, the steel retains and conducts heat better. When making multiple pizzas, the pizza stone requires a few minutes to recover and reach the correct heat settings after making each pizza. The pizza steel appears to stay hot. The bottom of the crust gets carbonized a bit too much, though. I only used the pizza steel once. I have to try a few more time before I can evaluate properly. I am sticking to the pizza stone for now.
In any case, picture #1A is my most recent pizza (using “00” flour, half Margherita and half pepperoni). To me, the crust charr marks are just right (“Darkness” setting at 11 o’clock) as compared to #3 which was too charred with the “Darkness” setting at one o’clock.
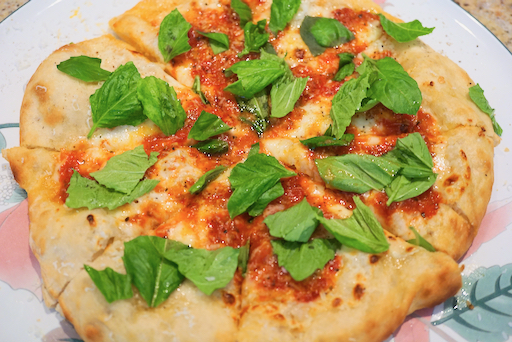
The next pizza (picture #1B) is our first attempt using pesto (from the basil on home-grown on the window sill) and red pepper sauce. The cheeses are low moisture Mozzarella and fresh goat cheese.
The picture #2 is another Margherita I made earlier. It looks “charred” but the taste was not bad, it did not taste like you are eating pure carbon but it was too much charr. This was the “darkness” setting at one o’clock.
Picture #3 is one of our most popular pizza; artichoke hearts (from a jar) with olives. Cheeses are mozzarella, Irish cheddar, smoked gouda and fresh goat cheese. This was baked immediately after the #3 pizza (I prepared this pizza in a wooden pizza paddle while the first one was being cooked). This made this pizza crust bottom not as crispy and charred since the pizza stone was not completely recovered heat.
Although this is still on-going process, the below are my current set-ups for the oven and dough.
Dough: I tried both “00” and bread flours with and without addition of olive oil. “00” dough without olive oil is a bit too chewy for us but addition of a small amount of olive oil appears to make it better (may not be authentic for Neapolitan or New York pizza). For us, the bread flour or “00” flour does not make a big difference but we may even prefer “bread-y” consistency of crust using the bread flour.
Ingredients:
3 and 1/2 of flour (either bread or “00”)
2 tbs olive oil
1 (or a bit more) cup of water
2 tsp Kosher salt
2 tsp instant yeast
Directions: (I use the food processor fitted with a kneading blade in low-speed up to 4 cups of flour).
After running the blade to mix all the dry ingredients, I drizzle the water in a thin steady stream as it is running until the dough forms above the blade (the surface is a bit sticky). Let it sit for 5 minutes for better hydration and run another 1-2 minutes. Take it out on a floured board and hand knead until elastic. Placed the dough in a lightly oiled bowl, turn it over to coat all the surface, cover it with a plastic wrap and place it in a proofing box at 85F for 1 hour or until doubles.
Deflate gently, fold several times and divide it up into 4 equal dough balls (I weigh making 4 balls of a bit over 200grams each). After the first rise, I divide the dough and form 4 balls with a smooth surface. Place it in a small Ziploc bag coated with olive oil inside and let it sit in the refrigerator at least overnight or up to several days. I take out the dough balls one hour before baking and let it come to the room temperature. If I do not use it within several days, I freeze them. (to use the frozen dough, I transfer it to the refrigerator one day before to completely thaw).
I hand stretch the dough to make 10 inch pizza, coat it with olive oil with crushed garlic. I place the slices of low moisture Mozzarella first and then tomato sauce.
Oven settings: “Wood fired” and the darkness setting to “11 o’clock”. Preheat for 30 minutes. I use the modified the wooden paddles which fit the oven perfectly. I use corn meal on the paddle so that the dough slides better. I cook for 2 minutes (as it is the automatically setting). Steam and some smoke come out during cooking so I use the oven under the hood with the exhaust fan running. For the next pizza, I wait until the stone temperature completely recovers (a few minutes until the “at temp” indicator light stops blinking).
Is it worth it?? Although pizza I made using the regular oven and pizza stone was quite good, pizza cooked in the Pizzaiola is definitely much better. They cook so quickly (instead of 6-7 minutes in the conventional oven they’re done in just 2 minutes). So if you have a pizza party, you could turn out a few pizzas in a jiffy. I am trying to keep this oven clean but it is a bit of a chore. Other use of this oven may be to bake focaccia (which we tried with a good result) or naan (which we have not tried yet).
Friday, July 5, 2024
Red and Green Udon “Pasta” with Prosciutto 生ハムのせ緑と赤のうどんパスタ
Friday, May 24, 2024
Anchovy Salad アンチョビサラダ
For the anchovy salad I sliced skinned Campari tomatoes and topped them with the anchovy filets and fresh basil. I dressed the salad with our favorite Spanish olive oil. I did not add salt thinking the anchovies would be salty.
The anchovies are much better than we expected. They were not too salty or fishy. All nicely filleted and no discernible small bones. We really like these anchovies.
Wednesday, December 14, 2022
Basil panna cotta バジルパンナコッタ
This is one of my wife’s panna cotta projects. Actually this is the second try making this basil panna cotta to use the basil forest growing on our kitchen window sill. The first time she made it, she followed a recipe she found on the internet. There was way too much gelatin. The panna cotta came out solid and rubbery—like a rubber ball. It would have bounced if dropped. We declared it a failure. So this is her second try. This time she used the tried and trusted ratio of 2 cups of liquid to 1 tsp of gelatin and it was a resounding success. It has a subtle but distinctive basil flavor and the texture was just right and melted in your mouth.
Ingredients:
1/2 cup cream
1/4 cup fresh basil crushed (or more to taste)
1/4 cup sugar
1 1/2 cup milk
1 tsp gelatin
Directions:
Put the cream, basil and sugar in a sauce pan. Bring to a boil then remove from the heat, cover, and let steep for 30 minutes. Pour through a fine mesh sieve to remove the solids. Press the solids to release as much flavor and liquid as possible. Bloom the gelatin over 1/2 cup of the milk. Put the bloomed gelatin in the top of a double boiler. Heat until it fully melts. Stir in the still warm basil/cream. Then the rest of the milk. Distribute it into the containers that are going to be used to chill the mixture. We used mini milk jars. Refrigerate until set.
What a major improvement over the previous attempt. The sweet, creamy, basil taste was a bit of a pleasant surprise. The texture was perfect. It was firm but very smooth and melted in the mouth. Overall this was a rather sophisticated desert just the right size to finish a dinner.
Thursday, July 7, 2022
Basil cake bread バジルブレッド
one 5.5 oz package of baby spinach cooked (about 1 cup when cooked and moisture drained off)
1 1/2 to 2 cups raw basil (packed)
3 eggs
1 tsp. vanilla
3/4 cup olive oil
2 cups flour
1 1/2 cups sugar
3 tsp. baking powder
1/2 tsp. salt
Icing (Optional)
4 oz of cream cheese
4 oz of goat cheese
Directions:
Sift together the flour, sugar, baking powder and salt in a bowl and then set aside. Put the spinach, basil, eggs, and vanilla, in a blender and puree. Then with the blender on a slow speed add the olive oil to make an emulsion. Add the vanilla and mix in. Add the spinach/mint mixture to the flour. Put into a greased 6" x 10" inch baking pan that has been lined with parchment paper (to made it easier to get the cake out of the pan when it is done.) Bake at 350 degrees for 25 to 30 minutes or until a tooth pick comes out clean.
For the icing. Put the two cheeses in a stand mixer bowel. Using a paddle, cream the two cheeses together. Split a piece of the basil cake in half and spread on the cheese blend
Monday, June 13, 2022
Puff pastry cheese swirls
Ingredients:
two sheets of frozen puff pastry
For the Broccoli based cheese swirl
The amounts of all the ingredients are arbitrary and are generally enough to cover the sheets.
Cooked broccoli finely chopped (spinach could also be used)
Scallion finely chopped
Various cheeses grated your choice (I used smoked gouda, mozzarella, and Parmesan.)
For the pesto based cheese swirl
Pesto to cover the sheet of puff pastry
Various cheeses grated. (I used Monterey Jack, Cheddar and Parmesan
Directions:
Thaw the sheets of puff pastry. Spread the ingredients to cover the sheets (#1 & 2 for the pesto) and (#3 for the broccoli) based. Roll up the sheets and slice into 1 inch thick pieces. Cook in a 400 F degree oven for 15 to 20 minutes until the swirls are golden brown.
These make a wonderful alternative to the traditional cheese tray. The pastry was light and crunchy. The cheese was nicely melted and toasted. The scallion flavor came through and really made the broccoli based rounds. While both cheese swirls were very good, in a contest of pesto versus broccoli I am completely biased in favor of pesto. (Actually it may not even be a contest).
Thursday, September 23, 2021
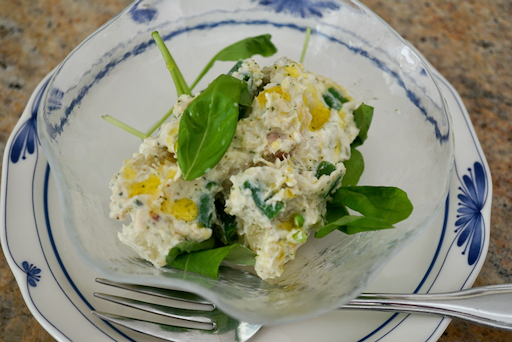
Potato salad with tuna and pesto ペストとツナのポテトサラダ
Friday, December 11, 2020
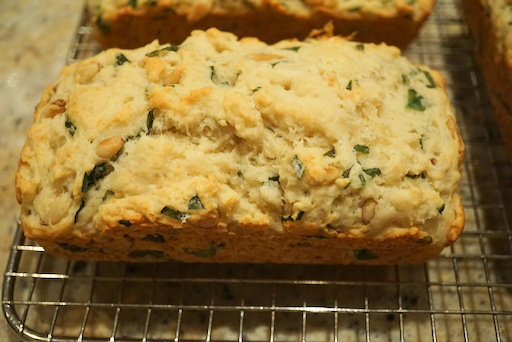
Basil and pine nuts quick bread バジルと松の実の速成パン
My wife made this quick bread as an effort to use more of the basil we are growing in our windowsill herb garden. In addition to the basil, it has pine nuts and parmesan cheese. So it is a kind-of disaggregated “pesto” bread. This is a savory quick bread which is good for breakfast or even as an hors d’oeuvre with wine.

Tuesday, December 8, 2020
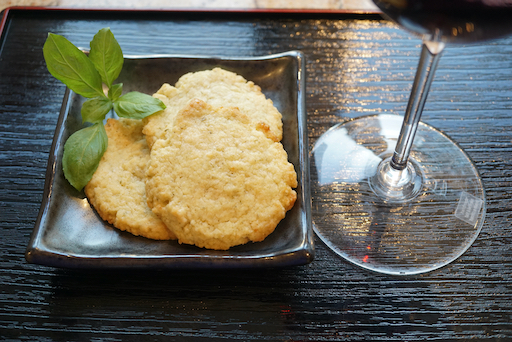
Lemon basil shortbread cookie レモンバジルクッキー
We had this with DAOU Vineyards Pessimist Red Blend 2018 which is Petit syrah based. Our recent favorite/house wine.
Ingredients: (18 cookies)
1 cup AP flour
1/2 cup sugar
1/2 cup unsalted butter, cold, cut into pieces
2 tbs sliced basil (or more to taste)
grated zest from one lemon
1/4 tsp kosher salt
Directions:
Preheat oven to 375F
Line cookie sheet with parchment paper
Add all ingredients to the food processor and mix (#1)
Using a small ice cream scoop, portion out the dough (#2)
Bake 7-8 minutes at 375F (#4)
Let cool on a cooling rack
The lemon flavors come through strongly contrasts nicely with the sweetness and is pleasantly refreshing. After one day in the refrigerator, the basil flavor began to surface more strongly. Somehow this cookie went well with the red wine we were having. My wife has made quite a good variety of savory cookies. This is another good one.
Thursday, October 1, 2020
No knead pizza dough 捏ねないピザ生地
Since we are into "no knead" breads, when my wife found a recipe for "No knead pizza dough", I had to try it. Using this dough, I made my usual version of Pizza Margherita.
No knead pizza dough recipe came from King Arthur flour web site.
Ingredients: (this makes two pizzas like above)250gram AP flour
1/8 tsp instant yeast
1/2 tsp sugar
1 tsp salt
185gram lukewarm water
Directions: (only making dough part was quoted here)
1. Stir all of the ingredients together. Cover the rough, sticky dough and let it rise at room temperature for 24 hours. After this first rise, you may choose to refrigerate the dough for up to 6 days, which will help develop its flavor.
2. Divide the dough in half. Shape each piece into a ball. Place each ball seam-side down into a floured bowl.
3. Cover the bowl and allow the dough to proof (rise) for 45 minutes to an hour, while your oven preheats.
4. Scoop the dough onto a well-floured work surface and dust the top with flour. Using your fingertips, gently depress the dough, being careful not to touch the outer edge of the crust; you want it to remain thick.
5. Lift up the pizza and use your knuckles to gently stretch the dough into a circle about 10" to 12" in diameter. Move it to a well-floured pizza peel (I use yellow corn meal).
The topping and baking parts I followed my usual way. Although I cooked the pizza the usual 5 minutes, because of the high water content of the dough, retrospectively, I would have cooked the pizza longer maybe 7-8 minutes.


