Showing posts sorted by relevance for query panna cotta. Sort by date Show all posts

Friday, May 27, 2016

English Pea panna cotta イングリッシュピーパンナコッタ

Previously, when my wife wanted to make this dish, we ended up making cauliflower-spinach panna cotta. This time, we made English pea panna cotta. It was based on a recipe in the Washington Post. As usual, we made some changes. The original recipe used agar-agar making it a vegetarian dish but, not being vegetarian and not having any agar-agar, we used powdered gelatin instead. We also infused this dish with fresh French tarragon as we do with our pea soup. Our panna cotta came out deep green; much deeper green than one in the picture contained in the recipe.


Instead of using cold sauteed vegetables around the panna cotta, I just placed watercress, thin slices of carrot, small cubes of tomato which were then dressed with my usual honey mustard dressing and fresh grinds of black pepper.


The pannacotta was smooth and creamy.


This time we made sure we had all the ingredients. We used frozen petite green peas from Hanover brand. (Over the years, my wife tried many different kinds of peas for various dishes and this is one instance when, generally, the frozen variety is better than fresh.  We even tried fresh peas which we bought at the roadside stands but they were too starchy. Among the frozen brands, she likes Hanover the best. I guess unless you grow the peas yourself, frozen are better than fresh. Oh-oh, maybe, I shouldn't give my wife ideas about growing our own peas).

Ingredients (about 12 servings using small Pyrex ramekins):
Frozen petite pea (Hanover brand petite pea, 12oz bag), 2 bags, thawed using running hot water.
Spinach, 2 bags, cooked without adding any liquid, turning occasionally, until well wilted. Let it cool down and squeeze out excess moisture.
Onion, one medium, halved and thinly sliced, sweat with olive oil until semi-transparent
Fresh tarragon, leaves removed and finely chopped (about 1 tbs)
Milk, we used 1% milk, added as needed while pureeing the peas (about 1/3 cup per one bag of frozen peas (#1) and also for infusing tarragon and dissolving the gelatin, about 2 cups (#3 and #4).
Butter, unsalted, 3 tbs
Gelatin, powdered, unflavored, 3 envelopes
Salt

Directions:
1. Add half of the peas, onion, spinach and tarragon in the blender* (#1). We did this in two batches. Add milk and puree. Add more milk until peas are totally smooth and pureed (#2).
*Do not use a food processor. We learned that using a good blender in "Puree" mode gives the best result.
2. Heat 2 cups of milk with 3 tbs of butter and tarragon (#3).
3. Just before boiling, sprinkle powdered gelatin on the top and whisk to dissolve (#4)


4. Put the milk mixture through sieve and put into #2 in the picture above, mix well. Taste and season with salt.
5. Pour into individual small glass ramekins.
6. Refrigerate until firm (at least several hours).
7. Remove from the ramekin by passing a thin bladed knife around the perimeter of the ramekin, inverting the ramekin over the plate and use the tip of the knife held against the side to introduce air to the bottom of the ramekin. The panna cotta should drop onto the plate with a "plop".

This was an unconditional success! The panna cotta has nice deep green color with creamy texture and an intense fresh pea taste with a hint of fresh tarragon. The salad around the panna cotta was also great with some bitterness of watercress and slightly sweet and tangy dressing. We really liked my wife's original cauliflower puree spinach panna cotta, but this is definitely a nice fresh pea and tarragon flavor variation on the theme of panna cotta. This is a perfect salad/appetizer in hot summer season.

Sunday, November 13, 2022

Avocado Panna Cotta アボカドパンナコッタ

 My wife is into panna cotta and aspic. She has been collecting panna cotta recipes and some days ago, she made basil panna cotta based on one of those recipes since we have a small forest of basil on our kitchen window sill. Although she followed the recipe, it called for way too much gelatin. The end result congealed all right—in fact it solidified. It tasted pretty good. The basil flavor really came through. But it was extremely hard in texture and would have bounced like a tennis ball if dropped.  After struggling with it for a while we declared it inedible and threw it out. Somewhat in despair over the less than successful basil panna cotta she went back to the collection of recipes and decided her revenge panna cotta would be the one that  featured avocado. (Even this recipe called for too much gelatin. After the experience with the basil panna cotta and consulting the panna cotta recipes that were successful, my wife has decided the “rule-of-thumb” she will use is 1 tsp of gelatin for every 2 cups of liquid. So she reduced the amount of gelatin for this dish accordingly.)  It came out perfectly. The consistency was very creamy and with a good flavor of avocado. She made this in a small glass jar with cork lid and it was just the right amount. This is a perfect light dessert.


This recipe is from on-line but as usual, she made significant modifications.

Ingredients: (made enough for 6 small jars)
500 ml.milk
75ml cream
1 tsp. gelatin
1 ripe avocado
23 g. Sugar
1 teaspoon of vanilla extract

Directions:
Bloom the gelatin in the cream. Put the bloomed gelatin in the top of a double boiler and heat until it melts. Slowly add the milk and sugar. Allow the mixture to come close to boiling stirring constantly until all the gelatin and sugar are dissolved. Allow the mixture to cool. Add the vanilla. Pour all the mixture in an immersion blender tube container together with the avocado meat. Blend until smooth. Sieve the mixture to ensure smooth and creamy texture. Then pour the mixture into a mold or ramekin. (In this case small jars as shown in the picture below.) Chill for at least 2 hours before serving.


This panna cotta was the perfect consistency. It was congealed but very tender and smooth. It just melted in the mouth. The flavor was very subtle and sophisticated. The taste of avocado came through and went well with the subtle vanilla. My wife felt very relieved and vindicated. From here on out: 1 tsp gelatin for every 2 cups of liquid. 


Saturday, July 2, 2016

Miso soup panna cotta 味噌汁のパンナコッタ

My wife came up with the idea of making miso soup in a solid form. (This was a natural progression from the various other panna cottas she has made recently. Also this is what happens when she is turned loose with gelatin; she was well-known in the past for her various "gelatin" concoctions). The idea appealed to me because I like to have miso soup with any meal (even breakfast). My wife on the other hand does not like having soup in the evening. So, if we could come up with a dish which had the taste of miso soup but was not liquid it would be a win-win for both my wife and myself.  This recipe was my first attempt. I intended to recreate miso soup with potato, onion, and wakame seaweed ワカメ、ジャガイモと玉ねぎの味噌汁. The reason I choose this particular combination of ingredients is a long story.*

*Digression alert: When my late-brother and I were small (probably I was a just in 1st grade), my late-father was home but my mother was out (probably attending a PTA meeting or something). My father almost never cooked but when 4 pm came around, he suggested "we must be hungry" and decided to cook something for us (in retrospect, I suspect he was the one who was hungry and could not wait my mother to come home). In any case, he made rice (using an electric rice cooker) and miso soup made of potato, onion, and wakame seaweed. When my mother arrived back home with some ready-made side dishes for supper, she was mighty miffed to find us finishing up a supper of rice and soup. But somehow, the taste of this miso soup remains a favorite for me.

The picture below shows the miso soup panna cotta, which included potato and onion, served with cucumber, wakame seaweed, and red radish as garnish. To make it interesting I included unflavored soy milk and silken tofu (the white squares).


I decided to add "sumiso" 酢味噌 (miso, rice vinegar and sugar) sauce as well.


I also put sumiso sauce on the top of the panna cotta.


The panna cotta had a smooth texture and a gentle miso flavor. We could taste the sweetness of the onion but the addition of soy milk may have made it taste a bit vague or muted. The sumiso sauce also overwhelmed the dish. So, next day, I served the panna cotta simply with wakame seaweed and thinly sliced scallion.


This tasted better and closer to the original miso soup taste but there is room for improvement.


Ingredients (about 2 servings):
1 cup Dried fish and kelp broth (from bashi pack).
1 cup unflavored soy milk
1 large white potato, peeled and cut into a dice.
1 large onion, cut into thin strips
1/4 cup wakame seaweed (I used "raw" salt preserved one).
2 tbs Miso
2 envelopes of unflavored powdered gelatin
1/3 silken tofu

Directions:
1. I cooked the potato in the broth until soft (15 minutes) and added onion and cooked another 5 minutes (left in the picture below). 
2. I dissolved the miso. I added more as I tasted. I needed to season it rather strongly since it would be diluted by the addition of soy milk.
3. I added the miso soup into a blender and pureed it smooth.
4. Meanwhile, I put soy milk in a pan, sprinkled unflavored powdered gelatin (two envelopes) on the surface to bloom. I gently heated up and dissolved the gelatin using a wire whisk (right in the picture below). I combined the miso soup and soy milk  with the dissolved gelatin.


5. I placed small cubes of tofu in the bottom of a small ramekin and poured the mixture on top.
6. I refrigerated until set.
7. Like the other  panna cotta dishes we made,  it will come out without any problem by running the thin blade of a knife around the perimeter and introducing air to the bottom of the ramekin. 

The two serving variations above were certainly "edible" but we were not satisfied. My wife suggested leaving out the soy milk. She also suggested serving the potato around the panna cotta rather than pureed in it. I will certainly incorporate her suggestions.  I am now on a mission to make the perfect miso soup panna cotta. 


Friday, April 15, 2016

Savory cauliflower and spinach Panna cotta カリフラワーとほうれん草のパンナコッタ

My wife came up with this dish. How this dish evolved is kind of interesting. It all started when my wife spotted a recipe for English pea panna cotta . She really wanted to try it. So I was tasked to get several bags of frozen petite peas and some cream for the recipe. I forgot to get the peas and the cream. Then I used up whatever cream we had in the fridge to make lobster bisque. Not to be deterred, my wife chose to do some substitutions. We had a head of cauliflower which I already separated to florets and washed. We also had a bag of spinach. Since we had some previous experience making 
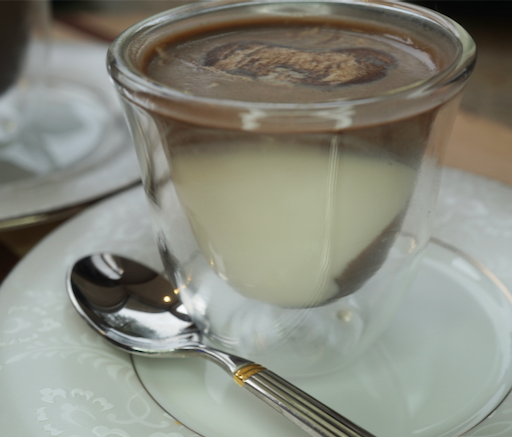
cauliflower puree, she proposed making "cauliflower and spinach panna cotta".  It turned out to be very good. I served it with watercress and blanched sugar snaps dressed with EVOO (extra-virgin olive oil) and syrupy balsamic vinegar with freshly cracked black pepper.


All green and, perhaps, it would have been perfect for St. Patrick's day.


I decided to add more bright colors and made two kinds of sweet pepper coulis (red and yellow) and sweet vinegar marinated red radish slices.


I think I may have overdone it, this time. Maybe a little less red color would have been more "restful to the eye".


Ingredients(for Cauliflower panna cotta, about 8 servings):

Cauliflower, 1 medium head, separated into florets, washed.
Spinach, one bag, cooked in a covered pan without adding any liquid. excess moisture squeezed out  #2).
Onion, two, medium, cut into thin strips.
Garlic, two cloves with skin on.
Milk, enough to cover the cauliflower (#1)
Butter, unsalted, 3 tbs

Directions.
1. Add the cauliflower, onion,, garlic, and butter to a saucepan and cover it with milk. Simmer it until the cauliflower is cooked (#1, about 30 minutes) (see P.S. below).
Alternatively, we need not cook the cauliflower in milk. Instead we could cook the cauliflower by steaming, sweat the onions in a pan then use milk to puree the two together.  Then we could heat some milk with about 3tbs of butter in it to bloom the gelatin and that milk would give the proper texture. 
2. Strain the cauliflower and milk mixture through a sieve,  reserving the milk (My wife figured adding butter will make the milk more cream-like).
3. In two batches, I placed vegetables in a blender and added enough milk to puree (with our blender on high speed, it took 30-40 seconds to have a nice smooth puree, #3 and 4). 
I added one of the garlic clover after squeezing it out of the skin in one of the batches. After tasting this batch, I did not add the garlic to the other batch.
4. I combined the puree in a bowl (#5) and tasted. I added few pinches of salt which made the sweetness of the vegetables to come out.
5. I sprinkled 3 envelopes of unflavored gelatin on about a half cup from the remaining milk (still hot) and whisked it to dissolve and then added to the puree making sure all the gelatin was dissolved into the puree.
6. I poured the final mixture into small individual ramekins (#6).
7. Covered them with plastic wrap and refrigerated until set (several hours).


8. To unmold, I placed the ramekin in hot water for few seconds and also ran a thin bamboo skewer (or a thin narrow knife blade) around the edge and inverted on the center of the plate.


Ingredients (For sweet pepper coulis):

Red and yellow sweet pepper, 1 each
Shallots, 3, finely chopped and sauteed in olive oil until soft
Vinegar (I used rice vinegar) 4 tsp
Olive oil (EVOO) 4-6  tbs
Salt

Directions:
1. I roasted the peppers in the toaster oven on broil mode, for about 20 minutes, turning every five minutes so that all the surfaces got slightly blackened. I immediately placed them in a Ziploc bag and let them steam for 10-20 minutes or until cooled down (#1).
2. I removed the skin, stem end and seeds (#2).
3. Cut it in small cubes (#3).
4. Place the #3, half of the shallot, juice accumulated in the bag, vinegar, and EVOO in a blending container (#4).
5. Using an immersion blender in high speed, blended into thin sauce (#5). If the consistency is too thick, you could add a bit of water. I tasted and added a pinch of salt.
6. I repeated for the yellow pepper to make red and yellow pepper coulis (#6).


Ingredients (For pickled red radish):
Small red radish, 3, top and bottom end removed, sliced into thin rounds (I used a Japanese mandoline).
Sweet vinegar, 1/4 cup (I took a short cut, and poured sushi vinegar from a bottle into a Pyrex ramekin with 2 tsp of sugar, and microwaved until the vinegar was warm and the sugar melted).
I immediately marinated the radish slices, covered with plastic wrap and let sit for a few hours. The red color leached out and the radish slices become a nice homogeneous pink.

This was an unequivocal success! This savory panna cotta has a nice light green color exactly like the picture of English pea panna cotta. We used gelatin instead of agar-agar suggested in the original recipe since we are not serving this to vegetarians. The texture came out just right without jello-like consistency but very creamy and also kept its shape. You can taste the spinach but if you were not told. you could not guess this is made of cauliflower.  Although I overdid with the second versions with sweet pepper coulis and marinated radish slices, the mixture of sweet sour flavor really worked. Next time I will use more discretion. We found another good way to use cauliflower.

P.S. Some days later, since I had a head of cauliflower which was already one week old, I decided to make cauliflower puree. I followed the recipe from the Washington Post. As per the recipe, I first steamed the cauliflower for 8 minutes and made a puree using my Cuisinart. But the result was disappointing with a mealy texture despite the fact I ran the food processor for quite some time. It never attained the smooth and creamy puree my wife made in the current recipe. I thought it had something to do with how the cauliflower was cooked. She cooked the cauliflower in milk and butter. Disappointed, I just put my cauliflower puree in a sealed container in the fridge thinking I would have to come up with a way to use it. 

The same day, my wife wanted to try the English pea pannacotta she had originally wanted to make using the original recipe, since we had all the ingredients this time. When we pureed the peas, we used the blender instead of the cuisinart, and the pea puree came out very smooth and velvety. We didn't even have to sieve it. It dawned on me that maybe I should have run my cauliflower puree through the blender instead of the cuisinart. So I retrieved my coarse textured puree added a bit more milk and let it whir. The result was amazing. My cauliflower puree became silky smooth. Moral of the story, use the blender to make cauliflower or pea puree--not the cuisinart. 


Monday, April 24, 2017

Buttermilk panna cotta バーターミルクパンナコッタ

My wife likes to use buttermilk for many dishes. She even likes to drink it (especially the high-octane kind from Harrisburg farms in Pennsylvania). We have never seen buttermilk in Japan. Originally buttermilk was leftover from churning butter out of cream and as a result had some small chunks of butter floating in it. This type is known as traditional buttermilk. The buttermilk used today is known as cultured buttermilk and is produced from cows milk fermented using one of two species of bacteria; Lactococcus lactis or Lactobacilliu bulgaricus. The fermentation creates lactic acid which is what gives buttermilk its characteristic tart taste.  The fermentation also means it lasts a long time. (My wife found, for example, that buttermilk marked with a due date of Jan 30 was perfectly good in April of the same year). In any case, one day, she decided to make this buttermilk panna cotta (She first called this "pudding" but since there is no egg involved this is more like panna cotta).


I myself would never like to "drink" buttermilk by itself, even though I have tasted it,  but using in baking or this type of dish it is quite good.


Ingredients:
2 tsp. powdered gelatin
2 tbs. water
1/2 cup half and half plus 1/2 cup milk (or you could use 1 cup of heavy cream instead for a really luxurious pudding).
1/2 cup sugar
1 tsp. vanilla
2 cups buttermilk

1/2 recipe ingredients:
1 tsp. gelatin
1 Tbs. water
1/4 cup 4% milk
1/4 cup heavy cream
1/4 cup sugar
1/2 tsp. vanilla
1 cup buttermilk 


Directions:
Bloom the gelatin in the water. Put the half & half, milk and sugar in a sauce pan and heat until the sugar is dissolved. Remove from heat and add the gelatin stirring until it is dissolved. When the milk mixture has cooled to room temperature add the vanilla and the buttermilk. Mix thoroughly. Pour into small ramekins or Pyrex dessert bowls. Put into the refrigerator until set.

This is a lovely panna cotta. It is not too sour or too sweet. It has a nice fresh tangy taste and smooth texture. It is also fairly easy to make.

Monday, July 12, 2021

Strawberry panna cotta いちごパナコタ

 My wife is into making panna cotta in some small jar we cam across recently. The amount is perfect for us as dessert. This time she made strawberry panna cotta. When we get fresh strawberry, I usually wash the strawberries, hull, cut into small pieces (small one quartered and large ones quartered and then halved). I place the strawberries in a sealable container, add some sugar (depending  on how sweet the strawberries are) and and triple sec  to taste. Then marinate them for a while in the refrigerator. This makes even not-so-good strawberries palatable and we eat as is or add it to the yogurt.  She used these marinated strawberries for panna cotta.


Ingredients:
1 tsp gelatin
1 1/2 Tbs. water
1/2 cup 4 % milk
1/4 cup sugar
1/2 cup strawberry puree (marinated strawberries as described above pureed)
1/2 tsp. vanilla
1 cup buttermilk

Sauce;
Strawberry puree to top off the jars

Directions:
Bloom the gelatin in the water. Warm the milk and sugar in a saucepan until the sugar is dissolved. Use the hot milk mixture to temper the bloomed gelatin until it is completely dissolved then add it back into the warm milk mixing to thoroughly combine. Add the strawberry puree and vanilla to the buttermilk and stir completely. When the milk sugar mixture has cooled to room temperature add the buttermilk mixture. Distribute to the serving jars (or containers). (Fills about 6 of the small jars). Put in the refridgerator until it becomes firm. When it is firm top with the rest of the strawberry puree.

This is a lovely refreshing dessert. The texture is very creamy. The bright slightly sweet strawberry flavor completely infuses the milk mixture and is very nice with the slight tang of the buttermilk. A perfect way to end a meal.

Wednesday, December 14, 2022

Basil panna cotta バジルパンナコッタ

This is one of my wife’s panna cotta projects. Actually this is the second try making this basil panna cotta to use the basil forest growing on our kitchen window sill. The first time she made it, she followed a recipe she found on the internet. There was way too much gelatin. The panna cotta came out solid and rubbery—like a rubber ball.  It would have bounced if dropped. We declared it a failure. So this is her second try. This time she used the tried and trusted ratio of 2 cups of liquid to 1 tsp of gelatin and it was a resounding success. It has a subtle but distinctive basil flavor and the texture was just right and melted in your mouth.

.


Ingredients:
1/2 cup cream
1/4 cup fresh basil crushed (or more to taste)
1/4 cup sugar
1 1/2 cup milk
1 tsp gelatin

Directions:
Put the cream, basil and sugar in a sauce pan. Bring to a boil then remove from the heat, cover, and let steep for 30 minutes. Pour through a fine mesh sieve to remove the solids. Press the solids to release as much flavor and liquid as possible. Bloom the gelatin over 1/2 cup of the milk. Put the bloomed gelatin in the top of a double boiler. Heat until it fully melts. Stir in the still warm basil/cream. Then the rest of the milk. Distribute it into the containers that are going to be used to chill the mixture. We used mini milk jars. Refrigerate until set.

What a major improvement over the previous attempt. The sweet, creamy, basil taste was a bit of a pleasant surprise. The texture was perfect. It was firm but very smooth and melted in the mouth. Overall this was a rather sophisticated desert just the right size to finish a dinner.

Sunday, June 27, 2021

Panna cotta from homemade buttermilk 自家製バターミルクでパナコッタ

After my wife made buttermilk using the culture from "The culture for health" we were quite impressed with the quality of the buttermilk. My wife decide to make something using the buttermilk. Since we had some leftover blueberries she decided to use the newly made buttermilk to make panna cotta with blueberry sauce as shown in the first picture.


Ingredients
1 tsp. gelatin
1 1/2 Tbs. water
1 cup 4% milk
1/4 cup sugar
1/2 tsp. vanilla
1 cup buttermilk

For the blueberry sauce:
1 cup of blueberries
1 tsp. Of sugar

Directions:
For blueberry sauce:
Put the blueberries and sugar in a small ceramic dish and cook them at 350 degrees for 30 minutes in the toaster oven until they form a thick type of blueberry jam.

For panna cotta:
Bloom the gelatin in the 1 1/2 Tbs. of water. Put the milk and sugar in a sauce pan and heat until the sugar is melted. Remove from the heat and use several tablespoons of the warm mixture to “temper” the gelatin until it is completely dissolved. Add the tempered gelatin into the rest of the milk mixture and stir completely. Let cool to room temperature. Add the buttermilk and vanilla. Pour the mixture into the containers. Tip the containers using a muffin tin to support them in order to get the beveled appearance. Cool in the refridgerator until the mixture becomes firm. Just before serving spoon in the blueberry mixture on top of the buttermilk mixture to bring the contents of the container even with the top.


This panne cotta turned out well. It was very creamy, slightly tangy and sweet with a vanilla flavor. The blueberries added a nice fresh blueberry flavor that went very well with the vanilla.

Sunday, November 8, 2020

Chocolate vanilla panna cotta チョコレート、バニラ パンナコッタ

As I mentioned before, my wife grew up with desserts as the end to a dinner. It was a kind of parental bribe, "eat all your dinner or you won't get dessert." So for a little kid the dessert was almost the goal of the meal. As I also mentioned I did not grow up with desserts so if my wife wants one usually she has to make it. (I, however, am not the least bit averse to helping her eat any dessert she may come up with) She makes a buttermilk panna cotta that we really like. With this success and after cruising several recipes on the internet, she was inspired to try a variation. She came up with this two layer, chocolate and vanilla panna cotta. She served it in a small double walled espresso glass. This makes a nice dainty dessert that is perfect for us. The recipe, however, can be scaled up for larger servings. 


Ingredients:
1 tsp. gelatin
3 Tbs. water
3/4 cup 4% milk
3/4 cup cream
1/4 cup sugar

for flavoring:
1/2 tsp vanilla
3 Tbs. cocoa powder

Directions:
Bloom the gelatin in the water and set it aside for a few minutes. Add the milk, cream and sugar to a sauce pan and heat gently until the sugar melts (don't boil). Take a ladle of the warm milk mixture and add to the gelatin mixture until the gelatin is completely melted into the milk. Add the melted gelatin into the rest of the milk mixture. Divide the milk mixture in half. Add the vanilla to one of the halves. Pour into a glass container that has been tipped on its side. See picture below.


Put into the refrigerator until it becomes firm. Meanwhile put the cocoa powder in a small bowl. Scoop in some of the milk mixture and stir to form a paste. Add back into the milk mixture. Stir to fully incorporate. When the vanilla mixture become firm add the chocolate mixture on top. Put back into the refrigerator until everything becomes firm.

This is a lovely little dessert. The texture is very creamy and smooth with a nice chocolate flavor contrasted with the vanilla. Just a few sweet bites to round out any dinner.

Thursday, July 15, 2021

Mint panna cotta ミントパナコタ

 Now that my wife is making buttermilk she has to come up with ways to use it. It is an heirloom culture so it can be used over and over again but it has to be used every week or so to stay healthy. So she is experimenting with different variations of dessert panna cotta. Or as she refers to it “variations on a theme by Paganini*”. No hardship for me. Keep them coming.  

*  This expression refers to a work by Johannes Brahms based on the caprice No. 24 in A minor by Niccolo Paganini. The work consists of two books. Each opens with the theme Paganini’s caprice No. 24 followed by fourteen variations. Hence variations (of panna cotta) based on a theme. 


Ingredients:
1 tsp gelatin
1 1/2 tsp water
1/2 cup 4 % milk
1 cup fresh mint leaves bruised with a meat pounder or torn into pieces (to release more flavor)
1/4 cup sugar
1/2 tsp vanilla
1 1/2 cup buttermilk

Sauce:
1/2 cup water
1 cup fresh mint bruised
1/4 cup sugar


Directions:
Bloom the gelatin in the water. Add the milk and mint to a sauce pan and gently heat to infuse the milk with the mint flavor. Continue gently heating until mint flavor is to taste (as shown in the second picture). Strain the milk mixture and put it back in the pan. Add the sugar and gently heat and stir until the sugar is dissolved. Let the milk mixture cool to room temperature. Add the buttermilk and vanilla. Distribute to the serving jars. Chill in the refridgerator until the mixture is firm.

For the sauce:
Put the water and mint in a sauce pan. Heat until the the water has a mint flavor to taste. Drain and return liquid to the sauce pan. Add the sugar and heat the mixture until the sugar has melted. When it has reached room temperature top off the serving jars with the mint sauce.

Again, this a very nice dessert. It is very creamy in texture. The mint flavor infuses throughout and very refreshing. Another good way to finish a meal.

Tuesday, May 24, 2016

Cauliflower puree with parmesan cheese パルメザンチーズ味カリフラワーのピューレ

This is based on a recipe that appeared in the Washington Post. I decided to make this since I had a head of cauliflower in the fridge which I bought a week ago. I followed the recipe exactly and it was not good. It had an unpleasant mealy consistency and was not smooth and creamy. We figured out why this was. The recipe calls for using a food processor. No matter how long your run the food processor, the cauliflower will not become smooth and creamy. Instead of a cuisinart you need to use a blender on high speed (puree mode). Once I fixed this, the end product was nice and creamy with good Parmesan flavor.


As suggested, I garnished it with finely chopped parsley fresh grated Parmigiano-Reggiano and freshly cracked black pepper. 


The below are the original recipe with one important modification; instead of a food processor, use a blender.

INGREDIENTS
1 medium head (2 pounds) cauliflower, cored and cut into 11/2-inch florets (7 cups)
1/3 cup low-fat milk (1 percent), plus more as needed
1 tablespoon unsalted butter
1/4 teaspoon kosher salt, plus more as needed
Generous pinch freshly grated nutmeg
1/4 cup freshly grated Parmigiana-Reggiano cheese, plus 4 teaspoons for garnish
1 tablespoon chopped fresh flat-leaf parsley
Freshly ground black pepper

STEPS
Place the cauliflower florets in a steamer basket set over a pot of boiling water. Cover and steam until the cauliflower is just tender, 5 to 7 minutes.
Transfer the cauliflower to a blender along with 1/3 cup of the milk (I needed more milk, probably 1/2 cup total), the butter, the 1/4 teaspoon of salt and the nutmeg; puree until very smooth.  Add extra milk a tablespoon at a time, as needed. Immediately add 1/4 cup of the cheese and pulsed just until the cheese melted and was incorporated.

When I first made it, using the Cuisinart as specified in the recipe, it was grainy and mealy. When my wife made cauliflower puree to make her cauliflower/spinach panna cotta, the cauliflower puree was really silky smooth. I initially thought cauliflower must be cooked in milk and butter as my wife did. But when we made English pea panna cotta, it became clear to us, the use of the blender made the difference. So I placed my previously made cauliflower puree into the blender and pureed it again. I needed to add a bit more milk but the end result was night and day different. Now the puree was nicely smooth, creamy and incorporated more air and became fluffy. This can be served warm or cold. I served it cold the second time with some good Spanish olive oil on the top. This made it better still. This can be eaten as a side vegetable dish, drinking snack or even as a spread for a cracker or a slice of bread. 

Saturday, July 24, 2021

Buttermilk ice cream バターミルクアイスクリーム

Since my wife started making heirloom buttermilk, she has been exploring recipes to use the buttermilk she makes. One of the reasons is that since this is "heirloom", the prior batch is used to inoculate and make the next batch. She was worried if she does not make the next batch in a reasonable amount of time (few weeks??), the inoculant may get too weak to make the next batch. So she is trying to use the buttermilk at a regular rate. She made several varieties of buttermilk panna cotta. This time, she made buttermilk ice cream.


She topped the ice cream with peach puree. The ice cream was very good with a nice mild buttermilk flavor and the peach puree went well with it. (the original peach was too hard and the puree was much better).


We mentioned our old (then) ice cream maker with a compressor (self-freezing) in a blog in 2017. After that post, we again completely forgot about the ice cream maker until now. We got it out of the basement. I first tested it with just water to see if the compressor still worked. Amazingly, it did! The bottom of the chamber got cold and formed ice in a few minutes. Then, I tested the churner. It worked as well. This machine must be close to 30 years old and we are amazed that it still works. In any case, my wife was “good to go” for making buttermilk ice cream.


Ingredients:
1 cup (200 g) sugar
3 Tbs. (20 g) cornstarch
1/8 tsp. (0.5) Kosher salt
2 large eggs (100 g). I used pasteurized eggs.
1 cup (225 g) heavy cream
1 1/4 cups (285 g) buttermilk

Directions:
In a sauce pan mix together everything except the buttermilk. (I used a double boiler to reduce the risk of having the mixture curdle.) Keep stirring on medium heat until the mixture starts to thicken. According to the instructions, when the mixture starts to bubble keep stirring for at least a minute to neutralize the starch-dissolving enzyme found in egg yolks. Remove from the heat and strain the mixture to remove any lumps that may have formed. When the mixture has cooled to room temperature stir in the buttermilk. Refrigerate the the mixture until it is about 40 degrees. (I used an ice bath to reduce the temperature of the mixture.) Churn the mixture according to the instructions for the ice cream maker. The final product is shown in the following picture.


This was a wonderful ice cream. It was smooth and creamy. It had a nice bright flavor with an interesting tanginess (from the buttermilk ?) that kept it from being cloying or boring. It also had a somewhat vanilla flavor (even though no vanilla was added). Unlike most recipes for buttermilk ice cream, some of which call for as many as 6 egg yolks, this one contained only two whole eggs. The recipe said that the addition of the cornstarch replaced the need for so many egg yolks to achieve its smooth creamy texture. Having replaced the egg yolks with cornstarch we would like to think that this ice cream was better for us than the other egg yolk based recipes. (Although, in all honesty we would have to admit that the amount of heavy cream used may negate whatever “brownie points” we may have gotten in the health department for the reduction in egg yolks.) Even though, as I have mentioned before, in general, I do not like buttermilk, I had absolutely no trouble eating more than my share of this ice cream. And again, I am astounded that the ice cream maker still works. 

Tuesday, October 27, 2020

Special Kaiseki box from Sushi Taro v2 寿司太郎特別会席弁当二回目

We had the second take-out special kaiseki  box from Sushi Taro. Again, this was amazing. We just wanted to record what we enjoyed.


Sardine with uni-mustard sauce イワシのぬた. The accompanying gelee (“nikogori” 煮凝り) was not to be missed


Sashimi,  wild snapper 天然鯛, tuna 鮪. Nice decorative touch. The carrot cut into “momiji” maple leaf にんじんの紅葉 and circular cut daikon stalk “karakuls a-girl” 大根の唐草切り shown on top of the maple leaf carrot, another example to attention to detail.


Pacific saury sashimi さんまの刺身. This was really good.


Fried sea eel collar and chestnuts, matsutake いが栗揚げ, fried lotus root, matsutake 揚げレンコン、matsutake 松茸、fried “anago” sea eel collar 穴子のかま揚げ. This is a really autumnal dish.  Tatsuta-age style anago collar, with a small fin attached, was new to us and was very good. We had the chestnut  dish at Omakase counter before but only a pro can do this type of dish imitating a real chestnuts peeking though the outer thorny shell. The shell was made of ground white fish meat with dried “somen” and deep fried. The chestnut was cooked in “Shibukawa-ni” so that inner brow skin is can be eaten without puckering taste. The matsutake with slices of yuzu were the essence of autumn.


Beef tongue stew with quail eggs and octopus 牛タンのシチュウ、うずらの卵、たこ. This is a really great dish. My wife loves stewed beef tongue. The tongue was very tender and perfectly seasoned (later we learned that this was from "Wagyu" 和牛). The surprise was the octopus leg which was a nice texture contrast. A perfect combination. It also had quail eggs which are always a favorite. 


Kamo-nasu eggplant 賀茂茄子, "anago" sea eel 穴子, sato-imo 里芋, shishi-togarashi しし唐辛子, “Kyo-bu” decorative gluten cake 京麩 simmered in broth (shishito was deep dried first, I think). Interestingly the flavor of the shishito subtly infused the fish and broth adding a deliciously different element. 


Grilled "sawara" (king mackerel) miso-fuan and turnip さわらの味噌祐庵焼きとかぶ. YUM. 


The following line-up of dishes was just a succession of exquisite mouthfuls of different taste profiles, and textures. Each one a special treat. There are not enough superlatives to describe them all. From left top clock wise: Aji (horse mackerel tataki with perilla seeds 鯵のタタキ紫蘇の種, grilled "mana-gatsuo" (Japanese pompano) 焼きマナガツオ、"Hamo" gonger eel liver ハモの肝 (exquisite), blue crab, crab mustard uni カニの蟹味噌ウニ和え.


Shirako "soft roe" ponzu 白子のポン酢あえ、goma-tofu with uni ウニと胡麻豆腐, "Ikura" salmon roe いくら, goma-tofu with uni ウニと胡麻豆腐. I have not tasted “shira-ko” for sometime and this was a special treat.


"Ankimo" monkfish liver 鮟肝 with vegetable, "Mizuna" Japanese green and quail egg yolk 水菜のお浸しとウズラの黄身,  "Wagyu" beef with kelp 和牛昆布締 (a very nice addition we have not had before). Of course “ankimo” is our favorite.


Sushi; salmon 鮭, ??, chu-toro 鮪中トロ, kohada 小肌, tai 鯛


Omelete 卵焼き, ama-ebi shrimp 甘海老,  cutlass fish 太刀魚?, hamachi はまち yellow tail, and “uni” 雲丹 sea urchin.


This is a lot of extremely exquisite food. This brings a bright ray of sunshine during this covid period. We are so fortunate we can have this and enjoy everything at home.

We keep forgetting but dessert is included. Roasted tea "houji-cha" 焙じ茶 flavored pudding/panna cotta. A perfect finale.