Showing posts with label Baked. Show all posts

Monday, March 6, 2023

Surf-and-turf Valentine’s Day Dinner ロブスターとステーキ(サーフアンドターフ)

We rarely have a surf-and-turf dinner but since it was Valentine’s  day, we decided to have a steak and lobster dinner. The filet mignon came from Omaha steak and we got frozen lobster tail from Whole Food.  I cooked both in sous vide. I also made “Mac-and-cheese”. The temperatures I used in the past for lobster tail and steak were slightly different but this time I used 135F for both so that I could sous vide both in the same setting which worked.  The steaks were cooked for 4 hours and the lobster 45 minutes. I timed it so they both came out around 7pm.


I seasoned the lobster tails with salt and tarragon (I only had dried) and vacuum packed with several pats of cold butter. After it was cooked I removed the lobster from the vacuum pack, and drained the liquid inside and added a squeeze of lemon juice to make a lobster-butter dipping sauce. It was perfectly cooked.


I thawed the previously frozen steak and patted it dry. I then further dried it on sheets of paper towel, uncovered for a few hours in the refrigerator.  I seasoned it with salt and pepper before vacuum packing it for sous vide. After it was cooked I removed the steak from the vacuum bag, and quickly seared both sides in a frying pan with melted butter. I set the steak aside and added the juice accumulated in the vacuum bag to the pan and scraped off the brown bits left from searing the steak. I added 2-3 tbs of red wine and reduce the mixture in half. I finished the pan sauce with pats of butter and seasoned with salt and pepper. The steak was nice medium rare.


I have made and  posted several variations of “Mac and cheese”. This time I went with a classic with Béchamel sauce but I also added finely chopped fresh shiitake mushroom which added nice flavors. The cheeses I used as per my wife’s selection were fresh goat, sharp cheddar and smoke Gouda. The seasonings were salt and freshly grated black pepper and nutmeg. We really liked this version.


We had this with one of our favorites; Caymus Napa valley Cabernet  Sauvignon 2020. We really enjoyed this special dinner and wine.

Saturday, March 4, 2023

Crispy Roasted Porcelet Belly パリパリ皮のロースト(子)豚バラ

Some time ago, we bought a special pork belly called “Porcelet” from D’Artagnan. It is from a milk-fed piglet and arrived with the skin on. The quantity was quite large so we divided it into 3 pieces one of which we used right away and froze the other two. Since the pieces in the freezer generally will not improve the longer we keep them frozen, we decided to make something out of one of the pieces. We thawed a portion of about 2 lbs. After consulting many recipes on the Internet, I decided to use the recipe from “America’s test kitchen (ATK)” on YouTube. It is a modification of a Chinese dish called “脆皮燒肉”. Actually ATK has two versions of video posted; one by  “The Pangs”, a father and son (Kevin Pang) Chinese cook duo and the other by Dan Souza. After watching both (which are mostly the same recipe), I cooked this porcelet with crispy skin. I made two sauces; one by Dan Souza which is inspired by North Carolina BBQ sauce with mustard and vinegar and the other by the Pangs which is Hoisin sauce based. We had this with oven fried potato which my wife made (using white potato and a bicarb treatment but using olive oil instead of duck fat) served with ketchup (picture below). OMG! This is an excellent pork dish with very crispy skin, juicy and tender meat/fat.


Here is the appearance of the pork belly after it was finished. The skin is golden brown and has multiple bubbles and extremely crispy.


Ingredients (This made three large portions providing servings for both of us for several meals over several days):
2lb skin on pork belly (in our case, porcelet belly)
Salt (for salting the skin)
Vegetable oil (to add to the rendered pork fat to make it 1 cup of fat)

For dry rub
Brown sugar and salt (1:1) ratio, we used regular sugar with one tsp dark molasses and kosher salt (#2)
Chinese 5 spice powder, optional, but makes it closer to the authentic flavors).
We found this rub a bit too salty so we will change the ration when we make it again.

Sauces (the amounts are from the original recipe, I made a much smaller amount keeping the ratios of the ingredients the same)

For the Chinese sauce
1/2 cup Hoisin sauce
4 tbs rice vinegar
1 tsp grated ginger
2 tbs scallion, chopped

For the Mustard sauce
1 cup Dijon mustard
1/3 cup wine vinegar (I used rice vinegar)
1/4 cup brown sugar (I used dark buckwheat honey)
1 tbs Worcestershire sauce
Hot sauce (as much as you like, I used 1tsp Sriracha)

Directions:
Cut the pork belly into three equal portions (#1)
Cut the skin and underlying fat (but not the meat) every 1/2 inch interval (#1)
Put the dry rub (#2) on the meat side including the ends and sides but not on the skin (the sugar will make the skin burn while baking)
Salt the skin surface (about 1/2 tbs for each piece) (#3)
Refrigerate without covering for 12-24 hours  (To dry the skin surface) in a glass baking pan (liquid will come out while in the refrigerator)
Some juice accumulated in the bottom of the baking dish and the skin surface looks dry without residual salt visible
Place the pork in a baking pan with the metal rack
Bake at 250F for 2 and half to 3 hours (to the internal temperature of 195F, in my case the temp went over 200F) (#4)
Set the pork aside and pour out the rendered fat to the 1 cup measuring cup. Add more vegetable oil to make it 1 cup.
Pour the fat into a 12 inch frying pan and place the pork skin side down in the cold oil and then turn on the heat to medium (#5)
Fry for 5-8 minutes or until the skin is golden brown and develops multiple bubbles and crispy (#6)
Let the meat rest for 10 minutes before slicing using the slits on the skin as a guide.


This pork was fabulous; probably one of the best things I’ve ever eaten. The meat was tender and the skin was wonderfully crunchy. It had a delicate pork flavor. We tried both sauces but we probably like the hoisin-based sauce best with this wonderful pork. The mustard sauce is good but a bit too vinegary for our teste. In any case, this is an amazing dish and the skin was crispy beyond belief. We are glad we made this dish. Our only concern is that it tasted a bit too salty for us. I may reduce the salt and/or increased the drying time in the refrigerator.


Addendum:
For us, knowing how best to reheat the left-overs is often important (since this is something we often do.) Particularly for this dish when re-heating, we would like to have the skin crispy and the underlying meat juicy. So, I sliced two each for a small appetizer one evening. I wrapped the slices together, standing up and wrapped all sides and bottom with aluminum foil but exposed the top (skin). I placed this package skin side up in the toaster oven and toasted at 7 (darkest setting for toasting bread). This heating method worked very well. The skin was crispy and the meat/fat underneath is soft and juicy and nicely warmed up. The picture below shows how I served it with the two sauces; The dark one on the left is the hoisin-based and the one on the right is mustard and vinegar. We both agree that the hoisin-based sauce is much better. The next batch I may add Chinese 5 spice powder in the rub.


Tuesday, February 21, 2023

Fastnacht Cake Version 3 ファストナハトケーキ V3

Since “Fastnacht” day (“Fat Tuesday”) is approaching, my wife made a new and improved version of “Fastnacht” cake. This one is made with Japanese sweet potato (satsuma imo サツマイモ), is double layered with “rivels” between the layers and on the top and as an additional innovation my wife added; a medley of dried fruit.


The “rivel” layer is difficult to see but it is there as is the dried fruit.


Ingredients: My wife will tell what she did to make the cake (makes two round 8 inch cake/bread)
1/2 cup warm mashed sweet potato (please note the original recipe specifies HOT)
1 1/2 cup buttermilk
1/2 cup butter
1 egg
1/2 cup sugar
2 tsp. salt
1/2 tsp. nutmeg
1 pkg active dry yeast
1/4 cup warm water if blooming the yeast
4 cups of AP flour to start, adding more as needed to make velvety dough.
1 cup of dried fruit cut into small pieces

Ingredients and directions for rivels (Crumb topping)
Mix together 1/2 cup sugar, 1/2 cup flour and 4 tbs. butter softened until the ingredients are completely combined and look like fine crumbs. (I added the ingredients to a small food processor and processed it until small clumps formed. These rivals were much finer than the ones made by hand.)

Directions:
Put the mashed potatoes into the bowl of a stand mixer. Using a mixing paddle beat in the butter, then the egg and a mixture of sugar, salt and nutmeg. Beat until fluffy. Bloom the yeast in warm water.
Beat the yeast into the potato mixture. Switch to a dough hook and alternately add the flour and milk beating well after each addition. If necessary add more flour to make a soft dough. Knead the dough on a floured surface until smooth and satiny. Spread the dough into a flat square and cover the square with the dried fruit then fold the dough over the fruit and knead until the fruit is well distributed. Put the dough into a greased bowl. Grease the top of the dough, cover and let rise in a warm place until doubled.

Punch down the dough. Since the recipe makes two cakes split the dough into quarters so the rivals can be put into the middle of each cake. Then put 1/4 of the dough in the bottom of the 8 inch pan (#1). Sprinkle on 1/4 of the rivels (#2) and top that layer with another quarter of dough (#3). Do this for both cakes. Brush the tops with melted butter and cover both with the remaining rivels. Let the cakes rise in a warm place for about 30 to 40 minutes while the oven preheats. (This is a variation from the original PA Dutch recipe. It does not call for the second rise; the cakes are cooked immediately after they are put in the pan. I’ve made fastnacht cakes both ways and think the cake made with a second rise is much better. It comes out much thicker and has a lovely tender texture.) Cook in a 400 degree oven for about 20 minutes or until golden brown. Picture (#4) shows the cake as it came out of the oven.


This is a good moist “cake” with a pleasing tender texture. (Although it is known as a cake, that might not be the most accurate nomenclature. It is not a cake in the traditional sense. It is more a mix of a cake and a very soft bread). It is only very slightly sweet. The sweet potato flavor is very subtle but does come through. The middle layer of rivels made with the food processor were much finer than those made by hand and maybe as a result almost disappeared. Nonetheless they added a layer of moist texture. The dried fruit really added and provided a little additional burst of flavor and sweetness. The cooks who wrote the original recipe that appeared in the 1940’s cookbook my wife uses, may not recognize this as the fastnacht cake they knew but as far as I am concerned this is the best version my wife has made yet.

Sunday, February 19, 2023

Bran and Raisin Muffin ブラン、レイズン マフィン

This is another my wife’s baking projects. She’s made almost all the muffins from Nancy Silverton’s “Pastries from La Brea bakery” but somehow missed this bran muffin. Although it appears to be a very healthy muffin high in fibers, don’t let appearances fool you; it is also extremely good. My wife keeps some speciality and whole wheat flours in the freezer (since whole wheat contains oil from the germ which can go rancid if left out).  These frozen flours included bran and whole wheat pastry flour. Although  the bran flour was good, the wheat pastry flour had a best used by date of  2017 (some 6 years past). My wife decided even frozen this flour was too old and did not use it. (She substituted AP flour) in this batch but promptly ordered new bag of the pastry flour from Amazon (#1 in the composite picture below).


Ingredients (made 12 muffins):
2 cups unprocessed bran
1 1/2 cups raisins (one cup rehydrated, the remaining 1/2 cup added to the batter)
1 1/2 cup water (1 cup to rehydrate the raisins, 1/2 cup to go into the batter).
1/2 cup buttermilk
The zest from one orange plus 1 tsp orange flavoring
1/2 cup brown sugar
1/2 cup vegetable oil
1 large egg
1 large egg white (or just 2 eggs, optional)
1/2 cup pastry flour (or AP flour)
1/4 cup whole wheat flour
1 tsp. Baking powder
1 Tsp. Baking soda
1/2 tsp. Kosher salt

Directions:
Toast the bran until it is fragrant. Pour the bran into a bowl add the buttermilk and remaining 1/2 cup of water and stir to combine (#3). Hydrate the raisins in 1 cup of water on the stove until the water has been absorbed, about 15 minutes. Add to a food processor and puree (#2). Add the oil, brown sugar, eggs, and continue pureeing. Put the two flours, baking powder, soda and salt in a bowl. Mix to combine. Add the bran mixture to the flour mixture then add the raisin mixture. Stir until completely blended. Add the remaining raisins. Scoop the batter into muffin tins (#4). Bake in a 350 degree oven for 25 to 30 minutes until the muffins are well browned and firm to the touch.


These muffins are quite moist (thanks to the raisin paste) with a gentle sweetness and has a nice orange flavor (thanks to orange zest). Regardless of the high-fiber or otherwise, this is a darn good muffin perfect for a breakfast. Probably one of our favorites from this cookbook.

Friday, December 23, 2022

Fruitcake フルーツケーキ

My wife likes to have special baked goods for the Xmas season. After several attempts, we gave up on making panettone and now buy it. For stollen bread, she made  it a few times but now we also buy it. This year we got two different brands of panettone from Amazon and a large stollen from Williams-Sonoma.  We also used to buy fruitcake (Claxton Fruit Cake) in the past. We were not planning on including fruitcake in this year’s line-up but I came across a recipe for fruitcake on the WashingtonPost website. Supposedly this one goes well with cheese. So I mentioned it to my wife and she went into action. (Note from Wifey: We had bought various candied fruit from Harry and David. While munching on them as a snack I thought, ‘These would be perfect for a fruitcake. So when I was presented with the fruitcake recipe, it was ‘all-systems-go”.) As usual, she made some modifications due to availability nuts and dried fruit. I helped her by cutting up the dried fruit. It was remarkably good and indeed went well with cheese (and a glass of red wine). 


Ingredients (shown in the picture below)
2 cups (180 grams) walnuts halves
1 cup (140 grams) dried mission figs, chopped into ½-inch pieces
1 cup (140 grams) dried fruit medley from Harry and David cut into 1/2 inch pieces (Original recipe called for dried dates.)
1 cup (140 grams) combination candied pineapple and mangos from Harry and David cut into 1/2 inch pieces. (Original recipe called for dried cherries)
½ cup (170 grams) honey, (I used buckwheat honey which is very strong in flavor and dark in color)
½ cup (118 grams) brandy
Zest and juice of 1 lemon
1 teaspoon ground cinnamon
½ teaspoon grated nutmeg
¼ teaspoon ground mace (may substitute with ground allspice)
1 cup (220 grams) packed light or dark brown sugar
1 cup (125 grams) all-purpose flour
1 teaspoon baking powder
½ teaspoon fine salt
1 stick (4 ounces/113 grams) unsalted butter
2 large eggs.


Directions:
Toast the walnut then roughly chop and place in a small bowl. In a medium bowl, toss together the figs, dates and dried fruit until combined. Whisk together the honey, brandy, lemon juice and lemon zest until combined, and set aside. In a small bowl, whisk together the cinnamon, nutmeg and mace. In a medium bowl, thoroughly whisk together the sugar, flour, baking powder and salt to combine then set aside.

Melt the butter in a sauce pan. Heat slowly to let the water in the butter boil off without exploding and then cook until the solids turn brown, about 5 minutes. Turn off the heat and stir in the spices (this will help bloom the flavor of the spices and suffuse them into the fruitcake). Carefully, add the honey mixture — the contents of the pot may bubble up — and stir to combine. Add the dried figs and stir to coat. Turn off the heat and let the mixture cool.

Once the mixture has cooled, stir in the eggs, one at a time, and mix thoroughly to incorporate. Stir in the dry ingredients until no trace of flour remains, then fold in the remaining dried fruit and walnuts. Grease a 9-by-5-inch loaf pan then line it with a piece of parchment paper long enough to have a generous overhang on each of the long sides. (Word of advice; be sure the parchment paper covers the entire bottom of the loaf pan because the cake really sticks to any exposed surface.) Grease the parchment as well. Scrape the batter into the prepared loaf pan and smooth out the top with an offset spatula or spoon, if needed. (Next picture below) Bake for 1 hour 35 minutes in a 300 degree oven or until the fruitcake has just begun to pull away from the edges of the pan. Transfer the fruitcake to a wire rack and let cool in the pan for about 20 minutes. Use the parchment sling to lift the fruitcake from the pan, and let cool completely before serving. (Second picture below.)


This is a really surprisingly great fruit cake. Probably the best we ever tasted. (Yes I know the baseline for fruit cake is very low, but this one stands up to any baseline for pastry.) It is very moist. The brandy, browned butter and honey really work well together to create a very complex pleasing taste. The dried fruit is slightly firm and adds another taste dimension. It also goes extremely well with a slice of cheddar cheese. The gentle sweetness of the fruit cake juxtaposed to the rich saltiness is the cheese is very nice. Next time we’ll make the fruitcake in several smaller loaf pans. The smaller pieces are just the right size for a fruitcake cheese appetizer and that combination goes very well with red wine. 

Saturday, December 17, 2022

Mini-honey corn muffin ミニハチミツコーンマフィン

This is another one of my wife’s baking projects. This time it’s mini honey corn muffins. They have a pleasant sweetness and corn flavor. The texture is coarse and they are a bit on the dry side. So, my wife concocted honey butter (shown on the muffin on the left below). This picture shows the butter before the muffin is toasted. We made the picture this way so the congealed honey butter is visible. The small muffins are quite nice as a breakfast with other assorted baked goods.


As usual, I will ask my wife for the recipe.

Ingredients:
1 cup whole wheat pastry flour (1/2 cup AP flour and 1/2 cup whole wheat flour can be used as a substitute.
1 cup yellow corn meal (corn flour might be another substitute).
3 Tbs. Sugar
2 tsp. Baking powder
1 teaspoon salt
2 eggs
3/4 cup milk (or buttermilk)
1/3 cup vegetable oil
1/3 cup honey
1 cup fresh corn (optional, I didn’t use it)

Directions:
Mix the dry ingredients (flours through salt) in a bowl. In another bowl mix the wet ingredients (eggs through honey). Add the wet ingredients to the dry and fold in the corn kernels if using them. Put into mini muffin tins lined with paper muffin cups. Bake in a 350 F oven for 18 to 23 minutes or until a skewer inserted in the center of the muffins comes out clean. Cool in the pan for 5 to 10 minutes (picture below).


These make a nice little bite. The corn and honey flavor really comes through. Not sure what the whole wheat pastry flour brings to the show. The texture is a bit coarse and dry. This situation is rectified with the application of honey butter melted on a warmed muffin. 

Wednesday, November 16, 2022

Feta, spinach and pine nuts in phyllo dough フェタ、ほうれん草と松の実フィロ包

This is a small finger food based on a recipe from “Frog Commissary Cookbook“. It is phyllo-covered spinach, cheese and pine nuts filling. This is very good with crispy multiple layers of phyllo and cheesy savory center. As good as it is, this was a quite tedious work to make. Unfortunately, even for my wife who patiently makes various baked goods requiring tedious multiple steps, folding the phyllo dough was a bit too time consuming and tedious. I helped toward the end since she was getting very tired. When we finally got them in the oven we concluded that in the future it may be easier to buy this type of appetizer from a holiday season gourmet catalog rather than making it ourselves. 


Ingredients: (makes about 30)
Spinach-cheese filling
1/4 lb feta cheese
1/2 log (4oz) fresh goat cheese
2 bags of baby spinach, cooked covered over low flame without adding water, squeezed and finely chopped
1/4 cup dill (we used a bit more), finely chopped
1 medium onion, finely chopped
2-3 scallion finely chopped
1/2 cup pine nuts, dry roasted in a frying pan
Olive oil for sautéing

Directions:
Sauté the onion and garlic in olive oil for few minutes and let it cool in a bowl
Add the spinach and dill
Flake and mix the feta and goat cheese
Add the pine nuts
(we made this one day before and refrigerated)

Assembly:
One roll (15 sheets) frozen phyllo dough, thawed. Cut the 15 sheets in half making 30 half sheets.
Separate one of the 30 1/2 sheets of phyllo, paint with melted butter and fold it lengthwise in half (#1) and paint again with butter. Place one tsp of the filling (approximately shaped like an Isosceles Right Triangle i.e. a right-angle triangle with two equal sides) on the left corner of the beginning of the phyllo (#2) Fold like folding a flag until to the end (#3) and paint more butter.
Bake it in a 375F oven for 25 minutes (#4).


The folding process made multiple layers of phyllo dough which was very light and crispy in contrast to the cheesy savory filling. The combination of feta and goat cheese really worked. After enjoying these for several days as appetizer, we may have modified the opinion we expressed earlier and decided it was worth it to make them again ourselves rather than buying them from the holiday gourmet catalog. Next time we will divide up the folding. My wife will fold 15 of the 30 phyllo half sheets and I will fold the other 15. If we manage to do this simultaneously it should take only 1/2 the time. Wish us luck.

Friday, November 4, 2022

Salmon-Spinach Tortas 鮭とほうれん草のケーキ

My wife is into making small appetizers. When she saw the recipe called “Tuna-Spinach tortas” at Washington Post on-line, it was a “must-do”. Although she liked the idea of a small tortas, canned tuna does not grace our pantry…ever.  (Instead, we keep frozen sashimi-grade tuna in the freezer). We also like salmon and almost every other week we get a half-salmon filet (A special available from the local grocery store only through home delivery). I scale it and using the main portion, make several fillet portions. I then separate the belly portion for an appetizer and use the resulting small irregular trimmings including the tail portion of the filet to make salmon cakes. After we cook the fillets (usually cooked in a frying pan to make crispy skin), I make salmon salad from the leftover portions.

This time my wife used the salmon salad I made from the left over salmon fillets instead of the canned tuna called for in the original recipe. The salmon salad was a bit different from what I usually make since we did not have enough cooked salmon fillets so I oil-poached the irregular bits of fresh salmon to make about 5oz of salmon. The oil poached salmon was much softer and more moist than our usual cooked salmon.  In addition, we did not have home-made Greek yogurt. So I used all mayo instead of mixture of mayo and Greek yogurt.

The tortas came out very nice and the salmon filling was moist but made a nice crispy shell. Although we cannot tell how the original canned tuna version would have been, this is pretty good.


As you can see in the picture below, the top portion is mixture of spinach, tomato and egg. The bottom is mixture of cheese and the salmon salad.


Ingredients: (12 cupcake sized servings)
2 bags of baby spinach cooked and drained
5 oz. Cooked salmon made into salmon salad (end amount about double the amount of salmon)
1/4 cup Parmigiana-Reggiano cheese grated
1/4 cup smoked gouda grated
3/4 cup plain panko (bread crumbs)
4 large eggs
4 Campari tomatoes
1 teaspoon kosher or sea salt
1/8 to 1/4 cayenne pepper

Directions:
Preheat the oven to 400 degrees. Grease the wells of the muffin pan with cooking oil spray. Combine the salmon salad, cheeses and panko in a mixing bowl. Divide it equally among the muffin pan wells, packing it in firmly. (I used second to largest ice cream scoop).

Lightly beat the eggs in a bowl. Coarsely chop the tomatoes (to taste), then add to the eggs, along with the salt and pepper. Add the spinach to the bowl. Stir until well incorporated, then spoon equal amounts of the mixture on top of each tuna portion in the individual muffin pan wells (#1). Bake for 15 to 20 minutes, until set and lightly browned (#2). Let cool for a few minutes before carefully inverting the tortas on individual plates. (#3 & #4)


This makes a great little dish that can be used as an appetizer or even part of a lunch. We were amazed at how it came out. Somehow the panko combined with the egg mixture makes a nice crisp crust on the bottom so the salmon salad seems like it is a pie filling. The salmon salad itself made a great filling. It was moist but held together. The flavors of the celery, onion and mayo used in the salad fused beautifully. The topping added a fresh note of tomato which went very well with the salmon filling. Overall this is an amazing little torta. 

Tuesday, November 1, 2022

Salmon-Scallop Spinach pate 鮭と帆立のパテ

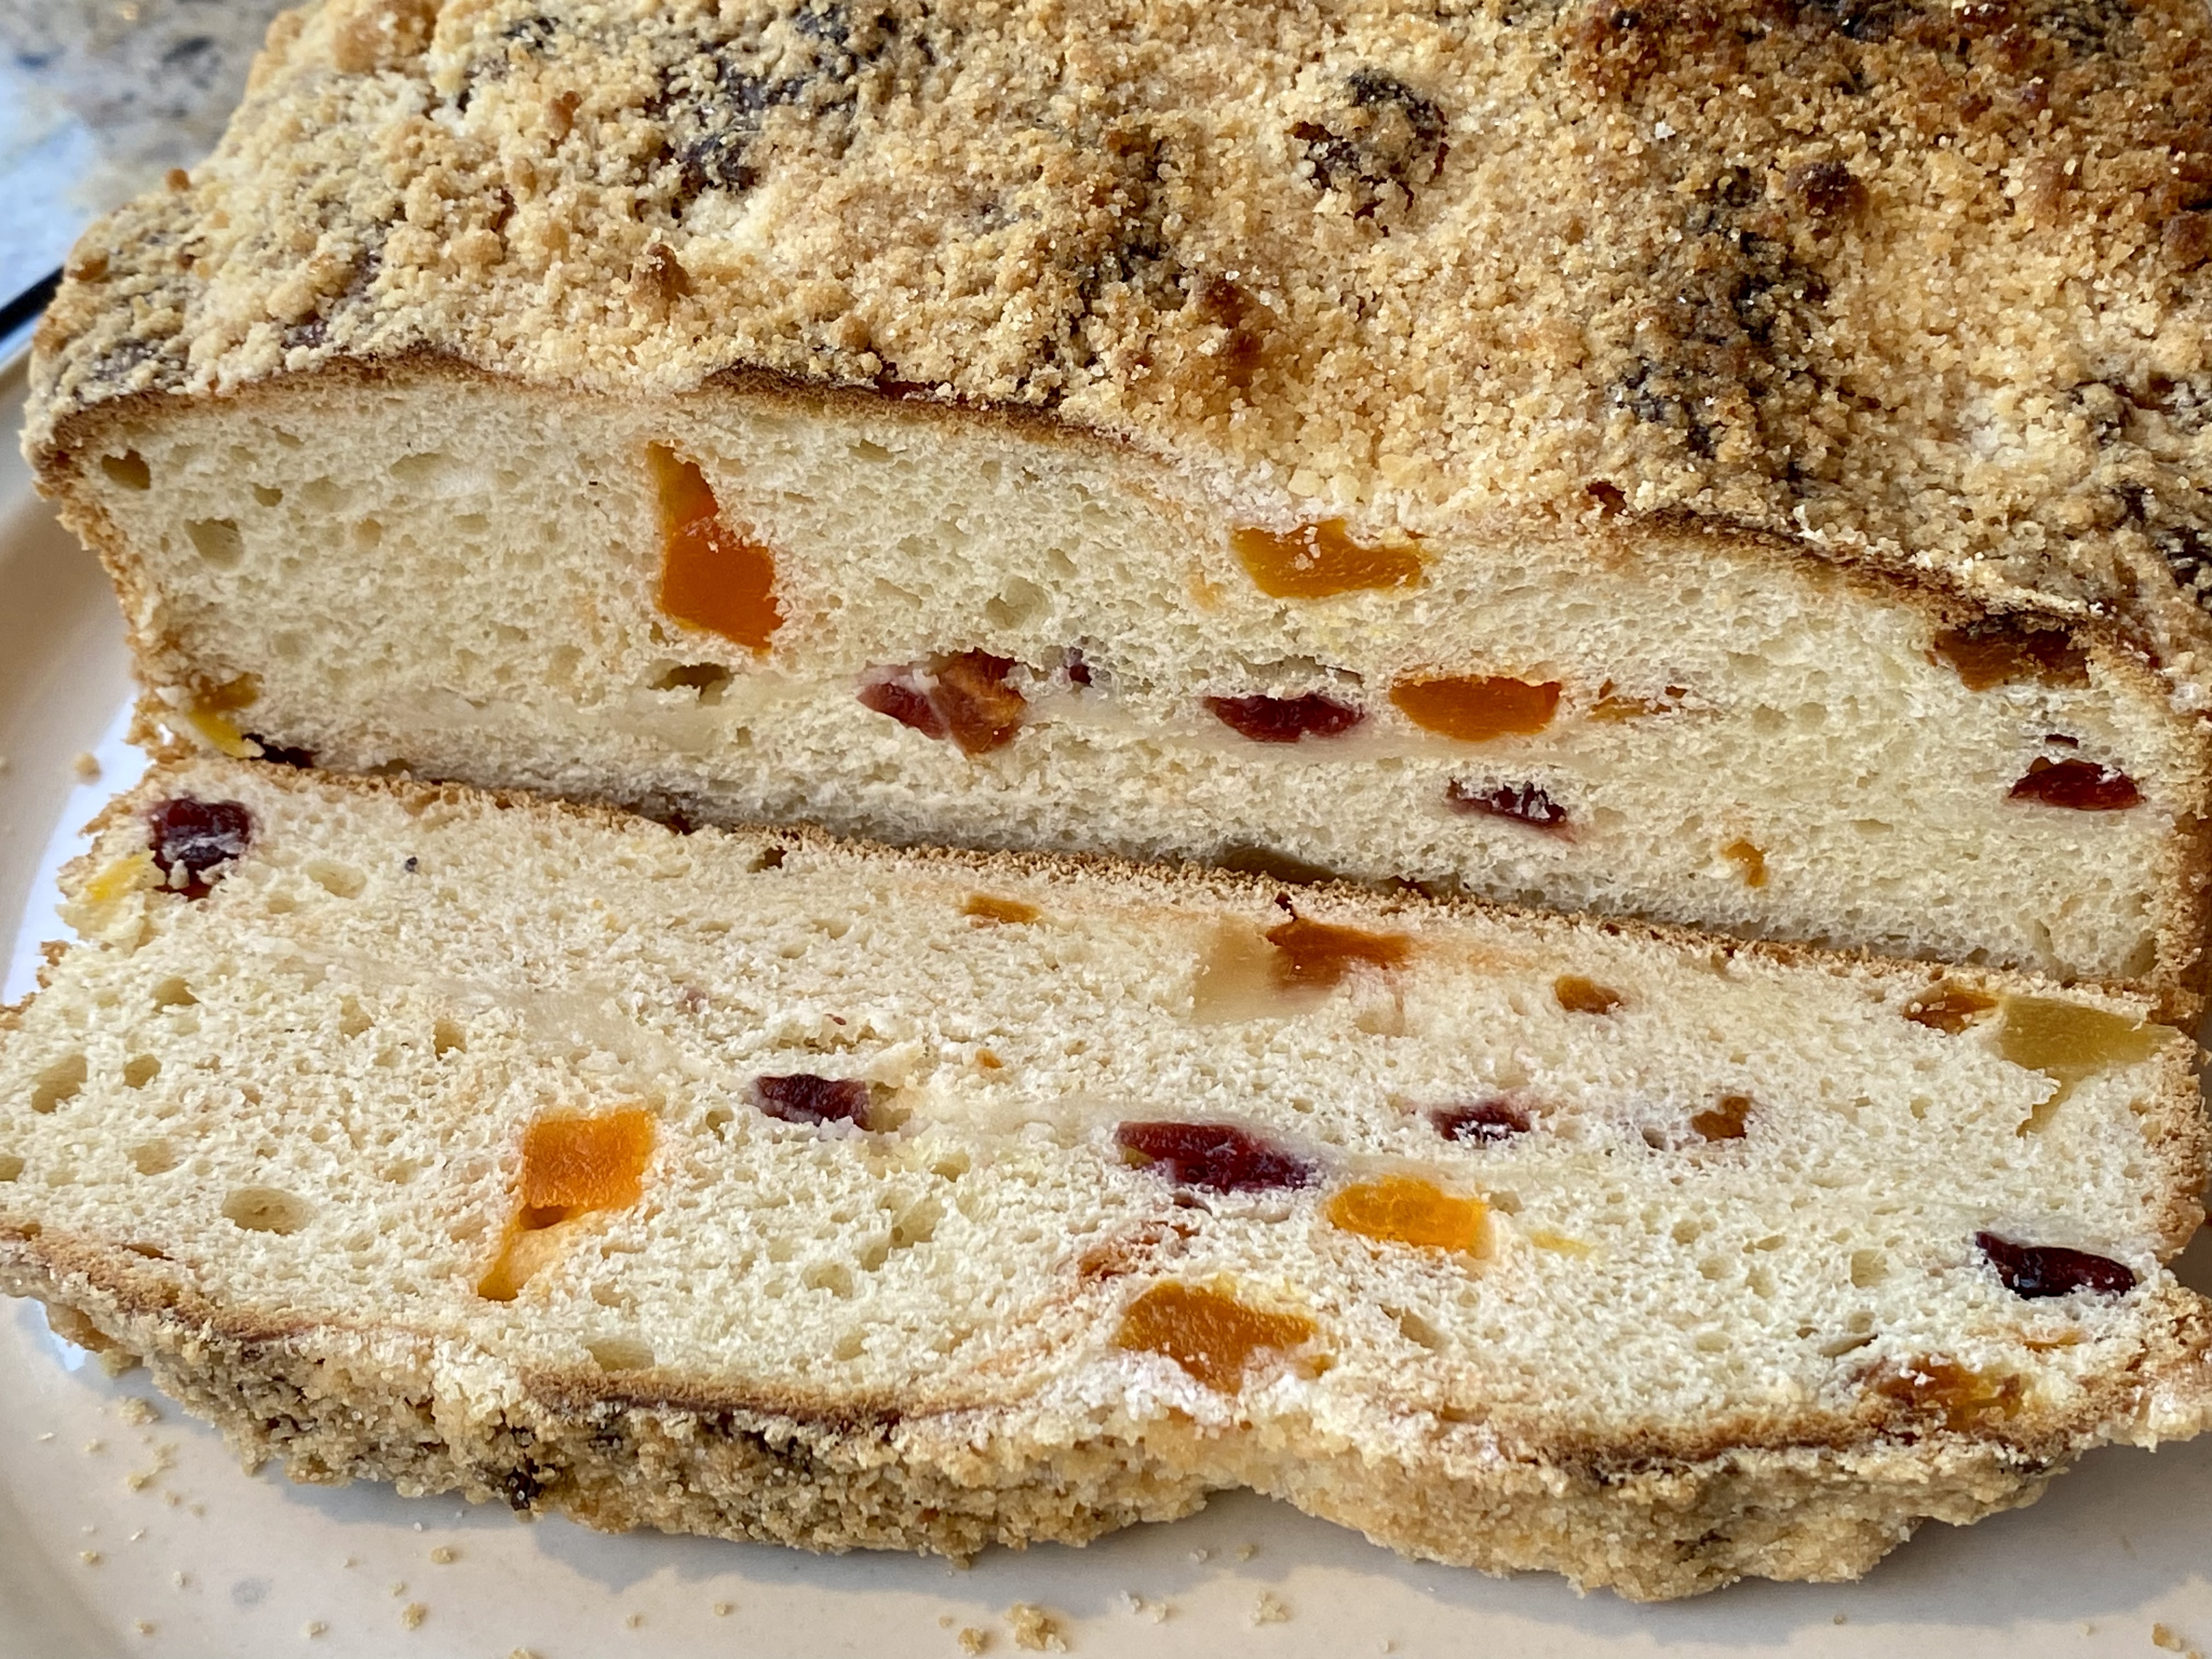
 My wife’s sister mentioned that recently she made a great carrot cake and apple pie. She said the recipes came from a cookbook called “Frog Commissary Cookbook” by Steven Poses which was published in 1985 (and presently out of print). While we were talking about the cookbook, I quickly searched for it and found a used one in good condition at Amazon and ordered it.

Digression alert: My wife’s sister originally lived in the Philadelphia area and was familiar with the Frog Commissary when it was in vogue back in the 1980’s. It was an exclusive catering service for the Franklin Institute which is the science museum in Philadelphia. The cookbook is based on Steven Poses former restaurant (called “Frog”) and his catering experience at the Franklin. Although we had never heard of it, back-in-the-day, the Frog Commissary Cookbook” was a “must have” in the Philadelphia area much like San Francisco a la Carte by the Junior League of San Francisco was about the same time while we were living in the San Francisco area. 

As my wife and I were browsing through the book we both thought this seafood pate recipe was worthwhile to try. The recipe as shown in the cookbook is of catering proportions and large enough to serve a multitude of people. As a result it required some scaling down. In my scaled down version, however, I was not aggressive enough in the seasoning; more seasoning would have been better. Although nothing was listed as a possible sauce in the original recipe we felt it called for one. After some experimentation I came up with two sauces that worked pretty well.  I served it with a side of tomato and cucumber dressed in olive oil and balsamic vinegar.  In any case, it is rather good looking and subtle flavored pate.


As I mentioned I thought the original recipe was sort-of a restaurant size and I reduced it by 1/4. This was not easy since the original amounts were not in metric. I first converted the non-metric weight and volume to metric and then divide those by 4. The seasoning should have been more than just 1/4 of the original recipe. (The seasoning amounts below reflect the suggested increase).

Ingredients: (makes one mini-loafpan)
Salmon-scallop mixture
85 g scallops
85 g salmon filet
1 egg white
1/8 tsp nutmeg (or to taste)
1/2 tsp. salt (or to taste)
1/4 tsp pepper (or to taste)
1/8 tsp cayenne (or to taste)
1/2 tbs (7ml) brandy
100 ml heavy cream

Spinach-scallop mixture
3 g butter
3.7ml minced shallots (half of medium shallot)
1/2 cup packed fresh spinach (30 g, cooked, moisture squeezed out, finely chopped)
1/8 tsp salt
1/16 tsp pepper
1/2 tbs minced dill
25 g scallop
15 ml heavy cream

Directions:
Salmon-scallop mixture
Cut up the salmon and scallops into a small size and place in a food processor (I used a mini-food processor) and process for 1 minute or until all chopped up
Add the seasonings, egg white and brandy and process 10 seconds
Place in a bowl and add the cream in several increments and mix until smooth.
Cover and refrigerate.

Spinach scallop mixture
Sauté the shallot in butter for 4-5 minutes (I seasoned this with salt and pepper), let it cool.
I cooked the spinach in a wok, lid on, at very low heat without any liquid (our usual way) for 7-8 minutes occasionally mixing top and bottom portions of the spinach until completely wilted and cooked. Cool, squeeze out the moisture and cut it up.
Place the shallot, spinach, and dill in a food processor and process for 10 seconds, add the chopped scallop and process additional 30 seconds or util smooth.
Transfer to a bowl and mix in the cream and mix until smooth

Assembly:
I first lightly oiled all surfaces of the loaf pan with olive oil. I lined the loaf pan with two portions of parchment paper in the shape of a cross with all sides covered (#1 picture below).
Add half of the salmon-scallop mixture, make shallow trough using the back of a wet spoon and add the spinach scallop mixture to the center in a log shape (I used a spatula and spoon to do this) (#2).
Add the remaining salmon-scallop mixture and smooth the surface.
Cover the surface with parchment paper (which I forgot but no ill effect) (#3) and then cover the loaf pan with aluminum foil (#4).
Bake in the toaster oven on convection mode at 350F using a bain marie (larger pan with hot water covering at least half of the depth of the loaf pan) for 35 minutes or internal temperature registers 135F.
Remove the aluminum foil and let it cool on the rack until reaching room temperature.
Unmold the pate by gently lifting the ends of the parchment paper lining (#5).
I placed folded paper towel on the bottom of a tight fitting sealable plastic container and refrigerated.
The cut surface is very attractive with green center (#6).


This was very elegant and very good. But I think we can improve on this. Although the color contrast is nice, we are not sure if we need the spinach in the center. Just all salmon-scallop pate could be nicer and easier to make. In terms of the sauce, we tried three sauces; aged Balsamic vinegar, wasabi soys sauce, and yuzu-kosho ponzu. All worked well but we liked the classic wasabi-soy sauce best. The amount we made is just right for most people. I think the usual wine pairing would be a dry white or sparkling wine. We had it with our usual red.

Wednesday, October 26, 2022

Spinach cheese puffs ほうれん草チーズパフ

This is one of those small cheesy appetizers my wife likes to made. She saw this recipe on line and also realized that one of the boxes of frozen puff pastry was getting old. On the top of that, she cooked 2 packages of baby spinach and was looking for the best way to use them. So, all converged to result in this dish. I helped in preparation and clean-up. This is cheesy with a nice lemony flavor from the lemon zest. The puff pastry was still good and made a light crispy shell. This is a bit on the larger side and half  per person is just perfect size for us.

As usual, I ask my wife to take over.

Ingredients:
One sheet of puff pastry
2/3 cup onions finely diced
4 garlic cloves finely diced
8 oz. Cream cheese
2 eggs
2 packages of fresh spinach, cooked and drained
1 1/2 cup feta cheese finely crumbled
4 tbs. Dill
4 tsp. Lemon zest

Directions:
Cook the onion and garlic in a frying pan. Set aside to cool. Soften the cream cheese by lightly microwaving it under the defrost setting. Cream the softened cheese together with the eggs. Add the rest of the ingredients and stir until completely combined.

Cut the puff pastry into 9 squares. Roll out the squares so they are large enough the put in the greased cups of the muffin tin with the edges hanging over the sides (#1). (It was a bit tedious convincing the pastry to go into the cups. Also, the 9 filled cups would leave 3 unfilled in the 12 cup muffin tin. So I thawed some regular pie crust dough and used it for the remaining 3 cups.) (Digression: I made the remaining pie dough into impromptu cookies; roll out pastry, put butter and cinnamon sugar on half, fold the other half over, cook in toaster oven 400 degrees 15 minutes.)

Fill the pastry shells with the cheese mixture(#2) and fold the pastry hanging on the side over the cheese filling (#3). (Cover the cups with the pie dough with a round piece of dough like a pie topping.) Refrigerate 30 minutes. Bake in a 400 degree oven for about 20 to 25 minutes until the tops are golden brown (#4). Picture #5 shows the puff pastry puff while #6 shows the one made with pie dough.

Whether made with puff pastry or pie dough the result is highly acceptable. Lemon was the first taste to come through which melded into a savory onion, garlic cheese combo. Both pastries added a nice buttery crunch. Interestingly, the cream cheese mellowed out the feta very nicely. After biting into it you wouldn’t say “oh cream cheese and feta” instead you would say, “ a nice creamy savory cheese combination. What cheese would that be?”

Thursday, October 20, 2022

Blueberry puree and pecan muffin ブルーベリーピュレー、ピーカンマフィン

This is another variation on the theme of blueberry muffins. When we got less than perfect (in terms of the shape/consistency and sourness) blueberries, my wife slowly cooked and then pureed them using the immersion blender. You could add sugar and the puree worked well when added to our morning yogurt.  My wife tried using blueberry puree in muffins and found that it really added a blueberry flavor in conjunction with the whole blueberries

At one point she found the whole blueberries were gone but she had more puree than she could use in the morning yogurt. She didn’t want the puree to go bad so she decided to made a blueberry muffin “sans” the whole blueberry but just using the leftover puree as the liquid in the batter. She made this blueberry muffin with the puree as the blueberry “representative” and the addition of pecans to see how it works.  As you can see below, the entire muffin turned sort-of purple.


Ingredients
1 cup toasted pecans).
2 ½ cups all-purpose flour
2 ½ teaspoons baking powder
1 teaspoon kosher salt
1 cup granulated sugar
2 eggs room temperature
4 tablespoons unsalted butter melted and cooled slightly
¼ cup vegetable oil
1 cup combination of buttermilk and blueberry puree (i.e. however much puree is available combined with buttermilk to make 1 cup) room temperature
1 ½ teaspoons vanilla extract
(Optional) finely grated zest of 1 lemon. We did not use this.

Directions:
To make the blueberry puree, bring 1 cup of blueberries to a very low simmer in a small saucepan. Cook until the berries have broken down. Puree using an immersion blended. Cool to room temperature.

Whisk the dry ingredients (flour through salt) in a large bowl. Whisk 1 cup sugar and eggs in medium bowl until thick and homogeneous. Slowly whisk in the butter and oil until combined. Whisk in buttermilk/blueberry puree, lemon zest (if using) and vanilla until combined. Fold wet mixture into flour mixture until just moistened (lumpy is fine). If the batter seems loose, let it mellow for 5 minutes, and it will thicken up (picture below).


Divide among 12 greased muffin cups (batter should completely fill cups) (picture below).


Bake at 425F until tops are golden and just firm, 17 to 19 minutes (picture below).  Cool in muffin tins for 5 minutes, then transfer to a wire rack and cool 5 minutes before serving.


This is not bad but blueberry flavor was not very strong. The amount of the puree you put in may be something to do with it but in it’s own right, this is a good muffin.


Monday, September 5, 2022

New Blueberry muffin 新ブルーベリーマフィン

Although we generally like home delivery of groceries, the quality of produce can be a bit unreliable. Since it was high-season for blueberries, we ordered some and several batches arrived in good shape and were delicious. But the last time, the blueberries that arrived had a hard life. Many were smashed or extremely soft. We had to discard about 1/3 of them and even the ones we saved were bit too soft to eat as whole fresh fruit on yogurt for example. So, my wife just heated them up in a sauce pan (no water or sugar, just gently cooked) until they were the consistence of soft jam. The next morning, I pureed them using an immersion blender. The blueberry puree was pretty good. We added a teaspoon of it to our morning yogurt. Somehow the blueberry taste intensified in the puree and actually tasted richer than the whole blueberries we had been adding. My wife, then expanded the blueberry repertoire by making this new version of blueberry muffin using both whole and pureed blueberry. The blueberry puree made the muffin really good with strong blueberry flavor. The puree was added to the top of the muffin. The cut surface looks like only a few whole blueberries were added to but the distribution was somewhat uneven. Other sections of the muffins had plenty of whole blueberries. This is based on the recipe called “America’s test kitchen’s best blueberry muffins”.


Ingredients
1 cup of whole blueberries (or optional substitute toasted pecans).  
1 cup of blueberry puree.
2 ½ cups all-purpose flour
2 ½ teaspoons baking powder
1 teaspoon kosher salt
1 cup granulated sugar
2 eggs room temperature
4 tablespoons unsalted butter melted and cooled slightly
¼ cup vegetable  oil
1 cup buttermilk room temperature
1 ½ teaspoons vanilla extract 
(Optional) finely grated zest of 1 lemon. We did not use this.


Directions:
To make the blueberry puree, bring 1 cup of blueberries to a very low simmer in a small saucepan. Cook until the berries have broken down. Puree. Cool to room temperature.

Whisk the dry ingredients (flour through salt) in a large bowl. Whisk 1 cup sugar and eggs in medium bowl until thick and homogeneous. Slowly whisk in the butter and oil until combined. Whisk in buttermilk, lemon zest (if using) and vanilla until combined. Fold wet mixture and remaining berries into flour mixture until just moistened (lumpy is fine). If the batter seems loose, let it mellow for 5 minutes, and it will thicken up.

Divide among 12 greased muffin cups (batter should completely fill cups). Spoon 1 teaspoon of the blueberry puree into the center of each mound. (First picture below) Gently swirl into the batter using a toothpick and a figure-eight motion.

Bake at 425F until tops are golden and just firm, 17 to 19 minutes. (Second picture below). Cool in muffin tins for 5 minutes, then transfer to a wire rack and cool 5 minutes before serving.


These were really good muffins with a very intense blueberry flavor thanks to the addition of the puree. The texture of the muffin was very tender with a nice fine crumb and faint vanilla flavor. The delivery of the smashed batch of blueberries was a “blessing-in-disguise” now that we have learned about blueberry blueberry puree and it’s flavor advantages. 


Addendum:
My wife was impressed by how the blueberry puree added a good blueberry flavor to the muffins. We had some left over puree but no whole blueberries left. So my wife decided to substitute toasted pecans for the whole blueberries. (Toasted pecans as a substitute for whole blueberries is not a substitute I would have made or let alone even thought of ) but this really worked. The picture below shows the result. It’a almost like two muffins in one. The top is blueberry muffin and the underneath is pecan muffin. And the blueberries and pecans really work well together. The pecans add a nice crunchy textural element.


Wednesday, August 24, 2022

Pigs in a blanket (PIB) ピッグインブランケット

When we got steaks from Omaha Steaks, we also got assorted packages of several different raw and cooked meat products as part of the promotion. One was hamburger  meat which prompted us to bake hamburger buns and make cheeseburgers. One of the additional packages was hotdogs. I am not sure when was the last time we ate hotdogs but since we had them in the freezer my wife proposed making “pigs in a blanket (PIB)”. The origin of this dish is not clear but hotdogs wrapped in “Pillsbury’s mini-crescent rolls”  appears to be the most common rendition in the U.S. (This was the stand-by dish my wife ate as a child.) My wife proposed we “kick-it-up-a-notch” and use frozen puff pastry instead of the Pillsbury mini-crescent. (Besides we didn’t have any mini-crescents but we did have frozen puff pastry which was getting old in the freezer). In keeping with the classic version of PIB she added cheese. (Just exactly like they were made when she was a child). Unlike the cheeseburgers we made some time ago, in which my wife insisted as a hamburger “purist” no ketchup or mustard should be involved, she insisted the case of hotdogs was completely different; ketchup and mustard, preferably mixed together were absolutely required. The PIB were good but the cheese ran out and made little puddles of crispy cheese on the bottom of the pan. I thought these were pretty good with the “required” amount of ketchup and mustard (As shown in the picture below, I did not mix the two together although my wife did). (We used Dijon mustard).


Ingredients (made 8 small P-in-Bs):
4 Hotdogs, thawed and cut into half
1 frozen puff pastry, thawed and cut into 8 long strips
Monterey jack and cheddar cheese (enough to stuff the hotdogs)

Directions:
Cut the hotdogs in half making 8 short pieces
Slit the hotdogs but not cut trough (may be better to make a pocket rather than cutting through to both ends)
Stuff the slits with the cheese (either cheddar or Monterey Jack)
Wrap it in the strips of puff pastry (see below)
Bake at 400F for 25 minutes (we used our toaster oven in convection mode).


In retrospect, to prevent the melting cheese from running out, it would be better to make a pocket in the hotdogs instead of cutting through to the ends. Another option would be to place the shredded cheese on the strip of puff pastry, wrap the cheese up by merging the both ends of the long edges of the pastry and then flatten it to the original width before wrapping the hotdogs. Nonetheless this was a nostalgic trip for my wife. These brought back some of the joy of one of her favorite childhood dishes. She did observe, however, that these hotdogs did not seem as flavorful as the ones she remembers. She mused that the brand used back then was probably Oscar-Mayer. I do not have any opinion since I am not sure I have ever tasted an O-M hotdog. To head off the possibility of a trip to the grocery store to retrieve a package of O-M’s I reminded my wife that the “taste difference” may be due to the difference between the taste buds of a child versus an adult. Nonetheless, she said the adult taste buds really liked this batch. While it was not part of my childhood I quite liked it too.

Sunday, July 10, 2022

Cheesy Lebanon Bologna bites チーズとレバノンボロニャ ミニマッフィン(バイツ)

 Some time ago, my wife made some small muffin/bites with cheese and Lebanon Bologna which is the perfect small appetizer with wine. We kept them frozen and she served the last two. She wanted to make some more and we naturally assumed we could find the recipe in our blog but after some searching, we could not find it. So, we concluded we must not have posted it. We looked for the original recipe and had difficult time but finally my wife found the print-out of the recipe. The original recipe came from King Arthur Flour web site and called “Cheesy Pepperoni bites”. The original recipe calls for “Pizza flavor seasoning ” to make it taste like pepperoni pizza, I suppose. As usual she took the recipe as “advisory” and made some changes mostly based on what ingredients we had available. So she used Lebanon Bologna (she keeps some on hand frozen) instead of pepperoni, added chopped fresh chives and omitted the pizza seasoning (since we didn’t have it).

I ask my wife to take over.

Ingredients
1 1/2 cups (180g) AP flour
1/4 cup (28g) Cheddar Cheese Powder
1 1/2 teaspoons baking powder
1/2 teaspoon salt
4 tablespoons (57g) butter, cut in pats
1/2 cup (50g) Lebanon Bologna (or pepperoni, diced) (#1)
1 cup (113g) sharp cheddar cheese, shredded
1/4 cup (14g) sliced chives (or scallions) (#1)
3/4 cup (170g) milk


Directions:
Preheat the oven to 425°F. Lightly grease a bite-sized tart pan; a mini muffin pan, or a baking sheet. If using the pop-up tart pan, have an ungreased baking sheet available to use as a base.
In a medium-sized mixing bowl, combine the flour, cheese powder, baking powder, salt.
Add the butter, working it in until the mixture is crumbly.
Add the Lebanon bologna, shredded cheese, and scallions, mixing to distribute (#2 above).
Add the milk, mixing just until everything is evenly moistened.
Scoop the dough by the level tablespoonful (second smallest ice cream scoop we have)  into the mini-muffin pan. 
Place the mini muffin pan onto a baking sheet to catch any drips.
Bake the biscuits till they're a medium to deep golden brown, 10 to 14 minutes.
Remove the biscuits from the oven, and cool briefly on a rack. Use a table knife to pop the bottom of the pan off the biscuits

I am sure pepperoni works well in this but Lebanon Bologna’s smoky and sweet flavors also work well. It is very cheesy with cheddar flavor which may be due to the addition of  “Better cheddar cheese powder” from King Athur. 

Monday, July 4, 2022

Apple tassie (mini pie) ミニアップルパイ

This is another version of the mini pie called “tassie”. This time my wife made it with apples so it is a mini apple pie. As with the “buttermilk mini pie”, this is a small dessert which is perfect for us. It is traditional apple and cinnamon flavors.


As usual, I will ask my wife to take over.


Ingredients: (makes 24)
For the crust
8 tablespoons (4 ounces/120 grams) unsalted butter, softened, but still cool to the touch
3 ounces (80 grams) cream cheese, softened, but still cool to the touch
1 cup plus 2 tablespoon (140 grams) all-purpose flour

For the topping:
1/2 cup (62.g) AP flour
6 Tbs. brown sugar (1/4 cup + 2 Tbs.)
1/4 tsp. salt
4 Tbs. (60 g) butter

For the filling:
12 oz. (300 g) apple grated
1/2 cup (110 g) brown sugar
2 Tbs. (30 g) melted butter
2 Tbs. cornstarch
1/2 tsp. cinnamon
1/2 tsp. ginger
1/4 tsp. nutmeg
1/4 tsp. salt

Directions:To make the crust: In the bowl of a stand mixer fitted with the paddle attachment beat together the butter and cream cheese until smooth, about 2 minutes. Stop the mixer and add the flour. On low speed, mix until no streaks remain and the dough starts to come together, about 1 minute. Scrape any stray dough from the sides of the bowl, gather into a ball and flatten into a smooth rectangle or disc. Cover tightly and refrigerate for 1 hour.

Cut the cold dough into 24 equal pieces, (I did this by dividing the total weight of the dough by 24 to get the gram weight of each piece. That way they would at least be somewhat equal). Using your fingers, evenly press each piece into the bottom and up the sides of the 24 mini muffin cups, making sure there are no holes. (This part was a bit tricky I found the best way was to make a small ball out of the dough, put it in the cup then using my thumb push down on the center of the ball forcing a depression in the center and the displaced dough up the sides of the cup.) There is enough butter in the recipe that the papers were not necessary. Refrigerate uncovered, while making the filling.

To make the topping:
Mix all the ingredients together using your fingers until they form small pea sized clumps. Set aside

To make the filling:
Grate the apple using the large holes of a grater. Add all the other ingredients mixing to distribute them evenly. Add about a tablespoon of the filling to each dough cup filling them about 3/4 full. (I used the smallest ice cream scoop to fill the cups about 3/4 full.) Top each cup with the topping.

Bake in a 350 degree oven for about 15 to 20 minutes until the crumble and crust are golden brown. Cool completely before removing from the pan.

These are wonderful little pies. Just the right amount for a sweet mouthful after a meal. Just perfect for us. The filling became almost like a thick jam which went very nicely with the crunch of the topping.

Thursday, June 16, 2022

Blueberry cake with miso crumbles ブルーベリーケーキとブルーベリー味噌クランブル

 We, especially my wife, have been exploring Western-style dishes using miso such as miso-peanuts butter cookie, miso maple syrup loaf, smothered chicken with miso and bourbon, carrot cashew spread with miso and avocado miso dressing. This is another one of these dishes made by my wife. The miso is in the crumbles.


This is a very moist and delicate cake/muffin with a nice crusty top. I can definitely taste miso.


I will ask my wife to fill in the ingredients and directions.


Ingredients:
For the crumble:
2 1/2 cups whole wheat flour (3/4 cup for the crumble, 1 3/4 cups for the cake)
1/2 cup brown sugar
4 Tbs. Butter melted
3 Tbs. White miso

For the cake:
1 3/4 cups whole wheat flour (mentioned as part of the 2 1/2 cups above)
1 1/2 tsp. Baking powder
1 tsp. Salt
1/4 tsp. Baking soda
1 cup (2 sticks) butter melted and cooled slightly
2 large eggs
1 cup brown sugar
1 cup whole milk greek yogurt
1 tsp. Vanilla
1 pint blueberries


Directions:
Mix the ingredients for the crumble until combined and set aside. In another bowl mix together the dry ingredients (flour through baking soda) and set aside. In another bowl mix together the wet ingredients (melted butter through vanilla). Mix the wet ingredients into the dry ingredients. Fold in the blueberries. Spread in a 9X13 pyrex baking dish that has been light greased with a greased parchment paper on the bottom. Spread the crumble over the top. Cook in a 350 degree oven for a total of 60 to 70 minutes. Start checking every 30 minutes and tent the top with aluminum foil if the crumble starts to get too dark. Cook until the top is firm and a tester inserted in the center comes out clean. Let the cake cool in the pan for a least 2 hours. 


This is a very unusual cake (in a good way). The combination of the whole wheat flour, miso and brown sugar makes a sweet/salty/robust flavor we have never tasted anywhere else. The miso is very pronounced. The blueberries add a burst of fresh sweetness which helps bring the other flavors back into balance. The crumble is nice and crunchy. It complements the tender texture of the cake. And the cake is extremely tender. I had trouble getting it into a storage bag in one piece even after cooling several hours. I couldn’t slice or serve it until it had been in the fridge overnight. Even then we had to eat the slices with a fork or spoon. Nonetheless it is a nice bread with coffee in the morning.

Monday, June 13, 2022

Puff pastry cheese swirls

My wife decided she had to use up some old frozen puff pastry which passed “best-by date” by a year. She found a recipe for broccoli based cheese swirls on the back of the puff pastry box and decided to make them. In addition, she found some pesto we had made and frozen sometime ago and decided to use the pesto to make a pesto based cheese swirl. Sort of killing two birds with one stone approach. 

As usual, I ask my wife to provide how-to.

Ingredients:
two sheets of frozen puff pastry

For the Broccoli based cheese swirl
The amounts of all the ingredients are arbitrary and are generally enough to cover the sheets.
Cooked broccoli finely chopped (spinach could also be used)
Scallion finely chopped
Various cheeses grated your choice (I used smoked gouda, mozzarella, and Parmesan.)

For the pesto based cheese swirl
Pesto to cover the sheet of puff pastry
Various cheeses grated. (I used Monterey Jack, Cheddar and Parmesan

Directions:
Thaw the sheets of puff pastry. Spread the ingredients to cover the sheets (#1 & 2 for the pesto) and (#3 for the broccoli) based. Roll up the sheets and slice into 1 inch thick pieces. Cook in a 400 F degree oven for 15 to 20 minutes until the swirls are golden brown.


These make a wonderful alternative to the traditional cheese tray. The pastry was light and crunchy. The cheese was nicely melted and toasted. The scallion flavor came through and really made the broccoli based rounds. While both cheese swirls were very good, in a contest of pesto versus broccoli I am completely biased in favor of pesto. (Actually it may not even be a contest). 

Tuesday, April 12, 2022

Hot cross buns 2022 ホットクロスバン 2022

It has been customary every year when Easter approaches, for my wife to make hot cross buns  (mostly without the sugar frosting cross, because the buns are sweet enough without it). This year was no exception. This year the recipe came from the heavy hard covered cookbook called “Bouchon Bakery Cookbook”. To me, this one looked like the most complicated recipe for hot cross buns I’ve seen my wife make over the years. Nonetheless it tasted very good and had a very nice texture.


This recipe calls for a lot of butter and multiple foldings. You can sort of see the multi-layering on the curt surface.


Ingredients: (#1)
Flour 372 g (2 1/2 cups)
Yeast 8 g (2 3/8 tsp)
Sugar 44 g (3 tbs. + 2 tsp)
Salt 9 g (1 1/2 tsp.)
Eggs 186 g (2 eggs)
Whole milk 63 g (1/4 cup)
Butter 167 g (5.8 oz) cut into small cubes
Raisins 122 g (3/4 cup)
Dried cranberries 61 g (1/2 cup)
1 tsp. Vanilla

Ingredients doubled:
Flour 744 g
Yeast 16 g (4 3/4 tsp)
Sugar 88 g (7 tbs. + 1 tsp)
Salt 18 g (3 tsp.)
Eggs 372 g (4 eggs)
Whole milk 126 g (1/2 cup)
Butter 334 g (11 oz) cut into small cubes Raisins 244 g (1 1/2 cups)
Dried cranberries 122 g (1 cup)
2 tsp. Vanilla

Directions:
Combine the fruit in a bowl and pour 2 cups of boiling water over it. Let sit for 5 minutes then drain and pat dry with paper towel. Set aside. Add all the other ingredients but the butter to the bowl of a stand mixer with a dough hook. Mix until a paste-like dough forms. Add the butter a piece at a time and incorporate into the dough. (At this point it will look like that will never happen since there seems to be more butter than flour mixture to incorporate it into.) When all the butter is incorporated mix on speed 2 for 7 to 10 minutes. Pat the dough into a rectangle and spread the fruit evenly over it (#2). Fold the dough into thirds as an envelope fold. Press the dough out into a rectangle again. Turn the dough 180 degrees and do another envelope fold. Press into a rectangle, turn and fold again (#3). Pat into a loaf and place in a lightly oiled bowl turning to coat with the oil and placing it seam side down (#4). Cover and put in proofing box at 75 degrees and let rise for 45 minutes. Remove from bowl and repeat 2 more folds. Return to bowl to rise another 45 minutes. Remove from bowl and divide into 12 equal portions, (24 equal portions for doubled recipe). Roll the divided portions into bun shape and place evenly spaced on a cookie sheet lined with parchment paper. (Next time I will just cut into squares. This will require less working of the dough and make the number of folds more evident in the final product). Cover the pan and let rise until rolls are touching each other. Coat with egg wash and bake in 350 degree oven for 18 to 22 minutes until golden and toothpick comes out clean. Let cool on a rack.


These were indeed fairly complicated muffins. The hardest part was incorporating all the butter. At one point it looked like it wouldn’t happen. But it did. The muffins themselves are luxurious. The texture is dense but very soft. The numerous foldings made very fine layers. They were sweet but not too sweet. (They would have been sweeter if we had added the icing). The fruit adds another texture and a slight vanilla flavor. These are really quite something and worth the effort.