Showing posts with label Pasta. Show all posts

Thursday, September 15, 2016

Cold pasta with smoked salmon and tomato トマトと燻製サーモンの冷製パスタ

This is a variation of cold pasta with tomato. We really liked this dish and tried to make it again on one hot and humid weekend.  We already had cooked thin Udon noodles and we had Campari tomato but we did not have prosciutto. My wife suggested we substitute smoked salmon.  


Just to change the appearance, I garnished the top with a chiffonade of basil and strips of smoked salmon and freshly cracked black pepper.


I also added a bit of the Spanish olive oil we really like,


The sauce was prepared as I posted before. Instead of pasta, we used thin Japanese Udon noodle (this was "sanuki" udon 讃岐うどん). This combination worked well. The saltiness of prosciutto is probably a better combination but this variation is no slouch. 

Tuesday, July 26, 2016

Cold pasta with cherry tomato トマトの冷製パスタ

I saw some nice looking cherry tomatoes in a pouch at the grocery store and bought them. Then, I saw this recipe on line and decided to try it as a Sunday lunch. It was an unusually nice weekend and we spent as much time as we could on our deck. This is a wonderful dish and we will make this again. It will become one of our regular dishes especially in the hot summer months.


Although I was sure we had some, I could not find any Angel hair pasta in our pantry (or Capellini) (which was used in the original recipe). So I used Linguine instead. The packaged Prosciutto  from our regular grocery store was not the best quality but it was OK. 


Ingredients: (for 2 servings):
Cherry tomatoes, 1 package (about 10, they were rather large for cherry tomatoes)
Olive oil, 1 tbs (or more depending on your preference).
Garlic, small clove, crashed using a garlic press.
Japanese concentrated (x3) sauce for noodles or "Mentsuyu" めんつゆ,  1 tsp
Salt and pepper to taste

Linguini, dried, 1/3 package
Japanese concentrated (x3) sauce for noodles,  1 tsp, to season the noodle.

Fresh basil
Proscuitto, 4 (2 slices per serving).

Directions:
  1. Skin the cherry tomatoes. I made a shallow "cross" on the stem end and plunged them into boiling water for 5 seconds and then transferred to an ice water bath. When cooled, I removed the skin(#1)
  2. I placed half of the cherry tomatoes, olive oil, garlic, and Japanese noodle sauce in the mixing container for an immersion blender. I blended until it made an emulsion (#2). I tasted and seasoned with salt and pepper.
  3. I cut the remaining cherry tomatoes into quarters (or halves if they were small) and placed them in the emulsion. I covered the container and placed it in the refrigerator (I did this in the morning).
  4. I cooked the linguine as per the package instructions (12 minutes in salted rapidly boiling water).
  5. I washed the noodles in cold running water and drained.
  6. I placed the noodles in a bowl and added the Japanese noodle sauce, tossed and drained excess sauce. I further blotted excess moisture using paper towels (#3) as per the original recipe (I did this also in the morning, coved it and placed in the refrigerator).
  7. At lunch time, I added the sauce to the noodle, added hand-torn fresh basil leaves and gently tossed and plated it (#4).
  8. I arranged strips of prosciutto, basel, and drizzled on some of our good olive oil.

This was a unqualified success. The sauce was wonderful. It had a very light but refreshingly intense tomato flavor. It was great probably because the cherry tomatoes were very ripe and good. The linguini actually worked well. My wife thought this was a Japanese udon noodle (thin Inaniwa kind 稲庭うどん). It had some al dente texture remaining but worked nicely. The Japanese noodle sauce was not recognizable as such but definitely added a je ne sais quoi flavor to the sauce and noodles ("Kakushi-aji" 隠し味 or hidden taste). The addition of prosciutto was also good. Although the prosciutto was not of the best quality, its saltiness really contrasted with the sweet and slightly sour taste of the sauce. Overall, we enjoyed this dish. It is perfect for a hot summer day lunch while lounging on the deck.

P.S. Since this was a really good dish, I made it a few days later with angel hair pasta and Campari tomato. Instead of hand-torn basil, I made a chiffonade which I thought would mix in better.


I even made a rose of prosciutto.


Angel hair past (capellini) appears to hold more sauce since the total surface area is larger than linguini for the same amount of pasta. We liked both.


Thursday, February 25, 2016

Mac and Cheese with cauliflower puree カリフラワープピュレー入りマックアンドチーズ

When my wife made baked cauliflower with cauliflower puree, we were impressed with how creamy the puree was without much fat. My wife suggested making Mac and Cheese with cauliflower puree instead of Bechamel sauce. So, one weekend, we made this new cauliflower puree Mac and cheese. We made two versions. One was topped with a mixture of panko bread crumbs and Parmesan cheese (see below). It came out nicely browned with a crunchy crust.


Under the crunchy topping was a creamy cheesy sauce clinging to the macaroni.


The second version was topped with grated cheddar cheese.


Again, underneath was the warm, cheesy sauce with macaroni.


Ingredients: (this makes about 8 servings in small ramekins such as the one seen above).
One head of cauliflower, separated into small florets.
Enough milk to cover the florets.
1 tbs unsalted butter
One large Jalapeno pepper, seeded and deveined, finely chopped (optional)
Cheeses (we used smoked gouda, fresh goat cheese, parmesan and cheddar) grated (#3)
Elbow macaroni, half box, cooked, drained, seasoned with salt, rice vinegar and then coated with olive oil (#5).

Directions:
Making cauliflower puree is exactly the same as posted before. Briefly; separate a head of cauliflower into florets, cook it in milk until tender with a pat of butter and red pepper flakes. I added one medium onion sautéed (instead of baked), adjusted the amount of milk to attain the right consistency while blending using a immersion mixer (#1). For variation, I added sautéed and finely chopped Jalapeno pepper (seeded and deveined) (#2). For cheeses, I used smoked gouda,  fresh goat and parmesan (#3) and mixed into the puree and cooked over the lowest flame until the cheeses incorporated (#4). I added the cooked macaroni (#5) into the cauliflower puree cheese mixture (#6). Then added the cheddar cheese (#7).  The reason for adding the cheddar at the last moment is to prevent it from being over cooked and getting grainy in texture. Meanwhile, I mixed panko bread crumbs, grated parmesan and olive oil (#8).


I placed the macaroni mixture in small ramekins (#9 and 10). I topped one with the panko/parmesan mixture (#11)  and the other with grated cheddar (#12). Baked in 350F oven for 15 minutes. If the top is not browned enough, place it under the broiler until the top browns nicely.


The end result: Both version were good but the sauce/puree was a bit grainy as compared to the cauliflower puree we made before. We were wondering if this is something to do with the cheeses we used, although we took precaution not to overcook cheddar cheese which get grainy after long cooking. We do not know how much calories/fat we are saving by substituting bechamel with cauliflower puree but certainly this is a good alternative. Compared to bechamel based Mac, this cauliflower puree did not get thick even after baking. We liked the one topped with bread crumbs and Parmesan cheese.


Wednesday, March 4, 2015

Wonton Skin ravioli ワンタンの皮のラビオリ

When my wife made cheese pockets, some extra cheese stuffing* was left over. I decided to use the cheese stuffing to make ravioli. Although I have a pasta machine (a hand cranked one), I wasn’t up for making homemade pasta so, instead, I used wonton skins. I also had left over marinara sauce from my pizza margarita that I made the weekend before.  I added light cream to the sauce put it over the ravioli and served it with green beans (steamed and then sautéed in butter).

Since I had leftover sautéed chicken breast**, I also served that to make complete meal.

*Cheese stuffing: This is a mixture of cheeses;
7 1/2 oz Ricotta cheese
1 egg (She used a fork to beat the egg and used approximately 1/2 in the cheese mixture and the rest as an egg wash to seal the pie dough. you could use the yolk in the cheese mixture and the white for the egg wash.)
1/4 cup Parmesan cheese
1/2 cup Feta cheese
1/4 cup smoked mozzarella cheese
One small onion finely diced and caramelized
1/8 cup parsley finely chopped
1/4 tsp. salt
1/2 tsp red pepper flakes

**Sautéed chicken breast: I used the technique I learned from the recipe blog site, in which I sliced chicken breast across the grain of the meat, pounded it with a meat pounder. I then massage the meat in sake and potato starch and let it marinate for at least several hours. Just before cooking, I seasoned it (I used dried oregano, basil, salt and pepper) and cooked it in a frying pan with a bit of olive oil. The starch and sake mixture appears to hold moisture in the meat so it came out very moist.

I did not take pictures of the process of making the ravioli using the wonton skins. I just placed a wonton skin on the cutting board and put on a small spoonful of the cheese stuffing. I painted the wonton skin around the stuffing with egg white, and layered the second wonton skin over it. Trying not to make any air pockets, I pressed it all around the stuffing to make sure the two wonton skins adhered together. Using an appropriate size round biscuit or cookie cutter, I cut out the the ravioli. Just to make it more visually appealing, I used the tines of a fork to make indentations around the edge (also to make sure the edges would not separate). I cooked the ravioli in boiling salted water with olive oil added for a few minutes. I removed the ravioli using a slotted spoon and put them on a plate coated with a small amount of olive oil to prevent them from sticking together. After they cooled down, I put them in a sealable container in the refrigerator (below).

I served this one weekday after coming home from work. I heated up the marinara sauce in a frying pan (below).


When the sauce was warm, I added light cream to make a saucy consistency and warmed up the ravioli in the sauce.
Wanton skins don’t not have the same consistency as pasta but they work fairly well as a substitute. The cheese filling also works well especially since this is leftover from another dish. Adding cream to the marinara sauce reduced the acidity and added a richer smoother taste.

We happened to have a very reasonably priced Super Tuscan red called “Brancaia 2011 Tre”. To us this is a bit too austere but it got better as it aerated. Not bad especially considering the price (significantly less than $20).
Decanter gave 95 and James Suckling 93 which appeared too high a score to us. Regardless,  it went very well this instant ravioli dish. This wine is also great with pizza.

Saturday, February 14, 2015

Mac and Cheese version 2 マック アンド チーズ 第二弾

This is a variation on "Mac and Cheese". I saw this recipe in the NY times and mentioned it to my wife which was a mistake. Being a devotee of mac and cheese, she immediately wanted me to make it. The amount of cheese included in this recipe is a bit intimidating (a lot) but un-cooked macaroni goes in with the sauce and then the whole thing is baked, which makes it much easier to cook than my variation of mac and cheese.

The picture below shows what it looks like when it came out of the oven (this is a 7 inch diameter rather deep baking dish).


It is very cheesy but not as creamy as we expected. We may have over cooked it a bit, or maybe it needed some more milk.


This is very good but my original Mac and Cheese may be better (and probably less deadly). But adjusting the cooking time and amount of milk, this may really work. The recipe below is just replicated from the original recipe in the NY times. This is just for our record, please refer to the original for details and accuracy.

Ingredients:
Butter 2 tbs
Cottage cheese 1 cup
Milk 2 cups (or maybe more to achieve the desired texture)
Dry mustard 1 tsp
Cayenne pepper a pinch
Nutmeg, freshly grated a pinch
Salt 1/2 tsp
Black pepper, freshly ground 1/4 tsp
Sharp Cheddar Cheese 1lb (set aside 1/4 cup for the topping).
Elbow pasta, dry, 1/2 lb

Preheat the oven to 375F. Using half of the butter, butter the baking dish (the original recipe called for a 9 inch diameter, ours was a bit smaller and deeper but we had to put the overflow into another smaller ramekin).

Puree the cottage cheese, mustard, cayenne, nutmeg, salt, black pepper and milk in a blender. Mix the pureed milk-cheese mixture to the grated cheddar cheese and then mix in uncooked dry elbow pasta.

Cover the baking dish tightly with aluminum foil and bake for 30 minutes.

Uncover, stir, top it with the reaming cheese, dot with the 1tbs of butter (at this point, the mixture is still very liquid) and bake another 15 minutes. Let it stand for 15 minutes before serving.

This is very easy to prepare and really cheesy but was not as creamy as we expected. Also the leftovers solidified into an almost solid block of cheesy pasta that we had to slice with a knife. We also had to add a lot of milk to reheat the block we sliced to have it separate into its component parts. Not bad for a quick mac and cheese fix.

Monday, April 15, 2013

Pasta with grated bottarga からすみパスタ

After tasting bottarga thinly sliced like Japanese karasumi, we tried an Italian style dish and made  "spaghetti alla bottarga". This is based on Mario Batali's recipe. We really like this pasta dish.
CIMG5932
My wife does not like regular spaghetti for some reason (note from Wife: she doesn’t like regular style spaghetti because of all those endless bowels of over cooked spaghetti topped with tasteless canned sauce that she had to work her way through as a kid particularly for school lunches). As an alternative we used very thin Angel hair pasta instead.

The amount of bottarga is totally arbitrary but probably 1-2 tablespoon(s) full of grated bottarga per serving would be appropriate. I just used a Japanese porcelain grater and grated bottarge (about 1/2 cup, below). It is salty, so we did not need to salt the pasta.
CIMG5922
Other ingredients for 2 servings (see picture below):
Italian parsley, finely chopped 1/4 cup
Lemon zest from one lemon, grated using  a micro grater
Garlic, two cloves, thinly sliced
Bottarga, thinly sliced (2-3 per serving)
Olive oil, 2-3 tbs
Red pepper flakes, to taste
CIMG5923
I put the olive oil in a frying pan on low flame and cooked the garlic and red pepper flakes until the garlic was fragrant but not browned (2-3 minutes). I added the pasta, lemon zest, parsley and tossed to mix well for one more minute on medium flame. I cut the flamed and mixed in the grated bottarga and served.

I topped the pasta with the slices of botargga, added more grated bottarga and a little bit of fruity olive oil on top.

This is a good dish. It is a bit like "tarako" spaghetti but the flavor and texture are quite different. The lemon flavor from the zest is refreshing and went well with the taste of bottarga. Surprisingly, although the botargga seemed extremely salty it was just right once it was mixed into the pasta. This dish went Ok with wine (such as the red wine we were drinking) but still it was not perfect. I am not sure what will go well with this dish but sake (to which we switched) or Scotch with water, for sure, or, may be, Prosecco.

Saturday, May 5, 2012

Sea Urchin pasta with poached egg 雲丹のパスタ温泉卵のせ

When we got sashimi from Catalina, only "premium" uni was available. After three days, one tray was left. Since the premium uni was a bit soft to begin with and the edges were disintegrating a bit (tasted OK, though), I decided to make another version of Uni pasta. I suggested to my wife, Carbonara style or a poached egg on the top. She chose the latter.

There is nothing different from what I posted before except for placing a poached egg on the top. As before, I used angel hair pasta. I added olive oil (or butter) in the frying pan (1 tbs) and added the cooked pasta and cream (3-4 tbs) and heated it up. When the cream was slightly reduced and coated the pasta, I put the uni in the pan (leaving a few aside for garnish) and mixed them with the pasta using a silicon spatula. Then I cut the flame. I tasted it and seasoned it with a bit of salt and pepper and also mixed in finely chopped parsley (Perilla or chives would also have been fine but I did not have them).

Porched eggs were made in our usual way with the yolk still runny (using pasteurized shell eggs). I garnished with thin strips of nori.

The combination of cream, uni, and egg yolk made this dish ultra rich and creamy. Although I was a bit disappointed with the quality of the sashimi items we received from Catalina this time, this was a quite piece de resistance to finish up the uni.

Thursday, January 12, 2012

Sea urchin pasta パスタのうにクリームソース

This was a dish I've been wanting to make for some time but it felt like a bit of a sacrilege to use  good uni this way, so I did not make it until now. Catalina Offshore products sells four different kinds of uni; two kinds of live uni in a shell, California "premium" uni and "gold" uni with the gold uni being the best. I usually get the gold uni but this time, the only uni available was "premium". The difference between the "gold" and "premium" is the color and texture; the gold uni has a nice golden color with a firm texture and the premium is yellower with a softer consistency. Both taste pretty similar to us but there is about a 100% difference in price. They also sell frozen "vana" uni which appears suitable to use for a sauce but we have not tried this.
In any case, because the premium uni has a softer consistency, I thought this was best for this pasta dish. Since this is still an excellent uni, I made sure not to cook the uni in order to preserve its fresh oceanic flavor.

Uni: I used the entire 80 gram tray for two small portions of pasta (We were going decadent here). Leaving a few pieces for garnish, I put the rest in a metal bowl and stirred to break it up and added cream (about 2 tbs) and mixed them well but did not use a bender. Because of this, it still had some small bits and was not totally homogenized but that was OK by me.

Pasta: I used Angel-hair pasta which was cooked as per instruction on the box.

While the pasta was draining, I melted butter (1 tbs) in a frying pan on medium flame. When the butter melted I added the drained pasta to coat. After I cut the fire, I added the mixture of uni and cream and coated the pasta.

I garnished it with chopped chives and nori strips and more uni on the top. I served soy sauce on the side. This is a very rich and creamy pasta. Excellent! Next time, I may mix in soy sauce before serving. Although this is a pasta dish, we stuck to cold sake which went so well with the uni.

Wednesday, October 26, 2011

Pasta with black truffle and cream sauce 黒トリュフとクリームソースパスタ

This is an extravaganza I prepared using the remaining black truffles. If we could not taste or smell black truffles with this pasta dish, we have to give up tasting truffles. I made this as simple as I can make it without garlic and without red pepper flakes; just olive oil, salt, cream, and garnish of chopped chives.
I just cooked the Angel hair pasta according to the instructions on the package. Meanwhile, I sliced off both ends of a black truffle and minced it. In a frying pan, I heated good olive oil and sautéed the pasta and mixed in the minced truffle, seasoned it with salt and cream (3-4 tbs) and reduced it for a few minutes. Off heat, I added thinly sliced truffles as you can see in the picture above. (I used a small sharp utility knife since I did not have a truffle slicer).

The taste? Well, this amount of truffles, we should be able to taste them. They definitely had a good earthy aroma wafting from this dish. The taste? I am not sure. It has a interesting texture and more aroma than the taste. Although my wife said it was something familiar, something she has tasted before. 

We decided  to go with a very inexpensive (but got 90 from Robert Parker) Riondo Prosecco for this dish. This effervescent light wine with floral note was perfect without overwhelming the truffle.

Friday, January 7, 2011

Pork scallopini with Pennsylvania dutch egg noodle 豚肉スカルピーニとペンシルバニアダッチエッグヌードル

This is a "padding" post. (I wrote this just in case I may have a lean moment realizing I do not have much to post, so if you are seeing this post, this is such a moment). We think this is a good simple dish which is very satisfying. The noodles you see here are called "Pennsylvania Dutch Egg noodles". It is a type of pasta but Pennsylvania "Dutch" ("Deutsch" or German) people brought it with them when they migrated to North America. I am sure there must be some traditional German or Swiss noodles which resemble this noodle. Since my wife grew up in "Pennsylvania Dutch country", this is her comfort food. As a result, we often eat this as a starch dish. After boiling the noodles as per the instruction on the bag, my wife simply sautés it in brown butter and a small amount of crème fraiche (optional), (traditional recipe uses sour cream) with the addition of chopped chives, salt and pepper.

I made a sort of scaloppini or, more authentically, scaloppine using flattened pork masquerading as veal. I used pork tenderloin. After removing the silver skin and fat, I cut the tenderloin into one inch thick rounds. Using a meat pounder, I made the rounds into thin flat pieces (as thin as you can make it). If you really want to emulate the taste of veal, you could soak the meat in milk for 10-20 minutes but, this time, I skipped this step especially since we like the porky flavor. I seasoned the meat with salt, pepper, dried oregano and basil on both sides (I overdid it). I then dredged the seasoned meat in flour. In a large skillet (or a frying pan) on a medium flame, I added a bit more than your usual amount of olive oil for sauteing, since the flour will absorb the oil. I cooked the meat on both sides (1 minute each). Since the meat is very thin, it will cook very quickly. You could make a sauce but I did not, since the meat was highly seasoned. Somehow this is a very comforting (especially for my wife), basic meat and starch supper.

Friday, November 12, 2010

Mac and Cheese マカロニチーズ

"Macaroni and cheese" a.k.a. "Mac and Cheese" is a quintessential American comfort food. Most  people  in the U.S., including my wife, have grown up eating Kraft "Mac and Cheese" in the blue box. The product is bright yellow and sweet, made of powdered cheddar cheese--kids love it. In recent years, gourmet versions of "Mac and Cheese" started appearing in many good restaurants. We (mostly my wife) tried several and pronounced them "very good". Besides these restaurants, my wife had "Mac and Cheese" at a semi-gourmet fast food restaurant/cafeteria "Wolfgang Puck Express" at the the Denver airport. Since airlines no longer serve food, she found the nice, big, still warm, comforting bowl of really good "Mac and Cheese" especially gratifying and reported to me that she liked it. Sometime later, I too, had a chance to try Wolfgang Puck Express "Mac and Cheese" at the Denver airport during a business trip but I found it way too greasy and I did not like it. When I reported this to my wife she replied,  "for those who do most of their praying during take-offs and landings even greasy Mac and cheese is ethereal". Thus, mostly for my wife, I made my version of "Mac and Cheese".

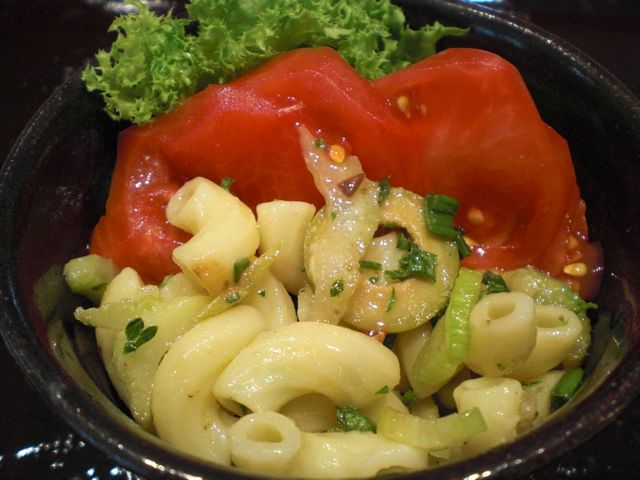
I think that the quality and types of cheeses are most important. My recipe is nothing unusual.  I first make béchamel sauce and add cheeses, combined with cooked elbow macaroni and bake. This recipe is for about 6 oz of macaroni, which makes about 4 small servings. We cooked one box (16 oz) of elbow macaroni and we used about 2/3 for macaroni salad and 1/3 for Mac and cheese.

Macaroni: As per the instruction on the package, cook Macaroni (al dente, since this will be further baked). I season it with salt  and pepper in a colander immediately after draining and coat it with a small amount of olive oil. The macaroni alone at this stage should be well seasoned and taste fairly good.

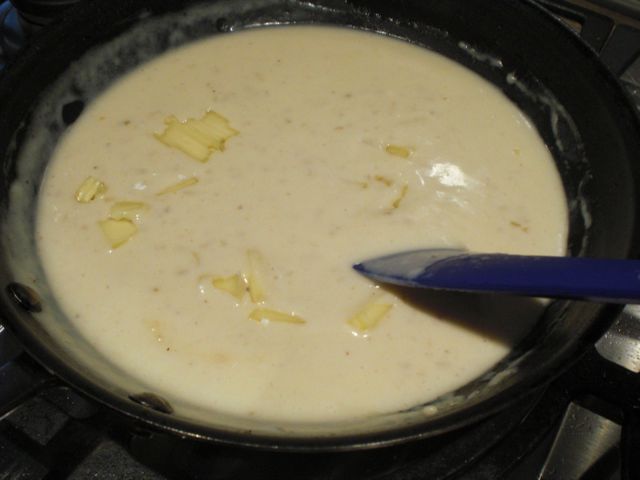
Sauce: I first make béchamel. I finely chop shallot (one medium or 1/2 large), and saute in olive oil (3 tbs) and butter (1/2 tbs) and add flour (3 tbs). Cook flour for 1-2 minutes (do not brown, we are not making brow roux) and add about 2 cups of milk (I used 1%) at once and whisk to resolve and keep stirring until it thickens. Add more milk depending on the consistency of the sauce. I keep this rather loose since the addition of the cheeses makes the sauce thick. I season it with salt, pepper, and freshly grated nutmeg. Using freshly grated nutmeg makes a big difference in taste.

Cheeses: Use decent quality cheeses. Cheddar cheese is an absolute "must". Unfortunately when it is cooked for a long time at a high temperature, it becomes grainy, so I mix it into the béchamel just before baking. Besides cheddar, I also use a combination of different cheeses depending on what we have in our refrigerator. This time, I made the mistake of using too much fresh goat cheese in the sauce. It made the sauce a bit grainy. I usually use any combination of Gruyere, Pecorino Romano, and Raclette. Tonight, I had Gruyere, Raclette, fresh goat cheese, and Parmigiano reggiano. The amount of the cheese is arbitrary but I used a total of 1 cup of shredded Gruyere and Raclette in addition to fresh goat cheese (1/4 cup). If the sauce becomes too stiff after the cheese is incorporated, you could add more milk. The sauce should be a bit runny because the macaroni absorbs some of the liquid while it bakes and the sauce may end up dry rather than creamy.

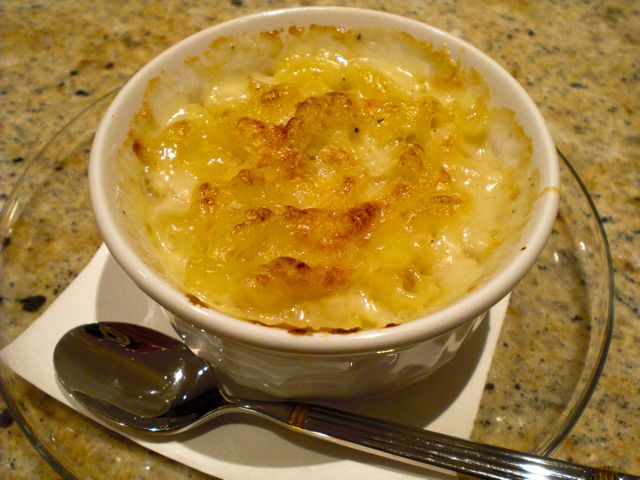
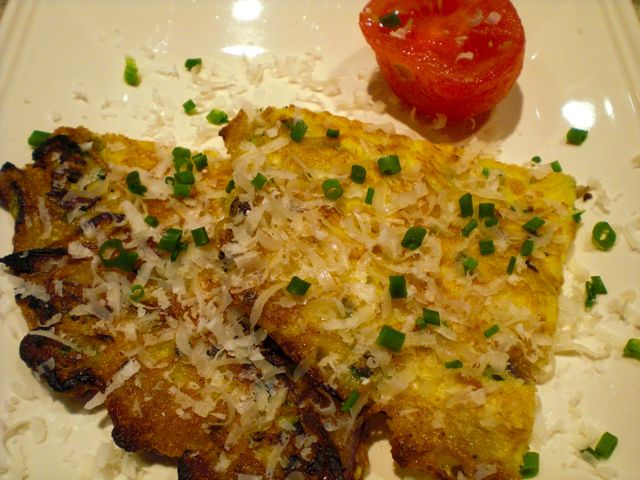
I poured the sauce into the cooked macaroni and mixed in shredded cheddar (1/2 cup, I used aged sharp cheddar). I tasted the mixture and adjusted the seasoning. I apportioned the mixture into 4 small individual ramekins. I grated Parmigiano reggiano cheese on the top. You could use bread crumbs on the top as well, but I did not. I baked it in a 400F (toaster) oven for 7-10 minutes or until the surface browns and the sauce is bubbling.

This was not bad (my wife's opinion was much less reserved but, then again, she may be biased). Nonetheless, to me, the sauce was a bit too grainy and I blame it on the goat cheese. Next time I will have to be more moderate in using it. In any case, this was far better than Kraft's or Wolfgang Puck's mac and cheese. This dish goes well with wines and beer (although we drink beer extremely rarely). I would suggest Izakaya in Japan consider serving this. It may become a big hit.

P.S. We had this later in the week as leftovers reheated in the toaster oven. Strangely enough, the taste and texture were much better and the graininess of the sauce disappeared.

Sunday, September 12, 2010

Angel hair pasta pancake in "okonomiyaki" style エンジェルヘアパスタと桜えびのお好み焼き風

"Okonomiyaki" お好み焼き is a very popular Japanese pancake in which you can put "anything you like on top" (this roughly translates to "okonomi"). We are not particularly fond of okonomiyaki. Last time we tried this dish was in Himeji 姫路. It was in the "Hiroshima" style, and we decided this was not our favorite. There were so many items piled up on the pancake--toppings and sauces, the flavors became "muddy" and we could not taste anything distinctive. But, I occasionally make something like "okonomiyaki" using leftovers. In this version, you can taste all the different flavors.

We had left over Angel hair pasta. So I made this as a starter. There are no rules on how to make this type of dish. I had about 1/2 cup (guesstimate) of cooked Angel hair pasta. To the pasta, I added grated Parmigiano Reggiano (about 4 tbs or more if you like), salt and pepper to taste and one egg. I mixed well. In a small frying pan on low flame, I added olive oil (1tbs), and spread the mixture (see the image below). After 4-5 minutes when the bottom is cooked (the surface is still wet), I sprinkled on the dried small shrimp called "sakura ebi" 桜えび but again anything goes. You could add anything you like or you do not have to put anything on at all. I then flip it so that the side with shrimp will cook (another 4 minutes).
I flipped it one more time to make sure the bottom and edge were crispy. I used a Pizza cutter to cut the pancake in quarters and garnished it with "aonori" 青のり and ketchup. This is a very interesting fusion dish but we like this over the more traditional "okonomiyaki". We had this with a nice Spanish red, Portal del Montsant Santbru 2007. We posted our tasting of 2005 vintage in the past. The 07 vintage appears to be very similar in appearance and taste. We shared one pancake since this was a starter.

Tuesday, June 8, 2010

Macaroni salad マカロニサラダ

This is the last post of three salad which are disguised as an "Otoshi". Who knows, next time we visit an Izakaya in Japan, these salad may become very popular items.  This is another popular salad with many variations. This is our version and we use my honey Dijon mustard dressing instead of (more commonly used) mayonnaise. This time instead of scallion or onion, we used chives. Served as seen below, this is a perfect Izakaya food as Otoshi お通し, although may not be as popular as potato salad in an Izakaya.

We use regular small elbow macaroni (this one has a groove on the surface). While it is hot, I dressed the cooked macaroni with a rice vinegar (the amount is arbitrary, enough to add flavor while still being absorbed completely by the pasta), and salt. When it is cooling down, I add a small amount of good olive oil and toss to prevent the macaroni from sticking. Once it is cooled, I mixed in several stalks of celery (both ends trimmed, veins removed and finely cut up), three different kinds of olives (oil cured black olives, Calamata olives, and large green olives stuffed with pimento, all sliced) and chopped chive. I dress the salad with Honey Dijon mustard dressing (I use the dressing sparingly).

Honey Dijon mustard Dressing: I minced shallot (one small), Jalapeno pepper, seeded, veined and minced (1/2, optional), crushed garlic (one small clove, optional. I did not use garlic this time), salt and pepper. I added 1 tbs of honey, 2 tbs of Dijon mustard (I used the smooth kind) and 3-4 tbs of a rice vinegar and mixed. I stream in a EVOO (extravirgin olive oil) and whisk (I do not measure but about 1/2 cup). Taste the dressing and adjust the seasoning.
This is our favorite version of macaroni salad. Since we served this together with our potato salad for Memorial day barbecue, we intentionally did not use mayonnaise. The occasional burst of salty olive flavor is well matched with slightly sweet and tangy dressing. The celery gives a nice crunch. The rice vinegar is much gentler than wine or cider vinegars.