Monday, June 7, 2010

Fresh corn and black bean salad コーンとブラックビーンのサラダ

We made this for Memorial day barbecue but, probably it could be served in an Izakaya and people may even like it (it is a stretch, I admit). I have seen similar types of bean salads in many Japanese recipe sites, so it must be getting popular even in Japan. Then I found a similar dish being served in an Izakaya in Dave P's restaurant review, so it was not too much of a stretch after all.

Black turtle beans or black beans are a popular item in Latin American and U.S. South Western cuisines. Since we had fresh corn on the cob, my wife made this salad (I did the final seasoning). The amount of beans and corn is arbitrary but we used 6 white ears of corn and one 16 oz can of black beans. (We like GOYA brand). The beans are rinsed and drained. My wife microwaved the corn, covered with a paper towel, for 4-6 minutes or until done. Then she cut the kernels off the cob with a knife and mixed them with the black beans. I added lemon juice (we did not have any limes but lime juice is better) from one large lemon (probably 3 tbs), olive oil (3 tbs), ground cumin (2 tsp), salt and pepper to taste. For some heat, I added two small Jalapeno peppers, seeded and veined, finely chopped and also added finely chopped cilantro (2 tsp). You could add chopped red pepper for color if you like. The white corn was so sweet and made a wonderful salad. Some people love cumin and some hate it but, for this salad, cumin is a must.

Sunday, June 6, 2010

Potato salad ポテトサラダ

Believe it or not, potato salad definitely is a very popular Izakaya food. I am sure that versions of potato salad are all over the (world) map. (Some may think Germany is where it started). Japanese made it's contribution to potato salad variations by adding Tarako 鱈子 or cod roe  to it, which I posted before. My wife grew up with American style potato salad and I did with Japanese style potato salad as my mother made it. We now make potato salad which is a hybrid between the two. Deviations from the America version are the use of rice vinegar and the addition of sliced and blanched onions rather than raw onions. I occasionally add Japanese curry powder to make a curry-favored version potato salad.  I made the hybrid style salad for Memorial day barbecue but I also served it in a small bowl like Otoshi お通し in an Izakaya.

This time I used white potatoes (5 large). Yukon gold and Russet potatoes also work. I cooked the potatoes whole in salted water (about 30 minutes or until you could insert a bamboo skewer to the center easily). I removed the skin while the potatoes were hot and cut them into bite sized pieces (We like potatoes well cooked). This way, the potatoes do not become watery and appear to keep their flavor better. The most important thing is to season the potatoes while they are hot. I add 2 tsp of salt, 1 tsp of black pepper and several tablespoons of Japanese rice vinegar and gently toss the potatoes. I taste and add more seasoning to my liking. You want to put on as much vinegar as you like but it has to be absorbed completely. If you are making a curry flavored salad, you add curry powders here (To be authentic, use the Japanese kind of powder such as the SB brand). I cut up carrots (5 long skinny ones which I had) and blanched them until they were soft but still crunchy. I halved and sliced onion into thin strips (one large or two small) and blanched the strips for 1-2 minutes. (I used the same pot in which the carrot was cooking. Put the onions in just 1 or 2 minutes before the carrot is done). The amount of onion is up to you but, by blanching the onion, the pungent onion flavor becomes much less strong and sweeter. The longer you cook, the less pungent the onion will become. So you could adjust the amount of the onion and the length of blanching to your liking. Drain them in a colander. I add a rice vinegar and salt to the carrots and onions in a colander and mix and drain at the same time. Mix all the ingredients together in a metal bowl (so that it will cool faster) and let it cool down to a room temperature. The potatoes should taste pretty good and well-seasoned at this point with vinegar, salt and pepper (it is like a southern Germany "Kartoffelsalat".  Most of Japanese recipes will add thinly sliced fresh cucumbers but I added cornichon pickles (cut up) instead. After the potatoes have cooled down to room temperature, I add Dijon mustard (1 tbs) and mayonnaise (3 tbs) and gently fold and mix. Because the mushed and well seasoned potato from the surface of the individual pieces gets mixed into the dressing it adds creaminess and you do not need too much mayo. I adjusted the seasoning (salt and pepper). Potatoes can take quite a bit of salt and vinegar but pre-seasoning them while they are hot is the key. We think our potato salad is much better than any of the store bought kind.

Friday, June 4, 2010

Salted (pickled) vegetable 浅漬け

Although I have posted this before, I decided to post it again with more details and a better picture. I make this regularly with whatever vegetables are available but cucumber, daikon, nappa cabbage, and celery are the best. I always use thinly sliced and Julienned ginger, red pepper flakes. From time to time, I add different seasonings such as jalapeno pepper, sliced lime or lemon. This time I had thinly cut dried kelp "Kizami konbu" 刻み昆布 (came in a bag) and I used this as well.

It is not really a recipe; just wash and cut any vegetable into an appropriate size and add salt. I slice "hard vegetables" such as daikon, carrot, and radish into rather thin slices. But I slice cucumber (American mini-cucumber) much thicker. If I use regular cabbage, I make the pieces a bit smaller than for nappa cabbage. The amount of salt is important. By weight, about 2% of salt against the total weight of the vegetables is the standard but I tend to use a bit less. After sometime, you can sort of tell the appropriate amount of salt. So I usually do not even measure. I added the vegetables and salt to a bowl with hydrated thinly cut kelp "Kizami konbu"  (after 5 minutes of hydration), and added ginger (finely julienned), red pepper flakes (just enough) and kneaded the mixture with my hand.

Then I transferred the vegetables to the contraption on the left called a Japanese pickling pot. I put on the lid and screwed down the inner plate so that the vegetables were under some pressure. I placed the pickling pot in the refrigerator. After several hours, you will see water developing above the vegetables. Then, it is ready. If you do not add enough salt, the water may never appear. (This is called "Mizu ga agaru" or "Water has risen"). After this, I transfer the vegetables in a sealable container with its liquid. I drain and squeeze out excess liquid just before serving.

Depending on the saltiness, you could use soy sauce when serving "asazuke". You could try many variations. Depending on the amount of the salt, it will keep at least a week in the refrigerator. We really like this dish. This dish can be served as a small dish which goes well with a sake. You could also serve this as an accompaniment to the rice dish you may serve as a "shime" 締め dish.

Wednesday, June 2, 2010

Memorial Day Barbecue メモリアルデイバベキュー

This is definitely not an Izakaya item but I have to "pad" my blog sometimes. Since it was Memorial day and the official beginning of the summer, it is customary to do barbecue in the U.S.  I often barbecue whole chickens in a Weber kettle. Once you set it up, you can just relax for 90 minutes or so while enjoying the sublime aroma of the chicken cooking. The result is quite good especially the crispy skin.

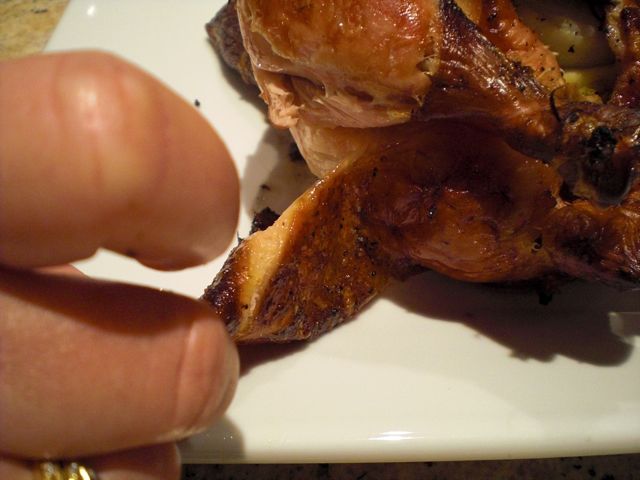
While the chicken is resting, portions of crispy skin get eaten by somebody. I caught the crime scene.

1. Preparing the chicken: I first make a mixture of freshly cracked black pepper and Kosher salt (half and half, about 3-4 tbs for two birds).  After washing the birds well and drying with paper towels, I remove the wish bones (or "clavicle" if you get technical) using a small paring knife. It will make a big difference later when you are carving the breast meat. I first squeeze lemon wedges (2 per bird) inside the cavity and outside. I then liberally sprinkle the pepper/salt mixture inside the cavity and stuff the cavity with aromatic vegetables, including the lemon wedges used for the juice, just for added flavor. I use coarsely chopped onion and celery (especially the core portion with leaves) and garlic cloves (5-6 crushed cloves per bird) and sprigs of fresh rosemary (slightly bruised to release the nice essential oil). I truss the birds without using a trussing needle. I start by wrapping butcher's twine around the "Pope's nose" in the mid portion of the string, then make a figure 8 around both legs, and go across to the back and tie it securely at the back just above the wings and then put the wings akimbo. Then, I smear olive oil all over the skin and generously coat the surface with the black pepper/salt mixture.

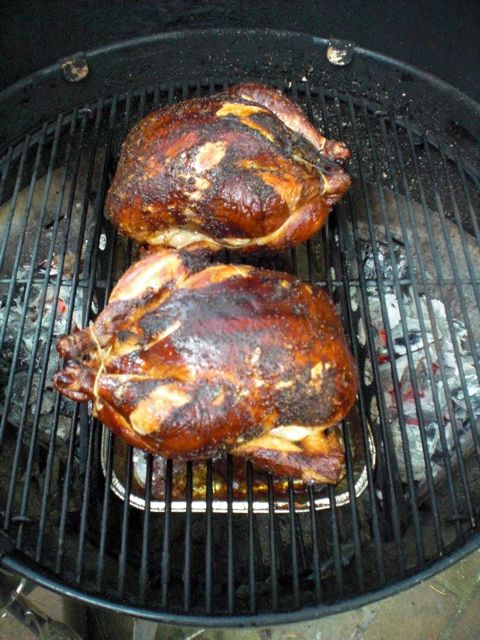
2. Setting up Weber Kettle Grill: We need to use the indirect heat set up. For this, we set up two charcoal baskets which sit on both sides of the inside of the Weber. We use lump charcoal and start it in a chimney-style charcoal starter with crumpled news papers (WSJ seems to work best for some reason) in the bottom. Recently we started using the hollow cardboard core from paper towel rolls and pack the coal around the roll to create a smoke stack. This makes the charcoal ready more quickly and reliably with less smoke. After the charcoal is ready (about 10 minutes), pour the hot charcoal into the baskets. Place a disposable aluminum tray in the middle to catch the drippings. Place the metal grate (which can be opened on both sides over the charcoal baskets to allow the addition of wood chips).

3. Wood chips: I use hot smoking for added flavors. I soak Apple wood chips (two fistfuls) for, at least, 30 minutes. After placing the chickens (this Weber can take two full size chickens) in the middle on the grate over the drip pan, I open both sides of the grate and place the drained and moist wood chips over the charcoal and place the lid with the air vents fully open. You immediately smell nice sweet apple wood smoke.

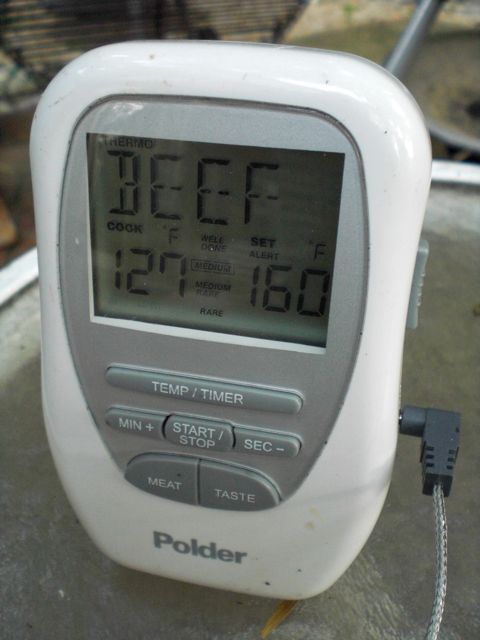
3. Judging the doneness: Depending on the wind, ambient temperature (We are known to barbecue in winter. In that  case, it will take little longer), and the size of the birds, it will take between 1 hours 15 minutes to 1 and a half hour. I do not have to add any coals during the cooking. After 1 hour and 10 minutes, I insert a temperature probe of a remote meat thermometer with an alarm (it has a beeper you can wear on your belt and it shows the internal temperature and beeps when the set temperature is reached. Shown here is the base unit.) The probe has to be inserted into the deepest part of thigh but not touching the bone. Please note that I had set the alarm at "Beef, Medium" which is 160F. If you choose "Chicken" it will set to 175F. I want 165F, so I let it cook 5 more minutes after 160F is reached and let the birds rest for 15-30 minutes, the truss removed but uncovered. This will produce a perfect doneness without over cooking. The reason I do not insert the probe (which is supposedly to be used in a grill) from the beginning is that  I had quite a few probes go bad on me when used this way. So I reduce the time the probe and the wire stay in the grill and also make sure the wire goes through the center area of the grill without hot  charcoals underneath. 
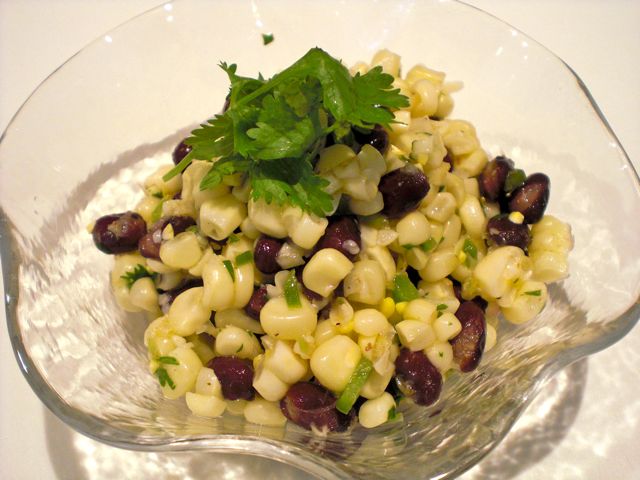
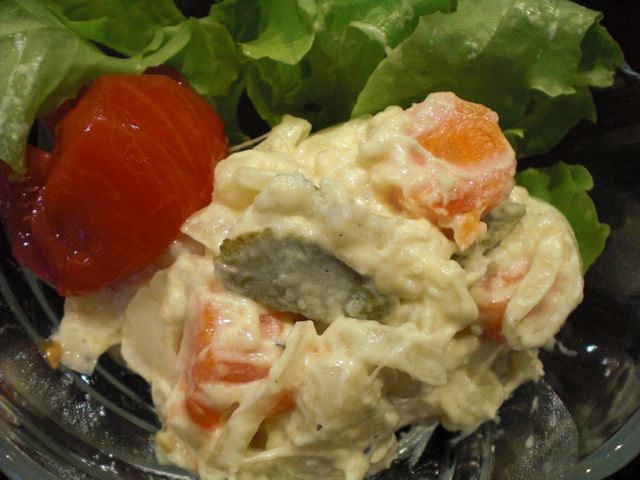
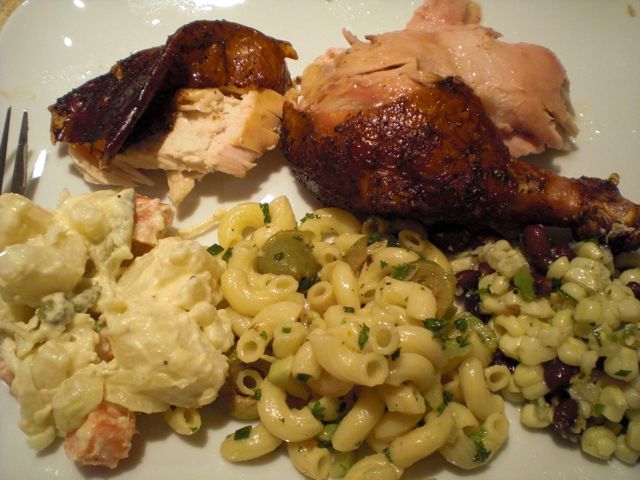
The skin is without a doubt the best part. My wife likes the wings and I like the dark meat of the thigh. We do not need any gravy or sauce for this. We had the chicken with a trio of home made salads; potato, macaroni and corn with black beans.
A nice start of the summer.
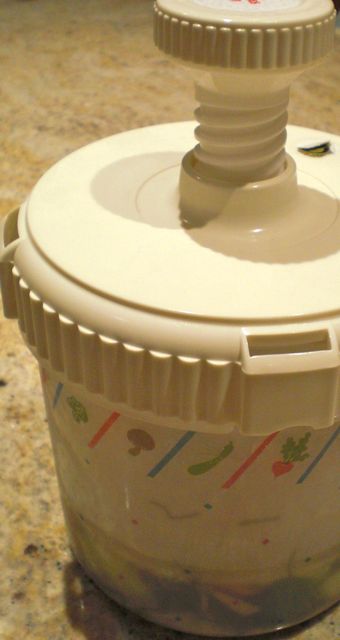
Monday, May 31, 2010

Japanese style steak, 2 kinds 和風ステーキ、二種類

Judging from the numbers of my posts, we do not eat beef that often. Unlike our "youngish" food blogger colleague who buys two (Japanese) servings of steak to reconstruct one serving for him, we have the opposite problem. One serving of steak we get here is way too big for us. One of the ways to deal with this "problem" is to serve the steak Japanese style or "wafu" 和風, in which the steak is served thinly sliced or served in small cubes (the famous "dice" steak along with "Lumb Chap" and "Spare Lib").

I used a somewhat unusual cut here, called Flat Iron Steak. My understanding is that this comes from upper portion of the shoulder and includes two muscle groups with a sinew in between.  But this particular one came vacuum packed and only contained one kind of muscle which is easier to handle. As the name implies, it is a rather flat rectangular piece of meat. I decided to use two different Japanese marinades and cranked up our Japanese Konro grill. Both marinades are very simple; the first is wasabi soy sauce ("real" wasabi, about 1 tbs, I smeared over the meat and added enough soy sauce to coat in a Ziploc bag, the second is "moromi" miso which I again smeared over the meat and placed it in a Ziploc bag. Both were marinated about 1 hour. I removed the marinades (reserving the wasabi soy sauce) but did not wash the meat so that some marinade remained on the surface. Over the charcoal fire, I grilled them to medium rare (2-3 minutes on each sides). I put them on a plate and loosely covered with aluminum foil and let it rest for 5-7 minutes while I made a sauce. I browned the butter (1 tsp) and then added the remaining wasabi-soy sauce marinade into a small frying pan. I then added the meat juice accumulated on the plate on which the steak was resting). After heating up (1-2 minutes), I added 1 small pat of butter to finish. I sliced both steaks into thin slices across the grain of the meat. One (left) served with wasabi and the sauce I just made and the other I just add more moromi miso.


(left, wasabi-soy sauce and right, moromi-miso marinated)

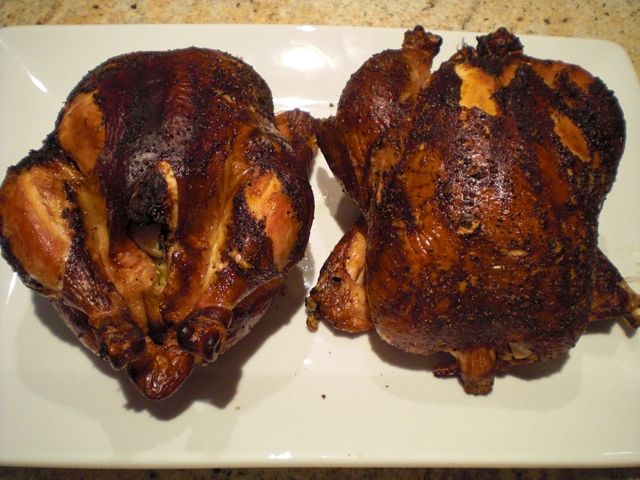
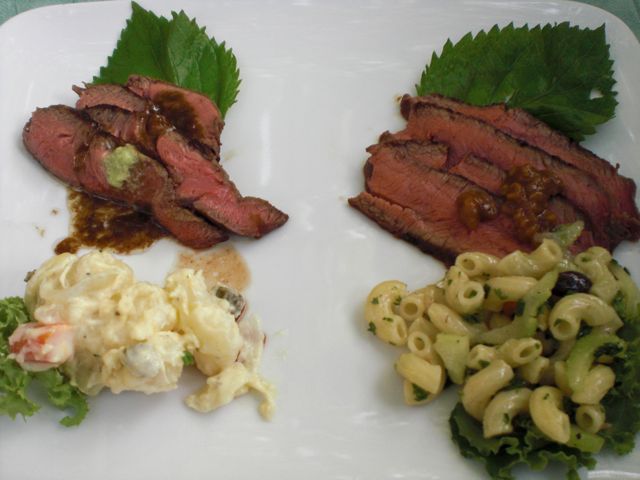
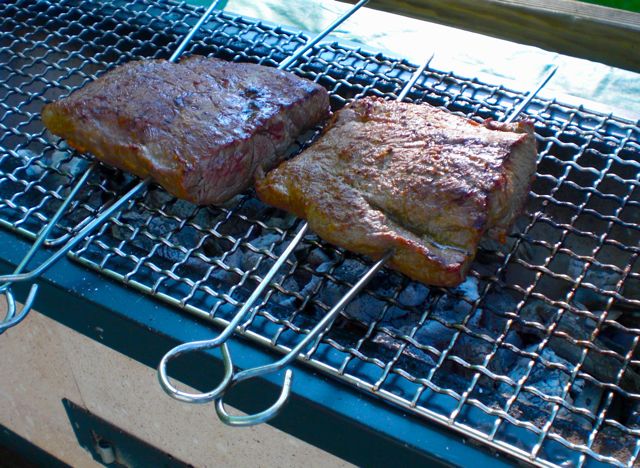
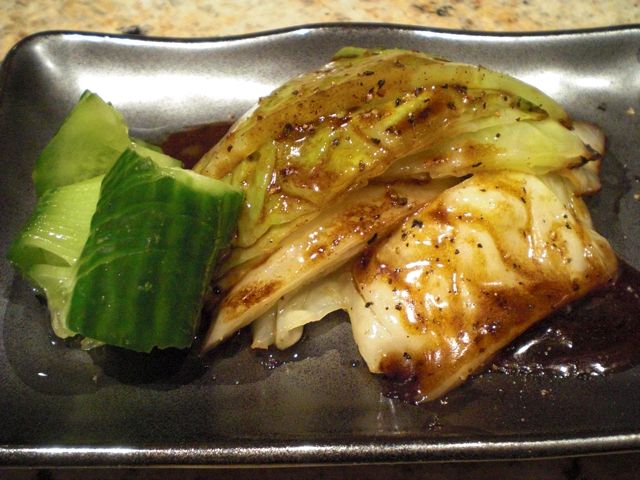
Both are good but we liked the wasabi-soy sauce steak slightly better. We had this with our potato salad and macaroni salad which also have Japanese touches--subjects for posting another time. We also made our usual grilled rice balls, this time with  a "yuzu" citrus miso (Yuzu juice from a bottle, miso, mirn and some sugar). My wife said she felt virtuous because despite how very good it was she restrained herself from overeating by not going back for seconds. We had this with an excellent (surprisingly) Bordeaux blend from South Africa, "Vilafonte" 2004. This wine really went well with this dish, highly recommended if you could get one (not too expensive to boot).

Saturday, May 29, 2010

Cabbage braised in butter キャベツのバター焼き

For some reason, shredded raw cabbage is the most common accompaniment for many Japanese-Western dishes or "Yo-shoku" 洋食 such as fried breaded pork or "Tonkatsu" トンカツ and Croquettes コロッケ. I like cabbage this way especially if I use cabbage leaves, after discarding several outermost layers of the head of cabbage, which are still green but not too tough. I like them julienned very thin and crisped in ice water before serving. My wife does not care for raw cabbage in general and I often end up making the cabbage into a kind of coleslaw. I also make sautéed cabbage with deep fried tofu pouch which was then braised in mirin and soy sauce (I am sure I can post this very soon). In any case, this is another simple quick cabbage dish which goes well with sake or any other drinks. I think I first saw this in the Kentaro Kobayashi's drinking food cook book and I made some modification (can't help it).

I cut 1/3 of a small head of cabbage (avoiding the core) which is then cut into three portions. I melt butter (1 tbs) in a frying pan and put in the cabbage chunks with cut side down on a medium low flame. I add salt and freshly ground black pepper to taste. I put a tightly fitting lid so that the cabbage is pan fried and steamed at the same time. Since we like cabbage to be more cooked than the original recipe will produce, I add 2-3 tbs of sake after 10 minutes or before the bottom of pan scorches and then put back the lid and continue to cook it on a slightly higher flame for another 5-6 minutes or until liquid is almost all gone. Remove the cabbage to the serving plate. Depending on how much liquid is left in the pan, I add a bit more sake to deglaze the brown bits on the bottom of the pan. I add 1 -2 tsp of soy sauce, and finish it with few pats of cold butter (less than 1 tbs). Pour the sauce over the cabbage and add freshly cracked black pepper.

This is surprisingly good. Salt and pepper flavors go well with cabbage and browned butter and soy sauce is also a winning combination. This dish will go well with any drink.

Thursday, May 27, 2010

Baba Ghanoushu, Gazpacho flavored or "Baba Gazpa-nouchu" ガスパッチョ味のババガヌーシュ

Sometimes when you are trying a new recipe, things don't go right. I have less of a problem with this because I usually don't follow recipes that closely as long as I know what should be the end result. Compared to my rather free wheeling approach, my wife tends to follow recipes more precisely (which anyone in their right mind should do). She read this rather healthy sounding recipe for baked eggplant, zucchini and tomato. It was a bit complicated. The eggplant, was not the Japanese variety and needed to be peeled, sliced, salted to remove the bitterness and prebaked with olive oil. Then, the eggplant slices, zucchini, and slices of tomatoes (she used canned whole plum tomatoes) were layered in a baking dish topped with seasoned bread crumbs (panko, thyme, oregano) and repeat the layers. We thought putting the bread crumbs in the middle of the layers did not make sense but that was what the recipe called for. The resulting dish was certainly edible (good flavor) but everything was mushy and the wet bread crumbs in the middle layer were not good. My wife was extremely disappointed and ready to throw it out. But, I said, "Wait, since everything is mushy why not mush it all up and make it into a dip like babaghanoush" which is supposed to be mushy. Only difference between this dish and "Baba Ghaoushu" are the zuchini, tomato and bread crumbs (come to think of it, that is quite a difference. The only common link is the eggplant).

But that did not deter me. I just put this mixture of the baked zucchini, eggplant, tomato, and bread crumbs in the mixing cup of an immersion blender, added some lemon juice, tahini (I used Japanese white sesame paste), crushed garlic and blended it. After tasting it, I added a small amount of good extra virgin olive oil, salt, and black pepper. Finally I added finely chopped parsley for color and fresh taste. It turned out to be pretty good (and was great as a spread on sandwiches). It is sort of "Baba ghanoushu" but because of the tomato, olive oil, and bread which acted as thickener, it has the flavor profile of Gazpacho. It is a very wonderful new-age fusion dip which I henceforth named "Baba Gazpa-noushu". I also made guacamole and hummus to complete a trio of ethnically confused dips.

Small flat bread, pita or pide, will be nice but we did not have one and it takes too long to make one. So I toasted small flour tortillas (from our freezer) in a toaster oven like toasting a slice of bread. The tortillas puffed up like pide. Although texture is quite different, it is perfect for dipping into these Mexican-Spanish-Middle eastern Meze starter.