
Friday, July 23, 2010
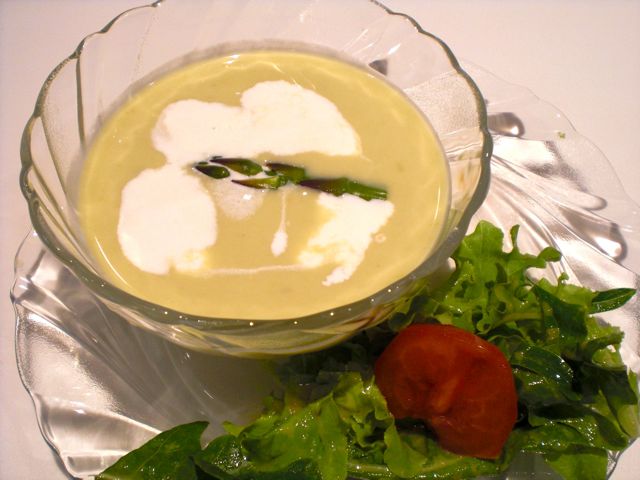
Cold asparagus soup 冷製アズパラガス スープ
It has been extremely hot especially in recent days. By my wife's request, I made cold asparagus soup. She says it is the essence of everything good about asparagus. It is a perfect starter dish for hot summer days.
For about 4 servings, I used asparagus (10, thick ones, not the pencil kind), white potato (one medium), onion (one, small), bay leaves (3), chicken broth (16 oz) and cream (1/4 cup). First I cut off the tips of the asparagus (about 1 inch from the top) and blanched them for 1 minute. Then I shocked it in cold water. I set them aside as a garnish. I then cut off the very bottoms which are woody and discard them. I slice the remaining stems on the bias in 1/3 inch thick. I skinned and diced the potato (small dice). I sauteed finely diced onion in olive oil (1 tbs) for 2-3 minutes or until it becomes semitransparent. I then added the sliced asparagus, diced potato and saute for another minute. I added the chicken broth and three bay leaves. Once it come to the boil, I turn down the flame to low and put the lid on. I let it simmer for 15-20 minutes or until all the ingredients are soft and cooked. I remove all three bay leaves (I count them very carefully) and, using an immersion blender, homogenize the soup. Toward the end, I add 1/4 of a cup of cream. I taste it and season with freshly ground white pepper and salt. I season a bit more severely than I would for hot soups since the taste will be somewhat muted when the soup is served cold. I did not strain the soup but you could strain it to make it perfectly smooth. Cool it down to the room temperature and then chill it in a refrigerator for, at least, several hours. I add a bit more cream when I serve it and garnish with the asparagus tips. Perfect cold soup to start hot summer days.
Wednesday, July 21, 2010
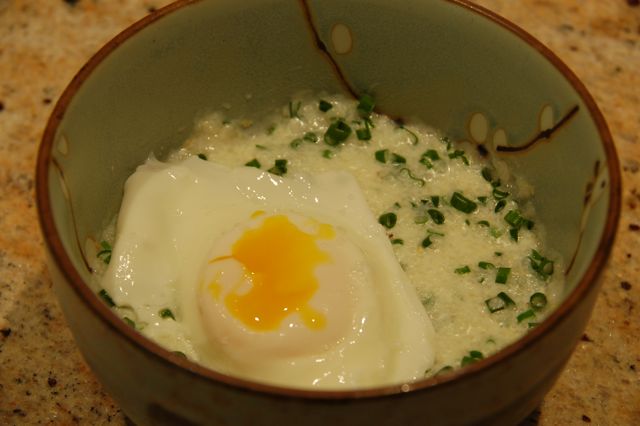
Grits and poached egg グリッツとポーチドエッグ
This could be a "shime" 締 ending dish or, more traditionally, a breakfast. It is a variation of "Okayu" お粥 or porridge but in a US Southern style. It is a very comforting and nice starch dish. This one is prepared by my wife and I only help by chopping up the chives and making the poached eggs.
Grits is a very Southern food and my wife is not even from the South but we adapted this dish for some reason. Instead of the more traditional grits which is eaten as a breakfast with additions of cheese, butter or maple syrup (a Northern addition to a Southern dish...don't ask why), we make it savory. We cook the grits in milk instead of water. Just in case you are not familiar with grits, it is coarsely ground alkaline-treated hard kernel corn. Alkaline treated corn prevents the development of a niacin deficiency (Pellagra) especially if your main diet consists of corn. I do not know who first figured this out but certainly American Indians ("hominy" from which grits is made) and Mexicans ("masa harina" for corn tortilla is also made from alkaline treated corn) must be among the first. This treatment also created another flavor different from regular corn meal. Grits and polenta are similar yet distinctive in their taste. The description below is how my wife makes grits.
 Grits: She prefers to use "Quick" grits (Quaker brand) rather than "Instant" grits. Quick grits, which has been pre-steamed and then dried, requires about 5 minutes cook time but it is more "authentic" in flavor and consistency than the "instant" variety. True old fashioned stone-ground grits will take way too long to cook.
Grits: She prefers to use "Quick" grits (Quaker brand) rather than "Instant" grits. Quick grits, which has been pre-steamed and then dried, requires about 5 minutes cook time but it is more "authentic" in flavor and consistency than the "instant" variety. True old fashioned stone-ground grits will take way too long to cook.
For two small serving, in a small but deep pan, add milk (one cup, we use 1%) and just when it starts boiling, add salt (1/4 tsp) and grits (3 tbs) while stirring with a whisk, turn down the flame and cook covered for 5 minutes until all the milk gets absorbed. Add chopped fresh chives (3-4 tbs). She adds 1 pat of butter (1/2 tbs) but no cheese.
Poached eggs: I poach eggs very simply without any vinegar and without any special techniques or gadgets but works all the time. I used a 8 inch frying pan with non-stick surface and with a high side wall so that it can have enough depth of water to completely submerge the eggs. After the water comes to a gentle boil, I adjust the heat so no or only few bubbles form in the water (many bubbles result in egg-drop soup). I then add 1 tsp of salt (just for seasoning). I crack the egg into a small ramekin or bowl and gently slide the egg into the water. Repeat the process. After the white is set and the egg yolk becomes opaque on the surface (4-5 minutes), using the perforated spoon or silicon spatula gently pry the bottom of the eggs from the surface of the pan; take care not to break the yolk. The eggs should come loose without a problem because of the non-stick surface. Pick up the egg using a perforated spoon and drain on a paper towel-lined plate.
Place the grits in a bowl and put the poached egg on top. Sprinkle with salt and serve. For breakfast my wife serves this with her home-made buttermilk biscuit (another Southern specialty) but for the "shime" dish serve as is. Break the egg yolk and mix it with the grits. Even if you are not from the South, you will like this dish.
Monday, July 19, 2010
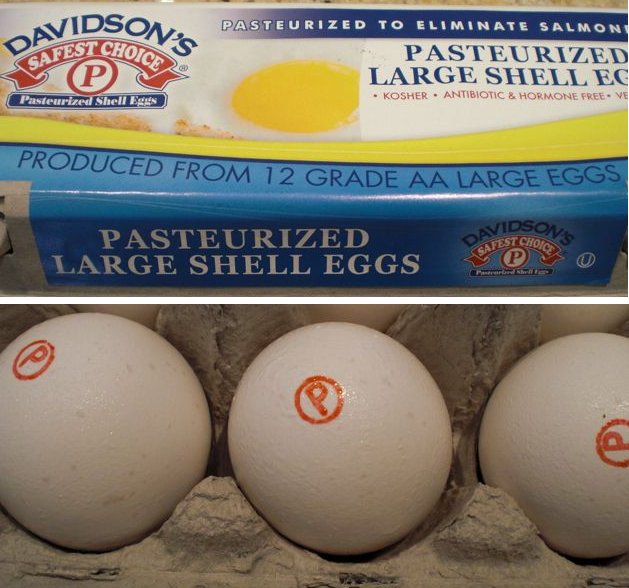
Pasteurized eggs and homemade mayonnaise 滅菌卵と自家製マヨネーズ
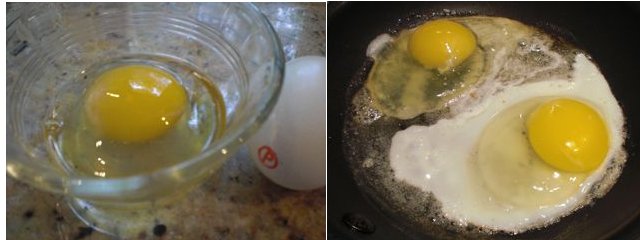
When I made cold ramen noodle, I discussed the risk of Salmonella food poisoning when eating raw or undercooked eggs. Since we like runny egg yolks and many Japanese cuisines call for raw or undercooked eggs, we have been using "free ranging and organic" eggs for these purposes, which are reportedly safer than regular mass produced eggs. Now we found we could get pasteurized eggs. The price appears to be about the same or even slightly cheaper than free ranging organic eggs. As you can see, eggs have red "P" in a circle stamped on them indicating it is "P"asturized.
In the mixing cup of an immersion blender, I put two egg yolks, lemon juice and rice vinegar (1 tbs each), salt (1/2 tbs), Dijon mustard (1 tbs, smooth kind), a pinch of sugar and vegetable oil (1 cup) plus olive oil (1/2 cup, extra-virgin olive oil). I put the immersion blender to the bottom of the mixing cup and pulsed it several times as emulsion develops in the bottom. As more emulsified material appears, I continuously blend and also raised the tip of the blender off the bottom to mix everything. In 30 seconds, nice mayonnaise is made.
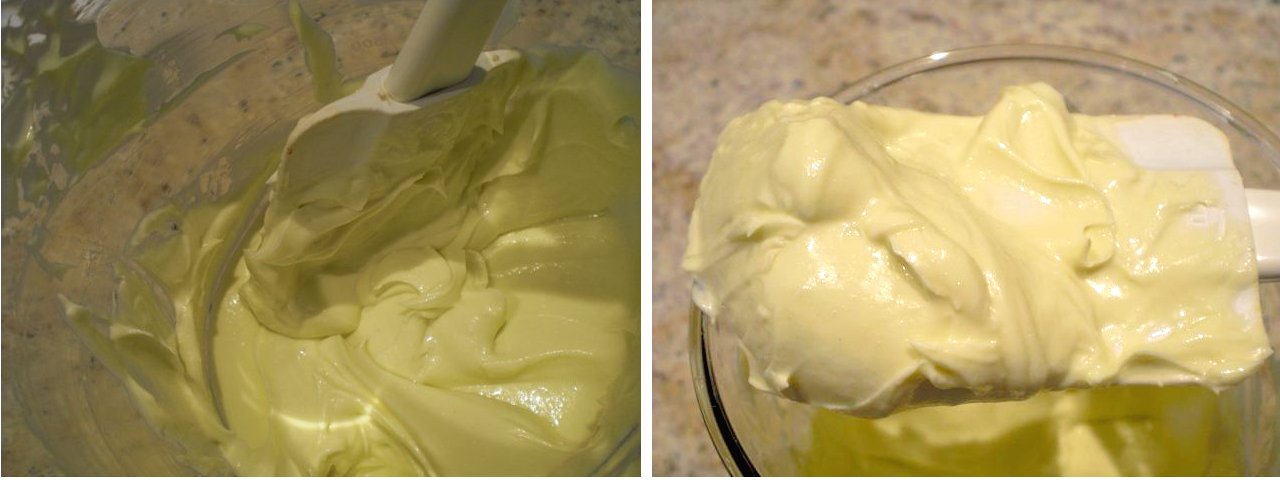
It tastes good. Because of the extra-virgin olive oil I used, it looks slightly greenish and you can taste both olive oil and egg yolk with nice acidity. Yolks from the pasteurized eggs work exactly same as yolks from regular eggs. Sunny-side-ups also look and taste identical to regular eggs, although the egg white looks slightly firmer than one in a regular egg.
Saturday, July 17, 2010
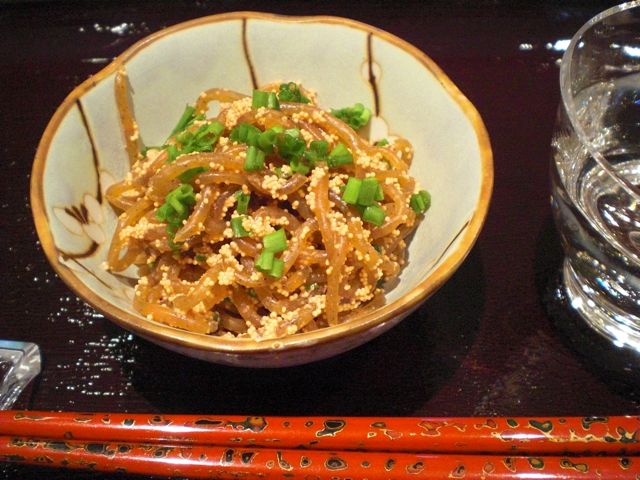
Braised Shirataki with Tarako roe 鱈子と白滝の炒り煮
I decided to make this dish because I found frozen tarako in our freezer which appears not to be high in quality (I must have bought it frozen sometime ago). Shirataki, which means "white cascade" in Japanese, is Konnyaku or Konjac made into thin noodles by extrusion and is often used in Sukiyaki. It does not have many calories and, for that matter, not much taste but can absorb any flavor you add to it.
Tarako mixture: First, remove the tarako roe by slicing the membrane and, using a back of the knife, scrape off the roe from the membrane and put it in a small bowl. For the one package of shirataki, I used two small sacs of tarako but the amount is totally arbitrary. I add 1-2 tbs of sake and a dash of Tabasco (optional) and mix so that it will have nice thick saucy consistency.
Shirataki: I drain and wash one package of shirataki and cut into three portions to make the noodles more manageable and cook it in a boiling water for 1 to 2 minutes (mostly to remove the peculiar smell konnyaku and shirataki always have) and drain. Put the shirataki noodle in a dry non-stick frying pan on a medium flame. Stir to let the excess moisture evaporate (so that it can absorb more liquid seasoning). I add sake and soy sauce (1 tbs each) and stir until the liquid is almost all gone. You could add mirin here to make this dish a bit sweet.
Add the tarako mixture and keep stirring until the color of the tarako become white and cooked through. Since tarako is salty you may adjust the amount of soy sauce accordingly. I mix in chopped chives (or scallion). I garnish with chopped chives when serving.
This dish has an interesting texture contrast of cooked roe and shirataki noodle. The addition of Tabasco adds a very slight and slow acting pleasant heat to the dish. Sake is definitely called for.
Friday, July 16, 2010
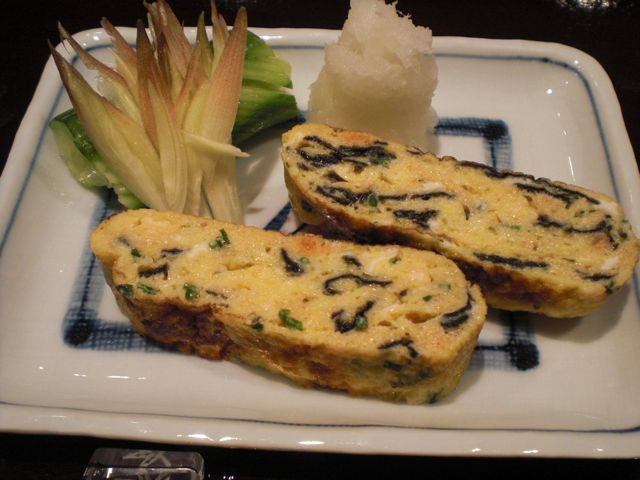
Omelet with tarako and nori 鱈子と海苔入り卵焼き
I made this dish at the same time I made "Braised shirataki and tarako" since I had extra tarako. This is one of many variations of Japanese omelet called "tamagoyaki" 卵焼き which I posted one previously.
Tarako mixture: First, remove tarako roe by slicing the membrane and, using a back of the knife, scrape off the roe from the membrane and put it in a small bowl. For three eggs, I used two small sacs of tarako but the amount is totally arbitrary. I add 1-2 tbs of sake and dash of Tabasco (optional) and mix so that it will have nice thick saucy consistency.
For two to three servings (two to three slices per serving), I crack eggs (three, large) in a bowl and add mirin (1 tbs). I then add the tarako mixture and coarsely crumbled nori (half sheet), beat it using chop sticks to mix well. I also add chopped chives but this is optional.
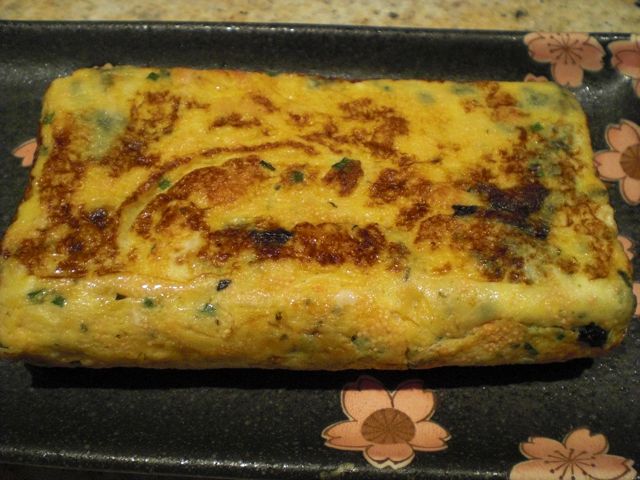
As usual I use a Japanese square frying pan. On a medium flame, I add vegetable oil (1/2 tbs) and add 2/3 of the egg mixture and gently scramble until it is semi-solid. Using a silicon spatula, I push the egg mixture to one end of the square frying pan to make it into a rectangle shape. If needed, I add more oil in the empty portion of the frying pan and add the remaining egg mixture. Again using the spatula, let the egg mixture flow under the rectangle of the eggs by lifting the rectangle. Wait a few moments until the egg on the bottom is set but the surface is still wet. Start rolling the rectangle of eggs so that the surface is all covered with the last layer of the egg mixture. Make sure the end of the seam is well set (you may have to flip it over several times so that all four surfaces are set). I take it out and wrap it in parchment paper to shape (if need be, further wrap it in a bamboo sushi mat to shape - I did not do this this time) and let it cool. The end result is like the image below, a nice rectangular shaped omelet.
I sliced it and served it with grated daikon or "daikon oroshi" 大根おろし (add soy sauce just before eating), finely cut myouga and salted and vinegared cucumber cut in jabara 蛇腹. This is, again, a perfect small dish for sake. Myouga really added to this dish. Myouga flavor is very difficult to describe but it is not scallion or ginger-like and it is just unique.
For two to three servings (two to three slices per serving), I crack eggs (three, large) in a bowl and add mirin (1 tbs). I then add the tarako mixture and coarsely crumbled nori (half sheet), beat it using chop sticks to mix well. I also add chopped chives but this is optional.
As usual I use a Japanese square frying pan. On a medium flame, I add vegetable oil (1/2 tbs) and add 2/3 of the egg mixture and gently scramble until it is semi-solid. Using a silicon spatula, I push the egg mixture to one end of the square frying pan to make it into a rectangle shape. If needed, I add more oil in the empty portion of the frying pan and add the remaining egg mixture. Again using the spatula, let the egg mixture flow under the rectangle of the eggs by lifting the rectangle. Wait a few moments until the egg on the bottom is set but the surface is still wet. Start rolling the rectangle of eggs so that the surface is all covered with the last layer of the egg mixture. Make sure the end of the seam is well set (you may have to flip it over several times so that all four surfaces are set). I take it out and wrap it in parchment paper to shape (if need be, further wrap it in a bamboo sushi mat to shape - I did not do this this time) and let it cool. The end result is like the image below, a nice rectangular shaped omelet.
Thursday, July 15, 2010
Marinated tuna sashimi マグロのづけ
The quality of tuna sashimi we can get from Japanese grocery stores in the U.S. is a far cry from what you can get in Japan from such places as "depachika" デパ地下 or basement (Gourmet food) floors of Japanese department stores. Even in the U.S., New York, Los Angeles and San Francisco areas may be the only areas in which you may have better luck getting some decent sashimi items. Oh, I almost forgot San Diego, home of Catalina Offshore Products. I have posted a few dishes I make from low-grade frozen "saku" (a block for sashimi) of yellowfin tuna. Although this is always available in our near-by Japanese grocery store (the one which is still open), and I can keep it for couple of months in our freezer, it is not good---very lean with a mealy texture. Among the many techniques used to make this kind of sashimi more palatable is marinating in a mixture of soy sauce, sake and mirin, which is called "zuke" 漬け or づけ. Of course, you can use this technique for a good quality tuna as well if you so prefer. I often use this "zuke" technique for the tuna in my Yamakake やまかけ mostly for the taste even when I have a descent quality tuna. If you marinate the tuna over night, the texture will change to a more "slimy" (this is not an appropriate word since it has a negative connotation for Westerners. The Japanese word will be "nettori" ねっとり, which does not have a negative connotation) texture. I do not particularly like this texture but some (Japanese) people love this. This time, I made this dish based on the recipe I saw in the Asahi Newspaper Web and I kind of like it. It changes the texture but not to the point of sliminess and makes this low-quality tuna sashimi much more palatable.
 Tuna block or "saku": First, I thaw one "saku" 柵 of frozen yellow fin tuna in the refrigerator overnight. I then do a "yubiki" 湯引き or "shimofuri" 霜降り process of plunging the tuna into boiling water for 5 seconds and then soaking it immediately in ice water for a few minutes until the tuna is ice cold again. Only the surface becomes white. This is similar to "Tataki" たたき technique which involves brief grilling instead of boiling. I dry the surface with a paper towel after taking it out from the ice water. I slice it on a slant (slice about 50-60 degree, instead of 90 degrees, from the horizontal surface of the saku) to make a less than 1/2 inch (or about 1 cm) thick but larger slices as compared to ones you slice perpendicular to the saku.
I serve this like sashimi with a Chiffonade of perilla leaves, chopped chives and thin slices of the white part of scallion (or whatever fresh herbs you like to use) with a dab of real wasabi. I think the timing of the marination, addition of sesame seeds, and ginger juice all work. Mixing light (colored) and regular soy sauce made the color of tuna sashimi darken to just the right color and make this low-grade sashimi taste and look like much better quality tuna sashimi. It tasted very good with a scant smear of wasabi. Only problem I had was that it tasted a bit too salty for me and I may reduce the proportion of soy sauce next time (my wife thought it was just fine). You could make a donburi どんぶり by placing the marinated tuna sashimi on (sushi) rice. This is indeed a great way to upgrade a low-quality tuna sashimi.
Marinade: Mix sake (1 part), mirin (1 part), light colored or "usukuchi" soy sauce 薄口醤油 (1 part) and regualr or "koikuchi" soy sauce 濃口醤油 (2 parts) with dry roasted coarsely ground white sesame seeds (2 tbs) and the juice from grated ginger (1 tbs). Although white sesame seeds you get from a Japanese grocery store are already roasted, I roast them again in a dry frying pan for 5 minutes or until the sesame seeds become fragrant and just start popping. I coarsely grind them in a "suribachi" すり鉢 or a Japanese mortar. This step is really worth the effort. You should smell a nice fragrance of sesame.
Marination: In a flat sealable container, I put the marinade and the tuna slices in one layer so that all the surface of the tuna is covered with the marinade. I let it marinate at room temperature for 10 minutes and then for 2 hours in the refrigerator. The timing is rather important since the taste and texture (especially the texture) will change depending on the length of the marination. I found two hours to be perfect.
I serve this like sashimi with a Chiffonade of perilla leaves, chopped chives and thin slices of the white part of scallion (or whatever fresh herbs you like to use) with a dab of real wasabi. I think the timing of the marination, addition of sesame seeds, and ginger juice all work. Mixing light (colored) and regular soy sauce made the color of tuna sashimi darken to just the right color and make this low-grade sashimi taste and look like much better quality tuna sashimi. It tasted very good with a scant smear of wasabi. Only problem I had was that it tasted a bit too salty for me and I may reduce the proportion of soy sauce next time (my wife thought it was just fine). You could make a donburi どんぶり by placing the marinated tuna sashimi on (sushi) rice. This is indeed a great way to upgrade a low-quality tuna sashimi.
Tuesday, July 13, 2010
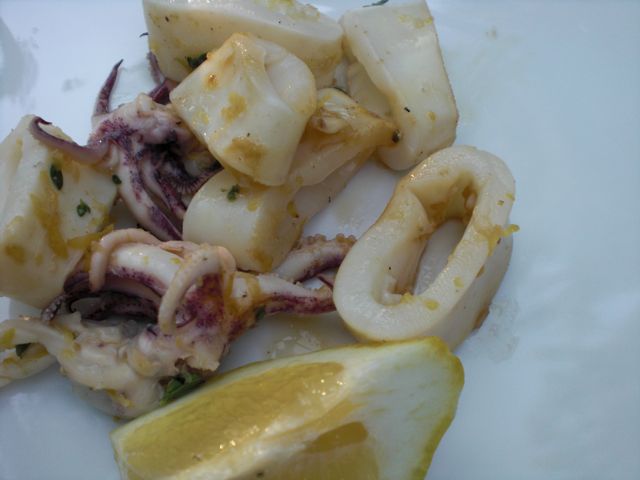
Grilled squid with lemon and thyme レモン、タイム味のイカ焼き
This is a type of dish that sounded great in concept but had some problems in execution. I did not follow any particular recipe but thought that having thyme and lemon flavoured grilled small squid would be a nice appetizer.
The type of squid I can consistently get here is a small pre-cleaned (previously frozen) kind which tend to be loaded with water (They must absorb water during the preparation process). I had too-much-liquid-coming-out-of-the-squid problem before.
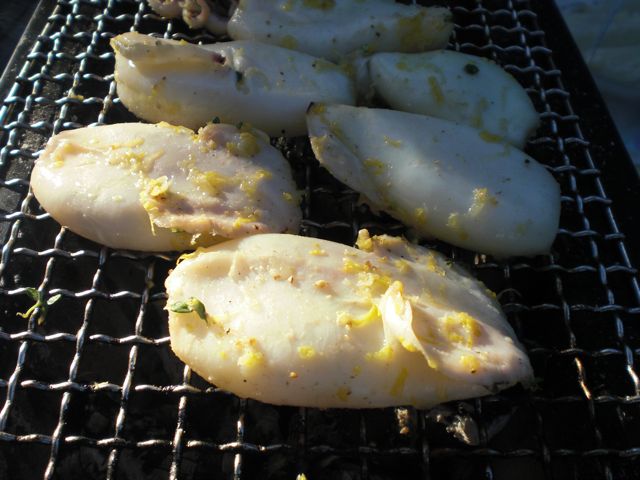
I marinated the squid in olive oil, lemon juice, grated lemon zest and fresh thyme, salt and freshly cracked white pepper for several hours in the refrigerator. I grilled the squid on a very hot charcoal fire but it failed to get nice char marks and sort of steamed. I have to assume it had so much water in the meat that the surface temperature did not rise high enough to form a char despite the hot charcoal fire. It was certainly edible but it did not have enough flavour and was somewhat tasteless. What a disappointment.
Subscribe to:
Posts (Atom)