Sunday, October 16, 2011

White Asparagus with Béarnaise(-like) sauce ホワイトアスパラガスのバーネイもどきソース添え

Usually, spring is the season for asparagus but, nowadays, they are available all year long. Europeans especially Germans appear to love white asparagus more than green asparagus. Although we generally prefer green asparagus, we go for the white when they appear in the grocery store. I am not sure where this one came from but probably Chile. I posted white asparagus before. I made a different sauce this time.

Digression alert: One of the reasons we can get asparagus all year round is because (believe it or not) they are part of the U.S. "war on drugs". In an effort to encourage farmers in South American countries south of the equator to produce something other than drugs, the U.S. opened trade to other agricultural products, one of which was asparagus. How successful the effort was in reducing the supply of drugs I'm not sure...I suspect farmers are now producing both products. The asparagus production occurs south of the equator in their spring when it is fall in the northern hemisphere. So we get the asparagus produced in the U.S. in our spring and summer and those produced in South America in our fall and winter. Maybe not such a successful weapon to win the "war on drugs" but definitely a win for great cuisine. 

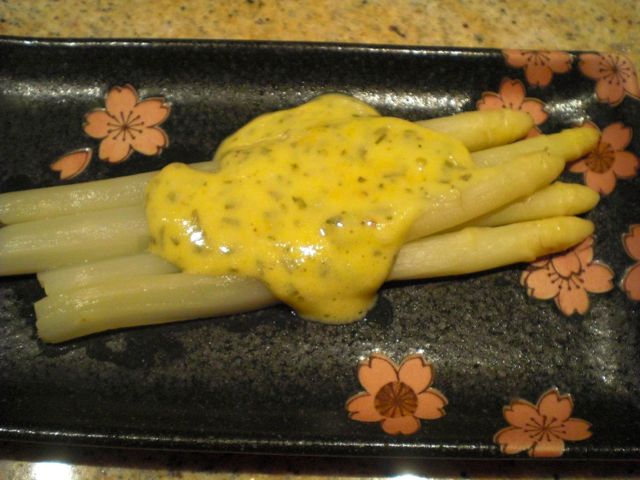
 If you happen to cook white asparagus often, it may be worthwhile to get a special peeler which must be a very common kitchen item in Germany, I suppose. For us, I just use a good, sharp vegetable peeler. It is necessary to peel the skin of white asparagus except for the tips otherwise, they are too fibrous no matter how long they are cooked. The center may become soft but the skin remains hard and unpleasant. There are some tricks to peeling white asparagus. Since they are so brittle, the stems breaks very easily particularly if you try to hold the stalk in your hand while peeling with a regular vegetable peeler. So this is how I do it: I first break off the root ends by bending the bottom portion by hand until it snaps.  I discarded the bottom part. I then lay the stalk flat on the cutting board and roll it 90 degree as I peeled, so that the asparagus is always supported by the board. (This does not work well if the asparagus is not straight or your peeler is not sharp). No matter what you do, you may break a few. In that case, you revert to the classic cooking technique known as "camouflage" by arranging the stalk as though it has not broken and cover it with sauce like I did. I do not discard the peel at this point.

I arranged the asparagus in one layer in a sauté pan or large frying pan, spread the peels on top and pour enough water to just cover. I put on the lid and cooked on low flame for 30-40 minutes. I then removed the lid and turned up the flame to medium and let it continue cooking for 10-15 minutes or until only a small amount of the cooking liquid remained. The purpose of this exercise is to make a liquid that has a highly concentrated white asparagus flavor.  I removed the peels and discarded them. I then set aside the asparagus on a plate keeping them warm. 

Sauce: This time I made a Béarnaise-like sauce but did not add melted butter to qualify for Béarnaise. I added champagne vinegar (1 tbs) and white vermouth (2 tbs) to the reducing simmering liquid and reduce a little further. I added tarragon (dried, 1/2 tsp). When only a very small amount of liquid remained (3-4 tbs), off heat, I added a beaten egg yolk (I first tempered the egg by making a "liaison"--adding a small portion of the reduced liquid into the yolk and mixing well). I added the liaison back to the pan and vigorously wisked it while moving the pan on and off the flame until I achieved a saucy (or mayonnaise like) consistency. I could have made a real Béarnaise sauce by further drizzling in melted butter but the consistency of the sauce was just fine and I decided not to add the butter. This happened because the liquid was a very small amount as compared to the egg yolk. I just wanted to make a quick sauce and did this (brave) quick method. Fortunately, the sauce did not break or become scrambled egg (by the way, I used an egg yolk from a pasteurized shell egg). I tasted the sauce and added salt and freshly ground white pepper. It tasted good with a nice acid and tarragon flavors. 

There is something about the taste of white asparagus. It is distinctive and different from the green kind. The sauce had a concentrated flavor of white asparagus with a nice but gentle acidity from the champagne vinegar. It almost tasted like Béarnaise sauce without butter. I saw my wife lick her plate clean after finishing the asparagus, when she thought I wasn't looking. I take that as her seal of approval for my sauce.

Friday, October 14, 2011

Boiled Chestnuts 茹で栗

This is continuation of the North American chestnut theme derived from the chestnuts I mail ordered from a farm in California. The chestnut rice was a success. I decided to just simply boil the chestnuts since this was the most common way I enjoyed them as a kid in Japan and we collected chestnuts from the neighborhood chestnut trees.

Obviously my mother cooked the chestnuts when I was a kid and I do not remember how long she cooked them. The pamphlet that came with the chestnuts had some information but I decided to do a web search and settled on this method.

I first soaked the chestnuts in cold water just enough to cover for several hours (close to 6 hours).  I poured the water to just covered the chestnuts, then added a pinch of salt. I placed the pot on a medium flame. As soon as the water started boiling, I tuned it down to simmer with the lid on. I boiled it for 40 minutes mixing the chestnuts once during the cooking. I let it sit in the pot until the water cooled to room temperature and then drained (Picture above).

When I was a kid, everybody peeled their own chestnuts. My mother would serve them in a big bowl and we all sat around the table peeling and eating. Since I was dealing with a chestnut amateur (my wife) I did the peeling before I served them. I peeled the outer skin as well as the inner skin (Picture above). It was not too difficult to remove these two layers of skins.

This was very good. The natural sweetness of the chestnuts was very nice with an almost starchy consistency. I told my wife that I did not remember when I last tasted boiled chestnuts.  She replied that she had nothing to remember since she never had boiled chestnuts and certainly nothing related to chestnuts that tasted this good. Surprisingly, the chestnuts went very well with the red we were drinking  (100% tempranillo from Spain), Bodegas Resalte de Penafiel Ribera del Duero Crianza 2005.  This is interesting pairing and we rather enjoyed it.

Wednesday, October 12, 2011

Chestnuts rice with North American Chestnuts 北米栗の栗ご飯

Last year I posted chestnuts rice or 栗ご飯. The chestnuts I bought at the gourmet market were probably of European origin and not particularly fresh. They were basically tasteless and had a really chalky consistency. In that post, I also mentioned that almost all North American chestnut trees were wiped out by the Chestnuts blight around 1940. But, at that time, by searching on the web, I found out that small numbers of chestnut groves survived and some farms are indeed producing North American chestnuts. By the time I got onto this last year, the season was over and I could not get the North American Chestnuts. This year, I was prepared and as soon as the chestnuts season came around, I placed my order. Although there are a few farms that sell chestnuts, mine came from Girolami farms in Califronia.

Here is a 3 lb bag of North American chestnuts I received (#1 below). They look excellent and are fairly big.

Chestnuts preparation: I soaked the chestnuts in boiling water (off heat) and let them soak until the water cooled down to room temperature. This softened the outer skin ("onikawa" 鬼皮 or demon skin) and made them easier to peel. Using a sharp paring knife, I first cut the bottom of the chestnut and peeled off the outer skin and then removed the inner skin ("shibukawa" 渋皮 or bitter skin). The inner skin was more difficult to remove, although for some I got lucky and it came off in one piece. For many of them I had to shave off some of the meat of the nuts to get the skin off (#2 below). I prepared 11 chestnuts (for 2 Japanese cups or 360ml of uncooked rice). As I peeled the inner skin I soaked the nuts in water to prevent discoloration and some starch leached out as well.

Rice: I used two cups (the measuring cup that came with the rice cooker--180ml. I understand that a regular Japanese cup is 200ml and an American cup is 240ml) of rice (360ml); a combination of regular Japanese short grain rice (Koshihikari コシヒカリ variety from California called "Kagayaki" かがやき) and "mochigome" 餅米 (glutenous or sweet rice), one rice cooker cup (180ml) each. After washing the rice in running cold water until the water ran clear. I drained the rice in a fine meshed strainer and let it sit in the strainer until I was ready to cook it.

Broth: I decided to use a seasoned "dashi" broth for this dish. I made dashi broth from a dash pack (combination of bonito flakes and kelp). In the cooled down dash broth, I added light colored soy sauce or "usukuchi shouyu 薄口醤油 (1 tbs) and mirin (1 tbs) and made it 400ml total.

Cooking: I used "Kamadosan" かまどさん, an earthenware rice cooker. I added the rice, broth and, for a good measure, a 3 inch square of dried kelp (surface wiped with damp paper towel) and arranged the prepared chestnuts on the surface. As per the instructions that came with the rice cooker, I set the steam holes of the inner and outer lids perpendicular to each other and placed it on a medium high flame for 14 minutes. I then shut off the heat and let it steep for 20 more minutes (#4 above).

While the rice was steeping, I made a small cucumber and myouga sunomono 胡瓜と茗荷の酢の物 (left in the back in the first picture).

I removed the kelp and mixed the rice while trying not to break the chestnuts. The bottom had a very slight crust of "okoge" おこげ. I served it with a garnish of black sesame seeds (The first picture above). 

The result? Much better than last year--a world of difference. The chestnuts were much sweeter and while they had the somewhat dry texture characteristic of chestnuts, it was pleasing and definately not chalky.  The  addition of the glutenous rice gave the dish a sticky consistency or "mochimochi" もちもち consistency. The seasoned broth that I used also added a subtle but nice flavor. So, I have to say this was a success. We are glad that North American chestnuts have survived and we can enjoy them. 

Monday, October 10, 2011

Cubes of chicken breast, cucumber and black vinegar soy sauce Gelée 鶏の黒酢煮、キュウリと黒酢醤油ジェレー

This is another one of those quick and simple dishes I make from leftovers. When I stew chicken wings or chicken breast, I have been re-using the simmering liquid (adding a mixture of mirin, soy sauce, and black vinegar in 1:1:1 ratio as I cook a new batch). After stewing a few batches of chicken wings, the amount of protein or collagen in the simmering liquid is high enough to make a nice gelée or "nikogori" 煮こごり in the refrigerator, so I decide to use it.

I just cubed cooked chicken breast, cucumber, and the gelée of the simmering liquid and topped it with mayonnaise with Japanese 7 flavored red pepper. I also garnished with fan-cut cucumber and perilla . The gelée really made this dish since it has nice slightly sweet, mild vinegary and salty flavors which come in bursts as you taste the small cubes of the jelled simmering liquid. If you have to make the gelée from scratch, I suppose you can dissolve either gelatin or agar-agar in the simmering liquid but that is probably not worth the effort.

In any case, the addition of mayonnaise further takes the vinegary edge off and this dish will go with any drink.

Saturday, October 8, 2011

Miso marinated tofu and Mozzarella cheese 豆腐とマッレラチーズの味噌漬け

This is a variation on the previous post. This time I used "silken" tofu as well as fresh Mozzarella cheese. We also experimented with overnight to 3 and 5 day marination to see if the duration of the marination will make any difference.

The above is 5 day old Silken tofu marinated in miso (back) and fresh Mozzarella cheese marinated in miso overnight.

The above is 3 day old silken tofu marinated in miso.

Tofu: I used one silken tofu which was wrapped in a paper towel placed on a perforated metal tray with a matching bottom. I placed a similar sized metal tray on top and weighed it down with a full container of American-size yogurt (1 lb). For firm tofu I used two containers (2 lb) as weights but for silken tofu I used only one (1 lb) so as not to crush it. After a few hours in the refrigerator, I replaced the paper towel and let it drain for 2-3 more hours.

Fresh Mozzarella cheese: I used fresh high moisture content whole cow's milk Mozzarella cheese. I cut the edges off to make it a sort of rectangular shape.

Miso marinade: I used rice miso or "kome" miso 米味噌 with saltiness between red and yellow miso. I added mirin and mixed until the miso became a nice spreadable paste. This time I did not add anything else.

In an air tight plastic container, I made a thin layer of the miso marinade on the bottom and place the tofu and the cheese on top. I smeared the remaining miso marinate all over the other sides of tofu and the cheese.

The texture of the silken tofu is a bit too soft to our taste. We liked the firm tofu texture, which is more similar to that of soft cheeses, better. In terms of overnight vs. 3 day vs. 5 day versions, there were only slight changes in texture, flavor and saltiness. The miso marinated tofu was particularly good if you eat it with perilla.  The Mozzarella cheese became more interesting than the original cheese, since plain mozzarella does not have any strong flavor by itself. This is a very interesting combination of a real cheese with a nutty miso flavor with slight saltiness. We may keep experimenting with the longer marination.

Thursday, October 6, 2011

Baked marinated tofu with cheese 豆腐とチーズのピリ辛オーブン焼き

This is a variation (euphemism!) or, more precisely, a leftover control, of the baked  marinated tofu which I made yesterday. I could have just warm it up but I added cheeses and spruced it up a notch.


I just put the leftover cubes of marinated and baked tofu into a small ramekin as seen above. I added slices of fresh Mazarella cheese and freshly grated Parmesan cheese on the top.  I drizzled a small amount of good fruity olive oil on the top and baked it for 10 minutes in 450F preheated toaster oven. Since I happened to have myouga harvested on the weekend, I added thinly sliced myouga (strictly optional) on the top and cooked it for another 5 minutes. I garnished it with a chiffonade of perilla.

This addition of cheese make it a much richer (less healthy) dish. Although the addition of myouga is subtle (cooking reduces myouga's flavor), it added one more dimension to this dish. 

We  had this with a red wine from Priorat, Genium Cellar Red Blend 2005. This is a blend of old-vine garnacha (60%) and the remaining balance consisting of cariñena, merlot and syrah. It is a good, rather big red especially if you are thinking of wines made from granache from elsewhere (Rhone). This wine would be good one to have with roasted red meat but this tofu dish has a "meaty" quality so the wine went very well.

Tuesday, October 4, 2011

Baked marinated tofu 豆腐のピリ辛オーブン焼き

One weekend, my wife found this tofu recipe in the Washington Post and suggested I make it. I made slight modifications and served it as a drinking snack.
The below is the ingredients list from the original recipe.

Ingredients:
14 ounces (1 block) extra-firm tofu
1 tablespoon toasted sesame oil
1 tablespoon low-sodium soy sauce
1 tablespoon rice wine, sake or dry sherry
1 tablespoon rice vinegar or apple cider vinegar
1 medium clove garlic, pressed or finely chopped
1-inch piece peeled ginger root, grated
4 tablespoons water
1/2 teaspoon hot chili paste

Since I did not have a chili paste, I used a Chinese garlic chili paste but otherwise followed the recipe. They suggest freezing and thawing the tofu before using it in this recipe. This is an interesting suggestion since one of the Japanese tofu products is called "Shimidoufu" 凍み豆腐 ("shim" means "frozen") or "Kouyadoufu" 高野豆腐. In the "old days", this was produced by hanging a thin block of tofu outside in the cold winter. This essentially freeze dries the tofu. I am sure, now, this type of tofu is produced in a factory freeze-drying machine. The end product is hard and dried squares which will last a long time. You simply hydrate and simmer it in a seasoning broth. The texture is completely different from the original tofu and firmer and spongier. I often make this for New Year (If you follow the link, on the left and front,  the triangular white item is simmered "kouyadofu"). I will certainly try this freezing and thawing tofu method for this dish, which is different from freeze-dried tofu, in the near future.

This time, I just drained the excess moisture from tofu. I cut the drained tofu into 1 inch cubes and mixed with the marinade (left in the image below). I placed it without a lid in a 350F convection oven. I baked it for 45 minutes mixing and turning several time until the marinade was almost all gone and just started scorching around the edge (right in the image below). I made a slight modification and added finely chopped scallion (2 stalks) just 5 minutes before I took the tofu out of the oven.
I served it with chiffonade of perilla as a garnish. The taste profile is similar to "Mapo tofu" but much drier and the tofu has a much firmer texture. It is nicely hot (both spice and temperature) with garlicky (this one is more garlicky than it should have been since the chili paste I used also included garlic and I used grated garlic instead of chopped garlic) and ginger tastes. Perilla and scallion also added to the flavor. We really like this dish.