Friday, July 8, 2016

Pork and shrimp teriyaki burger エビ入り豚肉照り焼きバーガー

This was just a leftover-control dish but it tasted good. When I made "Fried bamboo shoot stuffed with pork and shrimp",  I prepared much more stuffing than I could use. Using this stuffing, I made this "burger" as a drinking snack.


I served this with green beans (which were already blanched, I just warmed them up in the same pan in which I made these burgers). I also served bomboo shoot "Tosa-ni" 筍の土佐煮. These made nice starting dishes for the evening.


Ingredients: (For two small burgers)
Ground pork, 40g (I hand chopped pork butt).
Shrimp, 60g (I used frozen, thawed and chopped finely until it had a paste like consistency)
Scallion, one, white part, finely chopped.
Ginger root, finely chopped (to taste)
Salt, to taste
Soy sauce, 1/2 tsp
Sake, 1/2 tsp
White pepper, to taste

Directions:
I mixed together the above ingredients and formed the mixture into two identical patties. I cooked the burger in a small non-stick frying pan with light olive oil. I cooked about 2 minute or until browned and then turned over and cooked another one minute or until that side was nicely browned. I then added soy sauce (1 tbs) and mirin (1 tbs) and kept the pan moving and turning the burgers a few times. When the sauce evaporated enough to form a viscous sauce, I cut the flame. After I placed the burgers on the plates, I poured the sauce over them. I sprinkled on some "Sansho" 山椒 powder.

Because of the addition of shrimp, the consistency of the burger was quite different from a just meat burger. It had a more elastic texture (In Japanese, it is called "puripuri" プリプリ). The shrimp also added a slight sweetness. My instant teriyaki sauce went well. Sansho also added its unique flavor. This was a well-balanced first dish of the evening.

Tuesday, July 5, 2016

Cold Tofu with olive, olive oil and Balsamic vinegar 冷奴のオリーブオイル、バルサミコ酢かけ

This is not necessarily blog-worthy but good to have for our record. I had a this creamy tofu with intense soy bean flavor from Otokomae 男前豆腐.  I modified toppings of this cold tofu dish so it would go well with red wine.


I served it on a bed of baby water cress.


Toppings included, sliced almond-stuffed green olive,  "yukari" ゆかり(red-shiso flakes/salt), aonori 青のりwith our favorite Spanish olive oil and syrupy balsamic vinegar. 

This dish went well with the red wine we were having. The watercress added a slight bitterness. The combination of Western and Japanese ingredients worked surprisingly well.  This is certainly a variation of cold tofu toppings I should remember.


Saturday, July 2, 2016

Miso soup panna cotta 味噌汁のパンナコッタ

My wife came up with the idea of making miso soup in a solid form. (This was a natural progression from the various other panna cottas she has made recently. Also this is what happens when she is turned loose with gelatin; she was well-known in the past for her various "gelatin" concoctions). The idea appealed to me because I like to have miso soup with any meal (even breakfast). My wife on the other hand does not like having soup in the evening. So, if we could come up with a dish which had the taste of miso soup but was not liquid it would be a win-win for both my wife and myself.  This recipe was my first attempt. I intended to recreate miso soup with potato, onion, and wakame seaweed ワカメ、ジャガイモと玉ねぎの味噌汁. The reason I choose this particular combination of ingredients is a long story.*

*Digression alert: When my late-brother and I were small (probably I was a just in 1st grade), my late-father was home but my mother was out (probably attending a PTA meeting or something). My father almost never cooked but when 4 pm came around, he suggested "we must be hungry" and decided to cook something for us (in retrospect, I suspect he was the one who was hungry and could not wait my mother to come home). In any case, he made rice (using an electric rice cooker) and miso soup made of potato, onion, and wakame seaweed. When my mother arrived back home with some ready-made side dishes for supper, she was mighty miffed to find us finishing up a supper of rice and soup. But somehow, the taste of this miso soup remains a favorite for me.

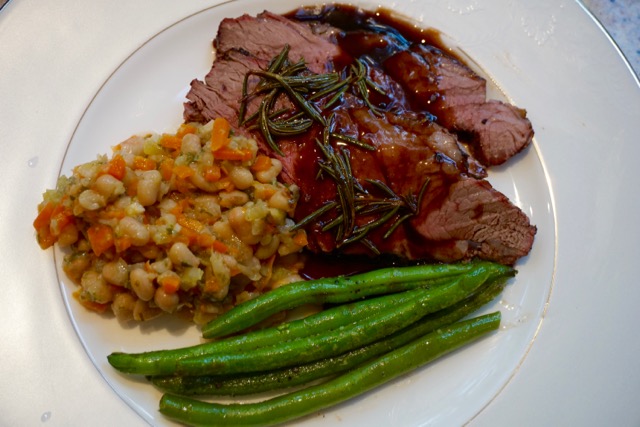
The picture below shows the miso soup panna cotta, which included potato and onion, served with cucumber, wakame seaweed, and red radish as garnish. To make it interesting I included unflavored soy milk and silken tofu (the white squares).


I decided to add "sumiso" 酢味噌 (miso, rice vinegar and sugar) sauce as well.


I also put sumiso sauce on the top of the panna cotta.


The panna cotta had a smooth texture and a gentle miso flavor. We could taste the sweetness of the onion but the addition of soy milk may have made it taste a bit vague or muted. The sumiso sauce also overwhelmed the dish. So, next day, I served the panna cotta simply with wakame seaweed and thinly sliced scallion.


This tasted better and closer to the original miso soup taste but there is room for improvement.


Ingredients (about 2 servings):
1 cup Dried fish and kelp broth (from bashi pack).
1 cup unflavored soy milk
1 large white potato, peeled and cut into a dice.
1 large onion, cut into thin strips
1/4 cup wakame seaweed (I used "raw" salt preserved one).
2 tbs Miso
2 envelopes of unflavored powdered gelatin
1/3 silken tofu

Directions:
1. I cooked the potato in the broth until soft (15 minutes) and added onion and cooked another 5 minutes (left in the picture below). 
2. I dissolved the miso. I added more as I tasted. I needed to season it rather strongly since it would be diluted by the addition of soy milk.
3. I added the miso soup into a blender and pureed it smooth.
4. Meanwhile, I put soy milk in a pan, sprinkled unflavored powdered gelatin (two envelopes) on the surface to bloom. I gently heated up and dissolved the gelatin using a wire whisk (right in the picture below). I combined the miso soup and soy milk  with the dissolved gelatin.


5. I placed small cubes of tofu in the bottom of a small ramekin and poured the mixture on top.
6. I refrigerated until set.
7. Like the other  panna cotta dishes we made,  it will come out without any problem by running the thin blade of a knife around the perimeter and introducing air to the bottom of the ramekin. 

The two serving variations above were certainly "edible" but we were not satisfied. My wife suggested leaving out the soy milk. She also suggested serving the potato around the panna cotta rather than pureed in it. I will certainly incorporate her suggestions.  I am now on a mission to make the perfect miso soup panna cotta. 


Wednesday, June 29, 2016

Baked Cauliflower with Chimichurri sauce オーブン焼きカリフラワーのチミチュリソース

We try to make some vegetable dishes which can be eaten during the work week. We had a large head of cauliflower from last week which needed to be prepared. My wife spotted a recipe which is "Cauliflower steak with Chimichurri sauce". Although we are not sold on the idea of thick slab of cauliflower (it was equated with a steak in the original recipe), the idea of baked cauliflower with chimuchurri sauce sounded good. So, instead, we baked cauliflower florets and dressed them with chimuchurri sauce.


The florets were nicely browed (although a bit overcooked).


The chimuchurri sauce was very good with fresh herbs.

Ingredients (with our modifications)
For Chimuchurri sauce
2 tablespoons extra-virgin olive oil (for the Chimuchurri)
1 garlic clove, minced
1 shallot, finely chopped
1 jalapeño pepper, large, deveined and seeded and finely chopped
3/4 teaspoon salt, divided
2 tablespoons finely chopped fresh oregano
2 tablespoons finely chopped fresh thyme
2 tablespoons water
2 teaspoons sherry vinegar (we used rice vinegar).
1/2 teaspoon paprika (we used smoked paprika)
3 tablespoons finely chopped flat-leaf parsley.

For Cauliflower
1 large head cauliflower (about 3 pounds), separated into florets.
Freshly ground pepper to taste
2 tbs olive oil (for coating the cookie sheet and the cauliflower).

Directions.
  1. Combine oil, garlic, jalapeño, shallot and 1/4 teaspoon salt in a small frying pan. Cook over medium heat just until the garlic starts to sizzle, 2 to 4 minutes, but don’t let it brown. Remove from heat and stir in oregano, thyme, water, vinegar and paprika. Cover and set aside (#3).
  2. Preheat oven to 450°F. Coat a cookie sheet with olive oil (we used a non-stick cookie sheet).
  3. Toss the cauliflower florets with olive oil and season with the remaining 1/2 teaspoon salt and pepper.
  4. Roast the cauliflower, gently turning once halfway through, until browned and the stems feel tender when pierced with a bamboo skewer, 15 minutes (we baked 18 minutes which was a bit too long) (#1 and 2).
  5. Just before serving, stir parsley into the reserved herb sauce and season with pepper. Dress the cauliflower florets (#4) with the sauce (#5 and 6).

Th fresh herbs in chimuchurri sauce were very good. It was good warm. We later served cold which was also very good. We may even try real steak with this chimuchurri sauce.

Sunday, June 26, 2016

Barbecued leg of lamb and white navy beans ラムのバーベキューとネービービーンズ

This was our Memorial day barbecue. Strictly speaking, this is not a barbecue according to the traditional definition of a barbecue as "low temperature long cooking with smoke".  Nonetheless, for our purposes, we will call it barbecue. While thinking about what we could serve with the lamb, I mused that it would be nice to have something different. My wife remembered that several times in the past we served lamb with beans and found this recipe for navy beans ネービービーンズ . The navy bean dish was a group production. I was chief-in-charge of chopping (and as you will see there is a fair amount of chopping involved.)  My wife prepared the beans, spices, put it together and cooked it.  I made an instant reduced port wine sauce to pour over the meat and sautéed green beans as a side .


Lamb and beans (both the navy and green) are a good combination .


The original recipe was called "Braised lamb shanks with white beans". We just used the white bean part of the recipe and served it with our barbecued leg of lamb.

Ingredients: (4 servings):
For beans
    2 tablespoons extra-virgin olive oil
    2 small onions, chopped fine
    2 small carrots, chopped fine
    2 celery ribs, chopped fine
    3 garlic cloves, minced
    2 cups cooked white beans (preferably Great Northern or navy). We used canned Navy beans rinsed and drained.
    chicken broth just to cover beans
    2 tablespoons unsalted butter
    1 bay leaf

For gremolata
    3 tablespoons chopped fresh parsley leaves (preferably flat-leafed)
    1 teaspoon freshly grated lemon zest (about 1 lemon)
    3 garlic cloves, minced

Directions:
For Beans
  1. In a saucepan heat oil over moderately high heat until hot but not smoking and cook onions, carrots, celery, and garlic, stirring, 2 or 3 minutes (#1, below). 
  2. Add beans, enough chicken broth to just cover the beans, butter, and bay leaf and cook over moderate heat, stirring occasionally and adding enough remaining broth to keep beans moist and to reach a creamy consistency, about 30 minutes (#2, below). 
  3. Discard bay leaf and add half of gremolata and salt and pepper to taste (#4, below).
For gremolata:
I hand chopped garlic, parsley and prepared the lemon zest using micro-grater. (#3 below)


We tasted the white beans (#1, below). Because of the gremolata, it had a nice bright fresh taste of lemon, garlic and parsley. The white beans were creamy with the savory and slightly sweet flavors of all the carrots, celery and onion that was added. The leg of lamb was deboned, seasoned with salt, black pepper and chopped fresh rosemary mixed with olive oil. Using indirect heat, I barbecued it in my Weber grill with added wood chips until the thickest center registered 140F (#2, below). I let it rest for 10 minutes. It was pink inside but I could have  cooked it a bit less. During the rest period, quite a good amount of au jus accumulated. I decided to make a quick sauce (#4, below). I poured the au jus into a frying pan, added port wine (cheap Taylor port I keep for cooking), threw in sprigs of fresh rosemary and reduced it by half, I added a small amount of balsamic vinegar and finished it with pats of cold butter.


This was a quite satisfactory Memorial day barbecue. Although a bit overcooked, the lamb had a nice lamb-y flavor and rosemary scent was a perfect combination. The sauce added a slight sweet and sour taste and moisten the meat. The white beans were a perfect accompaniment for the lamb. I am sure I opened a nice red for this dinner but at this point, I cannot remember what we had.

Thursday, June 23, 2016

Egg-in breakfast muffins 卵とベーコン入り朝食マフィン

My wife cannot resist interesting bread recipes especially ones that involve some kind of stuffing inside. She found this recipe on line and she had to try it. These breakfast muffins have cheese and bacon in the dough and encase an egg; either a whole or scrambled. It is an all inclusive portable breakfast. (If served on a stick it would classify as a "breakfast-on-a-stick" at the local state fair).  We were thinking that we might take this to work for breakfast and decided to make the scrambled egg version since this can be, reportedly,  be frozen while the one made with a whole egg cannot because the egg white becomes rubbery. We served this as a weekend lunch with my wife's ribbon salad.


As you can see, the scrambled eggs are stuffed inside.


Ingredients:
Flavorings (#4)
4 strips of bacon, cooked crisp, drained on paper towel (#2) and chopped (#4).
½ cup shallots, chopped, sautéed in bacon fat using the same pan in which the bacon was cooked and excess dripping poured out (#3).
2 cups grated cheddar cheese (we used smoked gouda and English cheddar)

Scrambled eggs: 5 eggs plus cream, seasonings and butter (#1).

Dry Ingredients
2 1/2  cups All purpose flour
2 tsp baking powder
1/2 tsp baking soda

Wet Ingredients (#4)
1 cup buttermilk
1 tsp salt
10 tsp Greek yogurt (original recipe called for sour cream)
4 tbs  melted butter
2 eggs


Directions:

  1. Preheat oven to 180C/350F. 
  2. Grease muffin tins with with butter (original recipe calls for "Texas muffin tin to accommodate a whole raw egg in each muffin, we used a regular muffin tin and scrambled eggs crumbled into small pieces).
  3. Place Dry Ingredients in a bowl and mix to combine.
  4. Whisk Wet Ingredients in a separate bowl.
  5. Pour the Wet Ingredients into the Dry Ingredients until just combined. Do not over mix. 
  6. Fold in Flavorings, including cooked bacon (#5).
  7. Place 3 tbsp of the batter into 4 muffin tin. Bang the tin to flatten the batter.
  8. Make a divot in the batter and put in the scrambled egg (or crack in a raw egg if using a larger tin and so prefer). (#6)
  9. Divide the remaining batter between each hole to cover the egg. (#6) shows covered eggs in front and uncovered eggs in back.
  10. Brush the muffins with melted butter (optional), then bake for 20 minutes or until golden brown.
  11. Remove from oven and allow to rest for 5 minutes before turning out onto a cooling rack. (#7 and 8)
  12. Best served warm.


This was good and the smell when cooking was divine but the amount of work and fat content may make us think twice before making this one again. We could possibly achieve the same effect by just baking a biscuit, cutting it in half horizontally and adding scrambled egg. Nevertheless, the idea is very interesting and we will take this to work for breakfast next week.


Monday, June 20, 2016

Tuna tartar variation with Jalapeno pepper 鮪のなめろうハロペニョペッパー入り

This is "a variation on the theme of tuna namerou 鮪のなめろう".  I think two of our favorite ways  to enjoy the block of low-quality but readily available frozen yellowfin tuna are "namerou" and "negitoro" ネギトロ. I could have made this tuna namerou as before but the limitation of what I had in terms of the ingredients forced me to make some changes. I also borrowed some ideas from making "negitro".  I garnished it with thin slices of Jalapeno pepper hinting at  what this namerou contains.

These two servings are made from a half of the tuna block but it turned out to be  quite a lot (for us, at least). 


Making this is rather simple. This time, modifications included using Vidalia onion (in stead of scallion) and Jalapeno pepper.  I cut the tuna into small cubes, added finely chopped, deseeded, and deveined Jalapeno pepper (half of large one), finely chopped Vidalia onion (half of medium sized) and miso (I added a bit more later after I tasted it). In addition, I added the Spanish olive oil we really like. As I "hit" or "tataku" 叩くit with my heavy chef's knife, I gradually added the olive oil to incorporate (instead of using mayonnaise when making negitoro) until it became the pasty consistency and still some small chunks are remaining. I also add a little bit more olive oil on the top as I served this.


Although we started the evening with a Napa cab, we switched to cold sake (We happened to have "Dassai" 獺祭 daiginjo 大吟醸 from Yamaguchi 山口県 prefecture). We thought the addition of Jalapeno to this dish was a good one. It added a fresh pepper taste without adding any heat (since I removed the veins and seeds). Although quite subtle, the addition of olive oil also added to the  unctuous texture.  The amount of miso was just right and we could really taste nice miso flavors with nutty-saltiness. I had a few more dishes planned but at this point, we were quite full.