Sunday, July 24, 2022

Spareribs cooked in Instant pot, Chinese style 中華風豚のスペアリブ

 At the beginning of the COVID pandemic, many workers at the major meat packing plants came down sick and some of the plants had to shut down leading to concerns about an impending meat shortage. So, we stocked up on meat, buying and freezing, some cuts we usually don’t get but were available at the time. My wife (a.k.a. Freezer inventory control officer for the household) informed me that we have frozen pork spareribs from that period dated April 2020 which were not getting any younger. With no impending meat shortages in sight, it was with some relief that at least that part of the epidemic was over, we decided it was time to reduce our “Covid stockpile”. The ribs turned out to be quite meaty. Some pieces contained 2 ribs (country style?). In any case, we decided to cook these in the Instant Pot rather than in the oven. The way the ribs were cut, made it possible for me to easily divide the ribs into shorter pieces.  We decided to make two different kinds of spareribs: one with BBQ sauce and the other in Chinese style. This worked well due to the capacity of the Instant Pot. The latter recipe based on what we saw on YouTube, but I had to modify it, as usual, due to the lack of some ingredients. In any case, the picture below shows the final product. It was definitely “off-the-bone” tender and had a sweet and sour taste which was quite good.


Ingredients:
5 3-inch pork spareribs (#1), seasoned with onion powder, garlic powder, salt and black pepper
Vegetable oil for sautéing and searing the meat
(Herbs and aromatics, #2 below)
3 shallots finely minced
4 garlic gloves finely minced
1/2-inch ginger finely minced
one cinnamon stick
2 star anis
1/4 tsp red pepper flakes
(Seasoning liquid #3 below)
4 tbs soy sauce
2tbs brown sugar (I used mixture of dark molasses and sugar)
2tbs oyster sauce
2tbs red miso (instead of hoisin sauce* since I did not have one)
1 cup sake
2 tbs rice vinegar

*I usually have hoisin sauce, but I do not use it often. I must have thrown out the opened one which I kept in the fridge some time ago. Red miso appears to work in the recipe.

Directions:
Using  the “sauté” function of the Instant Pot and a small amount of oil (wait until the oil gets hot), I browned the ribs (#1) in all 4 sides (despite our belief that browning of the meat in a stew is not needed).
Take out the meat and add a bit more vegetable oil and bloom the spices (#2) add the aromatic vegetables (#2) and sauté for several minutes.
Add back the ribs and add the liquid seasonings (#3)
Add 1/2 cup water and pressure cook at high-pressure for 35 minutes with natural de-pressurizing.
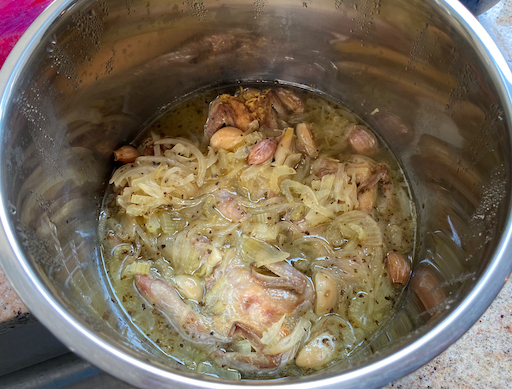
Remove the lid after de-pressurized and turn on “sauté” function and let it reduce for 20 minutes or until the sauce thickens.
We tasted a finished rib. (The result after the tasting shown in #4. As you can see it was so good not much was left for the picture after our “tasting”.) The meat easily came off the bone.


This is a good sparerib in oriental/Chinese style. The meat is very tender and falls off the bone easily. With sweet and salty flavor with anis and cinnamon flavors are very nice. I was afraid that the seasoning may become too salty, but it was just fine. Using the Instant Pot made the entire process easy.

Sunday, July 10, 2022

Cheesy Lebanon Bologna bites チーズとレバノンボロニャ ミニマッフィン(バイツ)

 Some time ago, my wife made some small muffin/bites with cheese and Lebanon Bologna which is the perfect small appetizer with wine. We kept them frozen and she served the last two. She wanted to make some more and we naturally assumed we could find the recipe in our blog but after some searching, we could not find it. So, we concluded we must not have posted it. We looked for the original recipe and had difficult time but finally my wife found the print-out of the recipe. The original recipe came from King Arthur Flour web site and called “Cheesy Pepperoni bites”. The original recipe calls for “Pizza flavor seasoning ” to make it taste like pepperoni pizza, I suppose. As usual she took the recipe as “advisory” and made some changes mostly based on what ingredients we had available. So she used Lebanon Bologna (she keeps some on hand frozen) instead of pepperoni, added chopped fresh chives and omitted the pizza seasoning (since we didn’t have it).

I ask my wife to take over.

Ingredients
1 1/2 cups (180g) AP flour
1/4 cup (28g) Cheddar Cheese Powder
1 1/2 teaspoons baking powder
1/2 teaspoon salt
4 tablespoons (57g) butter, cut in pats
1/2 cup (50g) Lebanon Bologna (or pepperoni, diced) (#1)
1 cup (113g) sharp cheddar cheese, shredded
1/4 cup (14g) sliced chives (or scallions) (#1)
3/4 cup (170g) milk


Directions:
Preheat the oven to 425°F. Lightly grease a bite-sized tart pan; a mini muffin pan, or a baking sheet. If using the pop-up tart pan, have an ungreased baking sheet available to use as a base.
In a medium-sized mixing bowl, combine the flour, cheese powder, baking powder, salt.
Add the butter, working it in until the mixture is crumbly.
Add the Lebanon bologna, shredded cheese, and scallions, mixing to distribute (#2 above).
Add the milk, mixing just until everything is evenly moistened.
Scoop the dough by the level tablespoonful (second smallest ice cream scoop we have)  into the mini-muffin pan. 
Place the mini muffin pan onto a baking sheet to catch any drips.
Bake the biscuits till they're a medium to deep golden brown, 10 to 14 minutes.
Remove the biscuits from the oven, and cool briefly on a rack. Use a table knife to pop the bottom of the pan off the biscuits

I am sure pepperoni works well in this but Lebanon Bologna’s smoky and sweet flavors also work well. It is very cheesy with cheddar flavor which may be due to the addition of  “Better cheddar cheese powder” from King Athur. 

Thursday, July 7, 2022

Basil cake bread バジルブレッド

My wife came up this as a variation on Mint cake. We have a forest of basil on the kitchen window sill and we are hard pressed to keep up with its production. After making a batch of mint cake my wife looked at the basil forest and thought, ‘if we can make a cake using mint how ‘bout a cake made with basil?’ This is how Basil cake came to be. 

The basil cake as shown below (sans icing) tastes very good and we were quite satisfied to eat most if it this way. 


Then my wife came up with the idea of making an icing of goat and cream cheese. This is very good too. (The icing is optional). 


Ingredients:
one 5.5 oz package of baby spinach cooked (about 1 cup when cooked and moisture drained off)
1 1/2 to 2 cups raw basil (packed)
3 eggs
1 tsp. vanilla
3/4 cup olive oil
2 cups flour
1 1/2 cups sugar
3 tsp. baking powder
1/2 tsp. salt


Icing (Optional)
4 oz of cream cheese
4 oz of goat cheese

Directions:
Sift together the flour, sugar, baking powder and salt in a bowl and then set aside. Put the spinach, basil, eggs, and vanilla, in a blender and puree. Then with the blender on a slow speed add the olive oil to make an emulsion. Add the vanilla and mix in. Add the spinach/mint mixture to the flour. Put into a greased 6" x 10" inch baking pan that has been lined with parchment paper (to made it easier to get the cake out of the pan when it is done.) Bake at 350 degrees for 25 to 30 minutes or until a tooth pick comes out clean.

For the icing. Put the two cheeses in a stand mixer bowel. Using a paddle, cream the two cheeses together. Split a piece of the basil cake in half and spread on the cheese blend

This was a very good innovative cake/bread. It has a nice moist texture. The main thing, however, is the rich robust flavor the basil brings to the show. It “sings” a note of almost meat-like umami savoriness which contrasts well with the overall slight sweetness of the cake. (I wondered if this is because when I taste basil it is generally in association with a meat rather than a sweet dish?) 

The cake tastes very good just “as-is” and after contentedly eating half of it that way my wife came up with the idea of making an icing out of cream cheese and goat cheese whipped together. A sweet icing such as the one used for mint cake would not have gone well with the robust flavor of the basil but this alternative really works because it is some what savory. Whatever, this is a great and surprising way to gain some constructive control over the basil forest. 

Monday, July 4, 2022

Apple tassie (mini pie) ミニアップルパイ

This is another version of the mini pie called “tassie”. This time my wife made it with apples so it is a mini apple pie. As with the “buttermilk mini pie”, this is a small dessert which is perfect for us. It is traditional apple and cinnamon flavors.


As usual, I will ask my wife to take over.


Ingredients: (makes 24)
For the crust
8 tablespoons (4 ounces/120 grams) unsalted butter, softened, but still cool to the touch
3 ounces (80 grams) cream cheese, softened, but still cool to the touch
1 cup plus 2 tablespoon (140 grams) all-purpose flour

For the topping:
1/2 cup (62.g) AP flour
6 Tbs. brown sugar (1/4 cup + 2 Tbs.)
1/4 tsp. salt
4 Tbs. (60 g) butter

For the filling:
12 oz. (300 g) apple grated
1/2 cup (110 g) brown sugar
2 Tbs. (30 g) melted butter
2 Tbs. cornstarch
1/2 tsp. cinnamon
1/2 tsp. ginger
1/4 tsp. nutmeg
1/4 tsp. salt

Directions:To make the crust: In the bowl of a stand mixer fitted with the paddle attachment beat together the butter and cream cheese until smooth, about 2 minutes. Stop the mixer and add the flour. On low speed, mix until no streaks remain and the dough starts to come together, about 1 minute. Scrape any stray dough from the sides of the bowl, gather into a ball and flatten into a smooth rectangle or disc. Cover tightly and refrigerate for 1 hour.

Cut the cold dough into 24 equal pieces, (I did this by dividing the total weight of the dough by 24 to get the gram weight of each piece. That way they would at least be somewhat equal). Using your fingers, evenly press each piece into the bottom and up the sides of the 24 mini muffin cups, making sure there are no holes. (This part was a bit tricky I found the best way was to make a small ball out of the dough, put it in the cup then using my thumb push down on the center of the ball forcing a depression in the center and the displaced dough up the sides of the cup.) There is enough butter in the recipe that the papers were not necessary. Refrigerate uncovered, while making the filling.

To make the topping:
Mix all the ingredients together using your fingers until they form small pea sized clumps. Set aside

To make the filling:
Grate the apple using the large holes of a grater. Add all the other ingredients mixing to distribute them evenly. Add about a tablespoon of the filling to each dough cup filling them about 3/4 full. (I used the smallest ice cream scoop to fill the cups about 3/4 full.) Top each cup with the topping.

Bake in a 350 degree oven for about 15 to 20 minutes until the crumble and crust are golden brown. Cool completely before removing from the pan.

These are wonderful little pies. Just the right amount for a sweet mouthful after a meal. Just perfect for us. The filling became almost like a thick jam which went very nicely with the crunch of the topping.

Friday, July 1, 2022

Cheese curd with Indian spices and yogurt

 This is from my wife’s new Indian cookbook called “Thali” by Maunika Gowardhan. Since my wife made cheese curd (paneer) to use up milk approaching its expiration date, she decide to try this recipe. It is called “Achari Paneer Tikka” but as usual, some of the ingredients were not available such as nigella seeds and particularly “gravy and oil” from “store-bought Indian green chili pickles”. We couldn’t even imagine how this should taste so we improvised using the pickling liquid from a jar of capers. We have no idea how this may have changed the end product but it clearly didn’t “hurt” it. Also we pan fried the paneer rather than grilling it. It came out rather nicely (below) with a brown crust.


Ingredients: (#1 below)
Paneer cut into inch size pieces (#2) below
2 garlic cloves roughly chopped
1 inch ginger root  roughly chopped
1 Tbs. coriander seeds
5 Tbs. greek yogurt
1 tsp. ground turmeric
1/2 tsp. garam masala
2 tsp. of pickling liquid from a jar of capers
salt to taste

Directions:
Blend the garlic and ginger in a small blender to make a smooth paste. (We used garlic and ginger paste from a tube.) Mix the garlic ginger and other spices into the greek yogurt (#3). Add the paneer cubes and coat them in the marinade (#4). Let them marinate for a least an hour. 

To cook: put a little oil in a frying pan. Add the paneer and marinade. Cook the pieces, turning them occasionally until the pieces get browned on the surface. 


This was a good variation on just plain paneer. The pieces had a nice crunchy, spicy crust and were soft inside. The flavor got even better over time with the pieces stored in the refridgerator. They toasted up well in the toaster oven and the crust got crispy again. 

Tuesday, June 28, 2022

Duck-fat potato Focaccia bread アヒルの脂肪入りジャガイモフォカッチャ

This focaccia bread is based on a recipe from a new cookbook called "A good day to bake".  We got the cookbook at the recommendation for my wife's sister. She read a good review of it in the New York Times The original recipe calls for goose fat. But we did not have goose fat. We did, however, have frozen duck fat (leftover from making duck confit). This is essentially a recipe for the standard focaccia bread but instead of olive oil, it uses duck (or goose) fat plus thinly sliced potatoes and rosemary as toppings. It came out nicely with the potato almost like potato chips (see picture below).


Ingredients:
450 g (3 and 1/4 cups) bread flour
7gram instant yeast
300 ml (1 1/4 cup of water )(or a bit more or less depending on the dough consistency)
1 tsp Kosher salt
80g duck fat or goose fat
1tsp sugar

Topping
3-4 baby red potato, eyes and skin removed and sliced thinly (I used a Japanese mandoline "Benriner")
A few sprigs of fresh rosemary, leaves removed and roughly chopped.
More duck fat to coat the potato slices.

Directions: (Since the amount of flour and water is the same as my focaccia bread, I used my usual procedure of the food processor fitted with a kneading blade instead of a stand mixer or by hand).

Add the flour, salt, sugar, yeast and duck fat in the food processor. Pulse it to roughly mix. Turn on at low speed and drizzle in the water until a dough ball forms above the kneading blade (the amount of the water may need to be adjusted). Let it stand for 5 minutes so that the moisture distributes evenly. Turn on the food processor to low speed and knead the dough for 1 minute. Take the dough out onto a floured board, and knead 5-7 minutes and make a tight ball. Put a small amount of olive oil (or duck fat) in a bowl, place the dough ball turning a few times to coat in the oil/fat. Cover the bowl with plastic wrap and let in rise until the volume doubles (1-2 hours) (I used a bread proofing box at 80 F). Place the dough on a 38x26cm(15x10 1/2 in) lightly oiled (I used olive oil but duck and goose fat can be used) baking pan, spread to fill the pan (may need 5-10 minutes rest to relax the dough). Cover it with a plastic wrap and let it rise for 45-60minutes (the baking pan did not fit into my proofing box, so I just put it on the top of the box without the lid. Preheat the oven to 375F (the original recipe calls for 435F but to me that is too hot since we do not like a hard crust).

Coat the dough surface with oil (I used olive oil) and make deep dimples using your fingers. Spread the duck fat coated potato slices and roughly chopped fresh rosemary leaves (see below).


Bake it 25-30 minutes or until the surface is brown/golden (see below picture). Take it out on the wire rack and let it cool.


Thinly sliced potato adds an interesting crunch texture almost like potato chips (but not quite that crispy). We could taste the rosemary but not the duck fat.


We had similar experience with the pan baked potato with duck fat. Somehow the duck fat does not add much of the flavor. I would rather use olive oil to reduce the amount of saturated fat. In any case, this is a good focaccia but I will make it without duck or goose fat next time.


Saturday, June 25, 2022

Quail braised in Greek style ギリシャ風ウズラ

My wife pointed out to me that we have some frozen quail. The last time we cooked quail, we baked them but we apparently did not blog the recipe. Our memory is that it was not bad but there were lots of small bones. This time we looked for other recipes and decide go with this “Greek style” recipe. The original recipe calls for braising the quail in wine, with aromatic vegetables then placing them in a Dutch oven and cooking them in an oven for 1 hour. Once they were cooked the recipe called for adding olives, artichoke hearts and capers once more warming it up again on the stove top. We did not see the point in using the oven and, instead, used our Instant pot (more about this later). The picture below shows the finished dish. The only way to eat this is using your fingers. (Necessary to separate the meat from all the minuscule bones).  It had lots of flavor ingredients (lemon, oregano, artichoke herts, black olive, caper and garlic) but the flavor was not as intense as we would have expected.


Ingredients
1/4 cup olive oil
4 to 8 quail
Salt
3 stalks celery, chopped
1 large yellow onion, sliced thin
1 head garlic, cloves peeled but whole
2 teaspoons dried oregano
1 cup white wine
3 Lemons, zest and juice
12 ounces marinated artichoke hearts
12 ounces pitted black olives
1 tablespoon capers (optional)
3 tablespoons chopped fresh parsley (we skipped this since we id not have it)
Black pepper to taste

Directions:
Using kitchen shears or a knife, cut out the backbones and ribs of the quail. The picure below is before I took of the ribs.


Salt the quail well and brown them in the oil in a frying pan, removing them to a bowl as they brown (I did brown the skin as indicated but I am not sure this is necessary).
Add the onion and celery and sauté until translucent, but not browned. 
Add the garlic cloves, the quail back into the pot along with any juices that have accumulated in the bowl.

Add the oregano and the wine. Mix well and let the wine boil for a minute.
Just barely cover the quails with water*, bring it to a simmer and add salt to taste. Add the lemon zest. 
Place the quail and vegetables in the instant pot, cut the parchment paper to fit the Instant Pot and place it as a paper lid. Pressure cook for 30 minutes with natural depressurizing. See below.


I could have continued with the instant pot but I placed the contents in a frying pan on a medium flame and added the artichoke hearts, black olives and capers and cooked for 5 minutes.
Add lemon juice and black pepper.

* This step of adding water probably works if the quail is cooked in the oven. But it does not work when cooking in the Instantpot. This is because it seems the liquid does not evaporate with pressure cooking the same as it would with oven cooking. After the quail was cooked the sauce was a bit watery. I removed the quail and put the sauce in a pan and reduced it to a gravy consistency. Next time I won’t add any water.

Later, my wife took the meat off the bone and simmered the leftovers for 30 minutes which reduced the sauce even more and further intensified the flavors. I added fresh artichoke hearts, olive and caper. This one tasted much better. Be careful of small bones, however.