Showing posts with label Appetizer. Show all posts

Monday, June 13, 2022

Puff pastry cheese swirls

My wife decided she had to use up some old frozen puff pastry which passed “best-by date” by a year. She found a recipe for broccoli based cheese swirls on the back of the puff pastry box and decided to make them. In addition, she found some pesto we had made and frozen sometime ago and decided to use the pesto to make a pesto based cheese swirl. Sort of killing two birds with one stone approach. 

As usual, I ask my wife to provide how-to.

Ingredients:
two sheets of frozen puff pastry

For the Broccoli based cheese swirl
The amounts of all the ingredients are arbitrary and are generally enough to cover the sheets.
Cooked broccoli finely chopped (spinach could also be used)
Scallion finely chopped
Various cheeses grated your choice (I used smoked gouda, mozzarella, and Parmesan.)

For the pesto based cheese swirl
Pesto to cover the sheet of puff pastry
Various cheeses grated. (I used Monterey Jack, Cheddar and Parmesan

Directions:
Thaw the sheets of puff pastry. Spread the ingredients to cover the sheets (#1 & 2 for the pesto) and (#3 for the broccoli) based. Roll up the sheets and slice into 1 inch thick pieces. Cook in a 400 F degree oven for 15 to 20 minutes until the swirls are golden brown.


These make a wonderful alternative to the traditional cheese tray. The pastry was light and crunchy. The cheese was nicely melted and toasted. The scallion flavor came through and really made the broccoli based rounds. While both cheese swirls were very good, in a contest of pesto versus broccoli I am completely biased in favor of pesto. (Actually it may not even be a contest). 

Friday, June 3, 2022

Crispy Cheese round カリカリチーズ

 One evening, my wife served this as a surprise. According to her, she saw a similar dish on YouTube WebSpoon. The original used slices of pepperoni. Since she did not have pepperoni, she used black olives. It was crispy and cheesy with parmesan flavor coming through. Good appetizer with wine. 


I will ask how she made it.

Ingredients:
Grated cheese of your choice and taste. The amounts are arbitrary. I used:
Smoked gouda
Cheddar
Monterey Jack
Mozzarella
Parmesan

Tomato sauce
Black olives (or pepperoni)

Directions:
Grate the cheeses and mix together. Make little mounds of the cheese mixture on a cookie sheet lined with parchment paper. (The parchment paper is important because it makes it possible to remove the cheese once its melted). Spoon the tomato sauce on the mounds and top with whatever you are using as the topping; olives or pepperoni. Heat in the oven at 390 degrees for 10 minutes. The cheese will melt and brown.

These are a quick flavorful cheese snack for appetizer.  They make a nice alternative to the traditional cheese plate. They are chewy, salty and go perfectly with red wine. 

Monday, March 7, 2022

Mini Lasagna cups ミニロザニアカップ

One day, all of a sudden, my wife asked if we still have wonton or gyoza skins. I said we had leftover gyoza skins frozen. I was not sure why she was asking this. I found out that she saw a recipe for “mini-lasagna cups” which uses wonton skins as the pasta. This is a good dish to make since I have been reheating my marinara sauce once a week for several weeks now to make it last. It was time to use it up. In any case, the picture below shows the mini-lasagna cups she made. They are perfect for a lunch or appetizer. The combination of flavors is very nice.


You can see the layers in the picture below; layers of ricotta cheese and spinach and alternating layers of marinara sauce (actually one time when I reheated it I put in chopped up cooked chicken) separated by the wonton skins. She ran out of the wonton skins and some of the lasagna cups ended up having a layer of Pennsylvania Dutch noodles instead. (Because she had those and hey, they are a form of pasta).
 

I am not sure where she saw this recipe but I’ll ask my wife to take over. (Note from wifey: I found the recipe in the Washington Post and as usual treated it as just advisory.)

Ingredients:
1 cup cooked spinach
1 cup ricotta cheese
1/2 tsp. salt
2 cups shredded cheese (I used a combination of dry mozzarella, smoked gouda and cheddar.)
1 1/2 cups husbandito’s marinara sauce
36 wonton skins (3 per 12 muffin cup tin)

Directions:
Mix the spinach, ricotta cheese and salt together. Put half of it in a separate bowl and stir in 1/2 of the shredded cheese. Fit a wonton skin into the bottom of a 12 cup muffin tin. (I used muffin papers to make it easier to get the finished product out but it turned out they weren’t necessary.) Evenly divide the ricotta spinach blend into each cup (#1). Fit another wonton skin on top. Spoon the marinara sauce on top (#2). Cover with another wonton skin. (Note that at this point I ran out of wonton skins so I used cooked pasta as shown in the left side of #3) Evenly divide the ricotta shredded cheese on top (#4). Top the mixture with remaining marinara sauce and grated cheese (#5). Cook in a 375 degree oven for 12 to 15 minutes until cheese on the top is melted, browned and bubbling (#6). 

These were a bit tedious to put together but they were worth it. They had all the satisfying complex flavor of a full lasagne with all the elegance of a single portion. They made a perfect lunch with a salad or a small bowl of soup. 

Tuesday, February 15, 2022

Edamame hummus 枝豆フムス

 We usually stock frozen edamame since it is a good and healthy snack. Recently, we found the frozen edamame from a frozen case at Tako Grill to be the best. My wife, found a recipe for "edamame hummus" in the cookbook called "Smoke and Pickles" by Edward Lee which we recently acquired. It used shelled edamame. My wife wanted to make this dish but she thought rather than using our stash of edamame which was in the shell and would have to be shelled it would be better to order some frozen edamame that was already out of the shell.  So we ordered some from our regular grocery store. When deciding what to order we could not figure out if the packages available were edamame shelled or in pods. We took a chance and ordered one anyway and it turned out they were in the pods so they had to be shelled anyway. My wife cooked up the package and shelled them making about 1 cup. She turned the prepared edamame over to me to make the hummus. I diverted from the original recipe a bit but the resulting dip/hummus was quite good.


Ingredients:
1 cup edamame, cooked and shelled
1/2 shallot, finely chopped
3 garlic cloves,
1/4 cup lemon juice
1/2 tbs soy sauce
1/4 cup smooth peanut butter (or tahini or Japanese nerigoma sesame paste)
1/2 tsp ground cumin
1tsp salt
1/2 cup water (I did not add the water but I added hot water -may be 1-2 tsp to the peanut butter mixutre to make it looser)
2 tbs olive oil (1/2 tbs to sautee shallot and the remaining mixed into the final product)

Directions:
Mix the peanut butter, soy sauce and hot water to make smooth loose paste.
Heat the olive oil and sauté the shallot and then garlic, add the peanut butter mixture, the edamame and heat up (below).
Using a beaker and emersion blender, process the above mixture. I added additional olive oil to make the mixture a bit smoother. Add lemon juice and cumin. Taste and add a small amount of salt to taste.


This is a unique dip/hummus. The edamame flavor really comes through. Substituting, peanut butter for the tahini (we did this before) worked well. We really like this as a hummus variation. 


Monday, January 24, 2022

Mayonaisse biscuit マヨネーズビスケット

This is another one of my wife's baking projects. When she made the mayonaisse/miso/peanut butter cookies, using the recipe in the freebee cookie cookbook we got from the grocery store, she saw an advertisement for Hellmann’s mayo beside the recipe. It stated “great cakes take Hellman’s”. She knew this to be true because many years ago a friend gave her a recipe for chocolate mayonnaise cake and it was a great hit. Further down the page she saw the following: “for this recipe and many more, visit Hellman’s.com. Intrigued she logged on and found a goldmine of recipes. This one for mayonnaise biscuits caught her eye particularly after making two versions of butter milk biscuits. So this was a “must bake”.


As usual she took the original recipe as advisory and made her own alterations


Ingredients:
2 cups all-purpose flour
1 Tbs. baking powder
1 Tbs. Sugar
1/2 tsp. salt
1/2 cup mayonnaise
3/4 cup milk (I used butter milk)
1 cup cheddar cheese grated

Other optional additions:
1/2 tsp. Dried basil
1/2 tsp. Dried dill weed
2 Tbs. Finely chopped onion
1/3 cup pepper jack cheese

Directions:
Preheat oven to 450°.
Combine flour, baking powder and salt in medium bowl. In another bowl combine the mayonnaise and buttermilk (#1). Shred the cheese (#2). Stir the mayo/buttermilk mixture and shredded cheese into the dry ingredients. On a baking sheet, lined with parchment paper, drop the batter by 1/4 cupfuls (#3). (I used a medium size ice cream scoop) .
Bake 10 minutes or until slightly golden (#4).


These are amazing biscuits. They have an outside “crust” that almost has the consistency of a very well made very thin pie crust. It gives the biscuit a very pleasing crunch. The inside is very soft and moist. It took a little while for the cheddar cheese flavor to come through but when it did it added another pleasing dimension of flavor. These are so easy to make they could be done at the drop-of-a hat or at the drop-of-an-ice-cream-scoop full. 

Friday, January 22, 2021

Olive and black pepper savory cookies

This is part of my wife's savory cookies project.  This is based on the recipe my wife found  in a blog called "Raspberry Cupcake". The original recipe calls for Kalamata olives but we did not have any so she used pimento stuffed green olive instead. (Hey! They were for my Martini!).


This is a savory shortbread and perfect with a glass of wine.


As usual, I ask my wife to fill in the rest.


Ingredients:
50 gm olives
1 1/4 cup (150 gm) flour
1/4 tsp. baking soda
1/2 tsp salt
1 tsp black pepper (or to taste)
1 stick (140 gm) butter
2 Tbs. sugar
1 large egg yolk

Directions:
Measure the dry ingredients (flour, soda, salt, pepper) in a bowl and set aside. Cream the butter, sugar and egg yolk until fully incorporated and fluffy. Add the dry ingredients to the the butter egg mixture. Fold in the olives. Roll the mixture into “logs” and wrap in plastic wrap. Refrigerate the dough for at least an hour. (Dough can be refrigerated for up to week or frozen for up to a month.) To cook: preheat the oven to 350 F, slice the logs into 1/4 inch pieces and put them on a parchment covered cookie sheet. Bake for 18 to 20 minutes or until golden.


These cookies are spicy (from the pepper) with a  slight sweet overtone (from the sugar) and bright bursts of saltiness (from the olives). They make a nice addition to an appetizer tray served with other cheeses, prosciutto and a glass of red wine. 

Friday, December 11, 2020

Basil and pine nuts quick bread バジルと松の実の速成パン

 My wife made this quick bread as an effort to use more of the basil we are growing in our windowsill herb garden. In addition to the basil, it has pine nuts and parmesan cheese. So it is a kind-of disaggregated “pesto” bread.  This is a savory quick bread which is good for breakfast or even as an hors d’oeuvre with wine.


The cut surface shows basil and pine nuts.


Ingredients: (three small loaves)
2 cups AP flour
1 1/2 tsp baking powder<
1/2 tsp baking soda
1 tsp salt
1 cup buttermilk
1 large egg
1/4 cup olive oil
1/2 cup pine nuts, toasted
1/2 cup grated Parmesan cheese
3 tbs minced fresh basil (or more to taste)

Directions:
Preheat oven to 350F.
Butter the three small loaf pans (5x3 inch).
In a large bowl, whisk together the flour, baking powder, baking soda, and salt. Stir in the cheese and minced basil.
In a medium bowl, whisk together the butter milk, egg and olive oil.
Pour the liquid ingredients to the dry ingredients, stir together until just combined.
Fold in the pine nuts.
Bake 30-35 minutes at 350F
Let it cool down for 15 minutes and remove the loaves

This bread is very flavorful. It is really good lightly toasted with melted butter. Since it is late in the season, the basil taste was a bit muted but still present. 

Tuesday, December 8, 2020

Lemon basil shortbread cookie レモンバジルクッキー

This is a continuation of my wife’s attempt to use more of the basil we are growing in our window sill herb garden. This is a savory cookie/shortbread which goes very well with red wine. My wife found the original recipe on line somewhere.


We had this with DAOU Vineyards Pessimist Red Blend 2018 which is Petit syrah based. Our recent favorite/house wine.


Ingredients: (18 cookies)
1 cup AP flour
1/2 cup sugar
1/2 cup unsalted butter, cold, cut into pieces
2 tbs sliced basil (or more to taste)
grated zest from one lemon
1 tbs lemon juice (or more to taste)
1/4 tsp kosher salt

Directions:
Preheat oven to 375F
Line cookie sheet with parchment paper
Add all ingredients to the food processor and mix (#1)
Using a small ice cream scoop, portion out the dough (#2)
Using the palm (or the lightly floured bottom of a glass) , press the ball into flat disks (#3)
Bake 7-8 minutes at 375F (#4)
Let cool on a cooling rack


The lemon flavors come through strongly contrasts nicely with the sweetness and is pleasantly refreshing. After one day in the refrigerator, the basil flavor began to surface more strongly. Somehow this cookie went well with the red wine we were having. My wife has made quite a good variety of savory cookies. This is another good one.

Wednesday, April 29, 2020

Puff pastry loaf with roast beef, cheese and potato salad ローストビーフ、チーズ、ポテトサラダローフ

My wife invented this loaf which is a variation of egg and smoked salmon in puff pastry. She already made one variation using smoked salmon, cheese and mashed potato. This time, we were in cleaning-up-leftovers mode. Although we rarely eat beef, one weekend we made a beef roast on the Weber grill with hot smoke. We used thin slices of the roast beef for sandwiches during the week but still had some left over. In addition, I had made potato salad a few weeks ago and a good amount was still left.  (The potato salad is made with rice vinegar and strained yogurt i.e. Greek yogurt in addition to the usual mayonnaise, and these two ingredients act as a kind of preservative. As a result the potato salad lasts a long time but even so there is a limit so we had to use it up). My wife came to the rescue with this dish using roast beef, potato salad and her variation of cheese stuffing. This is like a "pasty", all inclusive--starch, veggies and proteins from the meat and cheese.


Ingredients:
sheet of puff pastry thawed

for cheese filling:
4 oz. feta cheese
3 oz smoked mozzarella cheese
2 oz. Monterey jack
5 oz. ricotta cheese
2 large eggs
sprinkle of red pepper flakes to taste

Other ingredients
roast beef cut into thin slices.
cup of potato salad (or amount needed to top the cheese filling)

Directions:
Preheat oven to 425 degrees. Crumble the feta cheese into small pieces. Grate the mozzarella and Monterey jack cheeses. Mix the crumbled and grated cheeses with the ricotta, egg and red pepper flakes. Roll out the thawed puff pastry on parchment paper. On half of the pastry dough, add layers of thinly sliced roast beef, the cheese mixture and potato salad (shown below).


Fold the other half of the pastry dough over the filling and seal the edges by painting on a mixture of water and flour and pressing the edges using the tines of a fork.  Dock or prick the top of the dough with the fork. (This lets steam escape as the loaf cooks). With the loaf still on the parchment paper place it on a rack and put the rack on a cookie sheet. (This allows the bottom to cook thoroughly). Cook for 25 to 30 minutes or until the pastry is golden brown.


Again, you can't go wrong with this combination of pastry, meat, cheese and potatoes--its a meal in itself. The potato salad was an interesting addition. It added a slight vinegar tang and the mayonnaise yogurt blended into the cheese mixture adding a creaminess. The onions and carrots in the potato salad were a nice dimension that was not present in previous versions of this loaf. The smokiness of the barbecued beef also added its "voice" nicely. (Although the roast beef was very nice, we decided that maybe we preferred the saltiness of the smoked salmon used in previous versions a bit better). Slices of the loaf heat up well in the toaster oven. This is nice to have after work with a nice glass of red wine of course.

Friday, March 13, 2020

Cheesy spinach squares

My wife is into making small cheesy appetizers--particularly green cheesy appetizers. This recipe fulfilled both conditions and she had to make it.


The cheese squares were fairly easy to make but despite all the cheese and other ingredients that went into it, we felt, in general, it was pretty bland. The spinach gave it a green color but didn't add much flavor. To jazz it up a bit we tried it with my tomato sauce which was made from skinned Campari tomatoes. The addition of the tomato sauce added more flavor and really helped.


My wife was on the look-out for other ways she could improve the cheese squares and one evening when she was frying up some scrapple for an appetizer she decide she would fry up the cheese squares the same way since she had peanut oil in the pan and it was hot  .


She dredged the squares in flour and fried them on all sides until they had a nice brown crust as shown in the picture below. This was an improvement. The crust had a nice crunchy toasted flavor and the inside was soft with a slight cheesy flavor.  It was okay but not outstanding.


Ingredients (#1 in the composite picture):
1 cup flour
1 tsp salt
1 tsp baking powder
1 cup milk
1 and 1/2 cups grated cheddar cheese
2 eggs, lightly beaten
4 tbs butter, melted
1 cup chopped fresh spinach (original recipe calls or 1package or 9oz frozen chopped spinach).


Directions:
Mix all the ingredients (#1 in composite picture) together (#2 in composite picture) . Place the mixture in a greased 9 inch square pan lined with parchment paper and greased again. (This makes it easier to get out after it is done.) (#3 in composite picture)  Bake in a 350 degree oven for 30 to 35 minutes. Loosen the edges from the sides of the pan as soon as it comes out of the oven (#4 in composite picture) . Let it cool slightly before cutting.

This wasn't bad and certainly went together quickly. It was quite edible but not exciting. If we make it again we will have to make some significant alterations.

Monday, February 3, 2020

Smoked salmon, potato, cheese loaf and cheese bites スモークサーモン、ポテト、チーズローフ

We had some leftover cooked spinach, mashed potatoes and a small amount of smoked salmon so my wife came up with this. It is a combination of several recipes; "egg and smoked salmon in puff pastry", "spinach cheese loaf"and mashed potatoes with cream cheese and chives. The egg and smoked salmon recipe inspired the use of smoked salmon. The spinach cheese loaf was the basis for the center cheese and spinach layer. The mashed potato layer was a variation of gnocchi.


The layers are shown here from the bottom, the smoked salmon, cheeses mixture and mashed potato encased in puff pastry..


Since the cheese filling was too much for the loaf, my wife put the excess into small muffin tins with a small piece of smoked salmon on the  bottom to make little cheese bites (shown below).  They came out very nicely.


Without pastry shell and potato, these by themselves were quite a good small bite.


Ingredients:
1 frozen puff pastry sheet, thawed
1 cup mashed potato with cream cheese with chives
Smoked salmon, enough to cover 1/2 of the puff pastry (or whatever amount available)
6 oz. double Gloucester cheese grated (original recipe calls for Mozzarella, we did not have it).
block of feta cheese, crumbled (or to taste).
10 oz. ricotta cheese
One bag spinach (or whatever available) cooked without adding any liquid, excess moisture squeezed and finely chopped.
red pepper flakes (optional)
3 eggs (2 for cheese layer 1 for potato layer)

Directions:
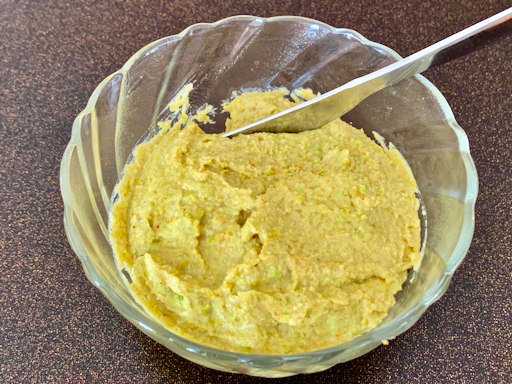
On a piece of parchment paper roll out the puff pastry. Combine the cheeses and the spinach (#1). Stir in the 2 eggs (#2). Put the mashed potatoes in a bowl. Stir in the egg. Add enough flour so the spinach has the consistency of gnocchi i.e. has a firm consistency and is not runny.

Assembly: Lay the smoked salmon on 1/2 of the puff pastry. Spread the cheese and spinach layer on top (#4). Spread the potato layer on top of the cheese (#5). Fold the other half of puff pastry over the half with the cheese mixture. Seal the edges with some water and press with a fork. Dock the pastry with the tines of the fork (#6). Transfer the puff pastry on the parchment paper to a baking sheet. Bake in a 425 degree oven for 30 to 35 minutes or until the pastry is golden brown.


Directions for the cheese bites
Since there was too much cheese stuffing to go into the puff pastry my wife used it to make little cheese bites. She greased a tin for mini muffins. Put a small piece of salmon in the bottom of the cup and scooped in enough filling to fill the tin. She baked these with the puff pastry loaf at 425 for about 18 minutes. When they came out of the oven the cheese stuck to the side of the tin. She used a spatula to loosen the edges while the cheese was still hot. Luckily because of the salmon on the bottom the little bites just fell out when the tin was inverted and tapped gently on the counter top.

This was a very good variation on the "cheese-in-puff-pastry" theme. The salmon gave a salty smokiness. The ricotta spinach feta combo is always winning. The layer of gnocchi like potato on the top was a lovely surprise. The cream cheese chive flavor really came through and smooth texture of the potatoes was a nice contrast to the somewhat firmer texture of the cheese layer. The little cheese bites were also very good. Again the salmon added it characteristic salty smokiness, the cheese layer was very good but it was different from the cheese layer in the puff pastry loaf made with the same ingredients. The outside of the cheese had gotten toasted in the mini muffin tins so it was somewhat crunchy and the flavor of the toasted portion was somewhat deeper than the un-toasted portion. It made a very satisfying single mouthful. These would definitely be worth making in their own right.

Sunday, December 29, 2019

Grilled feta, olive and grapes

My wife found this recipe in the food section of the Washington Post. It's a rather simple dish but we really like it.  It makes a good appetizer and goes well with wine. We served it with mini-baguette.


The original recipe suggested cooking this in a cast iron skillet. We thought that might be too big for the quantity we wanted to make so we cooked this is a small anodized cast aluminum pan (this was a Japanese style pot (mini version) with a wooded lid for an individual "nabe" dish) which worked perfectly.


The cubes of feta cheese get brown and crispy on the outside but soft inside. My wife thought it is also good just to enjoy without bread. The combination of spices (fennel seeds, red pepper flakes and ground black pepper), salty olives and sweet grapes all worked well.


Ingredients:

1 tablespoon extra-virgin olive oil, plus more as needed
1/2 cup (2 3/4 ounces) seedless red grapes, (we cut the amount in half).
1/3 cup (1 1/2 ounces) pitted and halved Kalamata olives. (We used a combination of the different olives we had on hand. We cut some of the large ones in half.)
1/2 teaspoon fennel seeds, crushed
1/2 teaspoon crushed red pepper flakes
Freshly ground black pepper
8 to 10 ounces feta cheese (in a block)
Good, crusty bread slices, for serving

Directions:
Preheat the oven to 425 degrees with the rack in the middle (we used our toaster oven on convection mode on the bottom rack). Oil a small, oven-proof casserole dish or cast-iron pan. Add the grapes, olives, 1 tablespoon olive oil, fennel seeds, red pepper flakes and a few grinds of black pepper, and stir to combine.
Break the block of feta up into irregular pieces, then nestle them among the grapes and olives. Drizzle with more olive oil, then bake, 20 to 25 minutes, until the grapes are softened and the feta is browned in spots.

This is a really good dish. We had only a small portion the night we made it and reheated it later in the microwave which worked well. My wife kept reminding me as I made the dish, "a little bit of fennel goes a long way". Don't over do it' the fennel actually made the dish. The combination of fennel, olives and grapes were made for each other and the total went remarkably well with red wine. Definitely this will join to our line up of "regular" dishes.

Tuesday, September 25, 2018

Ricotta cheese tart bitesリコッタチーズのタルト

For some reason, my wife wanted to try this recipe from "La Brea pastry cookbook". It is called "tart" but no tart shell is involved just the cheesy filling. In any case, my wife thought this is a good snack go with wine. She made it one-bite-small.


The main flavor is sage. We used fresh sage leaves from our herb garden.


Ingredients:
3 cups Ricotta cheese
2 cups Parmesan cheese
2 large large eggs
1/2 tsp. salt
7 sage leaves

Directions:
In a large bowl combine all the ingredients #1,#2,#3. Scoop the cheese mixture into small muffin pan. (grease the pan even if it is "non-stick") #4. Bake in 375 degree oven for about 18-20 minutes or until lightly browned and firm to the touch #5 and #6.


It was difficult to remove the tarts despite my wife's use of non-stick muffin tins. It required to use a small spatula to coax out the tarts. Next time, it may be advisable to grease the tin. In any case, this was nice cheesy mini tart (or quiche) with fresh sage flavor. It does indeed go well with wine.

Friday, September 25, 2015

Pumpkin cheese spread パンプキンチーズスプレッド

This is another installment in the pumpkin puree recipe series. This was originally a cheese ball recipe but we did not make it to balls and just used it as a cheese spread. This is perfect with sipping wine.


Ingredients:
8 ounces goat cheese,
2 cups grated manchego,
3/4 cup pumpkin
1/2 teaspoon each smoked paprika and kosher salt.


The original recipe said "pulse" the goat cheese but that does not work--the goat cheese is too thick to "pulse" successfully. (sometimes you have to wonder if the folks who publish the recipes have actually made them.) After the food blender stalled out I removed the half blended ingredients and mixed them by hand with a spatula (you can see the white specks of unblended goat cheese in the picture). My suggestion is to cream the goat cheese in a mixer then add the other ingredients. It would probably also be useful to have all the ingredients at room temperature

In any case, the mixture of manchego and fresh goat cheese gives very nice texture and taste. The addition of smoked paprika and pumpkin puree adds an interesting and complex flavor with a slight sweetness. We like this as a cheese spread and as I said before it tastes great with red wine.