Showing posts with label Pork. Show all posts

Sunday, August 15, 2021

Stuffed mini waffle bowls

 After making mini-waffle bowls, my wife suggested several ideas for filling them. For desert, ice cream and fruit appear standard. She wanted something for breakfast. Since we usually eat a bowl of home-made yogurt, she suggested filling the waffle bowls with the yogurt and blueberries. This was good but kind of difficult to eat the waffle and yogurt together. If you just eat the fruit and yogurt and then eat the waffle bowl, the waffle tends to get a bit soggy. I tried to chomp on the waffle and yogurt together but it was a bit messy. Using a knife and folk, cutting a wedge sort of works. But in the end, I’d rather eat the yogurt and waffle separately.


The next morning, my wife suggested filling the waffle bowls with her favorite sweet Lebanon bologna and scrambled eggs. This sort of worked using a knife and folk to cut a wedge and then eating the waffle, sausage and egg together.


It seems the major role of these waffle bowls is in the presentation. They had a nice crisp cookie taste but its a little awkward eating bowl and contents together. Nonetheless, never daunted, I suggested stuffing the waffle bowl with ice cream then freezing the entire thing. I am not sure if my wife bought the idea. We have to see.

Wednesday, June 30, 2021

Hot and sour pork インドスタイルのホットサワー豚肉カレー

This is continuation of what to do with the  bone-in pork roast we have been getting. The roast is rather large and is either shoulder or thigh. After removing the bone(s), I make one large roast for cooking in the Weber grill and a smaller roast for Ni-buta 煮豚. The remaining odds and ends, I cut into small chunks for other recipes, mostly stewed dishes. We found out that once we cook the meat in chicken broth the meat tends to be much more tender and it is much easier to convert into other stewed dishes without long cooking. So, I cooked the pork in chicken broth and kept it in the refrigerator. The meat exuded collagen and the liquid congealed which is also used in the subsequent dish adding good mouth feel and flavors. In addition, if we do not have a chance to make the meat into another dish, we can reheat the meat in the broth. So this pork was 2 weeks old and re-heated once. I asked my wife to make this curry dish. She made it once before based on a recipe from her favorite Indian cookbook. We liked it but somehow we never blogged it.

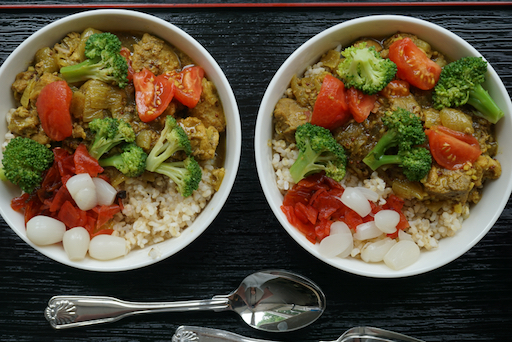
We served the curry for lunch one weekend as shown in the first picture. We served it on previously made brown rice and added skinned Campari tomatoes, cooked broccoli and Japanese pickles; rakyo ラッキョウ, fukusinzuke 福神漬け.


Ingredients:
1 tsp ground cumen
1/8 tsp cayenne
1 tsp. gound cardamon
1 tsp. cinnamon
1 1/2 tsp. black mustard seed
1 tsp. Ground fenugeek seed
1 tsp. salt
1 Tbs. brown sugar
1/3 cup sushi vinegar (recipe calls for white wine vinegar)
2 onions peeled and roughly minced
1 inch cube ginger (finely chopped)
2 cloves garlic (finely chopped)
1 Tbs. ground coriander
1/2 tsp ground tumeric
1 lb. previously simmered pork butt/shoulder trimmings

The second picture shows all the spices lined up. My wife does this to keep track of what spices she has mis en place and as you can see there are quite a few. 


Directions:
Pour the spices from cumin through brown sugar into the vinegar and stir to make a slurry then set aside. Saute the onions in a sauce pan until slightly carmelized. Add the garlic and ginger and cook until fragrant. Add the spice slurry to the onions and stir until the spices bloom (smell fragrant). Then add the coriander and turmeric stirring until they bloom too. Then add the precooked pork and mix to cover with the sauce. If there is not enough liquid add water or chicken broth. Cover and simmer for 20 minutes. The third picture shows the curry simmering in the pan. 


I think of this as not-quite a curry. It is spicy in terms of the layers of flavor of the many spice used but not particularly hot (depending on the amount of cayenne pepper). It does have a sweet/ sour undertone from the combination of the sautéed onions and vinegar which adds a brightness to the overall flavor. This is a good dish with rice or even bread.

Monday, March 29, 2021

Pork with chick-pea (and navy beans) curry 豚肉と雛豆のカレー

This is another curry/stew made from the trimmings of skin-on and bone-in large pork butt roast we have been getting. As usual, after removing the skin and bones, I made two roasts; one for barbecue in the Weber and another for simmered pork. The remaining meat was cut up for stew. I simmered the stew meat ahead of time in chicken broth and kept it in the refrigerator with the broth. I then commissioned my wife to make something from it. She consulted her trusty Indian Cookbook by Madhur Jaffrey. The original recipe was supposedly pork chops with chickpeas. But as indicated above the pork stew meat was substituted for the pork chop. In addition by mistake, my wife opened a can of navy beans as well as a can of chickpeas. So navy beans were substituted for some of the chickpeas. (Note from Wifey: Both cans showed white beans on the label and I was concentrating on the inventory control of using the cans with the oldest expiration dates. I didn’t notice the cans were for different beans until I opened them) So as usual the ordinal recipe was basically “advisory”. This is not spicy hot but lots of spices went in. Like other curry, I served this over rice, with blanched broccoli and Japanese curry accompaniments, rakyo (white items in the picture below) and fukishinzuke (red one).


Since we precooked the pork in the broth, it came out extra tender. The combination of navy beans and chickpeas worked well.


As usual, I ask my wife to provide the recipe.

Ingredients
1 can of navy beans
1 can of chickpeas
3 garlic cloves
1 1/2 inch cube of ginger sliced
3 Tbs. chicken stock
1/4 tsp. cardamom
4 bay leaves
1 inch cinnamon stick
3 medium onions peeled and coarsely chopped
1 Tbs. ground cumin
1 Tbs. ground coriander
1 Tsp. ground turmeric
3 medium tomatoes peeled
3 parsnips peeled and cut into pennies (original recipe called for potatoes)
1 Tbs. salt
1 cup of mushrooms sliced
1/2 tsp. cayenne pepper or to taste 

Directions:
Put the ginger, garlic, and chicken stock in a food processor with a blade. Pulse until it forms a paste.
Put several Tbs. oil in a frying pan. Add the cardamom, bay leaves and cinnamon. Heat until the spices bloom and become fragrant. Add the onions and stir until they are partially caramelized. Add the ginger garlic paste and stir until the garlic smells fragrant and the mixture has been incorporated with the onions. add the cumin, coriander, and turmeric stirring until they become fragrant. Add the parsnips (or potato) and tomato. Mash the tomato. Cook gently until the parsnips become soft. Add the beans and the stewed pork with the liquid in which it was cooked. Cook for 20 minutes until all the flavors meld. If the curry looks too soupy reduce it on low heat until the desired consistency is reached.

This was a pretty good curry. The mixture of chickpeas and navy beans worked out well. They absorb the flavor of the spices and add a creaminess to the curry sauce. The pork was deliciously tender. The parsnips added their characteristic sweetness. Although the curry was not hot (my wife forgot to add the cayenne pepper) it had multidimensional layers of flavor. A great way to eat pork trimmings.

Monday, March 1, 2021

Smothered pork スマザードポーク

Again we ended up with a bone-in cut of pork. This time, it appeared to be a "butt roast" instead of "shoulder roast" judging from the bone structure. In any case, I did more home butchering by removing the bones. I made one larger and one smaller roast (the large roast went for barbecue in our Weber grill and the small one for "nibuta" 煮豚 simmered pork). The prepared remaining smaller portions of meat around the bones were destined for a type of stew. I again tasked my wife to make something with the stew pork meat. She came up with this "smothered pork" dish based on a recipe from her favorite Indian cookbook by Madhur Jaffrey "Quick and Easy Indian Cooking". (She made alterations to the recipe based on various ingredients she had on hand). This was a lunch one weekend. We used frozen rice and added  snow peas and skinned Campari tomatoes. We defrosted the rice then microwaved the rice and smothered pork and vegetables in a bowl.


I also added pickled  Japanese “rakkyo” ラッキョウ small cocktail onion and Fukushinzuke 福神漬け.


This is really good. Lots of spices but no cayenne pepper but it had slow pleasant heat probably coming from fresh ginger. I will ask my wife to take over.


Ingredients:
About 1lb pork shoulder, cut into bit-size chunks
2 Tbs. catsup (or how every much you may want for taste). (This was a substitute for 2 Tbs. tomato paste)
2 onions roughly chopped
1 inch long piece of ginger finely chopped
3 garlic cloves finely chopped
1/2 tsp. turmeric
4 tsp. garam masala
2 tsp. cumin
3/4 tsp salt
4 compari tomatoes peeled

Directions:
For the pork:
The last time I made curry with this type of pork it was extremely tough. I ended up removing the pork from the curry and simmering it for 2 hours covered in chicken stock until it became very tender. I then added it back into the curry. This time I did the same thing but cooked the stew pork in the chicken stock before I made the curry sauce.

For the curry sauce:
Caramelize the catsup by stirring it in a frying pan until it turns brown in color. Add some peanut oil and the onions. Cook the onions until wilted. Add the garlic and cook until fragrant then add the ginger. Add the remaining spices and "bloom" them until they become fragrant. Then add the pork as well as the chicken stock in which it was simmered. Finally add the fresh tomatoes. Cover and cook for about 30 minutes to let all the flavors meld.

This was a very good curry. Plenty of flavor but just a pleasant mild heat that must have come from the ginger. The caramelized catsup added a slight hint of barbeque that was a nice addition. The pork was very tender and had absorbed the complex flavors from the curry sauce.

Tuesday, February 9, 2021

Pork curry with almond sauce アーモンドソースポークカレー

 We like to roast pork in our Weber but because of Covid, the cuts we usually use for roasting are not always available and we have had to make do with whatever we can get. Case-in-point, we recently got a bone-in shoulder pork roast. This cut was very large. In addition, it contained a portion of the scapula bone which I removed requiring some further “at home” butchery to get the various sizes and portions that we wanted. In this case I removed the bone and divided the roast into three segments. The first segment was the meat around where the bone was removed. I cut it into small chunks for stew or curry. The remaining two segments consisted of a smaller portion of roast which I used for “ni-buta” 煮豚 or simmered pork and a larger portion of roast which I barbecued in our Weber. 

I commissioned my wife to come up with a dish using the small chunks and suggested a curry. This time, my wife wanted to make a new curry she had not tried before. She chose one from Madhur Jaffrey’s cookbook “Indian Cooking. In addition to using quite a few spices (#1 & #2 below), it also includes pulverized almonds which is something we have not used before. The resulting curry is shown in the picture below. It was a lunch one day. I served the curry over rice with tomato (Skinned Campari tomato), blanched sugar snaps and broccoli which I warmed up in the curry while the curry was being heated.


I also served Japanese pickles which traditionally accompany Japanese curry. The red on the left is “Fukushin-zuke” 福神漬け (people from Hokkaido call it “Fukushin-zuke”a but the rest of Japan will call in “Fukujin-zuke” (a mixture of daikon, lotus root, egg plant and cucumber, soy sauce flavored) and the white objects on the right are “rakkyo” らっきょう (pickled small onions).


Ingredients:
2 garlic cloves
1 inch sized ginger cube coarsely chopped
5 Tbs. slivered almonds, roasted
3/4 to 1 cup of chicken stock
2 lbs. of pork shoulder cubes
1/2 tsp. cardamom
1 tsp. cinnamon
1/4 tsp. cloves
2 medium onions finely chopped
1 tsp. ground coriander
2 tsp. ground cumin
1/4 tsp. cayenne pepper
1 1/4 tsp. salt
1/4 tsp. garam masala

Directions:
Put the garlic, ginger, almonds and 6 Tbs. chicken stock in a blender (we used an immersion blender) and blend until you have a paste (#3).

Add several tablespoons of peanut oil into wide frying pan. Add the cardamom, cinnamon and cloves and cook until they “bloom” becoming fragrant. Put in the onions and cook until lightly browned (#4). Put in the almond paste as well as the coriander, cumin and cayenne pepper (#5). Stir until it browns slightly. Add the meat the salt as well the chicken stock (#6). Cover and cook on simmer for several hours until the meat gets tender. Add the garam masala before serving.

Just a Note: The meat did not get tender in the sauce even after several hours so I removed it and put it in a sauce pan covering it with chicken stock. I simmered it that way for about an hour. It got nicely tender and made additional sauce in the chicken stock. I added the meat back and sauce into the curry and it was much better.


This was very good. We've never had anything like this before. It had plenty of depth of flavor but was not too (spicy) hot. The almonds gave it a creamy texture and added a note of nuttiness that was very nice.  The additional veggies I put in as it was being heated up added some bright notes of freshness as well as additional flavors. It made a great lunch.

Sunday, October 4, 2020

Eggplant gyoza 茄子餃子

Last weekend I made gyoza 餃子. As usual, I used the trimmings from pork tenderloin. I made up a batch using wonton skins but I had more gyoza stuffing leftover. Then, I saw a Japanese recipe using thin slices of eggplant instead of Wonton or Gyoza skin. Since I happened to have a Japanese eggplant (one we can get here is a small diameter elongated eggplant. I only rarely see the other varieties of eggplant available in Japan such as "Kamo-nasu" 賀茂茄子 or "Mizu-nasu" 水茄子).  So, I made gyoza with this eggplant. A small amount of gyoza stuffing still remained after I made this dish so I stuffed a fresh shiitake mushroom to finish it up. I served this with some veggies as a starter one evening.


Since only enough leftover stuffing for one shiitake mushroom, I served three eggplant gyoza and half each of the shiitake gyoza. The veggies are sliced cucumber dressed in sushi vinegar 胡瓜の酢の物, skinned Campari tomato with sesame dressing トマトの胡麻和え, braised crunchy cauliflower モンパルナスのカリフラワー and sugar snap in salt broth スナップ豌豆の塩びたし.


Ingredients:
Gyoza stuffing is my usual. Hand chopped pork tenderloins trimmings, boiled and chopped cabbage, chopped scallions, garlic, ginger, seasoned with sesame oil, salt, and soy sauce. As I mentioned this was the leftovers after making regular gyoza.
One Japanese eggplant (one with small diameter and very long),
Potato starch (Katakuri-ko 片栗粉).
Peanut oils and sesame oil for frying

Directions:
Skin the eggplant using a peeler on both sides lengthwise, cut crosswise into 2 inch long pieces and then slice lengthwise into 3mm thick pieces and soak in about 5% salted water (#1) until the eggplant pieces get soft/limp (It took more that 30 minutes).
Drain in a colander and press using the back of a ladle to press out excess moisture and line them up on paper towels (#2) and press with another sheet of paper towel to blot.
Sprinkle potato starch or Katakuri-ko (#3)
Wrap the gyoza stuffing by folding the eggplant in half (#4).
Since I still had some gyoza stuffing left, I stuffed one fresh shiitake mushroom (#5)
Add 1tbs peanut oil and splashes of dark sesame oil in a frying pan on medium flame and place in the eggplant gyoza (#6).
After a few minutes when the eggplant is browned, turn it over and put on the lid for several minutes and finish with the lid off for 1 more minute (#8).

This time, the stuffing was well-seasoned and did not need any dipping sauce. This is not bad but both my wife and I prefer regular gyoza. We both missed the lovely crunch of the crispy wonton skin.

Tuesday, July 7, 2020

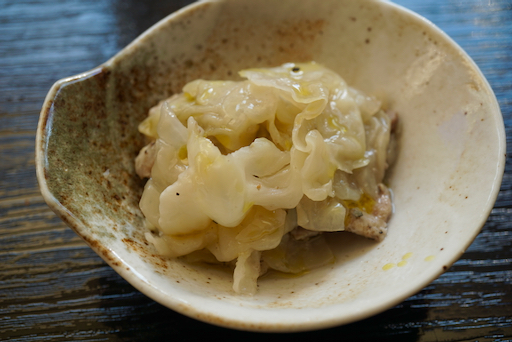
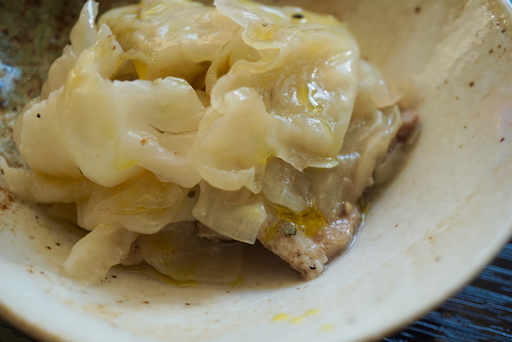
Pork belly and cabbage steamed in wine 豚バラとキャベツの塩蒸し

Because of COVIDー19, we have started using grocery home delivery. One of the problem is that when ordering on line using the descriptions and images provided we may not always end up with exactly what we wanted. This is one case in point; I thought I ordered a block of pork belly but instead, we got sliced pork belly. The slices are thicker than we expect to use in Japanese "Buta-bara" 豚バラ or "Sanmai-niku" 三枚肉.  I proposed several different dishes from the sliced pork belly but my wife wanted "Kaku-ni" 角煮 style preparation. So although I have never made kakuni from slices of pork belly before, I made that for her plus one other dish. Since I had jelled left over simmering liquid in the refrigerator from the previous pork belly (block) kakuni it was easy. I just cut the slices of pork belly into bite sized pieces and marinated them in a small amount of soy sauce for a few minutes. I then browned both sides and simmered it in the leftover simmering liquid for 2 hours. This was as good as my usual made from a block of pork belly.


The second dish I made was based on a recipe I saw on line. Since the slices of pork belly I got were thicker than Japanese buta-bara, I flattened the pieces with a meat pounder. Since we had leftover rose wine from Provence, I used that for this dish.


This is a simple dish but quite good. I splashed it with our favorite spicy Spanish olive oil before serving.


Ingredients
1/4 Cabbage, small head, leaves separate and washed and torn into bite sized pieces.
1lb slices of pork belly (They were a bit thicker than Japanese bura-bara. I pounded them thin, and cut into a bite sized pieces).
3 tbs white wine (We had a small amount of rose from Provence left over so I used that. It was more than 3 Tbs. more like 1/3 cup).
1/3 tsp salt
2 tsp oilve oil
slat and pepper for the meat.

Directions
Season the pork with salt and pepper.
In a pan, make alternating layers of cabbage and pork.
Add the wine, salt and olive oil, put it on medium flame with a lid.
Turned down the flame to low when it starts boiling.
Cook until the pork is cooked and cabbage is soft.
Serve hot, if needed season with additional salt and pepper (I sprinkled on our favorite Spanish olive oil)

This is a simple but good dish. Since the pork was well seasoned no additional seasoning was needed. It was good that I used up the cabbage I had, the left over wine and the last of pork belly slices.

Monday, May 11, 2020

Hybrid Katsu-don "fried pork" bowl 煮カツ丼ソースカツ丼ハイブリッド

When we get pork tenderloins, we most often make, at least a main portion of it, to "ton-katsu" トンカツ or "hire-katsu" ヒレカツ. We then make "Katsudon" カツ丼 from the leftover tonkatsu. I have made some variations of it depending on what ingredients are available but there are two main variations. The most common one is onion and tonkatsu simmered in soy sauce-based broth then topped with a lightly beaten egg (most people like the egg to be semi cooked) and then placed on the top of cooked white rice. The other is sometimes called "so-su katsudon" ソースカツ丼 . In this variation "tonkatsu sauce" or some other Japanese-Western style sauce such a mixture of catsup and Worcester  sauce is used. The tonkatsu is either simmered or dipped in the sauce or is topped with it. I made a hybrid of the traditional and the so-su katsudon then topped it off with a poached egg made from pasteurized eggs. This was a lunch. I served it with salted cucumber and daikon or "asazuke" 浅漬け.


Since I did not have any shiitake mushrooms which I usually use for this dish I used frozen "maitake" 舞茸 or hen of the woods. I also had blanched broccolini florets so I added that mostly for color.


Ingredients: (for two servings).
Cooked rice (freshly cooked is the best but microwaved frozen rice will do).
2 hire-katsu or pork tenderloin cutlets (if you fry them just before assembling the dish, that will be the best but that never happens in our household).
1 medium onion, halved and thinly sliced
Some mushrooms, I often use fresh shiitake but this time I used frozen maitake, amount arbitrary.
1/4 cup Japanese broth (made of kelp and dried bonito flakes)
1 - 2 tsp concentrated "mentsuyu" めんつゆ noodle sauce or mirin and soy sauce
2 pasteurized eggs
Some greenery such as snow peas, I added blanched broccolini (optional)

Directions:
1. In a small frying pan, I added olive oil and sautéed the onion and maitake (still frozen) until slightly soft (optional step, you can skip this and go to #2)
2. Add the broth and mentsuyu, when it starts boiling, turn the heat down and simmer with a cover on for 5-minutes or until the onion and mushroom are cooked and the sauce is slightly reduced.
3. Meanwhile, Put the rice in two bowls and microwave to warm it up.
3. Since this is leftover tonkatsu, I reheated it in our toaster oven using the toasting function, which is almost like re-frying. The crispy crust comes back. Cut into bite-size strips.
4. Start making poached eggs 4-5 minutes before everything comes together. The yolks should still be very runny.
5. Using a perforated spoon, place the cooked onion and mushroom on the rice (only small amount of sauce remains in the pan. I reserve this in a small serving bowl just in case my wife needs more sauce)
6. Place the sliced and reheated tonkatsu, broccolini and poached egg on the top.
7. I topped everything off with some tonkatsu sauce.

We like this hybrid katsudon. Since I poached the eggs, it is much easier to consistently get a runny yolk and cooked egg white compared to the traditional method of topping with lightly beaten eggs which often results in overcooked yolk and undercooked white. Because I do not cook the tonkatsu in the liquid, the crust remains crispy.

Friday, May 8, 2020

Meat pizzas 肉入りピザ

I occasionally make pizza but most of the time our pizzas do not have any meat as a topping. We are not intentionally trying to make vegetarian pizza, they just seem to come out that way. This time, I made two meat pizzas because we had leftover meat balls and pork chops cooked in BBQ sauce. Also, because of the Covid-19 related yeast shortage, my wife made a starter (biga/poolish) for me so I could make pizza dough. In addition to saving our yeast, this method results in a very flavorful and nicely chewy crust.

The picture below shows the meat ball pizza. I made the meat balls from the trimmings of pork tenderloin. After a week, I heated up the meat balls in some tomato sauce which I make from skinned Campari tomato. This reheating serves to make the meatballs last a little longer. But the time had come. We needed to use them up or we would be making an offering to the garbage-disposer god. This is a pizza similar to Margherita with the addition of the meat balls. After the pizza came out of the oven, I garnished it with a chiffonade of fresh basil leaves and grated parmesan cheese.


The picture below shows the pizza before baking. I brushed the dough with garlic oil (olive oil with crushed garlic). I then covered the dough with thin slices of fresh Mozzarella cheese, spread the tomato sauce on the cheese, placed on the sliced meat balls and basil leaves. I baked the pizza in a 480F oven on a preheated baking stone for 6 minutes.


The second pizza, shown below, is topped with shredded pork chops cooked in BBQ sauce my wife made several days ago. The cheeses are a mixture of Mozzarella, Double Gloucester and Monterey Jack.


The pizza is shown below before going into the oven.


This was evening so we had red wine with the pizza. We ate one quarter of each pizza and wrapped up the the rest to enjoy at other times. These leftover pizza heated up well in the toaster oven making a perfect snack in the evening with red wine. Because of the meat, the top was kind of heavy but it is quite satisfying and the crust was unbeatable.

Monday, April 20, 2020

Brined pork chops with homemade BBQ sauce ブラインドポークチョップとBBQソース

I usually do not get pork chops but, one day during the Covid19 pandemic, I could not find any other cuts of pork, so I ended up with fairly thin bone-in pork chops. After some thought about how to cook it, I decided to brine the pork (although we are not a true believer in brining). After brining I cooked the pork in a frying pan. My wife made her BBQ sauce to go with it. We served cooked baby red potatoes and sautéed green beans on the side; a classic American meat-and-potato affair.


Ingredients

Three bone-in pork chops (what I got was thin -1/2 inch-probably thick chops would be better).

For brine
2 cup water
1/3 cup Kosher salt
1/4 cup sugar
2 sprigs of rosemary, leaves removed and finely chopped
2 cloves of garlic, finely chopped

Mix the above ingredients in a pan, boil to dissolve the sugar and salt and let it cool down to room temperature.

For BBQ sauce (my wife made this)
2 medium onions coarsely diced, sautéed in olive oil until soft and caramelized (15-20 minutes).
1 cup of ketchup, added to the pan and cooked,  until the sugar in the ketchup is caramelized (the color will change from red to more dull brownish color).
 2 tbs  rice vinegar plus 1/2 cup water (or chicken broth),
1/4 cup lemon juice,
1/2 tsp paprika powder,
1 tbs Worcestershire sauce,
1/2 tsp salt,
2 tbs brown sugar
1 tbs mustard

Mix the above ingredients and simmer for about 20 minutes.

I brined the pork for 5 hours in the  refrigerator. Just  before cooking, I took them out of the fridge, rinsed and patted them dry. Using olive oil and butter, I cooked the pork chops few minutes on each side. At the end I added some of the BBQ sauce to the pan and continued to sauté for a few more minutes until the sauce covered the meat.


I think the chops were too thin to make good brined pork chops. The sauce was good but the chops were just so so. Later we cooked the leftover cooked pork chops with chicken drumsticks in the BBQ sauce in the oven in a covered casserole dish for about 1 hour or until the meat was tender. I then removed the meat from bone and hand shredded it to make something like pulled chicken and pork.

This preparation was pretty good. The tang of the BBQ sauce permeated the meat and the meat was very tender. This is probably how we would prepare pork chops in the future.

Thursday, February 27, 2020

Olive brine marinated pork tenderloin with cuscus オリーブブライン漬け豚ヒレ

This is continuation of my search for another way to cook pork tenderloins. A few days ago I used the trimmings from two pork tenderloins, I prepared to make "Pork, potato, and green bean stir fry". The next day, I made "Seared Pork tenderloin with smoked paprika and oregano 焼き豚フィレ肉、薫製パプリカ、オレガノ味" from one of the tenderloins. That left one last tenderloin. I came across this recipe in "Food and Wine" magazine. It uses the brine from a jar of olives (I suppose it is made of water, vinegar and salt with added olive flavor from the marinated olives) as a marinade for pork tenderloin. We were inspired by this recipe so we made this dish and served it with couscous. The original recipe called for white beans as the side but we happened to have a box of couscous which recently passed its "best used by" date. (Actually that date was one year ago but in our household that is "recent"). The brining did make the pork more succulent but did not add much flavor despite the addition of ground sage and lemon zest to the brine.


We added all the juice, olives and roasted garlic from the roasted pork to the couscous which made it very flavorful and moist. (We tend to avoid dry flakey couscous which we found from experience can easily become uncomfortably air borne if you happen to inhale slightly at the wrong time while eating it). Although the color could have been a bit better, we will call this dish a sucess.


Since we do not believe in "searing" the surface of the meat before baking, I skipped the searing step.

Ingredients:
One trimmed and prepared pork tenderloin
Several green olives, pitted and smashed
Several cloves of garlic, skin on
1 tbs olive oil

For marinade:
1/4 cup of brine from a jar of olives (we had sweet red pepper stuffed green olives which I use when I have a martini).
1 tbs extra-virgin olive oil
1/2 tsp ground sage
Lemon zest from one lemon using a micrograter.
1/2 tsp Kosher salt

Salt and pepper for seasning.

Directions:
Place the marinade and the tenderloin in a Ziploc bag. Removed the air, close the bag and marinate for 3 hours in the refrigerator.
Preheat oven (I used our toaster oven in convection mode) to 375F.
Remove the pork from the marinade, blot with a paper towel, coat with olive oil and season with salt and pepper. Coat the garlic cloves with olive oil.
Place the pork, olives, and garlic on a baking sheet and bake for 30 minutes or until the temperature in the thickest part of the pork registers 145F.
Let it rest for 5-10 minutes on the cutting board.

Meanwhile, we prepared a box of couscous according to the directions (we used chicken broth and pats of butter). When done, we fluffed up the couscous using a fork, added the roasted garlic by squeezing out the soft center of the clove leaving the skin behind. Then we added the olives and whatever juice from the meat that accumulated while it was resting.

Since we are not really into brining meats, this is a quick and easy way to do it. As far as we could tell the main impact of the brining was on the texture of the meat rather than its flavor. The meat was moist and nice. This is a new for us but we are not sure we will do this again.

Tuesday, February 18, 2020

Seared Pork tenderloin with smoked paprika and oregano 焼き豚フィレ肉、薫製パプリカ、オレガノ味

When I made "pork, potato, and green bean stir fry" from pork tenderloins trimmings, the two prepared pork tenderloins remained. I marinated them in sake (mostly to preserve the meat a bit longer). My default dishes for pork tenderloin are tonkatsu or hirekatsu ヒレカツ, baked in the toaster oven or scallopini. I happened to see this recipe in Milk Street magazine recently, I decided to try it for a change. It is called "seared pork tender loin with smoked paprika and oregano". My wife made PA dutch egg noodles with cream cheese and chopped chives as a accompaniment. This turned out quite good if not outstanding.


This came out just right and tender.


Ingredients: Since this was a sort of test, I only used one pork tenderloin.
One trimmed and prepared pork tenderloin, cut in half crosswise and then cut along the length of the segment leaving 1/4 inch intact (#1). Pound it lightly to flatten to 1/4 inch thick. Season with salt and pepper.
1 tbs neutral oil for searing (I used vegetable oil)

Sauce/marinade (mix all ingrediets):
3 tbs olive oil
1 tbs smoked Paprika (powder).
1/2 tsp sugar
1 tsp dried oregano

1tsp chopped fresh oregano (I did not have it so I didn't add it).

Directions:
Add the oil to a frying pan on medium high flame. When the oil is simmering/near smoking, add the pork and sear one side for 2-3 minutes without moving (#2), flip it over and sear the other side for 2 more minutes (#3), brush the sauce/marinade (I used a spoon to coat the surface with the sauce) (#4), flip again and repeat with the sauce.

I placed the pork on the plate. poured on any juice/sauce from the pan and covered with another identical pate as a lid to let the meat rest. (It could also be covered with aluminum foil for several minutes).


Although the smoked paprika flavor or oregano did not come through strongly (I am sure fresh oregano would have added good oregano flavor but I did not have it), the meat was done perfectly and was flavorful. The next day, I used the meat with avocado slices for sandwiches which was also very good. We may have to repeat this using fresh oregano. This was a different and good way to prepare pork tenderloins.

Wednesday, February 12, 2020

Pork, potato and green bean stir fry 豚じゃがインゲン

This is a variation of Japanese style "meat and potato" dishes. Since I had baby red potatoes that were  getting old and some partly shriveled  up, one-week-old blanched green beans and vacuum packed pork tenderloin which had just passed its "best used by" date, I came up with this variation of pork, potato and green bean dish. My mother used to make a simple variation of this dish using braised potatoes and green beans seasoned with mirin, sugar and soy sauce. In this version I expanded on my mothers recipe by adding pork. As is often the case with Japanese braised dishes, this one was seasoned "ama-kara" 甘辛 or "sweet and salty" with "salty" coming from soy sauce.


I did a bit of pre-treatment/seasoning to the pork to prevent it from getting dry, since these were the trimmings from tenderloin which tends to get dry when cooked. For an impromptu dish, this turned out to be quite good.


Ingredients:
10-12 baby red potatoes, skinned.
1/2 package of green beans, blanched in salted water, cut into 2-3 inch long pieces.
1 lb thinly sliced pork tenderloin (or pork belly may work better).
2 tsp olive oil
1/2 cup dashi broth (I used bonito-dashi pack)
1-2 tbs soy sauce
1-2 tbs mirin

For the pork marinade
1 tbs soy sauce
1 tbs sake
1 tbs mirin
1 tsp potato starch
1/2 tsp grated ginger (optional)

Directions:
Add the marinade and the pork into a ziploc bag, remove the air and close. Massage it well so that the marinade and potato starch permeates the meat (the potato starch keeps the moisture in the meat).  I marinaded the meat for 30 minutes.

In a wok on medium flame, add 1 tsp olive oil and the meat (marinade was totally absorbed). Stir and cook for a few minutes until done. Take out the meat and set aside. Wipe clean the wok, add 1 tsp of olive oil and add the potatoes. Stir for a few minutes until the surface of the potatoes are coated with oil. Add the dashi broth, the soy sauce and mirin, put on the lid and simmer for 10-15 minutes until the potatoes are cooked. Add the set-aside cooked pork and green beans, stir for several minutes until the liquid is reduced. Taste and add more soy sauce and/or mirin if needed.


Because of the marinade and potato starch, the meat came out moist tender and well seasoned. The green beans were still slightly crunchy. This is a really homey comfort dish.

Friday, October 18, 2019

Pork belly chasu and miso ramen 三枚肉チャーシュー と味噌ラーメン

Although we can get ”pork belly” or "Sanmai-niku" 三枚肉 (meaning "three layer meat" referring to alternating layers of fat and red meat) at  specialty grocery stores such as Whole Foods, it has not been available at our usual grocery store. But the other day, I found a large package of pork belly (probably 2-3 lb). I could not resist getting one. It was rather large and I made  "Kakuni" 角煮 from half and made pork belly chasu 三枚肉チャーシュー from the other half.  Since this is usually served as a ramen topping, I made miso ramen with pork belly chasu as a lunch one weekend.


I also made "ajitama" 味玉 or seasoned soft boiled egg. I also opened a jar of store-bought "Menma" メンマ seasoned bamboo shoot. I added nori seaweed and finely chopped chives as toppings.


As before, the ramen noodle is  American-made frozen  ones from "Sun Noodle". I also used "miso" seasoning that came with the noodles but instead of hot water, I used Japanese broth made from a "dashi pack" to make the soup.

Pork Belly chasu

Ingredients:
1 lb pork belly (half of the piece of pork I got), thinner portion (I assume this is  towards the front) which I rolled tightly and trussed.
3 tbs soy sauce
1 tbs mirin
1 tbs sake
1 scallion, bruised with back of the knife
2 cloves garlic, crushed and skin removed
5 black pepper corns
3 star anises (optional)
Water to cover

Directions:
Place the pork in a pot (in which the pork snuggly fits), add the soy sauce, mirin, sake, scallion, garlic, black pepper corns, and star anise. Marinate for a few hours at room temperature turning a few times.
Add water so that the pork is just barely covered. Cover the pork with either a silicon "otoshi buta" 落し蓋 or aluminum foil.
Put on the lid and simmer for several hours turning a few times.
Let it cool in the simmering liquid and then put into the refrigerator for overnight.
Skim off fat.

To serve:
Remove the pork from the now congealed marinade (#1 and #2).
Slice it to 1/4 to 1/2 inch thick (#3)
Meanwhile, soft boiled egg was marinated in Japanese concentrated noodle sauce in a Ziploc bag for overnight or longer in the refrigerator (#4).
Cut the egg in half (#5).  After 24 hours, the yolk is still liquid but the more you marinate, the more yolks will jell.
I have "pork belly chasu", "menma" seasoned bamboo shoots, "ajitma" seasoned boiled egg and chopped chives for toppings (#6).


I boiled one serving of the ramen noodle as per the instructions and drained (this is half ramen 半ラーメンfor each of us).
Divide the miso seasoning package into two portions and place it in the bowls. Pour in hot dashi broth and dissolve the miso seasoning.
Add half of the package of noodles into each bowl.
Garnished it with the toppings above and the nori sheet.

This was rather decadent ramen. Compared to pork loin or even shoulder version of chasu, this is much more unctuous.  On other occasion, I made "chasu and egg" チャーシューエッグ using this which was also really good. We have to be careful that all this lovely pork belly will be "too much of a good thing"...Not likely!

Sunday, August 25, 2019

"Tonkatsu" pork cutlet with sous vide pork 低温調理のトンカツ

We like tonkatsu トンカツ and make it occasionally. Although in Japan, serving undercooked pork is not unusual especially when using SPF pork from specific named-producers (although it does not specifically say it is cysticercus free, I am sure the risk is extremely low). I am sure American pork is relatively safe as well but I, just to be safe, make sure I cook pork completely. In the Weber grill, I roast pork using indirect heat to the inner temperature of 145F as per USDA standard. (Actually, I start going down to the grill when it reads 142F, by the time I am ready to remove the pork from the grill, the temperature will reach 145F). I previously posted sous vide pork tenderloin at 140F for 3 hours which appears to be safe for both bacteria and cysticercus. Going back to tonkatsu, I usually insert an instant digital thermometer in the center of the meat until it registers 140F but it is not easy to get it right. Many times,  the pork is a bit overcooked (since I err on the side of overcooking). To eliminate this anxiety of under or over cooking, I decided to try making tonkatsu from sous vide cooked pork tenderloin. This is what it looks like. I only deep fried it for a total of 1 minute  since the meat itself was precooked. As you can see the center looks slightly pink. It tasted great with a nice fried bread crust. So why is the center is pink?


I sous vide cooked pork tenderloin seasoned with salt and pepper at 140F for 4 hours which is more than enough to completely cook the pork and render it safe. I soaked the vacuum packages after completion of cooking in ice water for 30 minutes to quick cool down before moving them to the meat drawer of the refrigerator for future use. Just before making it into tonkatsu, I sliced it and the cut surfaces were totally homogenous and gray (see below).


So, the only explanation I can come up with is the oxygen exposure. The pork was cooked in a vacuum but after it was breaded and deep fried, oxygen may have bound to myoglobin to make a slightly pink color. This was an  interesting experiment and  proof of concept. I am not sure I will do this as a regular way to cook tonkatsu, though.

Tuesday, July 23, 2019

”Otsumami” appetizer snacks 酒の肴(おつまみ)

This is another rendition of the appetizer snacks we had. I went to our Japanese grocery store the day before which made serving many small dishes easy. I used small lidded bowls and small crane plate we got from Nishiki marker 錦市場 in Kyoto 京都 sometime ago.


We both get filled up quickly so I try to serve small portions. In small bowls from left to right are cold tofu or hiyayakko 冷や奴, grated "Tororo" nagaimo とろろ with "ikura" salmon roe and "Chinese -style" squid salad 中華風イカサラダ


On the black rectangular plate are boiled octopus leg thinly sliced with sumiso sauce タコの酢味噌, my usual dashi-maki Japanese omelet with aonori sea weed 青海苔だし巻き玉子, store bought small fish cake re-heated in the toaster oven.


The gyoza 餃子 I made a few days ago heated up in the toaster oven (skin becomes really crispy) cut in half with a small amount of Ponzu sauce ポン酢 poured into them. This replaces the separate dipping sauce and makes it a bit easier to eat the gyoza.


This store-bought boiled squid salad with Chinese flavors.


This is grated nagaimo (which is called "Tororo"とろろ). I dissolved wasabi into soy sauce and mixed into tororo and topped it with ikura and chiffonade of perilla.


 This is cold silken tofu. I added blanched edible chrysanthemum 春菊. Instead of straight soy sauce I dressed it with concentrated noddle sauce and topped it with bonito flakes かつお節.


We had these small dishes with our house cold sake "tengumai" daiginjo 天狗舞大吟醸. Nothing really new here but very enjoyable.

Monday, July 8, 2019

"Tsumami" appetizers 酒のつまみ

I am still cooking Izakaya-style small dishes but generally nothing particularly new. The dishes below are what we had after the perilla wrapped chicken dish 鶏胸肉の青紫蘇巻き. Often, we roast pork (loin or shoulder) in our Weber grill, but sometimes, the roast is really big so I divide it into two roasts; one to roast in the Weber and another to make into  Chinese style "Nibuta" 煮豚. For the dish pictured here I just served small pieces of one such nibuta, with ajitama 味玉 (a soft boiled egg marinated in concentrated noodle sauce) and blanched sugar snap. After a few days the egg yolk of the ajitama becomes more congealed but maintains a nice soft texture.


For the third  dish of the evening, I used one of the chicken breast halves left over after making the perilla wrapped chicken. Both are marinated in the same way but this one I pounded further into thin slices, coated in potato starch and gently poached (called "suisho” 水晶).


I cut it into small bite size pieces and served it with a side of thinly sliced cucumber (American mini-cucumber) dressed in ponzu sauce. Because it was coated with potato starch before poaching, it has a nice smooth (slippery) texture. Marinating with sake, soy sauce and potato starch made the meat moist and tender.


None of these are new but we still enjoy having many small dishes.

Tuesday, July 2, 2019

Morel mushroom pasta and pork scaloppini モレルマッシュルームパスタ

We like mushrooms in general (except for button mushrooms). Shiitake is our main stay. Occasionally we branch out to maitake 舞茸 or enoki えのき茸 or shimeji しめじ. Of course, once a year, matsutake 松茸 is a must have. This time my wife found a package of fresh morel mushrooms at our near-by Whole Foods. So one weekend evening, we had morel mushroom pasta and a pork scaloppini-like dish.


The pasta was PA dutch egg noodle. My wife made a sauce. This is a simple sauce with sautéed fresh morel in butter and cream simply seasoned with salt and pepper. Pork scaloppini was just pork tenderloin cut into medallions and pounded very thin, seasoned with dried basil and oregano, salt and pepper. I dusted with flour and cooked in olive oil. I did not make the traditional sauce that goes with scaloppini. The pasta had a lovely morel mushroom taste that was absorbed and extended by the pasta. The creamy sauce added an unctuous element. This was a great way to eat pasta. The pasta also went very well with the pork scaloppini.


Since we have started to open up the old wines we collected over the year, this bottle was up next. This is Barnett Vineyard 2006 Pinot Noir.
We got this bottle when we visited the vineyard. This was a reserved personal tasting and the guide (a bit grumpy guy) let us taste their wine in a gazebo on the top of the mountain on their property overlooking surrounding vinyards and mountains. The view was spectacular. We bought several bottles of cabernet and a few Pinot. We must have had them send to us but I do not remember the details. Long time ago, we finished all of their cabs but this pinot was left. This bottle was kept in our wine refrigerator not in the basement. So we were hoping this was better kept and aged.

I carefully decanted it one hour before. Although, edge was brownish indicating age, it had surprisingly fresh fruit; cherry and a bit of strawberry and tannin was mellow. We really enjoyed this aged Pinot. This was particularly good paring with morel mushroom pasta and the pork scaloppini. Since I did not make any sauce (like caper and lemon) but just herbs, salt and pepper, it went better with this wine.