Showing posts sorted by relevance for query 厚揚げ. Sort by date Show all posts

Thursday, November 27, 2014

“Atsuage” tofu 厚揚げ

"Atsu-age" 厚揚げ or "Nama-age" 生揚げ is deep fried thick ("atsu" 厚 means "thick") tofu. But this is not like "Abura-age" 油揚げ in which only the surface is fried, because the center portion of this tofu retains the look and texture of the original “raw” tofu or "nama" 生. In the case of ”abra-age", thin slices of tofu are deep fried until completely cooked. Although frozen abra-age was readily available at the Japanese grocery store in our neighborhood, atsu-age is more difficult to come by since it cannot be frozen. (When frozen, the raw tofu portion totally changes its consistency). I have not seen atsu-age in our grocery store before. We used to have grilled atsu-age occasionally at Tako Grill.  Recently I saw a package (from Japan) in the refrigerator case and bought it.

The way I served it is in the classic Izakaya-style. Since we had sashimi items including "Ootoro" from "Fish-for -Sushi" we splurged and opened the last bottle of "14th generation sake"  (十四代)which we have had in our refrigerator for more than 3 years.


Atsu-age could be a part of "nimono" 煮物 or simmered dish, or served grilled or heated up in a frying pan. At Izakaya, it is usually simply grilled. I just heated it up in a frying pan with a bit of vegetable oil for a few minutes on each side until the skin got crispy and the center was warm. I cut it into 2 blocks and topped it with graded daikon and thinly sliced scallion (below).


In this angle, you can see that the center is "raw" tofu.


Add just a little bit of soy sauce and we are ready.


As you can easily imagine, the quality of atsu-age really determines how good this dish is. This was fresh and very good. If this is not fresh, the only way you could possibly choke it down is simmered in broth with other items. I am glad I chose this simple way of serving. "Juyondai" sake was as good as when I first tasted it even after 3 years probably because it was kept under refrigeration all that time.

Monday, November 30, 2015

Simmered Nagaimo and Fried tofu 厚揚げと長芋の煮付け

I bought atsu-age 厚揚げ at our Japanese grocery store one weekend thinking I would either add it to oden おでん or just grill it in the toaster oven but neither happened.  I realized "the best tasted before date" was a few day AGO. So, instead of grilling, I switched to “emergency mode” and quickly made this dish which is like oden but has only a few items.


Again, I made this with what I had on hand.  I had half a nagaimo 長芋 in the refrigerator left over from when I made yamakake  山かけ more than a week ago. I also had some nice thick shiitake mushrooms which I also bought at the Japanese grocery store sometime ago that needed to be used.


So this is the dish I came up with.

Broth: I made broth from dashi pack (dried bonito and kelp), added sake, mirin, light colored soy sauce. I supplemented the soy sauce with salt added in increments as I tasted. I used the salt because I did not want the nagaimo to become too dark as it would have if I used all soy sauce but I also wanted properly seasoned simmering broth. (I ended up using about 1/2 tsp of Kosher salt).

Atsu-age: I placed them in a colander and poured hot water over them (from the instant hot water dispenser which is connected to Culligan reverse-ososis filtering system) to remove excess oil. I then cut them in half.

Nagaimo: I peeled and cut into 1 inch-thick rounds and then halved them. I immediately soaked in water with a splash of rice vinegar.

Shiitake mushrooms: I removed the stems and cut into half inch slices (this was rather large and thick shiitake, possibly from Japan).

I placed the nama-age, nagaimo and shiitke in the broth and gently simmered it for 40-50 minutes. I served it in a bowl with a bit of the simmering broth and garnished it with chopped scallion.

This was a good combination. When cooked, the nagaimo looses it's sliminess and has a nice crunchy texture. This was perfect for cold sake.

Saturday, June 24, 2023

“Atsu-age” Fried-tofu with Mapo Eggplant 厚揚げの麻婆茄子かけ

“Atsu-age” 厚揚げ or “Nama-age” 生揚げ is fried tofu with a surface like “Abura-age” but the inside remains as soft tofu. We used be able to get good quality atsu-age from our japanese grocery store. I have posted quite a few dishes I made with this but the best dish, as far as we are concerned, and particularly if the quality of the atsu-age is good is simply grilled (in the toaster oven) served with soy sauce and chopped scallion. But, for some reason, the ones we have gotten recently are not really good.  This was the case with the one I got the other day. I decided to make something different using this not-really-good atsu-age. Since I had leftover mapo eggplant, I decided to use it as a topping for the atsu-age.


Because of the spicy mapo eggplant sauce, the atsu-age was more palatable but still not great.


I first cut the atsu-age into cubes and heated it up in the toaster oven on high toast mode.


This ws not bad and made a nice appetizer but I hope at some point we can get better quality atsu-age.

Sunday, February 9, 2020

Grilled atsuage "fried tofu" 焼き厚揚げ

There are two kinds of fried tofu: "Abura-age" 油揚げ, literally means "fried in oil" and "Atsu-age"  厚揚げ, fried thick tofu. The difference between the two is that "abra-age" is a thin tofu piece  completely cooked with no raw tofu left in the center. It can be opened into a pouch which can be stuffed with other ingredients. "Atsu-age" or sometimes called "Nama-age" 生揚げ is a much thicker tofu piece and the center is still uncooked tofu. I usually do not buy this since the ones available are very poor quality since the tofu itself is rather poor quality.  This time, however, I found a Japanese brand atsu-age in our Japanese grocery store and bought it. I thought I never posted "atsu-age" and started writing this post but when I searched for "abura-age" in my blog, I realized that I did blog "atsu-age" 6 years ago. So, this is a bit of a repeat. This one comes from "Soumo-ya" 相模屋 in Maebashi, Gunnma prefecture 前橋市群馬県. This one is made from "Kinugoshi" 絹ごし or silken tofu.


The package contained two squares as seen  below. I toasted this in our toaster oven for 5 minutes on each sides  (I placed in metal grate on aluminum foil lined metal tray).


When you cut it, the surface is fried and brown but the center is still uncooked.


I garnished it with finely sliced scallion and ginger soy sauce.


I also added blanched rapini buds with sesame soy sauce ごま醤油.


Especially since I have not had this for some time, this tasted really good. The surface is nicly crunchy after tasting and the center is hot and silky soft. Hope our grocery store will regularly carry this.

Thursday, December 2, 2021

Sir-fried "kinpira" Astuage tofu 厚揚げのきんぴら

Atsuage or Nama-age 厚揚げ、生揚げ is a type of deep fried tofu which has only the surface fried; the center remains as basically uncooked tofu. I have posted a few dishes using Atsuage. If the quality is good, just grilling it making the surface crunchy and inside soft and hot with soy sauce and chopped scallion is the simplest and best way to cook it. This time, the atsuage I got from the Japanese grocery store was a U.S. made brand I had not used before and not being sure of its quality I came up with this quick stir-fry dish. Since I did not have the appropriate greens such as asparagus or snow peas, I used the sugar snaps I prepared.


Ingredients:
1/2 atsuage, cut into thin slices and cut in half length-wise making thin strips.
1 tsp vegetable oil
2 tsp concentrated noodle sauce or 1 tsp each of mirin and soy sauce
10 blanched sugar snaps or snow peas.

Directions:
Heat the oil on a medium flame in a frying pan. When the oil is hot, add the atsuage and stir several minutes until the surface gets crisp and the interior raw tofu parts browns slightly.
Add the seasoning, the sugar snaps and stir for an additional minute.
Garnish with chopped scallion and serve immediately.


For a quick impromptu dish, this was quite good. Since all the sides of the tofu strips are crispy and seasoned, this is better than just toasted with soy sauce.  

Saturday, April 18, 2015

Hamachi collar and grilled rice balls はまちのカマと焼きおにぎり

This was the very fist evening the weather was nice enough for us to stay outside and cook over the charcoal fire using our Yakitori grill. With my 
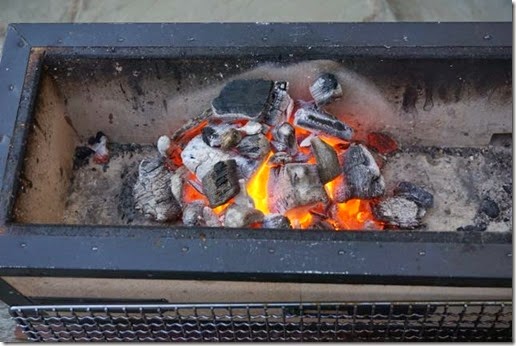
looftlighter, it is so easy to make charcoal fires. I just make a mound of lump hard wood charcoal in the middle of the grill, ignite the charcoal using my looftlighter from both sides in the base. Ten minutes later, the fire is ready (below).

Coming into this weekend, we had a sashimi/sushi combination take-out from 
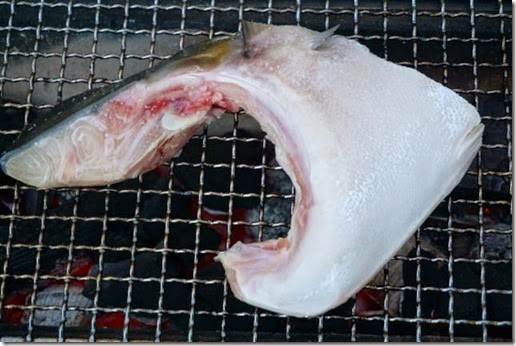
Kanpai sushi. When I picked up the food, I noticed one hamachi collar sitting in their cold case amongst the tuna sashimi blocks. Upon inquiry, I found out it was for sale and I bought it. At the Japanese grocery store, for the first time I can remember, I found a package of frozen bonito tataki as well.


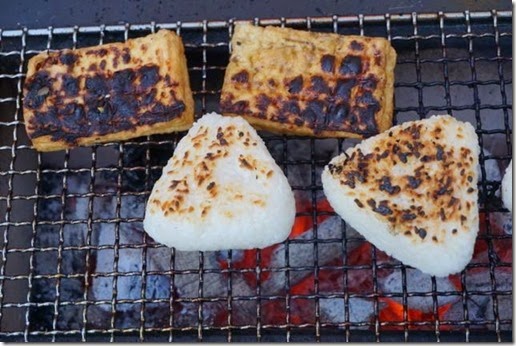
I placed a metal grill (sprayed with pam) over the fire after I spread out the lit charcoals and put on the hamachi (salted).


While we were waiting, we started with the bonito tataki which was wonderful and perfect with cold sake.


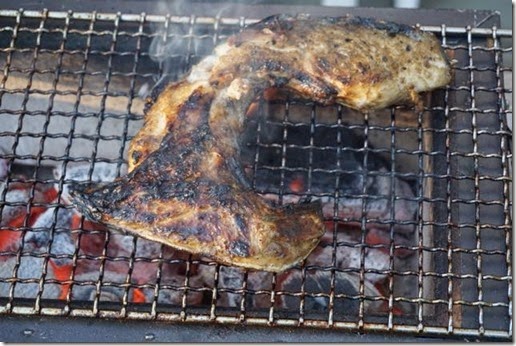
When the hamachi collar was done,  I did not have the motivation to make grated daikon. We just ate it as is. We even did not use any soy sauce since it was already nicely salted. The skin of the fish came out a bit more charred than I would have liked but it was crispy with the fat layer caramelized. It tasted much much better than it looked.

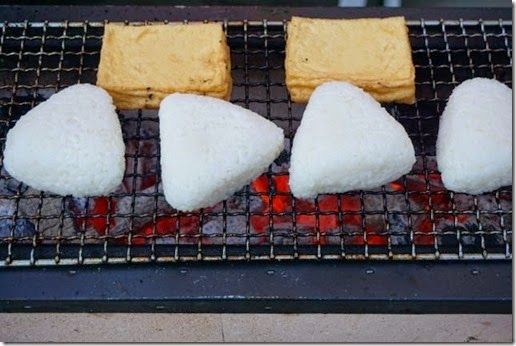
At this point, we were getting full (and pleasantly inebriated) in the heady early spring evening and went into the ending "shime" dishes of grilled rice balls. Since I had also bought some fresh deep fried tofu (center still uncooked) "Atsu-age" 厚揚げ, I included it with the rest on the grill.


The tofu was ready in short time. We just enjoyed using the chopped scallion and grated ginger and the sauce borrowed from our bonito tataki.


To make a good crust on a rice takes some time as you can see below.


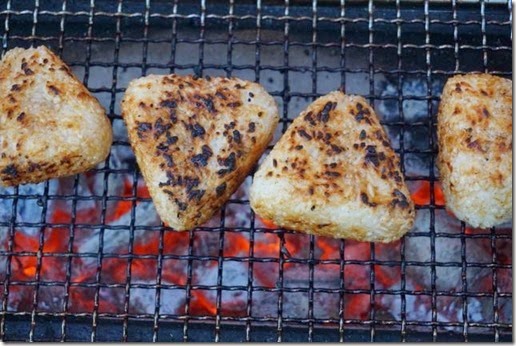
Of course, I make all three sides flat and wide enough so that they will stand on their own allowing me to make a crust on all the surfaces of the rice balls. I brushed them with a mixture of soy sauce and mirin (1:1 ratio) and finished cooking them.


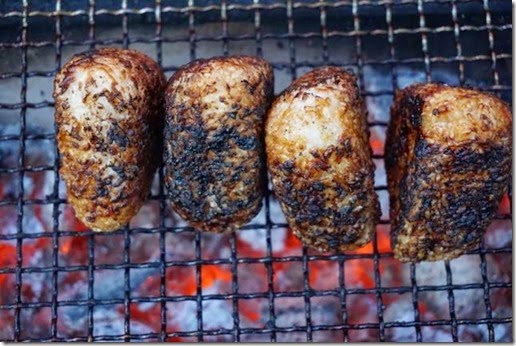
Since we still had some hot coals going, we nibbled on the crust of the rice balls and then put them back on the grill with the newly exposed white rice face down so the surface could become nicely grilled again. We repeated this process several times until we finished the last crispy piece.

Although the evening was not quite "warm", with the help of our heater (aptly called "Mojave sun"), we stayed outside until we finished our indulgence.