Thursday, August 8, 2013

Cheese stuffed small sweet peppers スイートペッパーのチーズ詰め焼き

We found a bag of colorful small long sweet peppers in our grocery store. They were very colorful with yellow, orange and red. We deiced to get one to see what we could make from it. We used some of them in asazuke 浅漬け and fried rice (thinly sliced or finely chopped), which added a nice sweet pepper taste to the dishes. We have seen cheese stuffed Jalapeño peppers recipes before. We even saw a special chili grill for the purpose of grilling stuffed jalapeno. Instead of Jalapeño pepper, which would probably be too hot for us, I decided to make a similar dish using these min-sweet peppers.


Since we do not have a chili grill, I decide to stuff the peppers from the side. I removed the roof of the peppers and removed the seeds and veins as you see below. It is not clear from the picture but I used crumpled aluminum foil so that I could place the peppers securely and horizontally.


For the stuffing, I used two cheeses; spicy harvati, which has chopped red hot peppers in it, and applewood smoked cheddar cheese. I made small dices of both cheeses and mixed with finely chopped shallot and cilantro. I also added a small amount of potato starch and mixed them all up. I stuffed the cavity of the sweet peppers (left in the picture below) and then topped it with a slice of gruyere cheese (right in the picture below).

I baked the stuffed peppers in my toaster oven preheated to 375F (convection mode) for 15-20 minutes or until the cheeses melted and brown spots started appearing (below).

I waited for a few minutes until the cheese solidified a bit before serving. This can not go wrong. Essentially you are eating grilled cheese with the nice flavor of sweet peppers, shallot and cilantro. It is a perfect drinking snack for any drink. The skin of the peppers bothered my wife and I saw her removing it before eating. Next time I may have to remove the skin of the peppers.

Monday, August 5, 2013

Live sea urchin 殻付き生ウニ

When we order sashimi items from Catalina, we like to order several items together so the shipping charges aren’t more than the value of the item being shipped. The best combination for us is “Gold Uni sea urchin” and fresh “Blue fine tuna toro” 本マグロのとろ. Sometimes this combination is difficult to achieve--one item may be available but the other is not. This time, they had the fresh tuna; both “akami” 赤身 or “loin” and “toro” of blue fine tuna. The only sea urchin available, however, was “live” whole sea urchins. I just couldn’t pass up the combination of tuna so I decided to go ahead with the live sea urchins as well.

I am not particularly fond of opening and retrieving sea urchin roe from the live animal but, in this case, I was on a mission to round out the shipment of tuna so I did not think I had a choice. Besides, I thought, I could blog this. So here it goes. The picture below is the amount of roe I extracted from one live sea urchin which is a generous serving for one. We got two live sea urchin which made two servings for us.


My wife likes the combination of sea urchin and nori so I also served thin nori strips on the side. The the sea urchin roe were excellent. They can’t be any fresher than this (the spines were still slowly moving even after I opened it up).

The roe, however, are hard won—this is messy work. The box arrived on an extremely hot day. The ice packs in which the shipment were packed were partially thawed so the interior of the box was wet with condensation moisture. The sea urchin were in a plastic bag but the spines had poked through the bag during shipment. Liquid from the sea urchins had seeped out of the holes made by the spines and combined with the condensation moisture. Sea urchin goop was all over everything including the packages of toro. Some of the spines were even embedded in the interior of Styrofoam outer case. Some clean-up was required.

There are many ways of retrieving roe from live sea urchin. Video instruction at Catalina suggest using two spoons to crack the sea urchin in half. I used the method I am most familiar with and perhaps the method most Japanese will use. To avoid having the spines and shell fragments going into the garbage disposal, I placed the sea urchin in a large metal bowl with the bottom side (where the mouth opening is located) facing up (#1 below). While holding the sea urchin using metal tongs, I cut across the bottom with a pair of sharp kitchen scissors (#2 below). After the bottom has opened up, using either forceps or long bamboo chopsticks (the latter was what I used), I removed some of the black entrails revealing the bright yellow roe (#3 below). Using the chopsticks and a long narrow spoon, I removed the roe carefully. I put them in a bowl of salted water. I removed any black stuff still attached to the roe using chopsticks and rinsed the roe in new clear salted water again (#4 below) Some roe were small and it was not possible to avoid fragmenting some of the pieces.

I do not think this is for everybody. You could loose your appetite during these processes but the end result was great fresh sea urchin roe. We savored the bounty of our labor while sipping cold sake. The blue fin tuna was also excellent. This was the best toro we have had in recent memory and even the loin meat was not “akami” but a nice “chu-toro”.

Friday, August 2, 2013

Molded or pressed "steak" sushi ステーキの押し寿司

The last time I made pressed sushi or "oshizushi" 押し寿司, I warned that my wife was interested in making oshizushi that represented “outside-the-box” thinking. It took a long time but here is one of those attempts. My wife came up with the idea and I executed it. I used leftover flat iron steak to make this “meat” sushi.


We are not sure we liked this. I may have to work on the different variations. In addition to steak,
I also layered perilla leaves and a thin omelet made from 4 egg yolks. Only reason I made this rather deadly but bright yellow omelet was because my wife made quick bread which required egg whites making 4 left over yolks (see picture below).
Rice: I made sushi rice using sushi vinegar from the bottle.
Steak: I thinly sliced medium rare flat iron steaks. I marinated this in a mixture of grated garlic and soy sauce for a few hours. On hindsight, this may have made the taste of the meat too strong.
Omelet: I just scrambled the 4 left over egg yolks, seasoned with a bit of sugar and salt. Using my square frying pan on a very low flame and with a lid, I cooked it slowly for 5 minutes until the surface was dry.

Using the mold for oshizushi, I first put in a few layers of steak slices (marinade squeezed out), then perilla leaves, followed by the omelet cut to fit the mold. I added the sushi rice and pressed it firmly.  After cutting it to small pieces, I garnished it with white roasted sesame seeds and a side of pickled ginger.

This is certainly edible but we did not particularly care for it. The meat seemed to over power the subtle flavor of the vinegared rice. Maybe I should not marinate the steak. I suggested we could make this type of sushi with “luncheon meat” (Japanese euphemism for “Spam” the magic pork product from Hormel) but that was immediately voted down.

Tuesday, July 30, 2013

Indian-style lamb stew インド風ラムシチュー

My wife really likes lamb and recently developed an interest in Indian-style cooking with lots of spices and flavors but not too much heat (spicy hot). This dish combines her favorites. This is, for sure, much more interesting than a regular "curry".

This recipe also came from "Easy and quick Indian cooking" but, as usual, my wife made some variations based on available ingredients. So it varies slightly from the original recipe. I was sous chef for this dish and did all the chopping and preparing.

The ingredients:
Lamb, I bought about 3 and 1/2 lb of lamb shoulder (bone in). After removing the bones and fat, the final amount was about 2 1/2 lb. I cut it into a large bite size (1-2 inches chunks).
2 onions chopped
2 tsp. ground ginger
1 tsp ground garlic
3 tsp water
1 1/2 tsp ground cardamon
2 bay leaves
1/4 tsp ground cloves
10 peppercorns
1 tsp cinnamon
1tsp coriander
2 tsp ground cumin
4 tsp smoked paprika
1/4 tsp cayenne
1 1/4 salt
1/4 tsp garam masala
7 tbs plain yogurt (thick greek style)
1 1/2 cup chicken broth
1/4 garam masala

The first step was to make a paste out of the ginger, garlic and water. We chose not to brown the meat (because it doesn’t seem to really make a difference that we can taste), so I made the sauce and then added the meat. The cardamon, bay leaves cloves, peppercorn and cinnamon went into the hot oil and cooked a few seconds until they were fragrant. Then I added the onion and cooked until it became medium brown. Next came the ginger/garlic paste which I cooked for a few seconds. Then the coriander, cumin, paprika, cayenne and salt. While on low heat I stirred in the yogurt one tbs at a time. When the sauce was all nicely blended I added the lamb cubes and water. I put on the lid and simmered for about a hour until the meat was tender. Before serving I was supposed to sprinkle on the garam masala (I forgot to do this.)


This dish was fun to make. I really enjoyed the smell as all the spices bloomed in the oil and gave off their fragrance. I had always thought the yogurt could not be used in cooking because it would “break” so it opens new vistas to be able to use it. (The secret seems to be to add it slowly over low heat). I really like the somewhat tart flavor it adds. For this recipe I might reduce the amount of chicken broth.

The meat really cooked down and the sauce was a bit watery. The flavor however was wonderful. Lots of flavor with only a hint of heat. (That is another thing I like about this cooking; I can control the amount of heat a keep it at a comfortable level). The meat was fork tender.

Saturday, July 27, 2013

Burdock root salad 牛蒡のサラダ

Whenever I buy “gobou”, two long roots are in one package and I need to make several dishes before I can finish it. I almost always make “kinpira”  きんぴらごぼう and make several other. Since my wife made “coleslaw” and there was leftover dressing, I made this gobou salad. It is similar to the previous post but I changed the way the gobou was cut and had the slight difference in the dressing.
I made a small serving with a half of a tomato, skinned and peeled (or blanched, shocked and the skin peeled) arranged in a rose-shape with some watercress.

This time, I only added carrots.

Gobou: After scraping off the skin under running water using the back of my knife. I shaved the gobou as though I was sharpening a pencil (I do not know how many younger people today actually sharpen pencils with a knife) in  small elongated pieces shaped like leaves of small bamboo or “sasa”. This way of cutting  is called “sasa-gaki” 笹掻き (here is the visual aid at You Tube) and most often used for gobou. After I cut the gobou in “sasagaki”, I soaked the pieces in water acidulated with rice vinegar for 10 minutes or so I then drained and washed them in running cold water. I cooked the pieces in boiling salted water for 20 minutes (I checked occasionally but this gobou was rather hard and required a long time to cook). I drained and soaked the pieces in cold water for 2-3 minutes and drained.

Carrot: I peeled and prepared the carrot in the same way as the gobou. I cooked the carrot  for 5 minutes and drained.

Dressing: This was leftover from making coleslaw. Essentially, it is half and half mixture of mayonnaise and plain yogurt (water drained or use Greek yogurt), seasoned with sushi vinegar, Worcestershire sauce, salt and pepper.

Even after 20 minutes of cooking, this gobou was a bit fibrous. The slightly bitter fresh taste of water cress was a nice contrast.

Wednesday, July 24, 2013

“Mughlai” Chicken 鶏肉のインド風クリームソース

This is the second Indian-inspired dish my wife made called “Mughlai” chicken. This is a very flavorful dish with lots of spices but not hot. Although it has good amount of cream, use of yogurt makes it less deadly while keeping the sauce very rich. I was sous chef and did the prepping of the chicken and chopping of vegetables. My wife follow the recipe from Madhur Jaffrey’s “Indian Cooking” cook book. The recipe is similar to one by  Nigela Lawson which  is available on-line.

Ingredients:
Chicken: Both recipes are a bit vague about what parts and kind of chicken. We used chicken thigh, skin off, bone out, and cut into two pieces. We used a total of 6 thighs (12 pieces, about 3 lb or 1 kg).
Ginger, I inch cube, peeled and coarsely chopped (we cheated and used ground ginger from a tube).
Garlic, The receipt calls for 8-9 cloves but we cut this down but again used ground garlic from a tube.
Almond, 6 tps, sliced. We used whole almond toasted and sliced.
Cardamom pods, 10, lightly bruised
Cinnamon stick, one
Bay leaves, two
Cloves, 5
Cumin, ground, 2 tsp
Cayenne pepper, 1/8 tsp
Plain yogurt, 7 tbs
Light cream, 10oz
Salt, 1 1/2 tsp
Raisin, 2 tbs (the original recipe called for golden raison but we used regular raison.)
Garam masala, 1/4 tsp
Onion, 2 medium, finely chopped
Vegetable oil, 7 tbs
1. Make a paste of almond (4 tbs), garlic, ginger, and water (starting from 4 tbs) in a small electric blender. We needed to add more water to make it a paste.
2. Brown the chicken:in oil in a large skillet in all sides in two batches. Set them aside.
3. In the same pot, add the cardamom pods, cinnamon stick and bay leaves in the same oil and fry until fragrant. The original recipe does not instruct to remove these items (only mentioned that they were not meant to be eaten). So as not to accidently crack a tooth however, we removed these including black seed spilling out from the  cardamom pods using a fine meshed square skimmer.
4. We added the onion and sautéed it for 3-4 minutes. We then added the almond paste, cayenne pepper and cumin and sautéed for few minutes.
5. We started adding the yogurt one tables spoon at a time until all were incorporated.
6.We added the cream, salt, and the chicken pieces including the liquid accumulated.
7. We simmered it for 20 minutes on low flame with a lid on. We turned over the chicken pieces and added the raisons (see below) and simmered for another 10 minutes.
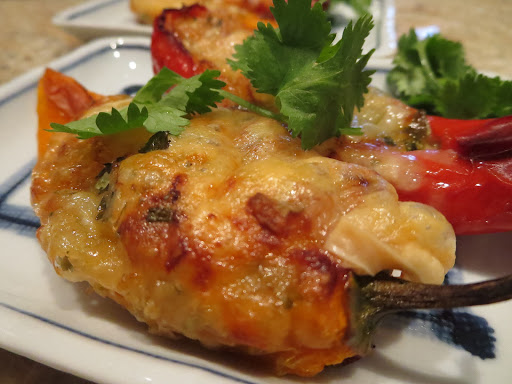
8. We served this over rice with toasted and sliced almond as a garnish (The first picture).
This is a very nice dish. It has a very complex flavor. Since we did not put too much cayenne pepper, it is not too hot. The mixture of yogurt and cream made the sauce very rich (hopefully better than just cream). This dish reheated well in the microwave oven.

Sunday, July 21, 2013

Fish cake and green beans "Isobe" fry ちくわとインゲンの磯辺揚げ

I made this dish to try out the new plates we recently acquired in New York. This white square plate with rim is very versatile. My only complaint is that it does not seem to have been made to stack—when stacked on atop the other the top plates slide off making it difficult to store. I realized that I had defrosted "chikuwa" 竹輪 fish cake the previous day but did not use it. I decided to make tried-and true "Isobe" 磯辺 fry. I also made green beans in the same  fashion.


Chikuwa: I cut it in half crosswise and then cut the halves into 4 pieces lengthwise to make 8 small batons.

Green beans: I trimmed both ends and cut in half to make the length equal to the chikuwa pieces.

Tempura batter: Just a mixture of cake flour and cold Seltzer water plus dried "aonori" 青海苔 sea weed. I made this a thin, runny batter.

I deep fried in 170F oil until done (the chikuwa 1-2 minutes, the green beans 3 minutes).

These two items were quite good. The green beans got so "etherial" like the dried green beans. The chikuwa developed good slightly chewy texture. Both had nice crisp  light crust with "seashore" flavors from the "aonori". I served this with my usual green tea salt.