Sunday, February 9, 2020

Grilled atsuage "fried tofu" 焼き厚揚げ

There are two kinds of fried tofu: "Abura-age" 油揚げ, literally means "fried in oil" and "Atsu-age"  厚揚げ, fried thick tofu. The difference between the two is that "abra-age" is a thin tofu piece  completely cooked with no raw tofu left in the center. It can be opened into a pouch which can be stuffed with other ingredients. "Atsu-age" or sometimes called "Nama-age" 生揚げ is a much thicker tofu piece and the center is still uncooked tofu. I usually do not buy this since the ones available are very poor quality since the tofu itself is rather poor quality.  This time, however, I found a Japanese brand atsu-age in our Japanese grocery store and bought it. I thought I never posted "atsu-age" and started writing this post but when I searched for "abura-age" in my blog, I realized that I did blog "atsu-age" 6 years ago. So, this is a bit of a repeat. This one comes from "Soumo-ya" 相模屋 in Maebashi, Gunnma prefecture 前橋市群馬県. This one is made from "Kinugoshi" 絹ごし or silken tofu.


The package contained two squares as seen  below. I toasted this in our toaster oven for 5 minutes on each sides  (I placed in metal grate on aluminum foil lined metal tray).


When you cut it, the surface is fried and brown but the center is still uncooked.


I garnished it with finely sliced scallion and ginger soy sauce.


I also added blanched rapini buds with sesame soy sauce ごま醤油.


Especially since I have not had this for some time, this tasted really good. The surface is nicly crunchy after tasting and the center is hot and silky soft. Hope our grocery store will regularly carry this.

Thursday, February 6, 2020

"Shime saba" cured Norwegian mackerel しめ鯖

"Saba" 鯖 is one of the "Hikari-mono" 光り物 fish which has a smooth skin with a blue grey sheen  to it. This group of fish can be strong flavored and may spoil quickly. Japanese call it "iki-gusare" 生き腐れ or "starts rotting while it is alive". Therefore, it is most common to have it as "shime-saba" しめ鯖. "Shime-ru" しめる in this context means "cured" or "salted and vinegar-ed"  しめ鯖.  Because of recent advancements in shipping logistics, however, eating "raw" or "lightly cured" local saba is possible and commonly used especially in the southern parts of Japan. In addition to its freshness, depending on the water temperature and/or where it is caught, the fish may  have a parasite called Anisakis (Ironically, the fresher the fish, the higher chance of Anisakis). So it is a bit of a risk eating this fish raw even in Japan.  Cooking and freezing make it safe but "vinegar" apparently doesn't kill Anisakis immediately. Most of the mackerel we get fresh here is Spanish mackerel. "Shime-saba" available in our Japanese grocery store is Norwegian mackerel imported and prepared ("vinegar-ed", packaged and frozen) in Japan and exported to US. So these are quite safe without any chance of Anisakis still surviving, albeit the quality of the fish may not be the best and tends to be "over cured". We (especially I) still like this. I realized that I posted variations on how to prepare shime-saba but never posted Shime-saba simply served with condiments and soy sauce. So, here it is. I served it with grated ginger, finely chopped scallion (which I  soaked in water and then strained and removed the excess moisture). I also made cucumber and wakame seaweed salad with sumiso dressing 胡瓜とわかめの酢味噌和え and salt broth marinated sugar snaps スナップ豌豆の塩びたし.


To prepare a frozen package of shime-saba as sashimi, first thaw it in the refrigerator in the package (I usually leave it overnight), remove it from the package, rinse and blot it with a paper towel and cover it with a sake-soaked paper towel for 5-10 minutes (I do this in the hope of reducing any excess fishiness that may be present). This fish does not have any scales but has a thin semi-tranparent skin which needs to be peeled off starting from the head side's edge. Although not really needed but I added several parallel shallow cuts along the length of the filet and then cut crosswise as seen below.


Soy sauce, grated ginger and scallion all work well with this fish and of course, the only drink that goes with this fish is sake. This was the very first dish of the evening and we enjoyed it.

Monday, February 3, 2020

Smoked salmon, potato, cheese loaf and cheese bites スモークサーモン、ポテト、チーズローフ

We had some leftover cooked spinach, mashed potatoes and a small amount of smoked salmon so my wife came up with this. It is a combination of several recipes; "egg and smoked salmon in puff pastry", "spinach cheese loaf"and mashed potatoes with cream cheese and chives. The egg and smoked salmon recipe inspired the use of smoked salmon. The spinach cheese loaf was the basis for the center cheese and spinach layer. The mashed potato layer was a variation of gnocchi.


The layers are shown here from the bottom, the smoked salmon, cheeses mixture and mashed potato encased in puff pastry..


Since the cheese filling was too much for the loaf, my wife put the excess into small muffin tins with a small piece of smoked salmon on the  bottom to make little cheese bites (shown below).  They came out very nicely.


Without pastry shell and potato, these by themselves were quite a good small bite.


Ingredients:
1 frozen puff pastry sheet, thawed
1 cup mashed potato with cream cheese with chives
Smoked salmon, enough to cover 1/2 of the puff pastry (or whatever amount available)
6 oz. double Gloucester cheese grated (original recipe calls for Mozzarella, we did not have it).
block of feta cheese, crumbled (or to taste).
10 oz. ricotta cheese
One bag spinach (or whatever available) cooked without adding any liquid, excess moisture squeezed and finely chopped.
red pepper flakes (optional)
3 eggs (2 for cheese layer 1 for potato layer)

Directions:
On a piece of parchment paper roll out the puff pastry. Combine the cheeses and the spinach (#1). Stir in the 2 eggs (#2). Put the mashed potatoes in a bowl. Stir in the egg. Add enough flour so the spinach has the consistency of gnocchi i.e. has a firm consistency and is not runny.

Assembly: Lay the smoked salmon on 1/2 of the puff pastry. Spread the cheese and spinach layer on top (#4). Spread the potato layer on top of the cheese (#5). Fold the other half of puff pastry over the half with the cheese mixture. Seal the edges with some water and press with a fork. Dock the pastry with the tines of the fork (#6). Transfer the puff pastry on the parchment paper to a baking sheet. Bake in a 425 degree oven for 30 to 35 minutes or until the pastry is golden brown.


Directions for the cheese bites
Since there was too much cheese stuffing to go into the puff pastry my wife used it to make little cheese bites. She greased a tin for mini muffins. Put a small piece of salmon in the bottom of the cup and scooped in enough filling to fill the tin. She baked these with the puff pastry loaf at 425 for about 18 minutes. When they came out of the oven the cheese stuck to the side of the tin. She used a spatula to loosen the edges while the cheese was still hot. Luckily because of the salmon on the bottom the little bites just fell out when the tin was inverted and tapped gently on the counter top.

This was a very good variation on the "cheese-in-puff-pastry" theme. The salmon gave a salty smokiness. The ricotta spinach feta combo is always winning. The layer of gnocchi like potato on the top was a lovely surprise. The cream cheese chive flavor really came through and smooth texture of the potatoes was a nice contrast to the somewhat firmer texture of the cheese layer. The little cheese bites were also very good. Again the salmon added it characteristic salty smokiness, the cheese layer was very good but it was different from the cheese layer in the puff pastry loaf made with the same ingredients. The outside of the cheese had gotten toasted in the mini muffin tins so it was somewhat crunchy and the flavor of the toasted portion was somewhat deeper than the un-toasted portion. It made a very satisfying single mouthful. These would definitely be worth making in their own right.

Friday, January 31, 2020

Kuri-kinton Daifuku 栗きんとん大福

In the Sushi Taro Osechi, we always get two traditional New Year items "kuromame" or simmered black beans 黒豆 and "kurikinton" or mashed sweet potato with chestnuts 栗きんとん. Although these are traditional "auspicious" foods for New Year, they are a bit sweet and we usually eat them last as a dessert. This year I wanted to do something different. From the leftover "kuromame", we made "green tea cake with kuromame" 黒豆入り抹茶ケーキ as before. As something new, I made "daikufu" 大福餅 with "kurikinton" in the center for the first time.  Diafuku literally means "Big luck" or "good luck" and usually has sweet red beans or "anko" あんこ in the center. I thought because the "kurikinton" was yellow in color (representing gold or riches) and sweet (in the old days in Japan sugar was rare so anything sweet was revered), it was appropriate to substitute for the beans with good-luck "kurikinton". I also added cooked chestnuts (store bought). It turned out the kurikinton had a generous amount of chestnut pieces as well so the addition of the chestnuts was not really needed but made the end result more sumptuous. Although it was the very first time I tried to make daifuku it turned out OK. I followed the instructions from a recipe on line (in English with a video).


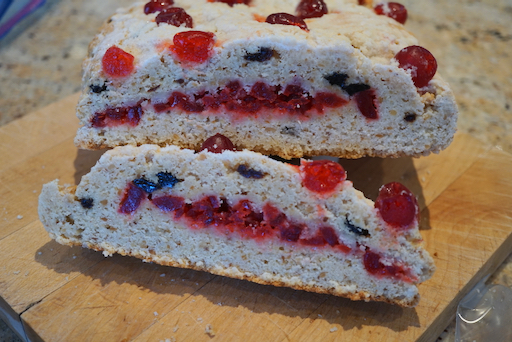
This is the cut surface. My wife thought the mochi skin could have been a bit thicker.


Ingredients: (I halved the amounts specified in the original recipe. It made 5 daifuku)
Kurikinton (came in the osechi box) (#2)
Additional cooked chestnuts (store bought in a jar*) (#1)
100gram Mochi-ko もちこ Japanese rice flour (or Shiratama-ko 白玉粉)
90 grams water
25 grams sugar
50 grams or as needed potato starch 片栗粉 for dusting

* I did make chestnuts cooked in syrup 栗の甘露煮 this past fall. They came from California but they were dry and chalky. I tasted them and decided to use the store bought instead).

Directions (near Verbatim quote from the "Just One Cook book" recipe for my own convenience, please look up the original recipe):
1. Combine mochiko and sugar in a medium bowl and whisk all together.

2. Add water and mix well until combined.
3. Cover the bowl loosely with plastic wrap. Cook in a microwave on high heat (1100w) for 1 minute. Take it out and stir with wet rubber spatula. Cover again and cook for 1 minute. Stir again, cover, and cook for 30 seconds to finish cooking. The color of mochi should change from white to almost translucent.
4. Cover the work surface with parchment paper and dust it generously with potato starch. Then transfer the cooked mochi on top.
5. To prevent from sticking, sprinkle more potato starch on top of the mochi. Once it’s cools down a bit,  using a rolling pin roll the mochi into a thin layer. Apply potato starch on your hands and the rolling pin.
6. Transfer the mochi with parchment paper onto a large baking sheet. Refrigerate for 15 minutes until the mochi is set.
6.Take the mochi out of the refrigerator and cut out 2-3 inch circles with a cookie cutter (#3).
7. Dust off the excess potato starch with a pastry brush. Place plastic wrap on a plate and then the mochi wrapper on top. Then lay another layer of plastic wrap down. Repeat for all wrappers (#4). 


6. Place the chestnut and kurikinton in the middle (#5)
7. Pull up the edges  in the center and pinch it together (#6).

For my first try, the mochi skin came out quite soft and nice. The Daifuku had just the right amount of sweetness and combined texture of soft and crunchy. This is a good Daifuku variation.

Tuesday, January 28, 2020

Warm sake and oden on a cold winter's evening 厳寒の冬の夕燗酒とおでん

Since we had some very cold wintery days recently, we enjoyed warm sake several times. One such evening, we had the Japanese classic of hot sake with oden. After I found Hakushika junmai and junmai ginjo 白鹿純米、純米吟醸 (sake in a box) at our Japanese grocery store, these have become our favorite sake served warm or "kanzake" 燗酒. The sake sold this way is usually not the best sake but is still good quality as is the case with these two. Also sake sold in a box costs significantly less than the same sake sold in a bottle. For these reasons, we think these are a good buy. (Other packaging variations may include "cup-sake" or "sake-in-a-can". Cup-sake could be even daiginjo class).


Of course on a cold winter evenings, warm sake is best paired with either oden おでん or nabe 鍋dishes. This time, I made oden. Usually boiled eggs in oden end up hardboiled even if they are soft boiled when put in the broth. So this time I made soft boiled eggs with runny yolks which I kept separate from the rest of the oden, then just 5 minutes before serving I warmed them in the broth.  I put mochi in the deep fried tofu pouches or "abura-age" 油揚げ. Instead of regular potato I used "sato imo" 里芋 or taro.


Although the eggs did not absorb the broth's flavor, the runny yolks were nice for a change. The cylindrical item is fish cake stuffed with burdock root or "Kobo-ten" ごぼう天.  The rest of the items were tofu, shitake mushroom, blanched broccoli and carrot.


On a cold winter evening, this is very warming and comforting.

Saturday, January 25, 2020

Stollen Bread Version 2

This was my wife's baking project for Christmas. She has baked versions of stollen and even panettone  before but we both agreed that the store-bought Panettone are really quite good and its not really worth baking it yourself. My wife thinks (and I agree) that her stollen is better than store-bought. It differs from traditional stollen in that the dough is nut based and made with baking powder instead of yeast. So, this year (2019), she improved on her original.


Later she admitted that she went a bit overboard with the candied cherries. As a result this was a bit sweet. But it looks very festive and tasted really good. She calls it "Stollen version 2". For several breakfasts around the holidays we feasted on this stollen and two kinds of store-bought Panettone. I asked my wife to fill in the details below.


Ingredients:
5 cups AP flour
4 tsp baking powder
1 1/2 cup granulated sugar
1 tsp salt
1 tsp nutmeg
1/2 tsp cardamon
2 cups blanched almonds toasted
1 cup butter (2 sticks)
2 cups ricotta cheese
2 eggs
1 tsp vanilla
1/2 tsp almond extract
4 tbs dark rum
1 cup raisins
the zest of 2 lemons
Candied cherries (amount to taste) some left whole to put on top  (#1) and some chopped (#2) to go into the center of the stollen.

Ingredients and directions for rivels.
(Crumbs for topping and to put into the center with the chopped cherries). Mix together 1/4 cup sugar, 1/4 cup flour and 2 tbs. butter softened until the ingredients are completely combined and look like fine crumbs. In addition melt 3 tbs. butter to brush onto the top of the stollen.

Directions:
In a food processor combine the flour, baking powder, granulated sugar, salt, nutmeg, cardamom, and almonds. Slice the butter into the mixture and pulse until the entire mixture resembles coarse crumbs. Set aside. In another bowel mix the ricotta, egg, vanilla, almond extract, rum, raisins, and lemon zest. Stir the wet mixture into the flour mixture until ingredients are combined.

Turn dough (which will be quite crumbly) out onto a floured board and knead a few times to bring the dough together into a smooth ball. Divide the dough into two portions, weighing them to make sure they are equal size. Roll one of the portions out into a square on a piece of parchment paper. Use the rolling pin to crease the dough just off center. Put half the chopped cherries (or to taste) on half of the square. Top the cherries with 1/4 of the rivels (#3). Fold the other half of the square over the cherry covered portion and seal by pressing the edges (#4). Brush the top of the stollen with butter and cover with 1/4 of the remaining rivals. Put as many whole cherries on top as you would like (#5) (Repeat with the other portion.) Place on baking sheet and bake in 350 degree oven for about 45 minutes or until golden brown and tests for done (#6).


This stollen has a nice nutty flavor and the texture almost of a big soft cookie. The cherries made it fun but the amount I used might be bordering on "too much of a good thing". The rivels were a nice addition particularly on the top where they added a crunch and pleasing sweetness. Now Christmas is over but we will continue enjoying the holiday by eating the stollen bread for breakfast,

Wednesday, January 22, 2020

Potato salad topped with squid "shiokara" イカの塩辛のせポテトサラダ

In one of the Izakaya blogs I follow, I saw a recipe to put squid "shiokara"イカの塩辛 ( or as my wife will say "squid and guts") on either mashed potatoes or potato salad. This recipe came to mind one evening after I came back from the Japanese grocery store with a package of shiokara (comes frozen in a plastic pouch) and one package containing 2 small boiled octopus legs. Since I already had potato salad in the fridge I decided to make a small dish of the potato salad topped it the shiokara as per the recipe. As another small dish, I sliced the octopus and served it on top of some daikon namasu 大根なます I had made for the new year. These two small items (shown in the picture below) were starter dishes for the evening meal.


The picture below shows the shiokara topped potato salad.  The idea here is that the salty and umami flavors of the shiokara will enhance the flavor of the potato.


The below is the octopus dish.  I just sliced the octopus leg thinly on the diagonal in a wavy pattern. I put the daikon namsu on the bottom of the small bowl and put the cut octopus on top.  I have been making a few Japanese sauces and storing them in the fridge in small squeeze bottles.  I squeezed some sumiso sauce that I made few days ago on top of the octopus. (Having these pre-made sauces ready in squeeze bottles is very convenient).


The potato salad shiokara combination is not bad but we both felt enjoying the potato salad and shiokara separately may be better. As my wife put it, "the purity of the shiokara flavor and the purity of the potato flavor are best experienced individually and in their own right." Thus sayeth a shiokara purist.