Thursday, September 23, 2021

Potato salad with tuna and pesto ペストとツナのポテトサラダ

We made pesto and froze it when we had a bumper crop of basil sometime ago. My wife found two small plastic containers in the freezer recently and tasked me to use it. I made two kinds of garlic mozzarella bread, one with original garlic scallion butter and another with the pesto. The one with pesto was quite good. That left me with the 2-3 tbs of pesto. From the depth of my memory I remembered a recipe for potato salad with tuna and pesto from the “Frugal Gourmet*" cookbook. I sort of remembered how this was made but I decided I needed to find the recipe. After going through a number of his cookbooks which we have in our collection, I found the recipe in "Frugal Gourmet cooks with wine". It was called "tuna and potato salad" which was introduced as an "American Italian" dish. In any case, I made this salad and finished up the pesto. It was definitely very distinctive and very good; quite different from my usual potato salad.

*When his show was popular on PBS in1980s, it was our routine to watch it on the weekend and we bought most of his cookbooks. Looking back, however, we think our cooking has advanced since then but at the time his recipes were quite inspirational. 


I made a few modifications as usual.  


Ingredients:
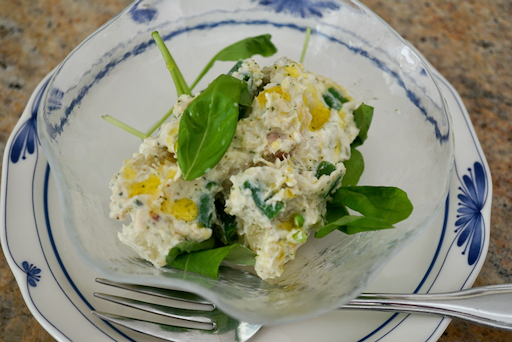
2 medium russet potatoes, boiled with skin on and then skin removed, cut (crumbed) into bite size chunks (original recipe calls for 6 small red potatoes).
One can of tuna in water, drained.
Blanched green beans, arbitrary amount (I prepared from fresh green beans, the original recipe calls for a 10 oz. package of frozen green beans, thawed, cooked and drained).
2 tbs pesto
3 tbs mayonnaise and 3 tbs Greek (strained) yogurt* (The original recipe calls for 1 cup mayo)
3 flat anchovies mashed (optional). I did not used them.
Salt and pepper to taste
3 tbs chopped parsley (I skipped this since I did not have fresh parsley)


Directions:
I seasoned the potatoes with salt, pepper and sushi vinegar while they were hot and I them cool in a bowl (my addition)
Cut the green beans in half inch length and add to the potato.
Add the pesto and tuna.
Add the mayo and Greek yogurt and mix.
Taste and season it with salt and pepper if needed.

This is a good salad to have. We really liked it.

Wednesday, September 8, 2021

Renkon "hasami-age" with avocado and cod roe アボカドとたらこのレンコンはさみ揚げ

My wife found an interesting YouTube series called "Kimono Mom".  A former geisha retired early got married, had a daughter, and now became a YouTuber showing Japanese cooking. She has many followers. In any case, we watched some of her episodes. One of the dishes she showed was "Hasami-age" はさみ揚げ meaning stuffing sandwiched between two slices of renkon 蓮根 (lotus root). The “sandwich” is then battered and deep fried. This is a common way of using renkon and I have previously posted such a dish.  The stuffing is usually meat especially chicken. Kimono Mom used a mixture of avocado and spicy cod roe called "mentaiko" 明太子. I happened to have a fresh renkon which I got from Tako Grill (besides packaed and frozen Japanese grocery items, Tako Grill grocery section now has some fresh Japanese vegetables and even sashimi blocks). I did not have "spicy" tarako but I did have frozen tarako. I could make tarako spicy by adding Sriracha. So I have everything to make this dish.

I also had fresh Japanese "shishi togarashi" 獅子唐辛子 pepper. So I just fried it as a side. I served the renkon dish with a wedge of lemon and green tea salt.


This is a rather unique and good dish. The renkon remains crispy and the avocado creamy with salty and lightly spicy (I did not add too much Sriracha) tarako flavors come through.


Ingredients: making 6.
One segment of fresh renkon, peeled and sliced (about 1/2 to 2/3 inch thick, I got a total of 12 slices).
6 perilla leaves
One sac of tarako, roe scraped out from the sac (#1)
One ripe avocado, stone and skin removed (#2)
Sriracha or other hot sauce to taste

For tempura batter
1/4 cup cake flour plus a bit more for dredging the renkon slices
1/4 cup carbonated water

Oil for deep frying

Directions:
Mash and mix the avocado, tarako with the sriracha hot sauce to taste (#3 and #4).
Lightly dredge the renkon slices. Put on a perilla leaf and then 1/6 (2-3 tsp) of the stuffing (#5).
Top the stack with another slice of renkon. Press lightly to secure (#6).


Heat the oil to 320F.
Mix the cake flour and cold carbonated water to make a relatively thin (like crepe batter) tempura batter.
Dip and coat the renkon “sandwich” and deep fry (#7) for fa ew minutes on one side. Turn it over and cook another few minutes then drain (#8) and serve.

I served this cut in half with a wedge of lemon and the green tea salt. We really like this dish. This could be good with beer but since we do not drink beer, we had it with cold sake.

Sunday, September 5, 2021

Squid and daikon, simmered イカ大根

This is a sort of standard dish using squid. I made this dish using the half of the squid package from Vital Choice. I posted a similar dish before. In that post, I mentioned that to make squid tender, you have to cook it either very briefly or a very long time. This time I cooked the squid briefly. I made a slight modification and included a grilled fish cake tube or "Yaki chikuwa" 焼きちくわ. The daikon and even the fish cake absorbed flavor from the squid and this is great "teiban" 定番料理 for the squid. The below is a picture of the serving immediately after I made this dish. 


The daikon was hiding in the bottom.


Ingredients:
170 gram (6oz) frozen squid, thawed, washed, body cut into 1/2 inch thick rings, tentacles separated
3 inch long daikon, peeled, sliced in 1 inch thick pieces
4 thin slices of ginger, cut into small match sticks
1 frozen fish cake tube or "yaki-chikuwa" 焼きちくわ, thawed and cut into bite size
Green beans, cooked, cut in bias, arbitrary amount

For simmering liquid
1 cup (240-50ml) Japanese broth (I used a bonito and kelp dashi pack)
50-60ml "x4 concentrated" noodle sauce (from the bottle) or half and half soy sauce and mirin

For pre-cooking the daikon
Water enough to cover the daikon
One pinch of uncooked rice (or water in which uncooked rice was rinsed "kome-no togijiru" 米のとぎ汁).

Directions:
Simmer the daikon for 30 minutes or longer until cooked though and soft, rinse off the rice grain if needed (you could prepare the daikon ahead and keep this for a few days in the refrigerator before using).

Add the simmering liquid and the ginger in a pan on medium high flame and let it come to the boil, add the squid and cook for 30 seconds to 1 minute or until the squid just becomes homogeneously white/opaque. Take out the squid and set aside.
Add the daikon and the fish cake and turn down the flame and simmer for 15 minutes.
Taste the simmering liquid and if needed add more noodle sauce (or soy sauce/mirin).
Add back the squid and simmer to warm up (30 seconds to one minute).
Garnish with the green beans and serve warm (or cold).

The next day, I served this cold with the other squid dish I made. This dish is usually served warm but even cold, this was a great dish.


The below was two  (quite different) simmered squid dishes both served cold as a starter.


These were a good taste contrast; one is very fresh bright tasting and the other is a very traditional flavor In both dishes the squid was tender due to brief cooking. In the squid-daikon dish, both the daikon and fish cake absorbed the squid flavor. The addition the chikuwa made it taste like you were enjoying more squid than was actually in the dish. 

Thursday, September 2, 2021

Squid and potato, lightly simmered イカとじゃがいもの軽い煮込み

I found two packages of frozen squid in our freezer.  I got them from “Vital Choice” when we got frozen Pacific oysters. I did not have a chance to use them until now. These were quite good, much better than previously-frozen-and-thawed cleaned squid we used to get from our regular grocery  store. After thawing, I washed them in cold running water. They were cleaned including bodies and tentacles. No fishy smell and the body tubes were nicely intact. I have made quite a few dishes using squid.  Since I am running out of new dishes, I have been on the look-out for any new recipes. I found this recipe in the digital edition of one of the Japanese newspaper sites. This was a bit unusual in that no traditional Japanese seasonings (soy sauce, ginger, etc) were used. The original recipe calls for “parsley” sauce (mixture of chopped parsley, olive oil and salt). Since I did not have fresh parsley, I had to improvise. Despite that, this dish was really good.  The evening I made this dish, we had it warm (picture below).


Next day, I served this cold. It tasted equally good cold. We may even prefer to serve this cold especially in summer.


Ingredients:
170g cleaned and frozen squid and tentacles, thawed* (I used half of a12oz package), washed and the body cut into tubes, and tentacles cut into bite sized pieces
2 small potatoes (I used red potato), skinned and cut into 1/4 slices
150 ml water
1 tbs olive oil
salt to taste
1 tb white wine
1/2 garlic clove

For parsley sauce
5 sprigs of fresh parsley finely chopped (Since I did not have fresh parsley, I used combination of finely chopped scallion and Jalapeno pepper)
2-3 tbs olive oil
1 pinch salt

*The original recipe calls for a one large squid.

Directions:
Sprinkle the white wine on the squid. 
Add the water, olive oil, the garlic and the potato in a pot. After it reaches boiling reduce the heat and cook 15-20 minutes with the lid askew. When the potato is cooked, season it with salt.
Add the squid and cook for 30 minutes stirring. Then cut off the heat and let it steep to finish cooking.
Serve with the potato on the bottom top with dollops of the sauce.

Although I could not make the parsley sauce, this was a very refreshing and nice dish. Actually the combination scallion and jalapeño may have been more flavorful than a parsley sauce. The squid was tender since it was cooked for a short time. It was sort of Western-style and perfect for hot summer when served cold.

Sunday, August 29, 2021

Wacky waffle cake bowl with ricotta cheese topping

In trying to decide how to use the waffle bowls we made a few days ago, my wife was inspired by two items. The first was the realization that there are several Pennsylvania Dutch desserts such as funny cake or shoofly pie  that are essentially cakes in a pie shell. In addition she thought of Japanese melon pan which is essentially a cakey bread covered in a cookie (and wasn’t the waffle bowl a kind of cookie?) So based on these inspirations, she decided, as an experiment, to fill several of the waffle bowls with a PA Dutch cake called Wacky cake topped with ricotta filling. She chose wacky cake because it is so simple to make. If the experiment didn’t turn out, it wouldn’t be a great loss. In fact the “experiment” turned out quite nicely. The picture shows a whole wacky waffle cake plus one cut in half to show how the ricotta filling dips into the cake as it cooks.


The waffle bowls were cooked again and got really brown and crispy. Then after some time, stored in the refrigerator they became a bit soft again. My wife  heated them up in the toaster oven just before serving which made the bowls crispy. I turn the platform over to my wife to describe how she made them.

Ingredients:

For the cake 
1 1/2 cups all purpose flour
1 tsp baking soda
1/4 tsp salt
1 cup sugar
1/3 cup cocoa powder
1 tsp. vanilla
1 tbs. vinegar
1/3 cup oil
1 cup water 


For the ricotta filling
1 cup ricotta cheese
1 egg 
1/8 cup sugar
1/4 tsp. salt
1/2 tsp vanilla


Directions:
Mix all the ingredients for the ricotta filling until smooth and set aside. Mix the dry ingredients from the flour thru the cocoa powder in a bowl. Mix the wet ingredients in another bowl. Add the wet ingredients to the dry ingredients until smooth. I put the waffle bowls in a tin for large muffins to provide support as the cake cooked (and in case the waffle bowls fell apart during cooking the mess would be contained.) I then filled them with the cake mixture and topped them with a scoop of the ricotta filling. (These are shown in the bottom row of muffins in the next picture). I had some batter left over after filling the waffle bowls so I just made some large muffins by putting the batter directly into the muffin tin and topping them with the ricotta mixture. (These muffins are shown in the top row of muffins in the picture). I cooked them at 350 degree for about 30 to 35 minutes until the ricotta topping firmed up and a skewer came out clean. 


The wacky waffle cakes were surprisingly good. Even though the shell was double cooked and got a bit high done it was nice and crispy and tasted very good. The combination of cookie-like crispiness, soft sweet chocolate cake and smooth moist ricotta filling made each chew a nice complex texture experience. The three different flavors of each element also went very well together. I think I may be onto something here. Stand back! 

Thursday, August 26, 2021

Butter, butter, butter, butter, rolls バター、バター、バターロール

My wife recently bought a cookbook called “Fast Breads” by Elinor Klivans and these were the first things she made from it. The are called buttery rowies. She thought they looked like croissants but were much easier to make so she gave them a try. 


Ingredients:
2 1/4 cups unbleached AP flour
2 tsp. Salt
2 1/4 tsp. Yeast
1 cup warm water (recipe calls for water 130 degrees F. I thought that was too hot and would kill the yeast. I don’t know what the purpose of such a high temperature would be.)
1 cup (two sticks) of butter softened for 20 minutes to room temperature

Directions:
Put the flour, salt, and yeast in the bowl of stand mixer. Add the water and mix until the ingredients are combined then beat for 4 minutes. Cover the bowl and let the dough rest for 15 minutes. Cut the butter into 1/4 inch slices. Pat and roll the dough into a 10 X 8 inch rectangle about 1/2 inch thick. Distribute the 1/2 of the butter pieces on the rectangle (picture on the left below). Using a spatula spread the butter evenly over the dough leaving a 1 inch border all around. With the long edge facing you fold the dough over into thirds and pinch the edges tightly to seal. (The dough should now measure 3 X 8.) Roll the dough out into a 12 X 6 rectangle. Distribute the remaining butter over the rectangle. Again using a spatula spread the butter evenly over the dough rectangle leaving a 1 inch border all around. With the short side facing you fold the dough into thirds pinching the sides to seal tightly. Let the dough rest 5 minutes.

Line baking sheet with 1 inch sides with parchment paper. Gently roll the dough into a 10 x 8 rectangle. Using a sharp knife (I used a pizza cutter), cut the dough into 2 inch squares. Place the squares on the baking sheet one inch apart, cover and let rolls rise for about 30 minutes. (They will not rise much but will soft and puffy). Bake in a 400 degree oven for about 20 to 25 minutes until golden brown (picture on the right). (Some of the butter will leak out so they will be baking in bubbling butter).
Let cool about 10 minutes then serve.


These rolls are basically a butter deliver system for those who like butter but are too embarrassed to just gnaw on a raw stick of it straight out of the package. To get an idea of how much butter was involved, the ratio of butter to flour is one stick of butter for each cup of flour. Also the picture on the left above, just shows half the butter used. Twice the amount of butter shown there goes on the same rectangle of dough. When the rolls came out of the oven they were literally swimming in melted butter. My wife tipped the baking sheet and ladled spoonfuls of butter over the top of the rolls to use it up. While the rolls were crispy on the outside they were completely soaked in butter on the inside. In short this is a prime example of “too much of a good thing”. This was way too much butter. My wife couldn’t eat them. I think they could be quite good, however, if made with half the amount of butter. 

Saturday, August 21, 2021

Simmered eggplant and shime-saba with grated daikon 茄子の忘れ煮としめ鯖のおろし和え

These are four appetizers we started with one evening. I tend to make the same things we like but this time, for a change, I made two new dishes. In the picture below, clock-wise from upper left are vinegar cured Japanese mackerel or "shime-saba" in grated daikon dressed in ponzu しめ鯖のおろし和え, long simmered Japanese eggplant or 茄子の忘れ煮, squid "shiokara" 塩辛 and salmon "nanban" 鮭の南蛮漬け.


I bought a package of frozen vinegar cured Japanese mackerel or "shime-saba" from the Japanese grocery store and realized I already had another package in the freezer. So I decided to use the old package. I have served this several different ways including simple sashimiしめ鯖の刺身, ceviche  鯖のサビーチェ, and moulded sushi 鯖の押し寿司. I saw this recipe on line and made some modifications. This is very similar to what I made using tuna sashimi 鮪のおろし和え, previously. I garnished this with chiffonade of perilla and a wedge of lemon. I served this the evening I made it and then, again the following evening. After some time in the fridge, the flavors amalgamated and it got much better.


Ingredients:
One package of shime-saba, thawed, lightly washed with sake, patted dry, thin skin removed, and then cut into thin (1/4 inch) slices.
2 tbs ponzu shoyu ポン酢醤油 (from the bottle, or equal mixture of rice vinegar or citrus juice and soy sauce)
2 inch long daikon, peeled and grated and excess moisture drained*
Rehydrate dried seaweed mixture, arbitrary amount (optional)
Chiffonade of perilla and lemon wedge for garnish

*I use a grater with a meshed receptacle inside the bottom container which automatically drains excess moisture from grated daikon (or any other items). I made  sure to taste before assembling into the dish since some daikon is atomically hot. This one was ok.


Directions:
In a bowl, add the shime-saba, grated diakon, seaweed and ponzu and mix, I also added additional yuzu juice (from the bottle) for a good measure. I let it marinate for several hours to overnight, then topped it with the perilla and lemon.

This is a good dish. The daikon really makes this dish and goes perfectly with cold sake.

I made the eggplant dish since I got 2 Japanese eggplants at the Japanese grocery store a week ago and did not immediately use them. (My wife was kind enough to reminded me that eggplant, even the Japanese kind, does not improve with age.) The dish is also from the same web site I got the recipe for the mackerel dish. I decided to make this since it does not use any oil and looked healthy and simple. The Japanese name is "Wasure-ni" 忘れ煮 meaning "forgot that it was still simmering" indicating involving long simmering. The original recipe calls for "hoshi-ebi" 干しエビ, small dried shrimp, which is used to add "umami" flavor and fresh "myouga" 茗荷 but I did not have either one so I skipped the shrimp and substituted fresh myouga with vinegard myouga 茗荷の甘酢漬け we made almost one year ago as a garnish. I added slices of ginger in the simmering liquid whihc was not part of the original recipe. I served this with blanched broccoli rabe which is the closest we can get to "Nanohana" 菜の花.


Ingredients:
One Japanese eggplant (this one was on the larger side), remove the stem end, cut in quarters lengthwise, multiple thin slice cuts on the bias through the skin into the flesh but not all the way through and immediately soak in salted cold water for 10-20 minutes.
2 slices of ginger
Threads of ginger root for garnish (skin, slice thinly and then cut into thin threads).

For broth
1 cup Bonito broth (I made it from a dashi pack)
1/3 cup of concentrated Japanese noodle sauce (or mirin and soy sauce in equal amount).
two slices of ginger (original recipe calls for 1 tbs dried shrimp)

Directions:
Heat up the simmering broth until boiling
Put the prepared egg plant, the ginger slices and cover with a inner "otoshi" buta 落とし蓋 (I used a silicon "otoshi-buta" or cover it with an aluminum foil made it to a round, slight smaller than the pot opening, place the lid and simmer for 20-30 minutes.

This is a really good dish. The eggplant got really soft and absorbed the flavors of the broth. I served it cold which is perfect for summer.

The picture below is the usual salmon dish I make which is always good with cold sake.


Shown below is frozen "shiokara" from the pouch. Again, only the drink that goes with this is sake.


So, we enjoyed all four appetizers with a sips of cold sake. Our home Izakaya is not bad at all.