Showing posts sorted by date for query shiitake. Sort by relevance Show all posts

Friday, March 22, 2024

Duck Tender Cutlet and Arancini 鴨ささみのカツレツ

Looking ahead to the up coming Easter dinner my wife ordered a bone-in forequarter lamb roast from D’ArtagnanShe also ordered lamb tenderloins (which we’ve had before) and something we have never had before but which she wanted to try; duck tenders. They came as a fairly large quantity frozen in a single package (picture #4). I was intrigued by a french recipe which I saw in D’Artagnan website entitled “Yakitori de canard” 鴨ささみの焼き鳥. It was in french and although I did not look at it my wife assured me she could probably translate it if I wanted to try it. Nonetheless I can easily imagine this would be made exactly like chicken tender yakitori. (Hence no translation necessary.) But that is beside the point because I also wanted to make “arancini” for this meal. So it was “cutlet de canard” on the menu instead. In the picture #1, the top are arancini cut in half showing melted mozzarella cheese and the bottom shows the duck tender cutlet.


The duck tender is dark meat as opposed to chicken tender (picture #2) and has much more flavor.


The arancini was made of leftover shiitake mushroom risotto.


There is nothing special about making duck tender cutlet. After semi-thawing this is the amount we had (picture #4). They were frozen in a big one mass. I had to separate each tenders and vacuum packed 5-6 tenders per bag. I left one package for immediate consumption. Initially I was thinking of marinating the tenders before cooking but taking my wife’s suggestion that since we have never had them before we should taste them as is without any flavoring that might mask the original flavor. I opted to just lightly salt and pepper then breading them and cooking them the same as any other type of cutlet.


I was afraid of the duck tender to become dry after cooking but that was not the case and had much more flavor than chicken tender. I will definitely try to make “Yakitori de canard” next.

Friday, March 1, 2024

“Maitake” Hen of Woods Mushroom in Brown Butter and Sage 焦がしバーターとセージ風味舞茸

We like mushrooms. We used to get fresh mushrooms from Oregon mushrooms (on-line order) and Whole Foods but recently, we have been getting many different kinds of fresh mushrooms from Weee. Besides the usual kinds of mushrooms, we can get from any grocery store, we can get shiitake 椎茸 (Good quality), enoki エノキ, kikurage 木耳 (wood ear), shimeji しめじ, king trumpet, and maitake 舞茸 (hen of woods), and hiratake 平茸  (oyster).We usually get several kinds of mushrooms when we order groceries from them. This time beside the usual shiitake and shimeji, we got maitake. When we had shad roe, I served maitake cooked in brown sage butter as a side which was really great. (My wife may have liked the mushroom more than the shad roe.)


This recipe came from “Foragerchef.com”. The original recipe calls for a large amount of mushrooms. I scaled it down.

Ingredients
One package (35g)  fresh hen of the woods (This was the size of the package I got), separated into a few fronds each in thin, long pieces
2 tbs (or about 40grams) unsalted butter
1 garlic clove finely chopped 
5-6 fresh sage leaves (from our herb garden, I used whole leaves, since they would be easier to remove from the browned butter later)
2 tbs dry white wine (I used sake)
2 tbs chicken stock (our usual Swanson low salt no fat)
1⁄4 teaspoon kosher salt
A few turns of the pepper mill to taste
A squeeze of fresh lemon juice to taste

Directions
In a frying pan with high sides, add the butter and the sage. Heat the butter on medium heat until melted and sizzling and brown bits appear (usual brown butter process). When the butter has reached the desired level of brown, remove the sage leaves. Then add the stock or water, salt, a few turns of fresh pepper from the pepper mill and the mushrooms. Cover with a lid, increase the heat to medium high and cook, stirring occasionally to coat the hens with the pan juices for about 10-15 minutes.

Finishing and serving
Continue cooking the mushrooms until the liquid is gone and there’s only butter. Stir the mushroom to coat with the juices, then taste a piece and adjust the salt as necessary until it tastes good to you.
Cook until the mushrooms have just started to brown lightly on the edges. Turn the heat down a bit. Add the garlic and cook for a minute or two more. Add the wine and the squeeze of lemon, simmer for a minute to cook off the alcohol.

This maitake is very good with sage and brown butter and garlic flavors are nice with the almost meaty texture and flavor of the mushroom. 

Monday, January 1, 2024

Happy New Year 2024 明けましておめでとう2024

Like the last year, we put the New Year’s decoration including “Kagami-mochi” 鏡餅 and dragon or “tatsu 辰” zodiac figurines shown in the picture #1 in the room we spend most of our time rather than in the tokonoma 床間 in the “tea-room”.  Upon waking New Year’s day, we learned of the magnitude 7.6 earthquake that hit Ishikwa prefecture 石川県. We hope for the wellbeing of the people affected.


On New Year’s eve, we started the evening with a plate of assorted sashimi, most of the sashimi came from “Riviera Seafood Club”, our most recent favorite source of “home freezer” sashimi or sashimi that we can store in the freezer here at home and thaw at any time we want sashimi. Since the portions are smaller than sashimi we can get from other sources, we can eat more than one kind of sashimi at a time. On the New Year’s plate (picture #2) we had chutoro tuna 中トロ, hamachi はまち, scollop ホタテ, and octopus leg タコの足 (which was from D’artagnan). I added wasabi with chopped wasabi plant stalk (from tube) and yuzu kocho 柚子胡椒 (from tube).


On New Year’s day, we had only coffee (cafe latte and macchiato with a bit of steamed cream) rather than our usual breakfast so we wouldn’t be too full for the large lunch we planned of “Ozhoni” お雑煮 New Year’s soup. As usual, I served the soup in real lacquer ware bowls (gift from my mother many many years ago) with a side of some New Year’s dishes I made (picture #3).


This year, I precooked all the vegetables and proteins that went into the soup. This included “gobo” burdock root 牛蒡, shiitake 椎茸, shimeji しめじ and wood ear 木耳 mushrooms, carrot 人参, daikon 大根, and “kinu-saya” 絹さや snow peas. The protein included sous vide chicken breast (a few slices) and poached shrimp. As usual, I encased the “mochi” 餅 rice cake in “abra-age” 油揚 deep fried tofu pouch (peaking out of the bottom right of the soup bowl). I made the broth from the dashi packs I usually use as well as by poaching the shrimp in the dashi broth. I seasoned it with x4 concentrated Japanese noodle sauce. By precooking the vegetables and the proteins, I had better control over cooking everything just right. It also made it possible for me to make a better arrangement of the ingredients in the final soup bowl serving. Just before serving, I added frozen yuzu zest which added a nice yuzu 柚子 citrus favor (picture #4).


The side dishes (picture #5) included the usual New Year’s dishes I like to make including: salmon kelp roll 酒の昆布巻き, salmon “Russian” marinade 鮭のロシア漬 garnished with “ikura” イクラsalmon roe, daikon namasu  大根なますand poached shrimp.


We also had a few small glasses of  sake with this as a libation to the New Year. Now, this evening we will be hitting the Sushi Taro Osechi box すし太郎お節箱. The below is a preview (pictures #6 and 7).


We expect some good New Year’s feast to come with the osechi box. Already salivating!!

Saturday, December 23, 2023

Arancini and Mini-Scotch Egg アランチーニとミニスコッチエッグ

My wife ordered some small appetizers from Harry and David. We were already going to order dried fruit medley from them to make fruit cakes and bread. So she added an assortment of small frozen appetizers to the order which included “arancini” among the other items. I told her that arancini is typically made from left-over risotto and I could make it very easily as long as we had left-over risotto. We tried the arancini we had ordered. During the heating, the cheese came out and it was ok but not great. Since we had made shiitake risotto a few days earlier, my wife took me up on my boast about how easily I could make arancini as long as we had left-over risotto and challenged me to make some. So with my feet accordingly held to the fire by this challenge I made arancini from the risotto. Since I would need hot oil for frying to make the arancini, I decided to also make mini-Scotch eggs from quail eggs and ground chicken. The picture below is not a great presentation—the arancini with the melted mozzarella in the center is shown on the left and the scotch egg with the quail egg in the center is shown on the right. We ate this immediately hot out of the oil with some Tonkatus sauce. Both the arancini and Scotch eggs had fresh shiitake in them and both were great.  The arancini had the melted mozzarella cheese in the center, a crunchy outer shell and soft risotto with a strong shiitake flavor.


For arancini

Ingredients: (made 8 arancini as seen below, the round ones are arancini and oval ones are mini-Scotch eggs)
Shiitake risotto (left-over) about 2 cups
Mozzarella cheese, 10 small cubes, low-moisture
Flour, egg, and Panko bread crumbs for breading
Oil for deep frying (I used peanut oil)

Directions:
Moisten your hands and make a ball about 1 and half inches in diameter and insert the cheese and encase it completely. If needed lightly squeeze to make sure the cheese is completely encased.
Bread the balls as usual; first coat with flour, then egg water and then with Panko bread crumbs (see picture below).


Deep fry in 180C (350F) oil for 2-3 minutes or until the surface is golden (everything is already cooked inside). See below picture.


The arancini I made were great straight out of the hot oil but they also warmed up nicely in the toaster oven. I would say the ones I made were much better than the store-bought and accordingly my wife has conceded that I met her challenge and has now commissioned me to make arancini whenever we have left over risotto.

Sunday, December 17, 2023

Burdock Root and Mushrooms 牛蒡とキノコの煮物

This is another dish I made to use up the mushrooms (Shimeji and shiitake しめじ、椎茸). I also had “gobou” 牛蒡  burdock root. I got the idea of cooking burdock root and mushroom together from a recipe I saw on line but I just made it in my own way. Burdock root can be very fibrous but this was a good one and the the combination of simmered burdock root and mushrooms worked very well. The shimeji was good but the shiitake caps worked well imparting very meaty texture and nice flavor.


The gobou gave a very distinctive flavor and nice crunchy texture but not fibrous. I seasoned it on the light and slightly sweeter side (than I usually do) and is a perfect drinking snack. As a side dish for rice, I would season it more strongly.


Ingredients: (The amount is arbitrary, I just used up all the mushrooms I had left)
10 inch long, medium-sized (diameter wise) “gobou” burdock root, skin scraped off using the back. of the knife, slice on angle 1/4 inch thick and immediately soak in acidulated water for 5- 10 minutes.
I package (100 gram) of shimeji mushrooms
4 caps of fresh shiitake mushrooms, quartered
300-400 ml Japanese dashi broth
2 Tbs. mirin
3 tbs x4 concentrated Japanese noodle sauce (or soy sauce with 1 tbs mirin)

Directions:
Drain the gobou and cook in a fresh water for 10 minutes and drain again
In a pan on medium low flame, add the broth, seasonings, the gobou, mushrooms and with a silicon otoshibuta, simmer for 20-30 minutes
Let it cool to the room temperature in the simmering broth
Serve at room temperature or warmed in a microwave oven especially after the refrigeration.

This is quite a robust dish. The mushrooms give it an almost meaty context. Especially the shitake mushroom which were very thick but tender and well seasoned. They tasted like a tender piece of meat. The burdock root was very tender and its distinctive flavor really came through. This is perfect for a cold evening with a warm cup sake.

Sunday, December 10, 2023

Eggplant, Avocado and Nagaimo Gratin ナスとアボカドの長芋グラタン

I made this dish for lunch one day from what we had on hand and what we need to finish before it went bad. I just winged it without any particular recipe. As a result I was not sure how it would come out but it was certainly edible and quite interesting (in a good way).


The main items are Asian eggplant, avocado and grated nagaimo mixed with an egg (in leu of Béchamel sauce). I also added tomato and shiitake mushroom sautéed with shallot, just because I had them.


Ingredients:
One Asian eggplant (pale purple and long), cut into a bite size by cutting at 45 degree angle as I turned the egg plant (“Rangiri” 乱切り)
One avocado, cut into a bite size pieces similar to the eggplant (I only had half of a leftover avocado).
Nagaimo, about 200grams, peeled and grated
One large egg
3 skinned Campari tomatoes, seeds removed and cut into small cubes
1 tbs of chopped shiitake mushroom and shallot sautéed in olive oil (I made this few says ago mostly from the stems of the shiitake mushrooms)
Cheeses (I used sharp cheddar and parmesan but any melting cheese will do), the amount is arbitrary
2-3 tbs olive oil

Directions:
Sauté the eggplant in 2 tbs of olive oil the skin side down first then brown all other sides (4-5 minutes)
Place the eggplant and the avocado in the bottom of a small Pyrex baking dish.  Add the remaining 1tbs olive oil.
Mix the grated nagaimo and the egg and pour over (see below)


Top with the mushroom mixture, the tomatoes, and the  cheeses and bake for 30 minutes at 350F (I used the toaster oven in convection mode) (see below).


Let it stand for 5 minutes and serve (the first picture).

I was not sure the grated nagaimo and egg ratio but it came out ok. This is a sort of healthy Béchamel sauce substitute. The eggplant and avocado went well together. The next day, we placed the remaining dish in smaller individual ramekins and added a bit more cheese and toasted it in the highest setting. It heated up very nicely.

Thursday, November 30, 2023

Sweet Potato and Chestnut Rice サツマイモ、栗ご飯

My wife got three relatively small Japanese sweet potatoes or “Satsuma-imo” さつまいも from Whole Foods.  She was vaguely thinking of making sweet potato muffins but the amount was not really enough. I suggested making sweet potato rice instead (I ended up using all three potatoes for three different dishes). Since we also had prepared chestnuts, I made sweet potato chestnut rice. To extend the autumnal theme, I also made miso soup with mushrooms and lily bulb. Since I also made new batches of pickled daikon and “asazuke” 浅漬け cucumber, I served those on the side.


This is a close-up of sweet potato chestnut rice. I sprinkled “goma-shio” ごま塩, a mixture of black sesame and salt.


For the miso soup, I added shimeji しめじand shiitake mushroom along with lily bulb 百合根 which sank to the bottom. We picked the lily bulb up with the chopsticks so they got their place in the photo op.


Ingredients:
2 cups (using the cup came with out rice cooker) of short grain rice (we used “Yumepirica” ゆめぴりかHokkaido rice we got form NY rice factory).
1 inch square kelp
1 Japanese sweet potato, peeled, diced and soaked in cold water
10 prepared chestnuts
1 tbs x4 concentrated “Mentsuyu” Japanese noodle sauce

Directions:
Wash the rice, place it in the rice cooker, add the specified amount of water, add the seasoning, sweet potato and chestnuts and turn on the switch.
When it is done (see below), remove the kelp and gently mix.


This is a very autumnal and nice rice. Nice sweetness from both the sweet potato and the chestnuts with contrasting texture of soft and somewhat crunchy. I just sprinkled the “goma-shio” and my wife, as usual, added butter and soy sauce. The soup also went very well. The nice sweetness and crunchy texture of the lily bulb and mushrooms worked well together. We were also pleased with the daikon tsukemono.

Thursday, November 9, 2023

Broccoli Cups ブロッコリーカップ

When we order broccoli using our grocery home delivery service, we usually get three giant heads (see picture below). It is not possible to consume everything before it spoils so I separate it into florets, steam them and freeze them in Ziploc bags in small batches for future use.


Recently we saw an interesting recipe on YouTube which uses a large amount of broccoli. Although the original recipe uses fresh broccoli, we figured blanched and frozen broccoli should work. As usual, we made substantial changes mostly due to the ingredients available. We really like the idea of making broccoli cups. We could come up with different kinds of stuffings. In any case, this was our first try.  The stuffing was a bit crumbly.


The broccoli cups retained their shape well.


Ingredients: (made 9)
For the broccoli cup
4 cup finely chopped broccoli (we used blanched and frozen, separated each frozen florets and chopped up in a small batches using the food processor fitted with cutting blade. If using fresh broccoli, the original recipe grated the broccoli using a box grater) 
2-3 eggs (2 eggs may have been better, excess egg pooled on the bottom of the cup when baked but we did not use 2 chopped boiled eggs in the stuffing which was in the original recipe. So, it sort of worked out)
1/2 cup grated Parmesan cheese (optional)

For stuffing
1 cup finely chopped onion
2 Jalapeño peppers, seeded and veined, finely chopped (or green pepper)
3 cloves of garlic, finely chopped
2 small carrots, peeled and cut into small dice
1/2 cup fresh shiitake mushroom stems, finely chopped (optional, since we had this. First tear length wise and then chop)
1-2 tbs olive oil
1 package feta cheese, crumbled
1/2 cup each grated smoked Gouda and Cheddar cheese

For the sauce (a type of aurora sauce)
Greek yogurt and Mayonnaise equal amount
Ketchup
Parsley and chives, chopped

Directions:For broccoli cups
Mix the broccoli, eggs, and Parmesan cheese
Divide the broccoli mixture in 12 equal portions and place in a muffin tin lined with  paper muffin cups (#1)
Using fingers or spoon, spread the mixture to make a cup (#2)
Bake at 350F for 15 minutes (#3, note the egg pooled on the bottom and cooked)
For stuffing
Sauté the stuffing ingredients except for cheeses in the olive oil for 2-3 minutes and turned down the heat with the lid one for 7 more minutes. Season with salt and pepper
Let it cool down a bit and mixed in the feta cheese

Final assembly
Place the stuffing in the baked broccoli cups (#4)
Top each with the grated cheeses (#5)
Bake 15-20 minutes at 350F (#6)

This is a surprisingly good dish. Next day, we reheated this in the toaster oven and had it as a lunch. Compared to freshly baked, the broccoli flavor it less intense and tasted better. stuffing tended to crumble but tasted great especially the umami the shiitake imparted. We can play with the stuffings to our liking. This is a great recipe to use a large amount of broccoli.

Monday, November 6, 2023

Chestnut Soup 栗ときのこのスープ

We used to get fresh chestnuts from California every fall. The preparation, especially removing the inner brown membrane is time consuming and difficult. So we decided to try commercially prepared chestnuts sold either in a jar or a plastic pouch. As a test to see if the prepared chestnut tasted any different from the fresh, I made chestnut rice 栗ごはん with it. The final dish came out similar to using fresh chestnuts with the added advantage of much less effort of preparation required. (Since we posted  making chestnut rice with fresh chestnuts and this preparation tasted exactly the same we did not post it again.) But this exercise proved to us that fresh and commercially prepared chestnuts are interchangeable.  After making the rice we were left with one and half bags of prepared/roasted chestnuts (about 7-8 oz or about 200 grams.) My wife came up with this chestnut soup recipe which she found on-line. Again I had to modify the recipe because of the ingredients we had. The original calls for dried porcini and fresh button mushrooms but I only had fresh shiitake mushrooms.


Ingredients
5-6 fresh shiitake mushrooms, stems removed and caps sliced.
2 tbs. unsalted butter and 2 tbs. olive oil
1 large leek, white and tender green parts only, finely chopped
1 carrot, thinly sliced
2 celery stalks finely chopped
1 teaspoon minced rosemary (from our herb garden)
7 oz. (200 grams) peeled roasted vacuum-packed chestnuts (see picture below)
3 cups chicken stock
Salt
Freshly ground pepper

For garnish
1 tbs each of olive oil and unsalted butter
5-6 fresh shiitake mushrooms, stem removed and caps thinly sliced
Salt and pepper to taste
Fresh rosemary, finely chopped up


Directions
In a saucepan on medium heat, add the olive oil and butter. Add the sliced shiitake mushrooms, leeks, carrot, celery and rosemary and cook, stirring occasionally, until the vegetables are cooked; about 15 minutes. Add the chestnuts and stock, season with salt and pepper. Bring the soup to a boil and simmer over low heat for 30 minutes. Using an immersion blender, puree the soup until smooth.

For garnish
In a frying pan, heat the oil and butter. Add the sliced shiitake mushrooms, cook over moderately high heat until lightly browned (6 minutes). Season with salt and pepper. I served the soup warm and garnished with the sautéed shiitake and the chopped rosemary.

This is an excellent soup/potage. The chestnuts and leeks imparted a nice sweetness and distinctive chestnut flavor. Although the original recipe calls for heavy cream, I served this warm without any cream. It really didn’t need it. We had this as a lunch with slices of my home baked baguette. I am sure certain chestnut dishes cannot be made using these kinds of prepared chestnuts but I will try to use them in more of our favorite chestnut dishes

Friday, November 3, 2023

Braised “Tsukuda-ni” Mushrooms きのこの佃煮

We like mushrooms especially shiitake mushrooms 椎茸. Since Weee offers a wide variety of mushrooms we tend to go “over board” and order too many when we get groceries from them. This time we ordered shiitake, wood ear 木耳, and brown shimeji mushrooms しめじ. Among these mushrooms, shimeji last the longest (about 2 weeks) in the original package in the refrigerator without doing anything. For  shiitake, I removed the stems. (I tear them lengthwise, then chop them finely and sauté with finely chopped onion. I use this mixture in meat balls or other dishes. It adds a lovely umami flavor). I place the caps in a ziploc bag with a small sheet paper towel which absorbs moisture and keeps the mushrooms dry. The wood ear, I wash and blanch, wash it again and dry spreading them out over a dish towel for a few hours. I then pack them in a Ziploc bag like I do for shiitake. Even with these preparations, we need to use up the mushrooms within 1-2 weeks. So at the end, I need to cook them in some way. For the shiitake, I slice the caps thinly and sauté them with finely chopped shallots. We can used this for making “shiitake risotto” or other dishes. This time we had left-over shiitake, shimeji and wood ear. So I made this simmered dish which is similar to “Tsukuda-ni” 佃煮.


Ingredients:
Any mushrooms (Here I used shiitake, shimeji and wood ear), amounts arbitrary, cut into bite size pieces,
small amount of  water
Mirin and soy sauce (I used x4 concentrated Japanese “Mentsuyu” noodle sauce),

Directions:
Add the mushrooms to a small pan with a lid. Place the pan on low heat and add a small amount of water (more water will come out from the mushrooms, so just a small amount is needed so that the bottom will not scorch) and place on a tight lid.
After 10-15 minutes, the volume of the mushrooms reduces.
Add mirin and soy sauce in about equal amount (You could add more later if needed, so start with a small amount)
Without a lid, simmer and stir occasionally until the liquid almost all evaporated (see picture below)
Taste and if not seasoned enough add more seasonings and repeat the process*


* the name “Tsukuda-ni” 佃煮 derived from a small island called “Tsukuda-jima” 佃島 in  Sumida river 隅田川 in tokyo. In edo-era 江戸時代, it was famous for simmered and seasoned (sweet and salty or “ama-kara” 甘辛) seafood mostly small fish and “nori” seaweed or other items such as meat.)  This was good for “preserving” fish and meat and mainly consumed as condiments for rice.

I made this dish as a drinking snack but it was bit too weakly seasoned. So I added more seasoning and re-cooked it a few days later. If this is to be used as a condiment for rice or over a block of tofu, I would have seasoned it a bit more. This is a good dish to use up left-over mushrooms and works well as a snack with either red wine or sake.

Tuesday, October 31, 2023

Mushrooms Udon Bowl きのこ沢山のかけうどん

“Udon” うどん are thick Japanese noodles made from wheat flour, salt and water. I’ve posted many udon dishes over the years. We usually use dried udon noodles because it is convenient. Udon appears to have many regioanl varieties. In Shikoku 四国 and Kansai 関西 (Osaka area),  Sanuki (-style) udon 讃岐風うどん is famous and is characteristically “chewy” as opposed to southern Kyushu 南九州 or Fukuoka 福岡 udon which is famous for its softness. The udon we usually get is somewhere in between. We tend to like thin udon such as “Inaniwa” 稲庭 udon or “Harima thread uson” 播磨糸うどん. I’m not sure what triggered it but we decided to get  frozen Sanuki-style  udon from Weee. The noodles are a bit on the thicker side with a square shape and straight edges (see 2nd picture below) which are characteristics of Sanuki udon or udon in the Kaisai region in general. For lunch, I made “kake-udon” かけうどん which is warm udon in broth. I used whatever was available for topping indluding three kinds of mushrooms (shiitake, maitake and simeji), soft boiled duck egg, simmered pork and edible chrysanthemum.


Underneath the toppings are the Sanuki-udon.


Ingredients: (2 small or half servings)
Mixed fresh mushrooms (I used shiitake sliced, mitake torn into small pices, and shimeji separated)
One package of frozen Sanuki udon, thawed and cooked in boiling water for 3-4 minutes
2 slices of simmered pork
Edible chrysanthemum, blanched
One soft boiled (pasteurized) duck egg, halved
Blanched sugar snaps
Dashi broth
X4 concentrated Japanese noodle sauce

Directions:
Sauté the mushrooms in olive oil for a few minutes, add the broth (enough for two bowls) and simmer for a few minutes, add the noodle sauce to taste, place the pork, egg, chrysanthemum, and sugar snaps on the top to warm them up for few minutes
Divide the udon into two bowls, arrange the toppings and pour in the seasoned broth.
Add 7 flavored pepper flakes or “shichi-mi tougarashi 七味唐辛子 (optional)

The udon was really chewy. We like it but it requires a bit of effort (chewing). This type of udon may be perfect for “Nabeyaki udon” 鍋焼きうどん.

Thursday, August 31, 2023

Duck Egg アヒルの卵

While I was browsing Weee Asian grocery website, I noticed that in addition to the quail eggs which we like to get regularly, they also have duck eggs. I asked my wife if she had ever eaten a duck egg. She replied, “Have I ever eaten a duck egg?” Then reminded me that duck eggs were a regular by-product of raising ducks as a child in rural Pennsylvania even if the ducks were just pets. “So yes she had eaten a number of duck eggs in her past.” She also mentioned that, to her recollection, they were extremely rich with a rather strong/gamy flavor. In fact, to her juvenile palate they were almost inedible. (Her sister emphatically confirmed my wife’s description of the duck eggs).  Her family used to cook scrambled eggs in the ratio of one duck egg with several hens eggs to somewhat blunt the gaminess of the duck eggs. This peaked my interest and ordered half a dozen.

The picture below is a comparison of a hen’s egg (left) to a duck egg (right). Although we read that duck eggs can be as much as 50 to 100% larger than chicken eggs, in this particular example, the duck egg is only about 20-30% larger than the chicken egg. 


Upon cracking it open, the duck egg has a thicker and sturdier shell and the inner membrane appears stronger. The duck egg yolk (right) are larger and brighter orange in color. 


For a taste comparison, we decided to simply scramble the two eggs. This preparation would also be the closest to the tastes my wife experienced as a child. Since this was a lunch, I served slices of barbecued pork cooked our Weber, celery feta cheese with shiitake mushroom salad, “drunken” Campari tomato and a half slice of home-baked English muffin bread.


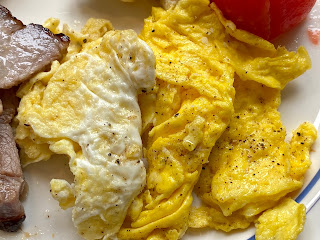
The scrambled duck egg has much brighter yellow in color (shown on the right). We tasted to compare. Based on my wife’s recollection, we were expecting the duck egg to be much stronger and gamier in flavor but it was quite similar to the hen’s egg. If we were not told, we would not have been able to tell the difference. My wife initially was hesitant to eat the duck egg fully expecting what she experienced as a child. Then she was very surprised and even a little disappointed at how similar it tasted to the chicken egg. (So she was left with a quandary. What had changed since her childhood—the duck egg or her palate?)


This was very interesting and we will try various preparations such as boiling, poaching or frying the duck eggs for comparison to the hen’s egg.

Monday, August 7, 2023

Nine appetizers served in nine divided plate version 2

This is the second version of nine small appetizers served on the nine space divided plate. Although it was not intentional it turned out that I did not have even one repeat of the items I presented in the previously posted nine appetizers. But this time I did include two store-bought items that I got from our Japanese grocery store; Chinese-style octopus salad and fish cakes. But I made the remaining 7.


The top row left is blanched edible chrysanthemum or “shun-giku” 春菊 shown in detail below, dressed with x4 Japanese noodle sauce and mixed with generous amount of dried bonito flakes or “kezuri-bushi”  削り節. It has very distinct flavors which we really like.


The 1st row, middle is my ususal “dashi-maki” だし巻き Japanese omelet. This time I added dried green nori or “aonori” 青のり. I garnished it with julienne of green perila or “aoziso” 青紫蘇.


The next dish is a Chinese-style octopus salad or 中華風タコサラダ. It is pretty good and we like it.


The center row, left is hijiki seaweed, deep fried tofu and carrot stir fry or ひじきと油揚の炒め物.


The 2nd row center is one I just made this morning. Fried egg plant and mushroom simmered in broth or ナスと椎茸の揚げ浸し. The mushrooms include fresh shiitake and brown shimeji. This is served cold with garnish of blanched green beans.


The 2nd row left is my usual burdock root stir fry ゴボウのきんぴら.


The 3rd row left is a cold skinned Campari tomato. I cross cut the top halfway-through and poured on some Irizake  煎り酒 and special sushi vinegar (both from the Rice Factory). Irizake is boiled down sake seasoned with “umeboshi” picked plum 梅干し, kelp and bonito flakes. The sushi vinegar is a special kind from “Echizen 越前” or present day Fukui 福井.  It tastes milder and better than our usual (Mizkan brand). I topped this with fine julienne of  “Gari” がりsweet vinegar marinated thinly sliced ginger root (usually use to accompany sushi) and perilla. I got this idea from one of the food blogs I follow but I did not follow the recipe exactly.


The 3rd row center is store-bought fish cake which I heated up in the toaster oven and dressed in x4 Japanese noodle sauce and yuzukosho.


The 3rd row right is my usual “asazuke” 浅漬け picked (salted) vegetable which includes cucumber, carrot, nappa cabbage and daikon radish. I also added “shio konbu” 塩昆布, and ginger. The asazuke is about two weeks old but still tasted fresh (I attribute this to the fact I added a bit more salt - more than the usual 3% - and added a small amount of Vodka when I made it. While it didn’t alter the overall taste, I think this makes the asazuke last longer without becoming sour).


After enjoying these 9 small dishes both of us were quite full and did not eat anything else. All the wonderful different flavors and textures made a really enjoyable dinner.

Friday, August 4, 2023

Quail egg fry and Scotch eggs うずらの卵の串揚げとスコッチエッグ

We started using quail eggs ウズラの卵 from fresh eggs that we boil rather than using canned ones since the quality is much better. We can get fresh quail eggs from three sources; Weee on-line Asian grocery delivery service, our local Japanese grocery store (not always) and Whole Foods. Fresh quail eggs have their own problems, however. 1. It is difficult to judge if any eggs are cracked unless it is leaking the white or otherwise quite obviously damaged, 2. while boiling some quail eggs develop the cracks and 3. It is not easy to peel the shell without taking off some of the white. So the yield is 70-80% on good days. In any case, we got a dozen eggs and ended up with 10 boiled quail eggs (that is 83%!). I made mini Scotch eggs with the quail eggs and ground chicken. I also made “fried boiled eggs” (i.e. boiled quail eggs that are breaded and then deep fried). As a starter for one evening, I served half a Scotch egg, fried boiled quail eggs, fried shrimp heads from our Tako Grill take out and marinated or “zuke” tuna and hamachi sashimi. As a vegetable, I served “asazuke” 浅漬け of cucumber, nappa, daikon and carrot. I initially served with green tea salt and wedge of lemon. My wife requested “Tonkastu-sauce” as well.


I skewered two fried quail eggs with a tooth picks (shown under the shrimp head) emulating “Kushi-age串揚げ, Japanese breaded fried items on skewer, which is a classic Izakaya item.


How to prepare boiled quail eggs:
Add quail eggs to a pan of cold water on medium flame, as the water gets warmer, gently start stirring the water which helps to center the egg yolks. Once the water starts boiling turn down the flame and boil for 3 minutes. Immediately cool in ice water

Quaril egg Scotch egg:
Ingredients: Made 5
8 oz ground chicken (or beef or pork)
5 boiled quail eggs
1/2 medium onion, finely chopped
2-3 shiitake mushrooms, finely chopped
freshly grated nutmeg, black pepper and salt to taste
1 tbs olive oil
2 tbs Panko bread crumbs

For breading
Flour or potato starch
1 egg beaten mixed with 2-3 tbs water
Panko bread crumbs
Peanut oil for deep frying

Directions:
Sauté the onion and mushrooms in olive oil for 2-3 minutes, let it cool to the room temperature
Add ground chicken, panko and the seasonings, mix well and knead by hand (if too loose add more panko and/or potato starch).
Coat each quail egg in potato starch
Divide the meat mixture into 5 parts and make an oval 1/3 inch thick on your palm.
Place the egg in the center and encase it with the meat mixture to make an oval sphere (or ellipsoid)
Bread the sphere by coating in the potato starch (or flour), the egg water and the panko bread crumbs
Deep fry at 180F for about 5 minutes or until the bubbles become small
Cut in half and serve

This was quite good. The fried quail egg had a nice crunchy outside and the inside yolk was velvety smooth. The overall flavor was very nice too. It would have been easy to eat many more. The little Scotch egg was just the right amount as an appetizer for us. (We find the Scotch eggs made with regular hens eggs are too big.