Tuesday, February 9, 2021

Pork curry with almond sauce アーモンドソースポークカレー

 We like to roast pork in our Weber but because of Covid, the cuts we usually use for roasting are not always available and we have had to make do with whatever we can get. Case-in-point, we recently got a bone-in shoulder pork roast. This cut was very large. In addition, it contained a portion of the scapula bone which I removed requiring some further “at home” butchery to get the various sizes and portions that we wanted. In this case I removed the bone and divided the roast into three segments. The first segment was the meat around where the bone was removed. I cut it into small chunks for stew or curry. The remaining two segments consisted of a smaller portion of roast which I used for “ni-buta” 煮豚 or simmered pork and a larger portion of roast which I barbecued in our Weber. 

I commissioned my wife to come up with a dish using the small chunks and suggested a curry. This time, my wife wanted to make a new curry she had not tried before. She chose one from Madhur Jaffrey’s cookbook “Indian Cooking. In addition to using quite a few spices (#1 & #2 below), it also includes pulverized almonds which is something we have not used before. The resulting curry is shown in the picture below. It was a lunch one day. I served the curry over rice with tomato (Skinned Campari tomato), blanched sugar snaps and broccoli which I warmed up in the curry while the curry was being heated.


I also served Japanese pickles which traditionally accompany Japanese curry. The red on the left is “Fukushin-zuke” 福神漬け (people from Hokkaido call it “Fukushin-zuke”a but the rest of Japan will call in “Fukujin-zuke” (a mixture of daikon, lotus root, egg plant and cucumber, soy sauce flavored) and the white objects on the right are “rakkyo” らっきょう (pickled small onions).


Ingredients:
2 garlic cloves
1 inch sized ginger cube coarsely chopped
5 Tbs. slivered almonds, roasted
3/4 to 1 cup of chicken stock
2 lbs. of pork shoulder cubes
1/2 tsp. cardamom
1 tsp. cinnamon
1/4 tsp. cloves
2 medium onions finely chopped
1 tsp. ground coriander
2 tsp. ground cumin
1/4 tsp. cayenne pepper
1 1/4 tsp. salt
1/4 tsp. garam masala

Directions:
Put the garlic, ginger, almonds and 6 Tbs. chicken stock in a blender (we used an immersion blender) and blend until you have a paste (#3).

Add several tablespoons of peanut oil into wide frying pan. Add the cardamom, cinnamon and cloves and cook until they “bloom” becoming fragrant. Put in the onions and cook until lightly browned (#4). Put in the almond paste as well as the coriander, cumin and cayenne pepper (#5). Stir until it browns slightly. Add the meat the salt as well the chicken stock (#6). Cover and cook on simmer for several hours until the meat gets tender. Add the garam masala before serving.

Just a Note: The meat did not get tender in the sauce even after several hours so I removed it and put it in a sauce pan covering it with chicken stock. I simmered it that way for about an hour. It got nicely tender and made additional sauce in the chicken stock. I added the meat back and sauce into the curry and it was much better.


This was very good. We've never had anything like this before. It had plenty of depth of flavor but was not too (spicy) hot. The almonds gave it a creamy texture and added a note of nuttiness that was very nice.  The additional veggies I put in as it was being heated up added some bright notes of freshness as well as additional flavors. It made a great lunch.

Saturday, February 6, 2021

"Kuri-mu pan" Cream custard buns クリームパン

 While I was growing up in Japan, sweet breads called "Kashi-pan" 菓子パン were very popular among kids. They came in many forms such as Melon-pan メロンパン  bread covered with a thin layer or sweet crunchy cookie, or bread filled with  cream custard (cream pan クリームパン), chocolate  (choko-pan チョコパン) or sweet bean paste (an-pan アンパン). The word “pan” is derived from the French word for bread “le pain” pronounced (le pan). Although these breads were very popular with kids either my parents' policy (most likely) or my own choice (I doubt it), I rarely enjoyed "kashi-pan" while growing up. When my wife and I visited Japan, my wife found "Kashi-pan" and, like the kid she is at heart, she really liked it. When we got home she even made "melon pan". My wife in general is very fond of filled buns. She somehow found this recipe for "Asian cream custard buns". She made two versions shown below. For the buns on the left, she fully encased the filling in dough. This is the more traditional way of making them. On the right, she filled a depression made on the top of the bun with the cream custard. This is the method she used for ricotta cheese buns


She said she did this to avoid having a bun with the steam created gap on the top as as shown in the picture below. This occurs because of the steam produced by the filling during baking. The one with custard filled in the surface depression does not have this problem. Since both are basically the same bun just prepared slightly differently I think both are equally good.


The picture below shows the glazed buns with cream totally encased in dough just out of the oven.


And these are the ones with the surface depression filled with custard.


Ingredients:
for the custard:
2 large eggs + 1 egg yolk
70 g sugar (1/3 cup)
15 g corns starch (2 Tbs.)
20 g cake flour (2 Tbs.)
300 g milk (1 1/4 cup)
1 tsp. vanilla
1 Tbs. butter

for the dough
250 g bread flour (2 cups)
50 g cake flour (1/3 cup)
30 g sugar (2 Tbs.)
20 g sweetened condensed milk (1 Tbs +1 tsp)
80 g cream (1/3 cup)
80 g milk (1/3 cup)
1 egg (25 g for the dough, the rest for the glaze)
1 tsp. yeast
1/2 tsp. salt
30 g cold butter cut into small cubes (2 Tbs.)

Directions:
For the custard
In a bowl, mix eggs, sugar, corn starch and cake flour until well combined. Heat milk in a sauce pan until steaming. Temper the egg mixture with the hot milk by adding several ladles full slowly and stirring to combine. After the egg mixture is tempered add it to the milk still in the sauce pan. Cook on medium low heat until it starts to thicken, stirring constantly. This could take some time so be patient. When it achieves a fairly firm consistency (i.e. won't run off if placed on a flat piece of dough). Take it off the heat. Add the butter until melted and then stir in the vanilla. Continue whisking so it doesn't form a skin as it cools. After it cools slightly cover with plastic wrap touching the top of the custard, again so it doesn't form a skin as it cools. Set aside or put into the refrigerator to use later.

For the dough
Add everything from the bread flour to the yeast into a stand mixer. Mix until dough forms. Let it rest for 30 minutes. Add the salt and knead for 1 minute. Add the butter a piece at a time kneading the dough until smooth. Knead 7 to 10 minutes. Form into a ball in a greased bowl. Turn the ball until it is covered with grease. Put into proofing box set at 81 degrees. Let it rise until doubled in size.

To assemble:
Punch down dough. Weigh the dough and calculate how many 50 g buns the dough will make. Then weigh the custard and see how much each scoop of filling must weigh to equally fill the 50 g buns calculated. I completely encased the filling for 8 buns in dough and put them on a parchment lined cookie sheet. I formed the remaining buns into balls and put them on the cookie sheet. The cookie sheets went back into the proofing box until the buns had about doubled in size. I took the buns made into balls but not filled with custard and using the base of a small cup dipped in flour pressed down on the center of the ball until the cup stopped moving. I then filled the depression with the remaining calculated portions of custard. I took the remaining egg and glazed the fully encased muffins completely and the depression filled buns just on the bread portion. I cooked them in a 375 degree oven for 12 to 18 minutes or until golden brown. I removed them from the oven and cooled on a rack.

These buns were everything you would expect in a kashi pan. The dough was tender and slightly sweet. The custard was luscious, not too sweet and vanilla flavored. What a breakfast treat!

Wednesday, February 3, 2021

Sweet condensed milk bread

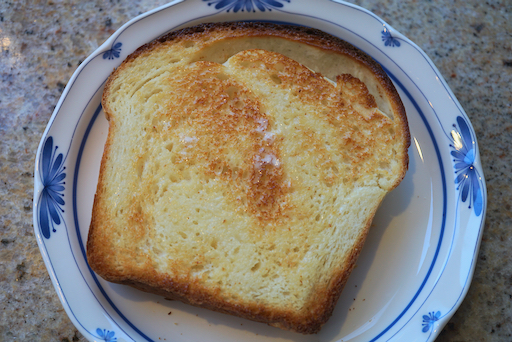
I made a Japanese-style super-soft milk bread recently. It was made with"Yu-dane" 湯種 or "Tangzong". I am not sure how my wife came across this recipe but this was also dubbed as "Japanese-style milk bread." It does not use Tangzong but uses sweetened condensed milk instead. My wife really wanted to try this recipe. We usually do not have any kind of condensed milk on hand so we ordered some when we had groceries delivered. As shown in the picture a space formed near the top surface. Maybe the secondary and last rising was a bit too much.  Otherwise this was a fine looking loaf of bread. It is not as soft as the previous milk bread but much softer than the regular white bread loaf we make. It has slight sweetness and the texture was great. Toasted and buttered this is great loaf.


My wife also used an egg for the glaze.


The grain of the cut surface shows slightly larger holes than the previous milk bread. This may be due to slight over raising after making the loaf.


One of the reasons this dough rose more vigorously may be this new contraption we got recently. This is called "Brod & Taylor Collapsible electric bread proofer". You just set the temperature which is said to be calibrated to the content temperature rather than the ambient temperature in the box. We interpret this to mean that when set at 81 degrees it is indicating that the bread being proofed is 81 degrees not the overall air in the box. The instructions say it was calibrated at the factory whether its for bread dough, yogurt or slow cooking).


This is collapsible so when it was not in use it flattens for easy stroage. The top has a clear window so that you can check on the progress of the bread dough rise.


Another good thing about this contraption is that it includes a shallow tray which can be half filled with water and provides moisture inside the box. We did not cover the dough but the surface did not dry out or make a crust. My wife is looking forward to using the box to make yogurt.


Ingredients
1 tsp sugar
1 cup milk
2 1/4 yeast (just a note: this is the amount of yeast usually used to make 2 loaves. This may have been another reason the bread rose so much so quickly.)
1 1/2 tsp. salt
1 Tbs. butter
3 1/4 cups bread flour
2/3 cup sweetened condensed milk
1 egg lightly beaten

Directions
Proof the yeast in the slightly warmed milk with the sugar dissolved. Add the yeast mixture and every thing except the egg to the bowel of a stand mixer. Mix until a dough forms. Knead for 7 to 10 minutes then turn out onto a lightly floured board and form into a ball. Place dough in a greased bowel turning to grease all over. Place in the proofing box set for 81 degree temperature until double in size. Punch down and form a loaf and put into a greased loaf pan. Put into the proofing box again until the loaf doubles in size. Brush the surface with the egg and bake in a 350 degree oven for 30 to 35 minutes until golden brown and sounds hollow when tapped. Turn out onto a wire rack to cool.

This is a very lovely bread. Nice soft texture and a complex flavor just slightly sweet. The flavor was even better the next day. The texture was a bit denser and moist compared to the previous Japanese milk bread we made. Nonetheless it is a wonderful toasted/buttered breakfast bread.

Sunday, January 31, 2021

Matcha green tea tasting 抹茶の飲み比べ

Two years ago I made green tea and black bean cake  using the left-over "kuromame" 黒豆 black beans in syrup that came in the Sushi Taro osechi box. The recipe I used is in English in our blog. This year I commissioned my wife to take over making the green tea cake. Then, she pointed out that we were out of "matcha" 抹茶 green tea powder. I kept it in the freezer and mostly used it for cooking such as making "green tea salt" for tempura and apparently didn’t replace it after using it up. Since we are not physically going to our Japanese grocery store because of covid, I decided to get the green tea on line. Hibiki-an 響庵 is a company we have used in the past to get green tea and we could have gotten matcha from them but it is shipped directly from Japan and would have taken too long to get here. I then found "Matcha Kari" which imports its matcha stock from Japan but is located here so delivery time was much shorter.  I bought a mid-priced tea from them called "First harvest sipping matcha". (According to Mach-kari’s, Hibiki-an’s, and other websites which sell matcha, they offer several grades of matcha which appear to range from lowest quality/lowest price to highest quality/highest price, identified as “culinary”, “sipping”, “ceremonial” and “competition”.) (Disclaimer: I am not sure if there is official grading of matcha and if so what the grades would be). While we were waiting for this to arrive, I happened to see, while picking up a take-out at Tako Grill, that they had the matcha tea brand we used to get from our Japanese grocery store. This was very reasonably priced ($0.28 per gram, while the one from Matcha Kari was $1.17 per gram or over 4 times more expensive). I assume that the one from Tako Grill  was not as low-grade as “culinary” matcha  according to the lexicon I outlined but would be at the lower end of  “sipping“ grade. It also came from “Uji” 宇治 near Kyoto 京都. We have gotten regular Uji green tea (sencha 煎茶) from Hibiki-an in the past and it was pretty good. So as far as I was concerned this matcha (left in the picture below) was certainly good enough to make green tea cake. Then, a few days later we received the matcha from "matcha kari".


I have not made or tasted matcha for a long time but since we had two different kinds, we decided to have a tea tasting to see if we could taste a difference. I knew I had matcha bowls and a "chasen" 茶筅 (matcha frothing bamboo whisk) and a bamboo scoop or "chashaku" 茶杓.  The chasen and chashaku were easy to find but it took some search to find the matcha bowls. We have two; one that I brought with me for some reason when I first came to the U.S., and one that was given to us as a gift. Both are rather utilitarian  bowls but will do the job.


I made the two kinds of matcha, (the one from Tako Grill shown on the left and the one from Macha kari shown on the right) and taste tested.


For the sweet “chagashi” 茶菓子 accompanying the matcha I served the last of  the “kurt-kenton” 栗きんとん the mashed sweet potato with chestnuts from the Sushitaro osechi box and green plum I made simmered in syrup 小梅の甘露煮. It is customary to serve such a sweet with matcha to enhance the flavor of the tea. 


First of all, as a disclaimer, we have to acknowledge that we are not connoisseurs of matcha. Nonetheless after carefully sniffing and tasting both matcha we could state, with confidence, that despite quite a difference in price, we could not identify any difference in taste; none. The first thing that came to mind was the Japanese expression “Giving gold coins to a cat” or “neko ni koban 猫に小判” i.e. giving something of value where it can’t be appreciated. Well we did say we weren’t connoisseurs and this may just prove it. In the future, however, we will stick to the more reasonably priced macha.

Thursday, January 28, 2021

NOT "no-knead" Pecan raisin bread 捏ねないのではないピーカン、レイズンパン

 I was duped into baking this bread by my wife. She found this bread recipe in a King-Authur flour catalog and ripped out the page. Since I mentioned in the previous blog that "When it comes to baking bread, I am in the school of the simpler the better like no-knead breads", my wife handed me this recipe, saying ‘here is another no-knead bread recipe you might want to try’.  She even made the biga starter for me the night before. So next morning, after closely reading the recipe, I pointed out that the recipe called for kneading the bread, (multiple times), indicating to me that this was not “no knead” bread. (I have no idea why she thought this was a no-knead bread). (Note from Wifey: She has no idea why either).  But by then, with the biga already made and ready to go, I did not have any choice but to make the bread. The original recipe called for dried apricots and cranberries but my wife said "just use raisins instead". (In her book, any candied or dried fruit can be substituted with raisins). So I followed her instructions. Actually the recipe requires lots of kneading, raising, deflating and raising etc. This is definitely more my wife's style bread than mine. But since I started it, I finished it.


This is an interesting bread. It is a cross between rustic and slightly sweet bread and is very versatile; good for breakfast and also with soup or stew.


Ingredients:
Biga (starter):
1 cup (120g) AP flour
1/4 cup (26g) Pumpernickel flour
1/2 cup (113g) water (my wife likes to use buttermilk instead)
1/8 tsp instant yeast

Dough:
all of the biga
3/4 cup (170g) water
2 1/4 cup (270g) AP flour
1 1/2 tsp salt
1/2 tsp instant yeast
1/2 cup (64g) diced dried apricots
1/4 cup (28g) dried cranberries (I used  about 1/2 cup of raisin instead).
3/4 cup (85g) chopped, toasted pecans.

The original recipe calls for egg wash  which I skipped.
The instructions were not very precise, to say the least, and I had to use my CCK (common culinary knowledge) to fill in the “blanks”.

Directions:
For the biga:
Mix all ingredients and cover and let it ferment for 12-24 hours.

For the dough (I edited for more clarity):
Mix and knead the biga, water, flour, salt and yeast (I used a stand mixer with a dough hook).
Knead in the dried fruit and the pecans.
In a bowl, put a small amount of olive oil, put in the dough ball, tuned it to coat with the oil and covered to let rise for 45 minutes.
After 45 minutes (puffy not quite doubled in bulk), pull the edges of the dough and fold to the center (4 times as you quarter turn the bowl), then turn the dough over, cover and let it rise 45 minutes.
Repeat folding and turning over the dough after 45 minutes until doubled.
Shape the dough into a ball (boule) and place in a lightly greased bowl seam-side down, cover and let it rise 45-60 minutes.
Meanwhile preheat the oven to 450F.
After 45-60 minutes (not quite doubled in bulk), brush with egg wash (I did not), slash the top (I used a lame and made a cross cut).
Bake at 450F for 15 minutes and lower the temperature to 375F and bake another 25 to 30 minutes (195F in the center of the bread).
Let it cool before slicing.

As I mentioned this is rather complicated bread to make and the original instruction was not really clear in the details. In any case, it was quite good. It was somewhat dense but moist and slightly sweet. But next time I will let my wife make it.

Addendum:

I baked this bread again. I made some changes and want to include more details on how I baked it.

My wife made biga the night before and left it in the proofing box set to 77 degrees for me to make the bread the next morning. I found the dried apricot and dried cranberries called for in the recipe but I could not find the pecans. So, instead, I used cashew nuts which my wife roasts regularly for a snack. Next problem/difference was the dough’s consistency. Later I found out my wife had added more liquid to the biga since the amount in the recipe made a very dry biga. (She referred to it as an unworkable form of concrete).  I didn’t realize this so when I added the rest of the ingredients, I did not adjust the amount of liquid. As a result the dough came out very wet and sticky, so I processed it the same as I would “Almost no knead” bread”. I went through the folding process three times, and let it rise 45 minutes each time. For the last rise, I placed it on parchment paper after I made the dough into a boule-shape and put it in a bowl to let it rise again (total of 4 rises).  I made a slash on the top of the boule and using the parchment paper placed the dough in a cast iron Dutch oven pan that had been preheated in the regular oven at 450F for 30 minutes. I baked the bread  at exactly 450F for 30 minutes with the lid on. I removed the lid and baked it for an additional 10 minutes. This worked out well as seen below. The bread had a nice crunchy crust. The interior was moist and the dried fruit gave it a slight sweet taste. The taste of the cashews was very subtle but they added to the texture. 
 

Monday, January 25, 2021

A spoonful appetizer 一口スプーン前菜

My wife gave me some new plates and bowls for Christmas which required us to rearrange things to make a room for them. During these activities, we found spoons my wife got for me some time ago which were meant to serve a just one-swallow/bite appetizer.  Since they newly resurfaced, I promptly tried a one-swallow/bite appetizer using the spoon. The handles of the spoons are bent so that they can sit on the plate without a handle sticking over the edge. I served this with the last of New Year’s salmon kelp roll and Russian marinaded salmon.


This was just a whim-of-the moment dish. Since I had Cauliflower purée which I made a few days ago, I just put a small amount on the spoon and topped it with soy sauce  marinated “ikura” salmon roe and micro green perilla from our window sill herb garden. This combination worked well. We had this with cold sake and it went very well.


This was quite good. Although our initial cauliflower purée was made with cauliflower cooked in milk, recently I have been making in an abbreviated quick method.


Ingredients:
One small head of cauliflower, florets separated
1-2 tbs unsalted butter
1 cup warm milk
salt to taste

Directions:
Steam the cauliflower using a basket steamer for 10-15 minutes until very soft.
Place the cauliflower in a plastic container for immersion blender
Add 2/3 of the milk and blend using an immersion blender in high-speed
Add more milk for the nice silky consistency if needed.
Add the butter in thick pats
Season with salt and blend until very smooth and silky

This is wonderful way to prepare cauliflower. This purée can be used in many different ways. The smooth texture of the cauliflower purée was a great contrast to the burst of saltiness from the ikura.

Friday, January 22, 2021

Olive and black pepper savory cookies

This is part of my wife's savory cookies project.  This is based on the recipe my wife found  in a blog called "Raspberry Cupcake". The original recipe calls for Kalamata olives but we did not have any so she used pimento stuffed green olive instead. (Hey! They were for my Martini!).


This is a savory shortbread and perfect with a glass of wine.


As usual, I ask my wife to fill in the rest.


Ingredients:
50 gm olives
1 1/4 cup (150 gm) flour
1/4 tsp. baking soda
1/2 tsp salt
1 tsp black pepper (or to taste)
1 stick (140 gm) butter
2 Tbs. sugar
1 large egg yolk

Directions:
Measure the dry ingredients (flour, soda, salt, pepper) in a bowl and set aside. Cream the butter, sugar and egg yolk until fully incorporated and fluffy. Add the dry ingredients to the the butter egg mixture. Fold in the olives. Roll the mixture into “logs” and wrap in plastic wrap. Refrigerate the dough for at least an hour. (Dough can be refrigerated for up to week or frozen for up to a month.) To cook: preheat the oven to 350 F, slice the logs into 1/4 inch pieces and put them on a parchment covered cookie sheet. Bake for 18 to 20 minutes or until golden.


These cookies are spicy (from the pepper) with a  slight sweet overtone (from the sugar) and bright bursts of saltiness (from the olives). They make a nice addition to an appetizer tray served with other cheeses, prosciutto and a glass of red wine.