We regularly get a catalog from the King Arthur Baking. One of them had a recipe for “chocolate milk bread”. Being a fan of
, my wife decided to make it. Compared to regular milk bread, this is much more difficult to make. A direct quote from my wife: “This is the weirdest bread I’ve ever made.” The dough was especially soft and sticky having the texture of dough you would pour rather than knead. Also the instructions to mix on high speed for 20 minutes were unique. The dough did indeed get stiffer after this treatment but it was still impossible to ”fold” and “shape” as instructed. We ended up using a floured board and a baker’s scraper to form it into a loaf and placed it in a pan. It rose very high after baking but collapsed a bit after it was removed from the pan and cooled. The texture was nicely soft but chocolate flavor was muted. We like it very much but knowing the difficulty of making this, we are not sure it is worth the effort to make it again.
Note: We made a second batch of this bread and using “Common Culinary Knowledge” (CCK) we added enough flour to make a stable workable dough. We also did not knead it 20 minutes but the usual kneading time of 7-10 minutes. We also did not bother reweighing the tangzhong but used it as it came out of the pan. The resulting bread was infinitely better than the first batch and is definitely worth making again (even though no distinctly chocolate flavor comes through).
Ingredients (X1 one loaf)
Tangzhong
2 tablespoons (11g) black cocoa
2 tablespoons (11g) Dutch- process cocoa
1 1/2 tablespoons (11g) King Arthur Unbleached Bread Flour
1/4 cup plus 1 tablespoon (70g) milk, whole preferred; cold
1/4 cup plus 1 tablespoon (70g) water, cold
1/2 tsp. King Arthur espresso powder (optional). (this brings out the taste of the chocolate
Dough
1 3/4 cups plus 1 tablespoon (219g) King Arthur Unbleached Bread Flour, plus more for dusting or to make the dough stable and useable.
1/4 cup plus 1 tablespoon (70g) milk, whole preferred; warm (110°F)
3 tablespoons plus 1 teaspoon (41g) granulated sugar
1 1/2 tablespoons (10g) King
Arthur Baker's Special Dry Milk, optional
2 1/2 teaspoons (7g) instant yeast
scant 1 teaspoon (5g) table salt
3 tablespoons (43g) unsalted butter, melted
1 large egg, beaten; divided
Scant 1/2 cup (75g) semisweet chocolate chips
Ingredients (X2) (Why make just one loaf when you can make 2 ?) We made 2 loavesTangzhong
4 tablespoons (22g) black cocoa
4 tablespoons (22g) Dutch- process cocoa
3 tablespoons (22g) King Arthur Unbleached Bread Flour
1/2 cup plus 2 tablespoons (140g) milk, whole preferred; cold
1/2 cup plus 2 tablespoon (140g) water, cold
1 tsp. King Arthur espresso powder (optional). (this brings out the taste of the chocolate)
Dough
3 1/2 cups plus 2 tablespoons (438g) King Arthur Unbleached Bread Flour (or however more is needed to make the dough stable and useable.
1/2 cup plus 2 tablespoons (140g) milk, whole preferred; warm (110°F)
6 tablespoons plus 2 teaspoon (82g) granulated sugar
3 tablespoons (20g) Dry Milk, optional
5 teaspoons (14g) instant yeast
2 teaspoons (10g) table salt
6 tablespoons (86g) unsalted butter, melted
2 large eggs, beaten;
Scant 1 cup (140g) semisweet chocolate chips (we didn’t use this)
Directions:
To make the tangzhong: In a small saucepan, whisk the cocoas, flour, milk, and water until no lumps remain. Over low heat, bring the mixture to a boil, whisking constantly, until the mixture looks glossy and thickened to the consistency of hot fudge sauce, 3 to 6 minutes. Transfer the tangzhong to the bowl of a stand mixer; it will weigh about 145g after cooking (or 284 if doubling the recipe). If your tangzhong is more than 155g, (or 310g when doubling the recipe) return it to the pot and cook it a bit longer. (We did not bother to do this with the second batch and the bread turned out just fine.)
To make the dough: Add the flour, milk, sugar, milk powder, yeast, salt, butter, and egg to the bowl of a stand mixer. Add the cooled tangzhong.
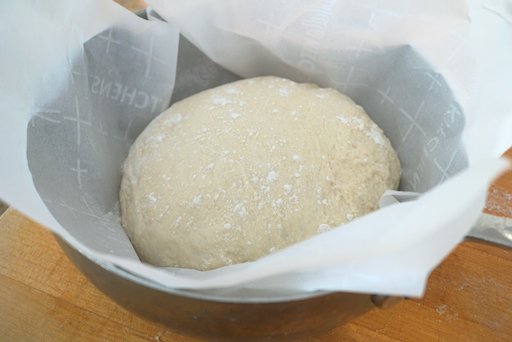
Using the dough hook, mix on medium-low speed adding additional flour as needed until a soft, sticky workable dough forms, scraping down the bowl as necessary. Increase the speed to medium-high and continue mixing until the dough almost clears the sides of the bowl (it will stick to the sides for much of the mixing time) and is smooth and elastic, 15 to 20 minutes total (We did not do this with the second batch we made, 7-10 minutes worked just fine). Every few minutes, scrape down the sides and bottom of the bowl, then continue mixing. Eventually the dough will strengthen enough to mostly pull away from the sides of the bowl; the dough will still be slightly sticky but significantly more manageable than it was before. Transfer the dough to a lightly greased bowl, cover, and let it rise until puffy and doubled in bulk, 1 to 1 1/2 hours.
Lightly grease an 8 1/2" x 4 1/2" loaf pan or 9" x 4" Pullman loaf pan with nonstick spray or vegetable oil.
Use a bowl scraper to gently ease the dough out of the bowl onto a lightly floured work surface. Gently form the dough into two loaves. (At this point the original recipe gave complex instructions on how to fold the dough into various squares, which, given the consistency of the dough was quite impossible. It held together but was more a pouring consistency. (#1) Forming it into loaves was the best we could do.) (#2) Cover and let the loaf rise until it just crests over the rim of the pan, 45 to 90 minutes, depending on the temperature of your kitchen. (#3) (If using a 9" x 4" pan, let the dough rise until it's about 1" below the top of the pan.)
Towards the end of the rising time, preheat the oven to 350 degrees F. Bake the chocolate milk bread for 30 to 35 minutes, until the loaf is fragrant, the top crust is firm, and the internal temperature is at least 190°F. Remove the loaf from the oven and cool briefly in the pan before turning it out onto a rack to cool completely.
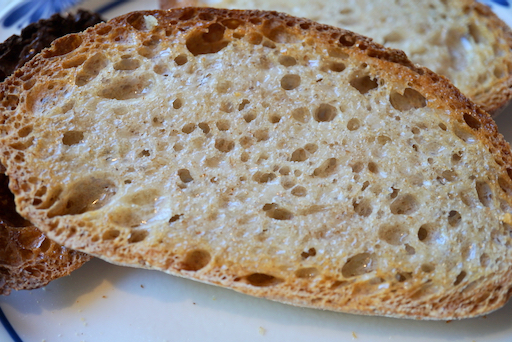
The loaf was so soft that when we turned it out it started collapsing on itself (# 4) and we had to cool it on its side. Nonetheless once it cooled it stabilized and the soft texture was very nice. (maybe we should leave it in the pan longer before turning it out). There was almost no flavor of chocolate. We ate it for breakfast lightly toasted with butter. It is good we made this bread because it makes our library of Japanese milk breads (to the extent we know of it) complete. But there are various of the other versions we would choose to make before doing this one again.
P.S. Turns out that over time this bread has gotten better. A nice very subtle chocolate flavor has moved to the fore. The texture has also gotten firmer


 Place this uncovered in the proofing box (the box has a water tray providing moisture to prevent a skin from forming on the dough). Let it rise for the second time for 1-2 hours.
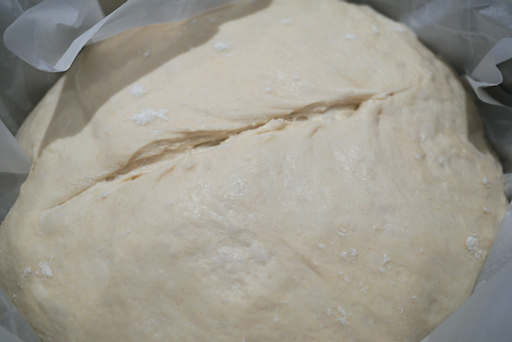 Bake for 30 minutes with the lid on and 5-10 minutes more minutes with lid off.


%20apricot%20and%20cranberry%20bread%20-%201.jpeg)


.jpeg)


