Sunday, June 13, 2010

Japanese grocery store

Our favorite Japanese grocery store has closed.

I went to the Japanese grocery store "Daruma" this weekend complete with shopping list, mouth ready for some good food afterwards when, imagine my shock, I discovered the store completely gone--without a trace! Part of the space was now occupied by a ramen restaurant. It was a real bummer. This was our favorite Japanese grocery store of 22 years. Over the years it moved location three times finally settling in Bethesda. Although there are a few other oriental markets and one other smaller Japanese market nearby, our ability to get Japanese food ingredients has definitely diminished dramatically.

A few months ago we noticed that their inventories were a bit sparse with empty shelf showing through, but we certainly did not think they would be closing. In the same location, we now have Ren's Ramen as a stand alone ramen restaurant. This restaurant started out as a few tables and stools "a store inside the store" of Daruma. Maybe, I will start a review of ramen noodle places (only problems is the number of places is extremely limited--albeit one more than a few weeks ago). 

Saturday, June 12, 2010

Roast beef ローストビーフ

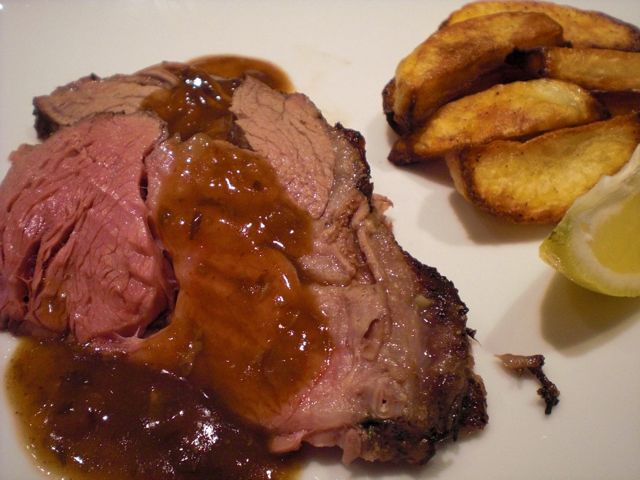
This is a totally "out-of-bounds" post for an Izakaya blog but I have a special reason.

Some time ago my niece asked me how to make roast beef. Since we rarely eat roast beef and when we do, we usually barbecue it using a Weber kettle, I could only give her general instructions gleaned from other sources such as the "Joy of Cooking" cookbook. I decided to make roast beef with gravy and post the process, so that my niece can refer to it. Here, we served the slices of roast beef with gravy and oven fried potatoes. (For her, I added Japanese text à la Hiroyuki's blog).
私の姪にローストビーフのレセピーを教えてほしいと言われたのですが、私たち自身ローストビーフをほとんど作る事がないし、ごく稀に作るときは、ウエバーケトルグリルでバーベキュウするので、料理の本からのレセピーを伝える事ぐらいしかできませんでした。そこで、私の姪の為に、オーブンローストビーフとグレイビィを作って, その経過を記録してみることにしました。下の写真は、出来上がったローストビーフとグレイビー、そしてオーブンで作ったフライドポテトです。

In terms of equipment, you need a good quick reading meat thermometer. In the absence of the thermometer, you could estimate the cooking time by the weight of the roast but you have to use the internal temperature of the roast to most accurately judge the doneness. You also need a roasting pan with a metal grate or rack so that the meat will sit above the juices that accumulate on the bottom of the pan. This serves two purposes; the hot air circulates under the meat and cooks it evenly and the meat is not sitting in its own drippings during the cooking process which would tend to braise rather than roast the meat.
必要な道具は、温度がすぐ読めるミートサモメター金属のラックのついたロースト用のパン。肉の重さからオーブンの時間は推定できますが、最終的には、ローストの内部の温度を計る事が焼き加減を知る一番の方法です。ラックは、肉の下側までオーブンの熱がよく伝わるためと、出てくる肉汁とロスートが直接接触しないようにするためです。

The cut of the meat I bought was a 3 lb top round (upper portion of the hind leg muscle) but it was not well cut and had a somewhat odd shape. So, this may not have been the best example of a good cut for roast beef (image below left, before trussing). It is important to truss it properly so that, it will cook evenly (Image below right).
私の買ったロースト用の肉は、トップラウンドと言うカットですが(後ろ足の上部の肉)あまり上質の肉ではないようで、ちょっと変な形をしています。重さは3ポンド(1.36kg). もうちょっと良い肉を買えばよっかたと反省しています(下の写真左側、紐で縛る前)。紐で形を整えながら縛る事 (トラシング) は、肉が均一に焼ける為に大切です(下の写真右側)。


For seasonings, I use fresh rosemary from our herb garden, garlic, salt, and freshly cracked black pepper. First, I thinly slice peeled garlic cloves (I use 4 cloves). I then make multiple deep slits in the meat and insert the garlic slices. It is important that the garlic slices are completely hidden below the surface so that the garlic will not burn during roasting. I remove the rosemary from the stems and finely chop (4 small sprigs) and mix with 2-3 tbs of olive oil and generously smear the mixture on the surface of the meat. I make a mixture of freshly cracked back pepper and kosher salt (half and half, about 2 tbs) and rub the mixture on the surface of the meat. (image below, left). Ideally, the meat should be at a room temperature before putting it in the oven. Actually my wife did the roasting part. Preheat the oven to 425 F and roast for 15 minutes. Then lower the temperature to 350F and roast for about 20minutes more/pound. So, a 3 pound roast will take about 60 minutes more. I start taking the temperature at the center of the roast after 45 minutes and for medium rare, I am looking for an internal temperature of 140F (Image below right).
私の庭で採れたローズマリー、ニンニク、挽きたての黒こしょう、塩で、肉の味付けをします。まずニンニクの皮を取ってから、薄切りにします(3−4個)。幅の狭い包丁(ボーニングナイフ)で肉に深い切り込みを幾つも入れ、ニンニクの薄切りを差し入れます。ニンニクが肉の外に出ていないように確かめてください。ニンニクが外に出ているとこげて苦い味になります。ローズマリーの葉だけとって細切り(4本もしくは大さじ2)、それをオリーブオイル(大さじ3)とまぜて、肉の表面によく塗り付けます。挽きたての黒こしょうと塩を混ぜ(それぞれ大さじ2)それも肉の表面にしっかりとなすり付けます。(下の写真左側)オーブンに入れる前に、肉が室温まで戻っているのが理想的です。ローストラックの上に肉をおいて、予熱した 220Cのオーブンの15分入れた後、温度を175Cにさげて、1ポンドあたり20分(20分/450グラム)。3ポンド(1.36Kg) の肉だと、もう一時間焼きます。45分位から肉の温度を計ります。メデァムには内部温度が、肉の真ん中の一番厚いところで、60Cになるまで焼きます。(下の写真右側)


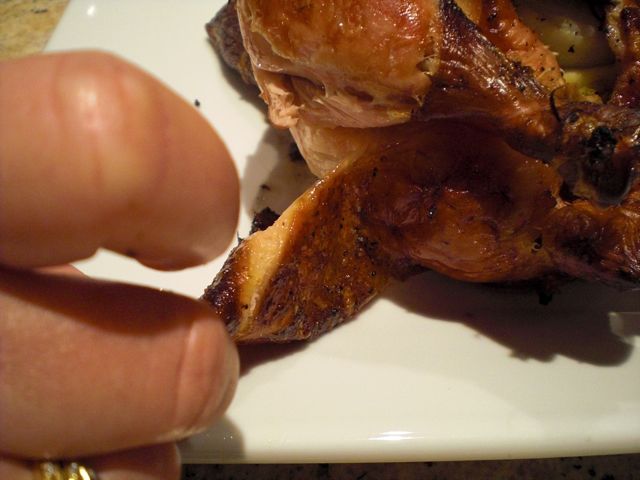
This roast took a bit longer to cook than we expected (the center may still have been cold after it was taken out of the refrigerator). Transfer the roast to a plate and loosely cover it with aluminum foil to keep it warm and let it rest for 15-20 minutes before carving. Our roast was a bit more done that we wanted (Image below) but still rosy in the middle.
重さから推測したよりも少し時間がかかりました。肉を他のお皿に移してアルミのフォイルをゆるくかけで肉を切る前、15−20分休ませます。私たちの好みより少し焼け過ぎになりましたが(下の写真)まだ真ん中はピンクです。

Now making gravy; I remove the metal grate of the roasting pan which collected some dripping in the bottom and the edges are nicely browned (below left). I place the roasting pan across two burners on the stove on medium low flame and add port wine and chicken broth (1/4 cup each) (since we did not have beef broth) and deglaze all the nice brown bits using a silicon spatula (below right).
肉が休んでいる間にグレィビーを作ります。金属製のラックを取り除いた後に、肉汁が沢山落ちています。端の方はちょっとこげかけています。(下の写真左側)ローストパンを二つのコンロのバーナーにまたいでかけ(弱中火)ポートワインまたは赤ワイン(60ml)をいれ、へらなどで焦げた肉汁をこそげながら溶かします。(ポートワインは甘みが有ります。) ビーフブロスまたはチキンブロス(60ml、ブイヨンキューブを水に溶かして代用の場合は塩気に注意)をさらに入れます。(下の写真右側)


I could finish the gravy in the roasting pan but it is a bit unwieldy, so I transfer the contents to a frying pan on medium heat. Add any juice from the plate on which the roast was resting, and reduce it a little (few minutes). The traditional American way is to finish this with flour (There is a special finely milled flour called "Wondra" for making gravy). I used a corn starch slurry to thicken the gravy, which results in a slightly different mouth feel (more viscous texture). Taste and adjust the seasoning.
このまま最後までやっても良いのですが、わたしは、これをフライパンに移し、ローストビーフが休んでいるお皿にたまった肉汁も加えて中火で少し煮詰めます(1−2分)(下の写真左側)。伝統的なアメリカのやり方ででは、特にソースやグレイビー用に作られた、”ワンドラ” という小麦粉を使いますが、ここでは水溶きしたコーンスターチを入れてグレイビーを仕上げました(下の写真右側)出来上がったグレイビーは小麦粉を使った場合と比べて、すこしヌルヌルした(なめらかな)口当たりになります。ここで味見をして、塩、胡椒を必要なら足してください。


You could add vegetables to the bottom of the roasting pan during roasting but we prefer to roast the vegetables (onion, garlic-skin on, potato,sweet potato, carrot etc) in a  separate pan by just coating them with olive oil and seasoning with salt and pepper. This way, you have better control of the doneness of the meat and vegetables.
根菜類をローストパンに肉と一緒に入れる事も出来ますが、私たちは、根菜類は、オリーブオイルを絡めて、塩、胡椒で味付けをして、別な容器に入れて、オーブンに入れます。この方が、肉と根菜が丁度良く出来上がる時間をそれぞれ調節できます。

This roast beef was OK with lots of garlic and rosemary flavors and the meat was reasonably tender if slightly more done than we would have liked (we prefer our beef on the rare side). The cut of the meat was not really the best. Hope this post helps my niece with her roasted beef and gravy dinner.
出来あっがたローストビーフはニンニクとローズマリーの味がして、肉も比較的柔らかく結構いいのですが、私たちの好みとしてはチョット焼き過ぎたのと、もともと肉の質が良く無かったのが、悔やまれます。このポストを参考にして、私の姪が彼女独自の完璧なローストビーフを料理する事を祈っています。

Thursday, June 10, 2010

Ricotta cheese tart リコッタチーズのタルト

I know I keep deviating from my theme. Some Izakayas serve non-transitional small dishes such as German potatoes (now this has become a classic Izakaya "teiban" dish), Poutine-like French fries and cheese dish, taco, and even variations of pizza. We saw pizza in the menu at one of the rather inexpensive chain Izakayas last time when we were in Japan. We refuse to order pizza at an Izakaya, though.  Although there are many "excellent" pizza places in our neck-of-the-woods, we are partial to my home-made pizza. (Certainly, my pizza is much better than any chain Pizzaria pizzas and we usually make pizzas without much sauce and without meat unlike American Pizzas which usually have too much cheese, too much meat and too much tomato sauce). I promise I will post some of my pizzas which are not bad at all for a home-made pizza (this is called "Jiman" 自慢 which literally means "boast" or "self-praise" but it is with some sense of "pride" such as in the name of sake "Isojiman" 磯自慢 which means both "Pride of shore" and "Beach boast".)

I was somehow coerced (which is not a right word but can't think of an alternative) into making this dish "Ricotta Cheese tart" using my pizza crust. We found this to be very good and can be reheated very nicely in a toaster oven. We recently served this as a starter with champagne when we had friends over and it went very well.

Pizza dough: There is nothing unusual about my pizza dough. For 4 pizzas (about 8 inch), I add bread flour* (3 1/2 cups) and salt (1 tsp) in a food processor with a dough blade. While the food processor in running at a low speed, I stream in olive oil (2 tbs) and stop after few seconds. I proof one package of active yeast in a small amount of tepid water (1/5 cup) with just a pinch of sugar dissolved. Once proofed, I add cold water to make it one cup. Stream the yeast mixture into the tube of the food processor with the blade running at a low speed until a ball is formed above the blade. You probably will need a few more tbs of water. Open the food processor and touch the dough. It should be rather soft and slightly tacky. I let the dough sit in the processor for 5 minutes so that the moisture will distribute more evenly and then, run the blade for 30 more seconds. The dough should be soft, elastic and somewhat tacky. Take it out on a floured kneading board and hand knead for 2-3 minutes until dough is smooth, elastic and no longer sticky. For raising the dough, instead of using a bowl, I use one gallon Ziploc bag which is sprayed with PAM or a similar non-stick spray and wrap it with towels in a warm non-drafty place (on the center island counter top in my case) for 2 hours or more until the volume doubles.

(*Sometimes, I use King Arthur brand double zero ("00") Italian flour. This flour has much less gluten and makes a delicate dough which can not be tossed into the air. The resulting crust is thin, crisp and cracker-like probably similar to this one.)

After the volume doubles, I deflate and fold the dough several times I then cut the dough into 4 equal portions and make them into 4 nice smooth disks by pinching the cut surface together and stretching the surface to make a round ball. I, then, press lightly to make a disk. The portions I'm do not going to use immediately, I put it into a Ziploc sandwich bag and place in the refrigerator (will last at least overnight or more, which even adds more favor but, after that, you need to freeze the dough. The dough freezes well but the characteristic of the resulting crusts change a bit--the previously frozen dough will yield less bready and crunchier pizza crusts). Let the dough ball rest for 10-15 minutes by covering with a floured tea towel (otherwise the dough will be too elastic and resist stretching).  I never use a rolling pin to form pizza dough but use the traditional way of stretching the dough using the back of the knuckle of the hands (I will even toss the dough into the air if our guests request it.) For a regular pizza, I do not crimp the edge but, for this tart, I did crimp the edge as seen below since the filling is rather runny. You need to have corn meal on the pizza peel before placing the formed dough on the peel. Then give the peel several sharp tugs to make sure the dough slides nicely before filling the dough.

Filling: I mixed Ricotta cheese (1 cup), large eggs (2), chive (fine chopped, 1/2 cup), shallot (one finely chopped), dill (1/2 tsp dried since I did not have fresh one), salt (1/2 tsp) and black pepper (1/4 tsp). This filling made two 8 inch tarts (see below).


Baking: I had my convection oven set at 450F with a Pizza stone* in and preheated for, at least,  30 minutes before sliding the filled tart directly onto the hot pizza stone. Bake for 10-15 minutes until the surface of the filling becomes slightly brown.

(* I have a square pizza stone almost the size of the inside of my oven. I keep it (almost) permanently in the lowest rack. It is essential to have a pizza stone to make a nice crust.)

I took it out on to the cooling rack and graded Riggiano-Parmigiano cheese. I cut the tart into 4 wedges and served. The filling is nicely eggybready crust, this is a very good dish. This can be breakfast as well.

Tuesday, June 8, 2010

Macaroni salad マカロニサラダ

This is the last post of three salad which are disguised as an "Otoshi". Who knows, next time we visit an Izakaya in Japan, these salad may become very popular items.  This is another popular salad with many variations. This is our version and we use my honey Dijon mustard dressing instead of (more commonly used) mayonnaise. This time instead of scallion or onion, we used chives. Served as seen below, this is a perfect Izakaya food as Otoshi お通し, although may not be as popular as potato salad in an Izakaya.

We use regular small elbow macaroni (this one has a groove on the surface). While it is hot, I dressed the cooked macaroni with a rice vinegar (the amount is arbitrary, enough to add flavor while still being absorbed completely by the pasta), and salt. When it is cooling down, I add a small amount of good olive oil and toss to prevent the macaroni from sticking. Once it is cooled, I mixed in several stalks of celery (both ends trimmed, veins removed and finely cut up), three different kinds of olives (oil cured black olives, Calamata olives, and large green olives stuffed with pimento, all sliced) and chopped chive. I dress the salad with Honey Dijon mustard dressing (I use the dressing sparingly).

Honey Dijon mustard Dressing: I minced shallot (one small), Jalapeno pepper, seeded, veined and minced (1/2, optional), crushed garlic (one small clove, optional. I did not use garlic this time), salt and pepper. I added 1 tbs of honey, 2 tbs of Dijon mustard (I used the smooth kind) and 3-4 tbs of a rice vinegar and mixed. I stream in a EVOO (extravirgin olive oil) and whisk (I do not measure but about 1/2 cup). Taste the dressing and adjust the seasoning.
This is our favorite version of macaroni salad. Since we served this together with our potato salad for Memorial day barbecue, we intentionally did not use mayonnaise. The occasional burst of salty olive flavor is well matched with slightly sweet and tangy dressing. The celery gives a nice crunch. The rice vinegar is much gentler than wine or cider vinegars.

Monday, June 7, 2010

Fresh corn and black bean salad コーンとブラックビーンのサラダ

We made this for Memorial day barbecue but, probably it could be served in an Izakaya and people may even like it (it is a stretch, I admit). I have seen similar types of bean salads in many Japanese recipe sites, so it must be getting popular even in Japan. Then I found a similar dish being served in an Izakaya in Dave P's restaurant review, so it was not too much of a stretch after all.

Black turtle beans or black beans are a popular item in Latin American and U.S. South Western cuisines. Since we had fresh corn on the cob, my wife made this salad (I did the final seasoning). The amount of beans and corn is arbitrary but we used 6 white ears of corn and one 16 oz can of black beans. (We like GOYA brand). The beans are rinsed and drained. My wife microwaved the corn, covered with a paper towel, for 4-6 minutes or until done. Then she cut the kernels off the cob with a knife and mixed them with the black beans. I added lemon juice (we did not have any limes but lime juice is better) from one large lemon (probably 3 tbs), olive oil (3 tbs), ground cumin (2 tsp), salt and pepper to taste. For some heat, I added two small Jalapeno peppers, seeded and veined, finely chopped and also added finely chopped cilantro (2 tsp). You could add chopped red pepper for color if you like. The white corn was so sweet and made a wonderful salad. Some people love cumin and some hate it but, for this salad, cumin is a must.

Sunday, June 6, 2010

Potato salad ポテトサラダ

Believe it or not, potato salad definitely is a very popular Izakaya food. I am sure that versions of potato salad are all over the (world) map. (Some may think Germany is where it started). Japanese made it's contribution to potato salad variations by adding Tarako 鱈子 or cod roe  to it, which I posted before. My wife grew up with American style potato salad and I did with Japanese style potato salad as my mother made it. We now make potato salad which is a hybrid between the two. Deviations from the America version are the use of rice vinegar and the addition of sliced and blanched onions rather than raw onions. I occasionally add Japanese curry powder to make a curry-favored version potato salad.  I made the hybrid style salad for Memorial day barbecue but I also served it in a small bowl like Otoshi お通し in an Izakaya.

This time I used white potatoes (5 large). Yukon gold and Russet potatoes also work. I cooked the potatoes whole in salted water (about 30 minutes or until you could insert a bamboo skewer to the center easily). I removed the skin while the potatoes were hot and cut them into bite sized pieces (We like potatoes well cooked). This way, the potatoes do not become watery and appear to keep their flavor better. The most important thing is to season the potatoes while they are hot. I add 2 tsp of salt, 1 tsp of black pepper and several tablespoons of Japanese rice vinegar and gently toss the potatoes. I taste and add more seasoning to my liking. You want to put on as much vinegar as you like but it has to be absorbed completely. If you are making a curry flavored salad, you add curry powders here (To be authentic, use the Japanese kind of powder such as the SB brand). I cut up carrots (5 long skinny ones which I had) and blanched them until they were soft but still crunchy. I halved and sliced onion into thin strips (one large or two small) and blanched the strips for 1-2 minutes. (I used the same pot in which the carrot was cooking. Put the onions in just 1 or 2 minutes before the carrot is done). The amount of onion is up to you but, by blanching the onion, the pungent onion flavor becomes much less strong and sweeter. The longer you cook, the less pungent the onion will become. So you could adjust the amount of the onion and the length of blanching to your liking. Drain them in a colander. I add a rice vinegar and salt to the carrots and onions in a colander and mix and drain at the same time. Mix all the ingredients together in a metal bowl (so that it will cool faster) and let it cool down to a room temperature. The potatoes should taste pretty good and well-seasoned at this point with vinegar, salt and pepper (it is like a southern Germany "Kartoffelsalat".  Most of Japanese recipes will add thinly sliced fresh cucumbers but I added cornichon pickles (cut up) instead. After the potatoes have cooled down to room temperature, I add Dijon mustard (1 tbs) and mayonnaise (3 tbs) and gently fold and mix. Because the mushed and well seasoned potato from the surface of the individual pieces gets mixed into the dressing it adds creaminess and you do not need too much mayo. I adjusted the seasoning (salt and pepper). Potatoes can take quite a bit of salt and vinegar but pre-seasoning them while they are hot is the key. We think our potato salad is much better than any of the store bought kind.

Friday, June 4, 2010

Salted (pickled) vegetable 浅漬け

Although I have posted this before, I decided to post it again with more details and a better picture. I make this regularly with whatever vegetables are available but cucumber, daikon, nappa cabbage, and celery are the best. I always use thinly sliced and Julienned ginger, red pepper flakes. From time to time, I add different seasonings such as jalapeno pepper, sliced lime or lemon. This time I had thinly cut dried kelp "Kizami konbu" 刻み昆布 (came in a bag) and I used this as well.

It is not really a recipe; just wash and cut any vegetable into an appropriate size and add salt. I slice "hard vegetables" such as daikon, carrot, and radish into rather thin slices. But I slice cucumber (American mini-cucumber) much thicker. If I use regular cabbage, I make the pieces a bit smaller than for nappa cabbage. The amount of salt is important. By weight, about 2% of salt against the total weight of the vegetables is the standard but I tend to use a bit less. After sometime, you can sort of tell the appropriate amount of salt. So I usually do not even measure. I added the vegetables and salt to a bowl with hydrated thinly cut kelp "Kizami konbu"  (after 5 minutes of hydration), and added ginger (finely julienned), red pepper flakes (just enough) and kneaded the mixture with my hand.

Then I transferred the vegetables to the contraption on the left called a Japanese pickling pot. I put on the lid and screwed down the inner plate so that the vegetables were under some pressure. I placed the pickling pot in the refrigerator. After several hours, you will see water developing above the vegetables. Then, it is ready. If you do not add enough salt, the water may never appear. (This is called "Mizu ga agaru" or "Water has risen"). After this, I transfer the vegetables in a sealable container with its liquid. I drain and squeeze out excess liquid just before serving.

Depending on the saltiness, you could use soy sauce when serving "asazuke". You could try many variations. Depending on the amount of the salt, it will keep at least a week in the refrigerator. We really like this dish. This dish can be served as a small dish which goes well with a sake. You could also serve this as an accompaniment to the rice dish you may serve as a "shime" 締め dish.

Wednesday, June 2, 2010

Memorial Day Barbecue メモリアルデイバベキュー

This is definitely not an Izakaya item but I have to "pad" my blog sometimes. Since it was Memorial day and the official beginning of the summer, it is customary to do barbecue in the U.S.  I often barbecue whole chickens in a Weber kettle. Once you set it up, you can just relax for 90 minutes or so while enjoying the sublime aroma of the chicken cooking. The result is quite good especially the crispy skin.

While the chicken is resting, portions of crispy skin get eaten by somebody. I caught the crime scene.

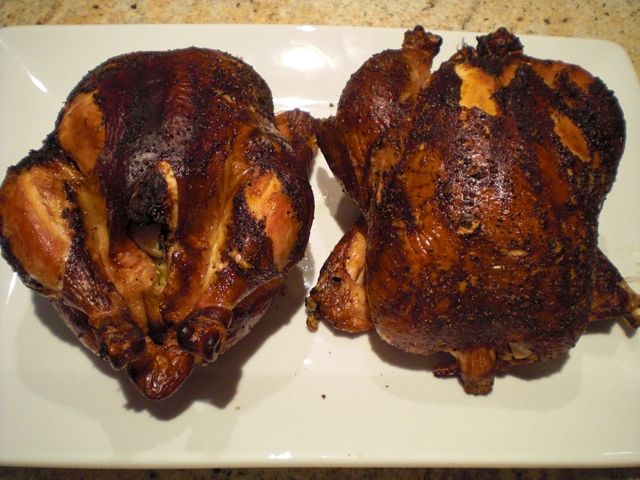
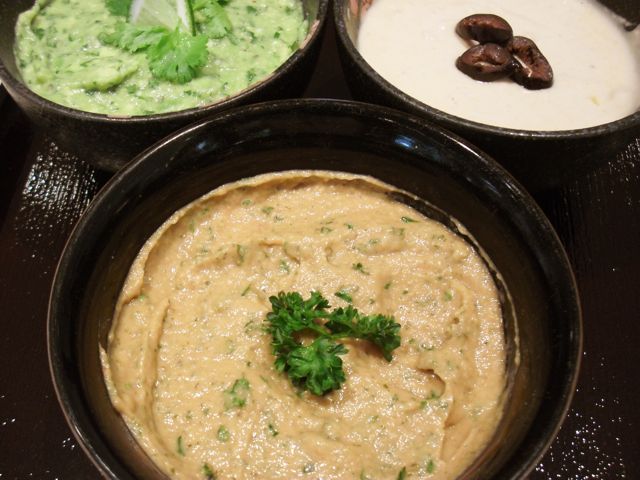
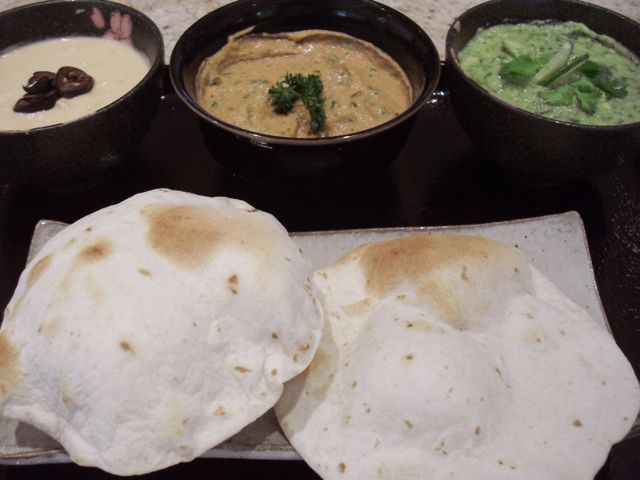
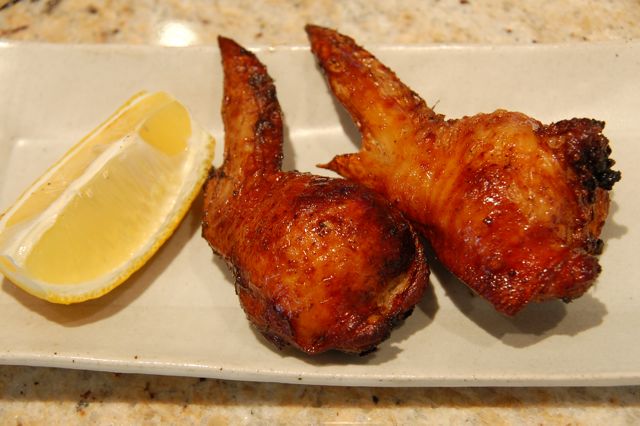
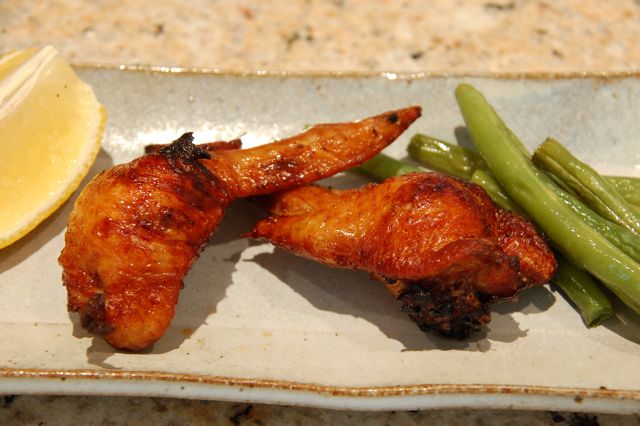
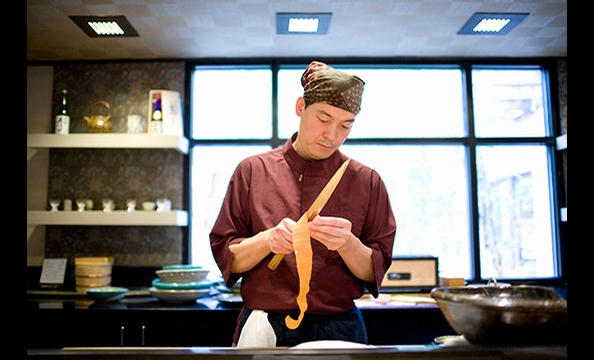
1. Preparing the chicken: I first make a mixture of freshly cracked black pepper and Kosher salt (half and half, about 3-4 tbs for two birds).  After washing the birds well and drying with paper towels, I remove the wish bones (or "clavicle" if you get technical) using a small paring knife. It will make a big difference later when you are carving the breast meat. I first squeeze lemon wedges (2 per bird) inside the cavity and outside. I then liberally sprinkle the pepper/salt mixture inside the cavity and stuff the cavity with aromatic vegetables, including the lemon wedges used for the juice, just for added flavor. I use coarsely chopped onion and celery (especially the core portion with leaves) and garlic cloves (5-6 crushed cloves per bird) and sprigs of fresh rosemary (slightly bruised to release the nice essential oil). I truss the birds without using a trussing needle. I start by wrapping butcher's twine around the "Pope's nose" in the mid portion of the string, then make a figure 8 around both legs, and go across to the back and tie it securely at the back just above the wings and then put the wings akimbo. Then, I smear olive oil all over the skin and generously coat the surface with the black pepper/salt mixture.

2. Setting up Weber Kettle Grill: We need to use the indirect heat set up. For this, we set up two charcoal baskets which sit on both sides of the inside of the Weber. We use lump charcoal and start it in a chimney-style charcoal starter with crumpled news papers (WSJ seems to work best for some reason) in the bottom. Recently we started using the hollow cardboard core from paper towel rolls and pack the coal around the roll to create a smoke stack. This makes the charcoal ready more quickly and reliably with less smoke. After the charcoal is ready (about 10 minutes), pour the hot charcoal into the baskets. Place a disposable aluminum tray in the middle to catch the drippings. Place the metal grate (which can be opened on both sides over the charcoal baskets to allow the addition of wood chips).

3. Wood chips: I use hot smoking for added flavors. I soak Apple wood chips (two fistfuls) for, at least, 30 minutes. After placing the chickens (this Weber can take two full size chickens) in the middle on the grate over the drip pan, I open both sides of the grate and place the drained and moist wood chips over the charcoal and place the lid with the air vents fully open. You immediately smell nice sweet apple wood smoke.

3. Judging the doneness: Depending on the wind, ambient temperature (We are known to barbecue in winter. In that  case, it will take little longer), and the size of the birds, it will take between 1 hours 15 minutes to 1 and a half hour. I do not have to add any coals during the cooking. After 1 hour and 10 minutes, I insert a temperature probe of a remote meat thermometer with an alarm (it has a beeper you can wear on your belt and it shows the internal temperature and beeps when the set temperature is reached. Shown here is the base unit.) The probe has to be inserted into the deepest part of thigh but not touching the bone. Please note that I had set the alarm at "Beef, Medium" which is 160F. If you choose "Chicken" it will set to 175F. I want 165F, so I let it cook 5 more minutes after 160F is reached and let the birds rest for 15-30 minutes, the truss removed but uncovered. This will produce a perfect doneness without over cooking. The reason I do not insert the probe (which is supposedly to be used in a grill) from the beginning is that  I had quite a few probes go bad on me when used this way. So I reduce the time the probe and the wire stay in the grill and also make sure the wire goes through the center area of the grill without hot  charcoals underneath. 
The skin is without a doubt the best part. My wife likes the wings and I like the dark meat of the thigh. We do not need any gravy or sauce for this. We had the chicken with a trio of home made salads; potato, macaroni and corn with black beans.
A nice start of the summer.

Monday, May 31, 2010

Japanese style steak, 2 kinds 和風ステーキ、二種類

Judging from the numbers of my posts, we do not eat beef that often. Unlike our "youngish" food blogger colleague who buys two (Japanese) servings of steak to reconstruct one serving for him, we have the opposite problem. One serving of steak we get here is way too big for us. One of the ways to deal with this "problem" is to serve the steak Japanese style or "wafu" 和風, in which the steak is served thinly sliced or served in small cubes (the famous "dice" steak along with "Lumb Chap" and "Spare Lib").

I used a somewhat unusual cut here, called Flat Iron Steak. My understanding is that this comes from upper portion of the shoulder and includes two muscle groups with a sinew in between.  But this particular one came vacuum packed and only contained one kind of muscle which is easier to handle. As the name implies, it is a rather flat rectangular piece of meat. I decided to use two different Japanese marinades and cranked up our Japanese Konro grill. Both marinades are very simple; the first is wasabi soy sauce ("real" wasabi, about 1 tbs, I smeared over the meat and added enough soy sauce to coat in a Ziploc bag, the second is "moromi" miso which I again smeared over the meat and placed it in a Ziploc bag. Both were marinated about 1 hour. I removed the marinades (reserving the wasabi soy sauce) but did not wash the meat so that some marinade remained on the surface. Over the charcoal fire, I grilled them to medium rare (2-3 minutes on each sides). I put them on a plate and loosely covered with aluminum foil and let it rest for 5-7 minutes while I made a sauce. I browned the butter (1 tsp) and then added the remaining wasabi-soy sauce marinade into a small frying pan. I then added the meat juice accumulated on the plate on which the steak was resting). After heating up (1-2 minutes), I added 1 small pat of butter to finish. I sliced both steaks into thin slices across the grain of the meat. One (left) served with wasabi and the sauce I just made and the other I just add more moromi miso.


(left, wasabi-soy sauce and right, moromi-miso marinated)

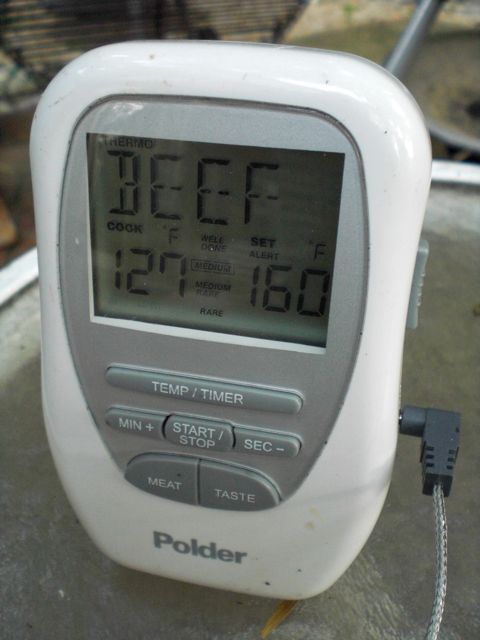
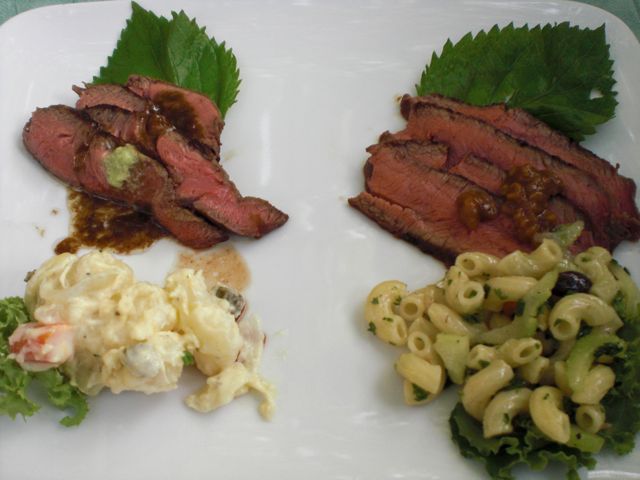
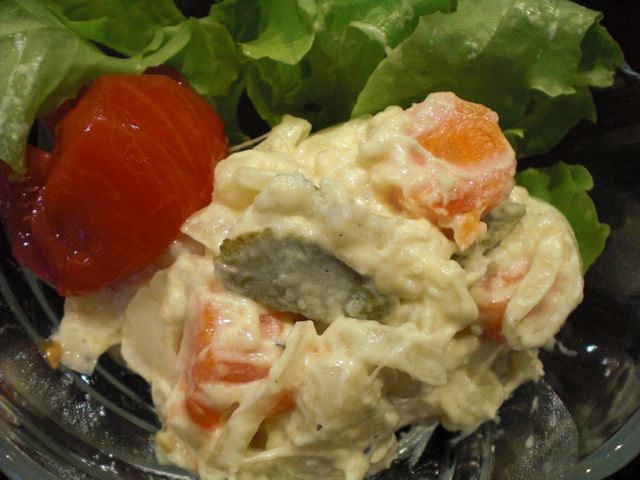
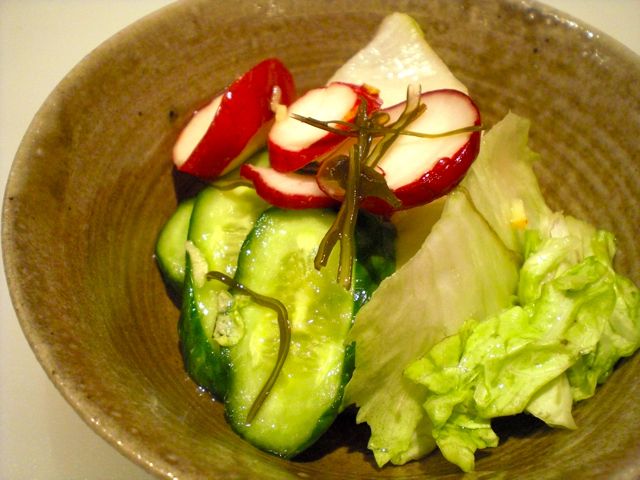
Both are good but we liked the wasabi-soy sauce steak slightly better. We had this with our potato salad and macaroni salad which also have Japanese touches--subjects for posting another time. We also made our usual grilled rice balls, this time with  a "yuzu" citrus miso (Yuzu juice from a bottle, miso, mirn and some sugar). My wife said she felt virtuous because despite how very good it was she restrained herself from overeating by not going back for seconds. We had this with an excellent (surprisingly) Bordeaux blend from South Africa, "Vilafonte" 2004. This wine really went well with this dish, highly recommended if you could get one (not too expensive to boot).

Saturday, May 29, 2010

Cabbage braised in butter キャベツのバター焼き

For some reason, shredded raw cabbage is the most common accompaniment for many Japanese-Western dishes or "Yo-shoku" 洋食 such as fried breaded pork or "Tonkatsu" トンカツ and Croquettes コロッケ. I like cabbage this way especially if I use cabbage leaves, after discarding several outermost layers of the head of cabbage, which are still green but not too tough. I like them julienned very thin and crisped in ice water before serving. My wife does not care for raw cabbage in general and I often end up making the cabbage into a kind of coleslaw. I also make sautéed cabbage with deep fried tofu pouch which was then braised in mirin and soy sauce (I am sure I can post this very soon). In any case, this is another simple quick cabbage dish which goes well with sake or any other drinks. I think I first saw this in the Kentaro Kobayashi's drinking food cook book and I made some modification (can't help it).

I cut 1/3 of a small head of cabbage (avoiding the core) which is then cut into three portions. I melt butter (1 tbs) in a frying pan and put in the cabbage chunks with cut side down on a medium low flame. I add salt and freshly ground black pepper to taste. I put a tightly fitting lid so that the cabbage is pan fried and steamed at the same time. Since we like cabbage to be more cooked than the original recipe will produce, I add 2-3 tbs of sake after 10 minutes or before the bottom of pan scorches and then put back the lid and continue to cook it on a slightly higher flame for another 5-6 minutes or until liquid is almost all gone. Remove the cabbage to the serving plate. Depending on how much liquid is left in the pan, I add a bit more sake to deglaze the brown bits on the bottom of the pan. I add 1 -2 tsp of soy sauce, and finish it with few pats of cold butter (less than 1 tbs). Pour the sauce over the cabbage and add freshly cracked black pepper.

This is surprisingly good. Salt and pepper flavors go well with cabbage and browned butter and soy sauce is also a winning combination. This dish will go well with any drink.

Thursday, May 27, 2010

Baba Ghanoushu, Gazpacho flavored or "Baba Gazpa-nouchu" ガスパッチョ味のババガヌーシュ

Sometimes when you are trying a new recipe, things don't go right. I have less of a problem with this because I usually don't follow recipes that closely as long as I know what should be the end result. Compared to my rather free wheeling approach, my wife tends to follow recipes more precisely (which anyone in their right mind should do). She read this rather healthy sounding recipe for baked eggplant, zucchini and tomato. It was a bit complicated. The eggplant, was not the Japanese variety and needed to be peeled, sliced, salted to remove the bitterness and prebaked with olive oil. Then, the eggplant slices, zucchini, and slices of tomatoes (she used canned whole plum tomatoes) were layered in a baking dish topped with seasoned bread crumbs (panko, thyme, oregano) and repeat the layers. We thought putting the bread crumbs in the middle of the layers did not make sense but that was what the recipe called for. The resulting dish was certainly edible (good flavor) but everything was mushy and the wet bread crumbs in the middle layer were not good. My wife was extremely disappointed and ready to throw it out. But, I said, "Wait, since everything is mushy why not mush it all up and make it into a dip like babaghanoush" which is supposed to be mushy. Only difference between this dish and "Baba Ghaoushu" are the zuchini, tomato and bread crumbs (come to think of it, that is quite a difference. The only common link is the eggplant).

But that did not deter me. I just put this mixture of the baked zucchini, eggplant, tomato, and bread crumbs in the mixing cup of an immersion blender, added some lemon juice, tahini (I used Japanese white sesame paste), crushed garlic and blended it. After tasting it, I added a small amount of good extra virgin olive oil, salt, and black pepper. Finally I added finely chopped parsley for color and fresh taste. It turned out to be pretty good (and was great as a spread on sandwiches). It is sort of "Baba ghanoushu" but because of the tomato, olive oil, and bread which acted as thickener, it has the flavor profile of Gazpacho. It is a very wonderful new-age fusion dip which I henceforth named "Baba Gazpa-noushu". I also made guacamole and hummus to complete a trio of ethnically confused dips.

Small flat bread, pita or pide, will be nice but we did not have one and it takes too long to make one. So I toasted small flour tortillas (from our freezer) in a toaster oven like toasting a slice of bread. The tortillas puffed up like pide. Although texture is quite different, it is perfect for dipping into these Mexican-Spanish-Middle eastern Meze starter. 

Tuesday, May 25, 2010

Chicken wing "Teba" Gyoza 手羽餃子

This dish must have been invented after I left Japan. It is a wonderful dish except for being rather fatty or, if I borrow the expression from the Japanese food critic who appears on Iron Chef America, "too oily". We first had this in a small Yakitori place (now defunct) run by a middle-aged husband and wife team, on a narrow alley way near the downtown "Yon-chome" 4丁目 intersection in Sapporo 札幌 some time ago while we were visiting Japan. Essentially this dish is a Japanese sausage with the skin of chicken wings as the casing. After removing the bones from the chicken wing, stuff the wing part with the pork gyoza mixture (leaving the wing tip as a handle so that you can hold it while you eat). Somehow, this dish reminds me of a "Turducken". The original recipe is to deep fry this to make it really deadly. This time, I followed the original way of cooking but I promise I will work on making this less deadly by either baking it in a high temp oven or grilling it. If I am successful you will see it in my future postings.

Chicken wings: I remove the drummetts (use for another dish) but leave the wing tips. Using a small knife, separate the meat around the two bones (equivalent to the "ulna" and "radius", if you would like to know) and pull the skin and meat down to expose the joint. I grab the ends of the bones and rotate and wiggle until both come off the joint. Please take care not to cut or break the skin. Now you have created the pocket.

Gyoza stuffing: This is the usual pork stuffing for gyoza. I made much more than I intend to use for this dish so that I could make regular gyoza later. We happened to grow garlic chives in our herb garden, so I added that as well. As usual, I used the trimming from a pork tenderloin and, by using a chef's knife, chopped up finely into ground pork (probably 1 cup). I added chopped garlic chives (probably 3 tbs), blanched and finely chopped cabbage (4 tbs), finely chopped scallion (2 tbs), crushed garlic (1 fat clove), grated ginger (1 tsp), salt (1/2 tsp), black pepper (1/2 tsp), mirin (2 tbs), soy sauce (1 tbs), sesame oil (2-3 tbs) and knead by hand until it become nicely elastic and bound together.

Assembly and frying: Stuff the wing pocket with the gyoza mixture and close it by inserting a tooth pick through the skin at the opening. I shallow fry as usual rather than deep dry. At about 160F (I actually did not measure but used the stick-bamboo-chopsticks-in-oil method as usual) for 5-7 minutes turning several times. I took them out of the oil. I then cranked up the flame and, briefly, re-fried to make the skin crispy. I cut into the fattest one to make sure the pork is thoroughly cooked (which it was).

My wife made baked green beans (just coat them with olive oil, salt and black pepper and spread in one layer in the cookie sheet and bake them for 30 minutes at 350F), which is the best way to cook green beans. They become very sweet and better than boiling or steaming. So, I added the green beans as a side after I took the first picture.

This dish is very good, although the skin was "oily" and could have been crispier. Since it is a type of sausage with a Japanese twist, it will go well with a cold beer but we had this with a red wine, Brookdale Cab Sauv from Napa, to counteract the effect of the fat.

Sunday, May 23, 2010

Braised Fiddlehead fern with Konnyaku and aburaage ぜんまい、コンニャク、油揚の炒め物

Japanese like to eat seasonal "Sansai" 山菜 or mountain vegetables. These are wild vegetables collected from the mountains. One of them is furled fern leaves called "Zenmai" ぜんまい (which means a spring such as those used in wind-up toys--for it's obvious resemblance) or "Warabi" 蕨 (Both are ferns but with some subtle difference). As a kid, I was not crazy about this vegetable but as you get older (as I am), you remember and get nostalgic about the food you tasted as a kid. In North America, Fiddle head fern (which is very similar to the Japanese Zenmai) is harvested (very seasonal) from the wild and eaten especially in Eastern Canada and New England. When I saw fresh Fiddle head fern in our neighborhood gourmet supermarket, I decided to make a small dish in the Izakaya food category. In its raw form, fiddle head ferns contain some toxins and need to be prepared properly before being consumed.

I wash the Fiddle head ferns well in several changes of cold running water and remove discolored ends of the stems. I boil the fern in a large amount of salted water for 5 minutes (The water browns in the first boil). I drain them in a colander, then wash in cold water. Repeat this process twice more (total of 15 minutes cooking or boiling time and three changes of water). This process is called "nikobosu" 煮こぼす  (boil and drain) in the Japanese cooking parlance. After the last boiling and draining, place them in a sealed container with an ample amount of cold water. I leave it in the refrigerator overnight. Once this preparation is done, it is fairly easy to use the Fiddle head fern in a dish. I decided to make a rather rustic Izakaya or home style dish.

I am not sure how much Fiddle head ferns I had but they are just enough for two small servings (probably 15-20 heads). Devils tongue or konnyaku (alternative spelling=Konjac) 蒟蒻 (I used about half) is blanched for a few minutes and sliced into thin strips. Two aburaage 油揚げ (small koage 小揚げ or ianari 稲荷 kind) were also blanched and the water squeezed out, then cut into thin strips. I put peanut oil (1tbs) with a dash of dark sesame oil in a frying pan. When the oil was hot, I added the drained Fiddle head fern, sauteed for 1-2 minutes and added the strips of konnyuaku and aburaage and sauteed another minute or two. I added mirin (1tbs) and soy sauce (1 tbs) and Japanese 7 flavor red pepper powder 七味唐辛子 to taste and braised until the liquid was almost all gone.

The Fiddle head fern has an interesting texture and flavor. With a combination of konnyaku and aburaage and some spiciness, this is a good rustic dish but given the amount of preparation required, I am not sure if I will make this often (probably once a year).

Saturday, May 22, 2010

Sushi Taro, Dupont Circle, Washington DC 寿司太郎

The Dupont Circle area has undergone significant change over the years and is now a very vibrant neighborhood with numerous good restaurants. It also was my wife's old stomping grounds. This Japanese restaurant, Sushi Taro, used to be your usual run-of-the mill sushi bar/ tempura place. It occupies the second floor of an unassuming brown square building at the corner of 17th and P, with a CVS Drug store on the ground level. Last year it went though a major renovation, when the old owner's son, Nobu Yamazaki (pictured below), took over. He transformed the place into a high-end Kaiseki and Omakase Japanese restaurant. We went to the old Sushi Taro a few times and were not particularly impressed. It was a very ordinary sushi bar. After this drastic transformation, however, we have been back three times; twice for sushi omakase and once for regular Kaiseki omakase.

Sushi omakase takes place in a room, separated from the main dining area, with a light-colored wood counter which only seats 6, Nobu himself and Chef de cuisin Masa Kitayama are behind the counter, where the cooking area is rather large with a charcoal burning Konro grill (exactly the same as the one we have) in the back counter in front of a picture window overlooking a stand of bamboo. The setting is very similar to a high-end sushi bar in Japan as described by Jon. The atmosphere is very intimate and quiet. With capacity for only six customers, the customers have the complete attention of the chefs. The night we were there only 4 customers, including ourselves, were in attendance. This time we feasted for over 3 hours with 12 courses--and this is not counting each individual piece of sashimi and sushi. This feast was much more than sushi and sashimi omakase as you will see.  

(From Washington post)

This time we started off with home-made umeshu 梅酒 aperitif with green plum simmered  in syrup or "kanroni" 青梅の甘露煮, a very nice refreshing start, which was followed by their signature appetizer Gomadofu 胡麻豆腐 topped with Maine sea urchin, real wasabi (every time wasabi was served, our chef grated a wasabi daikon root with a traditional sharkskin grater--the difference between this wasabi and the usual fake one from the tube was remarkable). Since it was in season, the next was Junsai ジュンサイ in sweet vinegar and yuzu 柚子. Junsai was very fresh with thick gelatinous layers. It matched perfectly with gentle sweet vinegar sauce highlighted with a bright yuzu flavor. (Masa showed us the fresh yuzu they had just received--the very small green kind). We then moved to a simmered dish; Hiryouzu 飛龍頭 and shrimp shinjou 海老しんじょう in yuba 湯葉 sauce. This was a nice comforting dish and well-prepared, if not spectacular. Next came a huge and fresh Pacific oyster (cut into three pieces) from Washington State, Japanese call it Iwagaki oyster 岩牡蛎, on the half shell with a lemon wedge and okinawan salt. This was so good (you may have noticed we are partial to raw oysters). It went so well with the sake we were drinking; a nice fresh ocean taste and, without any special sauce or seasoning, it  lingered pleasantly in the mouth for a while. Again seasonality is important here. "Ayu" 鮎 is in season. Japanese, especially Kyotoites, are very fond of this small fresh water river fish and we had this fish quite a few times in Kyoto. The Ayu which had been marinated very delicately in soy sauce and sake 祐庵地 was served butterflied and grilled 鮎の開き祐庵焼き. I like this rendition much better than the customary "shioyaki"塩焼き or salt grilled, which is usually served on a bed of salt and pine needles. Somewhere between these dishes, we had assorted "Hassun" appetizers 八寸 with 8 small tasty morsels; kinome-miso dengaku 木の芽味噌田楽, "aburana" with yuzu-miso アブラナの柚子味噌和え, lightly marinated firefly squid 蛍イカの沖漬け, "tamago-dofu" 卵豆腐, a small savory egg custard square with edamame paste, salt-cured shirako 白子 with vinegard daikon strips, garlic sprouts 芽ニンニク with miso-marinated Manila clams. All were fantastic. The only slight disappointment being the dengaku due to the quality of the tofu which could have been better. The salt cured "Shirako" or cod sperm sac (which does not sound appetizing) was delicate and tasty.

At this point, we were presented with two choices; one was "Lobster" shabushabu and the other was a Japanese style snapping turtle soup スッポンのお吸い物. Without hesitation, we took the snapping turtle. This was quite a soup; mine had one of the legs and my wife's had nice meaty parts. The broth was very savory. Yet the shimmering liquid in the bowl did not completely cover up the underlying primordial reptilian taste suggestive of mysteriously lurking depths of the pond. This does not taste like a chicken for sure. Since I got the leg, I had to spit out the "nails" as I chowed down. 

Since I made the reservation directly with Chef Masa and mentioned that the last time we were there we liked his home-made "Karasumi" からすみ, he gave us a small slice of that dreaded "Funazushi" フナ寿司 which was marinated with sake lee. Marinating in sake lee or "Sake kasu" 酒粕 made it very palatable (actually good). It had a similar texture and taste to "Karasumi". What a personal service! 

Then, we were presented with several square lacquer boxes of today's sashimi items. One box was all "hikarimonoayu" offered as sashimi. We started with a series of sashimi, very small but carefully prepared pieces; tuna around this time of year was less fatty and firm but very tasty. Again, freshly grated wasabi was just so nice. We can not remember every pieces we had but other stand-outs are "sayori" or needle fish, "Ayu" served two ways (one as is-just salt cured, and the other mixed with salted and preserved ayu innards called "Uruka" うるか. Ayu innards are cherished for their slightly bitter taste. Uruka definitely added a salty and slight bitter taste but it was a nice combination of tastes. I can not forget the wild white salmon from Alaska. Very tasty. Oh, one more item worth mentioning is, again in season, bonito "katsuo" 鰹 which was lightly grilled on a charcoal fire (Tataki) and served in a separate bowl with grated garlic and ginger; nice meaty slices and very flavourful. I have eaten a great deal of sashimi in my day but somehow this was especially good. Between the sashimi and sushi course we were offered a small delicately done "Sayori tempura" with perilla leaves さよりの天ぷら. At this point we were so full it was an effort to finish the sushi. Masa responded by making the rice ball very small for us and we had 4-5 pieces of yummy sushi. 

Finally, we were presented with the desert menu. We picked a Japanese "purin" custard, "kurosatou" or dark sugar (from Okinawa) ice cream. Both were very good but we particularly liked the very delicate Japanese custard.

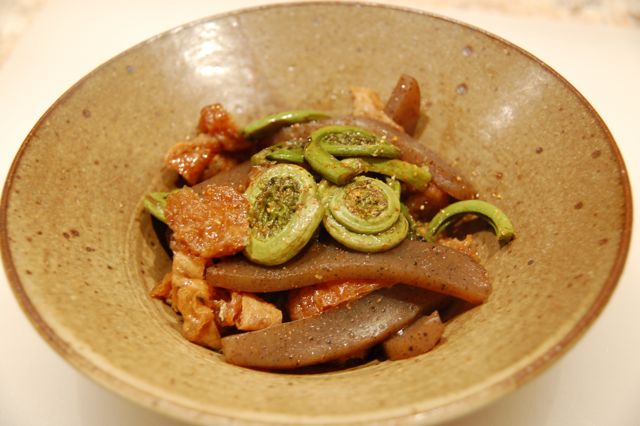
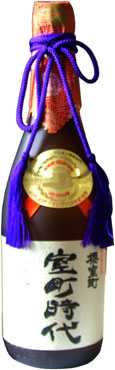
I just want to mention sakes we tasted at Sushi Taro on three occasions. The sake list is not extremely long but quite decent covering from the high-end to moderate. Among the ones we tasted; Muromachi Jidai 室町時代 (Junmai Supreme-Daigijo or Kiwami-daiginjo), Hakkaisan 八海山 (Ginjou), Kubota Hekiju 久保田 蒼寿 (Junmai Daiginjou), Dassai23 獺祭 (Junmai Daiginjo) and Hakuryu 白龍 (Daiginjo). By far, "Muromachi Jidai" is our favorite. Complex yet clean tasting and it is just cut above. Next will be Dassai23. Not as complex but very pleasant and clean. Hakkaisan is a bit too yeasty to our taste. Kubota has some muddy note and Hakuryu is rather simplistic.

In summary, we really like this place. This is one of the best restaurants we have eaten at both here and in Japan. They serve very traditional carefully created food with a keen sense of seasonality ("Shun" 旬) and the sake selection is quite decent. The only problem for us (if you can even call it a problem for most people) is that we get so full by the end of the feast in both Sushi omakase and regular Kaiseki. It is a bit expensive but a similar class restaurant in Japan will certainly cost much more.

Thursday, May 20, 2010

Kinpira Celery セロリの金平

I saw this dish in Dave P's review of "En" in Kichijouji 吉祥寺. "Kinpira" 金平 is a very simple Japanese way of braising thinly sliced or julienned vegetables, seasoned with mirin and soy sauce. Burdock or "gobo" 牛蒡 is the most common. I have made "kinpira" with diakon, carrot, lotus root or "renkon" 蓮根 beside gobo but celery is a nice idea.

I used 4 stalks of celery for two very small servings. I sliced the celery on bias thinly. In a frying pan on a medium flame, I add 1 tsp of vegetable oil, a dash of dark sesame oil, and red pepper flakes (whatever amount you like). When the oil is hot, I add the celery slices and saute for 30 seconds. I then add 2 tsp each of mirin and soy sauce, stirring until liquid is almost all gone (2-3 minutes more). I happened to have carrot slices in sweet vinegar and used them as a garnish. I sprinkled sesame seeds and 7 flavored Japanese pepper powder or "Shichimi tougarashi" 七味唐辛子, since I did not have red pepper threads 糸唐辛子 or 실고추 (shil-gochu). This is nice dish. Nice heat and crunch. This is definitely added as our Home Izakaya regular "Teiban" 定番 dishes along with Japanese style celery salad.

Tuesday, May 18, 2010

Stewed rolled daikon and deep fried tofu 大根と油揚の砧の煮物

This is another high-labor simple ingredient dish (it is a value added item and "you can charge more for this dish than for a simple nimono or simmered dish" is what I remember it said in the cookbook from which I got this recipe). Although I cannot charge more for this dish, I decided to make it because my wife found several Ziploc bags of half used packages of deep fried tofu pouches or "obraage" 油揚げ in our freezer, apparently representing different vintages. Since these things do not improve with age, I tried to use up the older vintage aburaage.  I made this dish a few times before and I remember that it tastes pretty good. I made this at the same time I made "Kanpyo with checkered daikon and carrot" カンピョウの市松 and the original recipe came from the same cookbook ("Appetizers and a la carte small dishes for Izakaya" by Tadashi Shinojima.)

(This is the way I served it the day I made this dish)

First, I soaked 6 "Inari" 稲荷 or "koage" 小揚げ type (i.e. small) aburaage in boiling water to thaw and remove excess oil.  While taking care not to burn my hands, I squeezed out any water it may have absorbed by pressing it between my palms. I then cut three edges of the aburaage and opened it up into a flat rectangular sheet (about 3 by 5 inches). I repeated this process with the rest of the abraage and set aside.

(The next day, with sugar snap)

I happened to have a rather large good daikon. I cut about a 5 inch-long (corresponding to the width of the aburaage sheets) segment of daikon. Using "Katsura-muki" 桂剝き, after peeling off the skin, I made a long thin sheet of daikon (it should be thicker -about 3mm- than when you make a daikon garnish for sashimi).  I managed to make 3 sheets, each about 13-14 inch long. I blanched the diakon sheets for 5 minutes so that it would be more pliable. When it cooled enough to handle, I layered the aburage on top of the dakon sheet. You need two abuaage sheets to cover 80% of the diakon sheet leaving about 3-4 inches at the end (which makes the outer most layer). I rolled up both together and tied the upper and lower portions of the resulting cylinder with Kanpyo 干瓢 (I cut the width of the Kanpyo ribbon in half since this one happened to be rather wide). I made three rolls (each will be cut in half when served yielding 6 pieces). I placed the rolls on their ends in a small deep pot containing dashi broth (abut 2-3 cups--enough to just cover the daikon cylinder), mirin (3 tbs), "usukuchi" 薄口 soy sauce (3 tbs). The original recipe calls for dashi, mirin and sugar without any soy sauce but this does not make sense to me, so I omitted the sugar and added soy sauce. With "otoshibuta" 落とし蓋, gently simmer for 30-40 minutes. Before serving, I cut the cylinder in half between two Kanpyo ties to make two disks. Serve with the cut end up (looks much nicer) with a dab of Japanese hot mustard and a bit of the broth. The combination of texture (still slightly crunchy daikon and gentle softness of obraage), subtle and gentle sweetness from daikon and the broth, all produced a sublime experience punctuated by loud wake-up calls from the Japanese hot mustard. Sake is definitely called for.

Sunday, May 16, 2010

Cocktail カクテル


We very rarely drink hard liquor or cocktails nowadays. Red wine and sake are more agreeable most of the time. But if the occasion calls for it like today, we enjoy a cocktail. I usually go for a Martini and my wife for a Manhattan. I think that, the quality of the gin, bourbon, and vermouth or whatever you are using is, of course, important. There are other very important details that make the cocktails especially good. The first is the glass. It has to be a very thin rimmed crystal so that when it touches your lip, it gives you a nice sensation. A thick cheap cocktail glass actually made of glass does not do it. Second, the glass and the ingredients have to be very cold. I chill the glasses by pouring crushed ice mixed with cold water into them first. Using a cocktail shaker with enough crushed ice (-10F ice from a freezer is better than ice from a stand alone ice maker some establishments may use, which is not as cold) is also important so that  the cocktail is super cold. Tiny ice crystals should float on the surface when poured. Third, the garnish--a good stuffed green olive for the Martini and maraschino cherries for the Manhattan. In the case of my wife, make that two maraschino cherries. (Its a long story having to do with good family times, and the distribution, to the kids, of Maraschino cherries, one each, from a Grandma and Grandpa who liked Manhattans but not the Maraschino's that came in them).  Of course instead of having a cocktail in a dark and smoky bar, we like to have it in our backyard on the weekend when the weather is perfect--sunny, cool and no mosquitoes, like today. We had small canapes of creme fraiche, capers and smoked salmon on small squares of Pumpernickel with the cocktails. We had to admit, though, if there is a nice Izakaya nearby like this one, we may change our mind and venue (especially if it was a weekday evening).

Saturday, May 15, 2010

Spinach soufflé ほうれん草のスフレ

This is totally not Izakaya food but, this soufflé rose nicely (for a fleeting moment anyway) warranting the post. My wife's idea of a good time and good food are somehow tied to spinach soufflé and a Manhattan (cocktail). Because I volunteered for testing Japanese grill recipes for a cookbook, we had extra bags of spinach and leftover steaks. In addition, we had 4 egg whites left since my wife made a very nice bread pudding with a delicious but deadly Whiskey sauce (required 4 egg yolks) for dessert when we had dinner guests to evaluate these recipes. So we decided to make a spinach soufflé from the leftovers. My wife only knew Stauffer's frozen spinach soufflé until I made this dish from scratch for her some time ago.
Please do not follow my recipe (I am sure we are safe since nobody in their right mind would follow any of my recipes anyway). If you are going to make this dish, please use a more accurate recipe available elsewhere. I just do not measure things and can not give you accurate amounts of anything. This is just the process we went through for our own record.

Spinach: We had one and half bags of baby spinach (one of those pre-washed variety). My wife just cooked the spinach (no water added) on a low flame in a large sauté pan with the lid on--about 5 minutes or until it is wilted (mixing several times to keep the bottom from scorching). I squeezed out any excess moisture and chopped it finely. 

Bechamel sauce: I chopped one small shallot and sauteed in about 2 tbs of olive oil and 1 tbs of butter for 2-3 minutes in a frying pan on a low flame. I added about 1/4 cup of AP flour and cooked for one to 2 minutes and added cold milk (I used 1%). I think I started with about a cup and then added more milk in several increments until it become rather loose saucy consistency. I added grated cheddar and sheep milk Gouda (about 1 cup) and mixed into the Bechamel sauce (became Mornay sauce, I guess). I seasoned with salt, white pepper, and freshly grated nutmeg to taste. I then mixed in the spinach above. I am not sure about the exact amount but I think this yielded about three cups (or little less) of the creamed spinach.

Egg white: We had 4 egg whites left over from making the Whiskey sauce (remember it used 4  egg yolks! Are those arteries I hear hardening?). I did not know how much egg whites were needed, so I asked my wife to whip all 4 egg whites to the hard peak stage. I first loosened up the creamed spinach with several large spoonful of the whipped egg white and then folded in another several spoonfuls of the egg white until it looked and felt right (whatever that means, I guess I used 2 egg whites worth or maybe a bit more).

Soufflé dish: We used a 7 inch souffle dish which was buttered and dusted with grated Parmesan cheese. I poured in the above mixture (perfect, it came to 80% of the volume of the dish). I cleaned up the edge of the dish and put it in a 400F oven for 30 minutes and Viola!

Thursday, May 13, 2010

Kanpyo with checkered daikon and carrot カンピョウの市松

Kanpyo 干瓢, literally means "dried gourd", is a rather common item used in Japanese cuisines. The meat of the gourd (a certain edible kind, I suppose) is peeled like a narrow tape and then dried. You can buy it, in this dried form, in a Japanese grocery store. I do not think it has much flavor by itself but, certainly, it will absorb any flavors in which it is cooked. It is often used as an edible tie to tie off something. For example, when I stuff a deep fried tofu pouch or abraage with a rice cake or "mochi" in my version of the New Year Soup, I use kanpyo to tie the pouch closed. It is also a common item to be included in scattered sushi "chirashi-zushi" ちらし寿司 or sushi roll "norimaki" のり巻き. To prepare kanpyo, you first wash, rehydrate (30 minutes or longer), and briefly (5 minutes) boil in water. After this, you could cook further a few different ways. If you are going to use this to tie off something, I will just use it without further cooking. The dish I am describing here is one of the rare dishes in which kanpyo is used as the main ingredient. After using kanpyo as a string/tie for another dish, I had a lot of unused kanpyo and decided to make this dish.  It is very subtle in flavor and a bit of a chore to make but it looks more "professional" than "home made".

This dish is originally from a cookbook called (roughly translated into English) "Appetizers and a la carte small "idea" dishes for Izakaya" by Tadashi Shinojima. First, I make the center portion of the dish by cutting equally sized rectangular-shaped sticks of carrot and daikon measuring about 1/2 x 1/2 x 3 inches (2 each, total of 4) (for two small servings). Combining these sticks to make a checker board pattern on the end (this is called "Ichimatsu" 市松 pattern in Japanese which is named after a Kabuki actor in the late Edo period). I make sure the kanpyo ribbon is open and flat (not to be folded or twisted) and wrap this core of the carrot and daikon sticks, keep moving up and down so that the length of the carrot and dikon sticks are evenly wrapped. Use a butcher twine (or a more delicate thread if you prefer) to tie the end of kapyo. I simmer it gently with a "otoshibuta" 落とし蓋 in 2 cup of #2 or niban dashi, 3 tbs of mirin and (about) 2 tbs of light colored or "Usukuchi" 薄口 soy sauce for 30 minutes. Let it cool down in the broth to room temperature. For the sweet miso sauce, I mix 3 tbs of red miso, 3 tbs of mirin and 2 tsp of sugar in a small sauce pan on a low flame and stir until it reaches nice saucy consistency (for about 5 minutes). You should taste and, if needed, add more sugar. Cut the kanpyo roll into 4 equal disks and serve with the miso sauce. This is a rather classic Japanese dish; simple ingredients but lots of steps and time to prepare. It has a very subtle and pleasing flavors. Perfect accompaniment for sake.

Tuesday, May 11, 2010

Fresh corn Kakiage tempura トウモロコシのかき揚げ (Mark's book P47)


I found corn in the husk for the first time this year in our grocery store. I asked the woman, stocking the shelf, where the corn came from (thinking it must have come from a foreign country like Mexico). She showed me the mark on the crates they came in. It was clearly stamped "U.S.A." but she did not know where in the U.S. It appears that seasonal items become available earlier and earlier every year.  So I bought 8 ears (less than $2). They were white corn and rather small but the kernels were full and sweet when I tasted them raw. So I decided to make kakiage tempera かきあげ. Kakiage is a version of tempera where small items (sliced onions, julienned Burdock roots, small shrimp or fish etc are fried with a batter as a binder).


The "corn kakiage" appears on Mark's book p47, but it is a rather standard recipe except the use of corn is a bit uique. I made my tempura batter with cake flour (1/2 cup), potato starch or "katakuriko" (1 tbs) and egg yolk (1/2) and mixed in ice cold water (about 1/2 cup) to a desired cosistnecy. For Kakiage, I made it to the consistency of a loose pancake batter. I removed the kernels from the cob (one ear of corn yielded about 1/2 cup) using a knife and placed them in a bowl. I added enough tempura batter to coat every kernel and a bit more. Using a soup spoon, I slipped the batter and corn mixture into hot oil (170C or 340F) and fried until crispy and lightly browned, turning once (about 2-3 minutes on each side). I drained and served while hot and crispy. I also made my usual green beans and shiitake mushroom tempura. I served this with green tea salt and wedges of lime. The corn was very sweet with a nice light tempura crust. The lime juice added a nice citrus acidity and made the salt stick better. We had a bit of red wine left but switched to cold sake for this dish.

Monday, May 10, 2010

Eggplant Gratiné with meat sauce 茄子のミートソースグラタン


This is not a classic Izakaya food but goes well with red wines or beer if you are having one. I used a medium-sized Italian eggplant for this dish. Again this is a very simple quick dish to make as long as you have a good eggplant. I could have made this with layered slices of eggplant and meat sauce and cheese in a casserole (similar to eggplant parmesan) but it would have taken too much time particularly when we have already opened a bottle of wine.

I cut the eggplant in half lengthwise and scored the meat (cross hatching) taking care not to cut the skin. I salted them lightly and let it stand for 5-10 minutes and the patted dry. I put small amount (1 tbs) of olive oil in a non-stick frying pan and put two halves of the eggplant--the cut surface down, on medium heat. I put on the lid and cooked for 10 minutes (it half steamed) until the eggplant was soft (Cut side should have a nice brown surface).

For the meat sauce, I just cooked ground chicken (leftover from making other dishes) in a frying pan (with olive oil, salt and pepper) and then added my marinara sauce (leftover) and simmered to warm and make sure the chicken is cooked through. Of course, nothing will prevent you from making a more fancy "ragu" or something.

Put the cooked eggplant in the ramekin or gratiné dish which can hold the eggplant snuggly. Pour the meat sauce over and place several slices of Mozzarella cheese on the top and put it in a 450F toaster oven (400F if using a regualr oven) for 10 minutes until cheese has melted and sauce is bubbly. Remove from the oven and grate Parmesan cheese over it, drizzle good olive oil, and garnish with chiffonade of fresh basil. It went well with a bottle of Italian-style (super Tuscan) wine from Washington state "Saggi" 2007.