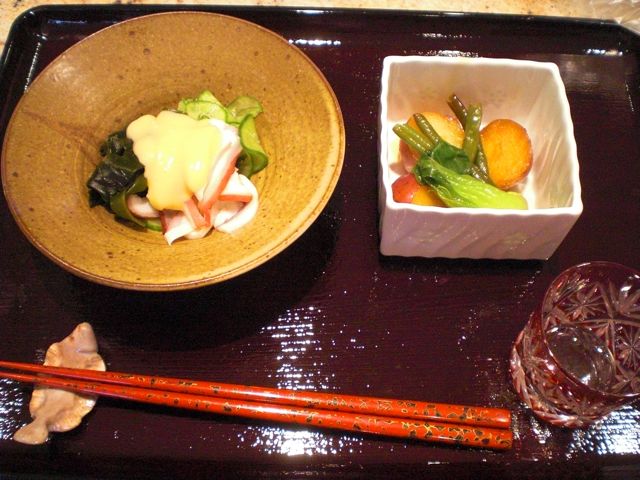
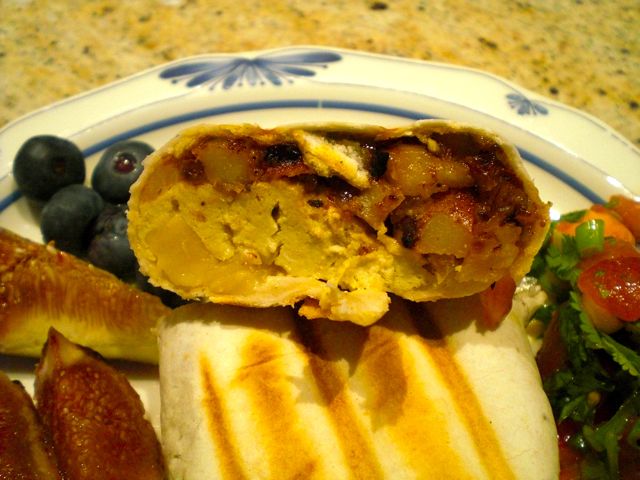
Monday, August 1, 2011

Red snapper and cream cheese dip レッドスナッパーのクリームチーズ ディップ

After grilling a large red snapper, we had lots of fish meat leftover. I made a Japanese style salad with it but did not take pictures. My wife made this dip from the fish meat. This is based on a dip we used to make from locally produced (Northern Virginia) hot smoked trout which we used to buy occasionally. Since we hot smoked our red snapper and the fish meat had a gentle smoky flavor, we thought this may work.

She put cream cheese (one stick or 8 oz, of course, Kraft Philadelphia brand), in the food processor then added about an equal amount of the cooked hot smoked red snapper meat (bones carefully removed), lemon juice (3 tbs), horse radish (1 tbs), salt (to taste, 1/2 tsp) and blended it until creamy and all the ingredients were incorporated. She then added finely chopped dill (as much as you like, we used about 2-3 tsp).

We serve this with our favorite crackers. In this picture, you can see crackers with sesame and roasted garlic behind the glass bowl.

This is a very nice dip. We had this dip with an ice cold white wine. It is very unusual for us red wine drinkers to go for a white wine but this is what hot days will do to you. The wine was Pionero Maccerato Albarino 2009 from Rias BaixasGalicia, Spain, which got a Wine Advocates score of 90. This one has a nice apple, melon and floral note and some mild acidity. This is a good wine to sip while eating this dip on crackers sitting outside enjoying a summer evening.

Saturday, July 30, 2011

Stewed fish head 兜煮もどき

When I grilled the whole large red snapper in a semi-Japanese style, we were left with this head (below). No self respecting person of the Japanese persuasion could bear to just cut it off and throw it out. We could have eaten the meat from the head the night we cooked the fish but we had plenty of meat from the other parts. So I decided to make something else from this.

Authentic Japanse stewed fish head or "kabutoni" 兜煮 traditionally starts with an uncooked fish head which is split in half (called "nashiwari" 梨割り) before stewing. Since we needed the head to properly display the whole grilled red fish, this fish head was already grilled (and even hot smoked). In addition, the head was really big with its thick skull and sturdy cervical vertebrae preventing me from cutting it in half short of using a reciprocal saw.

So, by no means, this was "kabuto-ni" but "kabutonioid" 兜煮もどき. Besides getting a fish head, one of the problems of "kabutoni" is the presentation. This one is particularly not good. It almost looks like a mummified fish head (below) dug up from one of the Egyptian pyramids. In any case, I just simmered the grilled (hot smoked) head with dashi, mirin and soy sauce with slices of ginger. The traditional way is to place the burdock root or "gobou" 牛蒡 in the bottom of the pan and then place the fish head on top but I did not have gobou. I just placed the fish head in the pot and added daikon instead.

With an "otoshi buta" 落とし蓋, I simmered it for 40 minutes or so and let it cool down. I actually served this the next day after it spent the night in the refrigerator and warmed it up the next evening.

The result? Obviously not as good and real kabutoni but it had lots of meat which is a bit on the dry side but not too bad. The skin was not edible (like leather)(but neither was the skin on the rest of the fish edible). The gelatinous stuff behind the eyeballs, which connoisseurs of fish head including myself love, was not as gelatinous but was quite good (my wife graciously offered her share of the eyeballs to me). Next time, we will get a smaller red snapper and may try different dishes from the fillets and maybe a more authentic "kabutoni".

Thursday, July 28, 2011

Angel hair pasta pancake with Parmesan cheese エンジェルヘアパスタとパルメザンチーズのパンケーキ

This was made mostly for leftover control but it is a nice satisfying dish. The ingredients I had to work with were: leftover cooked angel hair pasta, one egg (while making poached eggs earlier I broke one of the yolks when I cracked it into a small dish before submerging the egg into the poaching water. Luckily I could save the egg for later use) and a small piece of red onion (less than 1/4). So this is the dish I came up with.


This is variation of the one I already posted. I first sauteed the red onion (thinly sliced) in a light olive oil on a medium flame. Meanwhile I mixed an appropriate amount of pasta, egg, and good amount of grated Parmigiano Reggiano (all precise measurement). I added the sauteed onion and spread the mixture in a small flying pan (the same one I used for the onion) and cooked it for 2-3 minutes on low flame. When the bottom is set and brown, I flipped it (a successful flip is all in the wrist!) and browned the other side for 2-3 more minutes until cooked and the edge was brown and crispy. I grated more Parmigiano on the top and garnished it with chopped chives. I had one last drunken tomato which I served one half per person.

Tuesday, July 26, 2011

Octopus and Nagaimo stir fly with garlic 長芋とタコの塩バターソテー

I made this dish from what was left of boiled small octopus after making sumiso-ae.  I adapted this from e-recipe. I would have used soy sauce instead of just salt but I followed the recipe.

Octpus: I used boiled small octopus head (body). I sliced the octopus in to thin (1/2 to 1/4 inch) strips.
Nagaimo: I used nagaimo (2 inch segment), peeled, sliced (1/4 inch) and cut in half rounds.

I put a pat of butter (1 tsp) in a frying pan on medium low flame. When the butter melted, I added garlic (1 small glove, finely chopped). When the garlic became fragrant (1 minute), I added the nagaimo rounds and fried both sides (1-2 minutes each). I then put in the octopus and sauteed for another 1 minute. I added salt (1/3 tsp) melted in warm water (2 tbs) and  mirin (2 tbs). I braised it until the liquid is almost all evaporated. I garnished with a very small pat of butter, perilla and freshly cracked white pepper (my additions).

This is an interesting dish. The nagaimo is still a bit slimy and may not be suitable for those with slimonphobia out there but is nicely crunchy with a buttery flavor. The octopus is rather tender (relative to other cooked octopi) and nice garlic taste. Perfect drinking snack for sake.

Sunday, July 24, 2011

Small "Iidako" octopus and wakame dressed in vinegar-miso いいだこと塩蔵ワカメの酢みそ和え

When I visit the only Japanese grocery store left in our area, what I find is sort of hit-or-miss. On one such visit, I found boiled small octopus (only head or body portion but not the legs or tentacles) in the refrigerated case. I only saw boiled octopus legs before in this store but this was new, so I bought it.

This is probably "Iidako" 飯蛸. If I am correct, this is a small species of octopus but not a juvenile or baby of a larger octopus such as "true" octopus or 真蛸. I pondered a bit but I decided to make a classic vinegar-miso dressing with cucumber and wakame seaweed. Despite the fact I posted a few very similar dishes before, this is such a classic combination and I could not resist making this dish.

I just sliced the octopus thinly. Wakame was the salt preserved variety which was washed, hydrated and cut into a bite sized pieces (this was the last of the salt preserved wakame that we had). Cucumber was my usual American mini-cucumber, thinly sliced, salted and excess moisture squeezed out. 

"Karashi sumiso" is my usual with Saikyo miso 西京味噌 and rice vinegar and Japanese hot mustard.

The octopus is a bit firm but very nice. It has different textures as compared to the tentacles of larger octopus. I made sumiso sauce a tad too vinegary this time. I served this with braised potato and green beans (right in the image below) as opening dishes.

We tasted a new batch of G-Sake "joy" (I suppose "G" is for "Genshu" 原酒). We think this is a new brew since the shape of the bottle is slightly different (No "BY" or "Brew Year" is listed on the bottle). The taste is about the same as before with a "umami" predominant taste profile. It has a slightly viscous but pleasant mouth feel. As compared to the old batch, my wife felt it was slightly more yeasty but I did not. If this sake had a bit more fruity and crisp upfront taste which leads to the "umami"-laden finish, which this one already posses, this sake would be formidable. But the taste of this sake is a true undiluted or "genshu" style of sake. The assertive vinegary taste of my miso dressing actually went very well with this sake.

Friday, July 22, 2011

Braised new potatoes and green beans ジャガイモとインゲンの炒め煮

This is a very homey dish of potato and green beans. I grew up eating this dish and this is how my mother made it as far as I can remember. When my niece visited us many years ago, I made this dish and she immediately recognized it as her grandmother's recipe.

The amount of potato and green beans are arbitrary. The below picture shows the amount of potatoes and green beans I prepared. I used small red new potatoes (about 10, small one as is and larger ones cut in half after removing any blemish). Green beans, I trimmed off both ends after washing.

I put light olive oil (or vegetable oil, 2 tbs) with a splash of dark roasted sesame oil in a frying pan on medium heat. I sauteed both green beans and potatoes so that they were coated with oil. I added dashi (about 100ml). It immediately and vigorously started boiling. I put the tight fitting lid back on and let it cook for 5 minutes. I then added mirin (2-3tbs) and soy sauce (2-3 tbs). I put the lid back on and cooked another 7-10 minutes. I pierced  the potato and when the knife slid in easily it was done. I remove the lid and just let the liquid reduce until only a small amount of liquid remained (another 5 minutes). If the potato is not cooked but the liquid is almost gone, add water or dashi and cook a bit longer.

I added quartered baby bok choy on the top of the potato and green beans for the last 5 minutes of cooking and served this as a small drinking snack.

This is a classic home cooked dish. The green beans will lose color and it is not a fancy or pretty dish but is a very confronting dish. We went for sake with this.

Wednesday, July 20, 2011

Vidalia onion salad オニオンサラダ

The health effect of onion is a bit overhyped in Japan but eating raw onion is not easy because of the strong pungent taste. Vidalia onion is a milder onion since it contains less of the sulfa compounds and its derivatives develop by enzymatic actions after slicing, which is the basis of strong smell/taste and also its alleged heath benefits. Onion salads in different incarnations are being served up in some Izakaya. Quick scan of the Otsumami yokocho cookbooks reveals at least two versions. One looks particularly interesting topped with an egg yolk and bonito flakes. This is my more tame version made of Vidalia onion and slices of tomato.

The preparation of the onion is the same as in the cucumber onion salad. I slice onion thinly, salt, knead, let it stand for 5-10 minutes, squeeze and then wash it in cold running water. I then soak it in cold water for 15 minutes or longer and squeeze dry before using. (I am sure the most important substences for the onion's health benefits will be lost in this process but at least you can eat it without crying or smelling like an onion afterwords).

For dressing, I made a mixture of soy sauce, lemon juice, mirin, and sesame oil (to your liking, I did not measure) and dressed the onion. I spread the oinon on the plate and layered sliced tomato (skinned). I sprinkled some Kosher salt, good fruity olive oil and freshly ground peper (I used white pepper) on the tomato slices and garnished it with chopped chives. I chilled it in the refrigerator before serving.

It is very nice refreshing salad in hot weather. It may have lost some of the health benefits but the taste is very mild and even those who may not like raw onion will be able to enjoy it.

Monday, July 18, 2011

Grilled red snapper 鯛の塩焼き

When I posted "sekihan" 赤飯, I had to borrow an image of grilled "Tai" 鯛 (red snapper or sea bream? As usual, it is difficult to equate types of fish available in the U.S. and in Japan) to complete a full-fledged Japanese celebratory feast scene. Red snapper and Japanese "tai" may be totally different species but they are similar in appearance.  I was vying for a chance to get a nice red snapper to make my own salt grilled red fish. One Sunday, my wife suggested we mosey over to our new grocery store to look for a nice whole fish to grill, since it was rather hot and we did not feel like warming up our kitchen.

Among the whole fish they had, the red snapper looked the best, although many were very large. We ended up buying one of the smaller ones but it was still big (over 5 and a half pounds). I have never cooked red snapper this large before.

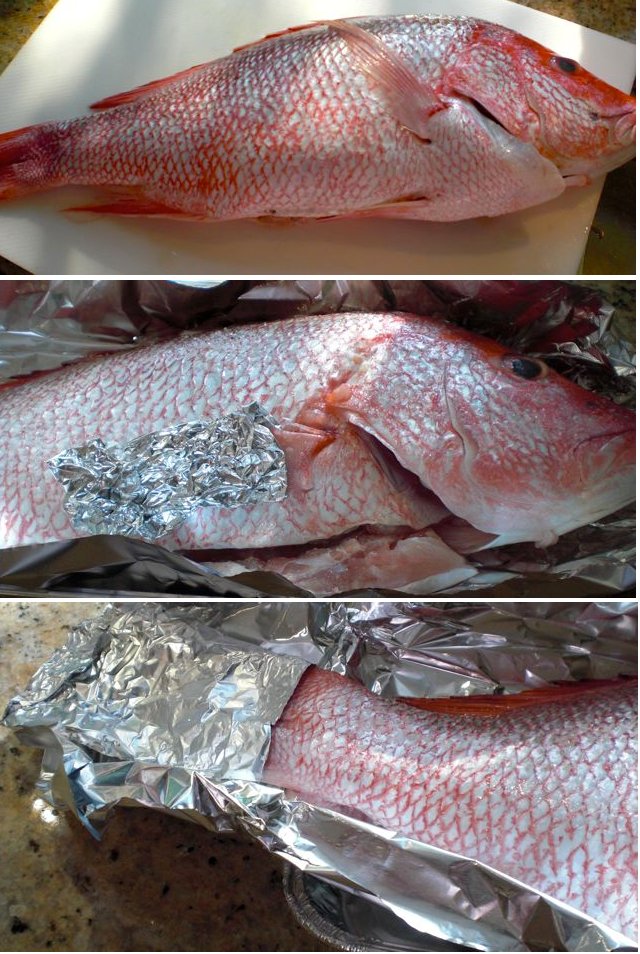
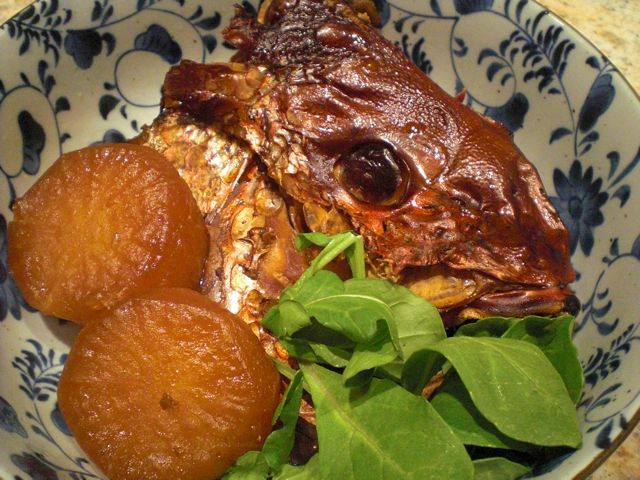
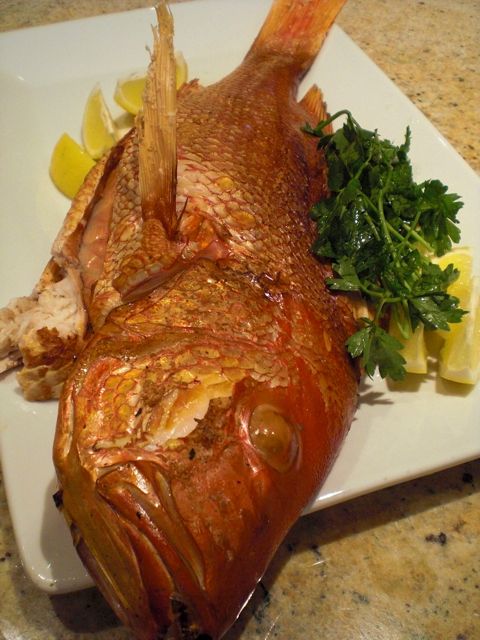
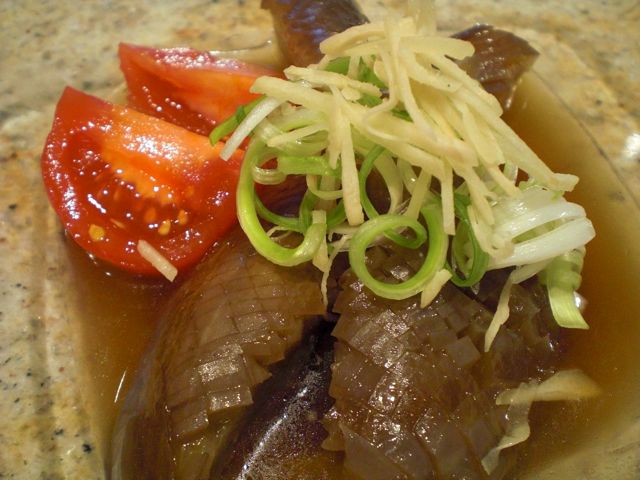
I asked the fish monger to gut and scale the fish. To my surprise, they did it in an appropriate Japanese way, meaning they left all the fins intact. Most American fish mongers, when asked to just gut and scale, will cut off all the fins using scissors. I'll admit the dorsal fins of some fish including this red snapper are very sharp and dangerous but, for Japanese (and I assume, for other Asian cultures as well), these fins are important, not because we eat them but because they are decorative. In addition, the fish monger did a good job of removing the scales from the head (face). This usually does not happen and is relevant since Japanese often eat the head of red snappers called "kabutoni" 兜煮 or "simmered war helmet". 

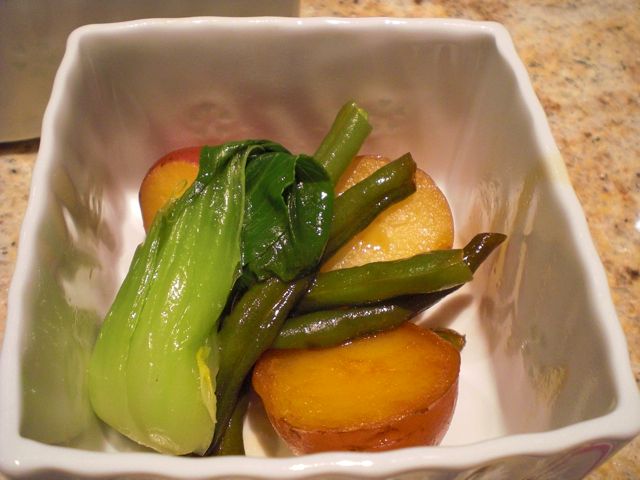
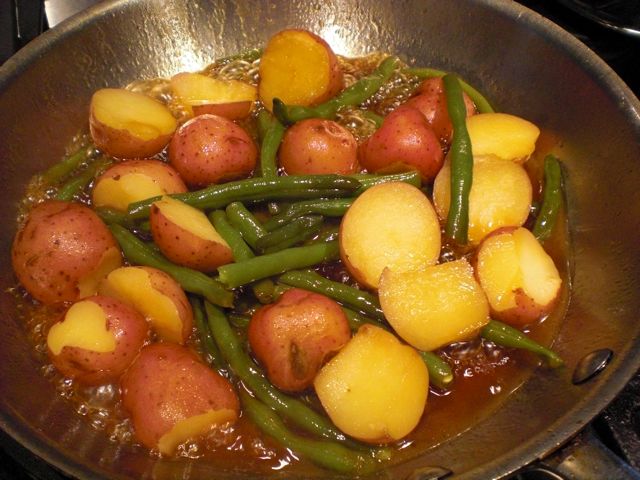
So, I decided to honor this fish monger's effort by salting the fins heavily (called "kazarijio" 飾り塩or decorative salting and protecting them with aluminum foil like you see on the left for pectoral fins (middle) and the tail (bottom). The rest of the fish including the skin and cavity were also salted but not too heavily. I decided not to use any lemons or other herbs in the cavity as per Japanese tradition. We deviated from tradition, however, after I made the comment that generally this type of white meat fish can be very bland. My wife suggested since we were already grilling it we should add hot smoking. I protested, "Smoking grilled fish was not traditional." But what the heck, I decide to do it.

Because the fish was so big it just barely fit into our Weber grill (there was no room to make "hot" to "cool" zones so I could move the fish between them as it cooked). I decided to use indirect heat like I do for whole chickens. This was another departure from the traditional Japanese way of grilling this type of fish. They are usually grilled over direct heat but I was concerned that if I used direct heat, the skin would be completely charred before the thickest part of the fish was done. As before, I used lump charcoal divided into two baskets on the left and right sides of the grill. I placed the fish in the center. I used soaked apple wood chips for the hot smoking. I cooked the fish for about 35 minutes (it was slightly underdone but only the meat around the back bone needed more cooking. See below.)

Before grilling, the skin is usually scored (decoratively) to prevent it from rupturing in a random fashion. I forgot to do this. As you will notice in the first picture, the skin split along the dorsal fin area (which was tactically covered by sprigs of parsley for the picture). My wife's theory is that this was fortuitous because the intact skin during cooking may have made the meat very moist but I am not sure. Despite the smoking, the skin retained its red color. Please notice the intact pectoral fin. 

This is by far and away the best red snapper or "tai" fish I have ever tasted. All of the grilled red fish I had in Japan were much smaller and totally overcooked. As a result they were rather dry and tasteless. This one is so flavorful (hot smoking helped), juicy and just excellent! We started snacking on it before we even got portions cut. We found ourselves standing over the fish, tasting morsels and exclaiming at how unimaginably good it was. We finally got control of ourselves and put some on a plate. So we actually ate 3 times more than what you see in the picture below. Since I did not use direct fire, the skin was not very crispy; it was actually fairly leathery and not good to eat (small concession).

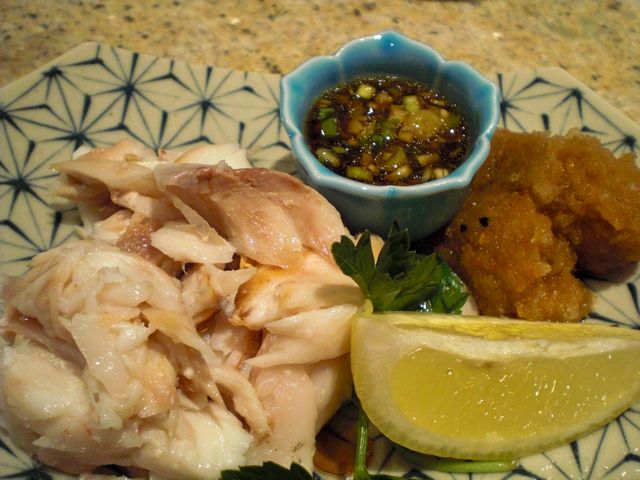
Before I started grilling this fish, my wife suggested I make some spicy sauces which would make this white meat fish more exciting. It turned out, the fish was so good we really did not need any sauces. Nonetheless I made two sauces. One was grated diakon with 7 favored Japanese red pepper flakes 七味唐辛子 and ponzu (ponzu-shouyu ポン酢醤油), the other was "
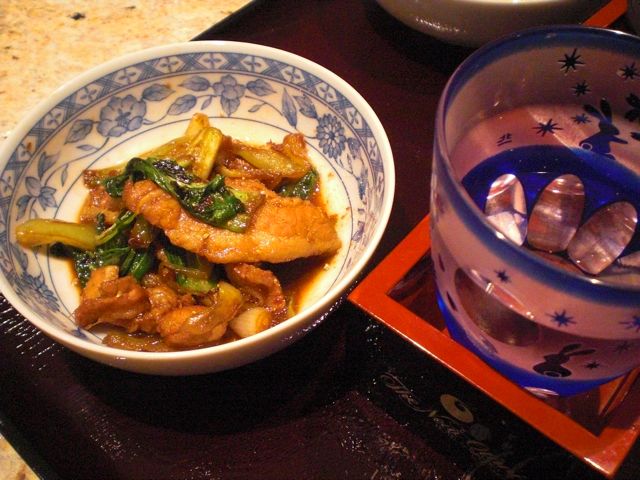
negi sauce" 葱ソース or scallion sauce, which is a mixture of lots of chopped scallion, soy sauce, sesame oil, mirin, and a dash of tabasco (in the small blue cup in the picture above). The ponzu-grated daikon sauce was way too harsh and spicy (mostly due to the daikon) but the negi sauce was good.

Since the meat around the back bone was a bit underdone, I put it in a frying pan and cooked it for 7-8 minutes at 400F in a convection oven (The original idea of not using the oven and heating up the kitchen obviously did not work).

The meat around the bone was now cooked and the juice was browned on the bottom of the pan. After I removed the meat from the bone, I added small amount of water and sake to deglaze the brown bits. I tasted it. It had enough saltiness and made a nice broth.

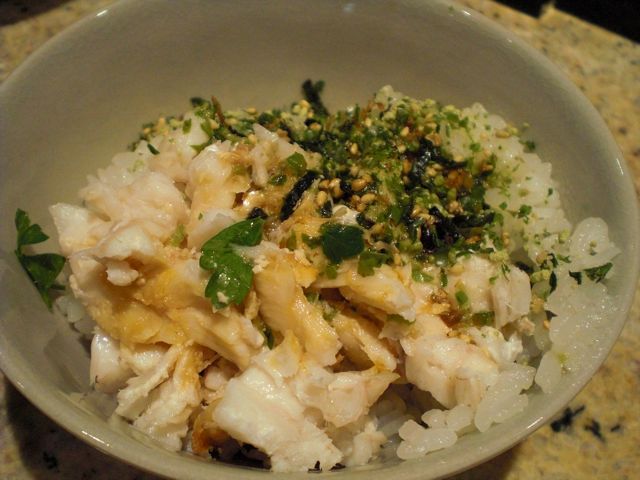
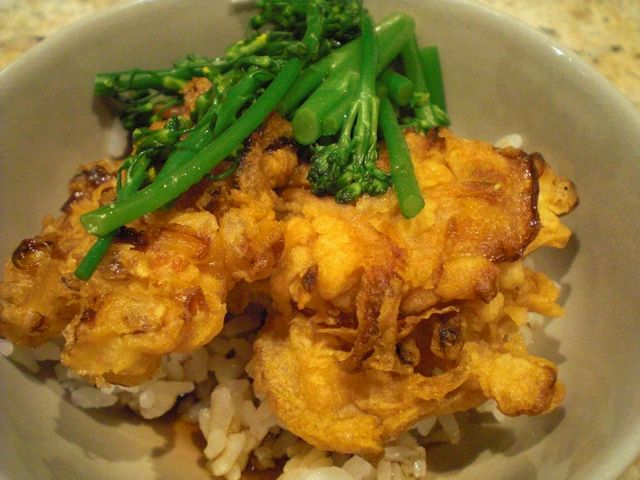
I added the meat to the hot rice as seen below. Since I had "rice seasoning" or "frikake" ふりかけwith a wasabi flavor (contains sesame seeds, nori etc as well), I sprinkled it over the rice. Then, I poured on a small amount of the broth (2-3 tbs).
This is not a true "tai chazuke" 
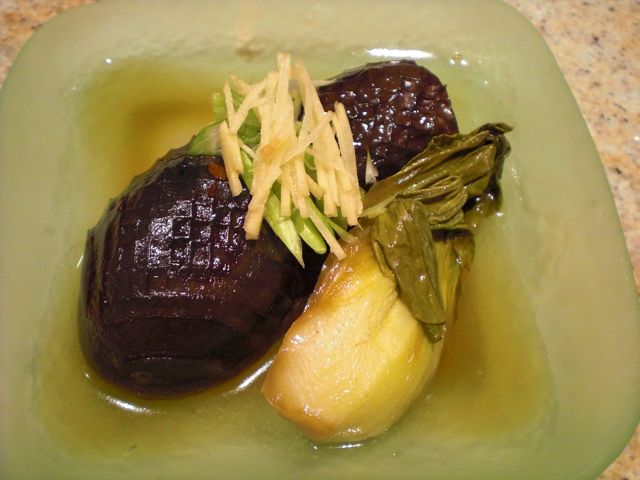
鯛茶漬 but the combination worked well as a shime 〆dish. Since this was rather hot day, our cold house sake "mu" with its clean crisp taste was perfect. We have lots of leftover fish meat including the head. I may have to come up with some new dishes.

Saturday, July 16, 2011

Cucumber and Vidalia onion salad キュウリとタマネギのサラダ

We made this for the 4th of July barbecue among other salads. This is a perfect dish for Swedish Smörgåsbord judging from its white color especially next to marinated herring in sour cream. (Japanese call this type of all-you-can-eat buffet "Viking" which is a catchier name and easier to pronounce, especially for Japanese, while suggesting its origin). My wife said, however, that this is not a Swedish but a Pennsylvania Dutch recipe. She grew up eating this salad in the summer and it was one of her favorites. In any case, this is a very cool refreshing salad for hot muggy summer days. In the original recipe sour creme is used. We substituted yogurt for the sour cream, making it is very healthy to boot. The major flavoring is dill.

I helped by slicing and chopping and did other prep works. My wife essentially was in charge of dressing and seasoning this. The amount and proportion of onion and cucumber is arbitrary.

I washed the cucumbers (American mini-cucues) then rubbed the cucumber skin with salt, rinsed and dried with a paper towel. Since we had 6 cucumbers, I used a Japanese mandoline and sliced it thinly. I added a small amount of salt (1/2 tsp), kneaded it and let it stand for 10-15 minutes. I wrung out the excess moisture but I did not wash away the salt (below left). My wife seasoned it with rice vinegar (about 2 tbs or to taste).

I used Vidalia onion (1 medium) thinly sliced. I added a relatively large amount of salt (3 tsp), kneaded and let it stand for 10 minutes or more (above right). I washed and drained several times in running cold water. I then wrung out the excess moisture and soaked in ice cold water (with ice cubes) for 30 minutes (skip this process if you really like strong onion flavor).

Dressing: My wife added Greek yogurt and finely chopped fresh dill (as much as you like).

The salad becomes better after one day in the refrigerator. Especially since we used yogurt, excess whey may develop, just pour it out before serving. Since we used Vidalia onion and salting and soaking all contributed to very mild almost sweet flavor of the onion. Using American mini-cucumber which is closest we can come to a Japanese cucumber also makes this salad much better than using ordinary American cucumbers. 

Pairing with drinks is not easy. Sake and beer will go with this salad but not any wines.

Thursday, July 14, 2011

Breakfast burrito 朝ご飯ブリト

I believe that a hearty breakfast is also a good mid-night snack after excessive imbibing. Although I am over with mid-night snacks these days, this was our breakfast. Some Izakaya could served this, minus the too-healthy-looking fruit. This is inspired by some recipes for breakfast burritos and wraps we saw, but I just made it without following any specific recipe.

We thought we would just wrap hash browns and scrambled eggs in tortillas. I made the hash browns and my wife made the eggs. This is for two small wraps or burritos

Hash browns: This is my cutting-corner version of hash browns. I first sauteed onion (half medium size, finely chopped) with olive oil (1 tbs) in a frying pan on medium flame until edges are brown. Meanwhile,  I cooked small, new or baby red potatoes (4-5) after removing the "eyes", in a microwave oven, covered, for 2 minutes or until a skewer goes through easily. I diced the potatoes and added them to the frying pan. I seasoned them with salt and pepper and let it cook for several minutes. I mixed and flipped after the bottom turned brown so that all the sides of the potato were browned (5-6 minutes). I then made a bare surface in the frying pan by pushing the hash browns aside and added ketchup (1-2 tbs). I folded ketchup several times using a silicon spatula until the color became dark and brown rather than red (Maillard reaction). I mixed the ketchup with the rest of the ingredients in the pan. I tasted and adjusted the seasoning (a bit more salt). You could add other seasoning and ingredients such as Tabasco or jalapeno pepper and, of course, crispy bacon, if you like.

Scrambled eggs: My wife made scrambled eggs seasoned with Worcestershire sauce, salt and pepper and with an addition of a small amount of cream. This is the reason the scrambled eggs below were not bright yellow but they tasted very good.

Assembly: I placed the hash browns, scrambled eggs and small amount of cubed cheese (I used smoked Gouda but cheddar may have been better), and rolled it up and secured it using  toothpicks. On both ends, I also tacked in the tortillas and secured using toothpicks. If you used a large tortillas, you may not need toothpicks but I hate to bite into tortillas all bunched up (folded into multi-layers) at the ends of rolled wraps.

Salsa: This is a quick salsa without jalopena pepper (I did not have one). I just mixed chopped scallion, diced tomato, and chopped fresh cilantro. I dressed it with lime juice, olive oil, salt and pepper (I did not use garlic .. .I am not into eating garlic as a breakfast).

I grilled the tortila rolls using a Foreman's grill until the tortilla surface developed brown marks and the cheese melted (2-3 minutes). Once the rolls were heated up, the tortilla will stay put so that you could safely remove the toothpicks without worrying about unravelling. By my wife's request, I cut the rolls in half and served. On the side, we served fresh mission figs (our favorite), blueberry, and the salsa.

This is a pretty good breakfast or mid-night snack depending on your situation.

Tuesday, July 12, 2011

Sauteed kabocha with pancetta, curry flavor カレー味のパンチェッタかぼちゃ炒め

I have posted Kabocha Hors d'oeuvres previously. This is another variation and is the best so far. This is based on a recipe from e-recipe but I made some changes.


I used the upper half of the kabocha where the meat is thinner than the bottom half. After removing the "guts" from the kabocha, I sliced it into 1/2 inch thick slices. Before sautéing, I microwaved it, covered, for 1-2 minutes or until just barely cooked.

I added a small amount of olive oil (1 tsp) to a frying pan on low heat and fried up chopped pancetta (the amount is arbitrary) until crispy and the fat is rendered. I set aside the crispy pancetta bits on a paper towel lined plate. I added the cooked kabocha slices in the same frying pan and fried them for one to 2 minutes each side on a medium flame until nice brown marks appeared. I added back the pancetta and seasoned it with Japanese curry powder (not too much), black pepper and salt (taste first, pancetta may be salty).

The combination of salty pork fat and curry flavor works very well with Kabocha. the only complaint is that while the skin is quite edible, the sharp contrast in consistency between the skin and meat of kabocha is not pleasant. I will remove most of the skin next time. A very nice drinking snack which will go well with any drink.

Sunday, July 10, 2011

Pork, tofu, mushrooms stir fry 豚肉、豆腐、きのこの炒め物

This is a dish I made from whatever I had on hand in the fridge one evening.  This is nothing noteworthy and there is no real recipe but was not bad.

I had pork (trimming from two pork tenderloins), mushrooms (royal trumpet, shiitake and oyster) and tofu which I had to use very soon (left over from another dish). I decided to make a simple stir fry dish somewhat like chanpuru. The amounts were all arbitrary.

I first thinly sliced the pork (more fatty cuts like belly may have been better). I marinated the meat in soy sauce, mirin, sesame oil, scallion (4 small, finely chopped), garlic (grated*), and ginger root (grated). The amounts are all arbitrary. I mixed into the meat and let it stand for 10-15 minutes at room temperature. I had about 2/3 of a piece of tofu which was cut into 1 inch cubes. I tore the trumpet mushroom from the bottom of the stems into several pieces, oyster mushroom was separated and shiitake mushroom stem removed and cut into 4 or 2 pieces depending on the size.

*if you "grate" garlic, it is potent. The best way you could grate garlic and ginger is to use a Japanese small porcelain grater. Metal graters will not work well.

I put peanut oil (1 tbs) plus sesame oil (1 tsp) in a frying pan on medium high flame. I drained the pork of excess marinade (not much left in the container) and sauteed until the meat was browned and almost cooked. I pushed the meat on one side and browned all sides of the tofu cubes. I made some more space by pushing the tofu aside in the frying pan and added the mushrooms. After a few minutes, turning the mushrooms few times, I mixed everything together crumbling the tofu as well. I added whatever marinade was left to the pan and added black pepper. After a few more minutes of stir frying, I tasted it and added salt (or soy sauce) and splashed in some sesame oil.

I garnished it with chopped chives. This is not an exciting dish but very enjoyable. The three different mushrooms with different textures and the fresh ginger and garlic notes were nice. We switched to sake for this dish.

Friday, July 8, 2011

Parent and offspring "salmon and salmon roe" bowl 鮭いくら親子丼

This is a less common version of parent and offspring bowl 親子丼 but it is popular in Hokkaido. This is a rice bowl dish with a combination of salmon and salmon roe topping. As long as you use salmon and salmon roe, it will qualify as a Hokkaido-style Oyakodon. You could use salmon ashimi or even grilled salmon. For salmon roe, you could use "ikura" イクラ as is or marinated in soy sauce and sake. I had salmon roe いくら I bought last weekend and needed to be used up soon, hence this dish. Instead of salmon sashimi or raw salmon, I used smoked salmon.

Salmon roe: I made marinated salmon roe. I simply made a mixture of sake and soy sauce (1:1 ratio) enough to cover the amount of the roe I had. I marinated it overnight in the refrigerator. Because the skin of the salmon roe is semi-permeable, it will absorb the marinade and swell up. This is called "Ikura no shouyu zuke" いくらの醤油漬. This also makes salmon roe last longer and is a good condiment eaten with hot rice or even as a drinking snack with sake by itself.

Assembly: This is very simple. I made sushi rice. I took a shortcut and used bottled sushi vinegar for this. I placed cold smoked salmon and the marinaded salmon roe on the top of the sushi rice. I also made dashi maki Japanese omelet and used it with a garnish of chiffonade of Perilla and nori. 

This is a very nice "shime" 〆 dish. For a regular person, I suggest serving a much larger portion.


Wednesday, July 6, 2011

Blueberry bread ブルーベリイブレッド

We are again deviating from our theme but when we posted blueberry pancakes, my wife said we had to post this one as well. So here we go; my wife's blueberry bread, which is "berry" excellent. She makes a large amount as you can see and cuts the resulting sheet cake into individual servings then freezes it. We often take this to work as breakfast.

I ask my wife to take over: The recipe will make one 10x15" sheet cake.

Prepare the pan by lining it with parchment paper. Grease the bottom of the pan, put in the parchment paper, then grease the top of the paper. (This allows the cake to release from the pan with no fuss or muss). Next,

Ingredients X1
1/2 cup butter 
1 1/3 cup sugar 
2 eggs and 
2 2/3 cups flour
2 tsp. baking powder, 
1/2 tsp baking soda, 
1/4 tsp salt. In yet another bowl add 
1 1/2 cups of buttermilk and 
2 tsp vanilla.

Ingredients X2
1 cup butter 
2 2/3 cup sugar 
4 eggs and 
5 1/3 cup flour, 
4 tsp. baking powder, 
1 tsp baking soda, 
1/2 tsp salt. 
3 cups of buttermilk and 
4 tsp vanilla.

Cream the butter until light and fluffy. Add the sugar and keep creaming. Add the eggs and cream until yellow light and fluffy. In a separate bowl mix the dry ingredients (flour through salt).  Alternatively add the creamed mixture and buttermilk to the flour. Pour into prepared pans. Next "install" the blueberries. (If the blueberries are added to the batter while it is being mixed they tend to clump. When this happens the batter around the clump doesn't cook because of the moisture in the berries. This makes for partially cooked patches that are unpleasant. Also during cooking the berries tend to sink to the bottom and form a wet mass.) To install the berries scatter them across the top of the batter fairly evenly (below left). Then take your fingers and gently push them slightly below the surface (below center). The batter will rise around them as it cooks.  If they sink its only to the middle of the cake and they are generally distributed so the batter cooks evenly. (if you don't do this step the berries just ride on the surface as the batter rises and they get over cooked.) Cook at 350 degrees for about an hour for this size (10x15") pan (below right).

This is a very luscious form of blueberry "muffin". It's another recipe that says 'summer is here'. The texture of the cake is very light and moist. The blueberries add a burst of juice and fresh flavor to the cake. 

Monday, July 4, 2011

Blueberry pancake ブルーベリイ ホットケーキ

Well, you will not find this in Izakaya. I don't remember how the tradition got started but this is a seasonal food we eat every year when blueberries arrive in the market. We always consider blueberry pancakes as an announcement that summer has arrived. They are also associated with having a good time eating breakfast out on the deck on a nice summer morning. It has been blueberry season for some time.  In the U.S. this type of quick cake made in a pan or on griddle is usually called a pancake but they go by many other names such as hot cakes, flap jacks, or Johnny cakes.  For some reason, however, in Japan they are called hot cakes or ホットケーキ. As a kid, I thought the only way to make hot cakes was to buy a hot cake mix in a box or visit "Snow brand" ice-cream parlor  雪印パーラー with my father in downtown Sapporo (Don't tell Mother). Apparently, they no longer serve hot cakes. Now, there is no reason to buy pancake or hotcake mix or frozen batters. We almost never visit IHOP, either.

We tried several different recipes for the batter and came up with this combination. This produces a very light and fluffy pancake. We have a sort of division of labor in their production; my wife makes the batter and I cook the pancakes and both of us "install" the blue berries.

An average American guy (you know who you are) can easily eat a stack of four of these (below on the left, this is 8 inch diameter pancake) as a breakfast. We, however, can only pack away one each (above). (My wife claims that as a child pancakes for breakfast were extra "special" and she once ate ten--I find that hard to believe). As you can see, I garnished the pancake with extra blueberries but no powdered sugar. We usually do not add extra pats of butter either (since there is plenty of butter in the batter). As you may know, once blueberries are cooked they turn purple (image below right). Another thing I did not know while I was in Japan is how good real maple syrup is compared to the fake kind usually served there. 
Batter: This recipe requires buttermilk which may be impossible to get in Japan.  Plain yogurt can be substituted (add milk if the consistency is too thick), however the resulting pancake may miss some of the taste complexity the buttermilk provides. This make 6 pancakes (8 inch in diameter).

I asked my wife to fill in here:

Dry ingredients: The secret to this pancake is using cake flour (2 cups) instead of regular flour. Add to the flour, sugar (1 Tbs), salt (1 tsp), baking powder (1 1/2 tsp), and baking soda (1 tsp). Mix to combine the dry ingredients. 

Liquid ingredients: 2 eggs, 2 cups buttermilk (or plain yogurt), 2 tsp. butter melted. Use a fork to scramble the eggs. Add 2 tbs of the buttermilk to the eggs and mix to temper them. Add the egg mixture and melted butter to the rest of the buttermilk. Add the buttermilk slowly to the dry ingredients whisking in a few quick strokes to make a smooth batter (don't mix too long or they will get tough) 

To cook: I usually use 4 identical 8 inch non-stick frying pans. I preheat them on low flame for 5-7 minutes so that all the batches come out at the same doness. Instead of butter, I use light olive oil. I add more than enough oil  in one pan, swirl, and dump the oil to next pan and so forth. Whatever excess is in the last pan will be poured back to a small bowl. After pouring the batter (I use a one cup ladle) into the pan, we "install" the blueberries by hand. We found that if we mix the blueberries into the batter they tend to clump together so some pancakes have too many berries and are too wet while others don't have enough. To ensure even distribution of the blueberries we throw the blueberries individually into the pancakes as the batter starts to set up (see above picture). (Requires some precision in aim to get the desired effect). Actually my wife really likes doing this. We have to move quickly to get all the berries in before the pancake is too cooked to accept them. When the edge of the pancake looks dry and small bubbles start appearing on the surface, I flip it using a spatula and a flick of my wrist. I then continue cooking for another 2-3 minutes or until done. The above recipe produced a total of 6 pancakes of a bit less than 8 inch diameter.

For us, it is really worth it to buy really good genuine maple syrup since the taste is so much better than the maple flavored sugar water that is so popular. We use the syrup sparingly. This is a very light pancake. The buttermilk gives it a uniquely pleasing taste. The manual "installation" of the blueberries means a proper distribution of sweet berry juice and cake with every bite. It is best to eat this outside on the deck when it is still nicely cool on a sunny summer morning with a cup of cappuccino (We have a decent but all-manual Italian cappuccino machine. We even roast the coffee beans ourselves).

Saturday, July 2, 2011

Stewed eggplant なすびの含め煮

As you know, eggplant and oil are a good combination.Eggplant parmesan is a good example--the eggplant absorbs a good amount of olive oil while being fried. Of course, modified recipes that try to reduce the amount of oil by baking the eggplant first instead of frying it are also popular.

Even in Japan, a classic recipe for stewed eggplant uses a technique called  "age-bitashi揚げ浸し. The eggplant is first deep fried and then simmered in a seasoning liquid. Although this produces an excellent eggplant dish, eggplants are like a sponge and absorb a large amount of oil.  So I made some modifications to take control of the amount of oil. Japanese eggplants (many different kinds of eggplant are available in Japan), are not readily available here. I do not particularly like the long slender and light purple "Asian" or "Chinese" eggplants. So I tend to use either small Italian eggplant or Zebra eggplant for Japanese-style eggplant dishes. 

Zebra eggplant version: I saw some nice looking small Zebra eggplants at the store the other day and decided to make this dish. 

I used Zebra eggplants (two, medium sized). I removed the stem end and halved them along the long axis. I made criss-cross shallow cuts on the skin and soaked them in water for a few minutes. I removed the moisture using a paper towel by lightly squeezing them. In a skillet large enough to hold 4 halves of the eggplant comfortably, I added light olive oil (2 tbs) and dark sesame oil (1 tsp). On medium flame, I fried the eggplant halves (the cut surfaces only, I did not bother with the skin side) for several minutes until most of the oil was absorbed. In the same pan, I added dashi (300 ml). I made dashi from a Dashi pack, mirin (2 tbs), sake (2 tbs), soy sauce (3 tbs) and sugar (1 tbs). I tasted the seasoning liquid and adjusted the amount of soy sauce and mirin. I also added several thin slices of ginger and a small amount of red pepper flakes for mild heat. I put on an otoshi-buta and simmered it for 30 minutes. I let it cool down in the broth and served it at room temperature with a garnish of scallion threads (shiraga-negi 白髪葱 and very thin juliennes of ginger hari-shouga 針ショウガ (both soaked in water for 10-11 minutes to make them milder). This tasted very good and had just enough oil to make it unctuous. the red pepper gave it a mild but pleasant zing. The meat of the eggplant was very soft and absorbed the nice gentle flavors of the broth and the skin was very tender (because of the scoring before stewing). The next day, I served it cold and it was even better. The only problem was the color, the Zebra pattern was all gone and looked gray and a bit unappetizing.

Italian eggplant version: So a few days later I made the dish using small Italian eggplant in the exactly same way.
This one tasted the same and was excellent. In addition, it retained a nice color. I added baby bok choy, quartered, cooked for the last 5 minutes in the same broth as the eggplants.

You could control the amount of oil being absorbed by the eggplants this way but the tastes and texture were as good as a classic deep fried "age-bitashi" eggplant dish. This dish goes well with any drink but, again, we went for cold sake.


Thursday, June 30, 2011

"Kakiage" tempura, two kinds かきあげ 2種類

When I posted soft shell crab tempura, I used a new recipe for the tempura batter which included Vodka. Soft shell crab tempura, however, was not the best way to assess the tempura crust. As promised, I did another test with "kakiage" tempura. Kakiage is tempura made of small pieces of ingredients bound by batter/crust. I made two kinds of kakiage.   

Sakura-ebi and onion kakiage: I used boiled and dried Sakura-ebi 桜 海老 which I kept in the freezer and thinly sliced red onion. To extract moisture from the onion, I mixed the onion slices with cake flour and a small pinch of salt. After 10 minutes, moisture came out and the flour sticks to the onion. I lifted the onion and shook it slightly to remove excess flour and mixed it with the sakura-ebi (whatever amount you like) before adding it to the tempura batter.

Fresh corn kakiage: This is the same as the one I posted before. We had fresh corn (not locally grown for sure). I removed the kernels by slicing them off the cob with a knife.

Tempura batter: This is the same as I posted before and based on the recipe from America's test kitchen. To briefly reiterate, I made the wet component by mixing water (or seltzer water, but I do not think this makes any difference) and Vodka in 1:1 radio. For two cups total, I added one whole egg, beaten. (The amount of egg should be proportional to the amount of water and vodka so reduce or increase the egg accordingly. For example, is the amount of water and vodka is reduced by half then use half and egg. The dry component is a mixture of cake flour and potato starch in 4-5:1 ratio.

First put the dry ingredient in a bowl and add the wet component to mix. The consistency I was looking for is like a runny pancake batter. For the fresh corn kakiage, I added corn and mixed in the batter. The amount of the batter is just enough to coat all the corn kernels and a bit more. Using a spoon, I put the mixture into hot oil (as usual peanut oil, 370F or so), turned over once during the frying. For the red onion and Sakura-ebi, I mixed them into the batter and just using cooking chop sticks, I put the mixture into the hot oil. I tried to make both kakiage into a sort of flat disk. Again, I turned it over once during the frying.

The results? Well, this new batter does create a lighter and crispier crust, although the difference is not gigantic. Both the traditional and Vodka batters produced good kakiage. As you can see we were in portion control mode here.

A few days later, I made a small "Kakiage donburi" かき揚げ丼 as a "shime" 〆 or ending dish from the leftover. I baked the kakiage in a 400F preheated toaster oven for 7-8 minutes placing the kakiage on a perforated metal tray over another deeper metal tray so that any excess oil which exuded from kakiage dripped down into the lower tray. The baking made the edges a bit dark but made the kakiage crispy and hot again.

I made a sauce with dashi, mirin, and soy sauce. I made it rather strong in taste but small in amount. I heated the mixture in a sauce pan and poured it over the kakiage and rice. I garnished it with blanched broccolini. For leftover kakiage, this was pretty good.


Tuesday, June 28, 2011

Pork belly, baby bok choy, scallion stir fry 豚の三枚肉、青梗菜、葱の炒め物

When I bought pork belly from the newly opened grocery store in our neighborhood, I made stewed pork belly or "kakuni" 角煮. I took a small block of the more meaty part with alternating fat and red meat layers and sliced it thinly to make "bara-niku" バラ肉 or "sanmai-niku" 三枚肉. This is a very common cut of pork in Japan. It was a really small amount and I made this starter dish one evening from it.

I cut scallions on a slant in 1 inch lengths (5, white part), baby bok choy (1, core removed, white root and stem parts cut into strips with green parts separated).

I marinated the pork in sake and soy sauce (1:1 ratio) with freshly ground ginger root (1/2 tsp) for 30 minutes or so.

In a hot wok on high flame, I added vegetable oil (1 tbs) with a splash of dark sesame oil. I stir fried the scallion and white part of the bok choy for several minutes. I removed the vegetables and set aside. I seared the pork slices on both sides (1 minute each), put back the vegetables, and stirred for 1 more minute. I added the green parts of the bock choy and added mirin (2 tsp), soy sauce (2 tsp) and freshly grated ginger (1/2 tsp) and very quickly braised. After I removed the wok from the heat, I added freshly ground white pepper.

This has very familiar taste and pork belly really adds to this simple dish. Since I cooked the stalk and green parts of bok choy in different timing, all came out nicely. The fresh ginger note and slight heat (from the white pepper and ginger) were also nice. A perfect Izakaya's "otoshi" dish as well as good for Bento or a Japanese lunch box. We had our house sake Yaegaki "mu" 八重垣 "無" in a hand cut colored glass tumbler with a rabbit motif; one gazing at cherry blossoms and the other watching fireworks, which came from Kitaichi glass 北一硝子 in Otaru 小樽. We should have gotten the autumn and winter ones as well.

Sunday, June 26, 2011

Baby artichokes sauté with Pancetta and olives ベィビィアーティチョークのパンチェッタとオリーブの炒めもの

We posted a baby artichokes dish before. Since it is (was) the season for baby artichokes, we got another dozen. As I understand it, baby artichokes come from exactly the same plant as regular artichokes but they are the smaller buds which grow on the lower branches. This time, I did the cleaning and cooking of the artichokes rather than my wife. I decided to make sautéed artichokes with pancceta and olives mostly because we had pancceta.


Preparing the baby artichokes: I used my usual quick cleaning method. I just removed the outer petals until I exposed the inner petals which were only top 1/3 green. I cut off the top 1/3 of the green parts. Using a small paring knife, I cut off the end of the stem and peeled the skin. I also quickly cleaned the remnants of the outer petals around the base. Unless it is very small, I cut the artichokes in half. I removed any chokes that may have developed using the tip of the knife. It sounds complicated and tedious but once you get used to this process, it goes fairly quickly. I threw the cleaned artichokes into acidulated water (water plus lemon juice) to prevent discoloration. 

Pre-cooking: I boiled the cleaned baby artichokes for 15 minutes in salted water (image below left). You can see one with undeveloped choke (right of the right image below) and one with the choke which was removed (left of the right image below).


Sautéing: In a frying pan, I added olive oil (1 tbs) and finely chopped pancceta (3 slices) on medium low flame. I rendered the fat from the pancceta and made it brown and crispy by sautéing for several minutes. I set the pancceta aside on a paper towel lined plate. In the same pan I added shallot (1 medium, finely chopped) and garlic (one clove finely chopped) on medium-low flame. After a few minutes, I added the baby artichokes, olives (I used an assortment of black olives, some requiring pitting). I sauteed for a few more minutes and added white vermouth (or white wine, 1-2 tbs) and kept braising until the liquid was almost all gone. I added salt, black pepper and chopped parsley. I served it topped with the crispy pancceta and shavings of Parmigiano Reggiano cheese.

This is a good accompaniment for wines; either white or red. We had this with Robert Young Estate Winery Red Winery Road Alexander Valley Cabernet Sauvignon 2005. This is a middle of the road decent cab--very good if not spectacular.

Friday, June 24, 2011

Parsnip potage パースニップポタージュ


We like to have soup or some kind of side dish we can eat on a weekday. We make these dishes in quantity on the weekend and then use it the rest of the week. My wife suggested we clean up parsnips パースニップ* in our fridge by making some kind of soup or potage. She said she would like to have pieces of carrot in the potage to provide texture and color. Without further detailed instructions from her, this is what I came up with (not based on any recipe).

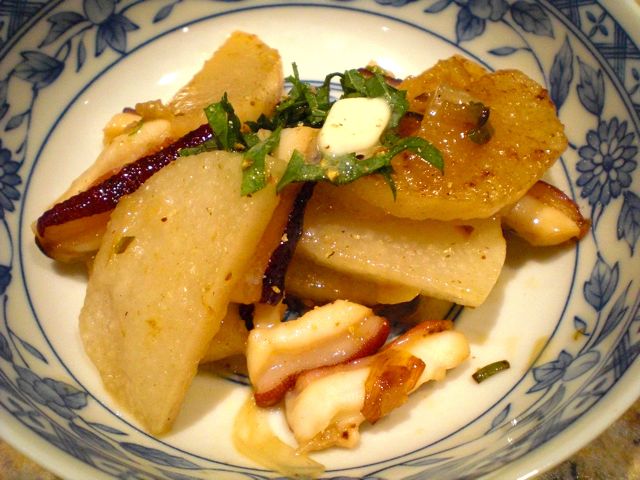
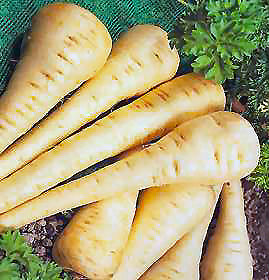
(*Digression Alert!: I did not know this root vegetable until I came to the U.S.. I am not sure this is available in Japan. Parsnip is know as the most favorite food of Gub-gub the pig in Dr. Dolittle's story. I read the entire series as a kid. It was translated by Masuji Ibuse 井伏鱒二 into Japanese. But I do not remember how he translated "parsnip" into Japanese. Japanese Wiki states "オランダボウフウ" to be a Japanese name for parsnip but that does not help most Japanese readers.)

I used parsnips (6), peeled and cut into small cubes, onion (1 medium, finely chopped), fennel bulb (1/3 chopped, I just happened to have this leftover and is optional), celery (3 stalks finely chopped), garlic (2 cloves, finely chopped) and potatoes (2 medium, Yukon gold, peeled and cubed). 

In a large pot on medium flame, I added light olive oil (4 tbs) and sauteed the above except for potatoes and parsnips for several minutes or until the onion became semi-transparent. I then added the parsnips and potatoes. I poured in low-sodium Swanson chicken broth (32 oz), bay leaves (3) and let it simmer for 30 minutes or until all the vegetables are soft. I then pureed it using an immersion blender. I added light cream (1/2 cup) toward the end of pureeing.

Meanwhile, I cooked carrot (4 medium, peeled and cut into small round or half round) in the chicken broth with bay leaves (2) and black pepper corns (4-5).

I tasted the potage and added salt and fresh ground white pepper (I did not use black pepper to prevent black specks from floating in the white potage).

To serve, I added the cooked carrot and chopped parsley as a garnish. Parsnips have nice sweetness with a very distinctive flavor. The potatoes and cream added silky smoothness to the potage. Since carrot and parsnip are "relatives", this combination worked very well. Very satisfying and unctuous soup/potage to start and my wife was impressed with this parsnip potage. I said I could make a similar potage from "daikon" 大根 but she did not encourage me in that endeavor--can't understand why.

(The following was added on April 22, 2012)

Parsnip potage Version2

This is another variation of parsnip soup. One weekend, my wife decided to make another version of parsnip potage. The addition of apples made the potage very good and different from the original.

2 packages of parsnips cut into pennies (about 12 parsnips)
2 onions diced
2 apples diced
1 potato peeled and diced
1 1/2 Package of Low-sodium and non-fat chicken broth (Swanson bland, one package=32oz)

 sweat the onions, add the parsnips and potatoes and chicken broth. Cook until tender. Just before pureeing add the apple and let them cook a few minutes. Puree. Lovely fresh flavor. The apple and parsnips go well together.

Wednesday, June 22, 2011

Sake-steamed chicken with togarashi soy sauce mayonnaise 酒蒸し鶏肉の唐辛子醤油マヨネーズ

This is just another way to serve "sakamushi" 酒蒸し or sake steamed chicken. I just sliced sakamushi chicken breast and served it with a mixture of 7 flavored Japanese red pepper flakes 七味唐辛子, soy sauce and mayonnaise (actually I did not mix it, you need to mix it before dipping.) It looks like lots of red pepper but mayo dampens the heat.

This mayonnaise concoction reminds me of my old drinking days in Susukino 薄野, Sapporo. Many bars served grilled semi-dried "Komai*" fish with this mayo. I remember in the bars which had hostesses, they carefully removed the meat from the fish and dipped it in the mayonnaise concoction and fed you (you paid dearly for the attention, of course).

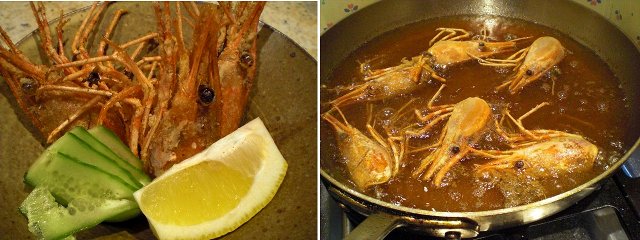
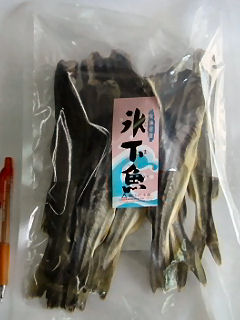
Komai こまい is a small fish which belongs to the cod family. The best season is in the coldest time of the winter in Hokkaido and traditionally fished by a net under the ice (after breaking the surface ice, of course). Thus, the kanji letter for this fish is 氷下魚 meaning under-the-ice fish. This appears to be rather peculiar to Hokkaido and was (at least when I was there) one of the popular drinking snacks in bars and drinking places in Sapporo. This is not unlike shishamo ししゃも and Hokkadoian (or Hokkaidoites?, an erudite English speaker will have to tell me which.) appear to like small semi-dried fish as a drinking snack.

In any case, I do not think I can find "komai" around here but this mayo concoction worked well with sakamush chicken.

Monday, June 20, 2011

Ginger pork cutlet 豚肉のショウガ味カツレツ

This is a hybrid between ginger pork and pork cutlet.  I just came up with this dish thinking it  would go well with a drink.  This could be a main dish if you serve a larger amount with veggies and a starch. This dish is also perfect for bentou 弁当 or Japanese lunch box.

I used the trimmings from a pork tenderloin which was pounded very thin. I marinated it with sake and soy sauce (3 tbs each or 1:1 ratio) and grated ginger (1 tsp). I purposely did not make the marinade sweet at all but you could replace half the amount of sake with mirin if you like slightly sweet. I coated the individual pieces with the marinade and then put them in a sealable container and let them marinade in the refrigerator for several hours. 

I could have sauteed the pork in the classic "sougayaki" 生姜焼き style but, at the very last moment, I decided to make it sightly different. After I removed the excess marinade from the pork using paper towels, I dredged it with potato starch or katakuriko 片栗粉. I added light olive oil (slightly more than for sauteing) in a frying pan on medium heat, and fried the pork (1-2 minutes per side) until both sides were crisp and brown. I added more oil as needed to cook all the pieces in small batches.

The resulting dish had a nice crispy crust with bright ginger and soy sauce flavor. Since it is highly seasoned, no need for any sauce. This turned out to be exactly how I intended; a cross between shouga-yaki and pork cutlet. Any drink will go with this. We had this with Casali di Bibbiano Argante Toscana Rosso Red Blend 2006 (This was our last bottle of this wine). If you are a white wine drinker, Chardonnay would be a good choice. Of course, beer and sake would be nice as well.

Saturday, June 18, 2011

Japanese sake "Juyondai" 14th generation 十四代 別撰純米吟醸 播州山田錦

As I mentioned before, most of the sake imported from Japan come from large scale producers. Small-scale production sake, especially those with cult followings, are difficult to find here. Even in Japan, there is some hype about the likes of Juyondai sake which maintains the aura of being a special, cult and difficult to find sake. One of the sake connoisseur bloggers in Tokyo appears to have no problem getting or tasting these cult sakes, however. Some time ago, I found one of the Juyondai sake listed on the website of the "Sakaya" of New York. I ordered it on-line and then promptly got a phone call from them saying that it had been sold out almost as soon as they received it. I asked them to contact me as soon as the Juyonday came in next time. A few months later, I got a phone call from Sakaya saying that they had received the shipment. I wanted to order a few bottles but was told there was a limit of one per customer. So, I got one bottle of Juyondai 十四代 along with Isojiman 磯自慢 and Kokuryu 黒龍.
There are so many different kinds of small batch brews under the name "Juyondai" which were brewed by Takagi sake brewery in Yamagata 山形県高木酒造. It  appears that they do not have their own website (I suppose there is no need to advertise). The one I happened to get this time is "bessen junmai-ginjou"  別撰 純米吟醸 made from "Banshu Yamada-nishiki" 播州山田錦, based on the name, I assume it was made from Yamada-nishiki rice grown in a part of Hyougo 兵庫 prefecture. Obviously, this might not have been one of the better brews by Takagi brewery but this is what was available. I had it shipped, while the weather was not too hot, overnight from New York and promptly refrigerated it upon receipt.

To pay adequate respect to this sake, I ordered toro, amaebi and uni from Catalina. The first night, after we accumulated all these ingredients for a blow-out gourmet experience, was a Friday.  Since we did not have time for proper preparation and to ease ourselves into the over indulgence, we did not bust into the Juyondai but opened Isojiman instead. We had it with some toro sashimi, uni and amaebi. Isojiman is a nice sake with a fruity crispness but not much of an umami component. Nonetheless this meal presaged good things to come. 

The next day was devoted to anticipation of the full-fledged feast we were planning for the evening. The center piece was, of course the sake complemented with excellent sashimi. The toro was blue fine tuna, chu-toro bordering on Ootoro, and was melt-in-your mouth excellent. I also made an "flower arrangement" of Ko-toro or slightly fatty tuna. The uni was plump luscious golden California uni and it was wonderful as usual.  

Since some of the amaebi was big, I made my usual ceviche, this time with lime juice and yuzu juice from the bottle mixed with soy sauce and real wasabi. I added slices of drunken tomato, Champagne mango cubes, and garnished it with "ume-su" 梅酢 seasoned daikon slices cut in a cherry blossom shape.

Of course, I had to serve fried amaebi heads. This cannot go wrong

Juyondai is indeed an excellent sake. It showed clean crisp tastes with hints of green apple and melon with a light umami component. But in my book, this does not justify the price and the difficulty of getting it. Other more readily available sakes such as our house sake Yaegaki "mu", which is a simpler sake, has a better PQR. Others, for example, Muromachi jidai 室町時代 is in a lower price range and has a more complex umami component than the Juyondai jungin we tasted here. Even Kokuryu which is not as fruity and crisp has more "umami". This is non-issue since it is next to impossible to get Juyondai and even Muromachi-jidai (except in a restaurant such as Sushi Taro) is not readily available here. Having said that, I will be "standing in line" to get other Juyondai brews if one becomes available.  I do not think the chance of this happening is particularly good, so, most likely, we have to wait until we visit Japan next time. 

This was a particularly memorable meal. In fact it bordered on being too much of a good thing but we thoroughly enjoyed it!

Thursday, June 16, 2011

Fava beans, grilled and boiled 焼きそら豆、茹でそら豆

We love the Asakusa 浅草 area of Tokyo. On one of our visits to Asakusa long ago, we stumbled into a small izakaya run by a husband and wife team. Beside ourselves, there were only two other customers at the counter--a past-middle-aged couple, clearly not husband and wife, but having fun talking, eating and drinking. It happened to be fava bean season or "sora-mame" そら豆. They ordered up a dish of the beans. We overheard (no not overheard that implies we were intruding, they were actually over talking) about how good the beans were. We had never seen them before and asked what they were. They generously offered us a taste. We agreed with their assessment and promptly order a dish for ourselves. It was indeed very good. Sora-mame is quintessential Izakaya food usually served simply boiled with a side of salt.

In the U.S., the easiest way to get fava beans is to buy a package of frozen sora-mame in a Japanese grocery store. They are not bad but usually a bit too mushy. Occasionally, while in season, we can get fresh fava beans in a pod from a near-by gourmet market. To choose which pods to buy, I press the pods between my fingers lightly to make sure there are beans inside. Some pods may look big and luxurious from outside but may not contain many beans.

I tried making them both grilled in the pod (in a toaster oven on "high" broil for 10 minutes turning once until the surface of the pods develops blotches of brown) and boiled (beans removed from the pods and boiled for 5 minutes in salted water). To us, there is no big difference in taste and consistency but we have not yet tried grilling fava beans in the pod on a charcoal fire, which may make a difference.


We like to peel the skin from the beans just before eating (the quintessential finger food) (see image on the left) and eat it with just a touch of salt (literally, we use Kosher salt with larger crystals).

Digression alert: Fava beans contain several pharmacologically active substances which may have some health effects on people with certain conditions. The most famous is "favism" in which an individual with the genetically inherited enzyme difficiency (G6PD deficiency) can have serious hemolytic anemia after consuming fava beans. Another is the interaction of the ingredients in fava beans with MAO-inhibitors. Among people taking  MAO-inhibitors (probably to treat depression), eating fava beans (or certain aged cheeses) may produce a hypertensive episode called "cheese effect". Fava beans also contain L-dopa, (a substance used to treat Parkinson's) although the health effects of the L-dopa found in fava beans may not be significant. So, before you order up "sora-mame", make sure you do not have G6PD deficiency or you are not taking a MAO-inhibitor. Consuming a large amount of "sora-mame" at Izakaya in an attempt to treat your Parkinson's disease is also not recommended. Please seek the professional advice of an appropriate specialist.

Fortunately, we do not have any of these restrictions and simply enjoy "sora-mame". It will go with any drink but sake is the best match for us.

Tuesday, June 14, 2011

Fresh corn pudding 新鮮コーンのプディング

My wife made this dish. It's a very simple dish but extremely good to make when fresh corn on the cob is available. Fresh corn has been available in the local grocery store for a few weeks (Late April and May). We are not sure where it comes from--we surmised Florida, certainly not locally grown.

Freshly picked corn is very sweet but it is my understanding that soon after harvest, the sugar  in the corn converts back to starch resulting in a far less pleasant product referred to as "starchy" corn. I had a friend who loved corn and used to have "corn parties". He would plant a patch of corn so that it ripened in sections over the course of a season. When a section was ready to harvest he invited some friends over and had a party. The purpose of the party was to eat the corn at the height of its perfection. After some libations and socializing, the guests retreated to the corn patch where they harvested their own dinner. Everyone came back to the house where a large pot of boiling, salted water was ready and waiting. The rest was simple--shuck, boil, eat and enjoy. The time between harvest and cooking was a max of 5 minutes. He was right; the corn was perfection. While we can't have such "corn parties", this corn pudding is next best thing.

My wife used a box grater to grate the corn kernels off the cob (They have to be grated. Cutting them off does not have the same effect). She then scraped the bare cobs with the back of a knife to make sure she captured any corn "milk" left behind. She then poured the grated mixture into a small ramekin like the one seen above. She did not add any seasoning or additional ingredients--it's all just corn. Believe it or not, the corn from two ears went into one small ramekin. She then simply baked this in a 350F toaster oven for 30 minutes.

Before serving she sprinkled some Kosher salt on top (the salt enhances the sweetness). This was so sweet and creamy--the essence of summer corn. Somehow grating the corn makes it sweeter. My wife tasted a kernel from this batch before grating it to see how it tasted and she said it was so-so. But then we tasted the grated mixture and it was suddenly much sweeter. Corn pudding is also much easier to eat than boiled corn on the cob; no kernels to stick between your teeth. This could be served as a vegetable side dish but we like it as a drinking snack. (You know our priorities). This will go with any drink; beer, wine, sake. My wife suggested it was sweet enough to be served as a dessert...but I'm not going there.