Tuesday, September 20, 2011

Greek yogurt dip with vegetable sticks ギリシャヨーグルトのディップ

On weekdays, when we come home and decide to open a bottle of wine, we tend to have crackers and cheese to go with it. Although we like the cheese, we were thinking we should have something (at least slightly) healthier. So one weekend, my wife picked up several different kinds of yogurt including plain Greek or strained yogurt, which is getting very popular in the U.S. She found a dip recipe on the inner seal and made it. The one shown here is based on that initial success, (this is actually the second attempt using a different brand of Greek yogurt). This one had a more appropriate i.e. thicker consistency especially for use as a dip compared to the first one*. Instead of commercial Greek yogurt, you could strain regular yogurt in a cheese cloth in the refrigerator over night.

*According to America's test kitchen, some "Greek" yogurts are not even strained but other thickeners are added. Certainly we experienced quite a difference between the two brands we tasted. The Test kitchen also taste tested non-fat varieties.

It is rather simple to make this. We just mixed in good fruity olive oil, lemon juice, chopped fresh mint, salt and pepper; all to taste. We then added crumbled feta cheese (We try not to overdo it since it will defeat the purpose of having a healthier snack). 

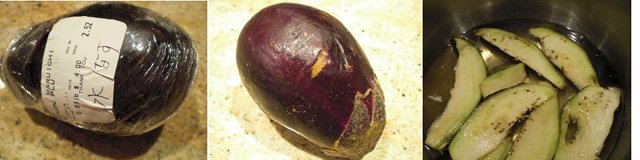
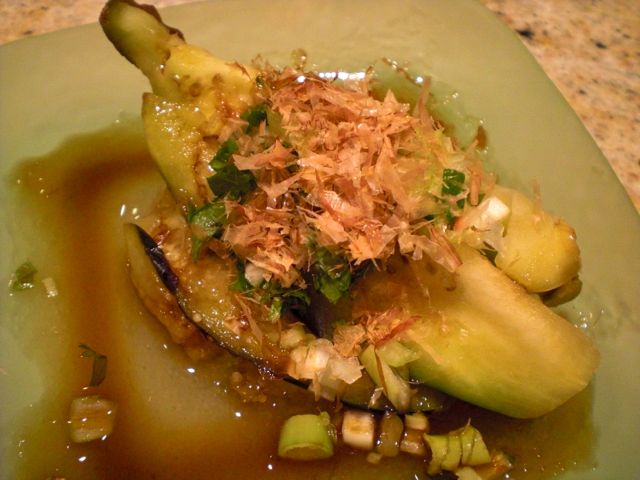
This time we added one cooked Italian eggplant (optional). Instead of skinning, cubing and roasting with olive oil as suggested in the recipe, we quickly microwaved it with the skin pierced multiple times to prevent an "explosion". (Quick preparation was in order, since we were making this after we came home from work). We removed the skin and cut up the meat into small pieces and mixed it in. 

The recipe also called for adding chick peas which we did in the first attempt but we omitted it this time since it did not add much and the chickpeas make it difficult to scope up the dip with vegetable sticks. 

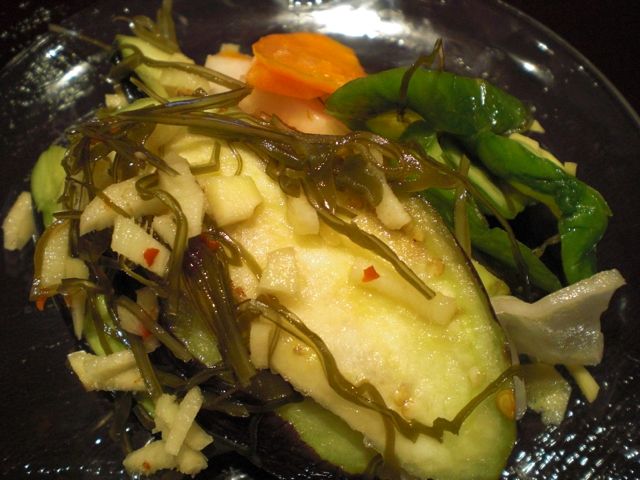
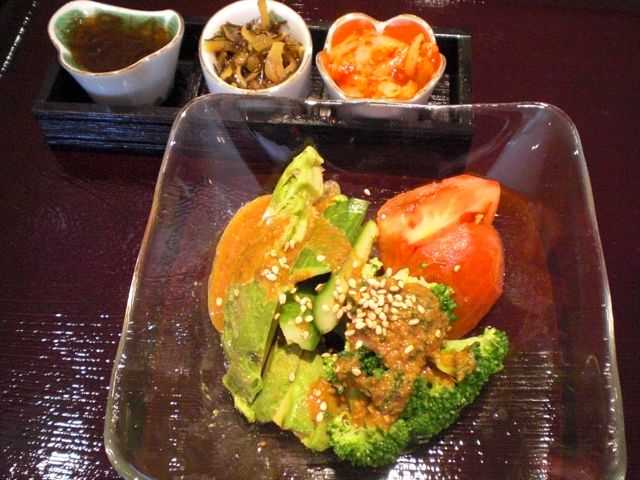
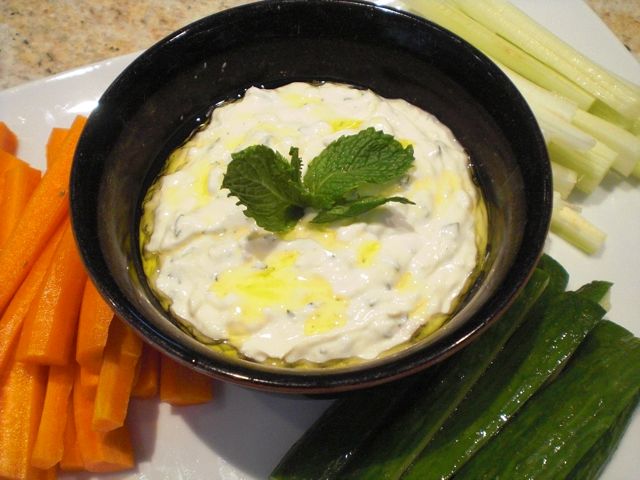
If the dip tastes too sour, you could add honey (we added honey in the first version but we didn't need it in the current version). The dip will improve if you leave it in a fridge overnight. I served this garnished with a bit more olive oil and mint leaves accompanied by carrot, cucumber and celery sticks. If you have thin wedges of tomatoes, they also work.

As a dip, on its own, this is surprisingly good with a nice fresh minty note and good creamy texture. We also felt good eating all the veggies. The dip however, did not go well with the red wine we were having. The wine was Summit Lake Cabernet Sauvigon 2003 from Howell Mountain district in Napa. This is an interesting wine but more in the old world style. The color of the wine had a brownish hue which is more than the vintage of this wine would suggest. In any case, the dip by itself was good, the wine by itself not bad, together--not a great pairing. 

Sunday, September 18, 2011

Cold tofu with okra and wasabi in sake lee 冷や奴のわさび漬けとオクラ添え

Most Westerners do not like slimy food (slimophobia). My wife told me a longtime ago that she hated (strong word!) okra which is one of the rare slimy food items available in a regular market in the U.S. Okra is thought to have been brought to the U.S. by slaves who were familiar with its use in Africa. Gumbo is a famous dish in New Orleans which uses okra. My wife's account was that as a kid she was served frozen and boiled okra as a vegetable side dish. It was grey-green with thickly viscous slime the consistency of snot (my wife's word precisely). I can imaging how terrible this was--she was thoroughly traumatized. From time to time, I have tried to get fresh okra but my wife made me put it back. Okra became rather popular in Japan as well, since Japanese love (many of them anyway) slimy food in general. Since my wife has been primed over time with various types of slimy Japanese food and there has been a catharsis of time factor as well, I thought I should try some okra.

I found this fresh okra in the market and it had only minimum blemishes. It looked much better than the ones I can usually find, my wife was not with me, so I just bought a few. I served it on a hot day over a cube of cold tofu or 'hiyayakko" 冷や奴. Obviously this is one of many garnish variations you can serve with cold tofu.

I first washed the okra and then added a good amount of kosher salt in my palm and rubbed the surface of the okra to remove the fine fuzz. I then washed it to remove the salt. I finely chopped the okra by hitting it with a blade ("tataki" たたき technique). I also set aside a few slices of okra for decoration. This way, the sliminess is not too bad. I happened to have "wasabi-zuke" 山葵漬け and used it to top the tofu as well. I also added finely chopped scallion. I could go on and added more items such as bonito flakes, perilla, nori, etc but I restrained myself to only these three toppings. For the sauce, instead of straight soy sauce, I used concentrated "mentsuyu" 麺つゆ from the bottle. This combination worked well and my wife found the fresh taste and minimal sliminess surprisingly quite acceptable (quite a step-up from "hated" okra).


As starters, I also served chicken breast (previously barbecued) with sesame dressing with blanched green asparagus and Campari tomato.


These two dishes are regular small dishes I make but small variations make them more interesting.

Friday, September 16, 2011

Vinegared mackerel and smoked salmon molded sushi しめ鯖、スモークサーモンの押し寿司

The molded sushi or "oshizushi" 押し寿司 ("oshi" means "to press or push") or sometimes called "hakozushi" 箱寿司 ("hako" means a box). As opposed to more familier "edomae sushi" 江戸前寿司 or Tokyo-style sushi, the molded sushi is easier to make as long as you have a special wooden mold. Sometime ago I saw a wooden sushi press mold or "oshizushi hako" and bought it so I could experiment with it. In general oshizushi is not commonly available in the U.S. restaurants or sushi bars. I do have a very nostalgic memory, however, of one of the few times we had oshizushi.

Digression alert: We had recently moved to Los Angles and were looking for a new sushi bar to call home. We stopped at one "Japanese" restaurant and I started ordering several small dishes a-la-carte as we usually do, when the very bossy Kimono-clad middle-aged Japanese waitress informed us that we would be ordering one of their combination platters--no choice. A very large platter appeared featuring sashimi and other many American-style Japanese dishes (yakitori skewers, tonkatsu etc) with big slices of water melon on the side. This looked more like a American-Mexican combo-platter. As a result, we dubbed this place "Casa sushi". Needless to say, this was the first and last time we visited. 

After some more, less-than-sucessful explorations, we finally found a small sushi place that became our regular.It was recommended to my wife by a carpet cleaner (an unexpected source of such information) who happened to notice Japanese artifacts in our household while cleaning the carpet and asked if that meant we liked sushi. We were astounded to learn that he was a sushi connoisseur having conducted an extensive survey of sushi restaurants in the LA basin. He pronounced this restaurant the best in the region.  It turned out to be the type of restaurant where drivers of 18 wheelers fresh off the freeway parked their rigs out front, bellied up to the bar to eat sushi and discuss the finer points of raw fish with the owner chef (the LA sushi scene was quite different from what we were used to). The owner-chef of the sushi bar was from Kyushu 九州 and the young chef-de-cuisine was from Osaka 大阪. The young chef was quite creative. One evening he presented deep fried tempura sushi roll with the comment, "when it comes to food I'll try anything once." One evening he presented us with "oshizushi" (off the menu), which was from his native Osaka. Somehow that one dish particularly stuck in my mind when I thought about that restaurant or oshizushi. 

Back to the sushi: I made two kinds; one is the classic of oshizushi called "battera" バッテラ (near side in the above picture and the picture below) and the other more Western style, smoked salmon and cream cheese oshizushi (the far side of the picture above).

The non-tradtional oshizushi with smoked salmon, cream cheese and nori (the picture below) was based on my wife's suggestion (she referred to is as the Osaka version of Philadelphia roll). Actually she lined up all the necessary ingredients without my asking. So this was her creation and I just assembled it.

To make battera, I used a packaged "shime saba" しめ鯖 which is bought frozen and vacuum packed (#1). I cannot get fresh enough mackerel to make "shime saba" myself. After thawing, I removed the transparent thin skin first (#2) and cut it lengthwise (the width has to match the size of the mold. You may have to solve some geometric puzzle to fit the fish best in the bottom of the mold with the skin side down. I layered it with thinly sliced vinegared ginger (#3) and perilla leaves (again cut into the width of the mold, #4). I then placed the sushi rice, about even with the edge of the mold with out pressing (#5). I then pressed the rice with the top plate of the mold (#6).

To make the smoked salmon oshizushi, I placed the smoked salmon on the bottom of the mold,  a thin slab of cream cheese, and a narrow sheet of nori and sushi rice.

You could make any kind of oshizushi this way. You could flavor the sushi rice by mixing chopped up perilla, pickled plum, or even aonori or "furikake" ふりかけ. You could make two different flavored rices and assemble oshizushi with two layers of rice. The topping could be anything such as fish, meat, omelet, and vegetables like avocado, myouga, cooked shiitake etc. Actually, if you do not have or do not want to get the special mold, you could just use a plastic wrap to make a cylinder of rice (which is called "bouzushi" 棒寿司, "bou" means "log") instead making it rectangular using an oshizushi mold.

This was the ending dish of the evening. We originally tried to go to Tako Grill for dinner but just as we were about to leave, a severe thunderstorm rolled in. We waited for a while but there was no sign of the rain letting up so we decided to stay in. Although we were eating at home our mouths were ready for the flavor of vinegared rice and this is what we came up with.  We both really enjoyed these two kinds of oshizushi. Although if truth be told, I also had a hankering for "toro" and there was no substitute for that in our freezer. 

In a true traditional way, battera should have been covered with thin sheet of kelp shaving called "shiraita konbu" 白板昆布 or "baterra konbu" バッテラ昆布 but I did not have one and I have not even tried to get one. My wife suggested that it might help to make the thickness of the shime saba more even. I will try to improve next time. I have a feeling that my wife may be inspired to come up with other ideas for oshizushi--lamb sushi anyone?

Wednesday, September 14, 2011

Pacific saury "Kabayaki" rice bowl さんまの蒲焼き丼

"Kabayaki" 蒲焼き is a very common Japanese way of grilling fish filets. "Eel Kabayaki" 鰻の蒲焼き is the best known example but many other kinds of fish can be prepared in the same way. The sauce is essentially a mixture of soy sauce, mirin, sugar, and sake but many eel-specialized restaurants may have their secret, and sacred recipes inherited from many generations before. Like an American barbecue sauce, towards the end of grilling, the Kabayaki sauce is applied repeatedly to make a crust of savory thickened sauce on the surface of the fish.

It is now pacific saury or "sanma" season in Japan. At Tako Grill, we just had our share of sanma sashimi and grilled sanma. I previously posted several ways of preparing sanma. I also happened to find a vacuum packed sanma kabayaki I bought few weeks ago in the refrigerator. One evening, I made this into a very simple "kabayaki" doburi or rice bowl. I just warmed up the sanma kabaayaki in the package by submerging it in boiling water for few minutes and put the warmed fish over the rice. I could have made more sauce but I did not. I also happened to have made "daikon namasu" which I garnished with salmon roe or "ikura".

If you make your own from fresh sanma, this could have been better. This pre-made kabayaki was a bit on a sweet and dry side but it was, nevertheless, a nice finish of the evening.

Monday, September 12, 2011

Miso marinated tofu 豆腐の味噌漬け

This is a rather popular item in Izakaya but somehow I neglected to make it. One weekend morning, my wife suggested we have smoked salmon and avocado scattered sushi for breakfast!. We often have English muffin bread smeared with creme fraiche and topped with smoked salmon and poached egg for breakfast but we were out of pasteurized eggs. As long as my wife was OK with this idea, I was too. I even served miso soup with tofu, wakame sea weed and scallion. This left us with 80% of the tofu leftover. I decided this was good time to make miso marinaded tofu.

This is not really a recipe and there are so many variations including a smoked one but essentially, you remove the extra moisture from tofu, either moment (firm) 木綿豆腐 or kinu-goshi (soft) tofu 絹ごし豆腐, marinade in miso for 1 or more days. The miso mixture can be variable such as straight miso, mixture of red and white miso, and prepared miso with sugar, mirin, sake, soy sauce etc. These differences as well as the duration of marination make variations in both texture and taste to the end result. Best is to try some variations and decide which combination is best for you.

Tofu preparation: I used "firm" tofu just because this was what available (leftover). I just wrapped the tofu with paper towels and placed it on a perforated metal tray with matched bottom tray. I placed a similar shallow metal tray on the top of the tofu and weighed it down (I just used two large American-size yogurt containers (full) since they were in the refrigerator and had the right weight). I changed the paper towel after a few hours and let it sit in the refrigerator for over half a day.

Miso marinade: I do not like the end product to be too salty. I happened to have miso which was designated as rice miso or "kome-miso" 米味噌, chuukara 中辛. This means this miso is between white and red miso in terms of saltiness, not as salty as "red" but not as sweet as white or Saikyo miso (about 4 tbs), sugar (1 tsp) and mirin (I am not sure how much but about 1-2 tbs to make a pastey but not runny consistency). The kind of miso is totally up to you and you may have to experiment a bit to find your sweet spot.


I smeared the miso mixture on all sides and placed in a sealed container (Picture above). You could wrap this in plastic wrap but I did not.

I left it for 1 full day and had it as a starter for sake the next evening. I scraped off the miso marinade using the back of a knife and sliced it (The picture on the top). I smeared the miso back on the remaining tofu using the knife and put it back in a container. I served it with matsuame-zuke 松前漬 and octopus "bukkake" 蛸のぶっかけ (both bought frozen). This was a first for my wife and she really liked it. She said that if I didn't mention it was tofu she might have thought it was cheese. The consistency is like semi-soft cheese with some nutty and slightly salty miso flavor. 

The next day, I served it with baby arugula salad dressed with fruity olive oil and Champagne vinegar  (Picture below). We had this with red wine, Louise M Martini, Napa Cab 2007, which is a decent everyday red that we like. Although this was into the second day, my miso marinade was rather mild so the flavor was not too strong or too salty. (I would not go further than 2-3 days with the marination but you could try longer). I could not say this was a particularly great pairing but it was OK, at least, the tofu was very nice and generally goes well with the red wine.


Tofu is congealed soy protein and cheese is made from coagulated mild protein. So there is similarity. Obviously they are not the same, though. My wife said, if I served this to our unsuspected guests sliced like a cheese, most will think this is a type of semi-soft cheese. I may try this sometimes to see what kid of responses we get.

Saturday, September 10, 2011

Baked Monk fish with smoked paprika (poor man's lobster) ベイクドパプリカアンコウ(擬製ロブスター)

Does this look like a nice lobster tail with caper butter lemon sauce? If it does, I was very successful in fooling you.
I usually do not get fresh fish at our regular grocery store since the fish does not look great most of the time. We go to (more expensive) gourmet markets to buy fish and some specialty meats. But today, they had monk fish which looked good and I got one. As you know, Japanese will make use of all parts of this deep water bottom feeder. Its liver is cherished and is called "ankimo" but here in U.S., the only part we see in the market is the tail meat. I pondered a while about how to cook this and decided to bake it with paprika. I do not remember where I got this recipe/idea. I used to cook Monk fish tails this way quite often  but I have not done this for some time. I have posted Monk fish cooked other ways but the end result of this method is that it looks like a nice fat lobster tail, although the texture and taste are not quite similar.
I had a 3/4 lb filet for 2 (small) servings. I first removed the thin membrane from the meat without wasting too much meat underneath. I then made a slit in the center lengthwise (left in the image above). I coated the filet with olive oil and season it with salt, black pepper, and smoked paprika powder (either Spanish or domestic, I used domestic). You need to use quite a good amount of paprika to get good end results. I then sautéd the bottom side in a mixture of olive oil and butter (2 tsp each) on a hot frying pan (medium high heat) for a few minutes. If you place the fish in the pan when the oil/butter is melted and hot, it will not stick. I also decided to cook/bake, green beans with it (right on the image above). I then placed the pan in a 350F oven for 10-12 minutes or until the inner temperature of the thickest part of the fish read 145-150F using a digital quick read thermometer. This is the only fish I know of, which needs to "rest'. I removed the fillets to a plate and loosely covered them with aluminum foil to let them rest at least 5 minutes.

Meanwhile I made lemon caper butter sauce. After the fish was out of the pan, I pushed the green beans on the side and added shallot (one, finely chopped) and sauteed for 1 minute or so and deglazed it with white vermouth (1 tbs). When the liquid reduced to almost dry, I added several  more small pats of butter (total of 2-3 tsps). When the butter melted, I added  lemon juice (2 tsp), capers (1 tsp) and chopped parsley. 

I sliced the cooked Monk fish into medallions and  poured the lemon caper butter sauce over them. The fish was not overcooked and very tender. Paprika is mostly for color but does add a nice slightly smoky flavor. The texture and taste are not quite like a real lobster tail but it is a very nice dish if a bit butter heavy. I could have had this with nice dry sparkling wine but instead we had cold sake.

Thursday, September 8, 2011

Pork tenderloin roulade with sun-dried tomato and olive 豚ヒレ肉のルーラード

I made this one evening and served it as the main course for dinner. The next day I served the leftovers as a drinking snack. I think this recipe is based on one in Cooks Illustrated.

Pork: I used my usual vacuum packed pork tenderloins. I trimmed and removed fat and sliver skin. I then cut it along the length of the tenderloin leaving 1/2 inch on the other side and opened it up like a book. Using a meat pounder, I flattened the tenderloin into a 1/2 inch thick rectangle. 

Stuffing: You can use any kind of stuffing but the amount you can use is rather small so you should make it highly flavorful. For these two tenderloins, I used sun-dried tomato (packed in olive oil, 6-7 chopped), black (Karamata) olive (8-9 pitted and chopped), lemon zest (one lemon using micro-grater), garlic (2 cloves), fresh thyme (3-4 sprigs, stem removed), anchovy fillets (4 packed in oil). I put everything in a mini-food processor and pureed it until it became a stiff paste. I added a bit of olive oil and black pepper (It was plenty salty from the anchovy and olive).

Assembly: Since the stuffing was rather strong, I did not season the inside of the meat. I spread a single layer of baby spinach leaves (if you have them, fresh basil leaves would work) and then spread the stuffing. In the same manner as when I make sushi roll, I made a tight roll trussed it with butcher twine in two inch intervals (see image below). I smeared the surface with olive oil and seasoned it with salt and pepper.

I could have grilled this on a Weber grill but I did not (not enough time). I just browned the surface in a frying pan with olive oil (1 tbs), turning 90 degree every few minutes. I then finished in in a pre-heated 400F oven for 8-10 minutes or until the center of the rolls registered 150F. I let it rest for 5-10 minutes. When I served this for dinner, I may have made red wine sauce (I think).

A few days later, I just sliced it and drizzled on a small amount of olive oil. I probably overdid the anchovy but otherwise the stuffing was very flavorful and no sauce was really needed . I served this on a layer of cucumber slices which added a nice fresh contrast in flavor and texture. 

Tuesday, September 6, 2011

"Chikuwa" stuffed with cucumber and cheese 竹輪のチーズとキュウリの射込み

When I made fried chikuwa sticks, I had two chikuwa leftover since one package contained 4 chikuwa. The next day, I decided to make this quick dish which is again a classic lowly Izakaya or homey dish which does not really involve "cooking". Since chikuwa has a convenient hollow center, it is perfect to stuff the space with something, which is called "ikomi" 射込み in Japanese culinary parlance. Actually some fish cakes are made with the center already filled such as "goboten" ごぼう天 (the center contains a burdock root).

Here, I made sticks of Raclette cheese and cucumber and filled the center holes of each chikuwa. Chikuwa is elastic so you do not have to carve the cheese and cucumber precisely. I just make sure the entire length of chikuwa is stuffed. I cut it in half first. I then cut the half obliquely into two pieces. You may have to shave the flat bottom to make it stand up like you see in the picture above for a better presentation.

I added the last of wasabi-zuke わさび漬け with soy sauce. You could serve this with wasabi paste and soy sauce as well. This is nothing special but serves well as a small snack which goes well with whatever you happened to be drinking.

Sunday, September 4, 2011

"Chikuwa" fish cake "isobe" fry 竹輪の磯辺揚げ

I was pleasantly surprised to discover I have not already blogged this item. This is another classic Izakaya fare. You will never see this in fancy or (not even fancy) restaurants. You have to make it at home or have it at an Izakaya. To make this you need a type of fish cake called "Chikuwa" 竹輪. Chikuwa literally means "bamboo ring" since traditionally it was made by putting fish meat paste or surimi すりみ around a small stick of bamboo and steaming it first then grilling it (if grilled it is called "yaki-chikuwa"). The bamboo stick left a hole in the center of the cylinder of fish cake. I am sure it is now mass produced using an extruder. Chikuwa is an essential item in oden. I can buy frozen chikuwa at the Japanese grocery store.

To make this dish, I cut chikuwa (2 for 2 small serving) into 4 pieces lengthwise and cut its length in half producing 8 small sticks from one chikuwa.

Batter; I used cake flour (3 tbs) and rice four (1 tbs, optional) and dried aonori  青海苔 (1 tsp, optional) and cold water to make a rather loose batter.

After coating each piece of the chikuwa sticks, I fried them in 170C or (340F) vegetable oil for 1-2 minutes or until a crispy crust formed (it doesn't have to cook long because chikuwa is already cooked). Serve hot with a lemon wedge and salt (optional).

This is a quick but perfect small dish for your sake. Nice crunchy crust has oceanic taste of aonori with soft but slightly chewy fish cake inside.

Friday, September 2, 2011

Rice cake "isobe" roll お餅の磯辺巻き

"Mochi" 餅 is steamed glutenous rice pounded into paste which is shaped into discs with one convexed side ("maru-mochi" 丸餅) or rolled out ("noshi-mochi" 伸し餅) and cut into small rectangles ("kiri-mochi" 切り餅). Instead of using a traditional wooden mallet or "kine" 杵 and mortar or "usu" 臼, nowadays, mochi can be made at home using a smal mochi making machine and, apparently, mochi can be made using a Kitchen-Aid mixer with a dough hook. The easiest way, however, is to buy packaged commercially produced mochi at a Japanese grocery store which is the route we usually take.

Especially If mochi is made at home, you could enjoy it while it is still warm and soft, however, more commonly, it is allowed to harden. Hardened mochi cakes can last at least a few weeks or longer and easily can be transformed back into a soft and edible state by boiling or grilling. After all, it does have its origins as a preserved food or emergency ration. Although it is eaten year around and many types of Japanese crackers are also made from mochi, it is a traditional New Year food (so that house wives do not have to cook rice for at least the first 3 days of New Year). I have posted mochi in New Year soup called "Zouni" 雑煮 and in a deep fried tofu pouch for "oden" おでん called "mochi kinchaku" 餅巾着 or "mochi-kin" for short.

One of the simplest and quickest ways to prepare mochi, however, is this dish called "Isobemaki". "Isobe" means "seashore" and "maki" means "wrap" or "roll", since it is wrapped in dried nori sea weed. We had this "isobemaki" 磯辺巻き one evening (one each) as an ending dish or "shime" dish. The taste brought me back to my childhood. Most of the Japanese families used to eat mochi more in quantity, in frequency, and for a longer period in New Year. When I was a kid, we used to eat mochi for breakfast and lunch at least in the first 3 days of New Year. We used to eat "isobemaki" mochi as lunch.

We bought a package of "kiri-mochi" for the past New Year. This is individually sealed in a plastic wrap and lasts for long time in the refrigerator. So one night, I decided to make this dish. It is not even a recipe but here it is.

Toasting mochi: Traditionally, mochi is grilled on a charcoal braiser but, in modern days, a toaster oven is the best choice. It tends to become very sticky so I used a small removable metal grate which prevents the mochi from sticking to the grate of the toaster oven. The small grate can be easily cleaned by soaking in water first.  I toasted the mochi like a piece of bread but I kept an eye on it closely. When it started puffing up I stopped cooking and took it out.

Sauce: This is sometimes called "sato(u)jouyu" 砂糖醤油 and can be very easily made. It is a mixture of sugar and soy sauce. The ratio is up to your taste but I use 1:1 rato. I microwave it briefly (a few seconds) so that sugar melts completely.

After I coated all sides of the cooked mochi, I wrapped it with a rectagular portion of dried nori sheet. If you hold the nori sheet on the mochi for a few seonds with chopsticks, it will stick to mochi like you see above. As you eat, you could dip it in the sauce if you like.

My wife told me that this is the very first Japanese food she ever ate. While at college she shared a dormitory house with a girl who grew up in Japan. Her family sent her a "CARE" package for New Year which included "mochi" and nori to wrap it in. My wife tasted it and immediately liked it. In her enthusiasm to share her new discovery she raced to take a piece to another friend who scowled at it critically and said, "wait, take the paper off first," referring to the nori. Every time I serve this dish my wife nostalgically laughs about that comment. In any case, this is not a bad ending for the evening of an Izakaya feast, although I do not know any Izakaya which would serve a mochi dish like this.

Wednesday, August 31, 2011

Baked Stuffed "Giant" yellow squash イエロースクワッシュの肉詰め

This was a bit of a challenge. I was given this over-(and home-)grown yellow squash with a comment from my friend, Jimmy, "Maybe YOU can do something with it" implying he would not cook this giant.  I decided to make stuffed baked squash.

Here is the home (over)grown yellow squash (below, upper left). It is at least 10 inch long. I scooped out the seeds in the center and sliced the skin side so that the squash would sit flat inside the glass baking dish (below upper right).

Ground pork: My wife was making a scrapple from ground pork and I used whatever she did not use. Instead of buying ground pork, we bought 2.5 lb of a pork butt roast and ground it ourselves. I intentionally did not remove all the fat. I first cut the meat in small cube with a knife and then pulsed it in a food processor until I attained the desired texture.

Meat stuffing: I used about 1 lb of ground pork. I mixed in shallot (1 medium, finely chopped), garlic (1 fat glove finely chopped), fresh parsley (1 tsp, finely chopped), dried oregano (1/4 tsp), dried basil (1/4 tsp), black pepper (1/4 tsp) and salt (1/2 tsp), Japanese "panko" bread crumbs (about 1/2 cup), and egg (one large, beaten) and kneaded it by hand until it became a bit sticky and well mixed.

Sauce: I quickly made my marinara sauce from garlic (4 cloves finely chopped) and canned whole plum tomatoes (the tomatoes from 2 cans (8 oz. each) crushed into small chunks). I cooked the garlic in olive oil (3 -4 tbs) until fragrant (1 minute) and added the tomatoes with the  juice and turned the heat to simmer. I added salt, black pepper (to taste), bay leaves (2) and dried oregano and basel. After simmering for 5 minutes I tasted it and added sugar (1/4 tsp, optional) to cut the acidity.

Assembly: I stuffed the squash cavities with the pork mixture and spread the sauce over and around the squash (above lower left). I placed slices of fresh mozzarella cheese on top and baked it in 350F convection oven for 40 minutes (above lower right).

I served this with a chiffonade of fresh basel leaves. The squash was still a bit hard! I thought baking it for 40 minutes would make this giant squash soft but I was wrong. I should have pre baked or pre-cooked it. We only tasted small portions. The next day, I added a bit more sauce and a mixture of shredded aged cheddar and Mozzarella cheese and re-baked it for another 30 minutes in a 350F oven. This time, the squash was soft. Of course, you could stuff the squash with your favorite uncooked Italian sausage (out of its casing). This tasted pretty good especially with red wine. Since I did not have suitable Italian reds handy, we went for Califronia Cab Ridgeline 2004 from Alexander valley with this dish.

Monday, August 29, 2011

Auntie N's no-crapple scrapple redux スクラップル 再登場

We previously posted scrapple which is a well-known and somewhat dreaded Pennsylvania Dutch breakfast item widely served in diners in Philadelphia. The authentic recipe requires a hog's head but my wife made it from stewed pork spare ribs and since it is not made with any offal, we called it "Auntie N's no-crapple scrapple". I came across another "civilized" scrapple recipe in the Washington Post on line which does not call for a whole hog's head boiled for several days. I forwarded this recipe to her hoping she would try it--which she did.

Ingredients from the Post article:
1 1/2 pounds ground pork
25 ounces chicken broth, preferably homemade
1 cup yellow cornmeal
1/2 cup flour, plus 1/4 cup for dusting the scrapple
1 tablespoon minced garlic
1 tablespoon minced shallots
1 teaspoon Old Bay seasoning
1 teaspoon chopped fresh thyme
1 teaspoon chopped fresh basil
Salt
Freshly ground black pepper
2 tablespoons olive oil, or more as needed (may substitute butter)

The recipe calls for ground pork. Since this is "no crapple-scrapple" we didn't want to use ground pork from the market because then we couldn't guarantee it didn't contain any crapple. So we purchased a pork butt roast and ground the meat ourselves. Grinding the pork was the extent of my contribution to the dish. I handed the prepared pork to Auntie N and she took over the preparation.

Auntie N wrote: While I used the basic ingredients from the Post article I put them together differently based on previous experience making scrapple. I browned the pork in a saucepan then added the broth bringing the mixture just to a boil. I added the garlic and shallots. In a separate bowl I combined the cornmeal and flour. I slowly added the dry ingredients to the pork broth mixture whisking briskly to prevent lumps. As if making polenta I stirred the mixture until it got very stiff and pulled away from the sides of the pan. Then I added the old bay seasoning, chopped fresh thyme and basil as well as salt and pepper to taste. I poured the mixture into a bread loaf pan to cool.

To cook, I sliced the pieces that were about 1/2 inch thick, lightly floured the surface and pan fried them on medium high heat for about 5 minutes a side.

The pieces cooked up very nicely with a pleasing crust outside and soft center. It turns out that this is a much more refined scrapple than the one I am used to. While it had a pleasing pork taste it was not as permeating as the more traditional recipe. In addition the various herbs and spices are a very good combination in their own right but not the intense rustic flavors characteristic of traditional scrapple (which in fact many people don't entirely appreciate). If you are one of those people this is a nice variation and worth trying.

Saturday, August 27, 2011

Chicken thigh stewed in soy sauce, mirin and black vinegar 鶏腿肉の黒酢煮

I have found the simmering liquid made of equal parts soy sauce, mirin and black vinegar (the Japanese not Chinese kind) to be a very good universal stewing medium. I first used it to steam/poach chicken breast. I then used the same concoction to simmer chicken wings which is now one of our most favorite drinking snacks. I think I have now perfected it.

Here is my secret; I keep reusing the simmering liquid. I realized, especially after cooking the chicken wings, it became slightly viscous with a nice unctuous mouth feel because of the collagen dissolved into the liquid. It jelled in the refrigerator and, later, after cooking a few more batches of wings, it congealed even at room temperature. It makes a nice "gelee" when eaten alone. I often make it into small cubes and use it as a part of dressing/seasoning.

I decided to keep this liquid going much as some Yakitori joints do (making a sauce started when great grand dad started the place and spanning many generations) by adding new "tare' sauce to the pot. After stewing and consuming all the wings (I usually keep the cooked wings we did not eat in the jelled liquid reheating the leftovers), I strained the hot liquid to removed any debris and spent ginger slices and kept it in the sealed container in the refrigerator. Every time I cook a new batch of wings, I remove the congeal chicken fat from the surface of the jelled simmering liquid, heat it up, and add the appropriate amount (for whatever you are stewing) of soy sauce, black vinegar and mirin (1:1:1). I taste it and add water since water evaporates which makes the simmering liquid too strong. I also add new slices of ginger every time to renew a fresh ginger taste. This way, the simmering liquid can be perpetuated. The simmering liquid is getting better and better every time I cook a new batch of chicken. 

My wife suggested I cook chicken thighs in this simmering liquid. I said "Why not?" I just cleaned the excess fat and skin from the thighs but left the bone and most of the skin. I simmered it with an otoshi-buta for 40-60 minutes. We often let the cooked chicken cool in the liquid and then place it in the refrigerator rather than eating it immediately. This is much meatier dish than the wings. The texture is also very different from that of the wings but we really like this. The night I made this dish, I blanched broccoli florets and sauteed them in butter with chopped garlic and seasoned it with salt and pepper as an accompaniment.

This is sort of the dish without a particular citizenship. It can be served as a main dish with a starch in the Western-style or it can be a wonderful Izakaya style drinking snack. The chicken meat is so tender, you can remove the bones by hand (my wife) or using chopsticks (me), or before serving (guests). Although we considered having sake, we had this with Ridgeline Vineyards Alexander Valley Cabernet Sauvignon 2005. This is a very decent California Cab without any harsh edges and went very well with this dish. The black vinegar became very mild and and did not compete with the wine at all. After eating two thighs each, we did not need any more food.

Thursday, August 25, 2011

Cold "corncob" soup 冷製コーンコブスープ

This is my wife's creation and I just helped. This corn soup is a bit unusual. I am not sure where she originally got the idea to use corn cobs as the basis for a corn soup broth but she has been making corn soup this way for a number of years. (With corn cobs there are essentially two options; feed them to your horses or make this soup). After making fresh corn pudding, she used the left over corn cobs; boiling them to make corn broth much as you would use beef bones to make beef broth. This produced an amazingly sweet and "corny" soup. I finished it and served it as a cold corn soup for the summer.

She boiled 12 corncobs--the kernels removed as well as any green parts of the stalk below the cob, in water enough to cover the cobs (about 4 cups). She also added roughly chopped onion (2 medium sized). She simmered it for 40 minutes or so removing any "scum" that appeared on the surface. At this point she removed the cobs and let the broth cool. We kept it in the fridge until I stepped in to complete the soup. 

We like to add more fresh corn to finish this soup but the fresh corn at the market did not look good and decide to use frozen corn instead. I tasted the broth which had a nice corn flavor and was very sweet. I decided to strain out the old onion and some of the debris from the corn. In a pan, I sautéed or sweated finely minced onion (1 large) in a mixture of butter and olive oil. I then added back the corn broth and half a bag of the frozen yellow corn. I cooked it for 20 minutes and using the immersion blender, homogenized the corn kernels and onion. It is good to strain the soup again at this point to remove any tough skin that may have come from the new corn kernels. I then added the remaining frozen corn to the broth and cooked it for another 10 minutes. I seasoned it with salt and white pepper.

Corn is such an integral part of what summer is all about and while this soup is not very thick it has an amazing corn flavor--representing the very essence of corn-ness (if that is a word). The additional corn kernels add a nice element of texture. Since it has been an extremely hot and humid summer, we served this soup cold but it is also good hot. A very refreshing summer soup.

Monday, August 22, 2011

Chow-chow pickles チャウチャウ ピクルス

In the food section of Washington Post online, I found a recipe for scrapple (a fairly "refined" version) and sent it to my wife. Since she created Auntie N's no-crapple scrapple, I thought she would be most interested in this recipe. As she was looking through the scrapple recipe, she also came across a recipe for a dressing which is based on (store-bought) "chow-chow", Pennsylvania Dutch pickles.  Although she is not Pennsylvania Dutch, she grew up in the Pennsylvania Dutch country. She tells me that chow-chow was ubiquitous and appeared everywhere. It was even served in the school cafeteria.

Chow-chow is one of the classic Pennsylvania dutch "Seven Sweets and Seven Sours" which by tradition should be included in every dinner served to company. The seven sours included: pickled vegetables (such as pickled cauliflower, beets, or cabbage), coleslaw, dill pickles, green tomato relish, meat jelly and spiced cucumbers in addition to chow-chow. (For those who are interested the sweets included: jelly (currant or apple), apple butter or apple sauce, preserves such as quince, candied watermelon rind or wild strawberry, two or three pies such as schnitz, shoofly, funeral or montgomery and cheese cake). As a kid, my wife particularly liked chow-chow because she could pick out the veggies she liked best from the wide selection that made up the dish. Although my wife knew chow-chow as exclusively PA dutch, we found out that it is also a southern dish. The Pennsylvania version, however, is said to be much sweeter than the southern.  Over the years my wife has looked for but never found a recipe that reproduces the chow-chow of her childhood.  She searched on line and found this one based on an old Pennsylvania dutch cookbook from the 1930's.

Vegetables: Red and yellow pepper, cut in strips (one each), Cauliflower (one head, separated into small florets), celery (two stalks cut in to 3 inch buttons), green beans (on hand full), corn (kernels from 2 cobs, uncooked), kidney beans (one 15 oz can), black beans (one 15 oz can), Lima beans (one package, frozen thawed) (picture below upper left). The cauliflower and beans were precooked by steaming.

Pickling liquid: She used sushi vinegar (1 cup), (this is obviously her modification--sushi vinegar is not traditional to Pennsylvania Dutch cooking. She said she used it because it is milder than the traditional cider vinegar), sugar (1 cup), water (1 cup), kosher salt (2 Tbs.), ground turmeric (1 tbs), black pepper corns (1 tbs), cinnamon stick (one), whole all spice (1/2 tbs). She simmered these ingredients in a pot for about 30 minutes. (top right picture).  

Then she strained the syrup to remove the spices. She poured the strained syrup back into the pot and added whole bay leaves (3), hot red peppers (dried, 2), yellow mustard seed (2 tbs), celery seeds (1 1/2 tsp) and simmered the mixture for another 10 minutes. 

She arranged the vegetables in a glass baking dish (top left picture, since we did not have a glass pickling jar) and poured the hot liquid over the vegetables, stirred well and covered. After it cooled she put it in the refrigerator. The recipe said 'wait at least a week before serving. Because of the way these pickles were made they are considered "refrigerator pickles" meaning that they should be kept in the fridge and will not last more than a couple of weeks. The traditional PA dutch method is, of course sterilized, "heavy duty" canning.

After waiting a week my wife tasted the chow-chow...she was ecstatic!! This was the traditional taste of her childhood that she had been looking for all these years.  She was so excited she called me at work to tell me the pickles were a success. She said that the minute she tasted them she was instantly transported back to her childhood--summer picnics, dinners at friend's houses, cafeteria lunches, community suppers at the firehouse. As she said, Proust really knew what he was talking about with those madelaines.  

This is a very mild pickle with a pleasing sweet and sour taste. If truth be told, it is a little too sweet for me (my wife says that she probably liked it as a child because it was sweet--she said she still likes it a lot). All the additional spices give it a distinctive depth of flavor. The veggies are still very crisp and the diversity of ingredients makes it very interesting. Chow-chow is sometimes referred to as "the end of summer pickles". It includes such a variety of vegetables because these are all the veggies that are left over from pickling individual vegetables from the summer harvest. I suspect my wife will be making this again. It is certainly worth the effort.  

Sunday, August 21, 2011

Sardines escabeche イワシの南蛮漬け

This is the second dish I made from some fresh sardines we got. For this dish, I used two sardines. This is a classic preparation of "Nanban" 南蛮 or Japanese-style escabeche. Essentially, the fish was first fried and then soaked in sweet vinegar with other vegetables.

Preparation of sardines: For this dish, I decided to use filets rather than the bone-in whole fish. After scaling the fish, I filleted them into three layers; two fillets of fish flesh and one layer of back bone. In Japanese culinary parlance, this is called "san-mai oroshi" 三枚下ろし. I use my own quick way to do this which is more like the Western style of filleting fish than the more traditional Japanese way.  Using  a narrow-bladed boning or fillet knife (instead of more traditional "deba" knife), I cut across just under the gills until the blade hit the back bone (do not cut through). Then, I turned the blade, 90 degree towards the tail and sliced off the fillet along the back bone. I do not even bother to gut the fish beforehand. I turned the fish over and repeated. I ended up with two fillets and the head with back bone attached (hence "san-mai" or three "sheets").  Using a fish bone tweezers, I remove all visible small bones especially inside the belly portion of the fish (this is very tedious). I also cut off some of the edges. After that, I washed and patted the fillets dry. I seasoned them with salt and white pepper and sprinkled sake over everything and kept them in the refrigerator covered until I was ready to cook (#1 in the image below).

Sweet vinegar: Again there are many variations but, this time,  I used my short-cut method. I just mixed rice vinegar (3 tbs), soy sauce (3 tbs) mirin (2 tbs)  and sugar (1/2 tsp). I also added two dried hot peppers cut into small rings (removing the seeds).

Vegetables: I julienned carrot (one small) and celery (two stalks) in a slightly larger than match stick size. I also sliced Vidalia onion (1/2, medium). I like my vegetables to be "cured" so I added and soaked the vegetables several hours at room temperature in sweet vinegar in a sealed container.
Frying: I removed the excess sake on the fish filetts using a paper towel and dredged them in potato starch or "katakuriko" 片栗粉. I deep fried the fish in 170F or 340C vegetable oil for several minutes on both sides. I drained the excess oil by resting the fish on a wire rack (I use a small frying pan with just half inch of oil. I will not reuse this oil since the sardines make it taste "fishy").

Meanwhile, I removed the vegetables from the sweet vinegar and arranged them on two plates (#4 above). While hot, I soaked the fillets in the sweet vinegar and turned them over several times to coat nicely (#3 above). I placed the fillets over the vegetables and garnished them with finely julienned ginger and perilla leaves (#4).

It turned out that the red pepper I used (bought it in a Japanese grocery store) was atomically hot. Especially the vegetables got really spicy. The fish was nicely crunchy with a sweet vinegar taste. No need to worry about bones because of the preparation I did. For me, the spiciness was the higher boundary of "OK" but, for my wife, it was too much especially for the vegetables but she finished the fish with gusto. the only drink we can think of is cold sake for this dish.

Friday, August 19, 2011

Stewed sardines with pickled plums イワシの梅煮

Did I happen to mention that fresh sardines at our new grocery store often look like they just came out of a bar fight the night before? Well, today, they looked slightly better and I decided to go with the sardines. I got six and made two dishes. This is one of them.

Sardines and herrings are related but slightly different. For one, herrings can be rather large but sardines are usually smaller. The sardines we got today were larger than we see canned. So I decided to treat the sardines as though they were small herrings.


The first dish I made from four sardines is called "Umeni" 梅煮 meaning "stewed with plum". Since herrings/sardines are rather oily blue fish with a strong taste,  adding some sourness helps to cut the oiliness. This is very similar to the simmered Pacific saury or "sanma" which I posted before.

Cleaning sardines: The fishmonger at the grocery store was a bit surprised when I said I would do the cleaning myself--"so just give me the sardines as is." Scaling was rather easy since they have large, easy-to-remove scales. For this dish, I wanted to keep the shape of the fish. So I did not want to open the underbelly and gut it. Instead, I cut off the head first and from that opening, extracted the guts using a narrow blade boning knife (being careful not break the belly) and my fingers.

Pre-cooking: Some kind of preparation is in order to reduce oily fishiness of the sardines before the actual stewing. Some would just pour hot water over the fish and then washed in cold water. But I went further. I boiled them in vinegared water first. In about 1 cup of water I added rice vinegar (2 tbs) and placed the cleaned sardines. When it came to boil, I turned the flame down and simmered it for 5-7 minutes without a lid on. I poured the simmering liquid out and gently washed them in cold running water. The skin is very fragile as you can see image below (#1).

Simmering liquid: There are many variations but essentially soy sauce with some sweetness either from mirin, sugar or both. I used water (300ml), soy sauce (3 tbs), mirin (2 tbs) and sugar (1 tsp). I added two "umeboshi" pickled plums and several thin slivers of ginger root (#2) in a Pyrex pan in which 4 sardines snuggly fit (#3). I placed my favorite silicon "otoshi-buta" on the top. Since this is made of silicon, it conformed to even a square pan (#4). I put a reguar lid slightly askew over it on a medium flame. As soon as it started boiling, I turned it down to a gentle simmer and cooked it for about 40 minutes.

After 40 minutes, I removed the both lids and turned up the heat and let it boil gently so that the simmering liquid reduced a bit. I removed it from the heat and let it cool down with a lid back on for several hours to room temperature before serving.

As you can see in the first picture, I garnished it with thinly julienned ginger ("Harishouga" 針ショウガ) and perilla. If you do not like a strong ginger taste, you could soak the julienned ginger in cold water for 5 minutes or so and ring out the moisture before using. I also removed the meat of the Umeboshi and draped it over the fish.

This is another homey dish, probably only served at home, in a "taishu shokudou" 大衆食堂 (eatery for the public) or izakaya. This is a perfect side dish with rice or its liquified form, i.e. sake. We had this with the latter. To enjoy this dish, you need to be a chopstick jedi since the fish has  lot of small bones (remember the "herring-bone pattern"). My wife was not expecting so many bones. She described her first bite as like chomping into a toothbrush and having all the bristles come off the handle into her mouth. But once she realized the situation, she was an expert at removing all available meat from the bones. I admit this is a very labor intensive dish (both preparing and eating) but it is worth it especially if you do not have a neighborhood Izakaya or "taishu shokudou" to visit.

Wednesday, August 17, 2011

Grilled chicken and soba salad 焼き鶏胸肉のそばサラダ

Did I tell you we had three chicken breasts I had to dispatch quickly? I already made two dishes in the past two days and had one more breast to go. I decided to make some kind of salad with grilled chicken breast.

I used one bone-less and skin-less chicken breast (for two servings). I butterflied the thickest potion to make it even in thickness. I, then, smeared soy sauce and grated ginger root on both sides of the meat and let it stand for 5 minutes while my Foreman's grill preheated. I cooked the breast for less than 2 minutes or until just done.

The rest of the salad components were whatever was available in the fridge. I julienned carrot (one medium) and cucumber (one American Mini-cucu). I also finely chopped scallion (two). I also happened to have leftover cooked soba noodles.

Assembly: I placed the soba on the bottom of the plate and piled the carrot, cucumber and scallion on the top. I cut the grilled chicken in 1/2 inch strips and placed it around the periphery of the plate. 

Sauce: I just mixed "mentsuyu (x2 concentrated)", sesame oil, and grated ginger and poured it (not too much) over the salad. I garnished it with Wasabi flavored "frikake" which also contains sesame seeds and nori strips.

We had this as a lunch but this could be a perfectly good "shime' 〆 dish. Obviously you could make many variations of this type of Japanified salads.

Monday, August 15, 2011

Chicken breast scaloppini 鶏胸肉のスカルピニ

For some reason, we had excess chicken breasts which needed to be cooked before going bad. On a whim, I quickly made this dish.

I used one bone-less and skin-less chicken breast. I cut it into thin (1/4 inch) bite sized pieces using a shaving cut or "sogigiri" 削ぎ切り technique. I then seasoned it with dried basil, marjoram, salt, and pepper, dredged it in flour and sauteed it in olive oil in a frying pan. I used a bit more oil than for sauteing.

I served this with a side of onion-cucumber salad. This salad is very white, so for color, I sprinkled Paprika. If I made a caper lemon butter sauce, this could have been called "chicken piccata" but I did not make any sauce. This is one of making-something-from-the-chicken breast dishes but this was a good solid effort by me. I cannot remember, but we were having a red wine with this.

Saturday, August 13, 2011

Chicken breast karaage 鶏胸肉の唐揚げ

I had some extra chicken breasts which needed to be used before they went bad. So I decided to make kara-age 唐揚げ. The difference between kara-age and tastuta-age 竜田揚げ may be sometimes blurred and this one can be considered a type of tatsuta-age as well. I posted tatsuta-age using chicken thighs and marinade of soy sauce and mirin previously.

I used one bone-less and skin-less chicken breast for two small servings. I cut the chicken breast into small and flat bit size pieces using shaving cut or "sogi-giri" 削ぎ切り in which the knife blade is placed on a slant against the grain of the meat. I made about 12-13 pieces of 1/4 inch thickness.

I heated peanut oil in a frying pan (about 1/2 inch deep) to 340F or 170C on medium flame.

Just before frying, I put the chicken pieces in a small bowl and added enough soy sauce to coat (about 1 tbs) and grated ginger root (1/2 tsp, optional). I massaged or kneaded the chicken pieces so that soy sauce and ginger will evenly coat and somewhat penetrate the meat. Then, I dredged the pieces with potato starch or katakuriko 片栗粉 and fried it. Since these were rather thin pieces, they only needed to cook about 1 minute or less on each side.

I drained the oil and served the chicken pieces hot with my usual celery salad. Since the chicken was seasoned with soy sauce there was no need to salt. Compared to the thigh, this is much quicker to cook and also the taste and texture are different. Since I did not use mirin, it may be more suitable as a drinking accompaniment. Any drinks will go well with this dish but the best would be beer or cold sake.

Thursday, August 11, 2011

Asazuke "Mizunasu" Water eggplant 水茄子の浅漬け

This is the second dish (rather preparation) of "mizunasu" 水茄子 I bought the other day. We enjoyed half of it eaten "raw' and made the other half into "Asazuke" 浅漬け.

Instead of my usual way of making asazuke, I used brine (salt water about 4%, slightly saltier than sea water, red pepper flakes, thinly sliced kelp, and chopped ginger). As in "raw" eggplant, I made thin wedges using combination of tearing by hand and cutting with knife. I placed them in the brine in a Japanese pickling pot, cranked down the pressure plate and left them in the refrigerator overnight. 

I served this with asazuke of daikon, cucumber and carrot which I made prior to making the eggplant asazuke. This was very refreshing and we like it. Somehow, the eggplant attained a very slight sliminess on the surface and became softer in texture than we expected. Although this dish was very good, both of us prefer eating "mizunasu" totally "raw". But who knows if or when we will be able to get fresh mizunasu again.

Tuesday, August 9, 2011

Raw "Mizunasu" eggplant 生の水茄子

I mentioned that the types of eggplant available in Japan are quite different from those available here. To my surprise, we found two kinds of Japanese eggplant in our Japanese grocery store; "Mizunasu" 水茄子 ("mizu" means water and "nasu" eggplant) and "Kamonasu" 加茂茄子. I assume these were imported from Japan. Although we saw several Kamonasu in the refrigerated case, only one mizunasu was remaining (left in the image below). Although it did not look particularly great (middle), I decided to get it. This is a type of eggplants which is so mild that it can be eaten "raw", although "asazuke" 浅漬けpreparation is the most popular way to serve it. I decided to make half of it in asazuke and serve the remaining half "raw".

Since the skin had some blemishes, I peeled the skin in a "zebra" pattern using a vegetable peeler. I removed the stem end and cut into the top portion of the eggplant for about one inch and then tore it in half by hand. I did this to make a more irregular cut surface (both to increase the exposed surface as well as for aesthetic reason). I repeated this several time to make thin wedges and soaked them in weak salted water (about the saltiness of a soup). This prevents the eggplant from discoloring. It also takes out some of the bitterness and seasons it lightly. I kept it soaking until I was ready to serve (for about 15 minutes, images above right).
After 15 minutes, the water became slightly brown. I patted the pieces dry with a paper towel and arranged them on a plate. The garnishes and sauce can be anything you like. Here, I garnished it with finely chopped scallion, perilla leaves, and dried bonito flakes. For sauce, I used "yuzu shouyu" 柚子醤油 sauce from the bottle. Alternatively, you could use soy sauce, mentsuyu, sesame sauce or even mayonnaise (straight or mixed with other seasonings).

You would be surprised how mild and slightly sweet this raw eggplant is. The only problem is that getting mizunasu is not easy or consistent. It was totally fortuitous that it was available this time.

Sunday, August 7, 2011

Kumato, avocado, broccoli and cucumber salad with sesame dressing クマト、アボカド、ブロッコリー、キュウリの胡麻和え

I am a sucker for "new" food items at the market. I found a brown tomato called "Kumato", which was developed in Spain (I do not think this is the result of genetic engineering), and had to try it. I made a nice and healthy salad with sesame dressing.

Here is the kumato tomato (label on the left indicating this one is from Toronto, Canada. I did not know they produced tomato/kumato for export.). The right picture shows three kumatoes and a regular tomato for comparison. I skinned and then quartered the kumato for this salad. I also included blanched and still crunchy broccoli, a sliced quarter of avocado and cucumber sticks.

Sesame dressing: I first dry roasted white sesame (1 tsp) in a dry frying pan. Although the sesame has already been roasted re-roasting makes it much more fragrant). I coarsely ground the roasted sesame in a Japanese pestle and mortal or "suribachi" すり鉢 as you see in the pictures below. One small gadget you must have is this "suribachi" rake. This is a minuscule metal rake to remove all the ground material from the suribachi as you see in the middle picture below. Using this "rake" you can remove all the ground sesame from the groves of the suribachi (below right). This works well to remove items from Japanese graters especially such items as ginger or wasabi root. The more traditional form of this is made of bamboo.

I added white sesame paste or "Shiro neri goma" 白練り胡麻 (1 tbs), sugar (1/2 tsp) and soy sauce (2-3 tsp).

I served this salad with three small items; "mozuku" モズク in sweet black vinegar (in the back left), matsumae-zuke 松前漬 (center) and squid "bukkake" イカのぶっかけ, all came frozen. Kumato is a bit sweeter than regular tomatoes and has less acidity. One of our guests tried it and really liked it, although we are not too impressed.

Friday, August 5, 2011

Dried Pacific saury in mirin marinade 秋刀魚のみりん干し

No, I did not make this myself. I bought it sometime ago, frozen, and almost forgot that we had it. This is a preparation called "mirin boshi" みりん干し. Japanese love dried or semi-dried fish (This probably started out mainly as a way to preserve fish but the reduction of the water content in  the fish flesh does concentrate the flavors. So now it is eaten for its taste since there are other ways to preserve fish). On our last trip to Japan, we visited stores that specialized in dried fish at the Nishiki market 錦市場 in Kyoto (picture below).

The mirin-bosh I bought was labeled as having been made in Ibaragi prefecture 茨城県. This technique of marinading in a mirin and soy sauce mixture and drying can be applied to different types of fish, for example, species of mackerel such as aji 鯵, saba 鯖, or pafici saury 秋刀魚. I recall eating it in Izakaya while I lived in Japan but they were rather sweet and often dry or even crunchy (almost candied), especially small fish like aji. I am sure if you make it at home, it may be better.

I found a package with two "sanma" fish already prepared (bone-less) in the Japanese grocery store's freezer case. I bought it for the "sake" of nostalgia (it goes well with "sake" as well). This preparation is usually grilled and served hot but some are sold already grilled (in that case, it just has to briefly warmed before serving). The one I got was not pre-grilled. After I thawed it overnight in the refrigerator, I grilled it in a toaster oven. Because of the high sugar content with mirin, it burns very easily. I lined the bottom of a baking dish with aluminum foil and placed a metal grill over it then put the mirin-boshi fish on the grill. I set my toaster oven to "broil" and started cooking the meat surface first. I carefully watched the fish as it cooked. When it started bubbling and the edges started browning I flipped the fish and continued cooking. The skin side started bubbling up and browned much faster than the meat side.

I served this with cucumber with moromi miso and slices of tomatoes sprinkled with salt. This may not have been the best example of this kind of fish; it was rather on the sweet side and not as meaty or juicy as it could have been, but it was not far from what I remembered eating in a small Izakaya in Susukino 薄野. It was nostalgic and brought back memories of good times with friends. This went well with cold sake we were having.

Wednesday, August 3, 2011

Creamed spinach au gratin ほうれん草のグラタン

One weekend, we were planning to make spinach soufflé. My wife prepared a package of spinach for this but somehow we ran out of time and decided to make the souffle later.  But it is basically not feasible to make soufflé on weekday evenings. Almost one week passed after my wife cooked the spinach and there was still no souffle. Before the spinach went bad, we decided to just make creamed spinach. As a consolation prize, I decided to make it slightly more interesting by adding panko crust mixed with Parmesan cheese and calling it "au gratin".


The amount of two small servings seen above.

Spinach: The package of baby spinach (about 10 oz) was cooked without additional water in a tightly lidded pan for 4-5 minutes or until wilted mixing twice of three time during the cooking. I squeezed out the excess moisture and cut into small (1/2 inch) pieces.

Béchamel sauce: I finely chopped a shallot (one, medium). I then sauteed it in a frying pan with olive oil (2 tbs) and butter (1 tbs). I sprinkled in AP flour (about 3-4 tbs) and sauteed it for few minutes until the flour coated all the shallot pieces and got sort of wet. If you use more fat, it will be easier to make the sauce but with the flour coating the individual pieces of shallot, you can make Béchamel with much less fat. I initially added milk (1%, one cup) all at once and mixed using a silicon spatula. After the sauce thickened, If needed, I add more milk to adjust the consistency. I seasoned it with salt, white pepper and nutmeg (both freshly ground). I then added shredded aged cheddar cheese (about 1/2 cup) and the spinach.

Bread crumbs: I used Japanese panko crumbs (about 1/4 cup or more), added good olive oil (about 2 tbs) and mixed the oil and crumbs by rubbing the crumbs between my finger tips. I also mixed in grated Parmigiano Reggiano (about 3-4 tbs), You could add more on the top of the crumb layer before baking.

Assembly: I divided the creamed spinach into two small flat ramekins and spread the bread crumbs on top. I baked them at 400F in a preheated toaster oven for 7-10 minutes or until the crumbs were golden brown.

This is not as good as spinach soufflé but much more interesting than a simple creamed spinach. We had this as a drinking snack but this will be perfect with toast points or small baguette rounds.