Showing posts sorted by relevance for query chestnut. Sort by date Show all posts

Tuesday, November 3, 2015

Chestnut flour pancake 栗の粉のパンケーキ

When we got this year's shipment of North American Chestnuts I prepared my usual Chestnut rice and other chestnut dishes. In an effort to expand our seasonal chestnut repertoire my wife hit the internet and came up with several recipes using chestnut flour. This is an ingredient we have never used before so my wife had to hit the internet again to find where we could purchase some. She got chestnut flour from Amazon and we made these pancakes one weekend. This also uses almond flour which we just happened to have in our freezer (how it got there and why is another story).  By the way, this pancake is gluten free if that is important to you.


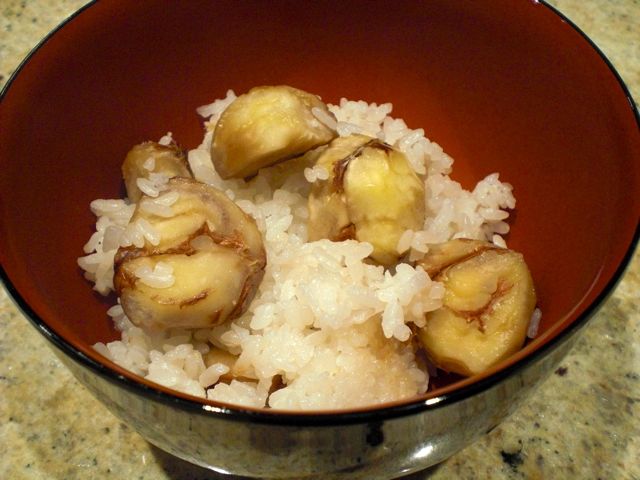
For a pancake without any wheat flour, this one came out very fluffy. I also added my chestnut in syrup as a garnish.


I used a small amount of maple syrup but this pancake is rather sweet and may not need any additional syrup.


This recipe came from this site. We modified the recipe using our CCK (Common Culinary Knowledge)

Ingredients: (4 pancakes)

- 3 Large Eggs
- 1 Cup Chestnut Flour sifted
- 1/3 Cup Blanched Almond Flour sifted
- 3 Tbs Granulated Sugar
- 2 Tsp double acting Baking Powder
- Pinch of Salt
- 1/4 cup Milk*
- 1 tsp Vanilla Extract
- 1 Tbs. melted Butter

Directions: sift the flours. (This step can not be skipped because the chestnut flour has a tendency to clump and without sifting ends up with several hard lumps). Mix the dry ingredients in a bowl and the wet ingredients in another bowl. Stir the two together. Adjust the amount of milk to get a pourable consistency. Ladle the batter into a hot pan with a little olive oil on the bottom. Cook as you would any other pancake.

*Note: It is important to have a appropriate consistency when making pancake batter. We had to add over 1/4 cup of milk (more like 1 cup) to get a "spreadable" consistency so that the batter would spread in the pan (see below). Probably we could have added more liquid to make it spread to fill the pan. We also omitted "vinegar or lemon juice" included in the original recipe since double action baking powder has it's own source of acid to activate and we judged that "acidic" taste will not be good in the pancake.


The pancake tends to brown quickly because of the sugar.


This is a great pancake.  Despite being gluten-free, it has a very fluffy fine texture. It is slightly sweet and because of the chestnut flour, it has a hint of chestnut flavor as well. Amazingly we were surprised that the pancake seemed to have a “chocolate” flavor. If we did not know how it was made we would have sworn that it included coco powder; although it clearly did not. Because of the special flours, this tends to be a rather expensive pancake to make but we really liked this and we will definitely make it again.

Saturday, February 3, 2024

Chestnut, Brown Butter, Sage Muffin 栗の粉とセイジマフィン

This fall we bought a new batch of chestnut flour. It was to replace the previous batch we had been storing in the freezer that had a Best-Use-By (BUB) date of 2015. The new batch came in bulk; 3 bags of flour. Given this “plenitude”, my wife was trying to come up with new dishes to use the chestnut flour. She came across a recipe for “chestnut and sage muffin” at the “Serious eats” site.  This was a perfect recipe to use for 2 reasons: 1) as previously stated we had an abundance of chestnut flour and 2) The sage bush in our herb garden still had nice lush green leaves despite several cold days and snow. The muffin was really good. Nice sage and brown butter flavor and chestnut flour made this muffin very light and moist.


I ask my wife to continue as usual.

Ingredients: (makes 12 small muffins)
Several bunches of sage (with about 5 leaves on each, one of which used in the browned butter the other steeped in the milk).
6 tablespoons unsalted butter
2/3 cup milk
3/4 cup all purpose flour
3/4 cup chestnut flour
1/4 cup sugar
2 teaspoons baking powder
1 teaspoon baking soda
1/2 teaspoon salt
2/3 cup yogurt
1/4 teaspoon vanilla extract


Ingredients X2: (suggested to make larger muffins)
Several bunches of sage (one of which used in the browned butter the other steeped in the milk. The more leaves use the more intense the sage flavor).
12 tablespoons unsalted butter
1 1/3 cup milk
1 1/2 cup all purpose flour
1 1/2 cup chestnut flour
1/2 cup sugar
4 teaspoons baking powder
2 teaspoon baking soda
1  teaspoon salt
1 1/3 cup yogurt
1/2 teaspoon vanilla extract

Directions
1. Preheat oven to 400°F. Combine milk and sage in small saucepan and heat to a bare simmer, then remove from heat and cover. Allow to steep at least 10 minutes, then remove sage, squeezing as much milk as possible from sage before discarding.
2. Place butter and remaining sage in small saucepan and heat over medium until melted and foamy. Allow to cook until liquid butter is golden brown and solids at bottom are deep brown and smell nutty. Transfer to a heatproof container, remove the sage and make sure to scrape out as much of the browned butter solids as possible.
3. Combine all purpose flour, chestnut flour, sugar, baking powder, baking soda and salt in medium mixing bowl. Sift if necessary, or simply whisk together. In separate mixing bowl, combine sage milk, sage butter, yogurt and vanilla and whisk until smooth. Gently fold the wet ingredients into the dry until all streaks of flour are incorporated and batter is fluffy and slightly lumpy. Divide evenly between cups in a 12 cup muffin pan lined with paper cups. Bake 7 minutes, then rotate pan and bake another 3-5 minutes, until a skewer inserted into muffin comes out clean. Be careful not to overbake. Allow to cool in pan slightly before transferring to rack to finish cooling.

These are truly remarkable muffins. They are a combination of unexpected tastes that work extremely well together. The combination of browned butter and sage came through with a pleasing robustness. The chestnut flour added a slightly nutty dimension. The chestnut flour also contributes to the very light and tender texture of the muffin. While these muffins were a bit of surprise flavor-wise they were also a great new discovery. Next time we’ll double the recipe so the muffins are a bit larger.

P.S. In early February, the plum tree in our yard started blooming. It is always amazing and nice to see this when it is still winter and the weather is still cold. It is such a nice early harbinger of hope for the upcoming spring.


Monday, October 16, 2023

Castanaccio Pugliese (Chestnut Flour Cake) カスタナチオ

We like pancakes for breakfast sometimes. One of the unusual ones we like to make is chestnut flour pancake”. Since we are now in the chestnut season, we decided to have the chestnut flour pancake for breakfast one weekend. We keep all exotic and whole grain flours including the chestnut flour in a small freezer in the basement. When my wife got it out, she realized its BUB (best used by) was in 2015. It smelled ok. We went ahead and made the pancakes which were very good but even by our standards this flour was a bit too far past its BUB. We decided it is the time to buy a new batch. We got a couple of bags of chestnut flour and my wife looked for some new recipes to use it. She came across this recipe for chestnut flour cake on-line. Actually, she made a chestnut flour cake with the same Italian name “Castagnaccio” previously. But that cake was quite different from this one. It was very savory and did not use any leavening agent, or sugar but did use fresh rosemary which provided good flavor. Overall, however, we were not crazy about it because it was rather dry and crumbly. The new recipe she found must be a variation of an Italian generic cake called castagnaccio. In any case, the major differences are this cake uses a leavening agent, sugar and coco powder. Instead of herbs such as rosemary this used a combination of nuts and candied fruit. It is much thicker as well. This version is more suitable for breakfast or dessert than the previous version which was more savory and as the original recipe suggested “should be washed down with red wine”. The common thing is that both cakes are quite crumbly. (We ended up eating both of them as crumbs with a spoon.)


Ingredients
1 1/2 cups chestnut flour
1/3 cups sugar
1 tablespoon baking powder
2 tablespoons cocoa powder, plus more for dusting
Pinch of salt
1/2 cup extra virgin olive oil, plus more for brushing
2 tablespoons honey, plus more for serving
2 large eggs
1 cup milk
1 cup of Harry and David’s medley of candied fruit. (The original recipe calls for 1/2 cup raisins and 1/2 cup dried cranberries, plumped in 1/4 cup warm water or wine - preferably Vin Santo).
1/3 cup toasted pine nuts
1/3 cup roughly chopped toasted walnuts (As added measure we added chopped chestnuts)
Confectioner's sugar for dusting

Directions:
Preheat oven to 350F degrees. Prepare a 9-inch cake pan (The original recipe suggested lightly greasing it with olive oil but we had trouble getting the cooked cake out of the pan. We suggest next time greasing the bottom of the pan and adding a layer of greased parchment paper.)
Toast the pine nuts and walnuts. In a large bowl, swift together the flour, sugar, baking powder, cocoa powder and salt. In a separate bowl, whisk together the olive oil, honey, eggs and milk. Slowly pour the liquids into the dry ingredients, whisking very well to avoid lumps. The batter should be smooth and a bit liquid. Add the nuts and dried fruit. Pour the batter into the prepared pan, and bake for 35 minutes, or until the cake begins to puff slightly and the middle is set. Remove from the oven and cool completely before removing from pan.
Dust lightly with confectioner's sugar and cocoa powder and serve with some warm honey.


We found it was difficult to remove the cake from the pan. A portion of it stuck to the pan and crumbled. (See the picture below). (Next time, we will use buttered parchment paper on the bottom of the pan). Even the portion that came out in one piece was difficult to cut into wedges since it kept crumbling. The only good thing was that even the crumbs tasted good.


Although eaten in crumbs this cake was very good. The chestnut flour added a nuttiness to the overall chocolate flavor. The pine nuts, walnuts and dried fruit added little bursts of flavor and texture. The dried fruit was particularly nice because it added a burst of sweetness. Interestingly, over time the chestnuts we added became rock hard and we had to be careful to remove them from every mouthful. We liked this cake better than the previous version my wife made. It would just be nice if it did not disintegrate into crumbs.

Friday, November 6, 2015

Chestnut Flour Cake: Castagnaccio 栗の粉のケーキ:カスタナチオ

Since my wife got chestnut flour, she searched for some recipes and came up with this Tuscan chestnut cake. This is indeed an interesting cake. As the recipe indicated, it requires wine to "wash it down".


This is a flat cake without any leavening agents. It is savory in taste with rosemary, pine nuts, walnuts and raisins.


My wife put some of these in the batter and some on the top.


We made a few variations from the original recipe.

INGREDIENTS

2 ounces raisins
16 ounces chestnut flour
2 tablespoons sugar
Zest of one lemon,
Pinch salt
2 cups water
3 tablespoons olive oil, plus more for pan
1 fresh rosemary sprig, leaves picked and finely chopped
1 ounce toasted chopped walnuts
1 ounce toasted pine nuts

DIRECTIONS

Preheat the oven to 375 degrees F.

Place the raisins in a ramekin of water to soften for 20 minutes.

In a large mixing bowl, sift the chestnut flour. Add the sugar, lemon zest, and pinch of salt, mix well and then gently start adding the water to the mix.

Using a whisk, beat the mixture well making sure to eliminate any lumps, then add 2 tablespoons olive oil, and half of the raisins, nuts and rosemary and mix again.

Lightly oil an 11-inch pie plate with 2-inch sides with olive oil and pour in the batter it should be no more than 1/3-inch thick. Sprinkle the cake with rosemary leaves, the remaining softened raisins, walnuts, and pine nuts. Sprinkle with 1 tablespoon olive oil and bake for about 40 minutes.

We used a rustic looking ceramic pie pan.


We used finely chopped fresh rosemary from our herb garden.


This is a very interesting cake. It has the texture and taste of a very large chestnut smashed into a flat piece. The predominantly chestnut flavor and texture is accented by intriguing overtones on rosemary and pine nuts (I couldn’t detect any walnut flavor). The original recipe said that this was not “kid friendly” and they were right. This is definitely not for desert and will not go well with coffee or tea. But the flavor grows on you. Also over time the rosemary and pine nut flavor marry into the chestnut flavor and the cake gets better.  We were probably too careful about adding too much rosemary. This time of year the rosemary in our garden is extremely aromatic and tacky with oil—probably at its best for the season.  Next time we can be a lot more aggressive with that herb. This cake reminded me of when I was introduced to the Italian liquor Compari. When I first tasted it, the flavor was very strong/bitter, unique and distinctive and I wasn’t sure I liked it. But then it grew on me. The cake is rather crumbly and we ended up eating it in chunks rather than slices. Since the raisins, pine nuts and rosemary we put on the surface just fell off as we ate and while we stored the cake, my wife suggested that next time we just mix all of it into the batter.

We had this with red wine and that combination worked out well. This cake ranks next to my wife’s anchovy black pepper cookie . They are of a similar  genre. Both go well with sipping wine rather than as a "dessert".

Monday, November 6, 2023

Chestnut Soup 栗ときのこのスープ

We used to get fresh chestnuts from California every fall. The preparation, especially removing the inner brown membrane is time consuming and difficult. So we decided to try commercially prepared chestnuts sold either in a jar or a plastic pouch. As a test to see if the prepared chestnut tasted any different from the fresh, I made chestnut rice 栗ごはん with it. The final dish came out similar to using fresh chestnuts with the added advantage of much less effort of preparation required. (Since we posted  making chestnut rice with fresh chestnuts and this preparation tasted exactly the same we did not post it again.) But this exercise proved to us that fresh and commercially prepared chestnuts are interchangeable.  After making the rice we were left with one and half bags of prepared/roasted chestnuts (about 7-8 oz or about 200 grams.) My wife came up with this chestnut soup recipe which she found on-line. Again I had to modify the recipe because of the ingredients we had. The original calls for dried porcini and fresh button mushrooms but I only had fresh shiitake mushrooms.


Ingredients
5-6 fresh shiitake mushrooms, stems removed and caps sliced.
2 tbs. unsalted butter and 2 tbs. olive oil
1 large leek, white and tender green parts only, finely chopped
1 carrot, thinly sliced
2 celery stalks finely chopped
1 teaspoon minced rosemary (from our herb garden)
7 oz. (200 grams) peeled roasted vacuum-packed chestnuts (see picture below)
3 cups chicken stock
Salt
Freshly ground pepper

For garnish
1 tbs each of olive oil and unsalted butter
5-6 fresh shiitake mushrooms, stem removed and caps thinly sliced
Salt and pepper to taste
Fresh rosemary, finely chopped up


Directions
In a saucepan on medium heat, add the olive oil and butter. Add the sliced shiitake mushrooms, leeks, carrot, celery and rosemary and cook, stirring occasionally, until the vegetables are cooked; about 15 minutes. Add the chestnuts and stock, season with salt and pepper. Bring the soup to a boil and simmer over low heat for 30 minutes. Using an immersion blender, puree the soup until smooth.

For garnish
In a frying pan, heat the oil and butter. Add the sliced shiitake mushrooms, cook over moderately high heat until lightly browned (6 minutes). Season with salt and pepper. I served the soup warm and garnished with the sautéed shiitake and the chopped rosemary.

This is an excellent soup/potage. The chestnuts and leeks imparted a nice sweetness and distinctive chestnut flavor. Although the original recipe calls for heavy cream, I served this warm without any cream. It really didn’t need it. We had this as a lunch with slices of my home baked baguette. I am sure certain chestnut dishes cannot be made using these kinds of prepared chestnuts but I will try to use them in more of our favorite chestnut dishes

Thursday, October 19, 2023

Chestnut Flour Cake with Persimmons and Buttermilk チェストナッツフラワーと柿のケーキ

This is an another cake my wife made from the new chestnut flour.   She came across the recipe using chestnut flour, persimmons, and buttermilk. Since we happened to have all these ingredients, she went for it. The cake was very moist and had nice chestnut flavor but the persimmon flavor is very subtle (i.e. not discernible at all). It was not too sweet and perfect for breakfast.


Ingredients:
172 grams chestnut flour
148 grams or 5.2 ounces of persimmon puree. *
1/2 cup buttermilk (we used my wife favorite buttermilk from Harrisburg dairies.)
3 eggs, at room temperature
1/4 cup melted unsalted  butter
1 tsp vanilla extract
generous pinch of salt
1 tsp baking powder

* The persimmon came from Weee (#1 below). They are “Fuyu” 富有柿 (which is pronounced “fuyuu” meaning “wealthy”) variety and are called chocolate fuyuu because of the dark brown color of the fruit. They were not expensive but they were small with seeds. (Most commercially grown Fuyu persimmons are seed-less). They were irregular in shape with dark blemishes which made them look like they came from somebody’s backyard tree. But when ripened they are very good with pudding-like consistency and sweet. Only problem was that it was very difficult to remove all the seeds/stones.

Directions:
Preheat oven to 350°F (177°C). Butter 9" cake pan. (Having learned from our previous experience with the chestnut flour cake we added a buttered piece of parchment paper to the bottom of the pan and the cake came out of the pan with no problem) 
Puree the persimmon and set aside (#2). Sift chestnut flour to remove any larger bits/chunks.
Mix dry ingredients in bowl and set aside. Using either an electric mixer or a bowl whisk and beat the eggs. Add other wet ingredients. Fold dry ingredients into wet ingredients until fully incorporated (#3).
Pour batter into buttered pan and put into pre-heated oven for about 30 minutes, until the cake is firm in the middle and a toothpick pulls out clean. Remove from oven and cool on baking rack for at least 30 minutes before serving (#4). We reheated in the microwave for 15 seconds (First picture).


This cake was very moist, slightly sweet with a dense texture. The nutty chestnut flavor came through but we couldn’t identify any persimmon taste. This was a very good addition to breakfast.

Monday, September 29, 2014

Simmered Chestnuts and Chicken "Chikimarron" チキマロン鶏肉と栗の甘辛煮

I thought I had exhausted all my repertoire possible for dishes using chestnuts but then I encountered this recipe on line and decide to make it using what was left over after making "shibukawa-ni" 渋皮煮, "Chestnut croquettes" 栗のコロッケ and "Chestnut rice" 栗ご飯. This turned out to be a good dish and we had this as a sumptuous lunch over the weekend.


The name of the chicken chestnut dish I made is "Chiki-marron" チキマロン(Chiki-English for chicken and marron-French for chestnut). I used, cleaned chestnuts (both outer and inner skins removed as posted before). I started with whole/intact chestnuts (9 of them) but realized that unlike Japanese chestnuts they would not be intact after cooking because of the many deep crevasses characteristic of North American chestnuts.  I added additional 3 chestnuts that broke into several large chunks when I peeled them (#1).

I poured in 1 cup (about 200 ml) of "dashi" broth (I made it with kelp and bonito flakes), sugar (4 tbs), and sake (4 tbs). Once it came to the boil, I turned the flame down, skimmed off any scum from the surface and covered with a  "otoshi buta" 落とし蓋 . I simmered for 8 minutes (#2). I then added soy sauce (3 tbs) and simmered  for 10-15 minutes until the simmering liquid was reduced to less than half (#3). I added freshly deep fried chicken "kara-age" 鶏の唐揚げ (see below) and mixed and simmered for 1-2 minutes until the potato starch coating bloomed into gelatinous coating and absorbed the simmering liquid (#4).

chestnuts and chicken composit

For chicken Kara-age: I skinned and deboned chicken thighs and cut them into bites sized pieces. I made up all of them but used only two for this dish reserving the rest for future use. (Of course number of remaining pieces declined continuously because we started snacking on them as soon as I made them). My wife declare that I could stop right there the dish was great just as it was.

I made the Kara-age by using a small amount of soy sauce and grated ginger and massaged it. I then dredged in potato flour (katakuri-ko 片栗粉) and deep fried in 170F peanut oil for 5 minutes (or until the center of the meat is done and surface crispy) turning several times. I drained them on a rack for a few minutes then added kara-age chicken into the pot of chestnuts and sauce.  I cooked the mixture stirring constantly until the coating on the chicken absorbed the simmering liquid leaving the pieces with a glossy rich coating.

I had some frozen chestnut rice which I heated in the microwave. It revived very well and tasted almost like freshly made.


My wife likes to add a thin pat of sweet butter to her chestnut rice (which is not the traditional preparation but tastes good nonetheless). I also sprinkled on some  "Goma-shio" ごま塩 which is a mixture of black sesame and kosher salt (see below). This is a rather standard Japanese seasoning.


Although we love kara-age and we were a bit skeptical about this dish (put crispy chicken into liquid? Really?), this was quite good. The crispy coating transformed into an altogether different but very flavorful coating that went very well with the chestnuts. Most of the chestnuts crumbled a bit but were still very good. The combination of chestnut rice and this dish is also good and really enjoyed all the goodness of chestnuts.

Wednesday, October 30, 2013

Chestnuts with somen noodle crust 栗のコッロケのいがぐり揚げ


Besides matsutake 松茸, chestnuts 栗 are a classic symbol of autumn. Every year, we get whatever remained of North American Chestnuts from California. Same as matsutake dishes, I almost exhausted what I can make from chestnuts but I came up with a variation of the chestnuts croquet.

CIMG6072

This is same as the chestnut croquet but instead of bread crumbs, I used broken thin Japanese noodles or so-men 素麺. As you can see above, it resembles the spiky outer layer or "Iga" いが or 毬 of chestnuts (sort of). This is mostly for appearance rather than taste.

CIMG6076

When you cut into it whole chestnuts appears.

To make it, (I am repeating the previous post).

Chestnuts: The best way to removed the hard outer skin is to do it while it is hot after boiling. I took one out at a time and keep the rest in the hot water in which the chestnuts were cooked. I removed the outer skin by cutting the bottom of the chestnut (mostly skin part) and then peeling off the outer skin or "onikawa" 鬼皮. The outer skin is easy to remove (except that the chestnut is very hot). The inner textured skin or "shibukawa" 渋皮” is more difficult to remove. Especially for Northern American chestnuts, the inner skin goes deep into the crevasses of the nut. Sometimes pulling up will release it or more often, the nuts break apart. We did about 20 chestnuts and 9 came out whole and other 11 were fragmented.

I placed the fragmented chestnuts (11) into a small food processor and pulsed it to break down the chestnuts and then added milk. I gradually added milk as I ran the processor until a chestnut paste is formed  (upper left and right below). I added a pinch of salt as well. The paste was stiff enough that the traces of the tines of a fork remained on the surface.

I moistened my hands and covered each whole chestnut with the chestnut paste (right lower).

Chest nuts corockets composit
For regular croquets, I dredged with flour, egg water and panko bread crumbs. For this preparation, instead of panko bread crumbs, I broke up the dried somen noodle in small segments (about1 inch or less) and coated the croquets. I just deep fried them in 350F oil for several minutes or until the somen noodles were golden brown.

Wednesday, December 21, 2011

Chestnut croquettes 栗のコロッケ

This looks like "Menchi-katsu" メンチカツ but this is made completely with chestnuts, no meat or anything else is involved. After I got the second batch of North American chestnuts, I looked for chestnut recipes and found this chestnut croquettes recipe.
Here, are the cut surfaces. 
I only made three but to make three I needed 5 chestnuts for the batter (#1). I broke up boiled and cleaned chestnuts (5) and put them into a small bowl food processor. I added milk gradually white running the processor until a nice consistency of the batter was reached (#2). Actually, I overdid the milk so I added a small amount of potato starch to adjust the consistency. I then encased the three chestnuts with the batter (#3) and then rolled them in Japanese Panko crumbs (#4). I skipped the usual steps of dredging in flour and egg water steps since I did not feel they were needed. I let them sit for few minutes so that the panko adhered better to the nuts (#5) and deep dried them in 340F peanut oil on medium flame (#6) for several minutes.
This is really good. Chestnut encased in chestnut batter is a great combination. We really enjoyed the sweetness of chestnuts and the levels of texture ranging from the interior nut, through the batter surrounding it, topped with the crunch of the outer layer. I liked the chestnut tempura and this croquette equally well but my wife said she definitely like the croquette better. She said the croquette really had substance and could be served as the "meat" part of a meal. She also said she now realizes chestnuts are indeed "real" food you can enjoy.

Monday, November 9, 2015

Chestnut flour crepes with honey Ricotta 栗の粉クレープ

This is a continuation of the seasonal chestnut flour recipes. This is a  recipe by Mario Batali.  We served it with very ripe and sweet Mission figs.


This is a rather simple recipe.

Ingredients
1 cup chestnut flour
2 extra large eggs
1 1/4 cups water
2 cups ricotta
1/2 cup honey
2 tablespoons olive oil

Directions
Sift the flour into a mixing bowl and beat in the eggs, 1 at a time. Add the water, whisking until smooth. Allow to stand 15 minutes.

Place the ricotta in a mixing bowl and stir in half the honey.

Heat a 6 to 8-inch nonstick frying pan over medium heat and brush with some of the olive oil. Add 2 tablespoons crepe batter and roll pan to distribute evenly and thinly. Cook until the crepe is firm on the underside and is curling up at the edges, about 1 minute (see below picture).


Flip the crepe and cook on the raw side for about 30 seconds (see picture below).


Continue making crepes until all the batter is finished, stacking each finished crepe on top of the previous one, to keep them warm. To speed up the crepe making process use multiple skillets.

To serve, spoon 2 tablespoons of the ricotta honey mixture in the center of each crepe, roll it up and placed a dollop of honey Ricotta (the original recipe suggested to put honey but that would have been too sweat for us).


We really liked the honey ricotta. The crepes are a bit dry/brittle (or "bosoboso" ボソボソusing Japanese expression) but had a unique flavor of chestnut. We will not get chestnut flour just to make this crepe in the future, though.

Saturday, October 31, 2015

Chestnut buns 栗入り全粒小麦 バン

Since I have exhausted my collection of chestnut recipes over the past several years, my wife came to the rescue. She made chestnut buns. She ended up using her favorite whole wheat buttermilk bun recipe and added chestnuts from North American Chestnuts which I prepared.


We served this with my chestnuts in syrup and pats of butter.

 
The bread recipe came from Laurel's Kitchen: Bread Book.

Ingredients:
2tsp active dry yeast
1/2cup warm water
3/4cup very hot water
1/4 honey
1 1/4 buttermilk
5 1/2 whole wheat flour
2tsp salt
4tbs butter
1 to 2 cups chopped up chestnuts in fairly large chunks

Instructions:

Bloom the yeast in the 1/2 cup warm water. Mix the hot water, salt, honey and buttermilk. It should be just slightly warm. Put 4 cups of wheat flour into the bowl of the mixer. Add the liquid ingredients to the flour and continue mixing. Add additional flour until the dough reaches a soft but not sticky consistency. For rolls the dough should be fairly soft. Once the right consistency is reached, knead for 7 minutes. Then an additional 3 minutes first adding the butter a tablespoon at a time until incorporated then the chestnut pieces. If the mixer can't handle the chestnut pieces knead the last part by hand.

chestnuts roll composit

Form the dough into a ball and put into a bowl that has a little vegetable oil on the bottom to coat the ball so it doesn't dry out as it rises. Rise in a warm place until double. Deflate and let rise again. The second rising will take 1/2 the time. When it has doubled again deflate and form into individual buns. (To get buns of equal size I weigh the dough--3 1/8 ounces makes the size shown here). Put them in a heavily buttered baking dish. (The butter in the dish makes the crust nice and crunchy). Cook at 400 degrees for about 20 minutes (check them after 15 minutes).


Although this is a whole wheat bread, it is very soft and moist and, by far, our favorite whole wheat bun. The addition of chestnuts was very nice but in retrospect, we should have put in larger pieces and more of them. (Initially we were concerned that the chestnuts might end up fairly hard and in a large size would not have a pleasant mouth feel but it turns out they absorbed into the dough and were quite soft). Since preparing chestnuts is a lot of work, next time we may try making this recipe with prepared chestnuts in a jar (from Europe especially France).

Tuesday, November 2, 2010

Chestnut rice 栗ごはん

Chestnuts are such a typical seasonal food item in Japan for deepening autumn.  As a kid in Japan, we ate them every fall, usually boiled and it was something I generally liked. We had quite a few mature chestnut trees in our neighborhood. Many half open "Iga" いが or outer prickly shells were on the ground and getting chestnuts from those shells was always tricky for young kids. The trick was getting the nut without being pricked. In North America, because of  Chestnut blight, most of the North American Chestnuts trees were wiped out by 1940. Chestnuts, maybe as a result,  appear not to be a very popular food item. The vast majority of chestnuts we see here are imported from Europe (see P.S. below). My wife tells me that her childhood memory of chestnuts was the yearly ordeal (usually around Christmas) of roasting them in the shell over an open fire in the fireplace. While they smelled great, they weren't worth the bother. Once she busted into them, they were a major disappointment--dry, chalky, tasteless.

On one of our first trips to Japan as a married couple, we came across a roasted sweet chestnut vendor, "tenshin amaguri" 天津甘栗, under the raised railroad tracks in Shinbashi 新橋 area of Tokyo. The smell wafting from the cart was divine. I suggested we get some and my wife said, "Don't bother" and kept walking. I got them anyway and the smell enticed her to try some. She was astounded at how good they were. She insisted they couldn't be the same thing she ate as a child. Last week I found chestnuts in the shell at our gourmet grocery store. I, again, could not resist and got some chestnuts for a Japanese chestnut rice or "kurigohan" 栗ごはん. Again my wife advised, "Don't bother" and warned me that they would not taste like the ones I was used to.

I first soaked the chestnuts (15 or so, upper left in the image below) in water for several hours to make it easier to peel the outer hard skin. You could also parboil to make it easier to remove the skin. It is easy to take off the hard skin called "onikawa" 鬼皮 by cutting off the bottom and peeling off the hard skin but the chestnuts are still covered with the bitter-tasting inner skin (upper right). The most labor intensive part is removing the inner skin called "shibukawa" 渋皮 meaning "bitter skin". I just used a small paring knife to remove the inner skin but it is not easy. I put these cleaned chestnuts into water to prevent discoloration (lower left).

I again used the earthenware rice cooker called "Kamado san" like I did when I made "Matsutake gohan", I used kelp soaked water and added sake (2 tbs) and salt (1 tsp) to make 400ml of the cooking liquid. I did not use soy sauce to prevent the rice from darkening. I washed and drained the rice (2 Japanese cups or 360ml). I added the rice and the liquid into the cooker, and placed cleaned chestnuts on the top  (lower right in the above image). As per the instruction that came with the cooker, I put on the inner lid and then the outer lid. I cooked it on a medium high flame for 14 minutes and then let it stand for 20 minutes.

Here is the end product (above). I was a bit disappointed--I "shouldn't have bothered". The chestnuts were dry, chalky and pretty tasteless (as my wife predicted), although they were certainly edible. The rice itself was quite nice. We may try this again with bottled boiled chestnuts from France next time. But at least, I feel like I paid some respect to autumn, which has firmly arrived here.

P.S. After I posted this, an interesting article appeared in Washington post regrading chestnuts including different types and origins of the chestnuts imported here.

Thursday, September 27, 2012

Chestnuts simmered in syrup 栗の甘露煮

CIMG5359
We are into the chestnuts season once again. This year, I was Johnny-on-the-spot and pre-ordered them. I got North American Chestnuts from Girolami farm as before (#1 in the picture below). As I mentioned in last year’s post on chestnuts, it is wonderful to know some North American chestnuts trees survived the chestnut blight. American chestnuts, unlike Japanese chestnuts have a brown skin that goes deep into the nut. It is extremely bitter and unpleasant if left in the nut. But it is also very difficult to remove. Last year was a series of trial and error to come up with the best way to peel both the outer and inner skins (Onikawa 鬼皮and Shijukawa 渋皮, respectively. I finally found the secret. I peel the chestnut while it is still hot and the brown skin just lifts out. If you wait until it cools it is impossible to remove. This method, however, while successful, requires asbestos fingers.

This year I am providing some visual aids.The chestnuts came in a net bag (1 lb). I soaked them in water for several hours and then boiled them gently for 15-20 minutes (counting the time after the water came to the boil). I let it sit and cool down a bit--for 20-30 minutes. I scooped the chestnuts out of the water using a slotted spoon 3-4 at a time. While still very warm, I sliced off the flat bottom part using a sharp paring knife (#2). I kept peeling the outer skin by pulling it up from the initial cut (#3). Then, just tugging gently on the inner skin, it came off easily even from deep within the crevices (#4), Some chestnuts, however,had crevices made by the brown skin, so deep it almost divided the nut into two separate pieces. In that case, removing the inner skin breaks the whole chestnut apart. This year, my wife helped me removing the inner skin which sped up the process significantly.


Since I have already posted quite a few recipes using chestnut, I decided to make “Kuri-no-kanroni 栗の甘露煮. I usually buy this ready-made and sold in a jar. Most of the time, I use this in my “Chawan mushi” 茶碗蒸し.The commercial ones have both outer and inner skins cut away and the surface is smooth. The color is also bright yellow which make me think they use some kind of dye (natural dye or otherwise).
In my case, I used cooked and cleaned chestnuts like you see below (#1). For this amount of chestnuts, I prepared 200ml of water with 100grams of sugar dissolved poured over the chestnuts covering the chestnuts completely. I simmered gently for 20 minutes with the lid slightly askew (#2). I added a pinch of salt toward the end of cooking (to enhance the sweetness, although this may sound odd). I scooped up the chestnuts and placed then in a glass jar (#3). I reduced the remaining syrup for a few minutes and poured it over the chestnuts (#4).
.
My kanroni does not look as pretty as the commercial kind but it tasted very good and can be eaten as a snack/dessert or, as I mentioned, in chawanmushi.

Wednesday, November 23, 2016

Sushi Taro Michelin ☆ Part 1, すし太郎 ミシュラン☆ その1

Finally Michelin came to Washington, DC and bestowed a galaxy of stars upon the city. While no 3 star constellations appeared, once they were done, 2 stars appeared behind the name of three restaurants, and one star for eight others. Among the eight restaurants which received one star was our "special occasion" Japanese restaurant "Sushi Taro" すし太郎 in Dupont Circle. We didn't need Michelin to tell us how good Sushi Taro is. We had discovered that some time ago all on our own. We gave it top rating among all the excellent restaurants we have visited even in Japan. The "star" is well deserved and as far as we are concerned, it shines bright as Venus. Despite our concern that, with the additional fame of a star, we would have difficulty getting a reservation, we were able to get a seat recently and had a fabulously memorable dinner. 

The night we were there, the main dining room was crowded and bustling but the Omakase Sushi Kaiseki 会席 area, which was separated from the main dining room, was serene and quiet. The roof top garden of bamboo highlighted in the large picture window in front of us contributed to the sense of tranquility. This was an Omakase (chef choice) dinner consisting of multiple small dishes reflecting the season and the best ingredients available. Sushi Taro deviates from a regular Kaiseki by prominently featuring sashimi and sushi. The counter accommodates 6 guests. They take only two parties and one seating per night. Each party gets the full undivided attention of Nobuhiro "Nobu" Yamazaki 山崎信博 (chef owner) or Masaya "Masa" Kitayama 北山勝也 (chef de cuisine)  for the entire length of the dinner.

We were warmly greeted by Chef de cuisine Masaya Kitayama. After choosing our sake, "Kubota Manju Diaginjo" 久保田万寿大吟醸 from Niigata 新潟 and our Guinomi ぐい呑 sake cups, an incredible course  of delicacies started. With the permission of Chef Masa, I took, or at least tried to take, some pictures. (Sometimes I got so wound up with excitement to taste the dish I forgot to take a picture.)

1. Grilled Goma-dofu 胡麻豆腐 with sesame sauce.

This is a variation of Sushi Taro's standard opening of "goma-dofu". The thin grilled crust contrasted with soft but elastic inside. Of course, freshly grated wasabi was nice with perfectly smooth sesame sauce.


2. House-smoked oyster with persimmon dressed in 150 year old balsamic vinegar 牡蠣と柿の和え物. 

This was an autumnal dish using a persimmon as a bowl which contained bite size pieces of house-smoked oyster (Kaki 牡蠣 in Japanese) and persimmon (Kaki 柿 in Japanese). So this was a whimsical play on words "Kaki and kaki in kaki". Crispy bits of deep fried "onion" (I am guessing this was  Tokyo scallion or "nihon negi" 日本ネギ) added nice flavor and crunch. The aged balsamic vinegar was sublime with just a hint of acidity and sweetness, which further brought out the sweetness of  the persimmon. The oyster was lightly smoked and very tender. Every aspect of the dish worked well together. 


3. Hassun 八寸 appetizer: 

Okinawan mozuku seaweed in sweet vinegar 沖縄モズク, chestnut encased in edible imitation "Iga" outer spiky shell イガ栗揚げ, mustard stuffed-lotus root 辛子蓮根,  stuffed ginko nuts 銀杏 (clockwise starting from left back) and pickled myoga ミョウガの甘酢漬け (center).

We were told that the chestnuts were from California. Among the batch of chestnuts Chef Masa received, he carefully chose those that did not have the tough inner shell separation characteristic of California chestnuts. The ones he used in this dish were visually perfect; just one example of his impeccable attention to detail. The chestnuts were cooked in a special way called "Shibukawa-ni" 渋皮煮. With this method, the papery brown inner skin is left on but is not bitter. The chestnut was encased in a puree of white fish ("surimi" すり身) and short segments of dried somen noodles ソーメン were attached to imitate "spines" of chestnut outer shell and deep fried. It was then partially opened up to show the chestnut inside, a nice depiction of chestnuts peeking through the outer spiny shell, but all edible.  Each morsel in the dish provided a different taste and texture which were distinct and unique but went well together as a whole. For example, the stuffed lotus root had a nice crunch and a slight zing of mustard, which went well with the soft texture and vinegar of the seaweed which in turn played in tune with the somewhat sweeter vinegar but coarser texture of the myoga with its own unique flavor. All the items were perfect for sipping sake..


4. Simmered abalone 鮑の柔らか煮, Japanese "Komatsuna" greens 小松菜 and Japanese "sato-imo" taro 里芋 in oyster broth.

The broth was very special with an intense brininess and pleasing essence of "Ocean". It was made from the cooking liquid in which many oysters were simmered for another dish according to Chef Masaya. This concentrated oyster broth was the basis for the seasoning for this dish. Chef Masaya told us that abalone does not have much of its own flavor but has a nice texture. To boost the flavor of the abalone, he let the oyster and other umami flavors of the broth permeate the abalone. Although it is generally not polite to drink the broth in this kind of dish, it was way too good to leave behind; without shame we both drank it dry.


Next is the sashimi and sushi course (to be continued).


Monday, December 5, 2016

Chestnuts 北米産の栗

In mid September, we finally got a shipment of North American Chestnuts from Girolami farm. I have already exhausted my repertoire of chestnut recipes but one post per year is warranted to commemorate the chestnut season.  This year, I made only a few dishes. The first one was chestnut rice 栗ご飯.  I used regular Japanese rice instead of sweet rice this time. As before, I made it in the "Kamado san" かまどさん donabe rice cooker.


North American chestnuts have many creases and when mixed tend to crumble into smaller pieces. I seasoned the rice with a mixture of black sesame seeds and kosher salt "Goma shio" ごま塩.


Since it was Sunday, we had some small dishes (which I do not remember) and the chestnut rice was the ending or "shime" dish. I usually barbecue some kind of meat mostly for sandwiches the next week. This time we cooked pork roast.


Since we were already rather full, we had a few slices of pork with cucumber onion salad with Greek yogurt dressing.


Here are all three items lined up. I was a pretty good combination. 


This is just a composite picture of this year's chestnuts. They are nice large, fresh chestnuts (much better than imported uncooked chestnuts from Europe).


I've finally gotten the hang of peeling these type of chestnuts. I first soak them in cold water for several hours and then boil them for 30 minutes. I take several at a time and start peeling them while they are still hot. The outer skin is easy to peel but the inner skin requires some effort. In any case, I peeled quite few of them in no time.