Showing posts sorted by date for query yogurt. Sort by relevance Show all posts

Saturday, April 6, 2024

Kabocha salad カボチャのサラダ

We regularly get Japanese/Asian groceries from Weee. This time we got a Japanese “Kabocha” かぼちゃ squash. It was larger than usual. I made my usual simmered kabocha and pottage かぼちゃの煮物とポタージュ but some still remained. I thought about tempura but that was too much work for such a small piece. So I decided to make this “kabocha salad”. I did not follow any particular recipe but sort of combined two different recipes. This is curry flavored and turned out to be quite good highlighting the natural sweetness of the kabocha.


This is just a note for myself.

Ingredients:
Kabocha squash, seeds removed, skin shaved off (optional), cut into half inch cubes
Raisins

For the dressing
Greek yogurt
Mayonnaise
Curry powder
Salt and pepper to taste

Directions:
Boil the kabocha in salted water for 5-7 minutes until cooked but not too mushy
Mix the ingredients for the dressing (about the same amount of mayo and yogurt, the amount of curry powder is to your liking)

For an impromptu salad, this was much better than I expected. The natural sweetness of the kabocha was complemented by the curry flavor. The mixture of the yogurt, mayo and kabocha made a nice creamy texture with some tartness. I will make this again.

P.S. Hawk joins us for Hanami 花見!
This year was a bit unusual for the cherry blossoms. The trees bloomed early and the blooms lasted for a long time. Since we have three trees with different bloom timing, we had a very long time to enjoy cherry blossoms or “Hanami”. One afternoon, a hawk joined us for Hanami! We looked out the window and there he was in all his magnificence sitting not ten feet from the window on the railing of the deck. We marveled at the image of such an awesome creature juxtaposed to the delicate loveliness of the cherry blossoms.


Saturday, February 3, 2024

Chestnut, Brown Butter, Sage Muffin 栗の粉とセイジマフィン

This fall we bought a new batch of chestnut flour. It was to replace the previous batch we had been storing in the freezer that had a Best-Use-By (BUB) date of 2015. The new batch came in bulk; 3 bags of flour. Given this “plenitude”, my wife was trying to come up with new dishes to use the chestnut flour. She came across a recipe for “chestnut and sage muffin” at the “Serious eats” site.  This was a perfect recipe to use for 2 reasons: 1) as previously stated we had an abundance of chestnut flour and 2) The sage bush in our herb garden still had nice lush green leaves despite several cold days and snow. The muffin was really good. Nice sage and brown butter flavor and chestnut flour made this muffin very light and moist.


I ask my wife to continue as usual.

Ingredients: (makes 12 small muffins)
Several bunches of sage (with about 5 leaves on each, one of which used in the browned butter the other steeped in the milk).
6 tablespoons unsalted butter
2/3 cup milk
3/4 cup all purpose flour
3/4 cup chestnut flour
1/4 cup sugar
2 teaspoons baking powder
1 teaspoon baking soda
1/2 teaspoon salt
2/3 cup yogurt
1/4 teaspoon vanilla extract


Ingredients X2: (suggested to make larger muffins)
Several bunches of sage (one of which used in the browned butter the other steeped in the milk. The more leaves use the more intense the sage flavor).
12 tablespoons unsalted butter
1 1/3 cup milk
1 1/2 cup all purpose flour
1 1/2 cup chestnut flour
1/2 cup sugar
4 teaspoons baking powder
2 teaspoon baking soda
1  teaspoon salt
1 1/3 cup yogurt
1/2 teaspoon vanilla extract

Directions
1. Preheat oven to 400°F. Combine milk and sage in small saucepan and heat to a bare simmer, then remove from heat and cover. Allow to steep at least 10 minutes, then remove sage, squeezing as much milk as possible from sage before discarding.
2. Place butter and remaining sage in small saucepan and heat over medium until melted and foamy. Allow to cook until liquid butter is golden brown and solids at bottom are deep brown and smell nutty. Transfer to a heatproof container, remove the sage and make sure to scrape out as much of the browned butter solids as possible.
3. Combine all purpose flour, chestnut flour, sugar, baking powder, baking soda and salt in medium mixing bowl. Sift if necessary, or simply whisk together. In separate mixing bowl, combine sage milk, sage butter, yogurt and vanilla and whisk until smooth. Gently fold the wet ingredients into the dry until all streaks of flour are incorporated and batter is fluffy and slightly lumpy. Divide evenly between cups in a 12 cup muffin pan lined with paper cups. Bake 7 minutes, then rotate pan and bake another 3-5 minutes, until a skewer inserted into muffin comes out clean. Be careful not to overbake. Allow to cool in pan slightly before transferring to rack to finish cooling.

These are truly remarkable muffins. They are a combination of unexpected tastes that work extremely well together. The combination of browned butter and sage came through with a pleasing robustness. The chestnut flour added a slightly nutty dimension. The chestnut flour also contributes to the very light and tender texture of the muffin. While these muffins were a bit of surprise flavor-wise they were also a great new discovery. Next time we’ll double the recipe so the muffins are a bit larger.

P.S. In early February, the plum tree in our yard started blooming. It is always amazing and nice to see this when it is still winter and the weather is still cold. It is such a nice early harbinger of hope for the upcoming spring.


Monday, January 22, 2024

Goat Cheese Scallion Muffin ゴートチーズと青葱マフィン

My wife found this recipe for “Muffin with goat cheese and chive” in the Washington Post. Since we are big fans of savory cookies and muffins and we happened to have a log of fresh goat cheese getting older in the refrigerator, my wife decided to make this muffin. The only problem was we did not have chives. So we used the green part of scallions and made it goat cheese scallion muffin. This is a nice muffin with soft and moist center and crunchy outside. Probably we could have used less scallion.


Ingredients(makes 12 muffins)
1 1/2 cups (200 grams) whole-wheat pastry flour
2 teaspoons baking powder
1 teaspoon onion powder
1/2 teaspoon baking soda
1/8 teaspoon cayenne pepper
1/4 teaspoon Kosher salt
1/3 cup (80 milliliters) mild-tasting olive oil, plus more for brushing the pan
2/3 cup (180 milliliters) buttermilk
1/2 cup (113 grams) plain Greek yogurt (homemade)
1 large egg
1 teaspoon honey
4 ounces (115 grams) fresh goat cheese (chevre), crumbled
1/4 cup green part of fresh scallions, finely chopped (original recipe calls for 1/2 cup or 22 grams of finely chopped fresh chives)

Directions:
Position a rack in the middle of the oven and preheat to 375 degrees. Brush a nonstick muffin tin with olive oil.

In a medium bowl, whisk together the dry ingredients; the flour, baking powder, onion powder, baking soda, scallions, pepper and salt until combined.

In a large bowl whisk together the wet ingredients; goat cheese, buttermilk, yogurt, oil, egg and honey until everything is mixed and creamy. Add the flour mixture to the milk mixture and stir until just combined.  

Using a 1/4-cup (60-milliliter) measure, divide the batter among the muffin tin cups; each should be filled about three-quarters of the way.

Bake for 18 to 20 minutes, or until the tops are golden brown and a toothpick or cake tester inserted into the center comes out clean.

Transfer to a wire rack and let cool for 5 to 10 minutes, then run a small offset spatula or butter knife around the perimeter of each muffin before removing them from the tin. Serve warm.
The muffin had a nice scallion flavor which became better and more mellow with time. We are not sure if using chives may have been a bit gentler flavor. In any case, we used shy of 1/4 cup which can be reduced further, although we do not mind the scallion flavor at all. The texture was extremely tender. This was a hardy muffin with a nice robust flavor. Great with eggs for breakfast of with soup for lunch.

Monday, November 27, 2023

Sweet Potato and Tuna Salad サツマイモとツナのサラダ

This is dish is on the theme of using up a can of tuna. We had one more can of albacore tuna which we bought during the Covid protein shortage, aging in the pantry. The idea for this dish is very similar to the tuna and daikon salad ツナと大根のサラダ but I replaced the daikon with sweet potato. Again mayo saved the canned tuna. This is also a good dish for a small appetizer.


The recipe came from e-recipe.

Ingredients:
1 small Japanese “Satsuma-imo” sweet potato, microwaved for 3-4 minutes until soft in a silicon container, peeled and mashed leaving some small chunks
1 can of tuna
1 tbs mayonnaise
1 tbs Greek yogurt (strained home-made yogurt my wife made)
salt and pepper to taste
chopped parsley

Directions:
Add the tuna and mashed sweet potato in a bowl, add the yogurt and mayo and mix
Season with salt and pepper and mix in chopped parsley.

This is another good dish using canned tuna. It is quite different from the tuna and daikon salad I posted before. The sweet potato has nice soft texture and sweet taste which went very well with tuna containing dressing.

Thursday, November 9, 2023

Broccoli Cups ブロッコリーカップ

When we order broccoli using our grocery home delivery service, we usually get three giant heads (see picture below). It is not possible to consume everything before it spoils so I separate it into florets, steam them and freeze them in Ziploc bags in small batches for future use.


Recently we saw 
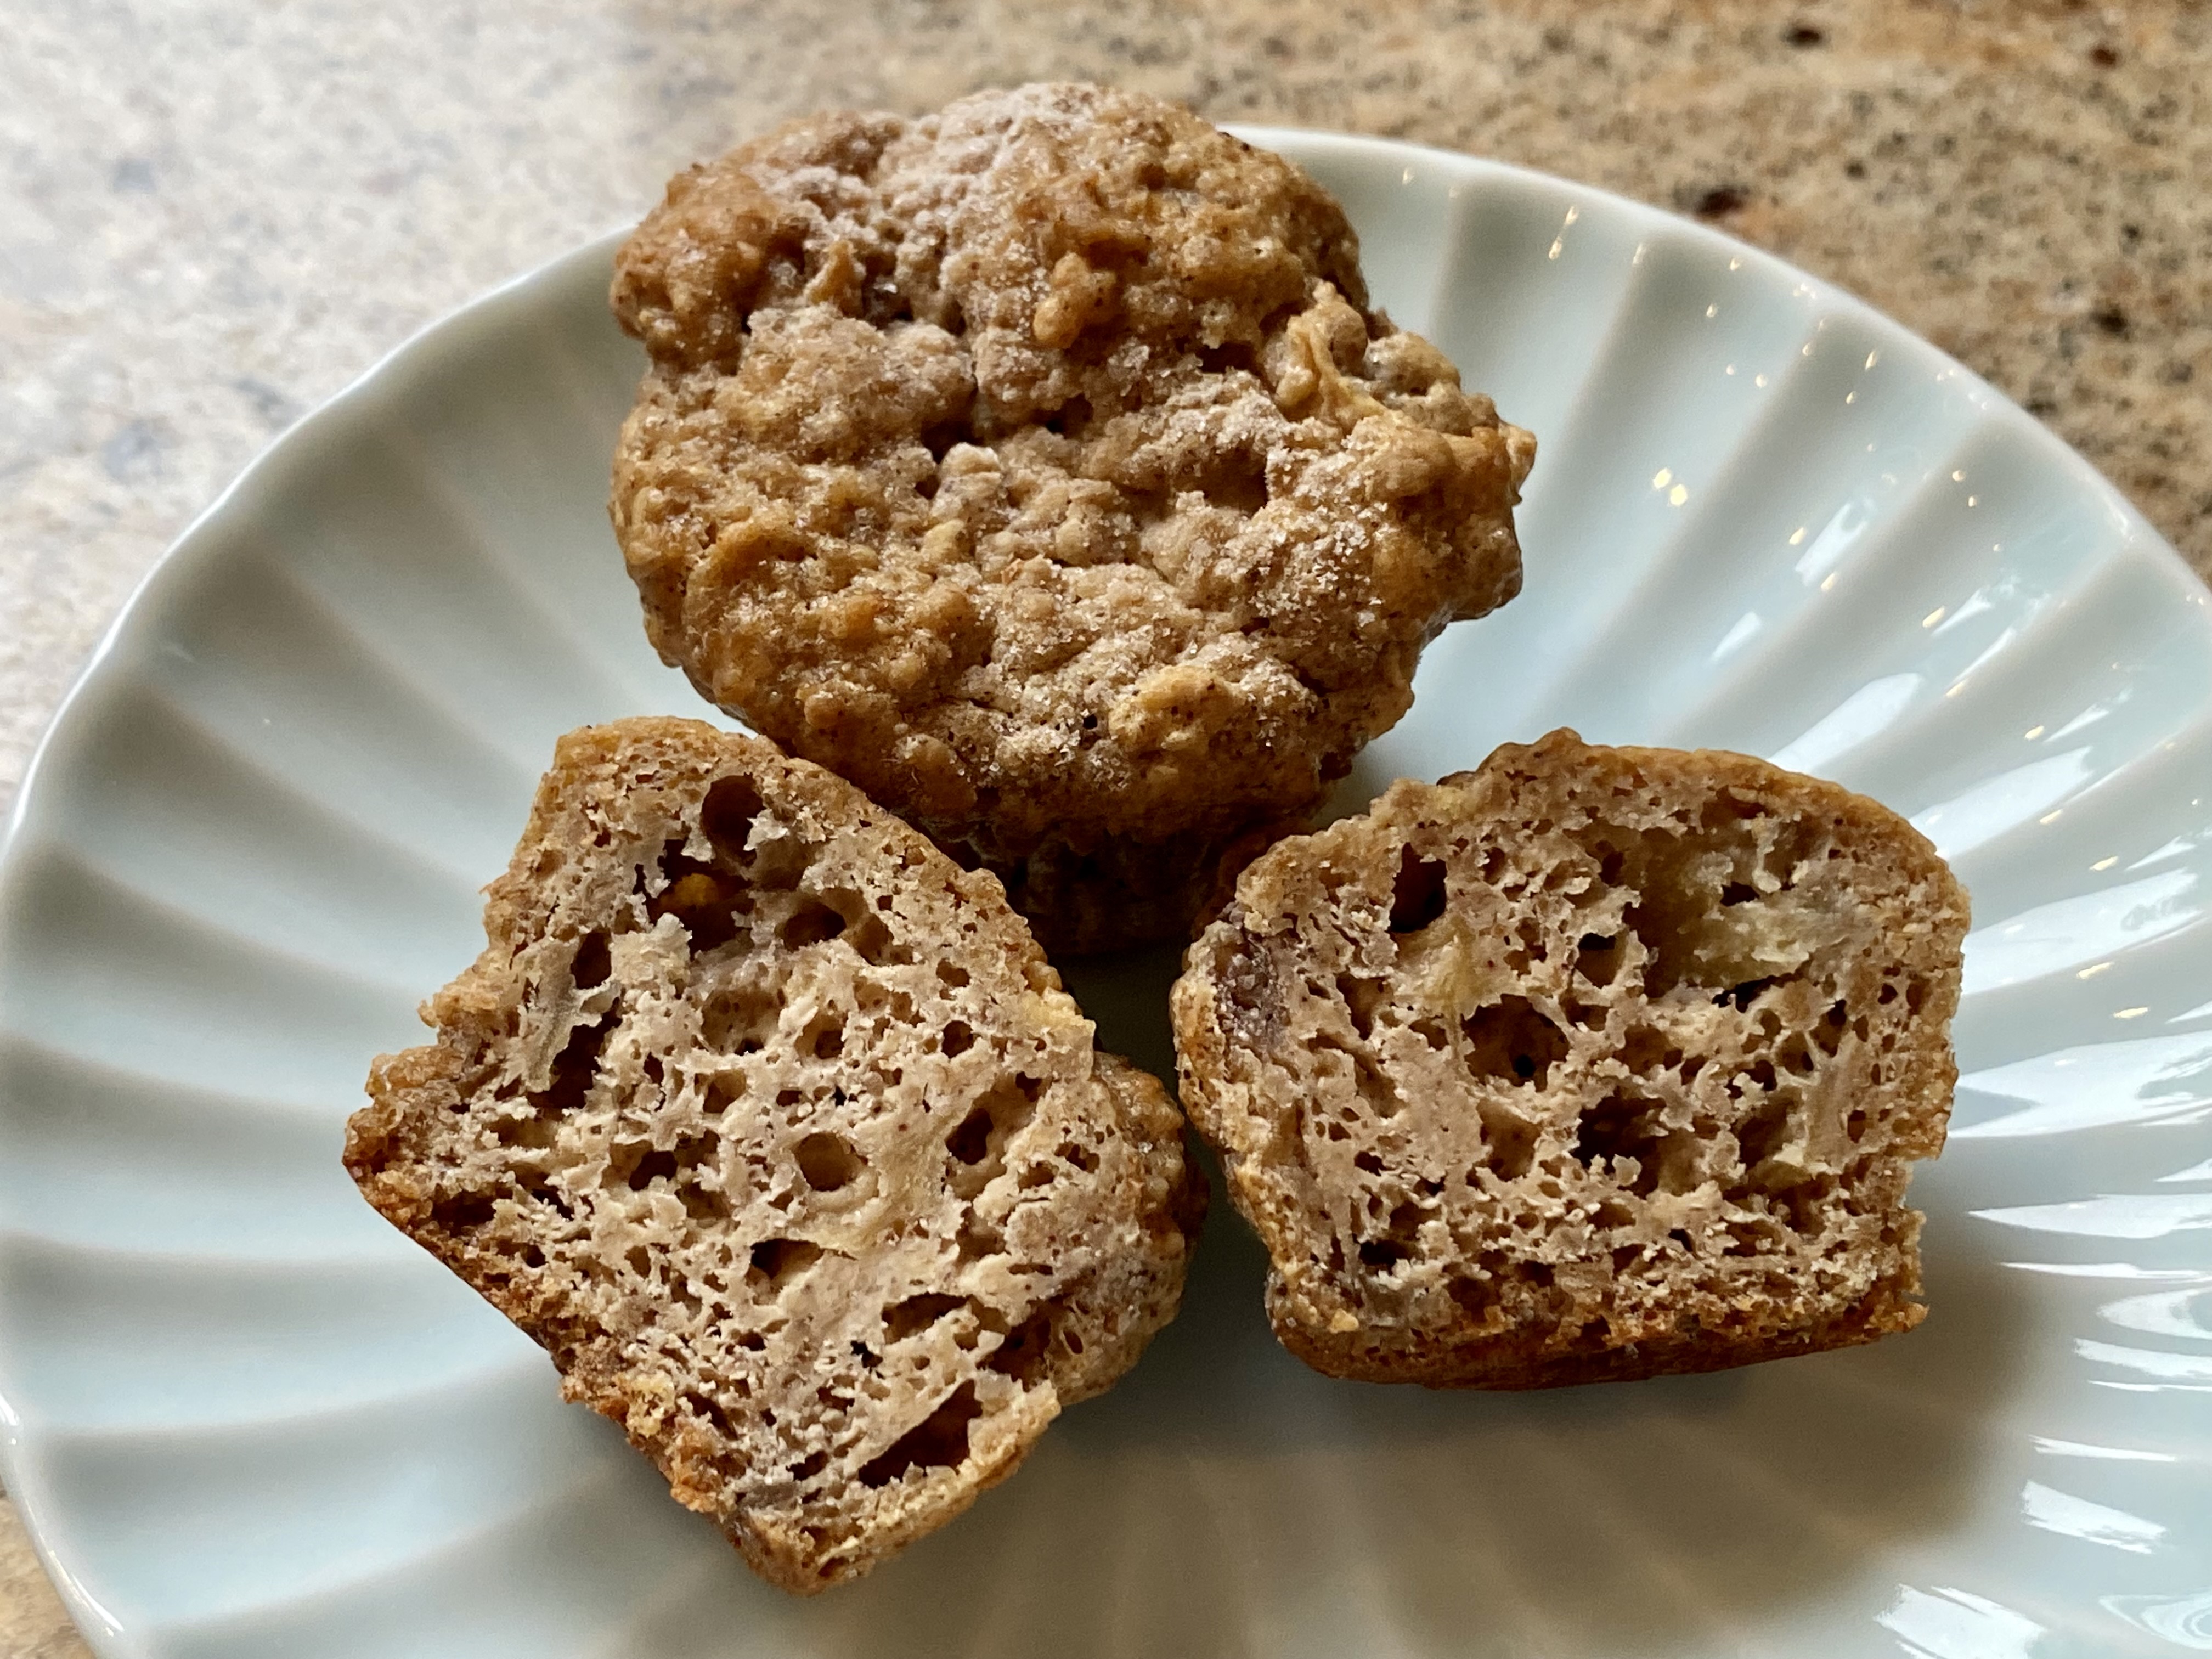
an interesting recipe on YouTube which uses a large amount of broccoli. Although the original recipe uses fresh broccoli, we figured blanched and frozen broccoli should work. As usual, we made substantial changes mostly due to the ingredients available. We really like the idea of making broccoli cups. We could come up with different kinds of stuffings. In any case, this was our first try.  The stuffing was a bit crumbly.


The broccoli cups retained their shape well.


Ingredients: (made 9)
For the broccoli cup
4 cup finely chopped broccoli (we used blanched and frozen, separated each frozen florets and chopped up in a small batches using the food processor fitted with cutting blade. If using fresh broccoli, the original recipe grated the broccoli using a box grater) 
2-3 eggs (2 eggs may have been better, excess egg pooled on the bottom of the cup when baked but we did not use 2 chopped boiled eggs in the stuffing which was in the original recipe. So, it sort of worked out)
1/2 cup grated Parmesan cheese (optional)

For stuffing
1 cup finely chopped onion
2 Jalapeño peppers, seeded and veined, finely chopped (or green pepper)
3 cloves of garlic, finely chopped
2 small carrots, peeled and cut into small dice
1/2 cup fresh shiitake mushroom stems, finely chopped (optional, since we had this. First tear length wise and then chop)
1-2 tbs olive oil
1 package feta cheese, crumbled
1/2 cup each grated smoked Gouda and Cheddar cheese

For the sauce (a type of aurora sauce)
Greek yogurt and Mayonnaise equal amount
Ketchup
Parsley and chives, chopped

Directions:For broccoli cups
Mix the broccoli, eggs, and Parmesan cheese
Divide the broccoli mixture in 12 equal portions and place in a muffin tin lined with  paper muffin cups (#1)
Using fingers or spoon, spread the mixture to make a cup (#2)
Bake at 350F for 15 minutes (#3, note the egg pooled on the bottom and cooked)
For stuffing
Sauté the stuffing ingredients except for cheeses in the olive oil for 2-3 minutes and turned down the heat with the lid one for 7 more minutes. Season with salt and pepper
Let it cool down a bit and mixed in the feta cheese

Final assembly
Place the stuffing in the baked broccoli cups (#4)
Top each with the grated cheeses (#5)
Bake 15-20 minutes at 350F (#6)

This is a surprisingly good dish. Next day, we reheated this in the toaster oven and had it as a lunch. Compared to freshly baked, the broccoli flavor it less intense and tasted better. stuffing tended to crumble but tasted great especially the umami the shiitake imparted. We can play with the stuffings to our liking. This is a great recipe to use a large amount of broccoli.

Sunday, October 22, 2023

Tuna and Daikon salad ツナ大根

We found two cans of albacore tuna in our pantry. We are not a fan of canned tuna and I am not sure why we have it; something to do with the start of COVID and the various food shortages, particularly of protein that occurred at that time. In any case, I saw a recipe on YouTube which combined daikon 大根 and canned tuna ツナ缶. I was not sure how this would work but I had just got two whole daikon from Weee. So I had to try this recipe. We first tasted the tuna as is. It was very dry and not great tasting but my wife said the only way to save this tuna was with the addition of mayonnaise.  This made me think that  this recipe could work after all. I slightly deviated from the original recipe.


Ingredients:
1 can of tuna (I used albacore tuna in water but the original recipe used tuna in oil)
1/4 daikon, peeled, sliced and julienned
salt

For dressing
2 tbs mayonnaise
2 tbs Greek yogurt
1-2 tsp soy sauce or x4 concentrated Japanese noodle sauce
1/4 tsp yuzu kosho (optional)
1/2 tsp “aonori” dried sea weed flakes (optional)

Directions:
Add salt to the daikon, knead and let it stand for 10 minutes
Squeeze out as much moisture as possible
Add the mixture of the mayo and Greek yogurt
Add the soy sauce and taste. If needed add more.
Add aonori and yuzu kosho if using..

This is a surprisingly good dish. If you are not told you couldn’t guess it has daikon in it. Even the tuna added some flavor helped by the dressing. This is definitely a very easy dish to make as well. Perfect for a drinking snack or a small side dish.

Wednesday, July 26, 2023

Apricot muffin アプリコットマフィン

Although we have dried apricots in the pantry, we almost never get fresh apricots. Somehow one day, we got a bag of apricots. We let them ripen on the counter and I processed them (meaning removed the skin and stone) when the apricots were slightly soft to the touch. The apricots appeared ripened and they had a good flavor but the texture was really mush and not pleasant to eat. So I asked my wife if she could use them to make muffins. She obliged and made this apricot muffin. This is a very moist and delicate muffin but not much of apricot flavor….at least we did not waste the fresh apricots we got.


As usual, I will ask my wife to take over. And as usual she took the recipe as “advisory”. For example, the recipe called for 1 cup greek yogurt. That was not readily available but ricotta cheese was so she used the cheese instead.  Also the recipe called for milk and dried apricots. But we were using fresh apricots so she substituted the apricot puree for the milk and dried fruit. But somehow it all still worked!

Ingredients:
2 cups all-purpose flour
¾ cup granulated sugar
1 tsp. baking soda
1/2 tsp. salt
1 egg
1 cup ricotta cheese
½ cup melted butter
1/4 cup pureed apricots

Directions
Preheat oven to 350°F. Puree the apricots and set aside. In a large bowl, mix the dry ingredients together.  Mix the ricotta cheese, melted butter, egg and apricot puree in a separate bowl just until combined. Pour into dry ingredients and mix just until combined. Fill cupcake liners 2/3 of the way full with batter (an ice cream scoop works perfectly for this). Bake for 20-24 minutes, or until tops are lightly browned and a toothpick inserted into the center comes out clean.


These muffins were very good. The texture was surprisingly soft and tender. (Due to the use of ricotta cheese, perhaps?) The flavor was slightly sweet but the apricot was basically not detectable. Nonetheless these muffins were quite a pleasure to have with coffee for breakfast.

Monday, July 17, 2023

New Divided Plate and 9 Otoshi Appetizers 9つ仕切り皿にのせたお通し9種類

This is on the theme of multiple small “otoshi” appetizers. Previously we used a 5 segmented plate to serve 5 appetizers. A few days ago, I found a 9 segmented square plate available on Amazon which was reasonably priced so I got two. I thought it would be hard coming up with 9 appetizers but I managed it with 8 dishes I made. The ninth dish was an exception since I didn’t make it. It was the fried shrimp head which came from Tako Grill when we had our sashimi/sushi take-out. (Shrimp head is a by-product of “botan-ebi” 牡丹海老 sashimi/sushi). In any case, I was surprised that once I started thinking otoshi I was on a roll and could have served two or three more appetizers if I wanted to. This was a nice start of the evening but even very small dishes are filling for us and we ended up with a  “shime” 〆ending dish after this.


In the 1st row, left, is a sugar snap in salt broth スナップ豌豆の塩びたし. We used to be able to get decent sugar snaps from our regular grocery store but recently, we have had to go to gourmet grocery stores to get decent ones This was crunchy, sweet soaked in salt dashi broth.


In the 1st row, center, are cucumber onion salad and stir fried shirataki, jalapeño pepper and enoki mushroom.


In the 1st row, right, is the cheese curd my wife made  but instead of jalapeño pepper, she added “Yuzukosho” 柚子胡椒, soy sauce and cream. I added a dab of yuzukosho on the side to provide an added “schmear” of yuzukosho flavor if desired.


Tsukune on a slice of lotus root 蓮根つくね.


Uni-shuto” ウニ酒盗 from Maruhide. As I stated before this is the best uni aside from fresh uni. I served it with cucumber and perilla leaves.


I refried the shrimp head kara-age which was part of take-out from Tako Grill a few days ago. Shrimp head has a good amount of meat and is very crunchy but you have to be careful how you eat the prickly legs so as to not injure your mouth.


Recently, we discovered that Whole Foods carries fresh quail eggs. We really like boiled quail eggs. Although we can get canned boiled quail eggs, boiled eggs prepared from fresh quail eggs are much much better. I served it with marinara sauce, basil and sprinkle of salt.


Blanched asparagus with sesame mayonnaise. The dressing is a mixture of mayo, Japanese sesame paste or nerigoma 練りごま and soy sauce.


Salmon salad. My usual. The dressing is mixture of mayo, Greek yogurt and Dijon mustard.


We really like our new plates. If I serve 9 appetizers for two of us in small bowls, we have to wash a total of 18 bowls but here we had to wash only two plates. We really like the many small dishes we had here; true Izakaya-style.

Monday, July 3, 2023

Matcha Almond Pancakes, 抹茶アーモンドパンケーキ

We like pancakes as a breakfast. Our all time favorite is buttermilk blueberry pancake when blueberries are in season. Another one we like is a green pancakes made with spinach and mint. We decided that the flavor comes from the mint but not the spinach so we modified the recipe to use just mint. We like the flavors as well as the striking “verdant”  green color. Recently, we saw a recipe for “matcha almond pancakes”. We both thought ‘we have to make this’. So here they are. A stack of matcha almond pancakes


They were quite good. We had this as a breakfast sitting outside on the patio with a cup of cappuccino and mango yogurt made with home-made yogurt with pureed and small cubes of champagne mango mixed in. These pancakes reminded us of the “Matcha green tea cake” we made a few times before.


Ingredients: (The original recipe indicated it makes 8 pancakes but we doubled the recipe and got only 7 pancakes)

1/2 cup plus 1 tablespoon (68 grams) whole-wheat pastry flour or all-purpose flour
1/2 cup (60 grams) almond flour
2 teaspoons baking powder
1/4 teaspoon fine salt
1 tablespoon matcha
1 cup (240 milliliters) whole, reduced-fat or plant-based milk
1 large egg
1 tablespoon neutral oil, such as avocado or canola
2 teaspoons vanilla extract
Maple syrup, for serving

Directions:
In a medium bowl, thoroughly whisk together the pastry flour, almond flour, baking powder and salt until combined. Sift the matcha into the mixture and whisk again to thoroughly combine.

In another medium bowl, whisk together the milk, egg, oil and vanilla until combined. Add the milk mixture to the flour mixture and stir just to combine. Do not overmix; it’s okay if there are some small lumps. Let the batter hydrate for 5 to 10 minutes. (The batter will initially appear quite watery but over the 5 to 10 minutes the flours thoroughly hydrate and it becomes thicker. Nonetheless it was still runnier than our usual pancake batters.)

Heat a large nonstick skillet or griddle over medium-high heat until hot. (To test, drop a dime-size amount of batter into the skillet and if it starts to bubble and brown right away, the pan is ready.)

Working in batches as necessary ladle the batter onto the skillet. Cook until bubbles form on top and the underside is nicely browned, about 2 minutes, then flip and cook until browned on the other side, and cooked through, 2 minutes more. Adjust the heat as necessary to prevent the pancakes from browning too fast before they’re cooked through. Transfer the pancakes to a plate and repeat with the remaining batter.

Serve with maple syrup.

These pancakes were quite good but not great. They were fairly thin in texture. The macha flavor really came through though. They reminded us of the macha cake we made previously. Next time we want a macha pancake we will try just adding some macha to our favorite buttermilk pancake recipe.

Addendum:Culinary grade vs. drinking/sipping matcha:


We have taste tested “Culinary” and “Drinking” grade matcha. Since we are not connoisseurs of matcha, we could not tell the difference. We bought the large can of “culinary matcha” from “Matcha Love” which is run by a Japanese tea company called “Ito-en” 伊藤園. For this type of cooking, this is quite good and reasonably priced.

Tuesday, June 27, 2023

Mini Apple Spiced Muffins アップルシナモンミニマフィン

We occasionally get a free cook booklets from Giant grocery store when we receive a grocery delivery. One of these include small “bites” type recipes. Since my wife is a devotee of “small bites” dishes, she decided to make one of these recipes. This is a kind of apple-cinnamon mini-muffin. This is very nice as a part of breakfast with nice classic apple-cinnamon flavors.


Ingredients: (makes about 24 to 30 mini-muffins)
1 apple, cored, skinned and cut into small pieces
1 cup bran cereal (we used Kellogg Special k,  since that was only cereal we had)
3/4 cup AP flour
1/4 cup brown sugar
1 tps baking soda
3 tbs unsalted butter, melted
1 large egg
1 cup Greek yogurt (we used home-made and strained kind)
1 tsp ground cinnamon
1tsp vanilla extract

Directions:
Preheat the oven to 350F
Place the cereal in food processor and grind it to a fine texture. In a bowl, combine the cereal, flour, baking soda, and sugar.
In a separate bowl, mix the egg, butter, yogurt, cinnamon and vanilla.
Mix the wet and dry ingredients (do not over mix)
Fold in the apple
Add the batter in a greased mini muffin pan and bake 13-15 minutes.

For a freebee cookbook recipe, this is really good. My wife further expanded her repertoires. This is just the right size if you want a little added-something with your usual breakfast repertoire.

Friday, May 19, 2023

Cookie Butter Swirls クッキーバターバンズ

Since we got Brod and Taylor’s folding proofer for bread, we are on their mailing list which includes new products and recipes. One of these had a recipe for a lemon and poppy seed buns. The appearance of the buns was very similar to the Swedish cardamon buns that my wife baked sometime ago. So, I drew my wife’s attention to this recipe. She was not crazy about the lemon poppy seed filling. She immediately thought of using the left-over “cookie butter” she made. (First she had excess chocolate covered cookies to use up. Now she had excess chocolate covered cookie butter to use up.) So instead of using the lemon poppy seed filling called for in the recipe, she decided to use the excess cookie butter she had as the filling. She then used the same technique of forming the buns that she used for the Swedish cardamon buns. The result was this elegant looking and good tasting sweet buns/swirls.


Ingredients (makes 12 buns):
Dough
120g (½ cup) Milk (my wife used 1/4 cups evaporated milk, since she had it, and 1/4 cup regular milk)
120g (½ cup) Yogurt, plain unsweetened
2 Eggs (one whole egg + an egg yolk for the dough and the egg white for an egg wash on the final buns.)
45g (3 tbsp + 2 tsp) Sugar
6g (2 tsp) Instant yeast
85g (6 tbsp) Butter, softened
420g (3 ½ cup) All-purpose flour
5g (1 tsp) Fine salt

Filling
370 g Cookie butter (This used up all the available cookie butter)

Glaze
The egg white from the separated egg above.
Sugar

Directions:
Set up the proofer
Set the proofer to 78°F (25°C) and put the water tray in the middle of the warming plate. Pour ¼ cup (60 ml) of water into the tray and place the rack on top of the tray.

Mix the dough:
Using a stand mixer fitted with a dough hook, combine the flour, yeast, sugar and salt in the bowl of the mixer. In a separate bowl, mix the milk, yogurt, and egg, until well combined. Add the wet mixture to the dry. Add the butter. Mix on low speed for 2 to 3 minutes until no dry remains and the butter in incorporated. Turn to medium speed and mix for 7 to 10 minutes until the ingredients form a smooth elastic dough.

1st fermentation: Transfer the dough to a greased bowl and place in the Folding Proofer for 1 to 1 ½ hours until doubled in size.

Roll the dough:
Turn the dough out onto a floured surface. Roll into a rectangle measuring about 10.5" x 16" (27 x 40cm).
With the dough facing you lengthwise, spread filling over the entire surface of the dough.
Spread the cookie butter in a thin layer (#1)
Fold the dough into thirds like a letter. To do so, take the left side and fold it in toward the center. Take the right third of the dough and fold in to the center on top of the fold just made.
Refrigerate it for about 15 minutes which will make it easier to cut and shape.
Roll the dough out again to a 16.5" x 8.5" (42 x 22cm) rectangle (#2). Do the letter fold again and re-roll it out to 16.5” x 8.5” again.
Line two sheet pans with parchment paper. Set aside.
Cut the dough into 12 strips. To do this, mark the dough with 3 lines making 4 section. Then mark each of these 4 sections with 2 lines making a total of 12 sections. Then go back and cut the entire length of the dough where marked (#2). Take one dough strip and twist each end in opposite directions until the entire strip is twisted (#3).
Starting at one end coil the strip to form a circular bun, tucking the tail underneath (#4).
Place on the prepared pan. Repeat until all 12 buns are shaped and placed 6 on each of the 2 trays (#4). (The buns are placed 6 to a tray and each tray is cooked individually. This allows each bun to receive even heat and expand without touching another bun).

Final proof: The cookie sheets do not fit in the proofer. Cover it with a plastic wrap, and place the trays on the towel so they are not resting on the cold table top. Cover with another towel. Allow the buns to rise for about 1 hour.

Glaze the surface: First paint on the egg white then sprinkle on the sugar
Near the end of the proofing time preheat the oven to 375° (190°C).
Bake: Bake the buns at 375°F (190°C) for 18-20 minutes (#6).


My wife is really getting good at forming these swirl/buns. Her idea of using the cookie butter (this is made of chocolate cover cookies) really worked. The buns were sweet but not too sweet with a subtle chocolate flavor and slightly crunchy surface and soft inside.

Thursday, March 9, 2023

Creamy Tomato Soup クリーミィトマトスープ

I get Campari tomatoes almost every week and prepare them by removing the skin. Then I keep them in the refrigerator which is very convenient to make a quick cucumber tomato salad or just add as a side. Often, we can’t use up all the tomatoes and my default is to make them into marinara sauce. This time since we already had a batch of marinara sauce which had been re-heated several times, I decided to make the excess tomatoes into a creamy tomato soup. I served the soup with macaroni salad (for the salad dressing I used mayo, Greek yogurt, Dijon mustard) and couscous salad, Campari tomato and a slice of baguette I made few days ago. I made this bread using biga made of rye flour and buttermilk (My wife prepared this for me). As a result, this baguette had a slightly different flavor which we really liked.


Ingredients:
5 Campari tomatoes, skinned, cut into small chunks
1 small onion, finely diced
1 small stalk of celery, finely diced
2 garlic cloves, finely chopped
1 tsp tomato paste
1 cup water/chicken broth (I used whey from the cheese curd my wife made recently)
1 tsp butter
1 tsp olive oil
1 tsp sodium bicarbonate (baking soda) (to reduce the acidity of the soup, optional*)
1/2 c heavy cream

*Digression alert: If tomato sauce or soup is too acidic, the most common suggestion is to add a small amount of sugar. This may mask the acidic taste but does not reduce the acidity (or does not raise pH). Adding sodium bicarbonate does reduce the acidity. My understanding is that tomato’s acidity mainly come from oxalic acid. So, the addition of bi-carbonate will produce carbon dioxide (CO2 gas), water (H20) and sodium carbonate (Na2CO3). Reportedly, the resulting sodium carbonate may give rise to a “bitter” and “soapy” taste but I have not experienced this. I have found that adding a small amount of sodium bicarbonate definitely makes these tomato containing dishes less acidic without negative effects in taste. The sodium ion from sodium carbonate in water may add some “saltiness” so the salt seasoning may have to be adjusted. It should be noted that when you add bicarbonate, the soup bubbles up for several minutes.

Directions:
Add the olive oil in a pan on medium heat. Add the butter and sauté the onion, celery, and garlic for a few minutes. Set the vegetables aside and add the tomato paste and sauté for 30 seconds (I use the type of tomato paste that comes in a tube, Cento tomato paste. It is much easier to use tomato paste from a tube when a small amount is needed compared to opening a whole can). Add the tomato and the liquid (I used whey). Cook 10-15 minutes until all the vegetables are cooked and soft. Using an immersion blender, make smooth soup. Season with salt and pepper.

(Optional) This process is to reduce the acidity. While it is simmering, add the sodium bicarbonate and mix (lots of bubbles come out, keep stirring for serval minutes until the bubbles subside.) I tasted the soup at this stage and it was very good without cream.

Since I was not planning to serve this immediately, I quickly chilled the soup by putting the pan in a large bowl with running water while stirring. Then I put it in sealable container in the refrigerator.


The next day, I served this for lunch. I warmed up the soup and added the cream. With an the addition of the cream, this became quite a luxurious soup.

Sunday, January 1, 2023

Happy New Year 2023 新年おめでとう御座います2023

It is morning of the first day of 2023. The past year was marked by many events; not the least of which is the still lingering COVID-19. In any case, here is the “Kagami-mochi” 鏡餅 New Year’s decoration. It is  accompanied by various rabbit figurines because this is the year of the rabbit according to the Chinese zodiac. We usually place the new year’s decoration in the tokonoma 床間 alcove  of  our “tearoom” in the basement but this year, we decided to place it in the room where we spend most of our time to maximize our enjoyment of the collection.


As usual, the highlight of our new year is the Sushi taro osechi box 寿司太郎お節箱. We drove down to Dupont circle and picked up the Osechi box and hand-cut soba noodles “toshikoshi soba” 年越しそば (which we usually enjoy the 2nd day of the new year). For many years, we traditionally have our regular breakfast of Cafe Latte with yogurt and breads and have the New Year’s “Ozouni” お雑煮 soup for lunch. I also served a few items I made. As always, we wheeled out the real Japanese laquer ware bowls my mother gave us a long time ago.


As usual, we encased the mochi in a fried tofu pouch or “abura-age” 油揚げ (in an effort to make the eating experience a bit more manageable). It is at the bottom of the bowl so you can’t see it in the picture. I cut the carrot into a flower-shape and the daikon into a ginko leaf-shape. I also added burdock root ごぼう (the white rectangular object in the picture), shiitake mushroom, shrimp, flower-shape gluten cakes or “fu” 麩, snow pea, scallion and yuzu zest (frozen). I made the broth from dashi packs, a bit of mirin and x4 Japanese noodle sauce.


The accompanying dishes (from left to right) are all listed in “Norio’s New year dishes”. They are: chicken squares with gorgonzola cheese and dried fig, salmon kelp roll 鮭の昆布巻き, datemaki omelet 伊達巻, and salmon Russian marinade. (This year I made some modifications to the marinade by adding Dijon mustard and dill). Of course it wouldn’t be an adequate celebration of the first day of the New Year without at least a token glass of sake. This year it was our house favorite Tengumai Daiginjo 天狗舞大吟醸. The soup and these items were pretty good if I do say so myself.


Although we did not tap into the osechi box, here is a preview of what to expect when we eagerly dive in this evening. The picture below shows the first tier. Although many goodies are hidden below the items we can see, we can spot our favorites like “karasumi” 唐墨,  “mushi uni” 蒸し雲丹 and “Kazunoko” 数の子.


The second tier also has our favorites such as “Ankimo tofu”, “Ikura” and duck breast.


We are repeating ourselves but it is so wonderful that we are able to get this incredible osechi from Sushi Taro. We will be enjoying these delicacies over the next few days.

Friday, November 4, 2022

Salmon-Spinach Tortas 鮭とほうれん草のケーキ

My wife is into making small appetizers. When she saw the recipe called “Tuna-Spinach tortas” at Washington Post on-line, it was a “must-do”. Although she liked the idea of a small tortas, canned tuna does not grace our pantry…ever.  (Instead, we keep frozen sashimi-grade tuna in the freezer). We also like salmon and almost every other week we get a half-salmon filet (A special available from the local grocery store only through home delivery). I scale it and using the main portion, make several fillet portions. I then separate the belly portion for an appetizer and use the resulting small irregular trimmings including the tail portion of the filet to make salmon cakes. After we cook the fillets (usually cooked in a frying pan to make crispy skin), I make salmon salad from the leftover portions.

This time my wife used the salmon salad I made from the left over salmon fillets instead of the canned tuna called for in the original recipe. The salmon salad was a bit different from what I usually make since we did not have enough cooked salmon fillets so I oil-poached the irregular bits of fresh salmon to make about 5oz of salmon. The oil poached salmon was much softer and more moist than our usual cooked salmon.  In addition, we did not have home-made Greek yogurt. So I used all mayo instead of mixture of mayo and Greek yogurt.

The tortas came out very nice and the salmon filling was moist but made a nice crispy shell. Although we cannot tell how the original canned tuna version would have been, this is pretty good.


As you can see in the picture below, the top portion is mixture of spinach, tomato and egg. The bottom is mixture of cheese and the salmon salad.


Ingredients: (12 cupcake sized servings)
2 bags of baby spinach cooked and drained
5 oz. Cooked salmon made into salmon salad (end amount about double the amount of salmon)
1/4 cup Parmigiana-Reggiano cheese grated
1/4 cup smoked gouda grated
3/4 cup plain panko (bread crumbs)
4 large eggs
4 Campari tomatoes
1 teaspoon kosher or sea salt
1/8 to 1/4 cayenne pepper

Directions:
Preheat the oven to 400 degrees. Grease the wells of the muffin pan with cooking oil spray. Combine the salmon salad, cheeses and panko in a mixing bowl. Divide it equally among the muffin pan wells, packing it in firmly. (I used second to largest ice cream scoop).

Lightly beat the eggs in a bowl. Coarsely chop the tomatoes (to taste), then add to the eggs, along with the salt and pepper. Add the spinach to the bowl. Stir until well incorporated, then spoon equal amounts of the mixture on top of each tuna portion in the individual muffin pan wells (#1). Bake for 15 to 20 minutes, until set and lightly browned (#2). Let cool for a few minutes before carefully inverting the tortas on individual plates. (#3 & #4)


This makes a great little dish that can be used as an appetizer or even part of a lunch. We were amazed at how it came out. Somehow the panko combined with the egg mixture makes a nice crisp crust on the bottom so the salmon salad seems like it is a pie filling. The salmon salad itself made a great filling. It was moist but held together. The flavors of the celery, onion and mayo used in the salad fused beautifully. The topping added a fresh note of tomato which went very well with the salmon filling. Overall this is an amazing little torta. 

Thursday, October 20, 2022

Blueberry puree and pecan muffin ブルーベリーピュレー、ピーカンマフィン

This is another variation on the theme of blueberry muffins. When we got less than perfect (in terms of the shape/consistency and sourness) blueberries, my wife slowly cooked and then pureed them using the immersion blender. You could add sugar and the puree worked well when added to our morning yogurt.  My wife tried using blueberry puree in muffins and found that it really added a blueberry flavor in conjunction with the whole blueberries

At one point she found the whole blueberries were gone but she had more puree than she could use in the morning yogurt. She didn’t want the puree to go bad so she decided to made a blueberry muffin “sans” the whole blueberry but just using the leftover puree as the liquid in the batter. She made this blueberry muffin with the puree as the blueberry “representative” and the addition of pecans to see how it works.  As you can see below, the entire muffin turned sort-of purple.


Ingredients
1 cup toasted pecans).
2 ½ cups all-purpose flour
2 ½ teaspoons baking powder
1 teaspoon kosher salt
1 cup granulated sugar
2 eggs room temperature
4 tablespoons unsalted butter melted and cooled slightly
¼ cup vegetable oil
1 cup combination of buttermilk and blueberry puree (i.e. however much puree is available combined with buttermilk to make 1 cup) room temperature
1 ½ teaspoons vanilla extract
(Optional) finely grated zest of 1 lemon. We did not use this.

Directions:
To make the blueberry puree, bring 1 cup of blueberries to a very low simmer in a small saucepan. Cook until the berries have broken down. Puree using an immersion blended. Cool to room temperature.

Whisk the dry ingredients (flour through salt) in a large bowl. Whisk 1 cup sugar and eggs in medium bowl until thick and homogeneous. Slowly whisk in the butter and oil until combined. Whisk in buttermilk/blueberry puree, lemon zest (if using) and vanilla until combined. Fold wet mixture into flour mixture until just moistened (lumpy is fine). If the batter seems loose, let it mellow for 5 minutes, and it will thicken up (picture below).


Divide among 12 greased muffin cups (batter should completely fill cups) (picture below).


Bake at 425F until tops are golden and just firm, 17 to 19 minutes (picture below).  Cool in muffin tins for 5 minutes, then transfer to a wire rack and cool 5 minutes before serving.


This is not bad but blueberry flavor was not very strong. The amount of the puree you put in may be something to do with it but in it’s own right, this is a good muffin.


Saturday, October 8, 2022

Cucumber aspic 胡瓜のゼリー

This is the second dish we made using the large American cucumbers we got through grocery home delivery by mistake. Since my wife is into anything “aspic”, this was “the dish” for her. It turned out to be remarkably good. For the picture I added slices of Japanese cucumber as a topping garnish and made an instant dill sauce. My wife later made a different sauce for this dish which is based on dressing for cucumber salad. and it worked well. The cucumber flavor of the aspic was very subtle. Most of the cucumber flavor seems to have come from the garnish of Japanese cucumbers but the aspic had a nice texture and fairly complex flavors.


This is based on the recipe on cooks.com.

Ingredients:
2 large American cucumbers, peeled and seeded, grated (I used a Japanese grater to get a fine grated texture)
1/2 c. cold water (We felt that plain water brings nothing to the “show” so we used lightly sweetened cold mint/black tea that my wife makes for the summer months because it was available. Chicken stock would probably work too).
1/2 c. boiling water
2 tbsp. Knox gelatin
1 tsp. grated onion (we used Vidalia onion)
2 1/2 tsp. salt
1 tsp. sugar
2 tbsp. vinegar (we used sushi vinegar)
2 tbsp. lemon juice
Dash of Tabasco sauce (we used Sriracha)

For sauce
Version 1
1tbs Greek yogurt
1tbs sour cream
1 tsp lemon juice
1tbs chopped dill

Version 21/4 cup sour cream
1/4 cup Greek yogurt
1/4 cup Mayonnaise
2 Tbs. sushi vinegar
1 Tbs. Worcestershire sauce
1/4 tsp. sugar
1/2 tsp. salt
1tbs chopped dill

Directions:
Bloom the gelatin by soaking it in the cold water for 5 minutes. Then add the boiling water, stir until thoroughly dissolved, then add all the other ingredients. Put into molds and set in refrigerator to congeal. Yield 6 servings.

This was a very light refreshing dish perfect for a hot summer day. Although the cucumber taste was very subtle the entire refridgerator smelled of cucumber as the aspic was solidifying (which was a very pleasant smell). The flavors were subtle but complex. No single one stood out. For example there was a slight hint of the mint from the tea and a slight hint of the onion. We could have used a bit more hot sauce. The texture was very smooth and pleasing. The sour cream based sauce with the dill really finished the whole dish nicely. Maybe getting the wrong cucumbers wasn’t such a bad mistake after all. 

Wednesday, October 5, 2022

Cold cucumber soup 冷製胡瓜のスープ

Getting home delivery of groceries is very convenient but one problems that the quality of the fresh produce may be quite variable since we cannot inspect the product before buying. Broken eggs are not uncommon as well the the delivery of wrong items. We have also disable the automatic option for substitutions if the item we requested is not available. This is because the substitutions may not be always appropriate. For example, the substitution of shallots for jalapeno. Talking of wrong item being delivered, we recently received 4 giant American cucumbers instead of a package of 4 mini-cucumbers. (We like these because they are the closest in taste and texture to a Japanese cucumber). Although we do not like regular American cucumbers rather than throwing them out, we tried to use them. This is one of such attempt. We made cold cucumber soup with mint and buttermilk. We had it as a lunch with our usual potato salad and coleslaw. I also served skinned Campari tomato with broccoli and pecan, apricot bread. This was certainly all home-made vegetarian salad and soup lunch which was quite good and filling


Since I had few Japanese cucumbers (from our Japanese grocery store), I garnished the soup with several slices and chiffonade of mint leaves from our herb garden.


For both coleslaw and potato salad, we used home made Greek yogurt (from heirloom yogurt my wife makes regularly) which make it very creamy and also healthier (hopefully).


Since I made miso salad dressing several days ago (recipe from Washington Post, subject of another post), I dressed Campari tomato and blanched broccoli.


Although we jointly prepared the cucumber soup, I peeled, chopped and blended but my wife was in charge and ask her to take over for the recipe.

The recipe came from Southern Living on line.

Ingredients:
21 oz. cucumbers (in our case this was two big American cucumbers)
2 cups whole buttermilk
1 cup plain whole-milk yogurt (we used home-made)
3 tablespoons chopped fresh mint (from our herb garden)
3 tablespoons chopped fresh tarragon, plus more for garnish (we did not have fresh, we used 1 tsp dried)
1 tablespoon fresh lemon juice plus 1 tsp. lemon zest (from 1 lemon)
1 teaspoon kosher salt

Directions:
Peel, seed, and chop 2 of the cucumbers.
Process chopped cucumbers, buttermilk, yogurt, mint, tarragon, lemon zest and juice, and salt in a blender until very smooth, about 2 minutes, stopping to scrape down sides as needed.
Chill 1 hour or overnight.
We served with slices of Japanese cucumber and chiffonade of fresh mint leaves.


This was a quite nice cold soup. I usually do not particularly fond of buttermilk but for this soup, the buttermilk really tasted great. The slices of Japanese cucumber added nice fresh cucumber taste. One thing that was kind-of odd was that the soup was effervescent. You can see the little bubbles in the pictures above and interestingly the bubbles didn’t go away after the soup had been in the fridge for some time. The bubbles added to texture giving the otherwise velvety smooth soup and somewhat grainy mouth feel. Nonetheless it was a very good cool refreshing soup.