Friday, April 23, 2010

Omelet with semi-dried baby sardines シラス卵焼き (Mark's book P116)

Japanese like this salty, semi-dried tiny hatchling fish called "shirasu" シラス or "chirimen jako" 縮緬雑魚. The difference between these two may be regional and/or degree of dryness but they appear to be essentially very similar. This is based on the recipe on Mark's book p116 but to make two small servings from two egg omelet, I used a Japanese rectanglar frying pan (for making "dashimaki"  だし巻き Japanese omelet). Please see the picture below. This is a home-use version of a rectangular pan and has a non-stick surface. I should have taken pictures while I was making the omelet to be more informative but this was an afterthought.

I essentially followed the recipe but I made a slight modification and made it like "dashimaki" or Japanese sweet omelet, which I may be able to post in near future. First, I beat two large eggs, and added one package of shirasu (about 2 tbs), one chopped scallion (about 2 tbs), dashi (2 tbs, I added it as though I was making "dashimaki" but it is optional), ground pepper (I use white pepper just for esthetics). I did not add salt or sugar. I heated the frying pan on a medium-low flame and added a small amount (1 tsp) of vegetable oil. I poured 2/3 of the egg mixture in the pan and scrambled the eggs using a silicon spatula. When the eggs were semi-cooked, I pushed all the eggs to one of the narrow ends of the frying pan to make 1 inch wide
rectangle, leave it for 10-20 seconds and then flipped it over using a spatula. I added the remaining egg mixture and spread it in the empty part of the pan and then lifted the rectangle of omelet, so that the egg mixture went under the rectangle. I waited 10 seconds so that the bottom of the new egg mixture is set but the surface is still runny. Again using a spatula (or kitchen chopsticks if you so prefer), from the end where you made the rectangle of omelet, turn it over several times (wait few seconds at each turns) so that the surface is covered with the final layer of omelet. When the surface of the omelet is cooked (you may have to push the sides of the omelet to the sidewalls of the frying pan and flip over once to make sure all the surface is set and the final layer of the omelet is adhering to the center), take it out on a cutting board and cut into six equal pieces. Serve it with grated daikon or "daikon-oroshi" 大根おろし and soy sauce. The small fish add saltiness, as well as interesting flavor and texture.

Wednesday, April 21, 2010

Duck breast with red onion, grated daikon and Ponzu Soy sauce 鴨の胸肉ポン酢大根おろし赤タマネギ添え

This is a variation of serving duck breast and similar to the one in Mark's book p143. I made some modifications to most traditional way of serving duck breast and served the duck breast slices on a bed of thinly sliced red onion. This time, I slightly over cooked the breast (not intentionally) but it still tasted OK. The ways I cook the duck breast is the same as before.

I sliced the red onion into very thin slices, lightly salted, mixed and let it stand for 5 minutes. After ringing out the extra moisture, I soaked it in ice cold water (with ice cubes) for 5 minutes--ringing out the water in a paper towel. I then dressed it with a small amount of ponzu shoyu ポン酢醤油 and extra-virgin olive oil. Meanwhile I grated daikon and added ponzu shoyu. I sliced the cooked duck breast into thin pieces.

To assemble, I spread the dressed onion on the plate, layer the sliced duck breast and made a linear mound of the dressed grated daikon and garnished with thinly sliced (on the bias) scallion. I added a wedge of lime (in lieu of yuzu 柚子) and also a dab of Yuzukosho 柚子胡椒 just in case some more kick was needed. To eat, I usually make a small roll of the duck slices using chopsticks with the grated daikon and scallion in the center. You could enjoy this roll with a little of the red onion and with or without Yuzukosho. I sort of like eating the duck breast this way. With Ponzu, we had this with cold sake (our house sake Yaegaki "mu" 八重垣『無』).

Tuesday, April 20, 2010

Browned crispy rice with Parmesan cheese おこげのパルメザンチーズ

Although automatic rice cookers made cooking rice very easy and consistently successful, one major drawback is not having the burned or browned crust that formed on the bottom of the pot or "okoge" おこげ. As a kid, I remember "okoge" was a good snack. My mother used to make rice in a traditional Japanese pot called "okama" お釜 with a heavy wooden lid when I was a little kid. After the rice is cooked, rice has to be transferred to a wooden vessel called "ohitsu" お櫃 (see the image) leaving a charred crust on the bottom of the pot. This crust is called "okoge" and it was nicely crunchy and flavorful. With just a small amount of miso, you could have the entire meal just eating "okoge". 

This dish is trying to recreate this "okoge" with some Italian twists. I must have seen it in one of the many Japanese drinking food cook books that I have. I did not find or check the original recipe this time and I may have changed something but it is a simple preparation of leftover rice rather than a recipe.

I use leftover frozen rice (about one cup for two servings). I defrost it in a microwave oven so that rice grain can be separated but still cold. I add the rice and 1-2 tbs of chicken broth (my usual Swanson no-fat, low-sodium) to a small pan on a medium flame and mix them with a silicon spatula until the rice gets heated up and absorbs the broth and becomes somewhat sticky. Remove from the heat and place the rice in a metal bowl and let it cool down a bit. I then grate a good amount of Parmigiano-Reggiano cheese (about 3 tbs but the amount is arbitrary) and mix it in the rice.
Using a non-stick frying pan (on a medium flame), I add a very small amount of light olive oil (1/2 tsp) and add back the rice-cheese mixture. Using a silicon spatula, spread the rice mixture in a thin layer and brown (5-6 minutes on one side) and then flip over (either by siding it onto a plate and then transfering it back to the pan or just flipping it like a flapjack - remember "its all in your wrist!").

I browned the other side for another 5 minutes. When desired brownness and crispiness are attained, take it out and break it into small manageable pieces. I served this as the last shime 締め dish with sautéed (in butter) broccoli rabe (pre-blanched) seasoned with salt and pepper, which sort of matches the Italian aspect of this dish. To me, I still like just simple "okoge" and miso better but this is close albeit a bit "oily".

Sunday, April 18, 2010

Daikon marinated in beer #2 大根のビール漬け 二回目

As I promised in the prior post on Daikon marinated in beer, I played with the kind of beer I used and types of vegetables. The last time I used Sam Adams Summer Ale which is a more pilsener-like light-colored beer (ale). This time I used Sam Adams Brown Ale which is a bit more robust and darker ale. The proportion of other ingredients is about the same but I used a whole bottle of beer (350ml or 12 oz) and almost proportionally increased the remaining ingredients. Beer (12 oz), rice vinegar (50ml), sugar (100 grams), salt (50 grams), Japanese hot mustard powder (20 grams). Like before, I peeled and cut a daikon into 4-5 inch long pieces and quartered. I used a half of a large daikon. I also added small carrots (2) and mini-cucumber (3).

After 7 days, the daikon and carrot are good but may be a bit too mustardy (especially the daikon). The cucumber was a bit shriveled up. I added a new mini-cucumber and tasted it after one day. The above pictures are one day old cucumber and 8 day old carrot and daikon. All are good but by far, daikon is the best. I will reduce the mustard powder next time and leave cucumber probably for 2 days. This cucumber was not shriveled up but did not have enough flavor penetrated. I am not sure of the difference between the brown and summer ales but the brown ale appears to add more depth to the flavor. Among the vegetables, there is no question that daikon is the best as everybody has indicated.

Friday, April 16, 2010

Simmered daikon and pork 大根と豚肉の煮物

This is something I made without any particular recipe one weekday evening. The weekend before, I got pork spareribs, not because we had something in mind to make but because I could not resist the good amount of front portion, i.e. pork belly or "sanmai niki" 三枚肉 in the package. Unfortunately we did not have enough time to make any particualr dish such as "Kakuni" or Pork baked in barbecue sauce. So, my wife decided to cook it like she did for making scrapple. Quoting from the scapple post; "Parboil for about 5 minutes. Put into a Pyrex baking dish with some onions and carrots, a bay leaf and several pepper corns. Cover the ribs half way with boiling chicken stock. Cover and place into a 350 degree oven and cook for 1 1/2 to 2 hours (until the meat is tender and falls off the bone)." We figured that once it is cooked this way, we may be able to use it more easily in some dish during the week and, at worst (a figure of speech, not really worst, actually it will be "best") case scenario, my wife can make it to scrapple next weekend.

I think I was loosely basing this dish on "simmered daikon and pork" or 大根と豚肉の煮物. The way the pork was cooked to this point is not much different from the first portion of the preparation (traditional recipe) for "Buta no kakuni" 豚の角煮. I just took out one rib (removing any congealed fat) and cut the meat into 1 inch cubes. Meanwhile, I peeled and cut daikon (about 3 x 2 inches) into 8 pieces. I sauted the daikon with a small amount of peanut oild and a dash of dark sesame oil for 1-2 minutes in a small deep pot on a medium flame. I added the pork cubes (also some of the pork aspic that accumulated on the bottom of the baking pan for good measure), mirin, soy sauce (3 tbs each) and water to cover (probably about 1 cup). When it came to the boil, I turned it down to simmer and cooked for 30 minutes (We went out to the back deck to enjoy the last of the cherry blossoms with a glass of wine at this point, so it may have cooked longer than 30 minutes). In the last 3 minutes, I added broccoli. This was a surprisingly good dish especially for a weekday evening. The daikon was well cooked, soft, and a good match for the fatty pork. The pork is unctuous and flavorful similar to "Kakuni".

Thursday, April 15, 2010

"Yamaimo somen" Mountain yam noodle in cold broth 山芋ソーメン

Recently I was introduced to several very interesting food blogs on Izakayas through "Izakaya Sanpo", which I listed in my favorite links. One called "Eating out in Tokyo with Jon" is quite amazing as he is very prolific (eating out and blogging) and his writing very informative and interesting. I was reading one of his posts on a quaint drinking place in Takasaki, Gunmma 群馬県高崎市 called "machiya" 待家. This reminded me of the last time we were in Maebashi 前橋-Takasaki 高崎 areas in Gunmma prefecture, my friend and his wife took us to a very fancy and excellent French restaurant which we enjoyed enormously (including a bottle of Chateau Lynch-Bages -- 2001, I think), but if I had known of this place we would have begged my friend to take us there instead. In any case, he was describing a mountain yam or "yamaimo" dish called "Yamaimo somen". Since I am trying to reproduce Izakaya food at home and blog about it, I wanted to reproduce this dish based on the picture and his description.

I peeled "Nagaimo" (it is the cultivated variety of "yamaimo") and then using a Japanese mandolin (the "Benriner", which we have been using for almost 25 years but still has very sharp blades), I made thick (using the most coarse julienne blade) juliennes, which are rather fine, actually. I think that, depending on what kind of texture/sliminess you like, one can change the treatment of the "Yamaimo somen". We rather like some slimy texture as well as crunch, so we would use these juliennes as is.  If you would rather reduce the sliminess, then, I would soak them in vinegared water, drain and wash them in running water to remove the surface slim before putting them in a bowl. 
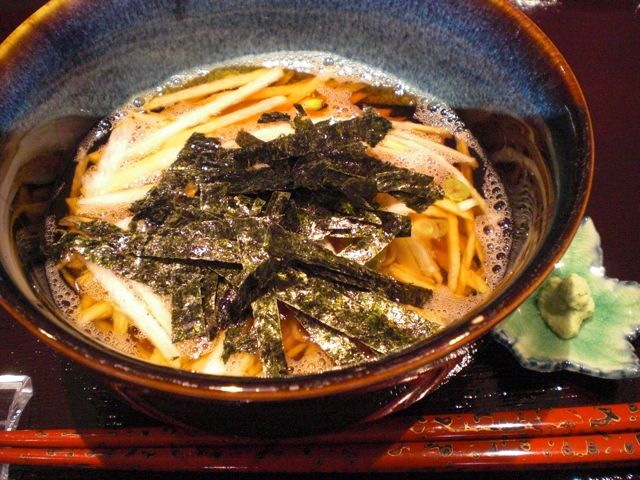
Judging from the picture and the delighted expression by Jon, they must have washed the slim out somehow. For us, I just placed the "yamaimo somen" into a bowl and poured in a cold noodle sauce (I used a bottled concentrate with strength weaker than for dipping but stronger than for hot noodle dishes). I garnished with chopped scallion and nori with a side of "real" wasabi. This was quite a new (at least to us) way of enjoying this slimy potato. I have posted 
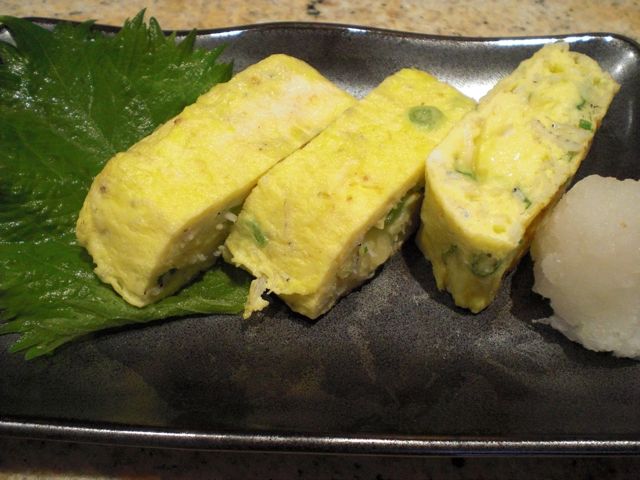
several other ways to enjoy this slimy potato (mostly grated, Sorry, Jon). Certainly, we can serve this to our Western guests with much less problem. Another idea I have is to mix this with juliennes of daikon which may add another type of crunch to this dish.

Tuesday, April 13, 2010

Deep fried fish and mountain potato dumpling 薩摩揚げ(もどき)

"Satsuma-age" 薩摩揚げ is a deep fried fish cake which originated from the "Satsuma" 薩摩 region of Kyushu 九州, the southern island of Japan. This is often served in Izakaya. We occasionally have this as a "robatayaki" 炉端焼き item at Tako Grill. At home, I, like most people, ususally buy pre-made and frozen fish cakes. Just before serving, I thaw and grill (or toast them in a toaster oven). We eat these with grated ginger and soy sauce, which is pretty good. Another common use is to put them in "oden" おでん.

Since I bought a whole red snapper, I ended up with small bits of fish meat as well as meat I scraped off the bones after I filleted the fish. If this had been a salmon, I could have made a "salmon" cake in a very similar manner to "crab" cake. Although I never made this type of fish cakes before, I decided to make these fish meat scraps into a "Satsuma age". Mark's book p44 has a rather sophisticated version of this dish. I decided to use a simpler recipe which was in one of my cookbooks. In any case, I had only fish meat from red snapper but, typically, you should have a combination of two or more fish, usually cod plus some other white flesh fish to achieve good texture and taste according to these recipes. So, I knew mine would not be great before I even started making it.

I first, slice and julianne small carrots and burdock root or "gobo" 牛蒡 (gobo was soaked in vinegared water for 10 minutes) and cooked it in a small amount of "dashi" broth (I used Kelp broth since I was making something else with it) for 5-10 minutes or until the vegetable is soft.  I got about 150gm of fish meat, I added salt (1/3 tsp), 2 tsp each of sake, soy sauce and mirin and made a paste using a small bowl food processor. I was supposedly to use 1/2 egg white but entire thing (one egg white) went in before I could stop it. This recipe also calls for 10grams of grated mountain yam. I substituted it with "nagaimo" 長芋 but "nagaimo" is more watery than "yamaimo" 山芋 and the resulting paste became a bit softer than I intended. I added the drained vegetable and made 5 flat oval shaped disks (I put some vegetable oil on my hands so that the paste would be manageable.) I covered them with plastic wrap and let them rest to firm up in the refrigerator for 1 hour before deep frying.

First, I should have used a lower temperature oil and I should have used more fish meat or less egg white, liquid and grated nagaimo. Although this was quite edible (and my wife said it was even good) it is not "Satsuma age"--the consistency is totally wrong, much lighter and fluffier. I would call this "fried fish and nagaimo dumpling". I do not think I will make this one again. Store bought frozen ones are just fine.