Sunday, June 17, 2018

Rich sour cream bread 豪華サワークリームパン

This is another one of my wife's baking. I may have to change the title of the blog to something like "Uncle and Auntie "N" on Wine, Food, and Bread". This recipe is also from the "Beard on Bread" cookbook and sort of high in fat (butter, sour cream and egg yolks). Its also a bit sweet. It requires some quite lengthy and rather complicated steps. My wife even glazed it a with brandy and marmalade wash. This is somewhat similar to the Pistachio bread she made before from the same cookbook.


The stuffing adds a sweet cinnamon flavor and walnuts.


This is when it was removed from the pan. She glazed with brandy and marmalade (The recipe called for apricot jam but we did not have it).


Ingredients:

(for the bread. This is half the recipe shown in the book. I only had one tube pan and one loaf seemed more than enough)

2 packages yeast
1/4 cup granulated sugar
1/4 cup warm water
1/2 Tsp salt
1/4 cup cold milk
1/2 cup sour cream
1 tsp lemon juice
1 tsp lemon flavoring
1/2 tsp. vanilla
2 egg yolks
1 1/2 sticks butter
4 to 6 cups flour

for the filling
1 Tbs. melted butter
1/8 cup brown sugar (or more to taste)
1/2 Tsp. cinnamon
1/4 cup raisins
1/4 cup chopped nuts (toasted). I used walnuts

for the glaze
1/2 cup marmelade (or apricot jam)
1 Tbs. triple sec

Directions:
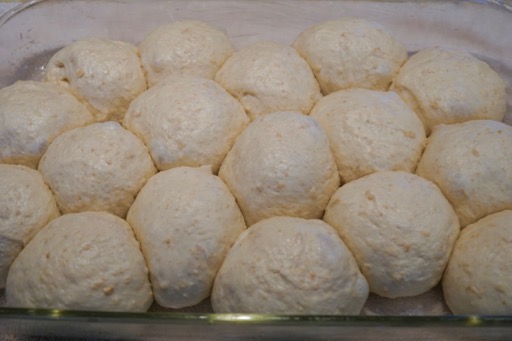
Bloom the yeast in the warm water and granulated sugar. Combine the next 7 ingredients (from the salt to the egg yolks). Using a pastry cutter cut the butter into 4 cups of flour as you would for pastry dough to produce a dry meal-like consistency. Put the butter/flour mixture into the bowl of a stand mixer with a dough hook. Add the yeast and other combined liquid ingredients and knead to start forming a dough. Add as much additional flour as needed to make a soft smooth dough. Knead on speed 2 for 7 to 10 minutes. Form into a ball, put into a bowl and lightly coat with vegetable oil so it doesn't dry out. Cover tightly and put into the refrigerator for at least 4 hours or until doubled. (The recipe said the dough could stay in the fridge for up to 3 days but should be punched down twice a day until it is finally rolled out.) I kept it in the fridge overnight. The next day I took it out and it was a solid ball (#1). Roll out to a 10 X 14 rectangle. Brush with the 1 tbs. melted butter for the filling (# 2). Sprinkle on the brown sugar combined with the cinnamon, followed by the chopped nuts, then the raisins. Using a rolling pin press the filling into the dough (#3). Roll up from the wide end like a jelly roll (#4 & #5). Seal the ends as best you can. Fit the roll into the 9 inch tube pan (#6) until the ends meet and seal them together (#7). Cover and let rise until doubled (#8). Bake in a preheated 375 degree over for 45 to 55 minutes until golden brown and sounds hollow when tapped (#9). Let cool in the pan for 15 minutes before removing to a cooling rack. Combine the ingredients for the glaze and and brush the glaze on when the bread is still hot (#10).


This is good bread but I am not sure it is quite worth the effort unless it is for a special occasion. It is rich and sweet with nice walnuts taste. This would be good for the holidays and a special treat for breakfast. We enjoyed it with a cup of coffee.

Monday, June 11, 2018

Potato salad stuffed "chikuwa" fish cake 熊本惣菜ちくわサラダ

I saw this recipe on line. According to the recipe, this was invented by a side-dish store (called "Sozai-ya" 惣菜屋 ) of  Kumamoto city 熊本市 on Kushu Island 九州, the southern most island of Japan. It was invented as a way to use up an excess amount of potato salad. Since I had frozen "chikuwa 竹輪" fish cake and leftover potato salad, I made this one weekend. The original recipe calls for chopped boiled eggs in the potato salad but I just used my usual potato salad which included myouga 茗荷 in sweet vinegar (home grown, harvested and made) and rakyo ラッキョウ, Japanese cocktail onion in sweet vinegar (store bought).


The recipe suggested tartar sauce or "chu-nou" sauce 中濃ソース but I only had "tonakatsu sauce".


Ingredients:
Three "chikuwa"fish cakes (frozen, I had one open package with three left), thawed (#1).
Potato salad (enough to stuff the three chikuwa (#3)
Oil for deep frying
Tempura batter (3 tbs of cake flour and about 1/3 cup cold water or additional water as needed to obtain the appropriate thickness of the batter).
Tonkatsu sauce

Directions:
Slit open the sides of the chikuwa along the length (#2).
Stuff the opening with the potato salad (#3) (over stuffing is recommended to get the right ratio of fish cake to potato salad).
Dredge in the tempura batter and deep fry until the crust is done and crispy (#4). Do not over fry since the fish cake may expand.
Drain the oil (#5).
Cut on bias into two pieces and serve (#6).


This is a good combination. I served this with skinned Campari tomato and baby arugula. The center was still cold (which was good). This is definitely a nice snack. After we ate one each, we went back to finish off the third and last one.

Friday, June 8, 2018

Bread made with cooked oatmeal オートミール入りパン

This is my wife's baking. Again this is from the "Beard on Bread" cookbook. It is rather unique in that it is made with "cooked" oatmeal.  The oatmeal isn't visible in the final product but the texture is nice and while raising and cooking, we can definitely smell oatmeal. Instead of making a loaf which was in the original recipe, my wife made it into rolls. Mainly because it is easier to take a roll to work for breakfast than a loaf or slice of bread.


Ingredients:
2 packages of dry yeast
1 tsp granulated sugar
1/2 cup warm water

1 cup rolled oats (toasted, optional)
1 cup boiling water
1 cup warm milk
2 tsp salt
1/4 cup brown sugar
4 - 5 cups of bread four

Directions: Bloom the yeast in the 1/2 cup warm water with 1 tsp. of sugar. Add the 1 cup water to a sauce pan. Dissolve the salt and brown sugar in the liquid and bring to a boil. Add the milk and the rolled oats and cook until the oats are softened and thick. Let cool to room temperature. Add 3 cups of bread flour to the bowl of a stand mixer with a dough paddle. Add the oat mixture and blend. Add additional flour 1 cup at a time until a nice smooth, elastic dough is formed. Knead on speed 2 for 7 to 10 minutes. Turn the dough into a bowl and lightly coat with vegetable oil to keep it from drying out. Cover and let rise until doubled in size. Punch the dough down and using a scale form into 2 1/2 oz. balls. Place in a well buttered baking dish (picture below).

Cover and let rise until doubled in size and the rolls are touching each other (about 30 minutes) Preheat the oven to 400 degrees. Cook the rolls for 18 to 20 minutes or until they are golden brown and sound hollow when tapped.


To make the crust more tender, paint the tops with melted butter immediately after the bread comes out of the oven (picture below).


We really like this bread. If I had not been told  this bread contains cook oatmeal I would never have guessed. The oatmeal added a tender but just lightly chewy very pleasant texture. This bread had a very distinctive and divine yeasty oatmeal smell as it proofed in the bowl and later cooked in the oven which really added to the enjoyment of the baking process.  This is a very versatile roll. You can eat it for breakfast or dinner. It is also a great way to use any left over breakfast oatmeal that may be hanging around. The addition of raisins would also be nice.

Tuesday, June 5, 2018

Fried vegetables やさいの素揚げ

Since I had Kabocha Japanese pumpkin カボチャ, shishi-tougarashi 獅子唐芥子 or shishitou (both were from our regular grocery store) and "Gobo" 牛蒡 burdock root (from the Japanese grocery store), I decided to make this simple vegetable fry. It came our a bit too oily for our taste but still it was still quite good.


I precooked and seasoned the Gobo since I used a part of it for another dish. Alternatively, I could have used raw gobo just salted in acidulated water and then drained.

Ingredients (#3 below):
"Gobo" burdock root, about 1/3, skin scrabbled clean with a food brush but not removed.
Japanese "shishitou" peppers, 5-6, stem removed and slits cut in to the middle to prevent explosion in hot oil.
Japanese "Kabocha" squash, 1/4, innards removed and skin shaved off, cut into half inch thick pices
Oil for deep frying
Kosher salt

For preparing Gobo
Rice vinegar (making acidulated water for initial cooking)
Japanese dashi broth seasoned with soy sauce and mirin

Directions:
Cut the gobo into 3 inch lengths. First cook in water with a splash of rice vinegar for 10 minutes and then in plain water for another 10 minutes. Finally, cook in a seasoned Japanese broth (Kelp-bonito broth seasoned with soy sauce and mirin) in 10 more minutes.
Let it cool down in the broth and then cut into 4 long pieces and return to the broth to soak (#1) (I soaked it overnight in the fridge but it could be fried immediately).


I deep fried each items separately. Kabocha takes the most time (4-5 minutes) and shishitou takes the least time (1 minute). I served these sprinkled with a bit of Kosher salt. The kabocha came out very sweet. The gobo was still a bit fibrous but not bad. My wife removed the skin and seeds from shishitou and I ate all. Fortunately, none of them was atomically hot.

Saturday, June 2, 2018

Fried taro root cake in broth 里芋まんじゅうの揚げ出し

This recipe is again from "a Buddhist  Monk" which regularly appears in Asahi-shinbun Japanese newspaper. Since I got taro root or "sato-imo" 里芋 from our regular grocery store and saw this recipe video, making this dish was a "no-brainer". I did not follow the original recipe precisely since I only had oyster mushroom (it calls for shimeji mushroom).


For  greens, I used blanched rapini instead of spinach just because I had it.  Of course, I did not used vegetarian broth and instead used bonito and kelp broth. I also did not have edible lily roots called "Yuri-ne" 百合根 or wood ear mushroom "ki-kurage" 木耳 which were called for in the original recipe.


Ingredients (for 5 dumplings):
Sato-imo "taro", 4 medium, peeled, parboiled and washed in cold running water (to reduce the slimy surface).
Fresh mushrooms (Original recipe calls for Shimeji mushroom, I used oyster mushroom), arbitrary amount.
Green vegetables (Original recipe calls for spinach, I used blanched rapini), arbitrary amount.
Dashi broth 200ml (I used a "kelp and bonito flakes" dash pack but to make it a vegetarian dish one can use kelp broth)
Soy sauce 1 tbs
Mirin 1/2 tbs
Prepared chestnuts, 5, (I used bottled preserved chestnuts in syrup called "kuri-no-kanroni" 栗の甘露煮 (#1 below), cut into small chunks.
Potato starch or "Katakuri-ko" かたくり粉 for dredging.
Oil for deep frying


Directions:
I added the parboiled sato-imo into the seasoned broth and cooked for 15-20 minutes or until a tooth pick goes through easily.  I let it cool down in the broth and mashed it in a Japanese suri-bachi mortar すり鉢 then mixed in the chestnuts (#2).
I made small flat rounds (#3), dredged in potato starch and deep fried in 350 F oil for 3-4 minutes until the surface was nicely browned (#4).
I addeds the green and mushroom in the broth the sato-imo was cooked in and heat it up for a few minutes. I tasted and adjusted the seasoning (I added a small amount of additional soy sauce).
I placed the sato-imo cake in a serving bowl and arranged the mushrooms and the greens then
poured the warm broth over everything and served.

This is a very nice and interesting dish. The sato-imo cake has a thin crust, very soft creamy texture with the chestnuts being nicely firm and sweet. I think the blanched rapini with its slight bitter distinctive taste went better than spinach would have. This is also a rather filling dish.

Wednesday, May 30, 2018

Burdock root wrapped in prosciutto プロシュート巻きごぼうの照煮

This is a modification of a Japanese recipe. Japanese really like to wrap cylindrical vegetables in meat or ham. I read a recipe in which whole burdock root or gobo 牛蒡 was first simmered in seasoned broth and then wrapped in thinly sliced pork belly and cooked in "teriyaki" 照り焼きsauce. Since I bought a package of gobo which contained 2 good sized root stalks, I needed to come up with new way of serving it. So, inspired by the recipe I had read I made this wrapped gobo. Since I didn't have thinly sliced pork belly, I used prosciutto as the wrap. This was the first dish for one evening. It went fairly well with the red wine we were having.


I used whole gobo cooked skin on.


Since I also made my usual "Kinpira-gobo"金平ごぼう, I served it as well.


Ingredients (for 2 servings seen above):
Gobo, three 3 inch lengths, skin scrubbed with a vegetable brush but skin not removed.

For initial cooking:
3-400 ml of water
1 tbs rice vinegar

For final cooking
Japanese dash broth about 300 ml (I used my usual bonito flakes and kelp dash pack)
Soy sauce, 1 tbs
Mirin 1 tbs
Sake 1tbs

Prosciutto, three slices

For Teriyaki sauce
Soy sauce 2 tbs
Sugar 2 tsp (Optional, I did not use).
Mirin 2tbs
Sake 2 tbs

Directions:
1. Cook the pieces in water with vinegar (to prevent darkening) for 10 minutes on low flame.
2. Wash the pieces in cold running water and cook it in plain water for 10 minutes to remove the vinegar taste (water may turn dark).
3. Simmer in the seasoned dash broth for another 10 minutes (#1) and let it cool down in the broth.
4. Separate one thin slice of prosciutto (#2) and wrap the gobo (#3 and #4)


5. In a dry non-stick frying pan, brown the prosciutto starting with the seam side down (#5).
6 Add the teriyaki sauce and cook shaking and rolling the gobo rolls until the sauce thickened (#6).
7. Let it cool and cut each gobo roll into 4 pieces and serve.

Despite the rather long cooking the gobo maintains a nice crunch and the prosciutto added nice flavor as well as some saltiness. I could have used more prosciutto to make a thicker layer but this was just fine as it was. The original recipe used thinly sliced pork belly which may have been better but we really liked this version.

Sunday, May 27, 2018

Japanese "Kabocha" pumpkin salad カボチャサラダ

I occasionally see Japanese pumpkin which is a type of winter squash in our regualr grocery store and when I see it I buy it. This time, I made pumpkin salad with the squash I brought home. I read the recipe somewhere but I could not find it again when it came time to make the salad so I made it from memory.  It came out quite good and its easy to prepare especially since I used the microwave to cook the squash. Since I had a "Kabocha"-shaped "hashi-oki" 箸置きor chopstick pillow that we bought in Kyoto last year, I used it in this picture to complete the Kabocha theme.


I added cottage cheese on top (I remember this was a part of the recipe I read). I added freshly ground black pepper.


Ingredients :
Kabocha pumpkin, half, innards removed and skin shaved off but leaving some (or you could just leave the skin), cut into a bite sized pieces, microwaved in a silicon container for 3-4 minutes or until a bamboo skewer went through easily.
Salt and pepper for seasoning while it is cooling.

For dressing:
Mayonnaise 2tbs
Greek yogurt 2tbs (my wife makes it by straining regular yogurt).
Cottage cheese 2-4 tbs
Soy sauce to taste (optional and our addition)

Directions:
When the pumpkin cooled to room temperature I dressed it with the mayo and greek yogurt (see below). Taste and add salt or soy sauce to taste. I served it with topping of the cottage cheese and freshly grated black pepper (my addition).


This is a really good salad. The natural sweetness of the pumpkin really comes through. We found out it is actually rather filling--a small serving goes a long way for us. Since I microwaved it, it was really easy to make.