
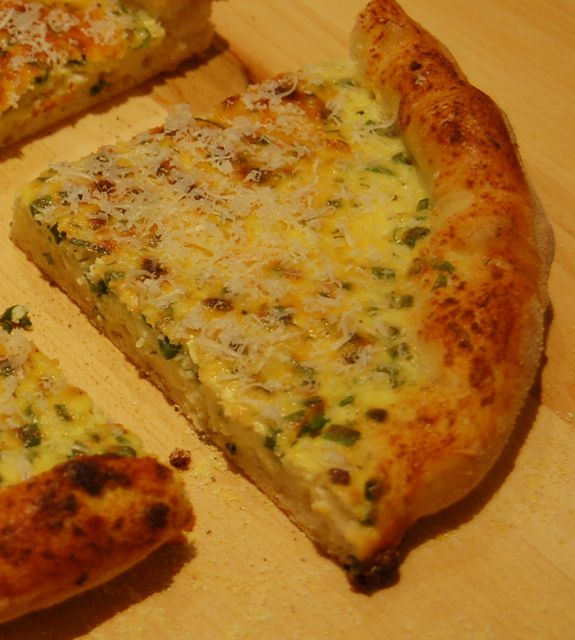
I was somehow coerced (which is not a right word but can't think of an alternative) into making this dish "Ricotta Cheese tart" using my pizza crust. We found this to be very good and can be reheated very nicely in a toaster oven. We recently served this as a starter with champagne when we had friends over and it went very well.
(*Sometimes, I use King Arthur brand double zero ("00") Italian flour. This flour has much less gluten and makes a delicate dough which can not be tossed into the air. The resulting crust is thin, crisp and cracker-like probably similar to this one.)
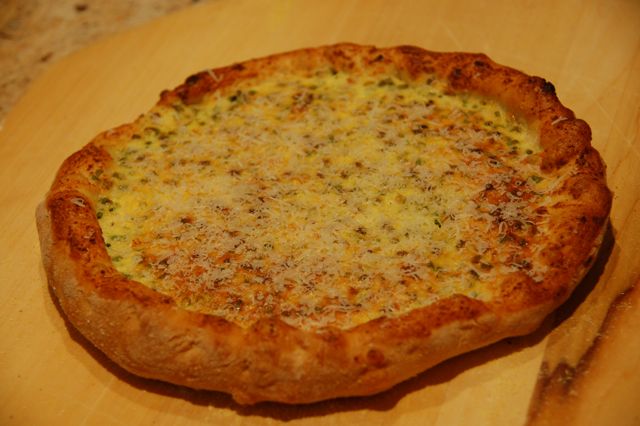
Baking: I had my convection oven set at 450F with a Pizza stone* in and preheated for, at least, 30 minutes before sliding the filled tart directly onto the hot pizza stone. Bake for 10-15 minutes until the surface of the filling becomes slightly brown.
(* I have a square pizza stone almost the size of the inside of my oven. I keep it (almost) permanently in the lowest rack. It is essential to have a pizza stone to make a nice crust.)
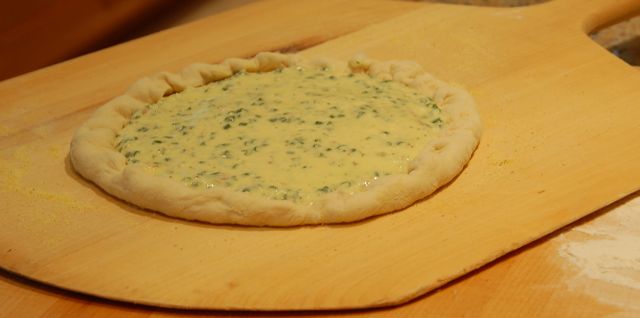
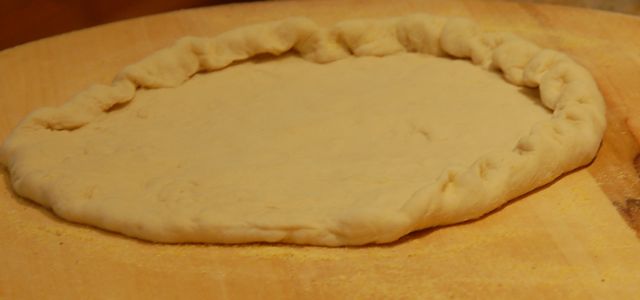
After the volume doubles, I deflate and fold the dough several times I then cut the dough into 4 equal portions and make them into 4 nice smooth disks by pinching the cut surface together and stretching the surface to make a round ball. I, then, press lightly to make a disk. The portions I'm do not going to use immediately, I put it into a Ziploc sandwich bag and place in the refrigerator (will last at least overnight or more, which even adds more favor but, after that, you need to freeze the dough. The dough freezes well but the characteristic of the resulting crusts change a bit--the previously frozen dough will yield less bready and crunchier pizza crusts). Let the dough ball rest for 10-15 minutes by covering with a floured tea towel (otherwise the dough will be too elastic and resist stretching). I never use a rolling pin to form pizza dough but use the traditional way of stretching the dough using the back of the knuckle of the hands (I will even toss the dough into the air if our guests request it.) For a regular pizza, I do not crimp the edge but, for this tart, I did crimp the edge as seen below since the filling is rather runny. You need to have corn meal on the pizza peel before placing the formed dough on the peel. Then give the peel several sharp tugs to make sure the dough slides nicely before filling the dough.
Filling: I mixed Ricotta cheese (1 cup), large eggs (2), chive (fine chopped, 1/2 cup), shallot (one finely chopped), dill (1/2 tsp dried since I did not have fresh one), salt (1/2 tsp) and black pepper (1/4 tsp). This filling made two 8 inch tarts (see below).
Baking: I had my convection oven set at 450F with a Pizza stone* in and preheated for, at least, 30 minutes before sliding the filled tart directly onto the hot pizza stone. Bake for 10-15 minutes until the surface of the filling becomes slightly brown.
(* I have a square pizza stone almost the size of the inside of my oven. I keep it (almost) permanently in the lowest rack. It is essential to have a pizza stone to make a nice crust.)
3 comments:
Thank you for posting this. I'm a big fan of your pizza and will give this a try.
Looks very good. Price for 200gr Ricotta in Tokyo: about 800 Yen....
There must be a very small demand for Ricotta in Japan to demand such a high price. I sounds like an Economist.
Post a Comment