Frangipane recipe (makes about 360 gram which is perfect for the frangipane rolls recipe below)
Ingredients:
6 tablespoons (85g) unsalted butter, at room temperature
1/2 cup (99g) granulated sugar
1/4 teaspoon table salt
1 cup (96g) King Arthur Almond Flour
3 tablespoons (23g) King Arthur Unbleached All-Purpose Flour or King Arthur Gluten- Free Measure for Measure Flour
1 large egg, at room temperature
2 teaspoons almond emulsion or almond extract
Directions:
1. In a medium bowl or the bowl of a stand mixer, beat together the butter, sugar, and salt until pale and fluffy, about 1 minute on medium speed.
2. Stir in the flours, egg, and almond flavoring. Mix until just combined.
3. Use the frangipane as desired: fill tart shells, pipe into croissant dough, top slices of Bostock, or come up with your own way to use this flavorful, nutty filling. Bake the frangipane as directed in your recipe or until it’s golden brown and smells nutty.
4. Store leftover unbaked frangipane in the refrigerator, covered, for up to 1 week or freeze for up to 2 months.
Frangipane roll recipe:
Ingredients: (doubled the original recipe)
Tangzhong (starter)
6 tablespoons (86g) water
6 tablespoons (86g) milk, whole preferred
4 tablespoons (28g) King Arthur Unbleached Bread Flour
Dough
5 cups (600g) King Arthur Unbleached Bread Flour
1 cup (226g) milk, whole preferred
2 large eggs
8 tablespoons (114g) unsalted butter, softened
1/2 cup (100g) granulated sugar
2 tablespoon (18g) instant yeast
2 teaspoon (12g) table salt
Topping
2 tablespoons (28g) milk,whole preferred
2 tablespoons (25g) granulated sugar, optional
Directions:
1.To make the tangzhong:
In a small saucepan, combine all the ingredients and whisk until no lumps remain.
2.Place the saucepan over medium heat and cook the mixture, stirring regularly, until thickened, paste-like, and the spoon or spatula leaves lines on the bottom of the pan. This should take 2 to 4 minutes, depending on the strength of the burner.
3.Remove the tangzhong from the heat and transfer it to a large mixing bowl, the bowl of a stand mixer, or the bucket of a bread machine (wherever you plan to knead the dough).
4.To make the dough:
Weigh the flour; or measure it by gently spooning it into a cup, then sweeping off any excess. Place the flour into the bowl with the tangzhong and add the remaining dough ingredients. Mix to combine, then knead — by hand, mixer, or bread machine — until a soft, smooth dough forms, about 8 to 10 minutes on medium-low speed of a mixer. (The dough may be tacky and stick to the sides of the bowl slightly; that's OK.)
5.Shape the dough into a ball, place it in a lightly greased large bowl or standard dough rising bucket, cover, and refrigerate for 12 to 24 hours. The refrigerated rise will make the dough much easier to handle and shape
6.To assemble: On a lightly floured surface, gently deflate the dough, divide it into four pieces and shape each piece into a ball.
7.Cover the dough and let it rest for 10 minutes.
8. Prepare a square pan with a parchment sling or reusable silicone liner. Lightly grease any exposed sides of the pan.
9. Working with one piece of dough at a time, roll it into an 8" square. If the dough begins to snap back during rolling, set it aside and begin rolling out the second piece. After a couple of minutes, return to the first piece to continue rolling it to the full size (this gives the gluten a chance to relax).
10. Portion one quarter of the filling onto the top half of the square.
11. Starting at the top, spread the filling across the entire width of the square and down about 4", leaving the bottom 4" bare (#1). If the filling is difficult to spread, warm it in the microwave for 15 seconds and stir; check the consistency. Repeat, if necessary, until it's easily spreadable.
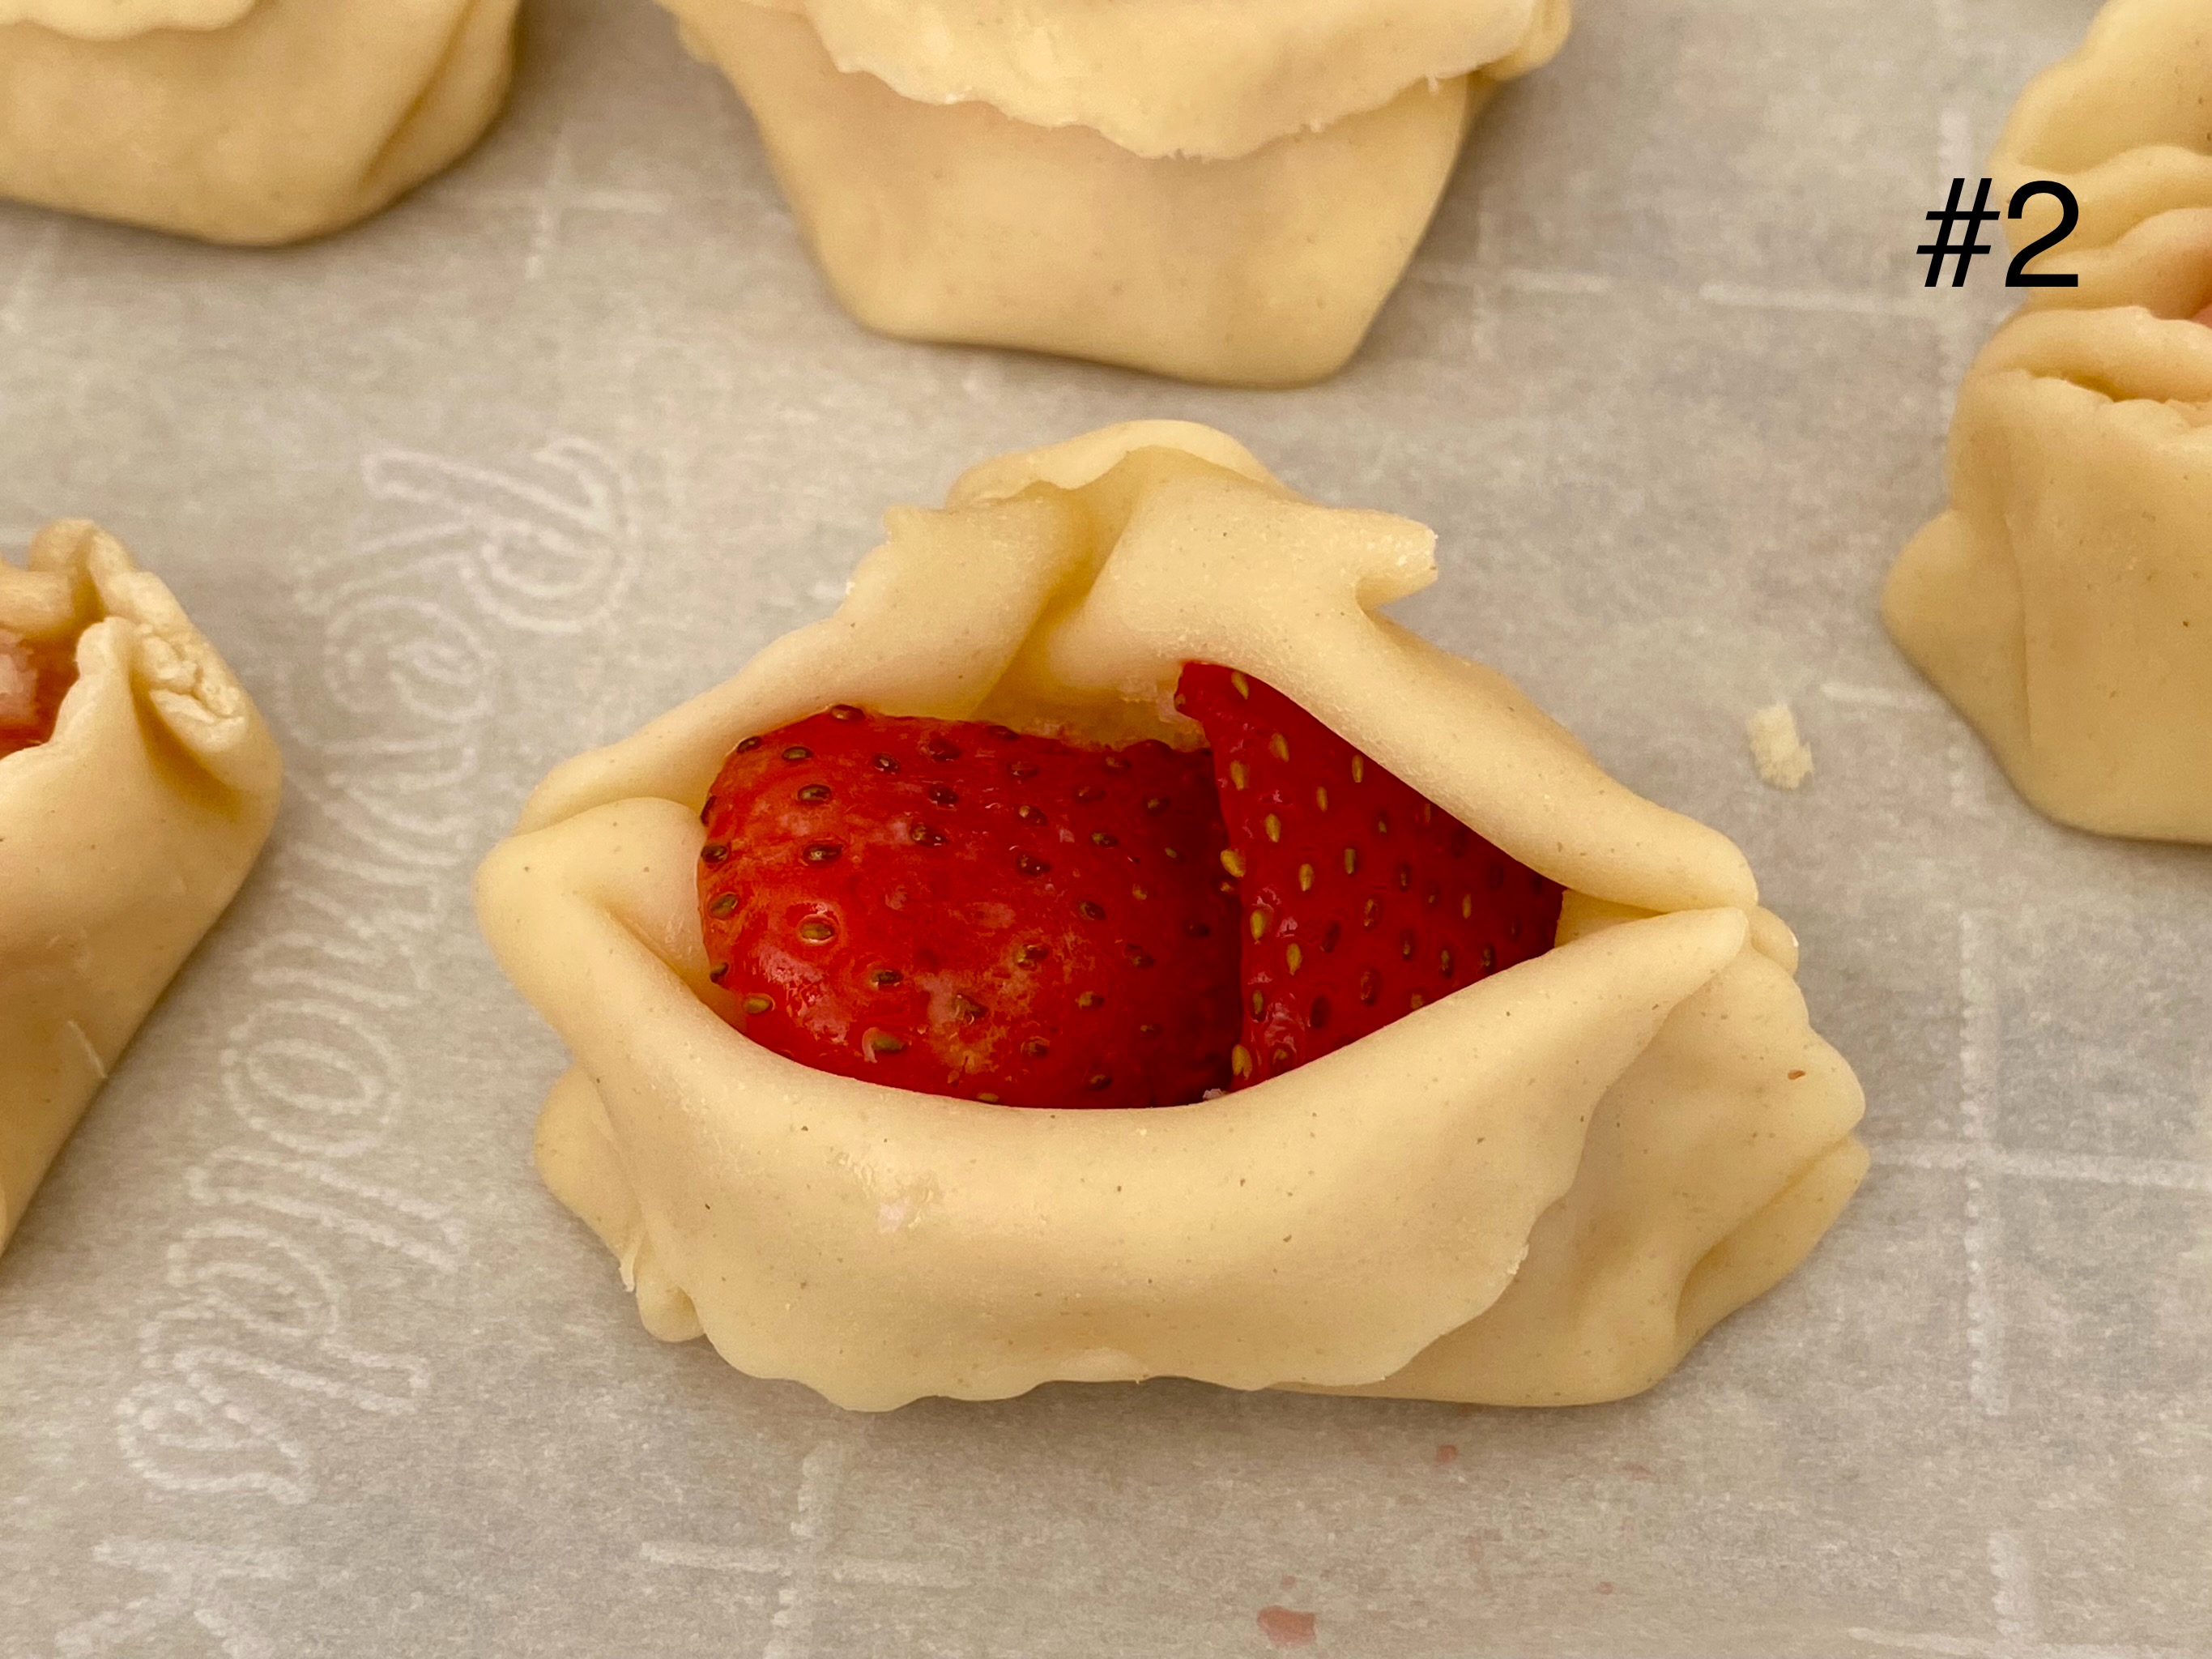
12. Using a bench or chef’s knife, cut the uncovered dough at the bottom into very thin strips (anywhere from 1/8" to 1/4" wide) (#2).
13.Starting from the filling-covered top and rolling toward the uncovered strips, roll the dough into a log about 8" long.
14. Lightly press the strips into the rolled log to secure. Cut the log into four 2" pieces and then place them, seam-side down, in a row and in alternating orientations in the pan (#3).
15. Roll, fill, and shape the remaining pieces of dough, placing the rolls into the pan to form 4 rows of 4 buns, each row in an alternating pattern (#4 & #5). Cover the rolls and let them rise for 60 to 75 minutes, until puffy.
16.While the rolls rise, preheat the oven to 350°F.
17.To finish and bake the rolls: Gently brush the rolls with milk, being careful not to deflate the delicate dough, and sprinkle generously with granulated sugar.
18. Bake the rolls for 30 to 35 minutes, until the tops are golden brown; a digital thermometer inserted into the center should read at least 190°F (#6).
19. Remove the rolls from the oven and cool in the pan until you can transfer it safely to a rack to cool completely, at least 15 minutes. Serve the rolls slightly warm or at room temperature.
20. Storage information: Store leftover mini wool rolls, well wrapped, at room temperature for several days.

These rolls have a very delicate flavor accented mostly by the frangipan which provides a delicate slightly sweet almond flavor. The bread has the texture and flavor of a milk bread while the frangipan provides a slightly custard like filling interspersed through out the bread. This is definitely a very sophisticated bread.
Weigh the flour; or measure it by gently spooning it into a cup, then sweeping off any excess. Place the flour into the bowl with the tangzhong and add the remaining dough ingredients. Mix to combine, then knead — by hand, mixer, or bread machine — until a soft, smooth dough forms, about 8 to 10 minutes on medium-low speed of a mixer. (The dough may be tacky and stick to the sides of the bowl slightly; that's OK.)
5.Shape the dough into a ball, place it in a lightly greased large bowl or standard dough rising bucket, cover, and refrigerate for 12 to 24 hours. The refrigerated rise will make the dough much easier to handle and shape
6.To assemble: On a lightly floured surface, gently deflate the dough, divide it into four pieces and shape each piece into a ball.
7.Cover the dough and let it rest for 10 minutes.
8. Prepare a square pan with a parchment sling or reusable silicone liner. Lightly grease any exposed sides of the pan.
9. Working with one piece of dough at a time, roll it into an 8" square. If the dough begins to snap back during rolling, set it aside and begin rolling out the second piece. After a couple of minutes, return to the first piece to continue rolling it to the full size (this gives the gluten a chance to relax).
10. Portion one quarter of the filling onto the top half of the square.
11. Starting at the top, spread the filling across the entire width of the square and down about 4", leaving the bottom 4" bare (#1). If the filling is difficult to spread, warm it in the microwave for 15 seconds and stir; check the consistency. Repeat, if necessary, until it's easily spreadable.
12. Using a bench or chef’s knife, cut the uncovered dough at the bottom into very thin strips (anywhere from 1/8" to 1/4" wide) (#2).
13.Starting from the filling-covered top and rolling toward the uncovered strips, roll the dough into a log about 8" long.
14. Lightly press the strips into the rolled log to secure. Cut the log into four 2" pieces and then place them, seam-side down, in a row and in alternating orientations in the pan (#3).
15. Roll, fill, and shape the remaining pieces of dough, placing the rolls into the pan to form 4 rows of 4 buns, each row in an alternating pattern (#4 & #5). Cover the rolls and let them rise for 60 to 75 minutes, until puffy.
16.While the rolls rise, preheat the oven to 350°F.
17.To finish and bake the rolls: Gently brush the rolls with milk, being careful not to deflate the delicate dough, and sprinkle generously with granulated sugar.
18. Bake the rolls for 30 to 35 minutes, until the tops are golden brown; a digital thermometer inserted into the center should read at least 190°F (#6).
19. Remove the rolls from the oven and cool in the pan until you can transfer it safely to a rack to cool completely, at least 15 minutes. Serve the rolls slightly warm or at room temperature.
20. Storage information: Store leftover mini wool rolls, well wrapped, at room temperature for several days.

These rolls have a very delicate flavor accented mostly by the frangipan which provides a delicate slightly sweet almond flavor. The bread has the texture and flavor of a milk bread while the frangipan provides a slightly custard like filling interspersed through out the bread. This is definitely a very sophisticated bread.