Monday, March 1, 2010

Stewed plums from plums used in making of plum wine 梅酒の梅の甘露煮

After bottling the umeshu, we always have to decide what to do with the remaining plums. My wife aksed me to share this story. When we first started making umeshu, my mother suggested that we take the plums used to make plum wine, bake them in a "musui-nabe" 無水鍋, which is a Japanese invention, somewhat like a cast iron Dutch oven, for several hours to make them soft and then eat them as a kind-of jam. Following her advice but since we do not have a "musui-nabe", we put the alchohol soaked plums left over from making umeshu into a pyrex baking dish, covered the baking dish with a glass lid and put it into a 350 degree oven to bake for several hours.

We were sitting in the other room watching television when there was a massive explosion in the kitchen. We rushed in expecting to find shards of glass and plums all over everything. Instead we saw the pyrex baking dish sitting quietly on the wire rack of the open oven. Apparently the alchohol fumes seeped out of the dish as it heated up and built up in the oven with enough force to blow open the oven door but didn't affect the baking dish. Word of advice that this method of making plum jam is not recommended.  

Instead, I make "Kanro-ni" 甘露煮. I just make a simple syrup (equal amounts of sugar and water heated to dissolve the sugar) and just simmer the plums on a very low flame for 30 minutes or until the plum is soft. This is rather sweet and can be used as a sort-of snack when you are having Japanese green tea or you can serve this in-between dishes as a palate cleanser as shown above.


I store this in a glass container with a tight lid in a refrigerator. As long as you use a simple syrup (very sweet), this will keep a long time. Actually, this one is two years old. Other usages of the Umeshu plums is to make it into jam. I see that you can use the Umeshu plums in stewing meat such as pork or chikcen, which I have not tried.

Sunday, February 28, 2010

Baguettes バゲット

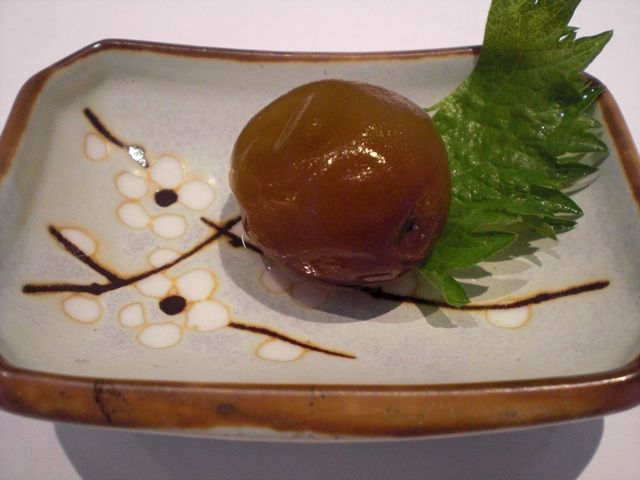
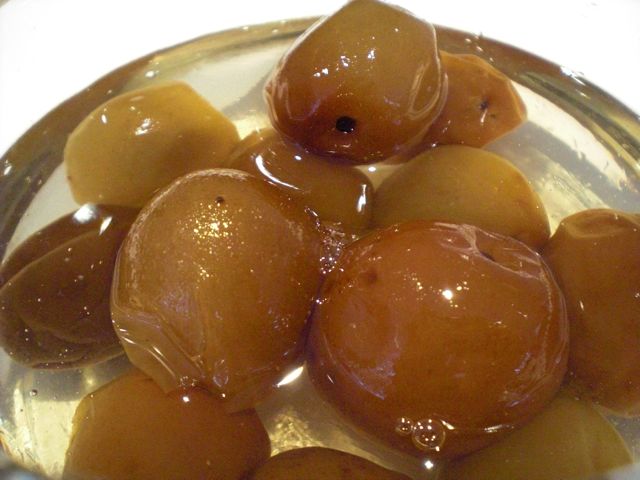
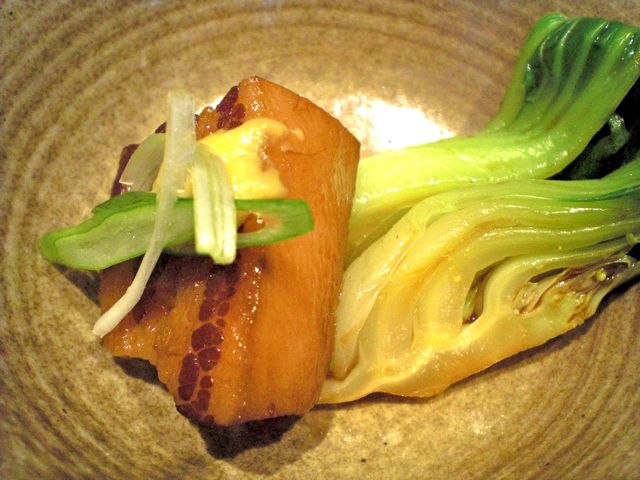
Baguette by itself is obviously not Izakaya food but as more Western-style food is served in Izakaya, baguettes are often served (For example Marks' book p95, Herb Garlic baguette served with Beef Intestine stew). I have posted few dishes served with a piece of baguette. Sometimes, we may start our home Izakaya feast with small bruschetta and end with pieces of baguette rather than rice or noodle dishes. Although good quality breads including baguettes can be had in many 
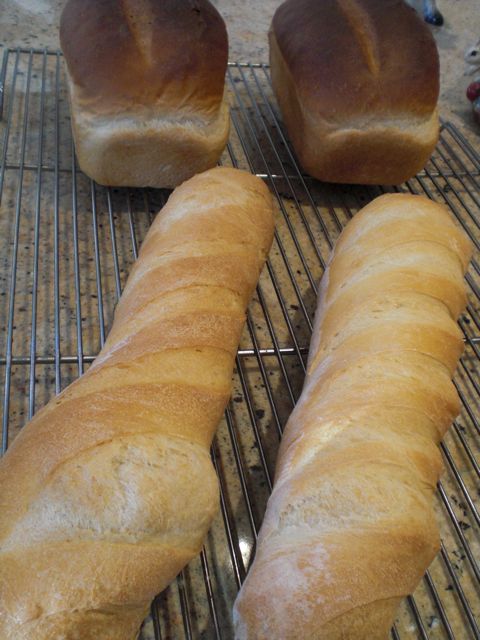
boulangerie or gourmet markets, we still like to make our own breads on occasional weekends. The smell of baking breads and tastes and textures of freshly baked breads are difficult to resist and can be only enjoyed if and when you bake them at home. I used to make all yeast breads and my wife made quick breads. I got a bit lazy recently and have not made a loaf of white bread or English muffins for some time. My wife got a bit impatient with me and started making some yeast breads including white bread (back of the picture) and English muffin loaf (with my helpful suggestions), which is very good (for me in particular) but she leaves baguette for me to make. 

My baguette is very simple. I do not use any fancy natural yeasts or special flour, just bread flour either Gold Medal brand or King Aurthur. I do not have any secret, inherited starters. I am sure mine is not the quality of true artisanal breads but we like it, so I keep making it. There are only a few things which are very important in making decent baguettes at home. These are: a baking stone, a water sprayer, and a razor blade.

This is the rare occasion when I actually measure the ingredients rather pricisely. First I proof the yeast in a glass measuring cup (1 or 2 cup size). I add 1 package (1/4 oz) or 1 and 1/4 teaspoon of active dried granulated yeast (I use Fleischmann's or Red Star active dried yeast) in 1/4 cup of warm water (about 110F or when you put your finger, it feels just tepid) in which 1/3 tsp of sugar has been dissolved. Mix well and let stand for 3-5 minutes to make sure the yeast is active as will be indicated by the surface bubbling up. 

Mixing and Kneading: I start my dough in a food processor fitted with a dough blade (of course you could use your hands as well as a mixer fitted with a dough hook). For two bauguettes, I place 3 and 1/2 cup of bread flour in the food processor and add 1/2 tsp of salt. I then add cold water to the proofed yeast (above) to 1 cup mark and mix well. While the food processor is on (I use the low-speed setting), I add the yeast mixture in a steady thin stream. After I add one cup of liquid, I get 1/3 cup more water and keep adding to the flour until, a ball of dough is formed above the blade. You do not need all the additional 1/3 of water. I stop and open the bowl to touch the dough. It should be soft but not too sticky. The amount of water you have to add varies depending on the weather or the flour. You have to decide when you have added enough by the look and feel of the dough. I then let it stand for 5 minutes so that the moisture will more evenly distribute. After 5 minutes, I run the processor for 30 seconds or so until a single mass of elastic dough is formed. I flour a large Kneading board and hand knead the dough to finish using the heels of my hands for 5 minutes or more until the dough feels nice and smooth. I finish the kneading by making a nice tight ball. 

Raising: I let the dough rise three times. You could do the first two in an oiled large bowl but I usually use a gallon size Ziploc bag sprayed inside with Pam or a similar non-stick spray  (just because I do not have to clean the bowl this way). After I place the dough in the bag, I squeeze out as much air as possible from the bag so that the dough will have a room to expand. I then wrap it using two or three towels and let it rise to double the size (about 1 hour but you should go by the volume not by the time as the room temperature, the potency of the yeast, the amount of salt etc change the time it takes to reach this point). I take the doubled dough out and deflate and fold it over several times and put it back to the Ziploc bag for the second rising (another hour or until volume doubles again).

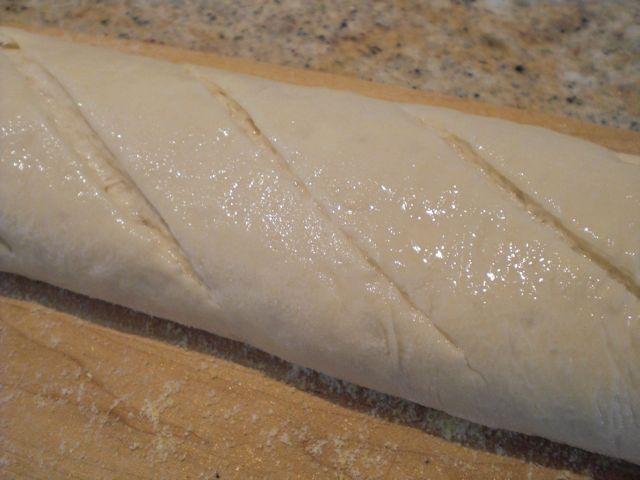
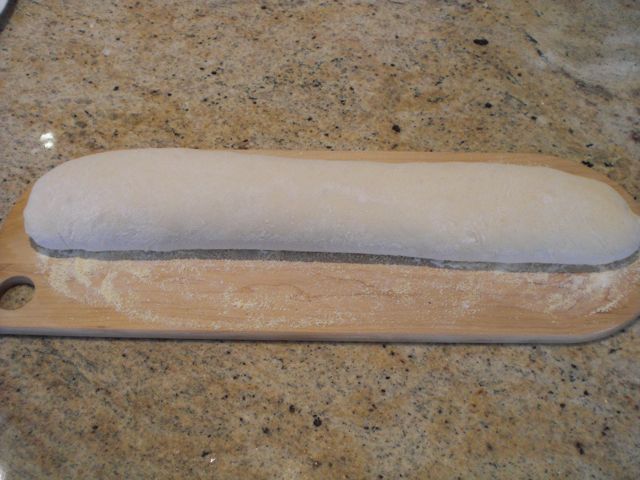
Forming: After the second rising, I deflate and fold the dough over a few times and then divide into two identical cylindrical portions (weighing is the best way to make the two portions identical). It is not easy to describe how to form the loaves but I press using the side of my hand to indent a cut surface and the pinch them together. Stretch and fold over the dough along the long edge. Repeat this as you elongate the dough. If dough feels too elastic, you could let it rest for 10 minutes before forming baguettes. Cover with a floured dish towel and let it rise for the last time until the volume doubles. Move it to a peel (below) which is coated with corn meal (so that the dough will slide).

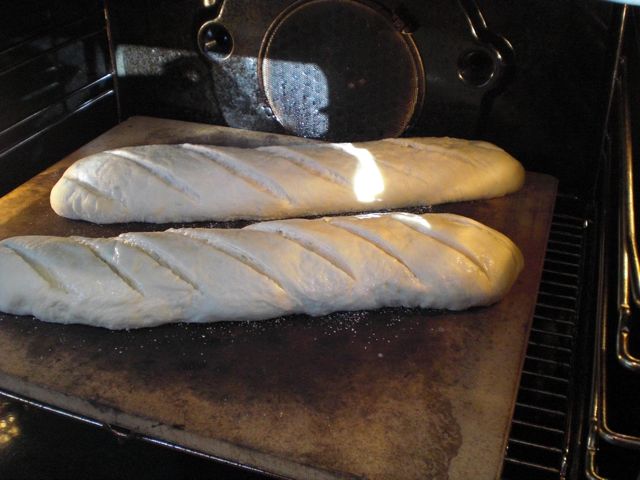
Using a sharp razor blade, make multiple oblique slashes on the top and spray water on the surface of the dough (see image below). This is to set the crust. I used to throw several ice cubes into the oven on a cookie sheet after I put the bread in.  But I am afraid that this may have damaged the oven (my old oven was not working properly towards the end). So I changed to the spray method before putting the dough into the oven. It works reasonably well and forms a good crust. 
I slide the slashed and sprayed dough in onto a hot baking stone (400F, should be preheated and left at 400F for at least 20 minutes so that the stone is throughly heated).
Bake it at 400F for 15 minutes and then reduce the temperature to 350F and bake another 30 minutes. I let the bread cool on a cooling rack as seen in the first picture. As it cools the bread makes a cracking noise ("music of bread" as per Julia Child) as the crust contracts. Cool to room temperature before eating. We usually slice and freeze the portion we did not consume by the next day. I am not sure what causes the difference but many commercial baguettes from the grocery store have a crust but the inside is spongy or mealy in texture. (I suspect they use some kind of additive in the dough). Ours has a better crust and texture as well as a nice nutty toasted flour taste.

Saturday, February 27, 2010

Baby clams in garlic cream sauce with angel hair pasta エンジェルヘアパスタ小蛤クリームソース

Marks's book has a Japanese style Clam pasta dish (p121). This is a much simpler version but the idea is the same. We are not sure how we ended up with this receipe but this is fairly simple and quick pasta dish and will be ideal for the last starch dish in Home Izakaya.

Short of having fresh small clams, the important ingredient is good quality canned baby clams - not chopped clams (which tend to be too tough and chewy). We use a 10oz can of "Sun of Italy" brand (see photo) for 2 small servings. I am sure there are many similarly good brands. Drain the clams retaining the juice, set aside. I add olive oil (2 tbs) to a frying pan and add thinly sliced garlic (3-4 cloves, we like lots of garlic but use at your discretion) in medium-low heat until garlic is fragrant and lightly browned (again do not burn, it will become bitter). Add reserved clam juice and 3 tbs of sake (or dry white vermouth) and reduce to 1/2 to 1/3 of the original volume (5 minutes on high heat). Meanwhile, I cook the angel hair pasta (about 3 minutes in boiling water).  I add 1/3 cup of cream to the pan as well as the clams. I reduce the sauce briefly and add, usually, finely chopped parsley but this time I used baby arugula (as much as you like, it will cook down quite a bit). When sauce is reduced and the green is wilted, add the angel hair pasta. Although, parmesan cheese is supposedly not to be used for sea food pasta, we like it on this dish. Adjust seasoning with salt and black pepper. I happened to make Baguette a few weekends ago (which was sliced and frozen). It appeared as an accompaniment for this dish. The usual choice of wine would be white but we rarely drink white so this night, we had this with a very inexpensive but quite decent weekday red wine, South Eastern Australian Shiraz "Reddust" 2007.

Thursday, February 25, 2010

Stewed pork belly 豚の角煮

This is one of the rather classic home cooked or Izakaya dish. Pork "kaku-ni" 角煮 has an origin in China and reportedly came into Japanese culinary vocabulary through Okinawa 沖縄 and Kyushu 九州. Although one may think that Japanese food is rather low-fat and healthy (which is mostly correct), Japanese also like totally unhealthy fatty items such as this dish. Cubes of Pork belly (portions used for salt pork and bacon) are cooked a long time in a soy sauce based broth producing a meltingly soft and sweet fatty morsel. This cut of pork is very common in Japan called "sanmai niku" 三枚肉 or "bara niku" バラ肉. The closest we can get in a regular grocery store in the U.S. is pork spare ribs. But unless you get pork spare ribs which include the front side, you do not get this cut of pork. The types of meat you get under "pork spare ribs" vary and, toward the back of the ribs, you get a cut similar to pork chops. Since salt pork is exactly a block of a pork belly (which is salt cured), I decided to experiment making this dish from salt pork.  There are many recipes including using a pressure cooker. The vast majority of the recipes suggest boiling the meat in a large amount of water first before cooking it in a seasoned broth. I figured that even though salt pork is salty, by boiling it in water or a seasoned broth with a lower salt content for a long time, the salt will eventually leach out from the salt pork. I looked through several recipes and decided on one which looked differet from the vast majority of the recipes and interesting by Atsushi Tsuchiya 土屋敦.


I first removed the rind (or skin) and cut a block of salt pork (about 500 grams) into 1 inch by 2 inch rectangles. Using a small dry frying pan, I browned all sides starting with the fatty side so that some fat will render out first (2-3 minutes on each side). In a small bowl, add 4 tbs of soy sauce (I used 1/3 low sodium soy sauce) and marinate the seared pork cubes for 10 minutes. I then put the pan on a low flame and cook for 5 minutes until soy sauce reduces a little and becomes slightly viscous. I add 200ml of sake and increased heat and cook 8-10 minutes and add 3 tbs of sugar.

Meanwhile I soak about 5-6 inch long dried kelp in water and let it rehydrate for 30 minutes or more. Add the water in which the kelp was soaking to the pan above so that the meat is covered. As it comes back to the boil, I skim off fat and scum which will appear on the surface. I placed the kelp to cover most of the meat as shown below and turn down the heat to simmer. I cook about 4 hours on simmer turning the meat over after about 2 hours, adding more water as needed.
I served this with a dab of Japanese mustard and sliced scallion. As an accompaniment, I made blanched baby Bok choy or チンゲンサイ青梗菜 dressed with a mustard soy sauce (Japanese mustard, sugar and soy sauce). This is a partial success. Although the meat is not too salty and fat is nicely rendered and soft, the meaty parts are a bit dry. I have to try this recipe with pork spare ribs.

P.S. We tasted this again after letting it sit in a refrigerator for 2 days (we forgot that we had this). I skimmed off any congealed pork fat and removed the kelp and warmed up the broth and pork. The pork was much better seasoned and not as dry, as compared to the last time we tasted this. The original recipe indeed recommended to keep it in a refrigerator overnight before serving and it is definitely worthwhile to do this extra step.

P.S. I posted two other attempt at making "Kakuni"; one with spare ribs and the other using genuine pork belly (to be posted).

Tuesday, February 23, 2010

Grilled chicken salad with white sesame dressing 鶏肉と椎茸の胡麻和え

This another example of making-a-dish-from-whatever-we-have. We had a left over grilled chicken thigh with salt. I decided to make a small Japanse-style salad with sesame dressing or "goma-ae" ごま和え. I often make similar dishes with some variations depending on what I have at a given moment.
Dressing: I first saute white sesame seeds (3 tsp) in a dry frying pan for a few minutes (although the sesame seeds are bought already roasted) this brings back the fresh toasted flavor. I tip the sesame seeds (reserving a few for a garnish) into a Japanese mortar or "Suribachi" すり鉢 and, with a pestle, grind the seeds until they are coarsely cracked and some oil comes out. You can smell the nice roasted sesame. Then, add 1 tsp of tahini or "shiro negi-goma" 白練りごま and 1/2 tsp of sugar, 2-3 tsp of soy sauce. I also add a very tiny amount (1/2 tsp) of rice vinegar but this is optional. The vinegar will add a subtle sourness as wel as lighten the color of the dressing.
Chicken: I just slice the one left over grilled chicken thigh with salt into small strips.
Scallion (1-2): I char the outer skin of a large scallion (white parts) over a direct gas flame for 2-3 minutes. Let it cool a little, remove the charred skin and cut into 1 inch long segments. I slice the remaining green parts into thin strips diagonally for a garnish. 
Cucumber (1 mini or 1/3 Japanese cucumber): I thinly slice one mini cucumber, salt and mix and let it stand for few minutes. I ring out the excess moisture and dress it with a small amount of sushi vinegar. 
Shiitake mushroom: I happened to have fresh shiitake mushrooms. I grilled 3 with the stem removed in a toaster oven for few minutes and cut into small strips and dressed it with a small amount of soy sauce while hot.

Mix all the above ingredients and dress with the sesame dressing. Garnish with thinly sliced scallion, Campari tomates, and sesame seeds. It is an extra step but dry roasting the sesame seeds makes a big difference.