This year, we were fortunate enough not to miss having some fresh matsutake 松茸 offered by Oregon mushrooms to celebrate the start of the fall season. In the past we have tried several other sources but the #1 grade matsutake from the Oregon mushrooms is our favorite choice. In any case we received 1lb. I have tried many matsutake dishes but I think the simpler the better. Three dishes I make are Toubanyaki 陶版焼き, chawan-mushi 茶碗蒸し and matsutake rice. 松茸ご飯. Another dish I usually make is clear soup with matustake; either matsutake “osuimono” 松茸のお吸い物 clear soup or dobin-mushi 土瓶蒸し. This time, I made Touban-yaki for the evening we received Matsutake. The next evening I made another touban-yaki, chawan-mushi and Matsutake-rice. The day following that I made Matsutake clear soup and served it with left-over matsutake rice.
Classically, the soup contains a small filet of conger eel or “hamo” 鱧 or other white fish filet but, since we did not have any, I used “Hanpen“ ハンペン fish cake. Other items included tofu, carrot, “Hana-fu” 花麩 gluten cake shaped like a flower. Since I wanted a bit of green, I added small florets of blanched broccoli. I also topped this with frozen “yuzu” 柚子 Japanese citrus rind. I only cooked the soup a few minutes after I added the matsutake. The broth was made from my usual dashi packets, seasoned with mirin, salt and soy sauce.
Since I had old asazuke 浅漬け (3-4 week old) and one I just made the previous day, I served both side-by-side for comparison (the one on the left is 1 day old the one on the right is 1 month old). The old asazuke developed slightly sour but more complex flavors and the young asazuke is fresh tasting but a bit simpler taste. I adjusted the original recipe by adding a bit more salt (instead of standard 3% I add 5% salt) as well as a small amount of Vodka. This makes the asazuke last much longer so 1 month old asazuke is even possible.
We are glad we had matsutake to commemorate the start of the fall.
Tuesday, September 26, 2023
Saturday, September 23, 2023
Creamy Tomato Aspic Salad クリーミートマトアスピックサラダ
My wife is a great fan of ribbon or aspic salad which now appears to be out of fashion. I also developed a liking for these aspic salads. Somewhere on-line, she came across a recipe for “creamy aspic salad”. She also had some V-8 juice left over from when she made ribbon salad so she decided to use it making this creamy aspic. As usual, although she got the idea to make the aspic from the recipe she modified it to her liking to accommodate the ingredients that were available. The most difficult part of making aspic is determining the correct amount of gelatin to use. Too much gelatin makes it like rubber and too little and it won’t hold together and keep its shape. This one was a bit on the softer side but had nice flavors and texture from using ricotta cheese and some crunch from celery.
Beside the celery, it has sliced and chopped green and black olive which gives a burst of salty flavor.
Ingredients:
3 cup V8 juice
2 packets of powdered gelatin (the end result was a bit soft so maybe another 1/2 packet of gelatin would make it firmer)
1 tbs sushi vinegar
2 tbs Worcestershire sauce
1/4 tsp salt
1 cup Ricotta cheese (I used 3/4 cup ricotta and 1/4 cup sour cream)
1 small onion (sweet or Vidalia onion), grated
2 stalks of celery, finely chopped
5 each Kalamata and oil cured olives, stone removed and chopped
5 pimento stuffed green olives, thinly sliced
Directions:
Soak the powdered gelatin in a cup of the V8 juice. Mix the remaining V8, vinegar, Worcestershire sauce and salt. Combine the ricotta and sour cream. Mix the cheese into the V8 vinegar mixture. Cut up and prepare the vegetables. Heat the soaked gelatin in the top of a double boiler until completely dissolved. (This is the only way I found to make sure all the gelatin is dissolved.) Add to the cheese mixture and stir to combine completely. Pour into the 9 X 13 pyrex pan and refrigerate. When the mixture becomes semi-solid stir in the vegetables. (This will encourage them to spread through out the mixture instead of sinking to the bottom.) Chill until fully set.
This is a very refreshing dish served cold on a hot summer day. The cheese and sour cream tone down the acidity of the V8 juice while ironically the sushi vinegar adds a nice acidic sharpness. The grated onion completely blends nicely into the mixture rather than standing out. The chopped veggies add a nice texture and the celery in particular really makes the dish. This is a good summer salad.
Wednesday, September 20, 2023
Tsukune with Lotus Root and Perilla 蓮根大葉つくね
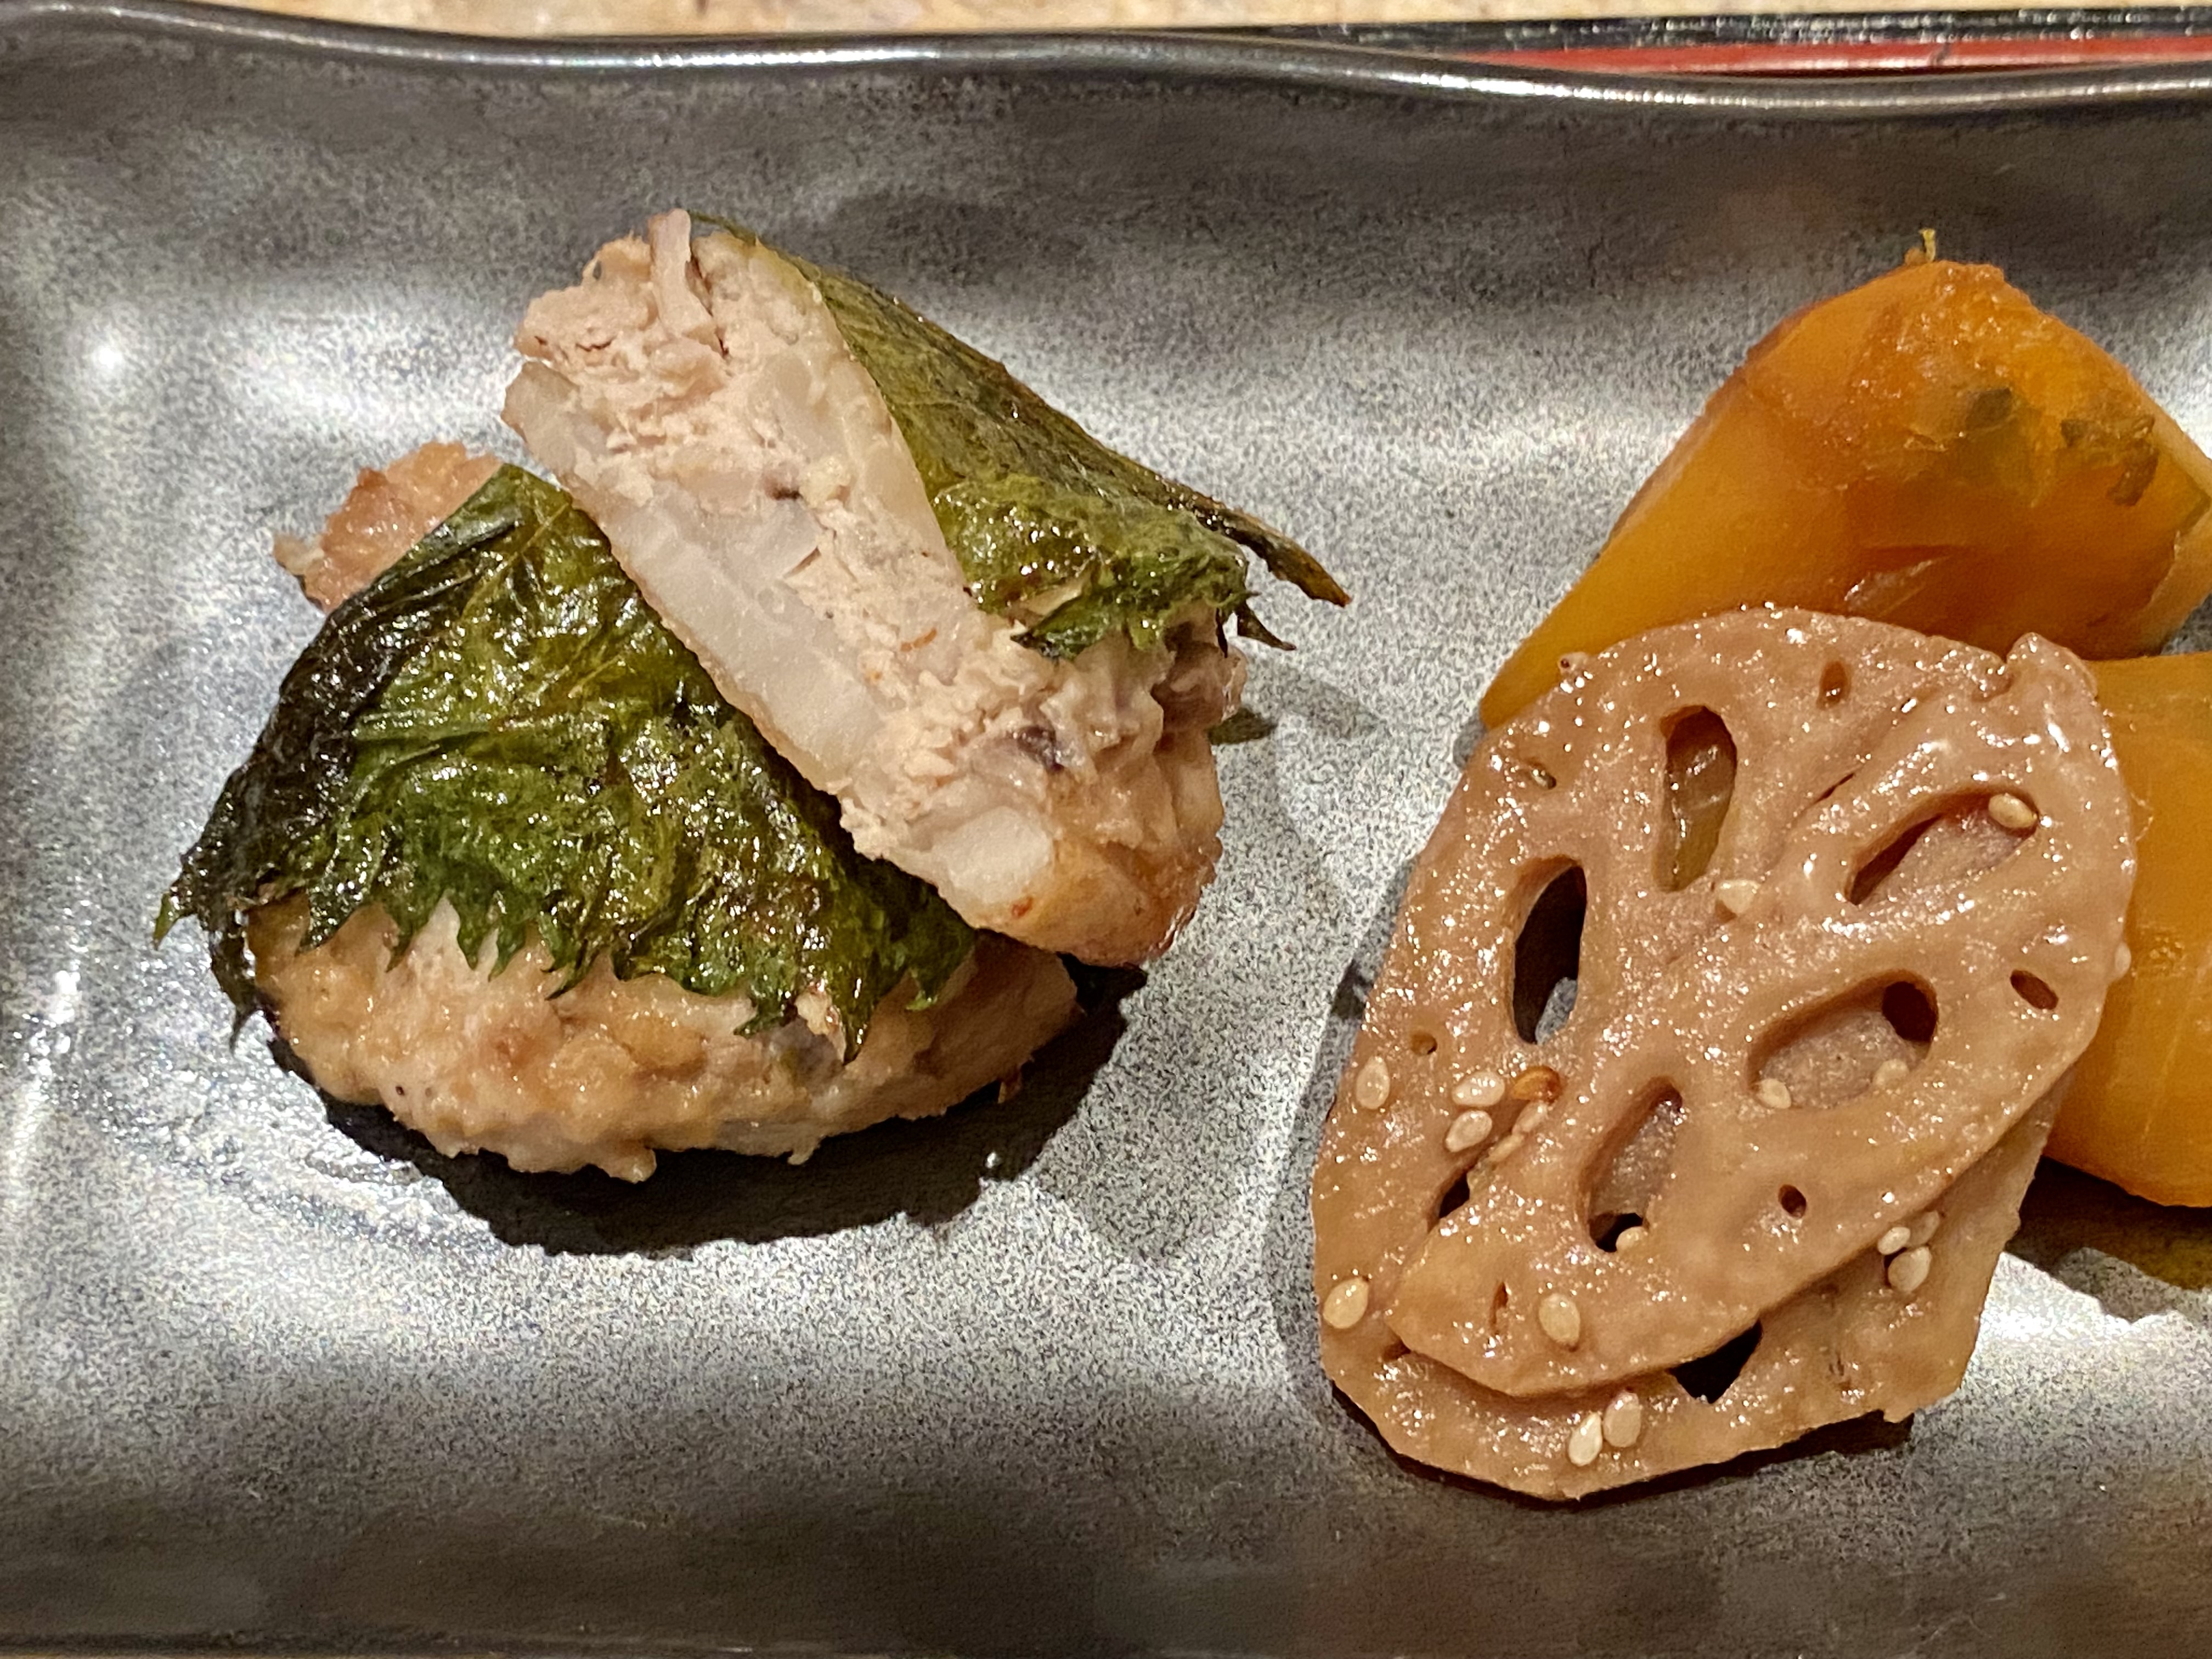
This is a hybrid of “Renkon Tuskune” 蓮根つくね and “Tsukune with perilla” つくねの大葉焼き. Since our perilla is growing profusely in our herb garden, we are using perilla leaves whenever we can. This is also the last segment of fresh lotus root we got from Weee asian grocery delivery service. We found that we could make the lotus root last longer by separating the fresh lotus root into its individual segments, wrapping the segments in paper towel and vacuum packing them. With this preparation they last for a long time under refrigeration (at least 1 mouth or more). Beside using a slice of the lotus root as a base for the Tuskune, I also included chopped up lotus root in the tsukune itself to give it nice crunch without using chicken cartilage. The perilla leaves add an additional unique flavor.
I served this with “kinpira” braised lotus root 金平蓮根 I made to finish up the last of the renkon. I also served simmered “kabocha” かぼちゃの煮物 Japanese pumpkin.
Ingredients:
8 slices of lotus root, skin peeled and sliced into (4-5mm) thick plus two or three slices chopped up (to mix into the tuskune itself)
8 perilla leaves (if too large cut in half to make 8 pieces)
4 oz (114 gram) of ground chicken (this was low-fat breast meat ground chicken)
1/2 tsp ground ginger root
1/2 tsp ground garlic
1 tsp mayonnaise (optional, to compensate low-fat ground meat)
1 tsp miso
1 tbs “katakuri-ko” potato starch
1 tbs vegetable or olive oil
Directions:
In a bowl, mix the chicken, ginger, garlic, mayonnaise, miso and chopped up lotus root. Mix well by hand until the mixture is elastic and binding together (if too loose, you could add potato starch, if too stiff, you could add a beaten egg)
Coat the slices of lotus root with the potato starch thinly (to improve the adhesion of the meat mixture)
Place 1/8 of the chicken mixture onto the lotus root on the cutting board and press lightly so that the mixture will go into the holes of the lotus root.
Place the perilla leaf on and press lightly so that it adheres to the meat mixture (see below)
Add the oil to a non-stick frying pan on medium heat, and start cooking the lotus root side down first (see below) and cook a few minutes or until the lotus root browns a bit
Gently turn it over and turn down the heat to low and cook a few more minutes with the lid on for the last 2 minutes to make sure the meat mixture is cooked through.
Optionally you could add a mixture of mirin and soy sauce at the end but I did not.
Drain excess oil on a paper towel.
This tsukune is seasoned enough for us but you could add “Yakitori sauce (equal mixture of mirin and soy sauce) ” as mentioned before. This re-heats nicely in a toaster oven. It is a nice contrast in textures and taste. The chicken portion is almost fluffy in texture which is a nice contrast to the crunch of the renkon on the bottom layer and distributed through out the meat. The perilla adds a nice fresh minty spiciness.
Sunday, September 17, 2023
Cold Thin Udon Noodle with Home-made Ponzu 自家製ポン酢、冷やし糸うどん
Cold noodle dishes using somen 素麺, soba 蕎麦 and ramen noodle “Hiyashi chuka” 冷やし中華 or “Hiyashi ramen” 冷やしラーメン are common especially on hot summer days in Japan. Cold udon うどん dishes are less common, except, as I understand it, in Osaka where you can have many combinations of cold/hot soup and cold/hot udon noodles. I made this cold udon dish just like cold ramen or “hiyashi ra-men” just substituting the ramen noodles with thin udon.
Since I made two kinds of pork a few days ago; Simmered pork and Barbecued pork, I cut some julienne pieces off of both kinds. We have a profusion of perilla in our herb garden and I added a chiffonade of perilla. My wife just harvested myouga 茗荷 and I made myouga picked in sweet vinegar. I included both fresh and pickled myouga as a topping (in the center). Other toppings included “Gari” ガリ pickled shouga ginger, cucumber and golden thread omelet or “Kinshi-ran” 金糸卵. For the sauce, I used my home-made ponzu-shouyu mixed with dark sesame oil (just a few splashes). I also added Japanese hot mustard and yuzu kosho shown on the rim of the plate (upper right).
Our myouga patch was doing well in terms of the foliage but the underground buds were slow to mature this year. But finally we had a good harvest. Myouga is such a unique herb/vegetable. We like to enjoy fresh as a topping or type of salad but pickled in sweet vinegar is also a very good way to prepare the myouga. At least for one or two weeks, the color of myouga becomes very red and sweet vinegar adds to the flavor. Then eventually the color fades to white.
I did not post about the home-made ponzu. This is just for my convenience. Since it is difficult to get fresh yuzu, I used bottled yuzu juice plus lime juice.
Ingredients:
100 ml yuzu juice (Either freshly squeezed or bottled) plus freshly squeezed lime of lemon juice to make 100ml
150 ml soy sauce
I small square of “konbu” kelp
I small package of bonito flakes
Directions:
Just mix the yuzu juice and soy sauce. In a clean sealable container (I used a clean and empty rakyo pickles plastic container) and added the kelp and bonito flakes.
Place in the refrigerator for 1-2 weeks (I kept it for 2 weeks)
Strain the kelp and bonito flakes and transfer the ponzu in clear sealable container and keep it in the refrigerator.
I think my home-made ponzu is slightly better but not much better than the commercial one since I could not use freshly squeezed Japanese citrus such as yuzu. This was a cool refreshing dish for a hot day.
Thursday, September 14, 2023
Soft Boiled Duck Eggs 半熟アヒルの卵
This is continuation of the duck eggs we got from Weee. Since we do not want to worry about a potential Salmonella problem, I pasteurized the duck eggs. I managed to make soft boiled duck eggs with runny yolk (see below). I somehow cut across the egg rather than usual halving the egg length-wise. In any case, the yolk was very rich and creamy. Interestingly, egg white clearly (more pronounced as compared to hen egg) showed two layers; an inner layer that did not congeal as firmly as the outer layer egg white.
I topped this with “ikura” salmon roe and a bit of soy sauce. This is a very luxurious appetizer.
Actually, this was part of the evening offerings. I made “bo-zushi” 棒鮨 of pickled mackerel with kelp. a very small sashimi assortment.
1. How to pasteurize duck eggs: Since duck eggs are larger than hen eggs (in our case no more than 30%), I used 57C for 2 hours instead of 75 minutes for hen’s eggs. As before, when the 2 hours were up, I immediately soaked the eggs in ice water for 30 minutes or more and placed them in the refrigerator.
2. How to make soft-boiled duck eggs with runny yolk: According to the on-line instructions I found, place the duck eggs in cold water and when the water starts simmering, cook another 6-7 minutes. I was not sure if I should pierce the shell on the air cell side (bland end) to prevent the egg from cracking. In the end, I did. One of the eggs extruded a thin thread of yolk. Next time, I will not pierce the shell and see what happens. After 7 minutes, I soaked the eggs in ice cold water. We peeled the shell after 30 minutes and the eggs were cooled down. It was difficult to peel. My wife did a better job.
We are quite satisfied with the soft-boiled duck eggs only if we can peel it more easily.
Subscribe to:
Comments (Atom)


