Wednesday, March 18, 2026
English Muffin Loaves イングリシュマフィンローフパン
Since the recipe was not posted in the blog, the next question was “Where did it come from?” Then, my wife remembered it was from a spiral bound instruction and recipe book that came with the very first Kitchenaid stand mixer we bought years ago. Bingo! Between the two of us we found the recipe and here is the bread! (Picture #1).
Like the other English muffin recipes we previously mentioned, this dough is also extremely sticky and hard to work with. But the good news is that it goes into only two loaf pans instead of multiple individual rings which is extremely difficult to do. But it is basically impossible to divide the dough even into just two loaf pans by hand. Having made this bread so many times my wife developed a “work-around” method of tipping the dough directly from the mixer bowl into the loaf pans, dividing it up by cutting it into two pieces using scissors as shown in picture #2. (No clumps of sticky dough stuck to hands.)
Ingredients: (yield two loaves)
5-6 cups all-purpose flour
2 packages active dry yeast
1 tablespoon sugar
2 teaspoons salt
¼ (generous) teaspoon baking soda
2 1/2 cups milk (my wife used buttermilk)
Cornmeal
Directions:
Place 4 cups flour, yeast, sugar, salt and baking soda in the bowl of a stand mixer. Using a dough hook turn the mixer to speed 2 and mix for 1 minute.
On speed 2 gradually add milk/buttermilk to flour mixture. Continuing on Speed 2, add remaining flour, ½ cup at a time. Knead on Speed 2 for 7 to 10 minutes. Dough will be very sticky.
Spread dough into two bread loaf pans that have been greased and sprinkled with cornmeal. Cover; let rise in warm place, free from draft, for 45 minutes. Bake at 400°F for 25 minutes. Remove from pans immediately and cool.
This is definitely THE WAY to make English Muffin-like bread! It toasts up beautifully and is great for breakfast slathered with butter.
Wednesday, June 22, 2022
Home-made English Muffin 自家製イングリッシュマフィン
Ingredients: (12 muffins)
4 cups (560 g) AP flour
Saturday, May 23, 2020
No Knead English muffin イングリィシュマフィン
Digression alert: according to my wife this fork method, which she learned eating many English muffins as a child, is "de rigueur" for cutting them into halves. It's done by inserting the tines of a fork from the edge of the muffin toward the center multiple times around the entire perimeter. Once this is done it easily pulls apart with just a gentle tug. As you can see from the picture it works pretty well. The two halves remain intact and the nice nooks and crannies are preserved. The original recipe calls for pulling them apart by inserting your thumbs and pulling with your fingers...needless to say, my wife quickly vetoed that method after she saw the mangled mess that resulted from my attempt to implement it.
Ingredients:
2 cups bread flour
1 cup whole-wheat flour
2 teaspoons kosher salt
1 1⁄4 teaspoons instant yeast
1 1⁄2 cups cold milk (any percentage)
1⁄4 cup honey
1 large egg white, cold
1 cup fine cornmeal, for dusting
2 tablespoons or more unsalted butter for cooking
Directions:
Mix together the dry ingredients and then add the wet ingredients, mix well with a spatula until smooth but sticky dough forms (#1). Cover the bowl with plastic wrap and let the dough rise for 4-5 hours in warm place. Dust a rimmed cookie sheet with the corn meal and drop on scoops of the dough using a large spoon (#2). Dust the surface of the dough with additional cornmeal and cover with a plastic wrap and place it in the refrigerator for 12 hours (we did this over night). The dough spread out so each dollop was almost touching each other (#3). Heat up a large cast iron skillet on medium low flame and when it is hot, add the butter (#4). Using a spatula, put the dough portions into the skillet (#5) and cook 6-7 minutes turning the dough 180 degrees half-way through cooking to get an even browning (our first batch was a bit over browned). Flip the muffins over and cook the other side (#6). My wife inserted a bamboo skewer from the side to the center to make sure the muffin was cooked. We put the cooked muffin in the wire rack to cool.
These muffins were our combined effort. The next morning, we cooked up the muffins and they were great. Although it takes time to prepare the dough, it is much easier to make than what I went through before. The addition of the whole wheat flour made it much better than just making it with white flour. The whole wheat flavor really came through with a mild nuttiness. Also, the butter became richly browned and added another wonderful taste dimension. We will make these again for sure. We can improve these in two ways; 1. reducing the salt in half (above we reduce to 2 tsp)--it tasted too salty to us and 2. Use lower heat to cook the muffin. The heat was too high and especially the first batch- came out too brown. Making the English muffin reminded us of naan we made which was also very good. Maybe we should make that again.
Wednesday, January 6, 2010
Eggs Benedict エッグスベネデクト
This is certainly not an Izakaya food but I decided to post it anyway. Sometimes eating breakfast for dinner is a wonderful thing and this dish only goes with good sparkling wines (Champagne, Cava or Prosecco). So it could be possible to have this for a late night snack or something for celebration (we do not think we can eat this late at night). Obviously, this is not "low" fat or low calory and we eat this only on very special occasions. We need four components to make this dish; 1. bread, 2. Canadian bacon, 3. poached egg, and 4. Hollandaise sauce.
1. Bread: The bread is transitionally an English muffin which I used to make but, recently my wife started making "English muffin loaf bread" which has a same texture and taste of English muffin and it is bit easier to make (for one thing, you need not to struggle to put the sticky dough into individual rings, but most importantly, I do not have to make it!). My wife recipe may be different but here is one I found on line.
2. Bacon: This time, I did not have Canadian bacon so I used chicken breast and half a strip of bacon to add bacon flavor. I cut half a strip of bacon into small pieces and made them crispy by rendering the bacon fat in a small frying pan. I removed the bacon bits from the pan and added slices of pre-cooked chicken (one I made few days ago) breast and saute for 30 seconds on each side to add bacon flavor and to warm.
3. Poached eggs: We poach eggs very simply using a small (8 inch) non-stick frying pan. Use one with a high side (not for a French omelet kind) so that enough water can be added allowing the egg yolk to be totally submerged. Add 1/2 tsp of salt (I do not add vinegar since we do not need it and do not like the vinegar flavor in our eggs). When it comes to simmer, break eggs in small cups and gently slide them in the hot water. The egg white around the yolk will stay together without any special techniques. After the surface of the yolk is just set but the yolk is still runny (4-5 minutes), using a slotted spoon, gently remove the eggs on a paper towel lined plate (the eggs may stick to the bottom of the pan but since it has a non-stick surface, they will come off. If not, you could use a silicon spatula to persuade, but be careful not to break the yolk on the bottom).
4. Hollandaise sauce (for two servings of one egg each): Once you get hang of it, this is not as difficult as you may think. If you are an expert chef you could use a small sauce pan directly on fire but I use a double boiler so that I do not make scrambled eggs instead. Add lemon juice from half a lemon (1-2 tbs) in the double boiler on simmer. Add a pinch of cayenne pepper and one egg yolk, whisk until frothy. Drizzle in 1-2 tbs of melted butter and keep whisking until thick and saucy consistency is reached (2-3 minutes). I usually add a small amount of water to loosen up the sauce to a nice flowing consistency.
5. Assembly: Toast and butter a slice of English muffin loaf (if you are so inclined you could use a ring mold to cut a circle or use an English muffin) on the bottom, place a slice of the chicken breast with bacon bits, then, a poached egg, and cover them with Hollandaise sauce. Sprinkle paprika and chopped chives (to make it Chrismasy since this was Christmas morning). By the way, we did not have any drink with this (we had cappuccinos instead) since it was breakfast but we could have Champagne or Mimosa.
The French know how to make it decadent and also artery clogging but this is a wonderful combination of tastes and textures.
Tuesday, May 26, 2020
Crumpets クランペット
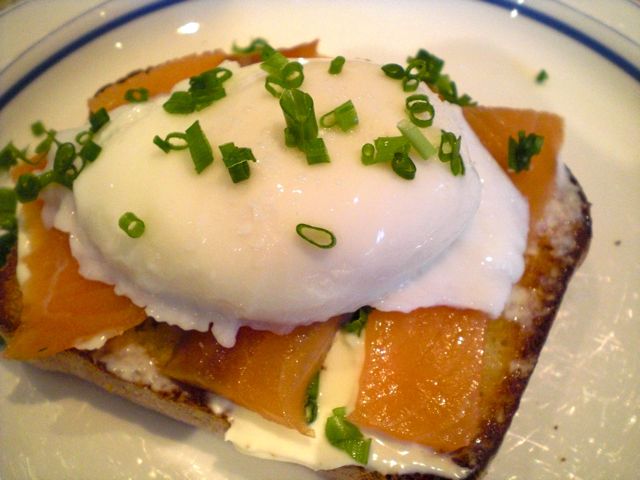
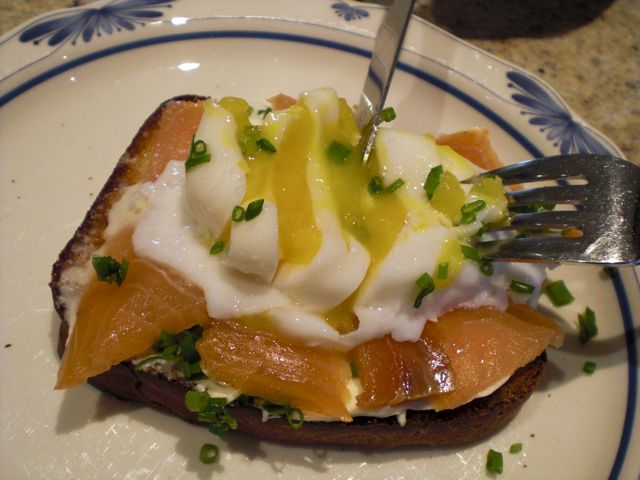
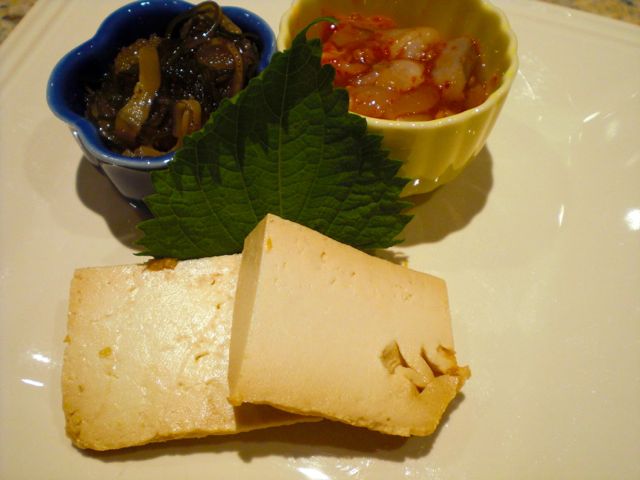
Both sets of pictures show the second batch of crumpets toasted served like English muffins (two layers separated, see below "How to serve"). The first batch did not go so well. You can see the nice crunchy surface with all the little nooks and crannies that capture the melted butter.
Ingredients:
1 1/2 cups milk
3 1/2 cups all-purpose flour
1 1/4 teaspoons active dry yeast
2 teaspoons sugar
1 1/2 cups water (lukewarm)
1 teaspoon salt
1 teaspoon baking powder
Direction:
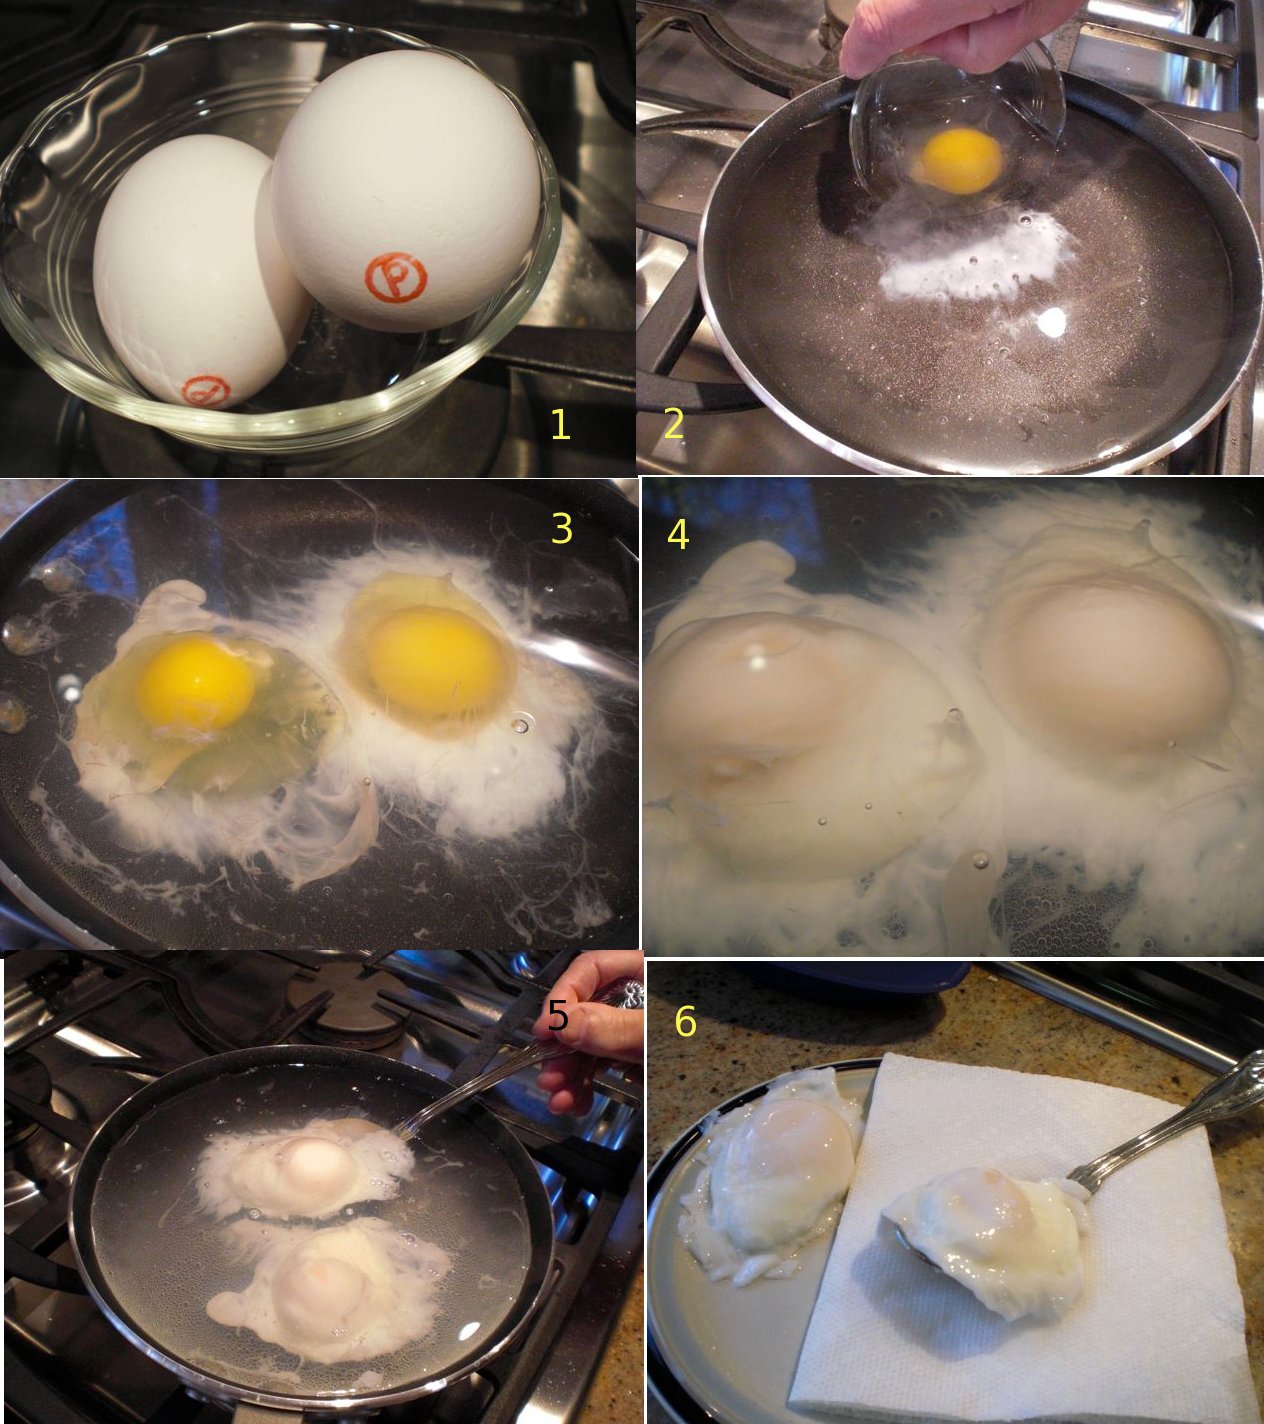
1. Warm the milk in a saucepan. Make sure that it is warm but not boiling (I was not sure how hot the milk should be but the milk gets mixed into the dry ingredients including the yeast. I reasoned that if it was too hot it would kill the yeast so I made sure the milk was about 110F.
2. Whisk together the warmed milk, flour, yeast, and sugar in a large bowl. (#2) I used a stand mixer with a paddle.
3. Once combined, add half the water and beat into the batter.
4. Continue to add more water until the batter is thick and smooth. Stop adding water once the batter reaches the consistency of thick cream. (I was not exactly sure what that consistency was, but I used up almost all the water so I decided that was enough).
5. Cover with plastic wrap and leave in a warm, draft-free place until foaming. This should take about 1 hour (#2). After one hour, it smelled very yeasty and looked bubbly.
6. Whisk the salt and baking powder into the batter (I added the salt in the dry ingredients).
How to cook (this is the most tricky part):
My wife carefully buttered the inside of the English muffin rings. Then, we melted the butter (my wife insisted it had to be butter not vegetable oil) in a large cast iron skillet on medium low flame. The recipe I was following suggested if the batter seeps out from the bottom of the ring, it is too watery; add more flour. Conversely, if the surface of the cooking crumpet does not form many little bubbles the batter is too thick, add more water. I started with one ring as a test. There was no seepage out the bottom (#3) and bubbles formed on the top. I concluded it was just right. So I went ahead and filled 4 rings (#4). The recipe said, fill the rings to just below the upper edge which I did. After a few minutes, the batter expanded and started running over the top edge of the rings. The recipe said to flip the crumpets over with the ring still on to cook the other side. This resulted in the excess batter going all over the bottom of the pan (#5). The crumpets were too thick and the center remained somewhat wet and doughy even after cooking them for over 20 minutes. This batch was deemed "a lack of success".
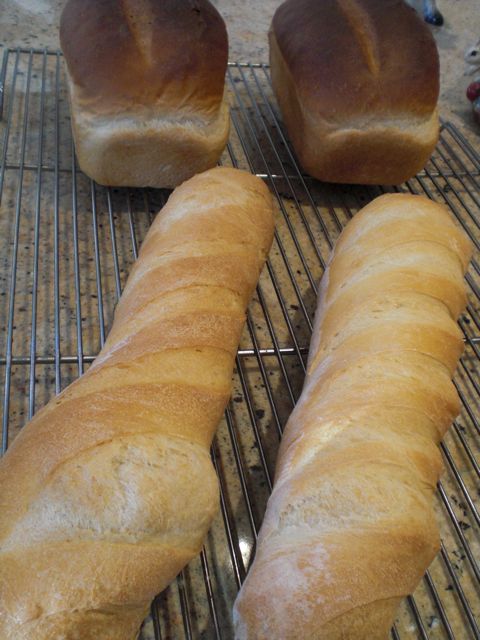
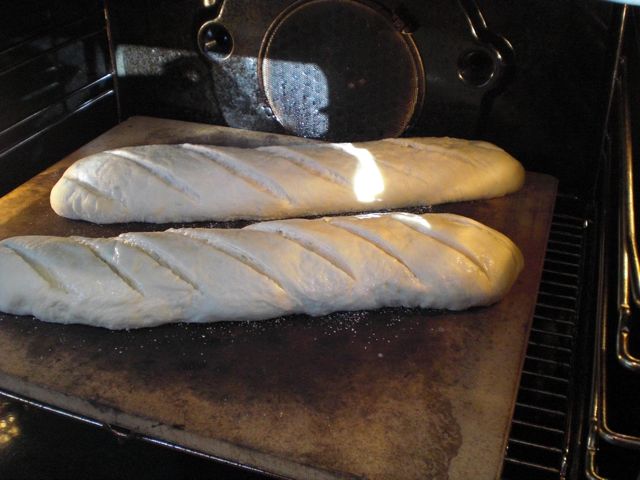
So, the next batch we adapted some ideas from the King-Arthur website recipe for crumpets. We filled the rings just half full (#6). After a few minutes, the batter expanded coming close to the upper edge of the rings (#7) (this looked much better than the previous batch). But for some rings, the batter did not come up to the upper edge, so flipping them with the ring still on would not have worked out well. The King Arthur recipe indicated that after 4 minutes cooking, as the edge of the batter dries out a bit the ring could be removed using a tong. We thought removing the ring would be difficult but as long as the batter did not expand to reach the top edge of the ring, it was surprisingly easy. We then flipped the muffin to cook the other side (without the ring) (#8). This worked much better than the method suggested in the previous recipe. We let the muffins cool on the cooling rack (the first picture above).
Tips for cooking:
1. Fill with batter to half height of the rings.
2. After 4 minutes, remove the rings using a tong.
3. Then, flip it over.
4. cook each side for 5 minutes for a total to 10 minutes. Then take another 5 minutes, as needed, to make sure both sides are evenly browned.
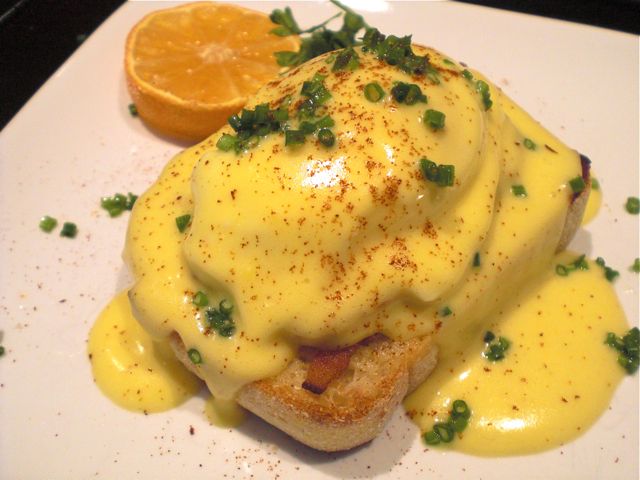
How to serve:
The crusts of the crumpets we made were nice a crunchy with a lovely browned butter taste. But even with the second and third batches, the insides were a bit wet and doughy. So my wife decided to separate the crumpet into 2 halves like an English muffin using her special fork method and toasted it. This was much better for us. The inside dried out and added to the lovely crunchiness of the crust. In general these were pretty good but in the future, we may just stick with our previously successful no knead english muffin recipe.
Wednesday, February 26, 2014
Poached egg with Indian-style sauce 落とし卵とインド風ソース
We had this for breakfast. It is a type of curry sauce with a poached egg on English muffin bread. (My wife also baked the bread. Instead of making round muffins she made it into a loaf). I think the original recipe called for the use of hard-boiled eggs but we like runny yolk. Of course, we used pasteurized shell eggs for this dish. Breaking the yolk and mixing it with the sauce and eating it with the bread (you’ll need a fork and knife) was wonderful. Again, it was very flavorful with lots of spices but not spicy hot. Perfect for breakfast or a late night snack.
Ingredients:
1 medium onion chopped
2 tsp grated ginger
1 jalapeño chopped
1 cup of light cream
1 tbs. lemon juice
1 tsp. ground cumin seeds
1/8 tsp cayenne pepper
½ tsp salt
¼ tsp garam masala
2 tsp. tomato paste
2/3 cup chicken stock
My wife cooked the onion until it was browned and caramelized. Then she added the ginger and jalapeño followed by the cream, lemon juice, cumin seeds, cayenne, salt, garam masala, tomato paste and chicken stock. She cooked the mixture until everything was combined and the sauce had thickened a bit. (The original recipe call for putting 6-8 hardboiled eggs, cut in half, face side up into the sauce and spooning the sauce over them cooking for 5 minutes). Instead, she toasted some english muffin bread, buttered it, put the sauce on the bread and topped it with a poached egg—voila, Indo-eggs Benedict (?).
As I said earlier, when the poached egg was broken the yoke ran into and mixed with the sauce. It was a luscious combination because the sauce was not too hot (spicy) but full of flavor. The toast added a lovely crunch.
Monday, April 30, 2018
Cornmeal bread コーンミールブレッド
Ingredients:
1/2 cup cornmeal
1 cup boiling water
1 Tsp salt
2 packages of active dry yeast
1/2 cup warm water (100 to 115 degrees)
1 Tbs. granulated sugar
1 cup warm milk
1-2 Tsp salt
1/4 cup dark brown sugar
4 to 4 1/2 All purpose flour
Directions:
Pour the cornmeal and salt into the boiling water. Stir vigorously until it cooks and becomes thick. (You are basically making polenta). Before the cornmeal completely cools and solidifies, add the cooked cornmeal, warmed milk, salt and brown sugar to a stand mixer with a dough hook. Stir to make a creamy mixture with no lumps. Let cool until slightly warm. Bloom the yeast in the 1/2 cup warm water and 1 tbs. granulated sugar. Add to the milk mixture. Add the flour one cup at a time. Stir until the dough is smooth and elastic. (Add more flour if necessary). Knead in the mixer for 7-10 minutes.
Put the dough in a bowl with a small amount of vegetable oil. Coat the dough in the oil. Cover and let rise until doubled in a warm place. When doubled punch the dough down and make two loaves. Put in a well greased loaf pan (the more butter used to grease the crunchier the crust because the dough is basically frying). Let rise again until almost doubled. Bake in a 425 degree oven for 10 minutes then lower the temperature to 350 and continue baking another 20 to 25 minutes or until the loaves are nicely browned and sound hollow when tapped. The original recipe said to take the loaves out of the pan and put on the rack of the oven for a few minutes to crisp the crust. We didn't do that.
This bread reminds of us of English muffin bread my wife makes. Both have a nice crunchy texture. This one has a pleasant faint corn flavor, of course, from the cornmeal. This bread can be used in any dishes where English muffin bread is called for and also good every day bread.
Wednesday, October 13, 2021
“Hoshigaki” (dried persimmon) muffins 干し柿マフィン
We bought dried persimmon or "hoshigaki" 干し柿 from Japan through the Japanese taste. We ate some and made a few small dishes. Although they were still good they were not getting any younger in the refrigerator, so we decided to make a concerted effort to use them. My wife tried to find recipes for dried persimmon on the U.S. (English language) internet and there seemed to be a few for fresh persimmon but basically none for dried aside from ‘eat them as-is for a snack.’ In contrast I found numerous recipes for dried persimmon on the Japanese internet. (I guess they are used more commonly in Japan.) In the dried fig stuffed muffins blog, my wife warned that a variation on the recipe using dried persimmon could be in the future so she decided to make good on her threat and use a variation of that recipe for the persimmon muffins. Since many of the Japanese recipes paired dried persimmon with rum as a hydrating agent my wife decided there must be a good reason that combination appeared so consistently so she decided to use rum too. These muffins were very good. Since we used rum to flavor and loosen up the hoshigaki, the muffins were a bit rummy/boozy but had a nice subtle sweetness and texture. These could also be a very nice dessert.
Ingredients (hoshigaki stuffing):
1 cup rum
Directions (for hoshigaki stuffing)
Carefully remove the seeds (#2), some had seeds and some did not.
Finely chop (they are sticky and it is not very easy but using the heavy chef's knife, I was able to finely chop them. The final weight was about 390 grams which made the stuffing for 17 muffins and some leftover).
In a small sauce pan, add the chopped hoshigaki and the rum and gently heat/mix.
Using a submersible blender, further chop it fine but not completely pasty (#3).
2 1/2 cup AP flour
2 tsp baking powder
1 tsp. baking soda
1 tsp salt
1 cup unsalted butter melted and cooled
1 cup sugar plus 2 Tbs. molasses (original recipe calls for dark brown sugar)
1/2 cup honey
2 eggs, lightly beaten
1 1/2 cups rum
Liberally grease the muffin tins (or use paper muffin cups #4). In a large bowl mix the dry ingredients. In another bowl mix the wet ingredients. Add the wet ingredients to the dry ingredients. Add half the dough to the bottom of the muffin cups. Top with the fig mixture. Don’t let the fig mixture touch the side of the muffin cups (#4). Top the fig mixture with the remaining half of the dough (#5). Bake in a 400 degree oven for 15 to 20 minutes until golden brown. Let cool for about 5 minutes and remove from the tins to a cooling rack.
Thursday, June 23, 2016
Egg-in breakfast muffins 卵とベーコン入り朝食マフィン
As you can see, the scrambled eggs are stuffed inside.
Directions:
- Preheat oven to 180C/350F.
- Grease muffin tins with with butter (original recipe calls for "Texas muffin tin to accommodate a whole raw egg in each muffin, we used a regular muffin tin and scrambled eggs crumbled into small pieces).
- Place Dry Ingredients in a bowl and mix to combine.
- Whisk Wet Ingredients in a separate bowl.
- Pour the Wet Ingredients into the Dry Ingredients until just combined. Do not over mix.
- Fold in Flavorings, including cooked bacon (#5).
- Place 3 tbsp of the batter into 4 muffin tin. Bang the tin to flatten the batter.
- Make a divot in the batter and put in the scrambled egg (or crack in a raw egg if using a larger tin and so prefer). (#6)
- Divide the remaining batter between each hole to cover the egg. (#6) shows covered eggs in front and uncovered eggs in back.
- Brush the muffins with melted butter (optional), then bake for 20 minutes or until golden brown.
- Remove from oven and allow to rest for 5 minutes before turning out onto a cooling rack. (#7 and 8)
- Best served warm.
Sunday, February 28, 2010
Baguettes バゲット
Monday, November 8, 2010
Poached egg, smoked salmon with crème fraîche ポーチドエッグとスモークサーモン
If you are into the looks, you could take off thin peripheral shaggy portions of the egg white to make it pretty.
Monday, September 12, 2011
Miso marinated tofu 豆腐の味噌漬け
I smeared the miso mixture on all sides and placed in a sealed container (Picture above). You could wrap this in plastic wrap but I did not.
Tofu is congealed soy protein and cheese is made from coagulated mild protein. So there is similarity. Obviously they are not the same, though. My wife said, if I served this to our unsuspected guests sliced like a cheese, most will think this is a type of semi-soft cheese. I may try this sometimes to see what kid of responses we get.
Sunday, February 4, 2018
Focaccia bread フォッカッチア
We like this particular Spanish olive oil. It has quite robust flavors. We recently got a newer pressing (for 2017).
This is not a recipe but a note to myself for future reference. I made this bread to reuse (rescue) the sponge (or starter or biga) my wife was attempting to make for her Panettone bread. My wife started the "biga" as per the recipe she found on line (200 grams or 1 3/4 cup of flour, 125 grams or a bit more than 1/2 cup of buttermilk, a small pinch of yeast, mixed together and let to stand at room temperature for 12-16 hours or until the volume doubles).
It looked quite dry for sponge and she was afraid she had not followed the recipe precisely. So she prepared another batch which also looked quite dry for sponge. In any case, she did make Panettone using the second sponge which was successful. So, we had the first sponge left over. Rather than throwing it out, I decided I would make a focaccia bread using this sponge. Since the sponge was rather dry, I added more water and kneaded and left it in a Ziplock bag for several more hours (it was made 2 days ago). It started looking more like sponge. Since the sponge had 1 3/4 cup of flour, I added 2 more cups of bread flour, one package of yeast (proofed in a small amount of lukewarm water with a pinch of sugar) and about 1 cup of water (I added a bit more until a proper dough formed). I kneaded it in a mixer with a dough hook for 10 minutes.
I decide to let it rise three times. I finished kneading by hand to make a tight ball. In a large bowl, I added a small amount of olive oil and placed in the dough ball and turned to coat. I covered it with a plastic wrap and towel and let it rise for 1 hour or until the volume doubled. I punched it down and let it rise for the second time. After the volume doubled again, I punched it down and let it rest for 10 minutes on the board (to relax the gluten). Then, I spread the dough onto a 1/4 sheet non-stick baking sheet. I let it rise for the 3rd and last time for 30 minutes. I then, pressed the dough with my finger tips to make multiple indents. I brushed on chopped fresh rosemary soaked in olive oil and scatted oil cured black olive (after the stones were removed) and pushed them into the dough (see below).
I baked it at a lower temperature than usual, at 350F for 30 minutes.
The focaccia came out less crusty and much thicker and bread-like in the center. This was one of the items in our bake-a-thon shown below. One weekend, we made Stollen (far left), English muffin bread (Upper middle), Panetonne (Upper right), White bread (Lower right) and my focaccia (center).
You may have notice both edges of the focaccia were already cut off for the tasting. We really liked the texture and flavor of the focaccia made this way.
Friday, March 22, 2013
Poached egg with curry sauce 温泉卵のカレーソース
We just toasted a piece of bread (This happened to be English muffin bread my wife baked). My wife toasted and buttered it. She put on three slices of smoked cheddar cheese (below left). Meanwhile I heated up the curry sauce, added slices of leftover roasted pork filet, and dropped two eggs (one per serving) into the sauce and put the lid back on. I took it off from the heat when the surface of the yolk was just barely opaque and the yolks were still runny (below right). Of course, we used safe, pasteurized eggs for this. I poured the sauce over the cheese/toast and placed the poached egg on the top. Because of the heat from the sauce, the cheese melted/softened.
We broke the egg yolk and enjoyed. The smoky flavor of the smoke cheddar cheese really worked here. The eggs yolk mixed with the curry sauce and made it richer. Since the curry sauce was rather mild, heartburn after breakfast was not a worry. This was a very hearty satisfying breakfast.
Wednesday, June 10, 2020
No Knead whole wheat bread 捏ねない全粒小麦粉パン
Cutting into it; a nice crust and very "hole-y".
Ingredients:
300 grams (2 1⁄4 cups) bread flour, plus more for the work surface
100 grams (3/4 cup) whole-wheat flour
1 1⁄4 teaspoons table salt
Wheat bran or cornmeal, for dusting (may use additional flour)
I weighed the flours and water. I used yellow corn meal for dusting.
Directions:
Step 1: Stir together the flours, salt and yeast in a medium bowl. Add the water; use a wooden spoon or your hands to mix until you have a wet, sticky dough, about 30 seconds. Cover the bowl and let the mixture sit at room temperature until its surface is dotted with bubbles and the dough has more than doubled in size, 12 to 18 hours.
Step 2: Generously dust a work surface with flour. Use a rubber spatula or lightly floured hands to scrape the dough onto the surface in one piece. Use your lightly floured hands to lift the edges of the dough up and in toward the center. Gently pinch the pulled- up dough together, cupping the edges in your hands as needed to nudge it into a round (don’t worry about making it a perfect circle).
Step 3: Place a clean dish towel on your work surface; generously dust the towel with wheat bran, cornmeal or flour. Gently place the dough on the towel, seam side down. If the dough feels sticky, dust the top lightly with more wheat bran, cornmeal or flour. Fold the ends of the towel loosely over the dough to cover it. Place the dough in a warm, draft-free spot to rise for 1 to 2 hours. The dough is ready when it has almost doubled in size. When you gently poke the dough with your finger, it should hold the impression. If it springs back, let it rise for an additional 15 minutes.
Step 4: About half an hour before you think the second rise is complete, position a rack in the lower third of the oven and place a 4 1/2- to 5 1/2-quart heavy Dutch oven or pot with a lid in the center of the rack. Preheat to 475 degrees. Use pot holders to carefully remove the preheated pot from the oven, then lift off the lid. Uncover the dough. Quickly but gently invert it off the towel and into the pot, seam side up. (Use caution — the pot and lid will be very hot.) Cover with the lid; bake (lower rack) for 30 minutes.
Step 5: Remove the lid; continue baking until the loaf is a deep chestnut color but not burnt, 15 to 30 minutes more. (If you like a more precise measure, the bread is done when an instant-read thermometer inserted into the center of the bread registers 200 to 210 degrees.) Use a heatproof spatula or pot holders to carefully lift the bread out of the pot and place it on a rack to cool thoroughly before serving or storing.
Certainly, looks great.
It was still warm when we sliced off a piece, buttered it and tasted it. This may be too crusty and rustic for us. The crust was extreme and almost felt like it broke into shards when we crunched it. It also didn't seem to have much flavor. My wife commented that it would make a nice crouton to dunk into hardy stews or soups but not the first choice for breakfast with coffee. Certainly some liquid is required and wine alone was not enough to enjoy this bread.
The next day, we had a toasted slice of this bread with cauliflower parmesan potage (similar to what we posted), and a small salad as a lunch and it was great! Somehow resting overnight made the bread much better. The crust, while crunchy, was not as hard and the overall texture of the bread had improved. The toasty flavor of the whole wheat flour really shone through. So what was the lesson learned here? We were clearly too hasty busting into this bread before it had cooled enough. It needs to rest at least until fully cooled or, at best, one day to mature to its full potential--and it is well worth the wait. This is definitely a very good bread to have.
Subsequently, reading Jim Lahey's cookbook we found the following passage which confirmed what we stumbled upon and mentioned above. "After the bread is removed from the oven there is a final step in the process. The cooling step is crucial. Thorough cooling actually completes the cooking of the dough and when you slice a hot loaf you are releasing heat and moisture prematurely. The bread will taste under baked and wet."
Friday, June 18, 2021
Crumpet version 2 クランペット 第二弾
The new recipe had instructions as to how to control the heat to develop multiple holes as shown in the second and third pictures. You can see that while cooking, bubbles developed and then popped creating nice holes.
300 g. (2 cups) AP flour
400 ml. (1 1/2 cups) warm water
1 tsp. Salt
1 tsp. Sugar
2 tsp. Baking powder (The recipe said baking soda doesn’t work as well)
2 tsp yeast
2 tbs. warm water
1 1/2 tsp. Salt
2 tsp. Sugar
3 tsp. Baking powder (The recipe said baking soda doesn’t work as well)
3 tsp yeast
3 tbs. warm water
600 g. (4 cups) AP flour (or 2 cups AP and 2 cups + 1/4 cup Cake flour)
800 ml. (3 cups) warm water (or buttermilk or regular milk)
2 tsp. Salt
2 tsp. Sugar
4 tsp. Baking powder (The recipe said baking soda doesn’t work as well)
4 tsp yeast
4 tbs. warm water (1/4 cup)
Directions:
Bloom the yeast in the warm water. Put the flour, water and salt in the bowl of an electric mixer and beat on speed 5 for 1 minute until smooth paste forms. Add the yeast mixture, sugar and baking powder and mix on speed 5 for another 30 seconds. Cover with cling wrap and put in a warm place for 15 to 30 minutes. The surface should get foamy but it will only increase in volume by 10 to 15 %.
These crumpets were much better than the first batch we made. They got even better after the second day. We tasted them just out of the pan and the outside was crunchy but the inside was kind of wet and doughy. We initially thought they may not have been cooked through. But by the next day the insides had firmed up and were nicely chewy. The flavor was nicely accented with the taste of browned butter. We toasted them in the toaster oven and served them with melted butter and some honey. Mighty fine!


.jpeg)


