It was an exceptionally nice day for mid June and we fired up the Konro grill outside and this was a part of the starter dishes pictured below. I already had stewed "hijiki" which I had made previously (middle). The cut glass tumbler from Kitaichi glass (on the right) is tall and a bit unstable so I used "masu" 升, a square wooden Japanese measuring cup, to stabilize it. This happens to be the common way in which sake is served in an Izakaya. They intentionally pour sake to overflow the cup and let the sake spill over into the "masu" underneath as a gesture of generosity. Although we need not to do that since we are quite generous to ourselves when it comes to sake, I recall Dave was not too happy at Shuto-an 酒徒庵 since they did not serve sake this way.
Wednesday, June 23, 2010
"Mozuku" and "Nagaimo" in sweet vinegar モズクと長芋の甘酢
The Japanese eat anything which comes out from the sea and also like combining slimy food with slimy food (double slim or, sometimes, triple slim). I got inspired (??) from the reportedly mediocre dish I saw in Jon's posting. I occasionally get a type of slimy sea vegetable called "Mozuku" もずく, which is already prepared in sweet vinegar and packaged in a plastic cup, which I get frozen. The southernmost archipelago of Japan, Okinawa 沖縄, is famous for Mozuku. Since I had an end piece of "Nagaimo" 長芋 left over, I simply peeled, sliced and made it into match stick shaped pieces. I used sushi vinegar to lightly dress it and placed it over the mozuku and garnished with another type of aquatic vegetable called "aonori" 青のり which is dried and comes as small flakes.

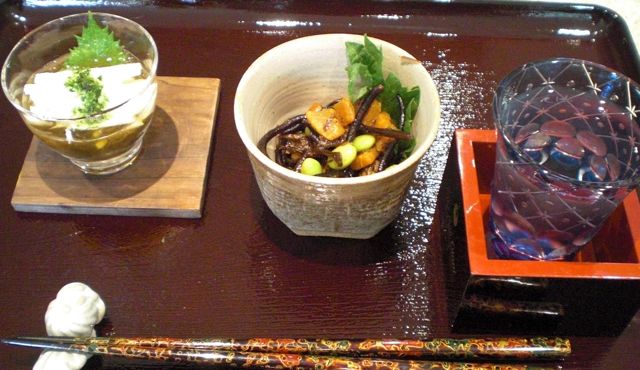
The nagaimo has a nice crispy texture with some sliminess (but nothing compared to grated nagaimo) and mozuku has a bit similar characteristic and is the perfect match. The sweet vinegar is very gentle and we slurped whatever was left in the cup. Actually, I served this in a crystal sake cup "guinomi" ぐいのみ also from Kitaichi glass, so this was a very natural thing to do.
Monday, June 21, 2010
Plum wine, Supplement 梅酒、追加
We harvested "aoume" 青梅 or unripe green plum last weekend for 2010 umeshu.
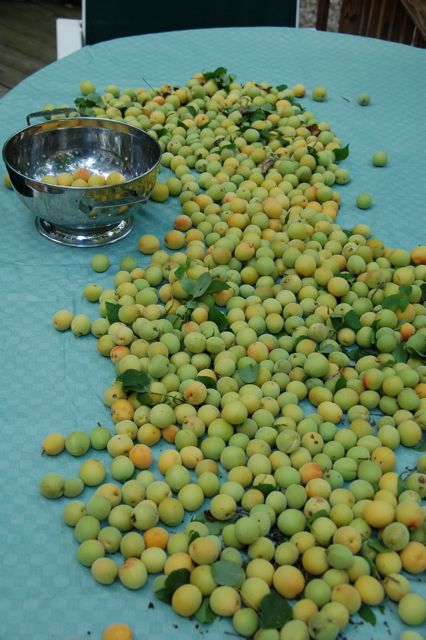
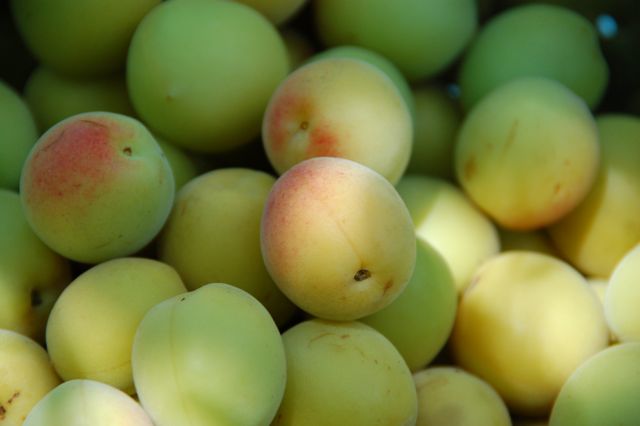
Although I posted umeshu when I bottled the 08 vintage, I decided to add a few more images and a description of how to make umeshu. We usually use 1 lb of plums, 1/2 lb of sugar and 1.75 liter of liquor (either Vodka or brandy), but we started using 2 lb of plums with the 2008 vintage since our tree produces so much fruit. Traditionally, rock sugar or "koorizatou" 氷砂糖 is used but it is difficult to find rock sugar here in the U.S. and we cannot detect the difference in the end product, so we use regular granulated sugar. I think the reason for using rock sugar is that it will slowly melt producing a saturated sugar containing liquid layer. Since this layer has a high specific gravity (as compare to the remaining liquid) the saturated layer will remain in the bottom for some time extracting plum juice. I try to achieve the same effect by coating the fruit with sugar and leaving it over night to extract the plum juice before adding the liquor as described below.
I use brandy for one batch and Vodka for two other batches as you can see below. For brandy, I use Christian Brothers, not Remy Martin XO, but that is up to you. I also use the cheapest Vodka I can find.
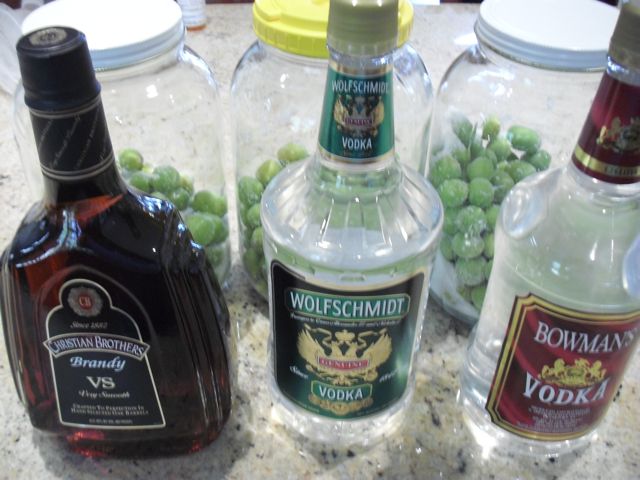
I gently pour in the liquor so as not to disturb the sugar in the bottom. As you can see below, undissolved sugar can be seen in the bottom. My hope is that the sugar will melt gradually and produce a concentrated sugar layer in the bottom of the jar.

I just place the containers on a shelf in the basement or where ever they will not be in your way and wait for one year before bottling and drinking. Just don't forget about it. (I forgot to bottle the '08 vintage for 2 years but the result was still good. So if you do forget, a few extra years don't seem to hurt.) Several years of bottle aging will make umeshu better.
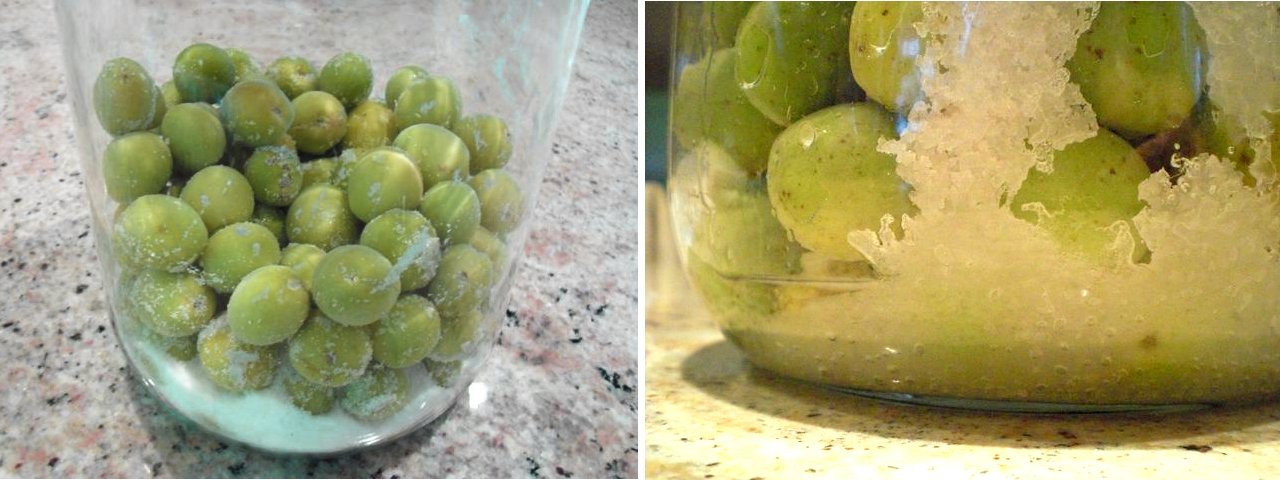
The image below left is of washed and dried plums (2 lb) in a container with (1/2 lb) of sugar added. I just gently rotate the container several times so that each plum is coated with sugar. The picture on the right is after the plums have been in the sugar over night. You can see the plum juice came out and the sugar is wet.
Sunday, June 20, 2010
Pizza Margherita and Pizza with caramelized onion ピザ
When we had our wine party/tasting, I made pizzas as a starter. They were a big hit but were eaten so fast we did not have a chance to take pictures. So, next day, I made a half-and-half pizza Margherita (left) and pizza with caramelized onion (right) from the left over ingredients. I already posted my pizza dough recipe. (Please note this image was not doctored up by Gimp or Photoshop.)

Garlic infused olive oil: I just crush several cloves of garlic using a garlic press and add good extravirgin olive oil and mix. Use this to brush pizza dough and crust.
Tomato sauce: Tomato sauce was made similar to my Marinara sauce but I added a small amount of port wine (Cheap Ruby port from Taylor) and simmered it longer so that the moisture level was very low.
Assembly: I sprinkle corn meal on a pizza peel and place the stretched and formed pizza dough on the corn meal before starting the assembly. Give the peel a quick tug to make sure the dough moves freely before adding the topping.

Pizza Margherita: I brush the garlic infused olive oil on the prepared dough. I put the slices of mozzarella cheese on the pizza first and then place a small amount of the tomato sauce on top of the cheese slices. (Usually the sauce is put on first and then the cheese). While my method is the opposite of what is usually done, I think this makes a better pizza since the cheese protects the crust from the moisture of the sauce. The result is a crispier crust.
Tomato sauce: Tomato sauce was made similar to my Marinara sauce but I added a small amount of port wine (Cheap Ruby port from Taylor) and simmered it longer so that the moisture level was very low.
Cheese: I used fresh cow's milk mozzarella. I usually use smoked mozzarella for the caramelized onion pizza but I used up all the smoked cheese I had for the pizzas at the wine party. So, for this pizza I used regular mozzarella and small chunks of fresh goat cheese. I do not shred the mozzarella but slice it (the reason becomes clear in the assembly part below). It is easier to cut thin slices when the mozzarella is cold using a thin bladed knife.
Caramelized onion: Simply saute halved and thinly sliced onion in olive oil. This requires some patience until the onion become wilted and dark brown (15 minutes or longer). When enough brown "fond" appears on the bottom of the saute pan, I deglaze it with small amount of water which helps to color and flavor the onion but you need to saute further to evaporate most of the liquid.
Pine nuts: We keep pine nuts in a freezer. Just dry roast them in a frying pan until slightly brown.
Assembly: I sprinkle corn meal on a pizza peel and place the stretched and formed pizza dough on the corn meal before starting the assembly. Give the peel a quick tug to make sure the dough moves freely before adding the topping.
Caramelized onion: The same as above but I spread the caramelized onion over the slices of cheese and then dot it with small chunks of the fresh goat cheese and sprinkle the pine nuts.
Baking: I bake for 8-9 minutes directly on a hot pizza stone by sliding the assembled pizza off the pizza peel. I preheat the oven for at least 30 minutes to 450F before baking--with the pizza stone in.
Take the pizza out and brush the edge of the crust with olive oil and grated Parmesan cheese. For Margherita, I garnish with a chiffonade of fresh basil.
We had this with the leftover wine from the day before, The 2005 Clos Mogador (about half the bottle left). The wine was much better than the first time we tasted it. The funky nose was totally dissipated. This wine has a very nice complex taste and went particularly well with the caramelized onion.
Friday, June 18, 2010
Eggplant gratine two ways; Marinara and Yuzu-miso sauce with cheese
Last time we had a chance to grill outside, I grilled a small Italian eggplant trying to make "yakinasu" やきなす or Japanese style grilled eggplant but it was not really good. So, when I saw a nice Zebra eggplant in the market, I had to get one. Since It was not feasible to fire-up a grill outside, I asked my wife how she like the eggplant cooked. I got a bit ambiguous answer. So I decided to halve the eggplant and make one in an Italian style with Marinara sauce and cheese and the other half in a Japanese style i.e., "citrus miso dengaku" with cheese, so that I can not go wrong.

I cooked the eggplant in my usual way. I cut the eggplant in half length wise. Then I cut the meat around the edges close to the skin and in cross-hatch pattern but not cutting through to the skin (This is hasten and make cooking uniform). I put about 2 tbs of light olive oil in a frying pan on a medium flame. When the oil is hot and shimmering, I put in the eggplant the cut side down. The eggplant eventually absorbs all the oil. After 1-2 minutes, I put on the tightly fitting lid and turned down the flame to low and let it cook about 10 minutes. The eggplant should be soft and thoroughly cooked with the cut surface nicely brown. I transferred the eggplant halves to a baking sheet (or ramekin) and layered one with Marinara sauce and the other with Yuzu-citrus miso. Then I topped them with grated cheese (I used a mixture of Cheddar and Raclette here but any melting cheese will do) and put them in a 400F oven (I used a toaster oven) for 5 minutes or until the cheese melts.
Marinara sauce: I placed olive oil (1/4 cup), 3-4 cloves of garlic (minced), and red pepper flakes (optional), in a small deep pot on a low flame. When the garlic became fragrant, I added canned whole tomato, drained and crushed (16 oz can), dried oregano and basil (1/2 tsp, each), salt and freshly ground black pepper. I simmered this sauce for 30 minutes. I tasted and adjusted the salt and pepper. You may want to add a pinch of sugar to cut the acidity.
Yuzu-miso sauce: Mix red miso (3 tbs), sugar (2tbs), and mirin (3 tbs) in a small sauce pan on a low flame. Keep stirring until nice thin saucy consistency is attained (about 5 minutes). I added 1 tsp of dark roasted sesame oil (optional) at the end and mix well. Off heat, I add Yuzu juice (from a bottle) (1 tsp) and zest of one lime (using a micrograter) or just lime or lemon juice and zest.
In the above picture, on the left is the eggplant with Marinara sauce and on the right is the one with Yuzu-miso sauce. I garnished the Yuzu-miso eggplant with the zest of a lime and, if I had fresh basil, I would have garnished the marinara sauce side with chopped basil. You can have this with wine, beer or sake. We had this with Poggio Il Castellare Sant Antimo Cervio Cabernet Sauvignon 2007, which taste more like California cab rather than Super Tuscan, but it went very well with this dish nonetheless.
Wednesday, June 16, 2010
Chicken liver and tofu terrine 鶏レバーのテリーヌ風
Believe it or not this recipe came from "Appetizers and a la carte small dishes for Izakaya" by Tadashi Shinojima. Judging from the title of the book, by definition, this must be an Izakaya food. Although this looks and tastes like a chicken liver pate (actually it is more pate than terrine), there are a few Japanese touches; one is the inclusion of tofu and the other is the addition of "edamame" 枝豆. Since I bought a container of chicken livers for Yakitori, I decided to make this dish; a situation similar to the previous time I made braised chicken liver and onion.
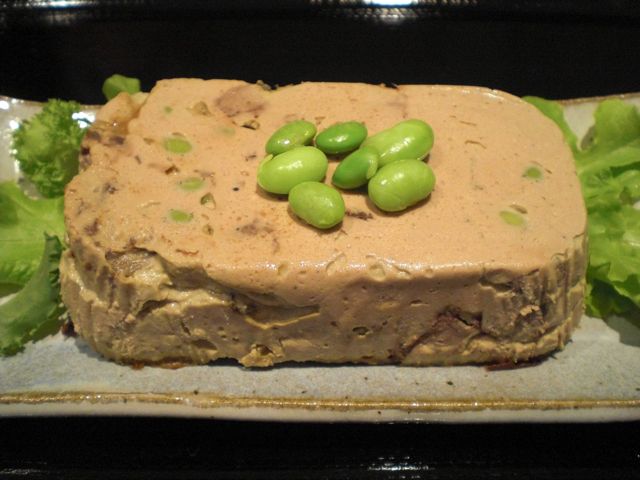
I used about 180 grams of chicken liver. After removing the fat and connective tissue, I soaked it in ice cold water for 15 minutes. I added a bit of sake to the water and boiled the liver for 4-5 minutes until thoroughly cooked. Meanwhile, I wrapped a firm or "momengoshi" tofu 木綿ごし豆腐 in paper towels and microwaved it for several minutes. I re-wrapped it in new paper towels and placed a heavy plate on the top for 10 minutes to squeeze out any excess water. I used about 150 grams (after removing the excess water) of tofu. In the mixing cup of an immersion blender, I added the cooked liver (180grmas), tofu (150grams), beaten egg (1/3), cream (1 tbs), grated onion (1 tbs), salt and pepper and blended them until smooth. I then folded in the shelled edamame (I used about 20 of the frozen kind, cooked and shelled). I also added small cubes of left over steak (the recipe called for cubes of roast beef). I then poured the mixture into small (disposable) loaf pan and baked for 30 minutes in a preheated 400F oven in a bain-marie. The original recipe was a bit vague about how this dish is to be cooked (the author said "mushiyaki" 蒸し焼き or steam-bake in an oven) but I interpreted this to mean bake using a bain-marie. I let it cool down to room temperature and stored it in the refrigerator overnight before slicing.
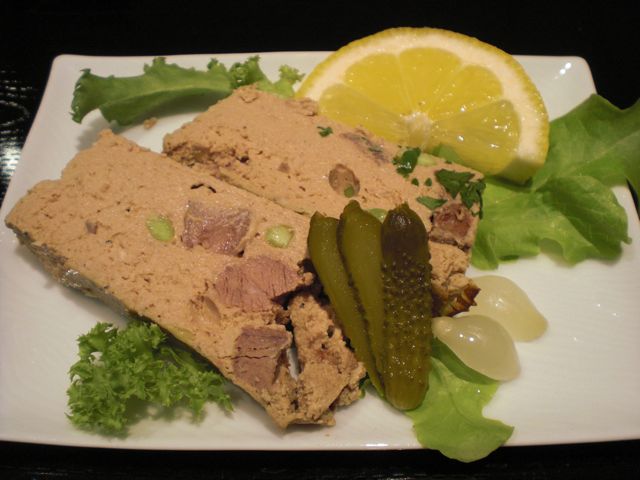
The recipe suggested serving this with a "white cream sauce" but I chose to serve it like a pate with cornichon pickles on toasted small squares of cocktail bread. The texture is great and the edamame and cubes of steak made an interesting texture contrast and color. If you are not told, you would not have guessed that close to half the bulk came from "tofu". It has a nice irony liver pate taste but it needs more distinctive spices (maybe more onion, black pepper and salt). For a fusion pate with tofu, this is not bad. Does Tofu make this dish a healthier dish? - maybe.
Monday, June 14, 2010
Spicy Konnyaku stir fry コンニャクのぴりから炒め
Spicy Konnyaku stir fry コンニャクのぴりから炒め
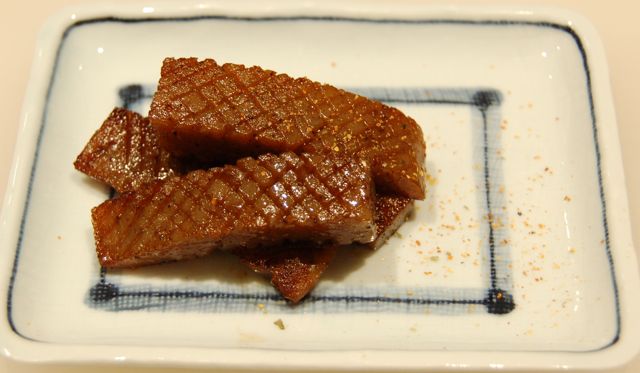
Since I have been posting non-Izakaya items for some time, I am going back to a simple Izakaya affair here. This is another very quick dish using Konnyaku 蒟蒻 and a perfect small dish with sake. I used a dark unbleached version of konnnyaku. After I wash and blanch the cake of konnyaku, I cut the thickness into two by cutting through horizontally as I press the cake of konnyaku against the cutting board. I then make shallow crisscross cuts on both sides as you can see in the above image. This is to make any seasoning penetrate the konnyaku. I cut them into a bit less than one inch wide strips.
I put 1/2 tbs of peanut oil with a dash of dark roasted sesame oil in a frying pan on medium flame. I fry each side of konnyaku strips for 1-2 minutes so that the surface become slightly congealed and crunchy (small bubbles will come out on the surface). I then add 1/2 tbs of soy sauce and quickly sauté until soy sauce become fragrant and absorbed. I sprinkle a Japanese 7 flavor red pepper powder 七味唐辛子. This is a sort of nothing dish but nice to have with sake. This time I made it a bit too spicy and registered a mild compliant from my wife. Sorry.
Sunday, June 13, 2010
Japanese grocery store
Our favorite Japanese grocery store has closed.
I went to the Japanese grocery store "Daruma" this weekend complete with shopping list, mouth ready for some good food afterwards when, imagine my shock, I discovered the store completely gone--without a trace! Part of the space was now occupied by a ramen restaurant. It was a real bummer. This was our favorite Japanese grocery store of 22 years. Over the years it moved location three times finally settling in Bethesda. Although there are a few other oriental markets and one other smaller Japanese market nearby, our ability to get Japanese food ingredients has definitely diminished dramatically.

A few months ago we noticed that their inventories were a bit sparse with empty shelf showing through, but we certainly did not think they would be closing. In the same location, we now have Ren's Ramen as a stand alone ramen restaurant. This restaurant started out as a few tables and stools "a store inside the store" of Daruma. Maybe, I will start a review of ramen noodle places (only problems is the number of places is extremely limited--albeit one more than a few weeks ago).
Subscribe to:
Comments (Atom)
