Saturday, May 7, 2011
Amaebi Ceviche 甘エビのサビーチェ
This is what I made from the two largest amaebi shrimp we received from the latest shipment of goodies from Catalina Offshore products. This is more like a classic ceviche than the one in the previous post. In addition, I remembered that we had an interesting Martini glass and used it to serve the amaebi ceviche. I am going to present a tight shot, followed by a long shot, and a longest shot this time.
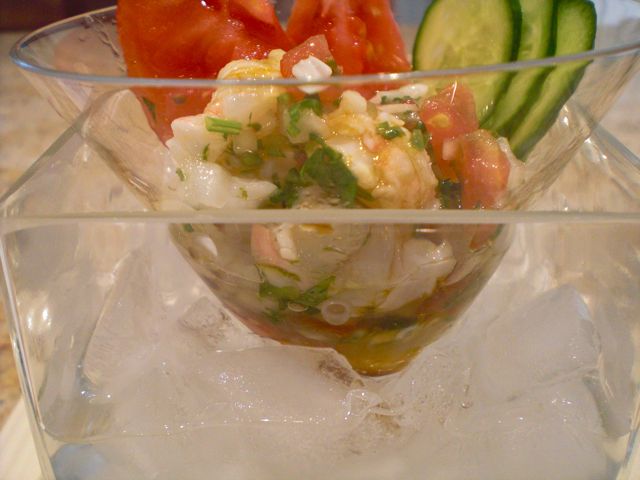
After I removed the head and roe (both shrimp had a large amount of roe) which was used in miso soup, I removed the shell and tail. I deveined and then cut it into small rounds. The marinade is mixture of freshly squeezed lime juice (4-5 tbs from 2 limes) and yuzu juice (1/2 tsp from the bottle). I added the zest of the lime (1/2 tsp, grated by a micro-grater), Vidalia spring onion (half, finely chopped), tomatoes (half, deseeded, skinned, and diced), Jalapeno pepper (1/2, seed and veins removed and finely chopped), parsley (1/2 tsp, finely chopped), salt and pepper. I mixed this into the marinade and added the shrimp. I let it steep (chemically cook) for few hours in the refrigerator.
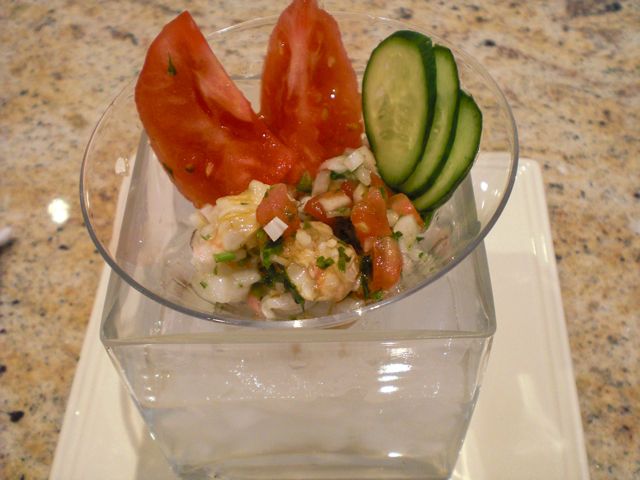
To serve, I drained the excess marinade, added a splash of good olive oil, sake, Tabasco (after tasting, I thought, it needed a bit more heat), and soy sauce. I placed it in the Martini glass on ice and garnished it with wedge of tomato and cucumber slices.
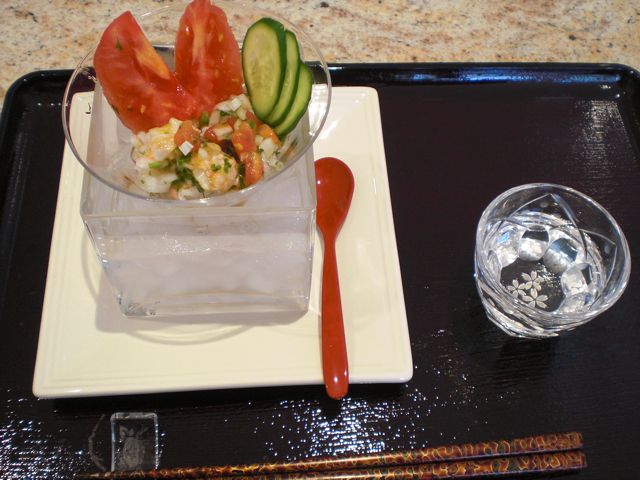
Cold sake appears to be appropriate for this dish. Compared to the previously posted amaebi ceviche which is not really (chemically) cooked, this is more like a traditional ceviche, and it tasted good. I did this because, although the shrimp was packed with ice in the meat conpartment of the refregirator, it had been 2 days since we received the live amaebi.
Thursday, May 5, 2011
Deep fried shrimp heads and Royal trumpet mushroom tempura 海老の頭の唐揚げとエリンギの天ぷら
I have posted deep fried shrimp heads before but it is, again spring season for amaebi or spot prawns. As usual, this came from Catalina offshore products and the shrimp was wild caught in water off San Diego. When they arrived, all of them were still arrive (albeit just barely), which was a very good sign.
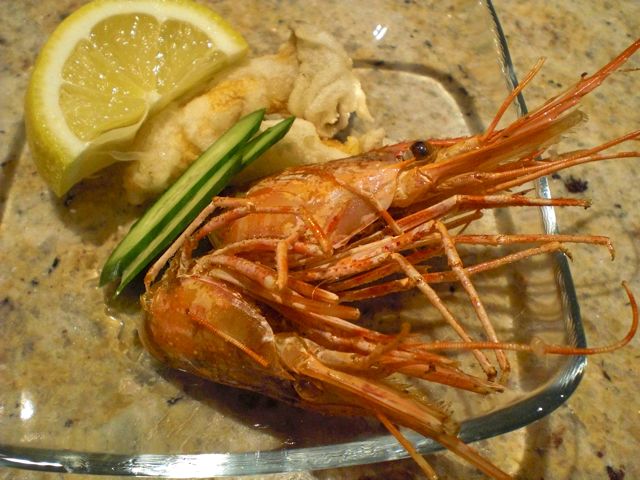
One of the problems with spring amaebi (spot prawns) is their size. Although this was supposed to be 12 count per pound, We had only 6 in the pound; 4 were about 10C in size but two were gigantic. For sashimi, we prefer the small size. For smaller amamebi, the heads can be easily deep fried but when shrimp are too big, it is not feasible to do this.
In any case, we first had the four smaller ones as sashimi and also made deep fried shrimp heads. I trimmed the antennae and blotted the excess moisture (using paper towels) and fried in 350-370F peanuts oil for 6-7 minutes. After draining the oil, while they were still hot, I salted them. Since I had hot oil, I also cooked some royal trumpet mushrooms (very similar to eryngii which are popular in Japan) tempura. I tore one mushroom into 4 pieces from the bottom of the stem. Tempura batter was made of cake flour with the addition of potato starch and cold water (4:1 ratio of the flour and potato starch. I added cold water until the desired loose "batter" consistency was reached).
The shrimp heads had a very nice crunchy shell and lots of sweet meat that almost tasted like small lobster. A word of caution; bite down the shell perpendicular to your teeth lest you incur injury from the sharp shell or leg impailing your pallet or gums. For sashimi, beside sweet shrimp, we had maguro (ko-toro 小トロ bordering on chu-toro 中トロ) and uni 雲丹 sea urchin. Nothing but sake works for us for this type of food.
Tuesday, May 3, 2011
Ratatouille with a poached egg ラタトゥユのポーチドエッグのせ
We got the idea for this dish from Eric Ripert's TV show. Since we had leftover ratatouille, it is very easy to make. From our experience of trying a few baked egg dishes such as Oeuf cocotte, we learned that baking eggs and having them come out just right instead of raw or like rubber, is very difficult. When the yolks are just done perfectly, the whites are not done or the whites are done but the yolks are overcooked. So whenever we see "baked" eggs recipes, we use "poached" eggs instead. This way we have a much better control over the doneness of the eggs.
*Please note that we use pasteurized shell eggs . Use pasteurized eggs or safe eggs from an alternative source for any dishes for which you undercook or not cook eggs.
Sunday, May 1, 2011
Curry flavored baked drumettes 鶏手羽のカーレ風味オーブン焼き
This is a variation on the theme of Buffalo wings. I thought I bought whole wings but when I opened the package, they were all drumettes and I just came up with this dish one evening. A similar dish may indeed exist but this was not based on any recipe.
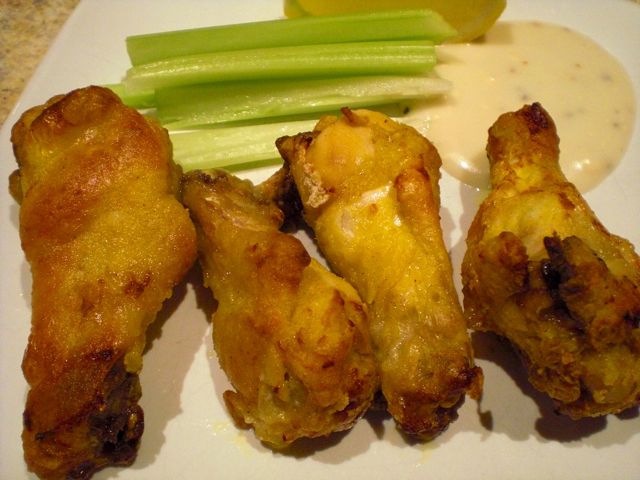
I had 8 drumettes. I seasoned them with salt and pepper. I made a mixture of flour and Japanese SB brand curry powder (1/2 cup flour and 1 tbs curry powder or add more curry powder if you like it spicier) in a Ziploc bag and added the drumettes and shook the bag to coat the chicken.
I baked them in a hot oven (450F convection oven in the top shelf) for 20 minutes turning them once half way through cooking. Although I did not add any oil, the oil from the skin made a crispy crust. The upper side of some of the drumettes still had flour left halfway through the cooking, but, by turning it over, oil from the skin turned the flour into the crispy crust (self frying). The end result was as seen above; nice crispy crust/skin with curry flavor with mild spiciness. I served them like Buffalo wings with celery sticks and blue cheese dressing. The skin and crust are almost as good as deep fried. Beer will be a natural choice but we went for cold sake.
Saturday, April 30, 2011
Sake-steamed "Sakamushi" chicken breast with scallion sauce 鶏胸肉の酒蒸し葱ソース
This is another simple dish but it is a perfect drinking snack. A Japanese cooking technique called "Sakamushi" 酒蒸し simply means "steamed in sake". There are some variations on how to do sakamushi. You could do this using a combination of poaching/steaming or purely steaming depending on the situation or the type of food items you are cooking. This technique is used mostly for fish (including shell fish) or chicken. I bought 4 split chicken breasts with bone in and skin attached. I was too lazy to debone the chicken before cooking (one of these weekday evenings). So I decided to do sakamushi using bone-in and skin-on breasts.
Steaming: In a large Dutch oven or soup pot, I placed a metal basket steamer and poured a sake and water mixture (a 1:1 ratio) to just below the bottom of the basket. When it started boiling/steaming, I turned it down to a simmer and placed the chicken breast in the steamer basket with the lid on tight. I let it steam for 20 minutes or so or until the juice ran clear when pierced in the thickest portion. It is important to let the chicken cool to room temperature before slicing. It tastes best just as it comes to room temperature but it is also fine cold the next day or two stored in the refrigerator. You should finish it within a week, though.
Sauce: This time I served this with a type scallion sauce or "negi sosu" 葱ソース (my own, just made on a whim). It is a mixture of chopped scallion (as much as you like), ponzu shoyu sauce (from the bottle), splash of dark sesame oil and Tabasco (as much as you like). I also added a chiffonade of perilla since I had it.
Assembly: I just removed the bones by hand and sliced the chicken with the skin on (if you do not like the skin or do not want to take in fat from the skin, remove the skin). I placed the chicken on a bed of thinly sliced and lightly salted cucumber (mini cucumber). I just topped it with the scallion sauce. I was afraid that I might have been a bit too liberal with the Tabasco but it was just the right amount of spiciness for us. Especially if you remove the skin, this is a very low fat drinking snack.
You could serve the sakamushi chicken many different ways. You could use this chicken for salad, sandwich etc. You could steam an entire chicken if you wish (steaming a whole chicken is not really a Japanese way of cooking, though) but you need a large and deep stock pot for that. Another method I used to use often is a Chinese style poaching technique similar to one used in Hainanese chicken and rice. You boil a pot full of water (sans the volume of the chicken you are planning to put in, but the pot must be large enough for the chicken to completely submerge and the water volume has to be sufficient to hold the heat). You dunk the whole chicken for 30 seconds in boiling water and take it out (supposedly this initial dunk makes the skin taut and less porous to keep the moisture in) and wait until the water comes to a boil again, then, put the chichen back in, shut off the heat and cover with a tight lid. Let it poach for 1 hour or longer without any additional heat until it is done. This technique produced a really tender succulent chicken but it is a big production (I think I got this recipe from Frugal Gourmet).
In any case, poaching or steaming a chicken is not popular in the U.S. but this is a good and energy efficient way to cook chicken. We had it with cold sake.
Thursday, April 28, 2011
Parent-offspring (chicken and egg) bowl 親子丼
This was a "shime" 〆 dish I served one evening. Chicken and egg bowl or "Oyako donburi" 親子丼 is a classic "donburi" or one bowl dish. It sounds a bit gruesome when it was translated literally into English. Albeit less common, the combination of salmon and salmon roe donburi also falls into this category of "parent-offspring" bowl.
For 2 servings, I used chicken thighs (2, deboned, skin removed and cut into bite size), small onion (1, halved and thinly sliced), shimeji mushroom (root end cut and divided, or fresh shiitake mushroom stem removed, arbitrary amount or "tekiryou" 適量), some kind of green (spinach is most commonly used, here I used baby arugula, again, an arbitrary amount) and eggs (two, I used one brown and one pasteurized shell eggs for the reason you will see below).
I slid everything onto a bowl of warm cooked rice (I used leftover frozen rice, microwaved). By this time only a small amount of the broth remained.
For 2 servings, I used chicken thighs (2, deboned, skin removed and cut into bite size), small onion (1, halved and thinly sliced), shimeji mushroom (root end cut and divided, or fresh shiitake mushroom stem removed, arbitrary amount or "tekiryou" 適量), some kind of green (spinach is most commonly used, here I used baby arugula, again, an arbitrary amount) and eggs (two, I used one brown and one pasteurized shell eggs for the reason you will see below).
Broth: I just used instant dashi granules dissolved in hot water (half cup), I added mirin and soy sauce (1 tbs each). You would like to have the broth a bit stronger than a soup but not as strong as a dipping sauce. I tasted and added a bit more soy sauce.
In two non-stick small (8 inch) frying pans on a low flame, I poured the broth and arranged the onion and mushroom. I put on the lids and let it simmer for 5 minutes or until the onion was almost cooked. I then added the chicken and let it cook for another 3-4 minutes or until the chicken was just cooked through. I added the greens and poured the beaten brown egg over it (divided between two pans). I put the lids back on and let it simmer for 2-3 more minutes or until the egg is almost completely cooked (image below), I turned off the fire and poured the beaten pasteurized shell egg over everything and put back the lids letting the pans steep for 1 -2 more minutes. (The beaten pasteurized egg should not be completely cooked).
This is best when the egg is semi cooked (or "hanjuku" 半熟). This is the reason, I added the beaten pasteurized egg after I cut the flame. This dish is a classic comfort food and perfect for lunch, dinner or "shime" 締め.
Tuesday, April 26, 2011
Daikon "steak" with balsamic vinegar reduction 大根のステーキ
This is a very interesting dish. This may be the best way to introduce "daikon" to the uninitiated. I had a daikon I bought sometime ago sitting in the refrigerator. I wanted to use it before it went bad. I decided to explore something I have not tried. I came across this dish in e-recipe. I deviated very slightly from the original recipe, although this was the first time for me to make this dish (my instinct makes me change the recipe on the fly).

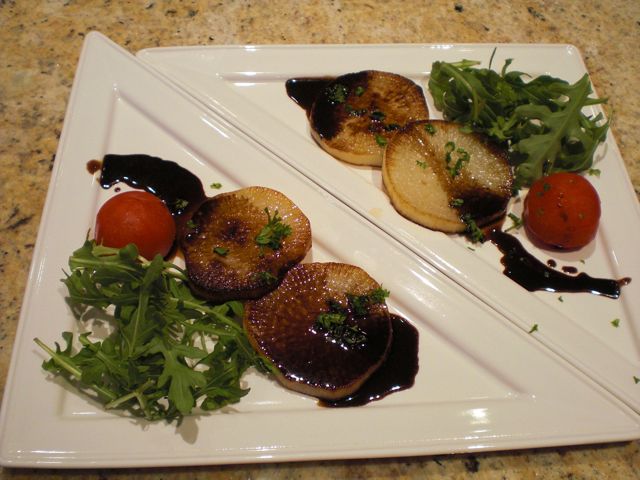
Daikon: I first cut about 1 inch thick rounds (two) and peeled the skin. I precooked the daikon in water with a pinch of raw rice for 30 minutes. After it was cooked, I washed it in cold running water. I kept this cooked daikon in a container in a refrigerator for later use.
Several days later on a weekday evening, I decided to finish this dish. (Since this dish turned out to be very good, I made it again several evenings later, see #4 in the image below). I decided the rounds of daikon might be a bit too thick and sliced each round into two 1/2 inch thick rounds. I simply fried the daikon rounds in a flying pan on medium flame with light olive oil (1 tbs) for 2-3 minutes on each side until both sides were nicely brown (#1 in the image below).
Several days later on a weekday evening, I decided to finish this dish. (Since this dish turned out to be very good, I made it again several evenings later, see #4 in the image below). I decided the rounds of daikon might be a bit too thick and sliced each round into two 1/2 inch thick rounds. I simply fried the daikon rounds in a flying pan on medium flame with light olive oil (1 tbs) for 2-3 minutes on each side until both sides were nicely brown (#1 in the image below).
Sauce: After I removed the daikon from the pan, I added balsamic vinegar (5 tbs) and let it reduce in half (#2). Instead of sugar or honey (as suggested in the original recipe), I added mirin (2 tbs or, as in my steak sauce, I could have added port wine here), soy sauce (2 tbs) and let it reduce further. When the bottom of the pan was just covered with liquid and the sauce was getting somewhat viscous, I added pats of butter (2 tsp or whatever amount) and finished the sauce (#3). This is the next evening when I served the same dish with drunken Camapari tomato and brocollini (#4).
My wife got these funky triangular plates sometime ago and I decided to use it for this dish (2nd image above). I garnished the daikon with chopped parsley with an accompaniment of Campari tomatoes and baby arugula. This is a very good dish. Not quite steak but it has a similar consistency and the sauce went very well with it. This arugula had a very strong peppery taste complimenting the dish. The wine we had with this is not outstanding but OK California Malbec, 2007 Dry Creek which went very well with this daikon steak. Very good and interesting fusion dish.
Subscribe to:
Comments (Atom)


