Monday, January 24, 2022

Mayonaisse biscuit マヨネーズビスケット

This is another one of my wife's baking projects. When she made the mayonaisse/miso/peanut butter cookies, using the recipe in the freebee cookie cookbook we got from the grocery store, she saw an advertisement for Hellmann’s mayo beside the recipe. It stated “great cakes take Hellman’s”. She knew this to be true because many years ago a friend gave her a recipe for chocolate mayonnaise cake and it was a great hit. Further down the page she saw the following: “for this recipe and many more, visit Hellman’s.com. Intrigued she logged on and found a goldmine of recipes. This one for mayonnaise biscuits caught her eye particularly after making two versions of butter milk biscuits. So this was a “must bake”.


As usual she took the original recipe as advisory and made her own alterations


Ingredients:
2 cups all-purpose flour
1 Tbs. baking powder
1 Tbs. Sugar
1/2 tsp. salt
1/2 cup mayonnaise
3/4 cup milk (I used butter milk)
1 cup cheddar cheese grated

Other optional additions:
1/2 tsp. Dried basil
1/2 tsp. Dried dill weed
2 Tbs. Finely chopped onion
1/3 cup pepper jack cheese

Directions:
Preheat oven to 450°.
Combine flour, baking powder and salt in medium bowl. In another bowl combine the mayonnaise and buttermilk (#1). Shred the cheese (#2). Stir the mayo/buttermilk mixture and shredded cheese into the dry ingredients. On a baking sheet, lined with parchment paper, drop the batter by 1/4 cupfuls (#3). (I used a medium size ice cream scoop) .
Bake 10 minutes or until slightly golden (#4).


These are amazing biscuits. They have an outside “crust” that almost has the consistency of a very well made very thin pie crust. It gives the biscuit a very pleasing crunch. The inside is very soft and moist. It took a little while for the cheddar cheese flavor to come through but when it did it added another pleasing dimension of flavor. These are so easy to make they could be done at the drop-of-a hat or at the drop-of-an-ice-cream-scoop full. 

Friday, January 21, 2022

Tasting of plum wine made in 1997 and 1998 梅酒飲み比べ.

In the past we used to regularly make plum wine 梅酒 with the plums we harvested from the Japanese plum tree we planted in our back yard. It has been some time however, since we made any plum wine There are several reasons for this: 1: Initially the plum tree was very productive and over the years we accumulated quite a stash of plum wine, 2: Then, about 10 years ago our plum tree, as well as most of the ornamental plum trees in the neighborhood got some kind of fungal disease. Many of the trees died of the disease, but we transplanted ours to a different location in the yard and severely trimmed back the diseased portion. We were not sure if it would survive and certainly during this period it did not produce any fruit. So we did not make any plum wine. Miraculously it not only survived but in the past few years, it started producing fruit again. It is a much smaller tree than it was at its peak and the plum yield is much less. We have been judiciously harvesting the plums to make a type umeboshi or slated plum. 

In any case, I recently stumbled across two bottles of plum wine labeled as started in 1998 (bottled in 1999) and 1997 (bottled in 1998). Both bottles had some cloudiness or precipitate, probably something to do with plum pulp. Both are made of 40% proof Vodka so I was not worried that the “plum wine” may have gone bad. In any case, using a filter paper for filtering cooking oil, I filtered out the sediment and re-bottled the wine in smaller bottles (picture below). The 1997 vintage (one on the right) is much darker probably indicating more oxidation.


So, it was very natural to do vertical tasting.


Both are quite mellowed out and quite good. They almost tasted like aged port. Interestingly, both had their own distinctive flavor and character. The 1997 vintage had a slightly more complex taste. Besides tasting the plum wine straight, we also diluted it with carbonated water which served us as a substitute for Champagne to celebrate New Year’s eve. It did not taste like Champagne but looked exactly like it and provided a refreshing alternative libation.

Wednesday, January 19, 2022

Miso-Mayo-Peanut butter cookie 味噌マヨネーズ, ピーナッツバタークッキー

This unusual recipe came in a freebie cookie recipe book from the local Giant grocery store. This recipe drew my wife’s attention because of the unusual combination of ingredients, i.e. miso, mayonnaise and peanut butter.  She came to me and asked which miso she should use (I have a collection of miso). Since it was for a cookie, I suggested “Saikyo” miso 西京味噌 which is a white sweet miso famous in Kyoto 京都 (“Sai” 西 meaning “West” and  “kyo” 京 meaning “capital” i.e. “West capital” which is “Kyoto” as opposed to “To(u)” meaning “East” 東”  and “kyo” 京 meaning capital which is “Tokyo”  東京).  In any case, she made this cookie which was quite good. I could certainly taste the peanut butter but if I had not been told I would not have guessed “mayo” and “miso” were included. Although I have to say they probably added to the overall peanut butter taste which was very rich; more so than other peanut butter cookies I've tasted. She also added a Hershey’s chocolate chip in the center of the cookie for "good measure".


I will ask my wife to fill in the rest.

Ingredients:
2 cups AP flour
1 tsp. baking soda
1/2 tsp. baking powder
1/2 tsp. salt
1/4 cup (1/2 stick) butter at room temperature
1/4 cup mayonnaise
1 cup brown sugar
1/2 cup granulated sugar
1 large egg
1 tsp. vanilla
1/4 cup miso paste
1/3 cup creamy peanut butter
Hershey's chocolate chip (optional)
Sugar to coat the cookies


Directions
Mix together the dry ingredients flour through salt. In another bowl cream the butter, mayo and sugar until fluffy. Add the egg and vanilla mixing to combine. Then add the miso and peanut butter mixing until completely combined. Slowly add the butter, egg, miso, peanut butter mixture to the dry ingredients to form a dough. Refrigerate the dough for at least and hour until it is thoroughly chilled and can be rolled into the ball. Roll the dough into 1 inch balls. Roll the balls in the coating sugar and place on a parchment covered cookie sheet about 2 inches apart. Cook in a 350 degree oven for 8 to 10 minutes until the edges are golden brown. Remove from the oven and while they are still hot press a chocolate chip into the middle of the cookie. 

These are without a doubt the best peanut butter cookies we've ever had. They are nicely chewy but the main thing is the flavor is very intense and rich. We figure this must come from the umami provided by the mayo and the miso. They are also very good slightly heated in the microwave. 

Sunday, January 16, 2022

Matcha crinkle cookie 抹茶クッキー

My wife was into baking cookies before Christmas. I saw this recipe called "Matcha Crinkle cookie" on the website “No recipe” by Mark Matsumoto.  Although we already had enough cookies, I thought these might be a good addition. So I showed the recipe and images to my wife. It was not a hard sell. These have a very interesting crinkle. They are a cross between cake and cookie with nice sweetness and tea flavor.


Ingredients:
Dry Ingredients
2 cups (280 grams) all purpose flour
6 Tbs. (30 grams) matcha powder
2 teaspoons baking powder
1/4 teaspoon salt

Wet Ingredients
4 large eggs 
1 1/3 cups (268 grams) granulated sugar 
8 Tbs. (114 grams) unsalted butter melted

For Dusting
1/3 cups (140 grams) granulated sugar
1/3 cups (80 grams) powdered sugar

Optional:
kuromame beans 黒豆 (traditional Japanese New Year black bean)
tuck a bean into the interior of the cookie or place on top 

Directions:
Pass the flour, matcha, baking powder and salt through a fine mesh sieve to sift them (#1). Add the eggs and sugar to a mixer bowl fitted with a wire whisk and beat together until light in color. Slowly beat the melted butter into the egg mixture until it's fully incorporated. The mixture will have the consistency of mayonnaise. Add the wet ingredients to the dry ingredients.  Mix together until there are no dry areas and the dough has the texture of soft frosting (#2). Refrigerate the dough for at least an hour or until it is firm enough to scoop. Line a baking sheet with parchment paper. Prepare a bowl with the remaining 1/3 cup of sugar and another bowl with 1/3 cup of powdered sugar (#3). When the dough is ready measure out the dough and roll the pieces into a small ball. (I measured the total weight of the dough then divided it by 24 to get the weight of 24 equal sized cookies.) Drop the ball into the granulated sugar. Roll it around in the sugar to coat evenly (#3). Transfer the ball of matcha cookie dough into the powdered sugar and roll it around until the ball is totally white (#4). Place the sugar-dusted ball onto the prepared cookie sheet and repeat with the remaining dough. Put the oven rack in the center position and preheat to 320°F. Bake the cookies until they've flattened out slightly and the tops have cracked, but the cookie is still soft in the center (about 10 to 15 minutes) . When the cookies are done, remove them from the oven and let them cool for a few minutes before transferring them to a cooling rack to cool completely (#5 and 6).


This is a good cookie. Very unusual and good with unique green tea flavor. It is a cross between a cake and a cookie. We had this with “sencha” 煎茶 green tea.

Thursday, January 13, 2022

Home-made yogurt; the definitive "how-to" make thick and creamy.

This is a note mostly to ourselves to chronicle the steps we use to consistently make thick, creamy and flavorful homemade yogurt. My wife has been making yogurt from the starter she got from "culture for health" for some time. Initially, following the instructions that came with the starter, the first few batches were OK but they resulted in a thin watery yogurt that we could basically drink. The yogurt was made at room temperature which worked in the summer but not in the winter. The batch she made when it turned cold was a "failure". She ended up throwing it out. When a second cold weather batch also failed, somehow dawned on her that the yogurt wasn't forming because it wasn't warm enough. Instead of throwing it out she put it in the oven with the heat off but the light on and VIOLA Le Yogurt! She then went through a "trial-and-error" process for some time and finally nailed a fail-proof process that she has been using to make a wonderful thick, creamy, slightly sweet, slightly tangy yogurt that we really like. 

During this process we realized that we needed some equipment which would allow precise temperature and timing controls. My wife did all the work of trial-and-error while I provided scientific advice and explanation.

Equipment:
1. Slow cooker (one gallon capacity) (#1 picture below)
2. Proofing box with temperature control (We use Brod-and Taylor's, #8 picture below)
3. Temperature probe with high and low temperature  alarm (we use Thermoworks  ChefAlarm® Cooking Alarm Thermometer and Timer). (#2 picture below)
4. Mason jars with an airtight lids 32 oz (need 4 to accommodate 1 gallon of milk, #7 picture below)

Ingredients:
1 gallon whole pasteurized milk
1/4 cup heirloom yogurt

Method:
1. Heat 1 gallon of whole milk in a slow cooker on "high" (with the temperature probe inserted) to 180F (This takes a few hours. Starting at 6:30AM it will reach temp about 10:30 or 10:45AM).
2. Using the cooking alarm thermometer, the high temperature alarm will sound when the milk reaches 180F.
3. Turn the slow cooker to "low" and maintain the temperature for 30 minutes (temperature will keep climbing to near 185F).
4. Turn off the slow cooker.
5. Because a skin forms on the surface of the milk (#3), skim it off and strain the milk through a fine sieve or a sieve lined the with cheese cloth (#4) into a metal dutch oven (This catches any other pieces of milk skin that may have formed). Cover the dutch oven with plastic wrap and insert the temperature probe (#6).
6.  Let the milk cool to 98 -100F (This cooling can take hours and would mean the yogurt could not be finished in one day. It would have to stay overnight. My wife cannot wait that long so she puts the dutch oven in an ice water Bain Marie to hasten the cooling ( #5) If it goes into the Bain Marie at 10 :45 it will have reached the low temp about 12:00 noon. The low temperature cooking alarm thermometer will sound when the temperature cools to 100F, #6).
8. Meanwhile, preheat the proofing box to 99F (#9) while the milk is cooling.
9.When the milk cools to 100F and feels about body temperature when tested with a finger, inoculate the milk with 1/4 cup of the previous batch of home-made yogurt.
10. Divide the mixture into 4 mason jars (#7), close the lids, and place them in the 4 corners of the proofing box (the center position is hottest part and not good for the yogurt. No need for a water tray) (#10).
8. Incubate for about 9 hours. (If the jars go in the proofing box at Noon they can be removed at around 9:00 PM.
9. Take them out and let them cool to room temperature.
10. Refrigerate at least overnight before tasting.


Semi scientific explanation of how these steps work:
1. Reason for heating the milk: The main milk protein casein coagulates or makes a protein meshwork in the presence of lactic acid as the process of making yogurt. The heating process (steps #1 and 2 above) denatures another protein; a major whey protein called "lactoglobulin". Since thick yogurt needs the participation of the most protein available to make a thicker protein meshwork and, hence, a thicker yogurt, denaturing the lactoglobulin increases the protein available for this process. If not heated, the lactoglobulin remains dissolved and does not participate in making the protein meshwork.

2. Initially my wife covered the mason jars with cheese cloth fastened by a rubber band. We later learned that an air-tight lid (step #7 above) works even better. The bacteria in yogurt (lactobacilli and others) ferment anaerobically (i.e. without oxygen) to break down lactose and other milk sugars to lactic acid. So there is no need for oxygen to be present.

3. Incubation time and temperature (steps #7 and #8): Since biochemical or enzymatic reactions accelerate with increased temperature within the range (Michaelis-Menten kinetics), the higher the incubation temperature the faster the fermentation. Some recipes use higher temperature and shorter incubation time. The temperature and time may influence the consistency and flavors (such as tartness) of the resulting yogurt. We thought slower and longer (99F for at least 9 hours) produced the best yogurt.

4. Although low-temperature (step #10) will slow the fermentation, the yogurt appears to continue developing and produces firmer but creamer texture with overnight refrigeration. We also found that over time the yogurt continues to thicken and become creamier. 

We really like this homemade yogurt. It is very creamy and smooth in texture. The flavor while mild is still distinctive. It is slightly sweet with a mild tang. We eat this yogurt almost every morning with a little fresh fruit such as blueberries or strawberries and a little bit of sugar. We will probably won't go back to a commercial brand.

Monday, January 10, 2022

New Year 2022 Jan 3 Salmon three ways 一月三日鮭尽し

We have been enjoying the items from the Sushi Taro osechi box. After indulging in a serving of wonderful dishes from the box which go perfectly with sake,  I served this plate as the “second course”.  The red and white fish cake or "kouhaku kamaboko" 紅白蒲鉾 (upper left in the picture) came from the osechi box (they were the last four slices). I made a deep pocket in each and stuffed the pink one with the leftover Maruhide sea urchin shutou 丸秀雲丹の酒盗 topped with a dab of wasabi. I topped the white one with Ikura marinated in soy sauce イクラの醤油ずけ topped with strips of nori.

The remaining items were all different salmon dishes which I prepared for New Year. Starting from right upper, clock wise, is salmon nanban 鮭の南蛮漬け、Russian marinated salmon 鮭のロシア漬け, and finally salmon kelp roll 鮭の昆布巻き. These three salmon dishes all have different textures and flavors. For the salmon nanban, the salmon was dredged in flour and fried before being marinaded in sweet vinegar which gave it a bit firmer texture. The Russian marinated salmon started out as thin strips of raw salmon marinated in sake, vinegar and oil without any sweetness. This year I something different. I added dijon mustard to the marinade and emulsified it with the “motor boat” emersion blender. As a result the oil didn’t separate or solidify. Also, the salmon did not “over cook”  and had a lovely soft texture. Finally the salmon kelp roll was simmered for sometime in seasoning broth, producing a yet different soft and moist texture. These are wonderful to enjoy with sips of sake.

Friday, January 7, 2022

Sushitaro Osechi 2022 寿司太郎お節 2020

As always, we are so spoiled to have Sushitaro osechi.


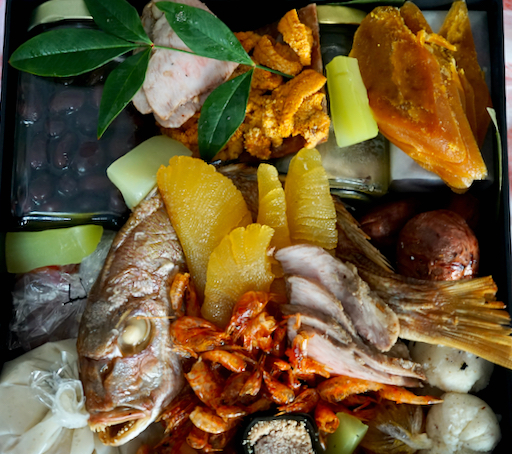
This is a picture of the upper box.  I am not going into the details but its all good stuff. Many items are hidden behind and under the items on the top.


This is the lower box.


This was what we ate from the box the evening of January 2. I just served whatever caught my eye. This round was mainly items that go well  with sake.


The next picture shows is an assortment of goodies. I lightly heated (toasted) “Karasumi” 唐墨 mullet roe or botargo, and wagyu roast beef 和牛ローストビーフ, which makes the beef unctuous melting in you mouth and the karasumi soft with enhanced flavor. Of course, “ankimo tofu” あん肝豆腐 or Monkfish liver terrine is one of our favorites.


In this three compartment plate, I served (from left to right) “Mushi uni” 蒸し雲丹 or steamed sea urchin, “Uni shutou with yuzu-chilli” ウニ酒盗 柚子胡椒 from Maruhide 丸秀 and  “ikura shouyu-zuke”  いくら醤油ずけ soy marinated salmon roe.  I added wasabi-soy sauce to the steamed uni and made a cucumber boat to contain the ikura. All perfect for sake.


After these, we had simmered vegetables (again lightly warmed in the microwave) and finished with a mayo-biscuit my wife made that afternoon (subject of another post).

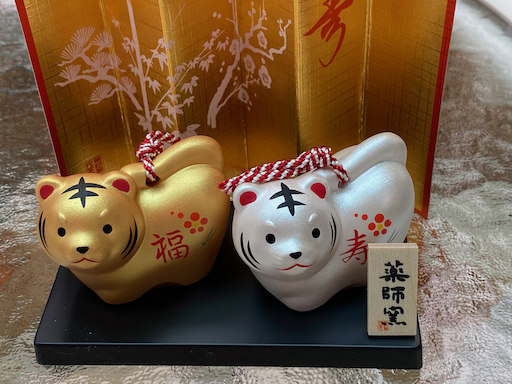
P.S. In the January 1, 2022 post, I mentioned that we thought we had some better zodiac figurines for the year of tiger but the ones we displayed in the blog were the only ones we had. My wife quickly remedied the situation by ordering two figurines from Japan, one (the first picture) perfectly matches the style we have for the other zodiac animals (it is made from earthenware as a bell called "Do-rei" 土鈴).


The fellows below came from the same kiln as the one above. But they have more accoutrements. Aren't they cute?


Hope we can used these figurines again.