Wednesday, January 29, 2025

Apple Fritter アップルフリッター

We received a Christmas present which included a good number of apples and pears. We finished all the pears and made a significant dent in the number of apples but we still had several honey crisp apples left. We happened to come across this recipe for “apple fritters”. Since we have never made an apple fritter, and we also happened to have some apples on hand, we decided to try it. It was kind of a production but we fried up fritters for breakfast one weekend. We did not bother with “glazing” them. Hot off the oil (#1) and with cappuccino/cafe late, this was quite a special breakfast. Crispy outside and soft inside with apple cinnamon flavors—can’t be beat, although we should not have this type of breakfast too often.


The original recipe came from “Serious eats”.

Ingredients

For the apples:
226 g granny smith apples (we used two honey crisp apples, peeled, cored and diced in small pieces)
42g unsalted butter (1 1/2 ounces; 3 tablespoons)
2 teaspoons fresh lemon juice
1/2 cup sugar
1 teaspoon plus a pinch kosher salt

For the dough:
355 g all purpose flour
2 teaspoons baking powder
3/4 teaspoons apple pie spice*
2 large eggs, lightly beaten
1/2 cup whole milk
1/3 cup sour cream
1 teaspoon vanilla extract

Canola oil, for frying

*Apple pie spice: 1 tsp. ground cinnamon, 1/4 tsp nutmeg, 1/2 tsp ginger and 1/2 tsp cardamon.

Directions:
In a large skillet, melt butter over medium heat. Cook, whisking constantly with a wooden spoon, until milk solids sink to the bottom of the skillet and turn light golden brown, 3 to 4 minutes. Add apples and stir to evenly coat in butter. Cook, stirring occasionally, until apples are crisp-tender and still hold their shape, about 5 minutes. Add lemon juice, 2 tablespoons of the sugar, and a pinch of salt. Cook, stirring constantly, until sugar dissolves and apples are glazed in sugar mixture, about 2 minutes. Transfer apples to a large plate and refrigerate until cool, about 20 minutes.

Set a wire rack inside a 13- by 18-inch rimmed baking sheet; set aside. Fill a large Dutch oven with 1 1/2 inches of canola oil and heat over medium-high until oil is 375ºF (190ºC).

In a large bowl, whisk flour, baking powder, apple pie spice, remaining 1/2 cup sugar, and 1 teaspoon salt to combine; set aside. In a medium bowl, whisk eggs, milk, sour cream, and vanilla to combine. Add sour cream mixture and cooked apples to dry ingredients, and, using a flexible spatula, fold together until a thick batter forms.

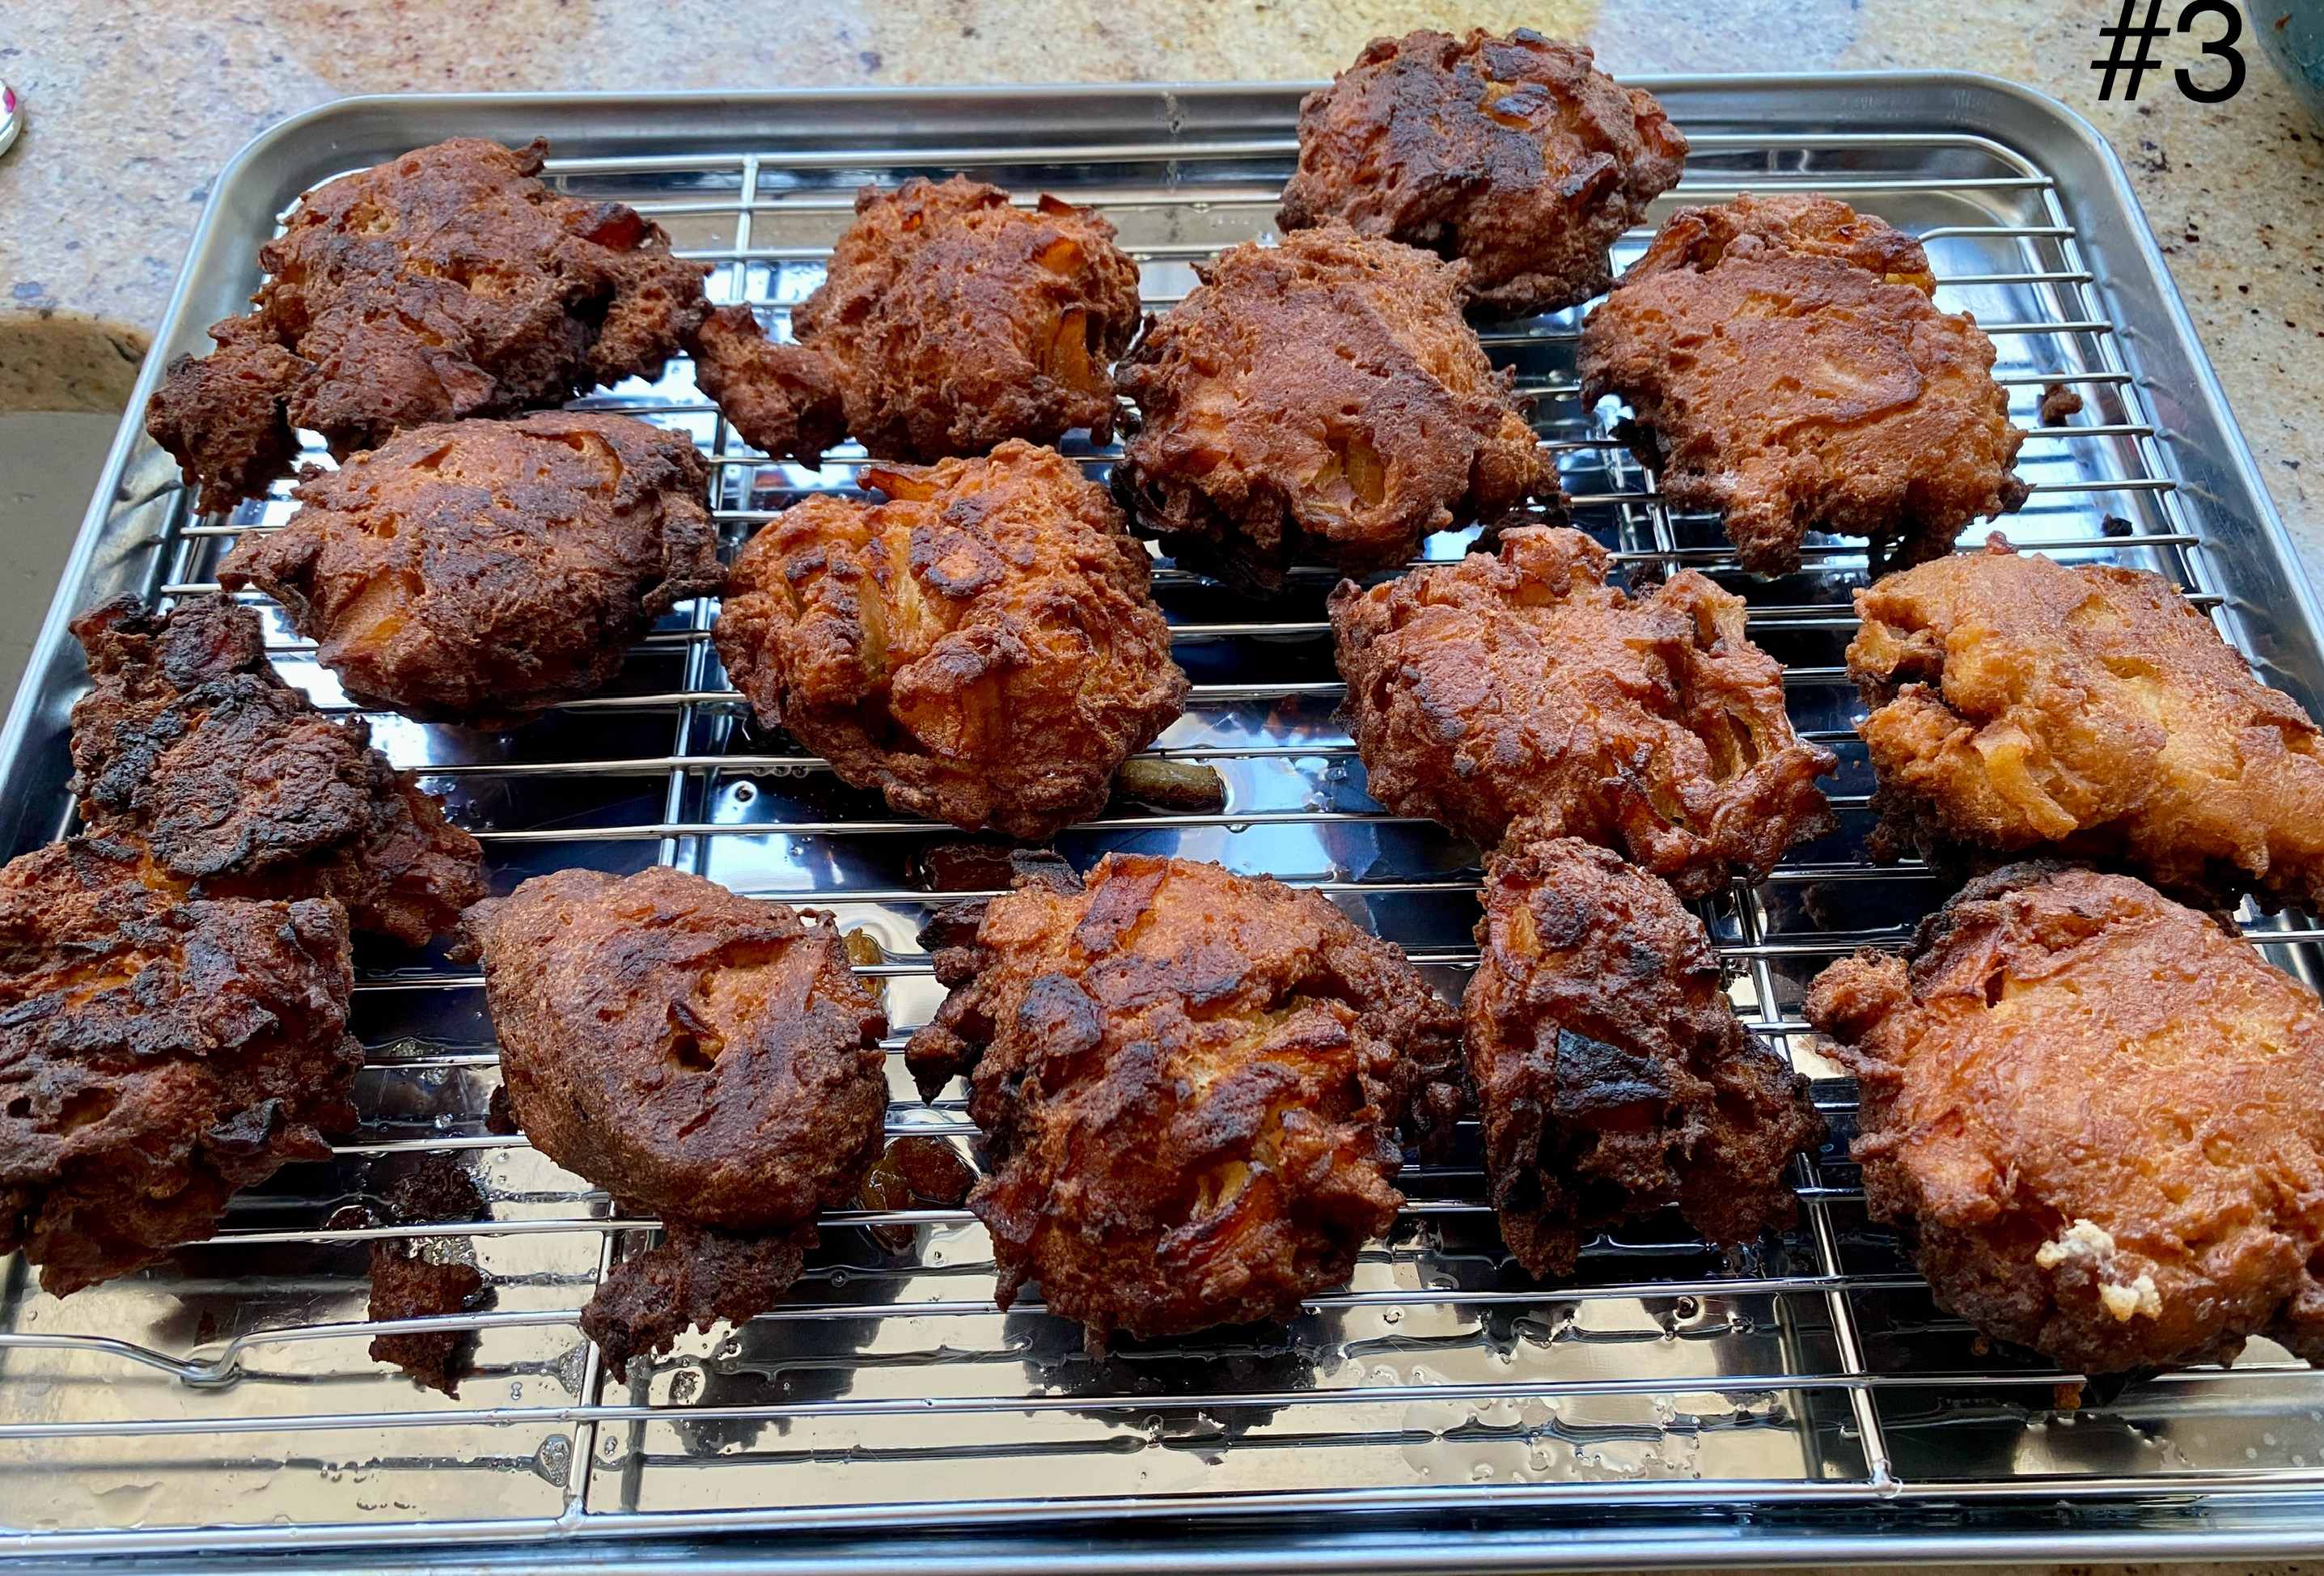
Working in batches carefully drop about 1/2 cup of batter into the hot oil and, using the back of a spoon, immediately press fritter until fritter is about 4-inches in diameter. Fry, adjusting heat as needed to maintain temperature, and use a spider skimmer or slotted spoon to flip fritters halfway through. Cook until fritters are browned, puffed, and cooked through, about 5 minutes (picture #2). Transfer finished fritters to prepared wire rack and repeat with remaining fritters (picture #3).


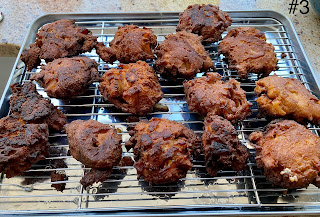
This recipe made a quite large amount (picture #3). The fritter heated up very well in the toaster oven. They were quite a treat (Can’t go wrong with sweet, spicy, fried bread.) The outside had a wonderful crunch and the inside was soft and sweetly spicy. The apple gave a burst of sweet fruit taste. 

Sunday, January 26, 2025

Mock Tofu 擬制豆腐

I saw this recipe of “Mock tofu” or “Gisei-dofu 擬制豆腐” on Youtube by Chef. Kasahara 笠原. It looked interesting and I happened to have extra tofu and fresh shiitake mushroom which needed to be used up before going bad. Supposedly, this is a common form of “shojin-ryouri 精進料理” or vegetarian cooking done by Buddhist monks. The name “mock” or “gisei” reportedly comes from the fact that tofu was crumbed, other ingredients are added,  formed into an original rectangular shape of tofu and cooked. No eggs should be used in the original shojin-ryori but modern renditions use eggs as binder and some recipes even call for ground meat. 

While I was making this, I realized a U.S. block of tofu is larger than a Japanese block so I was afraid that the final loaf which had more tofu may not firm up but it did. The cut surface looked more like tofu than omelette (picture #1). I did not make it too sweet but this is a very good looking dish and tasted very gentle with nice texture.  Adding more tofu appeared to work. According to Chef Kasahara, this is his regular osechi “new year” dish. I may add this to my osechi next year. Since this could be a new year osechi dish, I served the slices on a small crane design plate we bought in Kyoto some years ago since the “crane” is very suitable motif for new year cerebration.


Ingredients: (made two loaves measuring 2 1/2 and 5 1/2 inch)
1 package (14oz or 400gram*) tofu (I used medium firm), drained, wrapped in paper towel with a weight on the top (I used two cutting boards as weights) for 20 minutes, crumble by hand
3 large eggs, beaten
4-5 caps of shiitake mushroom, thinly sliced
1 small carrot, julienned
3 scallions finely chopped
1 tbs vegetable oil

*Apparently Japanese one block of tofu is smaller. The original recipe used one block which was 300grams. 

Seasoning*:
1 tbs x 4 concentrated noodle sauce or soy sauce either light colored or regular
1 tbs mirin

* Original recipe calls for soy sauce and sugar. The above is not as sweet.

Directions:
Prepare loaf pans (I used two 2 1/2 x 5 1/2 inch silicon loaf pans) by lining with parchment paper and lightly oil for easy lifting (see “A” in the composite picture).  Preheat oven to 350F*.

In a frying pan on medium heat, add 1 tbs vegetable oil and sauté the carrot and mushroom. After few minutes, add the crumbled tofu and keep stirring for another 5 minutes or so until water is not seeping out from the tofu. Add the seasonings and cook until no liquid is visible on the bottom. Add the scallion, mix and shut off the flame.

Add the half of the eggs and mix. The residual heat will semi cook the eggs. Add the remaining eggs and mix.

Pour in the mixture to the loaf pans and press and flatten the surface with a silicon spatula.
Place the loaf pans in the 350F oven for 30 minutes (“A” in the composite picture) .

*Original recipe calls for 250C oven which is over 480F. I thought this was way too hot. Using my own discretion, I baked at 350F (about 180C) using the toaster oven in convection mode.


After cooling down for 10 minutes, I lifted the load out of the pan using both ends of the parchment paper (“B” in the composite picture). I sliced it after it cooled to near room temperature.

As I mentioned before, because of the larger proportion of tofu in my rendition (albeit by accident), the cut surface looks more like tofu than omelette. I do not think this dish should be omelette with tofu mixed in. More like tofu dish hiding the use of eggs like some Buddhist monks may have done. 

Obviously, you could alter the vegetables you can use in this dish. Renkon, wood ear mushroom, green beans, hijiki, ginnan, mitsuba etc were suggested. I also saw the recipes adding ground meat but I do not particularly like that idea.

In any case, we really like this dish as I made it (by accident??).

P.S. I made this dish again with few modifications. 
1. Seasonings: I used 2 tsp sugar and 2tbs x4 concentrated Japanese noodle sauce making it sweeter thatn the first. This appears to have worked. Both of us liked the a bit sweeter taste better.
2. I used three silicon loaf pans without parchment paper lining but coating the inside with a small mount of oil. The giese-tofu came out without problem. I am not sure the oil is needed.


Thursday, January 23, 2025

“Endless” Konnyaku 無限コンニャク

I saw this recipe on Youtube. Many Japanese recipes use the word “Mugen 無限” meaning “endless” in front of the items indicating the dish is so good that you will be eating endlessly or without stopping. This one is “mugen-konnyaku” 無限コンニャク.  I have posted quite a few dishes using Kon-nyaku 蒟蒻 or konjac. I am not sure why Japanese including myself like kon-nyaku. It is made of vegetable roots and has a consistency similar to rubber and does not have any taste or calories. Certainly, this is not one of my wife’s favorites. The only version of konnyaku she sort of likes is “spicy konnyaku stir fry コンニャクのピリカラ炒め” despite the fact she usually does not prefer spicy dishes. I suppose since konnyaku does not have any taste, even a spicy taste is  better than no taste. In any case, this recipe claims that it tastes like “meat” and you can eat it forever or without stopping. Although this may not be true, it is nonetheless  a very interesting dish. Certainly the consistency of the konnyaku is much chewier and the seasoning clings to it better compared to other konnyaku dishes. I added a few sprinkles of seven flavored red pepper flakes or “shichimi tougarashi 七味唐辛子. I think I may have over boiled the konnyaku which made it a bit too chewy. I think this dish has potential and I can make it better next time.


Ingredients:
1 block of konnyaku
1 tbs x4 concentrated Japanese noodle sauce
1 tbs mirin
White sesame
1 small individual package of bonito flakes
1 tsp vegetable oil
1 tsp sesame oil

Directions:
Boil the konnyaku in enough water to cover completely for 10 minutes (I may have boiled it longer than 10 which may have made the consistency too chewy*).
Drain and wrap it in a cloth dish towel and pound using a rolling pin (I used a meat pounder) until the konnyaku is all shredded.
Add the oils to a frying pan on medium heat (add the red pepper flakes if you are using them), stir continuously until bubbles form on the surface. Further evaporate the water from the konnyaku for 5 minutes or so (all the moisture boiling away is from the konnyaku since no additional water has been added to the pan.)
Add the mirin and noodle sauce and stir until only small amount of liquid remains.
Add the bonito flakes and stir which absorbs most of the remaining liquid.
Sprinkle the white sesame and serve.

*I made this dish second time and timed the boiling to 10 minutes. This gave a much better consistency. It is chewy but not too chewy. I also used a small amount of red pepper which made the dish not really hot but added flavor.

I do not think this tastes like meat but it is certainly different from any other konnyaku dish I’ve ever eaten having a much chewier consistency and very well seasoned.

Monday, January 20, 2025

Apple Pie Muffin and Pan Cake アップルパイ マフィン

As part of the season, we received some fresh fruit which included of several Granny Smith Apples. In general, these apples are not good eating apples and are typically used in baked goods such as cake. My wife remembered that she had saved a recipe she found on the internet about apple muffins that taste just like apple pie and thought this would be a perfect use of the Granny Smith Apples.

The original recipe came from “Serious Eats”. This is a somewhat complicated muffin to make. It comes in 3 parts. First is making the apples by coating them with spices and then cooking them in melted butter until they start getting soft. Second is a layer of crumbs to put between two layers of dough. Third is the muffin dough itself.

My wife made muffins (pictures #1 and #2) and baked in a baking dish as a flat cake (picture #3).


The problem was that these three different parts were not specified in the original recipe but instead all clumped together with phrases like, “2 1/4 cups AP flour divided” and it wasn’t until you were knee deep in the directions that you discovered 1/2 cup of the flour was supposed to be used to make crumbs and the other 1 3/4 cups was used for the actual muffin batter. As a matter of fact the recipe did not even specify there was a layer of crumbs and it took my wife some time to figure out the recipe consisted of 3 parts at which point the recipe started to make sense. Added to all that we wanted to use up all the Granny Smith apples but once we cooked them all we realized we had too many for just one batch of a dozen muffins. So we decided to double the recipe and make 1/2 as muffins and 1/2 as a pan cake (i.e. a flat cake baked in a baking pan). Hopefully we have sorted out the three components of the recipe below so they are clearer than the original and by showing the recipe as X1 for just muffins and X2 for muffins and pan cake. Good Luck.

Ingredients (X 1)

For the Spiced Apples:
3 tablespoons unsalted butter
2 small tart apple such as Granny Smith cut into 1/4 inch pieces (1 cup chopped)
1/4 cup packed light brown sugar
3/4 teaspoon ground cinnamon
1/4 teaspoon kosher salt; for table salt use half as much by volume
1/4 teaspoon pumpkin pie spice

For the crumbs:
1/2 cup packed light brown sugar
3/4 teaspoon pumpkin pie spice
1/2 cup flour
1 1/2 tsp cinnamon
4 tbs butter

For the muffins: 
1 3/4 cups all-purpose flour,
1 teaspoons ground cinnamon,
2/3 cup unsalted butter, softened,
3/4 cup granulated sugar
2 large eggs, at room temperature
1/2 teaspoon kosher salt; for table salt use half as much by volume
1/2 teaspoon baking powder
1/2 teaspoon baking soda
1/2 cup sour cream, at room temperature
1/3 cup apple cider, at room temperature (We didn’t have any cider so we juiced another apple)

Ingredients (X2) We wanted to use up the Granny Smith Apples but we ended up with too many apples so we chose to double the recipe and make 1/2 as muffins and 1/2 as pan cake

For the Spiced Apples:
6 tablespoons unsalted butter
3 tart apples such as Granny Smith, cut into 1/4 inch pieces
1/2 cup packed light brown sugar
1/2 teaspoon ground cinnamon
1/2 teaspoon kosher salt; for table salt use half as much by volume
1/2 teaspoon pumpkin pie spice

For the crumbs:
1 cup packed light brown sugar
1 1/2 teaspoon pumpkin pie spice
1 cup flour
3 tsp cinnamon
8 tbs butter

For the muffins:
1 1/3 cup unsalted butter, softened,
1 1/2 cup granulated sugar
4 large eggs, at room temperature
3 1/2 cup all-purpose flour
2 tsp. cinnamon
1 teaspoon kosher salt; for table salt use half as much by volume
1 teaspoon baking powder
1 teaspoon baking soda
1 cup sour cream, at room temperature
2/3 cup apple cider, at room temperature (We didn’t have any cider so we juiced another apple)

Directions: whether making 1X or 2X of the recipe just use the quantity of ingredients specified for that amount.

For the Spiced Apples:  In a 10-inch skillet, melt butter over medium heat. Once melted, add apple pieces, brown sugar, cinnamon, salt, and pie spice and cook, stirring frequently, until apples are tender, about 10 minutes. Transfer apple mixture to a fine mesh strainer set over a medium bowl. Thoroughly strain, gently stirring to remove as much excess moisture from apples as possible; set aside to let apples strain until they reach room temperature, about 15 minutes. Spread strained apples in an even layer on a large plate and refrigerate uncovered until cooled, 15 to 20 minutes. Reserve strained sauce for use as a glaze. 

Prepare oven and cooking utensils: Adjust oven rack to middle position and preheat oven to 400°F. Line a 12-cup muffin tin with paper liners. If making pan cake grease the medium sized pyrex cooking pan then line with greased parchment paper.

Make the crumbs for the Muffins: Stir together brown sugar, pie spice,1/2 cup of the flour, and 1 1/2 teaspoons of the cinnamon in a medium bowl until well combined. Work in 4 tablespoons of the butter using fingertips until mixture is well combined and resembles wet sand. Set aside.

Make the batter for the muffin: In a large bowl with an electric mixer, beat granulated sugar and remaining 2/3 cup butter on medium speed until fluffy, 3 to 4 minutes, stopping to scrape down sides as needed. Add eggs, one at a time, beating until combined after each addition, about 30
seconds.

In a medium bowl, whisk together salt, baking powder, baking soda, remaining 1 3/4
cups flour, and remaining 1 teaspoon cinnamon.

In a small measuring cup whisk together sour cream and cider (apple juice) until well combined.

Stir flour mixture into butter mixture in 3 additions, alternating with sour cream mixture, until flour mixture is moistened but large flour streaks remain. Fold cooled apples into batter until evenly dispersed and batter is just combined. (Do not over-mix.)


Assembly: Spoon 2 tablespoons batter into bottom of each paper liner. Sprinkle 1 packed teaspoon brown sugar mixture evenly over batter in each muffin liner; top with remaining batter (about 3 tablespoons per well) spreading into an even layer. (Liners will be very full.) (1 and 2 in the composite)

Bake for 5 minutes. Reduce oven temperature to 375°F and continue baking until a wooden pick inserted in center comes out clean, 12 to 18 minutes, rotating pan halfway. Let cool in pan 10 minutes.

If making pan cake, spoon 1/2 the batter into the baking dish, cover with crumbs, and cover crumbs with remaining batter. Bake at 400 degrees for 5 minutes reduce temperature to 375 and bake for 30 minutes and start testing for doneness by seeing if wooden pick comes out clean (3 and 4 in the composite).

Carefully remove from pan and serve warm or at room temperature, drizzling with reserved strained apple juices from step 2 just before serving.


Although this is a fairly convoluted recipe for apple based muffins it is probably worth it because the end result is very good. They do taste distinctly of apple pie. The texture is very light, soft and tender. The cooked apples introduce a burst of cinnamon flavored moistness that is very pleasant. The crumbs kind of melted into the texture making an internal layer of buttery cinnamon flavored dough. The pan cake had all the similar characteristics but was simpler to make. These muffins are a bit unique in the combination of flavors and textures they deliver. Despite the initial difficulties now that we have the recipe sorted out we will be making them again.

Friday, January 17, 2025

Bottarga/Karasumi Taste Test 日本の唐墨とサルジニアのボタルガの味比べ

We enjoyed the fresh uni and karasumi 唐墨 from Maruhide 丸秀 a few days ago. We decided that while we still had some of the karasumi left, we would get some Sardinian bottarga and have a taste test. The last time we tried Sardinian bottarga was 11 years ago. The brand we bought back then was called bottarga Di Muggine from L’Oro di Cabras, Sardinia, Italy. We tried another one this time. The one we got is called “Sardinian Gold” from “Bottarga Brothers” through Amazon market place (picture #1, right). In terms of the price, the karasumi is 3.5 times more expensive than the bottarga. The color of this bottarga is about the same as the karasumi. I remembered that the bottarga we previously bought was darker in color and stronger in taste compared to Japanese karasumi I had eaten back then. The information brochure that came with the bottarga we just bought stated that when bottarga is exposed to air, the color it becomes darker and the taste becomes stronger.  So, to prevent that from happening, I separated the sacs and vacuum packed one for later use.


I sliced both and slightly toasted them. We had them with cold sake. In the picture #2, the left is karasumi and the right is bottarga. As you can see the bottarga is larger in size but the color is exactly the same. Both tasted good and about the same. We like this “Sardinian bottarga gold”.


Of course we needed some more items to go with the sake. In the picture #3, from left to right are karasumi/bottarga, squid shiokara イカの塩辛, Russian marinated salmon 鮭のロシア漬 with pickled cucumber topped with ikura, and daikon namasu 大根なます with slices of boiled octopus leg and also topped with ikura. The boiled octopus legs came from Weee (originated from China). This is excellent and as close as I can think of to a Japanese prepared boiled octopus leg. All these small dishes went so well with cold sake.


*Digression Alert: Although Sardinian bottarga is most well known, other cultures also make similar fish roe (usually gray mullet roe), salt cured and then dried under the sun. A small pamphlet came with our bottarga included the other types of bottarga the company sells which included Greek, Egyptian, French (two kinds) and Brazilian.  Japan, Korea and Chinese also make their versions.


Tuesday, January 14, 2025

“Karasumi” Japanese Bottarga from Maruhide 丸秀の唐墨

Our source of quality sea urchins “Maruhide” 丸秀 has made some changes after the original founder’s daughter took over some time ago. I noticed “karasumi” Japanese bottarga is available. We decided to get our usual fresh uni (both in salt water 塩水うに and regular alum-treated in a metal case), uni shutou ウニ酒盗 and karasumi* 唐墨. They arrived on Christmas eve and we had a tasting of two kinds of uni and karasumi. In the serving picture, the left is uni in salt water and the right is regular alum-treated. The center is slices of karasumi lightly toasted. we had these with “Tengumai Kimoto Junmai” 天狗舞生酛純米 hot since it was a very cold outside. Both the uni were very good. The salt water uni is softer in texture and alum-treated one keeps its shape but we did not taste the “bitterness” sometimes associated with alum-treated. Karasumi is wonderful with almost uni-like after taste or more like preserved uni (or neriuni ねりうに) flavor which is more concentrated.


*Digression alert: I already pontificated about “Karasimi” that it is originally from Sardinia which came into southern Japan during the edo-period and that the shape of bottarga to Japanese was reminiscent  of “sumi” ink block from China hence the name  “kara-sumi” in which “kara” 唐 means “China” (more precisely Tang-dynasty) and “sumi” means “ink”. We really like karasumi which is a regular part of the “osechi” box from Sushi taro. Karasumi is also associated with a fond memory of when we were in Japan last time in fall. Because of the approaching typhoon we left Sapporo one day earlier and stayed in a hotel near Narita airport. We went to a sushi bar in the hotel for dinner and a drink. It was not crowded. We tried to sit at the sushi bar where an old couple was already seated.  Although the rest of the restaurant was empty there was a “reserved” sign on the sushi bar. When we indicated we would like to sit at the bar, a waitress told us the bar was a “no set menu order,  a la carte only” in English. To that I reply in Japanese that it was fine with us. After a quick look of surprise the waitress ushered up to our seat at the sushi bar. So we sat and a very friendly sushi chef came greeted us and asked where we were from. Once he found we were from Washington, DC areas, he beamed and said “The Nationals!” (he was a big baseball fan). I asked for “otsumami” drinking snacks of his choice (i.e. omakase) first. Several sashimi were served and he said they had “karasumi” so we ordered it. It was very nice and served slightly toasted. The old couple appeared “surprised” at our ordering karasumi (in such close quarters with only two customers we were all aware of what each other was eating) and that my wife enjoyed it. So they also ordered some too.

The karasumi we got was from Hyogo prefecture (#1 below). It was very small (especially for the price). I sliced it and tasted a small piece. It tasted very good but I wanted to compare this with Sardinian bottarga so I ordered some on-line. Stay tuned karasumi tasting coming up. 


Saturday, January 11, 2025

Grilled “Tai” Perch Seasoned Rice 鯛飯もどき

Among the items in the Sushi Taro osechi box, was a grilled small “Tai” perch 小鯛の姿焼き that looks very nice and makes the osechi box festive and special. In the past, I used it to make a bowl of rice (a type of donburi 丼) by removing the meat and making it into “Soboro そぼろ ‘or finely crumbled seasoned fish meat topping the rice along with “Braised small ice fish seasoned with Japanese pepper じゃこの有馬煮” from the box. This year, in the Japanese menu or “Oshinagaki お品書き” accompanying the osechi, Chef Kitayama suggested cooking the Tai over rice. I thought this was a great idea. It immediately reminded me of “Tai-meshi 鯛飯” we had in Matsuyama, Shikoku 松山、四国.

This worked very well. It was much easier to remove meat since it was sort of steamed while the rice cooked. The resulting rice was flavorful and, as far as we can tell, this is the best way to enjoy the grilled Tai perch fish from the osechi box (picture #1).


I did not follow any recipe but just made it like I make seasoned rice or “maze-gohan 混ぜご飯”. You may not like to add any other items or add more items to the rice beside the perch.

Ingredients:
1 grilled small Tai perch (from the Sushi Taro osechi box).
1 small carrot, peeled and julienned.
1 inch square of Dashi Kelp, surface cleaned with dump paper towel.
3-4 small fresh shiitake caps, thinly sliced
2 cups of Japanese short-grain rice. I used “Nanatsuboshi ななつぼしfrom Hokkaido” (a cup came with the rice cooker which is smaller than US cup)
2 cups or a bit more of water including 1 tbs x4 concentrated Japanese noodle sauce (or light colored soy sauce) and 1 tbs mirin (see directions below how to determine the liquid amount).
Thin strips of nori or “Kizami-nori 刻み海苔” for garnish.

Directions:
Wash the rice and drain.
Add the washed rice to the rice cooker.
Add the noodle sauce and mirin.
Add water to the mark in the rice cooker for 2 cups of rice and gently mix to distribute the seasonings.
Top the rice with the kelp, carrot and mushroom and place the grilled fish on the top and start the rice cooker in the normal white rice mode (#1 in the composite).
Remove the fish and the kelp. Remove the meat from the bone. I did not remove the skin which has good flavor. Carefully inspect for the bone (#2 in the composite)


Mix and fluff up the rice (#3 in the composite). You could mix the fish meat at this time or just top the rice in the serving bowl (#4 in the composite).

Garnish with the nori strips (#1 picture).

Making this rice was a great suggestion. The flavor of the fish permeated the rice with a rich umami. the mushrooms added yet another umami dimension. Great end to the New Year’s osechi box.