Showing posts sorted by relevance for query edamame. Sort by date Show all posts

Tuesday, February 15, 2022

Edamame hummus 枝豆フムス

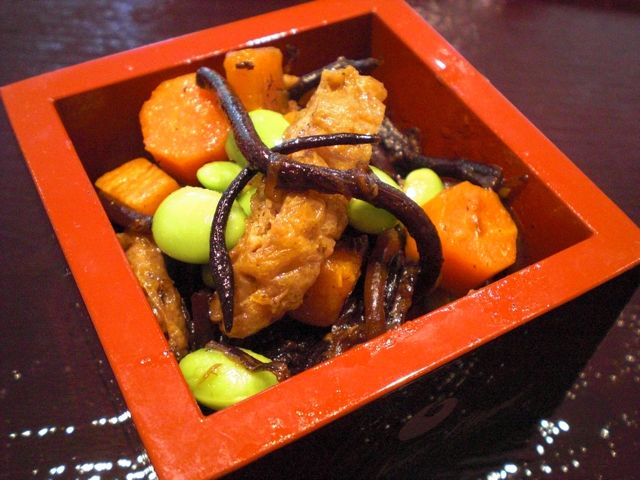
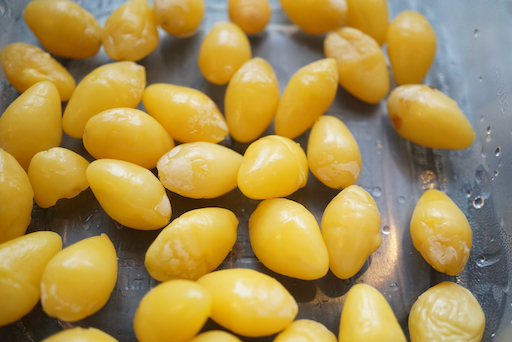
 We usually stock frozen edamame since it is a good and healthy snack. Recently, we found the frozen edamame from a frozen case at Tako Grill to be the best. My wife, found a recipe for "edamame hummus" in the cookbook called "Smoke and Pickles" by Edward Lee which we recently acquired. It used shelled edamame. My wife wanted to make this dish but she thought rather than using our stash of edamame which was in the shell and would have to be shelled it would be better to order some frozen edamame that was already out of the shell.  So we ordered some from our regular grocery store. When deciding what to order we could not figure out if the packages available were edamame shelled or in pods. We took a chance and ordered one anyway and it turned out they were in the pods so they had to be shelled anyway. My wife cooked up the package and shelled them making about 1 cup. She turned the prepared edamame over to me to make the hummus. I diverted from the original recipe a bit but the resulting dip/hummus was quite good.


Ingredients:
1 cup edamame, cooked and shelled
1/2 shallot, finely chopped
3 garlic cloves,
1/4 cup lemon juice
1/2 tbs soy sauce
1/4 cup smooth peanut butter (or tahini or Japanese nerigoma sesame paste)
1/2 tsp ground cumin
1tsp salt
1/2 cup water (I did not add the water but I added hot water -may be 1-2 tsp to the peanut butter mixutre to make it looser)
2 tbs olive oil (1/2 tbs to sautee shallot and the remaining mixed into the final product)

Directions:
Mix the peanut butter, soy sauce and hot water to make smooth loose paste.
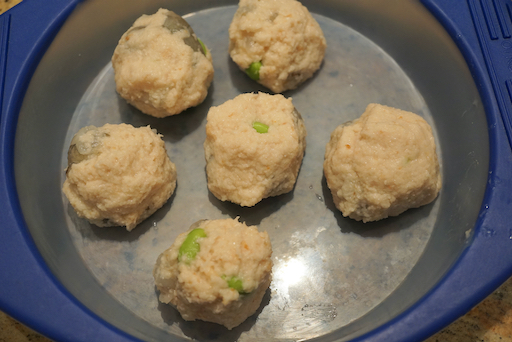
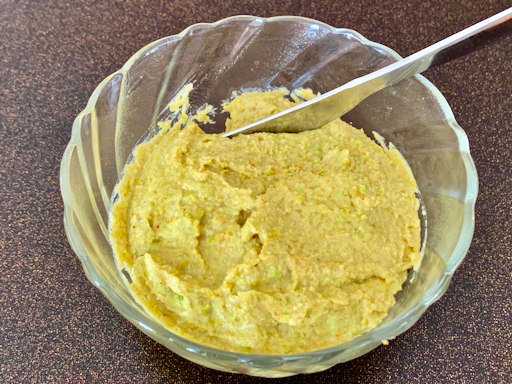
Heat the olive oil and sauté the shallot and then garlic, add the peanut butter mixture, the edamame and heat up (below).
Using a beaker and emersion blender, process the above mixture. I added additional olive oil to make the mixture a bit smoother. Add lemon juice and cumin. Taste and add a small amount of salt to taste.


This is a unique dip/hummus. The edamame flavor really comes through. Substituting, peanut butter for the tahini (we did this before) worked well. We really like this as a hummus variation. 


Sunday, March 1, 2020

Takoyaki variation with tofu and nagaimo 長芋豆腐たこ焼き

This is a takoyaki たこ焼き ("tako grill") variation made without "tako" (octopus). This recipe is from "The real Japanese Izakaya Cookbook". We made takoyaki (octopus inclusive) using an electric ebelskiver maker before. An ebelskiver maker is the closest we could come to a traditional takoyaki grill.  This recipe deviates significantly from the traditional approach because it uses grated nagaimo 長芋 and tofu 豆腐 instead of flour. Instead of tako is uses hijiki ひじき sea weed and edamame 枝豆 . Continuing on the innovative theme, instead of the usual "Takoyaki sauce", this recipe used "Gin-an" 銀餡 which is a milder and "more sophisticated" sauce.


The surface was nicely brown and crunchy.


The inside was soft and hot showing hijiki (black stringy below) and edamame (green).


Ingredients: (I tried to halve the amount of the original recipe. I ended up making some changes inadvertently, since I just did not want to use "half egg" and I did not want to leave a small portion of nagaimo).

The original recipe is as follows;

1 firm silken tofu 12oz (350g)
Handful dried Hijiki seaweed
8 oz (225g) unshelled edamame pods (then, cooked and shelled)
1 egg
4oz (125g) yamaimo
1/2 tbs sugar
1/2 tsp salt

The amount below are what I think I used. It made 6 balls using the Ebelskiver cooker (the balls were larger than regular takoyaki) as below.

1 small package of silken tofu, about 125gram, wrapped in paper towel with a weight (I used wooden cutting board) to drain for 1 hour.
Nagaimo, skin removed and grated, about 120g (I used up what I had left)
1 egg
Hijiki seaweed, hydrated, arbitrary amount
Edamame, frozen, cooked and shelled, arbitrary amount
Pinch of salt and sugar
"Katakuri-ko" potato Starch (because, proportionally I used more nagaimo and egg than the original recipe which made the batter runnier, I added potato starch to adjust the consistency of the batter).

For the dipping sauce; (this is the original, again, I halved the recipe when I made it)
2 tbs potato starch
2 cup (500ml) dashi
1 tbs soy sauce
1/2 sugar
1/2 tbs mirin
1/4 tsp salt

Directions:
Using a small food processor, I mixed the tofu, grated nagaimo, egg, salt and sugar until the batter was smooth. I then added the potato starch in small increments to adjust the consistency (it was the consistency of a bit runny pancake batter).
I added the hijiki, edamame and mixed (#1)
I preheated my electric ebelskiver to medium high (#2)
I poured the batter filling 6 wells (#3)
After the bottom got set and browned (it took a few minutes, I was too inpatient and started flipping too early)
After several flipping, the surface started getting evenly brown (#4)
I kept flipping until the surface is all cooked and browned about 5-6 minutes (#5 and 6).


This version of takoyaki was good and the dipping sauce went well with it but this is not really takoyaki (I am sure people from Osaka would agree). It is a dish in-and-of its own just resembling the shape of takoyaki. Making  this requires some steps and effort and I would rather make  regular takoyaki which is much easier to make.

Thursday, January 21, 2016

Another three appetizers お通し3種類

Here are other examples of drinking snacks--3 kinds. From left to right are blanched okra, burdock root salad and edamame.


I made the okra dish just before serving. The rest were prepared ahead of time.


1. Okura
Most of the time the okra I see at our regular grocery store is blemished and generally not good. This time, when I went to the grocery store, which is not our usual one, for Pasteurized eggs, I saw really fresh good looking okra and could not resist buying it. I first rolled the okra on the cutting board with Kosher salt to remove the fine hairs on the surface. I washed off the salt and blanched them in salted boiling water for 15 seconds and then cooled them in ice water. After they were cooled, I blotted the water from the surface and kept them in a sealed container in the refrigerator.

Just before serving, I sliced them into thin slices and dressed with soy sauce and dried bonito flakes.

2. Burdock root
I made this at the same time I made Kimpira. Instead of  braising the burdock root, I boiled it in salted boiling water for a few minutes. I let it cool down and dressed in mayonnaise with a bit of soy sauce.

3. Edamame
This is just boiled frozen edamame. Since I had broth left over from the simmered atsuage  and nagaimo dish, I just cut off the ends of the pods and soaked the edamame in the broth. I kept it for a few days in the refrigerator.

This threesomes was not bad (but not great either). Although I liked the okra, my wife did not like the residual sliminess (in general okra is not one of  her favorites). The burdock root salad was good but I think the classic kimpira is better. The broth did not season the edamame as much as I thought it would. As a starter, however, this was more than adequate.


Wednesday, December 2, 2020

Renkon balls レンコンまんじゅう

This dish is the result of an unexpected “silver lining” derived from the Covid epidemic. Because of Covid, we decided as a safety precaution, not to go to the grocery store but rather have groceries delivered. This forced us out of our usual routines and by necessity introduced us to new options. One of which was buying groceries from HMart Korean grocery store via the Instacart. As a benefit, we are now getting items which were not available from our usual grocery stores. One such item is fresh “reckon” 蓮根 or lotus root. (It is the floating stalk, not the root of a water lily). Even at our Japanese grocery store, the only reckon we could get was cleaned, boiled and sold in a package. It is easier to use than fresh renkon but it limits the dishes that can be made from it. For example, I could not have made this renkon ball or dumpling  dish レンコンまんじゅう shown below from packaged prepared renkon. But with fresh renkon available I could. I served the dumplings in a very gentle broth, with garnishes of edamame 枝豆, and simply fried reckon slices.


Reckon is an interesting vegetable. Even after cooking, it remains crunchy but grated and made into dumplings, the consistency changes completely into the consistency of “mochi-mochi” もちもち or like-fresh rice cake. I added shrimp and edamame to the dumpling. As a garnish I added simply fried renkon  which gave a nice contrasting  crunchy texture.


The other evening, I served three renkon dishes. From the left, Nitsuke 煮付け, the center is this renkon ball or dumpling dish but I added one fish ball made from blue fish, the right is renkon salad れんこんサラダ. 


In this nitsuke dish, renkon remains crunchy.


Boiled  renkon (again remains crunchy), blanched broccoli and skinned Campari tomato dressed in Yuzu mayonnaise. Since we used up the store bought Yuzu mayonnaise, I made my version by mixing Hellman’s mayo, yuzu juice (from the bottle) and a pinch of sugar . This really emulated the commercial Yuzu mayonnaise we got earlier.


Instructions for the renkon balls

Ingredients:
One segment of fresh renkon (#1) (after grated, #4, it was slightly more than 700grams)
2 tbs potato starch
3 large shrimp, thawed, shell removed and cut into small chunks then salted
10-15 shelled edamame

For broth
1 cup kelp and bonito broth (I used a dashi pack)
1 tbs of white dashi “shirt-dashi” 白だし seasoning or 1tbs each mirin and light colored soy sauce (or to taste).

Directions:
One segment of fresh renkon (#1).
Remove the ends of the segment of renkon and peel the skin (#2 and #3)
Finely grate the renkon and drain to remove excess moisture (#4)
Mix in the corn starch, shrimp and edamame. Make small balls about one inch in diameter.
Deep fry at 300-320 F for 7-10 minutes (#5)
I also fried sliced and quartered renkon
Drain (#6)


Assembly:
I cut one renkon ball in half and placed the halves in a bowl. I added the fried renkon and edamame and poured in the hot broth. You can also reheat everything in the broth and serve.

This is a very good dish. The contrast of elastic texture of the renkon balls and crunchy fried renkon is wonderful. The shrimp has similar texture to the renkon ball and since it was salted, it imparts briny salty burst of flavors. I made the broth very gentle and light which also went well.

Monday, September 12, 2016

Succotash サカッタシュ

We thought we already posted "succotash" but found out we did not. So, this is our version of succotash. This must be an archetypical American food which may have originated with native Americans (at least the name is from "sohquttahhash" in Narragansett language meaning "broken corn kernels"). Traditionally, lima beans are used in addition to corn,  but I used "edamame" 枝豆  soybeans. (digression alert: My wife commented that she was glad I substituted the edamame for the lima beans. She mentioned that lima bean succotash was a staple of childhood summer dinners and she remembered the tedium of carefully separating the corn, which she liked, from the lima beans, which she did not like. The alternative was suffering through the starchy large lima beans at the expense of enjoying the sweet corn.)


There are so many variations of this dish and I did not follow any particular recipe.  This could be a vegetable side dish for meat but it can also be served as a small snack like I did here.


Ingredients:
Corn kernels, corn on the cob briefly boiled in salted water and kernels removed using a knife (see second picture below).
Edamame soybeans, shelled and frozen, briefly boiled in salted water and drained (see the third picture below).
Tomato, skinned and diced
Onion, finely chopped
Garlic, finely chopped
Bacon, one strip
Salt and pepper to taste
(The amounts are all arbitrary)

Direction:
In a frying pan, I cooked a strip of bacon on low heat until the fat rendered and the bacon became crispy. I took out the bacon and kept it on a plate lined with a paper towel.  I left the bacon drippings in the pan and added the onion and garlic and sautéed them until cooked (a few minutes). I added the corn, edamame, and tomato and cooked them for few minutes stirring. I added the crumbled bacon and seasoned it with salt and pepper.


Cooked in bacon drippings with onion and garlic, this tasted pretty good. Although I only used one strip of bacon, the bacon flavor permeated the dish. We much prefer the soybeans rather than lima beans (even if they are small) which are usually used in this dish. 

Monday, December 5, 2022

“Canned mackerel and hanpen” Satsuma-age like fish cake 鯖缶とはんぺんの薩摩揚げ

Canned mackerel or “saba-kan” 鯖缶 is a very popular canned fish item in Japan and is readily available in the U.S. Upon inspection, of the canned mackerel in our pantry, I realized that the “Best used by” date had just passed on one of the cans. (I thought canned food lasted forever but that is apparently not the case). I needed to use this can fast and I then saw a perfect  recipe of fried fishcake on the Japanese website I follow using canned mackerel and “Hanpen” fishcake はんぺん.  This type of fishcake is called “Satsuma-age” さつま揚げ, which is a very common dish served grilled in Izakaya. Although I attempted to make Satusma-age from scratch, it was not quite authentic due to the lack of appropriate kinds of fish. The current version is interesting because instead of using ground fish meat “surimi” すり身 which is the authentic way to make Satuma-age this recipe used a mixture of canned mackerel and hanpen.  I served this with the usual grated ginger and soy sauce. It does not have the texture of authentic Sastuma-age but this was good; crispy outside and tender inside with the firmer texture of edamame and carrot. It all worked. The inclusion of ginger and deep frying toned down the otherwise strong flavor of the mackerel. This is a perfect dish with sake.


Ingredients:
One can of boiled (Mizu-ni 水煮) mackerel (190 grams with the liquid, about 150 grams fish meat), drained and crumbled
2 hanpen steamed fish cakes, frozen, thawed (240 grams), cut into small pieces.
1 tbs potato starch
1 tsp sugar
30 grams julienned carrot(1/3 of medium carrot), boiled or microwaved for 30 seconds
60 grams cooked and shelled edamame
1/2 tsp grated ginger

Peanut oil for shallow frying

Directions:
Mix all the ingredients until completely incorporated (The original recipe placed everything in a plastic bag and hand massaged it to make the dough, I did not have the patience to do that so I used an immersion blender, #1).
Mix in the edamame and carrot and make flat ovals (I made 8) (#2)
Add the oil to the frying pan to the depth of 5mm and heat to around 350F and shallow fry for 3 minutes (#3)
Turn over and fry the other side for 3 minutes (#4)
Drain and serve immediately (or once refrigerated, toaster-oven to warm).


This is not Satsuma-age but it is a nice fishcake and we really like it. Since the ingredients (hanpen and canned mackerel) are easy to get, this is a good and easy dish to make.

Friday, June 30, 2023

Corn, Roasted Ped Pepper, Edamame and Jalapeño Pepper Salad 玉蜀黍、ロースト赤パプリカ、枝豆とべーコンサラダ

Although it is not quite local corn season, fresh corn is available and on our last trip to Whole Foods my wife celebrated the season by stocking up on corn. She used it for various dishes and this is one of them. In addition, we got a bag of 6 red peppers. (Turns out it was much cheaper to buy the bag of peppers than to buy several peppers individually). My wife looked up corn salad recipes which used roasted red pepper on the internet. This dish is an amalgamation of the various ingredients used in those recipes with our own ideas mixed in. It has a nice color combination and tasted great.


Ingredients:
1 roasted red pepper, skin, ribs and seeds removed and cut into small squares
2 ears of fresh corn on cob, microwaved wrapped in wet paper towel for 2 minutes or more until cooked
1 sweet (Vidalia) onion, finely chopped
2 strips of bacon, cooked to crisp and crumbled
1 large jalapeño pepper, seeded, deveined and finely chopped
1 cup of boiled edamame, shelled (or lima beans)

For dressing:
1 tbs Dijon mustard
1 tbs honey
2 tbs rice vinegar (or any vinegar)
8 tbs or more fruity olive oil
salt and pepper to taste

Directions:

For roasted red pepper
I roasted them at 450F in the toaster oven on convection mode for 20 minutes turning a few times so that all the surface was cooked/charred. I then put them in Ziploc bags to steam for 30 minutes. Once cooled down, remove the stem end, skin, ribs, seeds and peel. (The skin will come off easily).

Combine all the ingredients, add the dressing and stir well.

This is a great salad. The corn adds and lovely sweetness and crunch. Although I initially protested when my wife suggested using bacon, it adds a salty, smokiness and crunch which is really a great addition and a “must-have” for this salad. In addition to adding to the color the roasted red peppers adds a slightly spicy bite. The edamame yields yet another crunch dimension. The dressing adds a bright tart note. We will be making this one again.

Tuesday, June 30, 2015

New small containers with three appetizers

When we visit Kyoto, we always go to Nishiki market 錦市場. Among the stores we visit is a small china store called "Kawazen touki" 河善陶器.  This time we found the store basically unchanged from previous visits except the proprietor (and us as well) were somewhat older. This place has a collection of small bowls and containers. We have not yet seen such things anywhere else (even in Kappabashi 河童橋). They come in essentially two sizes--very small and small. On one visit we heard one Chinese woman ask her companion, in English, what the dishes were used for and the woman answered, "for dolls" i.e. toys. We chortled about that statement for some time. On this visit we picked out two sets of the small sized dishes and a few extras.


On this trip we also got more small sake cups from Kita-ichi glass in Otaru 北市グラス、小樽, Hokkaido. One of them is shown here; a rather tall one with a frosted inside. We bought a set of 4 but when we used it for the first time, I broke one of them. Oh, well...glass and I do not always get along. In any case, I was looking for an occasion when I could use these new containers. Since we did not have anything special to eat and I did not have time to go to the Japanese grocery store, I decided to make something from what we already had in the refrigerator or freezer.


So, here are three small appetizers presented in the new containers. From the left, grated daikon and jako garnished with tobiko and edamame, center is peanuts in sweet miso with walnuts, the right is chicken (barbecued) and green beans dressed in sesame mayonnaise.


The one below was inspired by an otoshi dish we had in a Yakitori place called "Kushiwakamaru" in Naka-meguro (Dave, Tobias and their wives went there with us and we had a grand time). It is grated daikon with jako (dried small bait fish) dressed in sweet vinegar. At Kushiwaka-maru, the amount they gave us was so large that we (my wife and I) could not finish it. But this time, I made only a small amount that we could handle. Since I happened to have tobiko (previously frozen) and edamame (left over from a salad my wife made that day). I used these as garnish for additional color in the dish.


The center dish was inspired by the breakfast we had in Wakamatsu Honten 若松本店, a Japanese Ryokan in Narita where we always stay on our last night in Japan. Being a ryokan, they give us a grand spread of food for dinner and breakfast. I should have taken pictures. One of the dishes among so many served for our breakfast was peanuts in sweet miso, a Chiba 千葉 prefecture speciality (where Narita is located). While my rendition was not bad I will have to work on improving it. Initially my intention was to use walnuts as the basic ingredient. (I thought I could take a shortcut by stealing some of the walnuts my wife had roasted for her grain salads. While I had no problem snarfing the edamame because it was left over, I was not so fortunate with the walnuts. She caught me before I could amass a sufficient amount and I had to revert back to using peanuts) which were the main ingredient for this dish served at the roykan.  This is how I made it. I put miso in a small sauce pan and added mirin and sugar. I mixed well and gently heated up the mixture until the consistency came back almost to the original miso. I then added ground walnuts (ground in a Japanese suribachi mortar) and further mixed. I then added peanuts (dry roasted lightly salted). It tasted very similar to what we had but was a bit too salty. I may use peanut butter in the next try.


The last one is shredded chicken (which we barbecued few days ago) and small pieces of cooked green beans and dressed then in sesame mayonnaise (mayo, sesame paste and soy sauce).


For three quick appetizers to inaugurate our new containers, these were quite ok. The peanuts in sweet miso was a bit too salty by itself but would have been perfect with rice. This dish definitely requires more improvement. Sake in a new glass also somehow tasted better. 

Tuesday, January 19, 2021

Steamed renkon balls 蒸し蓮根まんじゅう

This is on the theme of fresh renkon lotus root. This is another renkon ball 蓮根まんじゅう but instead of deep frying, this was steamed/microwaved (hence healthier). The original recipe calls for "ginnan" 銀杏 ginko nuts but we did not have it. So I used shelled edamame 枝豆.


I added gentle broth made of kelp-bonito dashi pack and shirodashi 白だし seasoning. I garnished it with more edamame and blanched snow peas.


Ingredients:
200 grams grated fresh renkon, skin peeled, excess moisture drained
1 tbs potato starch
4 shrimp, thawed, shelled and cut into bit size chunks
20 shelled edamame, cooked

For broth.
200 ml kelp and bonito dashi (made from dashi pack), heated
2-3 tbs shirodashi 白だし or 1tbs mirin and 1 tbs light colored soy sauce

you could thicken the broth by adding potato starch slurries (optional)

Direction:
Mix all ingredients in a bowl.
Made 6 small balls.
Using a microwave safe silicon container, I microwaved for about 2 minutes or until done.

Place one ball in a small bowl, add hot broth and garnish.

The texture is very different from the deep fried version. Much softer and gentler. We like this variation and it is easier to make. Some recipes suggest wrapping the balls in plastic wrap and microwave but I did not like the idea of microwaving in plastic wrap. That’s why I used a microwave safe silicon container instead.

Wednesday, September 4, 2013

Cold tofu with upripe soybean puree 豆腐の枝豆ソース

The other day, when my wife made chow chow pickles, she used soy beans "edamame" 枝豆 instead of lima beans. Actually she prefers to use young soy beans instead of lima beans when the recipe calls for lima beans. She says that the texture and taste of the soybeans is not a starchy as lima beams. Since we had a leftover pouch of frozen shelled soybeans, I decided to use it up by making two dishes. This is the first one I made. This recipe came from "Otsumami Doujou" おつまみ道場 (in Japanese).


As usual, I did not precisely measure the ingredients but the original recipe (2 servings) calls for;

Edamame: 25grams (boiled, shelled and cooled or in my case, frozen shelled edamame in a microwavable pouch).

Seasonings: White miso (1/2 tbs, I used "saikyou" miso 西京味噌), Cream (1 tsp, I used more), Dashi broth (1 tbs, I used concentrated "white dashi" 白だし from a bottle, about 1 tsp)

I first put all the ingredients in a small food processor and whirred them until they attained a saucy consistency. I did this by adding a bit more cream as needed. The skin of the soybeans did not homogenize completely. So I moved the contents to a Japanese mortal or "suribachi" すり鉢 and tried to make it smoother but it didn’t seem to make a big difference. So the sauce was not as smooth as I had hoped. I tasted it, it had a nice salty nutty flavor from the miso. Since this sauce would be mixed into tofu, I thought the saltiness was just right. You can always "add" more miso or salt to make it saltier to your liking. The ratio of tofu to sauce needed to be taken into account as well. In my case, I was going to serve this with a rather small cube of silken tofu (i.e. more sauce than the original recipe) so I did not add any more miso.

I put this sauce over the cube of cold silken tofu. We mixed well with the tofu before eating but how you eat this is up to you. You could eat it with spoonful of tofu and sauce on the top as well. The cream adds a richness and the miso adds a nutty, slightly sweet and salty flavor. Perfect dish for summer days.

Tuesday, October 19, 2021

Matsutake from Maine メイン州からの松茸

We have been getting fresh Matsutake from the Oregon mushroom for many years and I have made all the dishes I can think of. This year when I looked on their web site matsutake was listed “out of stock”. So I decided to look into alternatives sources. I found fresh matsutake available from Maine at a site called  “Foraged”. It appears this is the web hub for individual foragers. I ordered some matsutake from the site and ours came from a forager in Bangor, ME. One of the forager’s ad even states “Picked to order”. I did not know Maine has matsutake (I know Oregon and Colorado produced North American Matsutake). Oregon mushroom has different grades for matustake and I have been getting “grade #1” which has unopened caps. “The Foraged” did not have different grades.  As shown in the picture below what arrived were large with opened caps (These are after I cleaned). 


Because of the open caps and gills, it is a bit more difficult to clean and also had more “worm holes” than the ones from the Oregon mushroom.


I had posted all matsutake dishes I can think of as I mentioned earlier. I prepared the classic dishes from the Maine matsutake such as “Matsutake rice” and “Grilled matustake on a toban yaki grill”.
This Maine matutake had good flavor and we had a "Matsutake feast" one evening which included  "Matsutake toban-grill” 松茸の陶板焼き, "chawan-mushi" 松茸の茶碗蒸し, "Dobinmushi-like soup" 松茸の土瓶蒸しもどき and ended with "Matsutake rice" 松茸ご飯 . 

The below are the first group of matsutake dishes. Since I could not get a Japanese citrus called “Sudachi” スダチ, which is typically used with matsutake dishes, I used wedges of lime which is closest among the readily available citrus.


I cooked touban-yaki on the stove with the lid on so the matsutake grilled and steamed at the same time keeping the aroma in. I happended to get shell-on ginko nuts or “ginnan” 銀杏 from Tako Grill, which I prepared a few days before, I coated the nuts with salt and grilled them with the matsutake. 


This chawan-mushi is mostly matsutake and a few ginko nuts and shelled edamame, and small chunks of shrimp. I also added chopped chives since I had it.


I also served edamame.


Then, I served the matsutake soup somewhat like a traditional “dobin-mishi” but since I do not have proper "dobin" 土瓶 I made dobin-mushi -like soup in a mini-donabe.


For the broth, I made #1 broth or "ichiban dashi" using kelp and bonito flakes. I also added steamed renkon ball, shrimp, daikon, carrot, shelled edamame and ginko nuts.


The matsutake-rice was prepared the night before. So I just microwave but it came back really nicely. So we think this feast did justice to the celebration of autumnal dishes ushering in the new season. 

Sunday, July 9, 2023

Corn Sage Muffin Variation コーン、セージ、マフィンバリエーション

It is getting to be the season for fresh corn and we have gotten quite few ears of it recently. We (mostly my wife) love corn and we’re making quite a few corn dishes. This particular baking project started out as one of my wife’s regular sage corn bread (in muffin form) but she realized the recipe called for 1 1/2 cups of corn puree and she only had a cup; not quire enough of the corn puree required to make the batch of muffins. Then she remembered we had left-over corn, roasted red pepper, edamame and bacon salad that we had made a few days ago. She thought, ‘That salad included corn. If I substitute the salad for the missing corn, wouldn’t that make up the shortfall?’ She first contemplated pureeing the salad and adding it to the corn puree but in the end, she decided to just put a cup of the salad into the batter to add some additional texture.   I will never fathom how my wife (the queen of substitutions in recipes) comes up with these things but this substitution happened to result in a very good muffin. The red in the picture is the roasted red pepper. The green is the jalapeños pepper and boiled edamame. The flavors of these ingredients, particularly the roasted red pepper really comes through and went beautifully with the over all corn sage flavor of the muffin. This is a variation well worth repeating.


The picture below shows the salad she added.


The ingredients and directions for the two recipes she combine are shown below for convenience

Ingredients: For the muffin
1 cup grated corn
1 stick butter
6 large sage leaves (or several sprigs of rosemary)
1 cup of corn salad (this is the current variation in the recipe) (Salad recipe below)
1 1/2 tsp salt
2 large eggs
1 cup buttermilk
3/4 corn flour (or corn meal)
2 cups All Purpose (AP) flour
1/2 tsp baking soda
2 tsp baking powder
1/4 cup sugar (or more for a slightly sweeter muffin)

Directions:
Grate the ears of corn on a stand grater. Scrape the ears with the back of the knife to get the remaining "corn milk" . Melt the butter in a saucepan (do not allow it to boil or brown). Mix in the grated corn, salt, and sage leaves. Cook until creamy and thickened, making a kind of polenta. Remove the sage leaves. To achieve a really smooth emersion blend it further in a “motor boat” blender. Allow the mixture to cool. Add the buttermilk and eggs and mix until blended.

In a large bowl sift together the corn flour (or corn meal), AP flour, baking soda, baking powder, and sugar. Add the 1 cup of corn salad and mix in the dry ingredients to coat with a bit of the flour. Add the liquid ingredients and stir until blended. Scoop into the prepared muffin tin. Cook in 400F degree oven for 18 to 20 minutes for muffins, or until a skewer comes out clean and the muffins are nicely browned.

Ingredients: For the corn salad
1 roasted red pepper, skin, ribs and seeds removed and cut into small squares
2 ears of fresh corn on cob, microwaved wrapped in wet paper towel for 2 minutes or more until cooked
1 sweet (Vidalia) onion, finely chopped
2 strips of bacon, cooked to crisp and crumbled
1 large jalapeño pepper, seeded, deveined and finely chopped
1 cup of boiled edamame, shelled (or lima beans)

For dressing:
1 tbs Dijon mustard
1 tbs honey
2 tbs rice vinegar (or any vinegar)
8 tbs or more fruity olive oil
salt and pepper to taste

Directions:
For roasted red pepper
I roasted them at 450F in the toaster oven on convection mode for 20 minutes turning a few times so that all the surface was cooked/charred. I then put them in Ziploc bags to steam for 30 minutes. Once cooled down, remove the stem end, skin, ribs, seeds and peel. (The skin will come off easily).

Combine all the ingredients, add the dressing and stir well.

Wednesday, June 16, 2010

Chicken liver and tofu terrine 鶏レバーのテリーヌ風

Believe it or not this recipe came from "Appetizers and a la carte small dishes for Izakaya" by Tadashi Shinojima.  Judging from the title of the book, by definition, this must be an Izakaya food. Although this looks and tastes like a chicken liver pate (actually it is more pate than terrine), there are a few Japanese touches; one is the inclusion of tofu and the other is the addition of "edamame" 枝豆. Since I bought a container of chicken livers for Yakitori, I decided to make this dish; a situation similar to the previous time I made braised chicken liver and onion.

I used about 180 grams of chicken liver. After removing the fat and connective tissue, I soaked it in ice cold water for 15 minutes. I added a bit of sake to the water and boiled the liver for 4-5 minutes until thoroughly cooked. Meanwhile, I wrapped a firm or "momengoshi" tofu 木綿ごし豆腐 in paper towels and microwaved it for several minutes. I re-wrapped it in new paper towels and placed a heavy plate on the top for 10 minutes to squeeze out any excess water. I used about 150 grams (after removing the excess water) of tofu. In the mixing cup of an immersion blender, I added the cooked liver (180grmas), tofu (150grams), beaten egg (1/3), cream (1 tbs), grated onion (1 tbs), salt and pepper and blended them until smooth. I then folded in the shelled edamame (I used about 20 of the frozen kind, cooked and shelled). I also added small cubes of left over steak (the recipe called for cubes of roast beef).  I then poured the mixture into small (disposable) loaf pan and baked for 30 minutes in a preheated 400F oven in a bain-marie. The original recipe was a bit vague about how this dish is to be cooked (the author said "mushiyaki" 蒸し焼き or steam-bake in an oven) but I interpreted this to mean bake using a bain-marie. I let it cool down to room temperature and stored it in the refrigerator overnight before slicing.

The recipe suggested serving this with a "white cream sauce" but I chose to serve it like a pate with cornichon pickles on toasted small squares of cocktail bread. The texture is great and the edamame and cubes of steak made an interesting texture contrast and color. If you are not told, you would not have guessed that close to half the bulk came from "tofu". It has a nice irony liver pate taste but it needs more distinctive spices (maybe more onion, black pepper and salt). For a fusion pate with tofu, this is not bad. Does Tofu make this dish a healthier dish? - maybe.

Tuesday, June 29, 2010

Hijiki and chicken salad and Stewed Hijiki ひじきと鶏肉のサラダ、ひじきの煮物

Hijiki ひじき is one of the several "kaiso" 海藻 or sea vegetables (sounds better than "seaweed") which has been a part of Japanese cuisine for a long time. Japanese consider hijiki to be a healthy food with high fibers and minerals. As I was growning up, we had hijiki occasionally, but it was, by no means, my favorite dish as a kid. It does make a nice small dish for a drink, however, and as such, I like hijiki now. (Regarding arsenic contained in Hijiki, please refer to the footnote.)

Hijiki comes dried and usually has two different kinds; "Me-hijiki" 芽ひじき consisting of the buds or tips of hijiki, and "Naga-hijiki" 長ひじき consisting of the stalks of hijiki. I happened to get dried "Naga-hijiki" and decided to make two dishes. In dried form, hijiki is very hard and black like tangles of black metal wires. To prepare, after washing in cold running water in a colander, I soak it in large amount of cold water initially for 30 minutes. At the end of the 30 minutes, the volume of hijiki increases something like 10 fold and you can see the dark brown shapes of the original hijiki plant with the fresh smell of the ocean. I drain and wash in cold running water in a colander.  I then soak again in fresh water. I repeat this several times over the period of about 2 hours (you do not really need this long soak and changes of water but I like to leach out as much of the small amount of arsenic as possible, see the footnote). If I am not ready to cook this immediately I keep it in a container with water and place it in the refrigerator.

1. Hijiki and chicken salad ひじきと鶏肉のサラダ

Since I had some leftover cooked (barbecued) whole chicken, I used the breast meat for this dish. If you are making this from scratch, you should either steam in sake or "sakamushi*" 酒蒸し or microwave the chicken breasts.

*add 2-3 tbs of sake in a small frying pan and add a chicken breast (skin removed). Put on a tight fitting lid and braise/steam for 4-5 minutes or until the chicken is done in a low flame.

In a small frying pan, add olive oil with a dash of dark roasted sesame oil. When the oil is hot, add a desired amount of hydrated and drained hijiki and saute for 1-2 minutes and then add coarsely shredded (by hand) cooked chicken breast and saute for aother minute and season with salt and pepper.  Tip them out in a bowl and add soy sauce with dissolved yuzukosho 柚子胡椒 (from the tube) or wasabi. You could also use ponzu (soy sauce) ポン酢醤油 with or without the spicy stuff. Here, I made a half and half mixture of soy sauce and yuzukosho and added the mixture in several increments as I tasted it to my liking. I garnished it with cooked and shelled edamame. I serve this at a room temperature. This is a good dish. Mild zing and flavors of the yuzukosho is very nice.

2. Stewed Hijiki ひじきの煮物

This is as classic as hijiki dishes go. There are many variations to this. Some add cooked (yellow or ripe) soy beans "mizuni daizu" 水煮大豆 and other vegetables. Carrot and deep-fried tofu pouch "abura-age" 油揚げ are most common ingredients in this dish. I used carrot, sweet potato, edamame  枝豆 and deep fried tofu pouch in mine.

I made a large batch with the remaining prepared hijiki which is about 3 cups after hydration. I added broth (I used granulated instant "dashi" dissolved in water) (1 cup) add small cubes of carrot (one large) and sweet potato (1/2 large) and simmered for 10 minutes or until vegetables were cooked (not too soft) and set it aside in a bowl with the liquid. I added peanut oil (1tbs) with a dash of dark sesame oil in a sauce pan on a medium flame and saute the prepared hijiki and thin strips of abura-age (2 small squares or "koage" 小揚げ, blanched, squeezed of water and cut into thin strips) for 1-2 minutes and add the cooked vegetables with its liquid. Simmer for 5 minutes and I season it with sake, mirin and soy sauce (1:1:2 parts), I will go easy on soy sauce at first since it will cook until the liquid is almost all gone. I taste when the dish is almost done and add more soy sauce if needed (I did not). After turning off the heat, I mixed in cooked and shelled edamame and let it sit and come to the room temperature before serving. This has a classic taste of hijiki "nimono" dish.  I found  old "ichi-go Masu" 一合升 in the back of the kitchen cabinet and used it to serve this dish.

We had both hijiki dishes at one sitting. Both dishes are quite different in taste and texture (although it may look similar) and went well with cold sake.

*Footnote regrading arsenic in Hijiki:
I did not know this until I read Hiroyuki's blog some time ago. It appears that the amount of inorganic arsenic is not high enough to have a serous health concern if you consume hijiki in moderation (meaning not eat tons of hijiki everyday). There is no known case of arsenic health effects even in Japan where people tend to eat more seaweed than anywhere else including hijiki. It is also reported that If you soak hijiki for 1 hour and if you boil it for 5 minutes after hydration, . This time, I soaked much longer than needed with multiple changes of water which, I am surmising, reasonably reduced the arsenic content. So it appears that consuming hijiki cooked this way is not to be of any health concern. A (professional) well-informed Japanese food blogger appears to take a similar position.

Friday, November 20, 2020

Shelled ginko nuts 殻付き銀杏

Because of Covid, it is not possible to go to a restaurant for a “sit down” meal so, instead, we are doing “take-out” sashimi and sushi from Tako Grill regularly. Since Mr. Segawa’s restaurant is essentially closed for  sit down customers, he expanded his business into groceries by adding frozen and refrigerated cabinets stocked with many Japanese grocery items. Every time I go there, I get some of  these in addition to the take-out. One such time, Mr. Segawa was kind enough to include some matsutake soup that he made. It was really good. Besides all the lovely ingredients such as matsutake  松茸,  chicken,  "edamame"  it also included "ginnan" ginko nuts. We love ginko nuts! Having them in the soup reminded us that we used to get canned  boiled "gin-nan" 銀杏 ginko nuts. For some reason they have totally disappeared and we have not had ginko nuts for quite some time. I asked Mr. Segawa, if we could buy ginko nuts as groceries from him. He was good enough to provide some with the shells on (see below). We were delighted but, to be honest, I have never dealt with ginko nuts in the shell.


So I quickly searched on-line and found three ways to prepare them: 1. Place the ginko nuts in a paper envelope and microwave it until the shell cracks. 2. Dry roast them in a frying pan until the shell cracks, 3. Crack the shell remove the nuts and gently boil for few minutes making sure the nuts are submerged all the time and then remove the brown inner skin while hot. I tried the 2nd method on some of the nuts, i.e. dry roasting them in a frying pan.  The shells did not crack (although one did "explode"—quite impressive). I cracked open the remaining un-cracked nuts but they were over cooked, dry, with burned spots and taste. So, I decided to try the third method.

I cracked the shells using the kitchen scissors which has a nut cracking device near the handles. It was not too difficult but I had to be careful not to damage the nuts inside. Some of the brown inner skin came off when the shell was remove but, for many, the brown skin remained (picture below).


I then placed the nuts in salted gently boiling water. They stayed submerged without much intervention.


After few minutes, I drained the nuts and using a sheet of paper towel, removed the inner brown skin.


This was a success. Here I used them to top cold chawanmushi 茶碗蒸し along with edamame 枝豆 and ikura.


 We really enjoyed this. Definitely the taste of autumn.