

Ingredients
1 cup (5 oz) AP flour
1 cup (4 oz) cake flour
2 tsp. yeast
3/4 tsp baking powder
1/2 tsp salt
1 1/2 cup warm water (1 1/4 into dough before rising, 1/4 into dough after rising)
Directions:
Combine AP flour through salt in an 8 cup measuring cup (the measuring cup makes it easier to pour the batter into the pan). Add 1 1/4 warm water and mix until smooth. Cover and let rise until double (about 40 minutes). The whole secret of getting the little holes in the crumpets is in the cooking. Put oil in an 8 inch skillet and heat on low for at least 5 minutes. Meanwhile add the remaining 1/4 water to the batter and mix until smooth. Increase heat to medium and heat skillet for an additional 1 minute. Using a paper towel wipe the excess oil out of the skillet. Pour 1/3 of the batter into the skillet. Increase the heat to high and cook on high for 45 seconds. Reduce heat to medium low and contiue cooking until the edges are risen, set and beginning to dry out (about 4 minutes). Take skillet off the heat. Place a dry flat spatula on top of the crumpet and pull up sharply to remove the excess batter and reveal the underlying holes. Turn the crumpet over. Return to the heat on high until the edges on the second side are lightly browned. Remove to cooling rack. Immediately add half of the remaining batter to the pan, turn up the heat and repeat the cooking process.
The picture below shows the crumpet soon after it comes out of the skillet. As you can see there are many nice holes to collect the melted butter or honey.
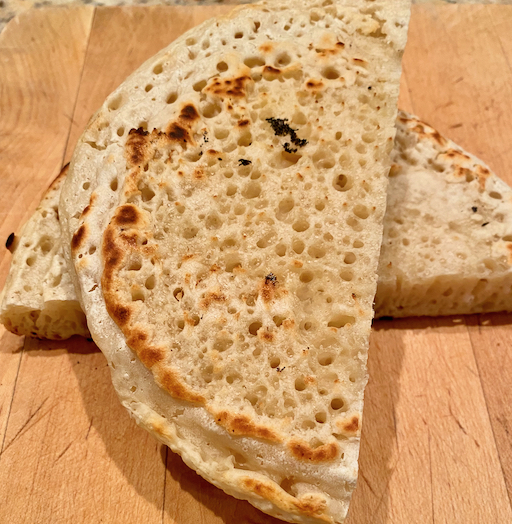
The method works well to elicit the necessary nooks and crannies to collect the toppings. The picture below however shows what happened to the underside that was exposed to the high heat to create those lovely holes. No matter how we did it this happened with the batter actually smoking. The good news is that although the surface turned black it apparently was not burned and tasted just fine.
This process of cooking the crumpet is certainly less tedious than our previous method. The crumpet was very nice; crunchy on the outside and soft on the inside. It also held what ever topping we used very well. It tasted pretty good although I think the previous recipe we had tasted better. Also, I'm not sure about adding the additional 1/4 cup of warm water after the batter has risen to double. The recipe says the water in the batter converts rapidly to steam when the high heat is applied creating the bubbles that form the holes before the batter firms up. But this would also have the effect of deflating the rise created by the yeast. The next step would be to use the previous recipe with this cooking method to see what we get.
No comments:
Post a Comment