Thursday, November 21, 2024
Chestnut Apple Soup クリとリンゴのスープ
Saturday, February 3, 2024
Chestnut, Brown Butter, Sage Muffin 栗の粉とセイジマフィン
I ask my wife to continue as usual.
Ingredients: (makes 12 small muffins)
Several bunches of sage (with about 5 leaves on each, one of which used in the browned butter the other steeped in the milk).
6 tablespoons unsalted butter
2/3 cup milk
3/4 cup all purpose flour
3/4 cup chestnut flour
1/4 cup sugar
2 teaspoons baking powder
1 teaspoon baking soda
1/2 teaspoon salt
2/3 cup yogurt
1/4 teaspoon vanilla extract
Ingredients X2: (suggested to make larger muffins)
Several bunches of sage (one of which used in the browned butter the other steeped in the milk. The more leaves use the more intense the sage flavor).
12 tablespoons unsalted butter
1 1/3 cup milk
1 1/2 cup all purpose flour
1 1/2 cup chestnut flour
1/2 cup sugar
4 teaspoons baking powder
2 teaspoon baking soda
1 teaspoon salt
1 1/3 cup yogurt
1/2 teaspoon vanilla extract
Directions
1. Preheat oven to 400°F. Combine milk and sage in small saucepan and heat to a bare simmer, then remove from heat and cover. Allow to steep at least 10 minutes, then remove sage, squeezing as much milk as possible from sage before discarding.
2. Place butter and remaining sage in small saucepan and heat over medium until melted and foamy. Allow to cook until liquid butter is golden brown and solids at bottom are deep brown and smell nutty. Transfer to a heatproof container, remove the sage and make sure to scrape out as much of the browned butter solids as possible.
3. Combine all purpose flour, chestnut flour, sugar, baking powder, baking soda and salt in medium mixing bowl. Sift if necessary, or simply whisk together. In separate mixing bowl, combine sage milk, sage butter, yogurt and vanilla and whisk until smooth. Gently fold the wet ingredients into the dry until all streaks of flour are incorporated and batter is fluffy and slightly lumpy. Divide evenly between cups in a 12 cup muffin pan lined with paper cups. Bake 7 minutes, then rotate pan and bake another 3-5 minutes, until a skewer inserted into muffin comes out clean. Be careful not to overbake. Allow to cool in pan slightly before transferring to rack to finish cooling.
These are truly remarkable muffins. They are a combination of unexpected tastes that work extremely well together. The combination of browned butter and sage came through with a pleasing robustness. The chestnut flour added a slightly nutty dimension. The chestnut flour also contributes to the very light and tender texture of the muffin. While these muffins were a bit of surprise flavor-wise they were also a great new discovery. Next time we’ll double the recipe so the muffins are a bit larger.
P.S. In early February, the plum tree in our yard started blooming. It is always amazing and nice to see this when it is still winter and the weather is still cold. It is such a nice early harbinger of hope for the upcoming spring.
Thursday, November 30, 2023
Sweet Potato and Chestnut Rice サツマイモ、栗ご飯
This is a close-up of sweet potato chestnut rice. I sprinkled “goma-shio” ごま塩, a mixture of black sesame and salt.
For the miso soup, I added shimeji しめじand shiitake mushroom along with lily bulb 百合根 which sank to the bottom. We picked the lily bulb up with the chopsticks so they got their place in the photo op.
Ingredients:
2 cups (using the cup came with out rice cooker) of short grain rice (we used “Yumepirica” ゆめぴりかHokkaido rice we got form NY rice factory).
1 inch square kelp
1 Japanese sweet potato, peeled, diced and soaked in cold water
10 prepared chestnuts
1 tbs x4 concentrated “Mentsuyu” Japanese noodle sauce
Directions:
Wash the rice, place it in the rice cooker, add the specified amount of water, add the seasoning, sweet potato and chestnuts and turn on the switch.
When it is done (see below), remove the kelp and gently mix.
This is a very autumnal and nice rice. Nice sweetness from both the sweet potato and the chestnuts with contrasting texture of soft and somewhat crunchy. I just sprinkled the “goma-shio” and my wife, as usual, added butter and soy sauce. The soup also went very well. The nice sweetness and crunchy texture of the lily bulb and mushrooms worked well together. We were also pleased with the daikon tsukemono.
Monday, November 6, 2023
Chestnut Soup 栗ときのこのスープ
Ingredients
5-6 fresh shiitake mushrooms, stems removed and caps sliced.
2 tbs. unsalted butter and 2 tbs. olive oil
1 large leek, white and tender green parts only, finely chopped
1 carrot, thinly sliced
2 celery stalks finely chopped
1 teaspoon minced rosemary (from our herb garden)
7 oz. (200 grams) peeled roasted vacuum-packed chestnuts (see picture below)
3 cups chicken stock
Salt
Freshly ground pepper
For garnish
1 tbs each of olive oil and unsalted butter
5-6 fresh shiitake mushrooms, stem removed and caps thinly sliced
Salt and pepper to taste
Fresh rosemary, finely chopped up
In a saucepan on medium heat, add the olive oil and butter. Add the sliced shiitake mushrooms, leeks, carrot, celery and rosemary and cook, stirring occasionally, until the vegetables are cooked; about 15 minutes. Add the chestnuts and stock, season with salt and pepper. Bring the soup to a boil and simmer over low heat for 30 minutes. Using an immersion blender, puree the soup until smooth.
For garnish
In a frying pan, heat the oil and butter. Add the sliced shiitake mushrooms, cook over moderately high heat until lightly browned (6 minutes). Season with salt and pepper. I served the soup warm and garnished with the sautéed shiitake and the chopped rosemary.
Thursday, October 19, 2023
Chestnut Flour Cake with Persimmons and Buttermilk チェストナッツフラワーと柿のケーキ
Ingredients:
172 grams chestnut flour
148 grams or 5.2 ounces of persimmon puree. *
1/2 cup buttermilk (we used my wife favorite buttermilk from Harrisburg dairies.)
3 eggs, at room temperature
1/4 cup melted unsalted butter
1 tsp vanilla extract
generous pinch of salt
1 tsp baking powder
* The persimmon came from Weee (#1 below). They are “Fuyu” 富有柿 (which is pronounced “fuyuu” meaning “wealthy”) variety and are called chocolate fuyuu because of the dark brown color of the fruit. They were not expensive but they were small with seeds. (Most commercially grown Fuyu persimmons are seed-less). They were irregular in shape with dark blemishes which made them look like they came from somebody’s backyard tree. But when ripened they are very good with pudding-like consistency and sweet. Only problem was that it was very difficult to remove all the seeds/stones.
Directions:
Preheat oven to 350°F (177°C). Butter 9" cake pan. (Having learned from our previous experience with the chestnut flour cake we added a buttered piece of parchment paper to the bottom of the pan and the cake came out of the pan with no problem)
Puree the persimmon and set aside (#2). Sift chestnut flour to remove any larger bits/chunks.
Mix dry ingredients in bowl and set aside. Using either an electric mixer or a bowl whisk and beat the eggs. Add other wet ingredients. Fold dry ingredients into wet ingredients until fully incorporated (#3).
Pour batter into buttered pan and put into pre-heated oven for about 30 minutes, until the cake is firm in the middle and a toothpick pulls out clean. Remove from oven and cool on baking rack for at least 30 minutes before serving (#4). We reheated in the microwave for 15 seconds (First picture).
This cake was very moist, slightly sweet with a dense texture. The nutty chestnut flavor came through but we couldn’t identify any persimmon taste. This was a very good addition to breakfast.
Monday, October 16, 2023
Castanaccio Pugliese (Chestnut Flour Cake) カスタナチオ
Ingredients
1 1/2 cups chestnut flour
1/3 cups sugar
1 tablespoon baking powder
2 tablespoons cocoa powder, plus more for dusting
Pinch of salt
1/2 cup extra virgin olive oil, plus more for brushing
2 tablespoons honey, plus more for serving
2 large eggs
1 cup milk
1 cup of Harry and David’s medley of candied fruit. (The original recipe calls for 1/2 cup raisins and 1/2 cup dried cranberries, plumped in 1/4 cup warm water or wine - preferably Vin Santo).
1/3 cup toasted pine nuts
1/3 cup roughly chopped toasted walnuts (As added measure we added chopped chestnuts)
Confectioner's sugar for dusting
Directions:
Preheat oven to 350F degrees. Prepare a 9-inch cake pan (The original recipe suggested lightly greasing it with olive oil but we had trouble getting the cooked cake out of the pan. We suggest next time greasing the bottom of the pan and adding a layer of greased parchment paper.)
Toast the pine nuts and walnuts. In a large bowl, swift together the flour, sugar, baking powder, cocoa powder and salt. In a separate bowl, whisk together the olive oil, honey, eggs and milk. Slowly pour the liquids into the dry ingredients, whisking very well to avoid lumps. The batter should be smooth and a bit liquid. Add the nuts and dried fruit. Pour the batter into the prepared pan, and bake for 35 minutes, or until the cake begins to puff slightly and the middle is set. Remove from the oven and cool completely before removing from pan.
Dust lightly with confectioner's sugar and cocoa powder and serve with some warm honey.
We found it was difficult to remove the cake from the pan. A portion of it stuck to the pan and crumbled. (See the picture below). (Next time, we will use buttered parchment paper on the bottom of the pan). Even the portion that came out in one piece was difficult to cut into wedges since it kept crumbling. The only good thing was that even the crumbs tasted good.
Although eaten in crumbs this cake was very good. The chestnut flour added a nuttiness to the overall chocolate flavor. The pine nuts, walnuts and dried fruit added little bursts of flavor and texture. The dried fruit was particularly nice because it added a burst of sweetness. Interestingly, over time the chestnuts we added became rock hard and we had to be careful to remove them from every mouthful. We liked this cake better than the previous version my wife made. It would just be nice if it did not disintegrate into crumbs.
Sunday, January 30, 2022
Octopus rice 瀬戸内海蛸めし
We have been getting Japanese rice from the New York Rice factory. It may be hard to believe (we our selves are somewhat incredulous) that there could be such a difference in something as subtly flavored as rice but the rice from the rice factory is really good. It is hard to identify what sets it apart from the rice we used to get but in general we really like the texture, the taste and especially how well it can be reheated and still tastes like it just came out of the rice cooker.
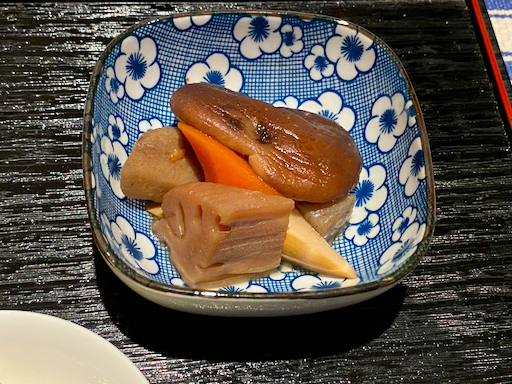
Whenever I order rice from the rice factory I usually supplement the order with other items. In the past, we got a kit to make “red snapper rice” or “taimeshi” 鯛めし, a type of seasoned rice famous in the Japanese inland sea area or "seto-naikai" 瀬戸内海. Another time I ordered a similar seasoned rice kit made with octopus called “seto-naikai tako-meshi” 瀬戸内海蛸めし. After I bought it, however, the kit sat in our pantry for some time. When I checked the expiration date, it had expired the previous month, so I decide it was time to make it as a shime 〆 or ending dish one weekend. The kit came in several pouches; one with seasoning sauce, one with small bits of octopus, one with freeze dried items. It also included a rectangle of kelp. I made the octopus rice according to the instructions. I served it with a side of simmered Japanese root vegetables I had made and salted cucumber, daikon and nappa cabbage or "oshinko" お新香.
Tuesday, December 14, 2021
PA Dutch Schnecken ペンシルバニアダッチ シュネッケン
For the dough
1 package of yeast
1/2 tsp. Salt
1/3 cup sugar
4 to 5 cups AP flour
1 1/2 cup milk (buttermilk would work too)
2 eggs beaten
1/4 cup melted butter
For the filling
1/3 cup butter softened
1/3 cup packed brown sugar
1 1/2 tsp. Ground cinnamon
Optional topping
1 egg white mixed with 1 tbs water
1/2 tsp. Sugar per muffin (more or less to taste)
Directions:
Add the dry ingredients (yeast through flour) to the bowl of a mixer with a dough hook. Mix together the wet ingredients (milk through melted butter) together and mix well. With the mixer running add the wet ingredients to the dry ingredients. Add more flour as needed to make a soft dough. Knead for 7 to 10 minutes. Cover and let rise in a warm place.
Meanwhile combine the ingredients for the filling (butter through cinnamon) into a paste and set aside.
When the dough has doubled in size punch it down and divide it into two portions weighing them to make them about even in size. Roll out each portion into a rectangle of about 15 X 18 inches. Spread 1/2 the filling over each rectangle right to the edges. Roll up each “as for a jelly roll” as specified by the instructions. Cut each roll crosswise into 12 pieces. (A word of advice: to get pieces of somewhat equal size, cut the roll into thirds. Then cut each third into fourths (3 x 4 = 12). Place the slices cut side down into a well greased muffin tin. (First picture below) Cover and let rise until double. Just before baking brush each muffin with the egg wash mixture and sprinkle on the desired amount of sugar per bun. This sugar will caramelize slightly when cooked. Bake in a 375 degree oven form 18 to 20 minutes or until golden brown. (Second picture below). Another word of advice: remove the buns from the tins immediately after they come out of the oven before the caramelized sugar hardens . Once it hardens it will become extremely difficult to extract them. Also, scoop any caramelized sugar left on the bottom of the tins before it hardens and spread onto the buns.
Saturday, October 23, 2021
Chicken and chestnuts stew 鶏肉と栗の煮込み
Ingredients (at least 4 fairly good size servings).
For pre-cooking of the chicken
Two chicken thigh, bone removed (I left the skin on) .
2 tbs sake
2 scallions
several slices of ginger
12000 ml water
For stew
2-3 inch daikon, peeled, cut into 1/2 inch thick rounds and then quarters
2-3 carrots, peeled and cut into bite sized pieces (“rangiri” 乱切り cut at 45 degree angle as you rotate the carrot)
1/2 “gobou” burdock root, skin scraped off using the back of the knife and also cut into bite sized pieces using “rangiri”
2 inch long renkon, skin peeled and cut into 1/4 inch thick half moon (I did not have renkon).
1/2 Konnyaku, torn into small bite sized pieces by hand (irregular shapes increase the surface areas), parboiled and drained
10-15 parboiled green beans
12-15 chestnuts (original recipe calls for roasted and sweetened chestnuts called “Tenshin amaguri” 天津甘栗.
For cooking liquid
250ml of the water in which the chicken was cooked
250ml dashi broth
100ml sake
3 tbs mirin
3 tbs soy sauce
1-2 slices of ginger cut into julienne
For pre-cooking the chicken
Add the sake, ginger and scallion to the water and let it come to a boil then place the chicken into the water.
Turn down the flame to simmer and let it cook for 5 minutes and then turn off the flame. Let it stand for 15 minutes (the original instructions said cook for15 minutes but I thought that would be overcooking especially since the chicken will be simmered again with the vegetables).
Take out the chicken and cut into bite sizes pieces.
Keep the water which was used for cooking the chicken to cook the vegetables.
For stew
Add the chicken cooking liquid to a pan
Add the chicken, vegetables and konnyaku
Cook them on medium high flame
Once it starts boiling, turn down to simmer, add the chestnuts and cook for 20 minutes.
Add the green beans in the last 5 minutes.
This has a typical Japanese flavor profile. I am not sure pre-cooking the chicken is necessary. The prepared chestnuts had a natural sweetness and the entire dish was really nice if not outstanding. The quality of the jarred chestnuts was not the best we have ever had but it was still a lot easier then trying to process the raw chestnuts and tasted better too.
Sunday, March 21, 2021
Traditional Irish soda bread 伝統的アイルランドソーダブレッド
Just a few days before St. Patrick’s day, I happened to see a “real Irish soda bread” recipe on the “Serious Eats” website. I showed my wife the recipe and in passing mentioned that St. Patrick’s day was coming up. Next thing I knew she has found 2 other Irish soda bread recipes and for 3 days in a row when I came home a new loaf was cooling on the rack. What a treat! This is the first loaf she made. It was baked in an enameled cast iron Dutch oven like “no-knead bread” and produced a nice brown crust and center was moist.
15 ounces all-purpose flour (3 cups; 425g)
1 3/4 teaspoons (7g) kosher salt; for table salt, use the same weight or half as much by volume
1 1/8 teaspoons (6g) baking soda
18 ounces low-fat cultured buttermilk (2 1/4 cups; 510g), well shaken
Directions
1.Adjust oven rack to middle position and preheat to 450°F (230°C) at least 15 minutes in advance. Roughly cover the bottom of a deep 10-inch cast iron or enameled Dutch oven with a sheet of parchment paper; no need to trim.
2.Combine flour, salt, and baking soda in a large bowl and whisk a full minute to combine. Stir in buttermilk with a flexible spatula until dough is fully moistened and no pockets of flour remain. For extra-fluffy results, stop folding as soon as dough comes together. For extra-chewy results, fold dough about 20 seconds more. Scrape sticky dough into prepared Dutch oven and smooth with a spatula into a rough boule-like shape. Score deeply into quarters with a sharp knife or razor, cleaning the blade between each slice.
3.Cover and bake until well risen and golden, 45 minutes. Remove lid and continue baking until chestnut brown, with an internal temperature of 210°F (99°C), 12 to 15 minutes longer. Invert onto a wire rack, discard parchment, turn right side up, and cool until crumb has set, about 30 minutes. Cut thick slices to accompany hearty soups and stews, or slice thinly for sandwiches. (This will be easier if bread is allowed to cool 2 hours more.) Store up to 24 hours in an airtight container and toast to freshen bread before serving.
The bread had a nice crunchy crust and the interior was moist with a nice crumb. The buttermilk gave it a subtle tang. The flavor was a bit salty. We had this with a lamb stew I made. (What else would you have for St. Patrick’s day?) This was the perfect bread to accompany the stew.
Our plum tree was in full bloom and our backyard was filled with the nice sweet smell of plum blossom. This is the plum tree we got many many years ago. We wanted the type of plum that produced the fruit used to make Japanese salted plum and umeshu. After some search, we finally found one at an Oregon nursery. It arrived as a twig in a small envelope but it miraculously grew into a good sized tree and provided lots of plum fruit over the years. We used the fruit to make “umeshu” plum wine. Then, a few years ago all the plum trees in the area got a fungal disease. Our poor tree was no exception. We thought it was a “goner” especially after we had to transplant it during a landscaping project. Although the tree is much smaller than it was at its peak, it appears that this plum tree is surviving. Spring is almost here.
Tuesday, October 27, 2020
Special Kaiseki box from Sushi Taro v2 寿司太郎特別会席弁当二回目
We had the second take-out special kaiseki box from Sushi Taro. Again, this was amazing. We just wanted to record what we enjoyed.
Tuesday, October 13, 2020
Special take-out Kaiseki box from Sushi Taro 寿司太郎のテイクアウト特製会席弁当
Prior to COVID the omakase counter at Sushi Taro was our special-occasion-go-to place. As a matter of fact, we had a reservation in March this year but because of COVID, that got canceled. I knew for some time that, although the restaurant was closed, Sushi Taro has been doing take-out. But getting there either from home or work for the pick-up was impractical. Since I started thinking about the NewYear “Osechi” 御節 from Sushi Taro, I contacted them. I was delighted to find out that they are going to do Osechi for the next New Year and I quickly placed an order. During that interaction, I learned that they do special omakase kaiseki boxes-to-go and that they can deliver. I quickly placed an order. Delivery was scheduled for Friday at 5pm. We were like little kids in anticipation. I even "just happened" to come home from work a bit early for the delivery. It arrived in two, two-tiered (bento or modified jubako?) boxes. (a total of four boxes with three compartments each). We initially thought we got two identical sets but when we opened the second box, surprise! We were totally blown away. All compartments contained many wonderful different dishes. The first one had some cooked dishes, two different kinds of sushi. The cooked dishes in the top tier were still warm.